{count, plural, one {Kursus} other {Kursus}}
Pengembangan Kode dengan Bantuan AI untuk Developer
{hours} jam {minutes} menit
11K
Have you ever wondered how an application works behind the scenes, especially when its source code is not publicly available? Traditionally, reverse engineering required specialized tools, assembly knowledge, and a lot of patience. But with AI coding agents, things are getting much easier.
REA (Reverse Engineer Anything) brings reverse engineering to AI coding agents, allowing them to investigate software, understand its internal logic, and help recreate specific features without access to the original source code.
In this tutorial, we will combine REA with Pi Coding Agent to investigate Chrome's Dinosaur Game.
We will explore its jumping, collision, and scoring mechanics, then use what we learn to build an entirely new game with different characters and visuals.
We will also turn our game into a standalone Windows application and publish it on GitHub so anyone can download and play it.
The best part? We will do everything using natural-language prompts, without manually writing the game code ourselves.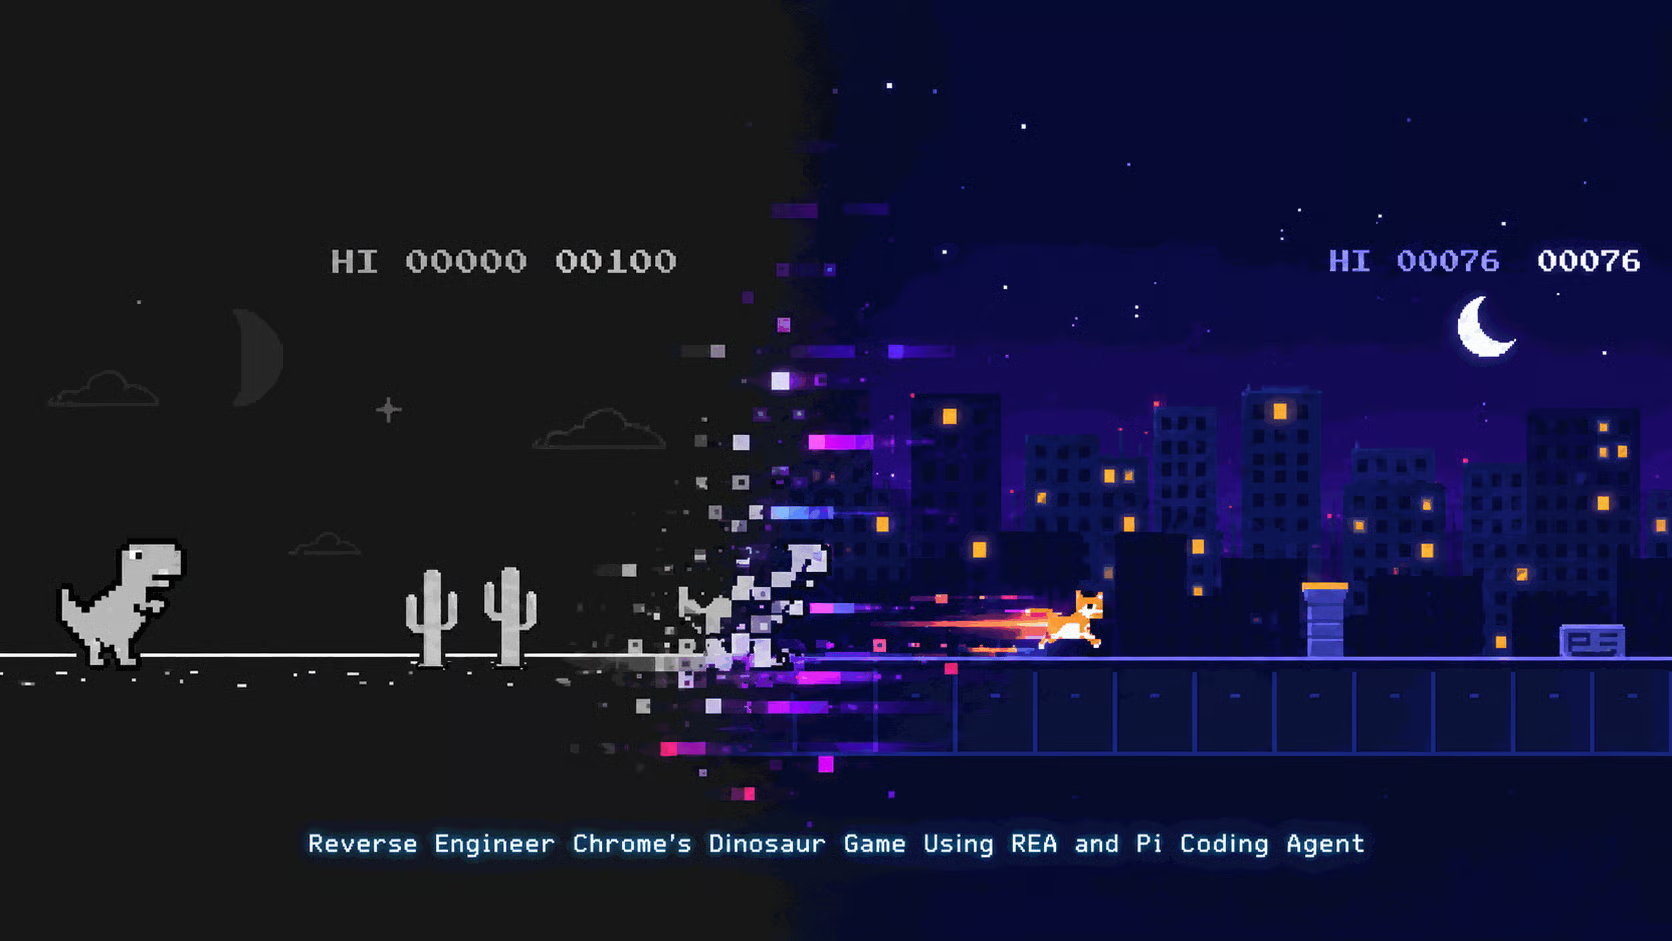
REA is an open-source toolkit that makes reverse engineering easier by connecting traditional analysis tools with AI coding agents.
The project has gained massive popularity, gaining over 250,000 GitHub stars, as developers explore ways to understand and recreate software without access to its original source code.
What makes REA interesting is its practical applications.
Developers can use it to investigate abandoned software, recreate useful features, understand old games, and potentially revive unsupported hardware.
For example, if a printer manufacturer stops releasing drivers for newer operating systems, reverse engineering could help developers understand how the original driver communicates with the device and build a compatible replacement.
REA connects AI coding agents, such as Pi, Claude Code, and Codex, to reverse-engineering tools like Ghidra and Hopper using the Model Context Protocol (MCP).
The process is straightforward:
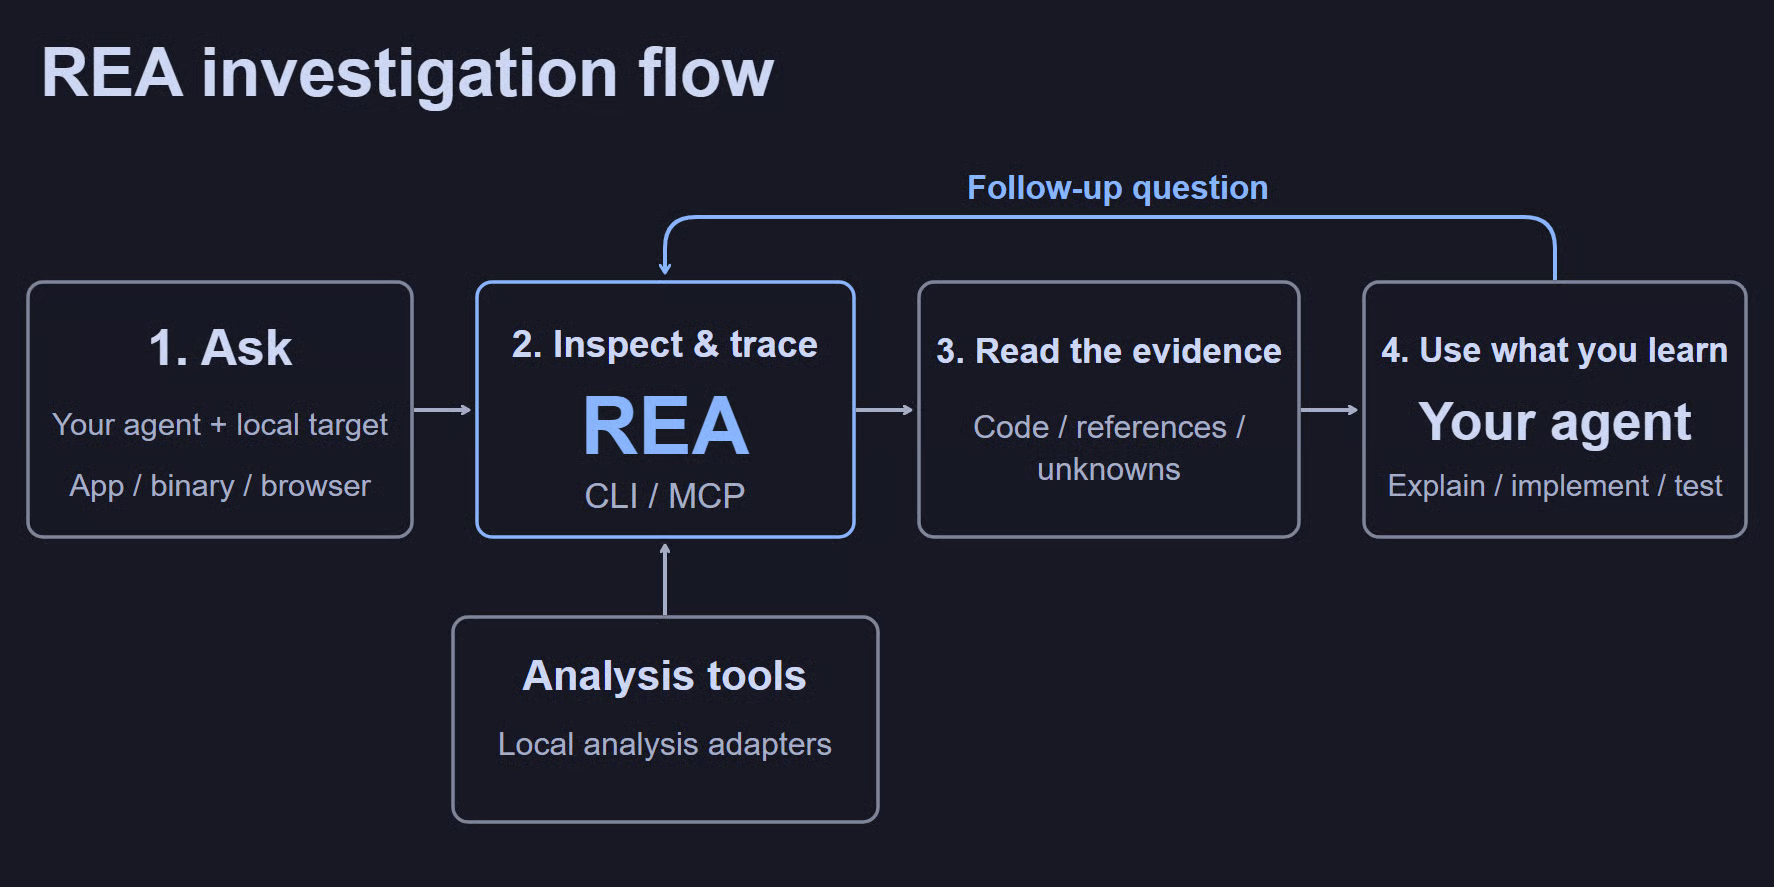
Source: morluto/rea
Unlike simply asking an AI model to guess how an application works, REA provides actual evidence from the software being investigated.
It does not guarantee complete source-code recovery, and some platforms or applications have limited support.
However, it can significantly simplify investigations that previously required considerable manual effort.
In this tutorial, we will explore this workflow using REA and Pi Coding Agent to investigate Chrome's Dinosaur Game and build our own version with similar mechanics but different characters and visuals.
In the sections below, I’ve outlined everything you need to know to get started with REA.
We will run everything on Windows 11, so there is no need for a Linux server, Docker, Python, or Ghidra.
Before getting started, make sure you have the following:
First, download and install Node.js from https://nodejs.org/. REA requires a supported version, such as Node.js 22.19+ or 24.11+.
Open PowerShell and verify the installation:
node --version
npm --version
Next, install Pi Coding Agent using npm:
npm install -g --ignore-scripts @earendil-works/pi-coding-agentCreate a new project folder:
mkdir dino-reverse-engineering
cd dino-reverse-engineering
Launch Pi:
piOnce Pi opens, use /login to connect your preferred AI provider and /model to select a coding-capable model.
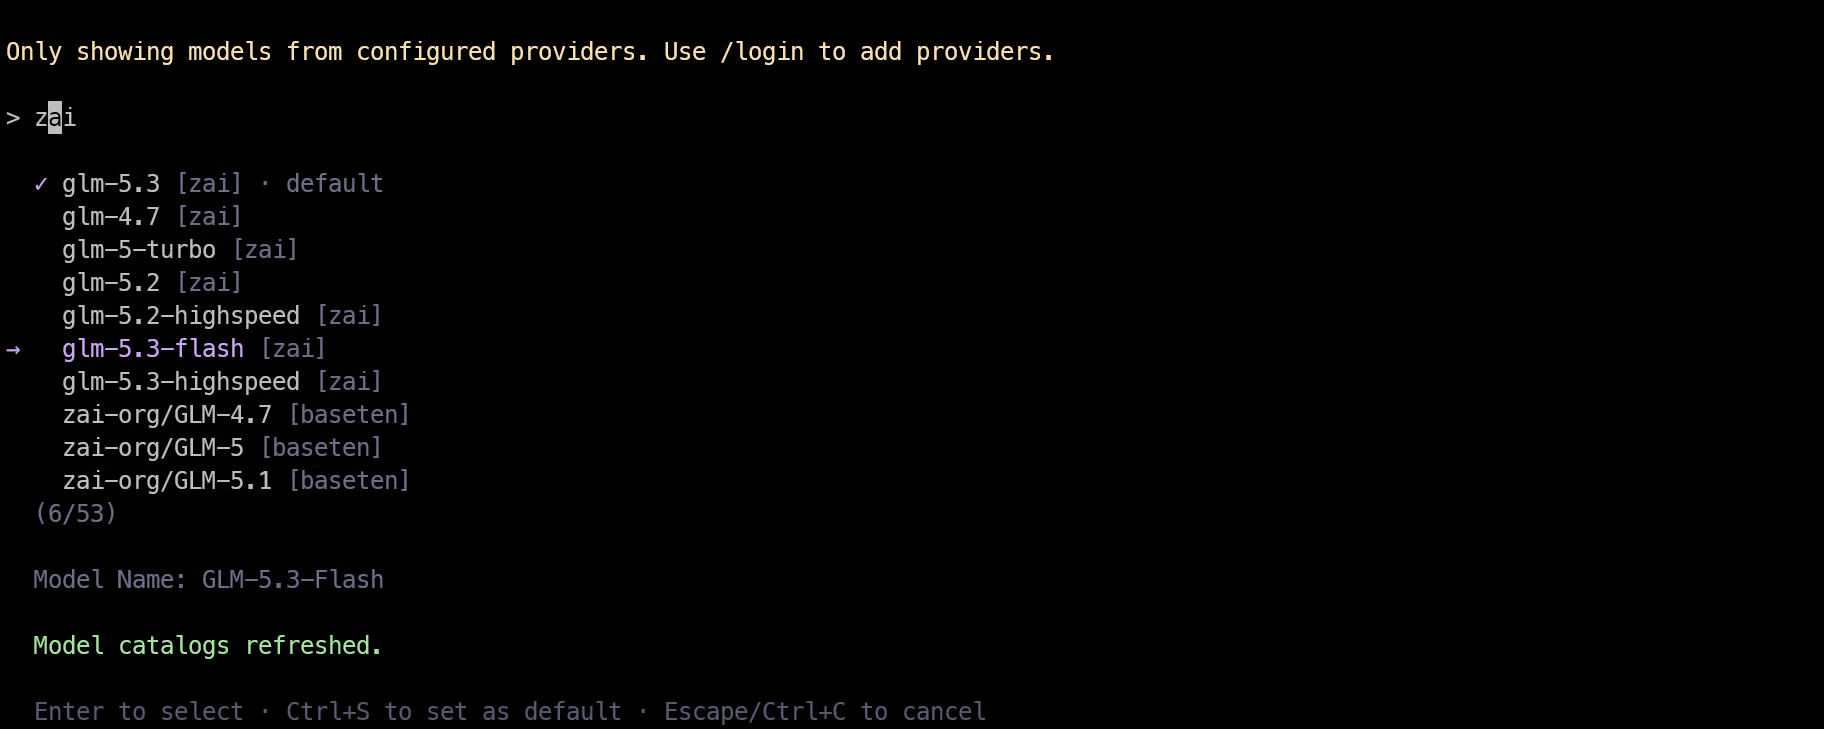
For this tutorial, we will use GLM-5.3. However, the same workflow should work with other compatible coding models.
Now we need to install REA and connect it to our coding agent.
Open a new PowerShell terminal and run:
npm install -g rea-agentsOnce installed, configure REA for Pi Coding Agent:
rea setup --client pi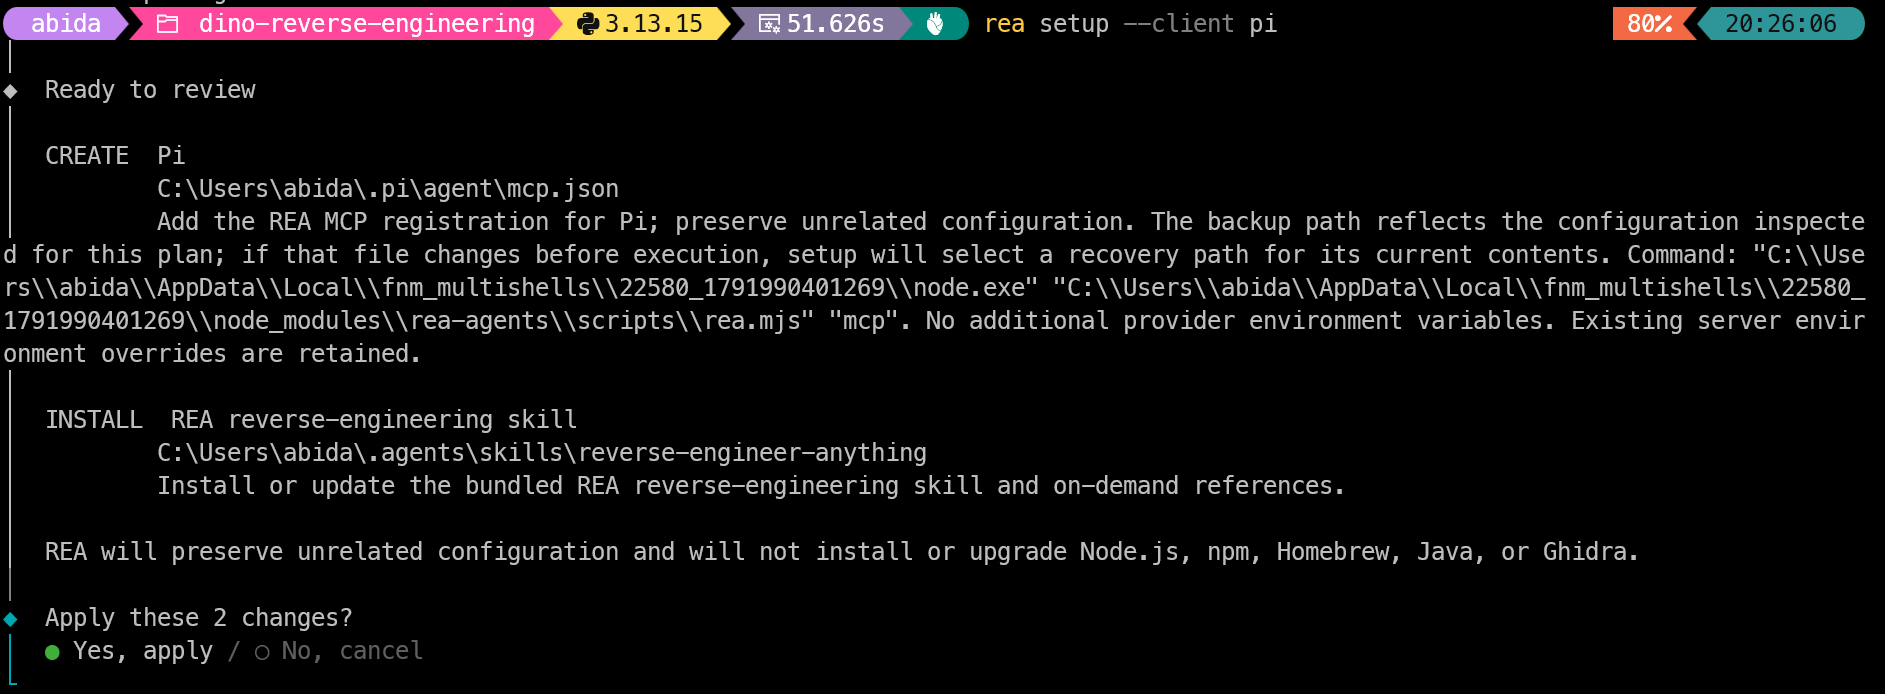
Review the proposed changes and approve the configuration.
It will automatically set up the necessary Model Context Protocol (MCP) connection and investigation instructions, allowing Pi to communicate with REA's reverse-engineering tools.
We do not need to create or modify MCP configuration files manually.
To verify everything is working, run:
rea doctor --client piThis command checks the installation and reports any configuration issues.
Finally, restart Pi so it can load the newly configured REA tools.
Before investigating the Dinosaur Game, we need to enable Chrome's remote debugging interface so REA can communicate with the browser.
First, close Chrome completely. Then open PowerShell and run:
& "C:\Program Files\Google\Chrome\Application\chrome.exe" --remote-debugging-port=9222 --remote-debugging-address=127.0.0.1 --user-data-dir="C:\rea-chrome-profile"This launches Chrome using a separate profile with remote debugging enabled.
Once Chrome opens, manually enter chrome://dino in the address bar and press Enter to launch the original Dinosaur Game.
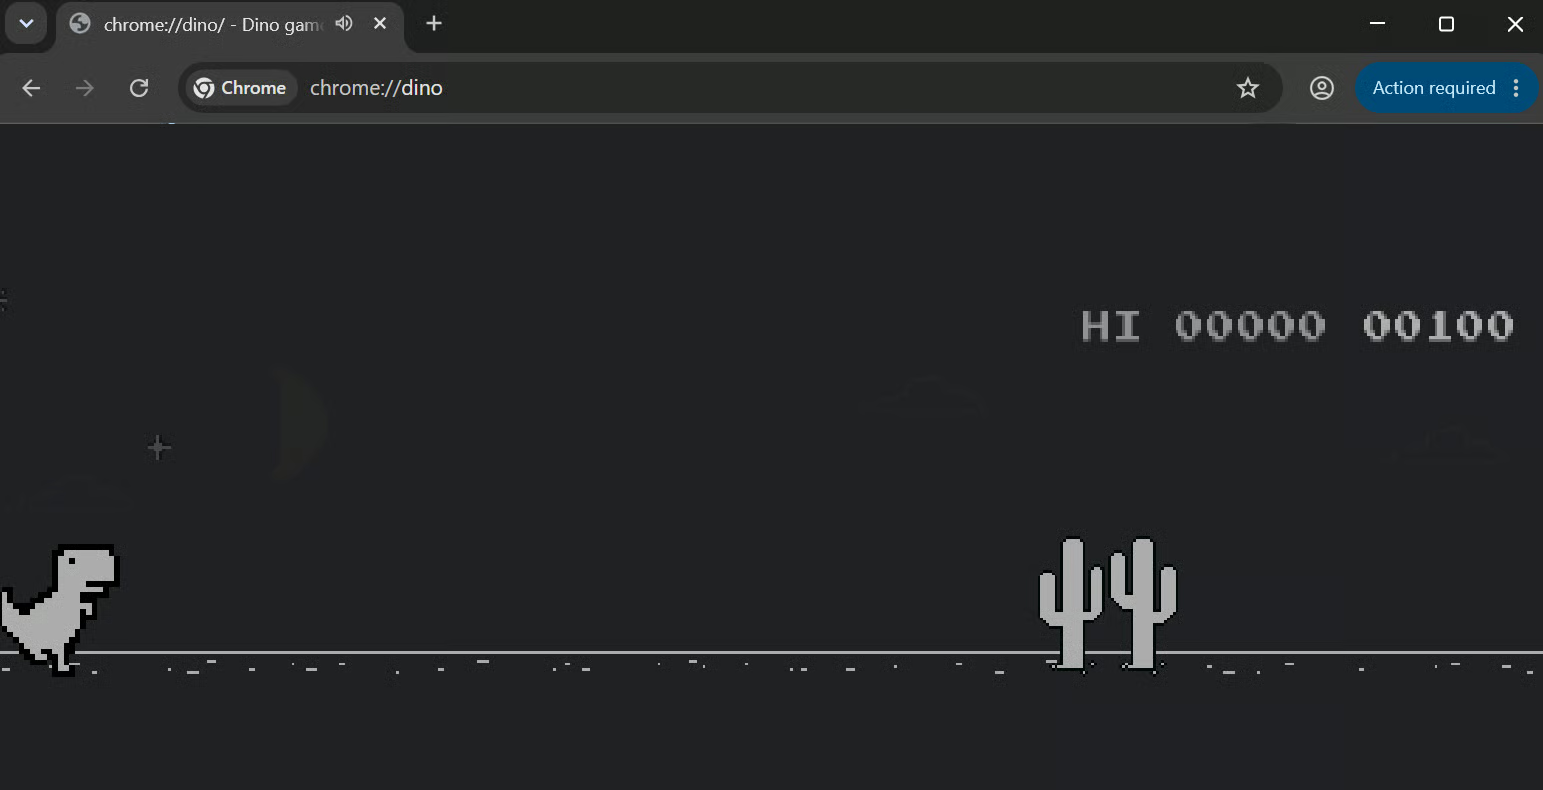
Now open another PowerShell terminal and verify the debugging connection:
(Invoke-RestMethod -Uri "http://127.0.0.1:9222/json/list") |
    Format-Table title, type, url -AutoSize
If Chrome returns a list of debugging targets, the connection is working.

Now that we have REA connected to Pi Coding Agent, we can start investigating Chrome's original Dinosaur Game.
Open your project folder in PowerShell and launch Pi:
piWe will ask Pi to investigate the game using REA, identify its core mechanics, and explain how everything works.
Prompt 1: Reverse Engineer the Game
Use REA to investigate the original Chrome Dinosaur Game running at chrome://dino.
Identify the JavaScript functions responsible for jumping, obstacles, scoring, and collision detection.
Use evidence from REA to explain how these mechanics work.
Do not consult the Chromium source repository.
If direct browser inspection is unsupported, investigate the locally installed Chrome resources instead.
Pi started by reading REA's documentation and checking whether it could access the running game through Chrome's debugging interface.
The connection worked. REA successfully detected Chrome 155 through the local debugging endpoint at 127.0.0.1:9222.
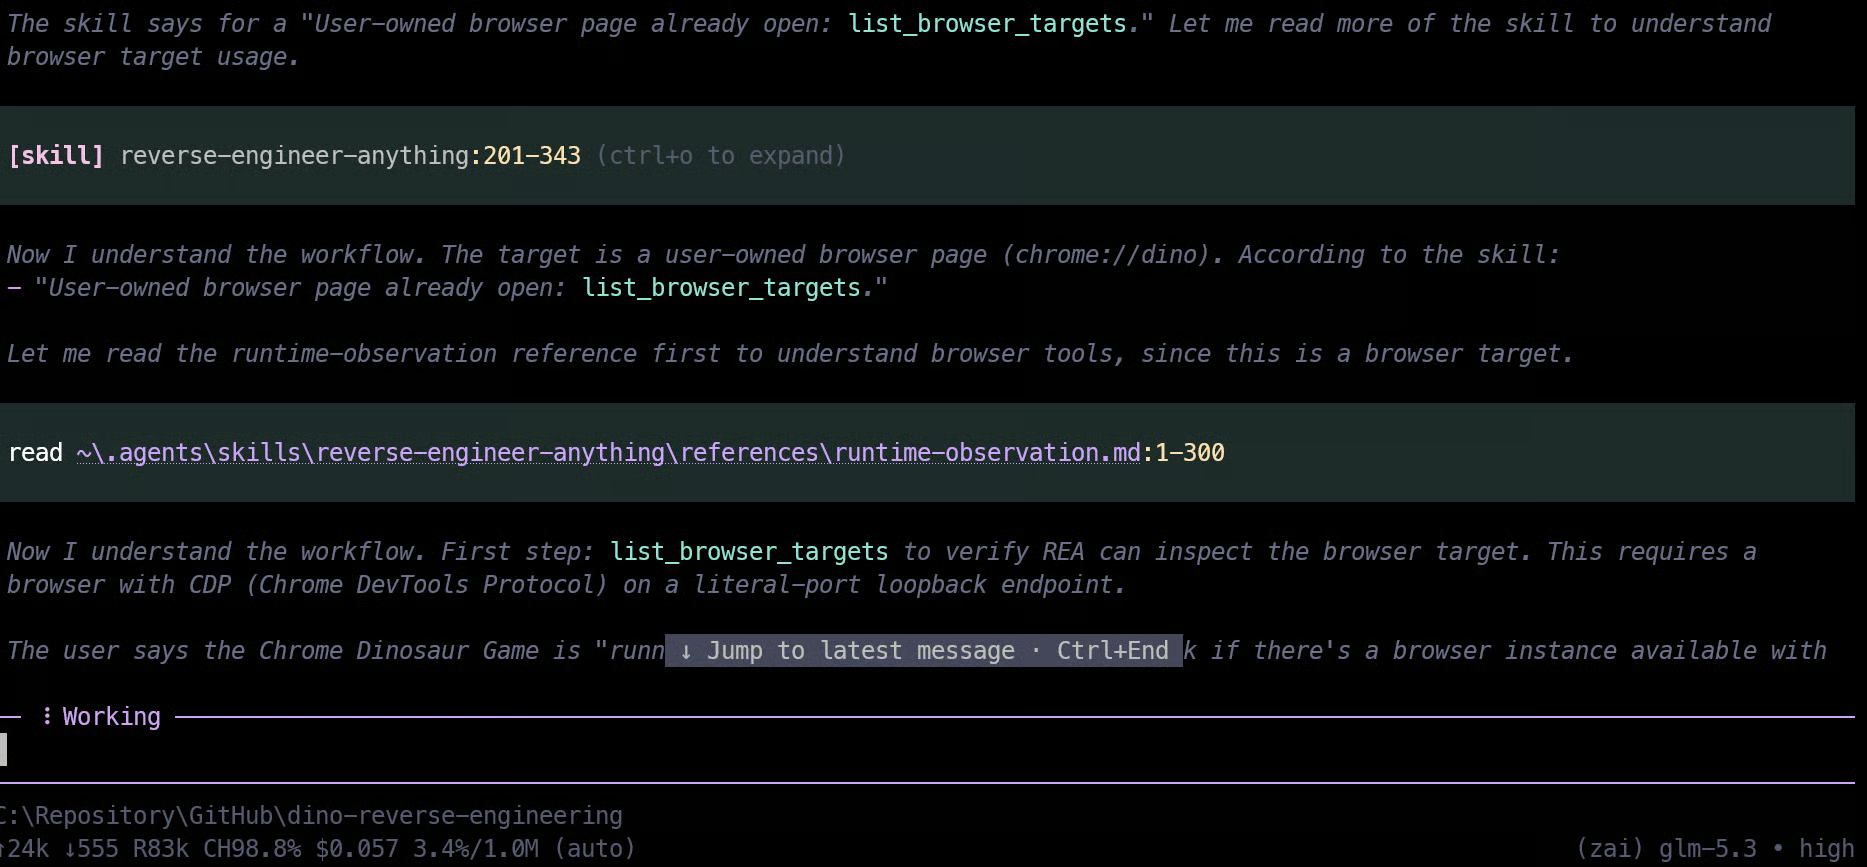
However, we encountered an interesting limitation: REA only supports HTTP and HTTPS pages for browser inspection. Since the Dinosaur Game runs at chrome://dino, REA excluded it from direct inspection.
Instead of stopping, Pi explored another approach.
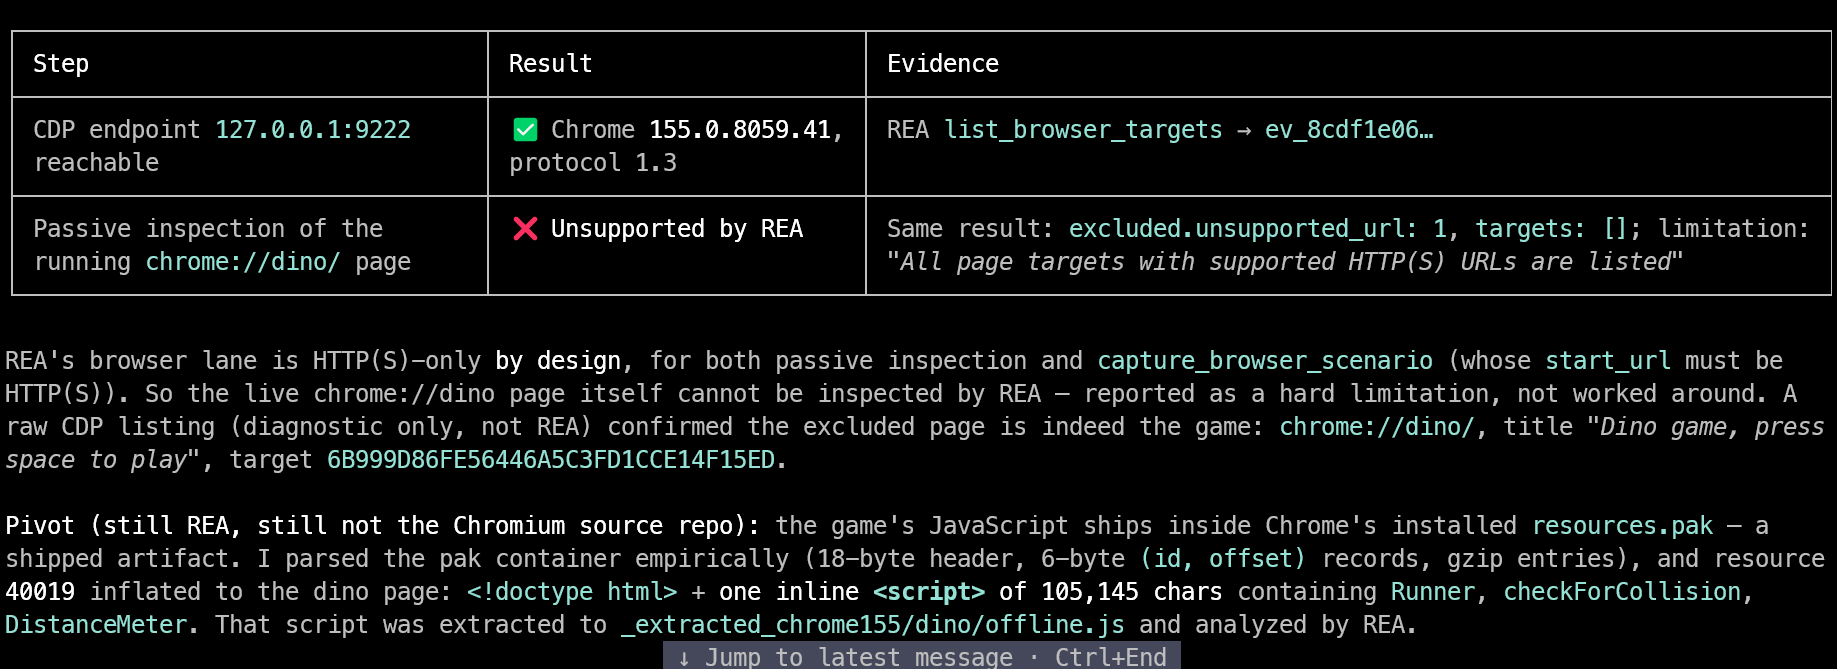
It located Chrome's installed resources.pak file, which contains packaged resources used by the browser.
Pi examined the package structure and extracted the JavaScript associated with the Dinosaur Game.
The investigation identified an inline script of approximately 105,145 characters, containing functions and components such as Runner, checkForCollision, and DistanceMeter.
Pi then passed the extracted JavaScript to REA for analysis, allowing us to investigate the game's implementation without downloading or reading Chromium's source repository.
This gave us a useful distinction: REA could not inspect the live internal browser page, but it could analyze the JavaScript recovered from Chrome's locally installed resources.
Now that Pi has investigated Chrome's Dinosaur Game and identified its core mechanics, we can use those findings to create something new.
We gave Pi a simple prompt:
Prompt 2: Build the Game
Using what we learned from investigating Chrome's Dinosaur Game,
build a simple browser-based endless runner using HTML, CSS, and JavaScript.
Keep the core gameplay mechanics similar to the original,
including automatic running, Space-key jumping, moving obstacles,
collision detection, increasing difficulty, a score counter,
and the ability to restart after losing.
However, make the game visually different.
Replace the dinosaur with a new character, such as a small robot or adventurous
cat, and create a different landscape with unique obstacles, backgrounds,
and simple animations.
Use original pixel-art-style graphics instead of copying Chrome's assets.
Pi created a game called Neon Rooftops, featuring an orange pixel-art cat running across rooftops in a nighttime city.
Instead of cacti and a desert landscape, our game features chimneys, satellite dishes, air-conditioning units, and drones. The background includes a moon, stars, and a city skyline.
The gameplay remains similar to Chrome's original Dinosaur Game, with jumping, obstacles, collision detection, increasing speed, scoring, and restarting.
Pi also added extra mechanics, including variable jumping and diving.
The first version needed a few visual improvements.
Some obstacles were difficult to see, the cat's face had rendering issues, and the early game lacked variety of obstacles. Pi fixed these issues by adjusting the background contrast, improving the character graphics, and introducing more obstacles earlier in the game.
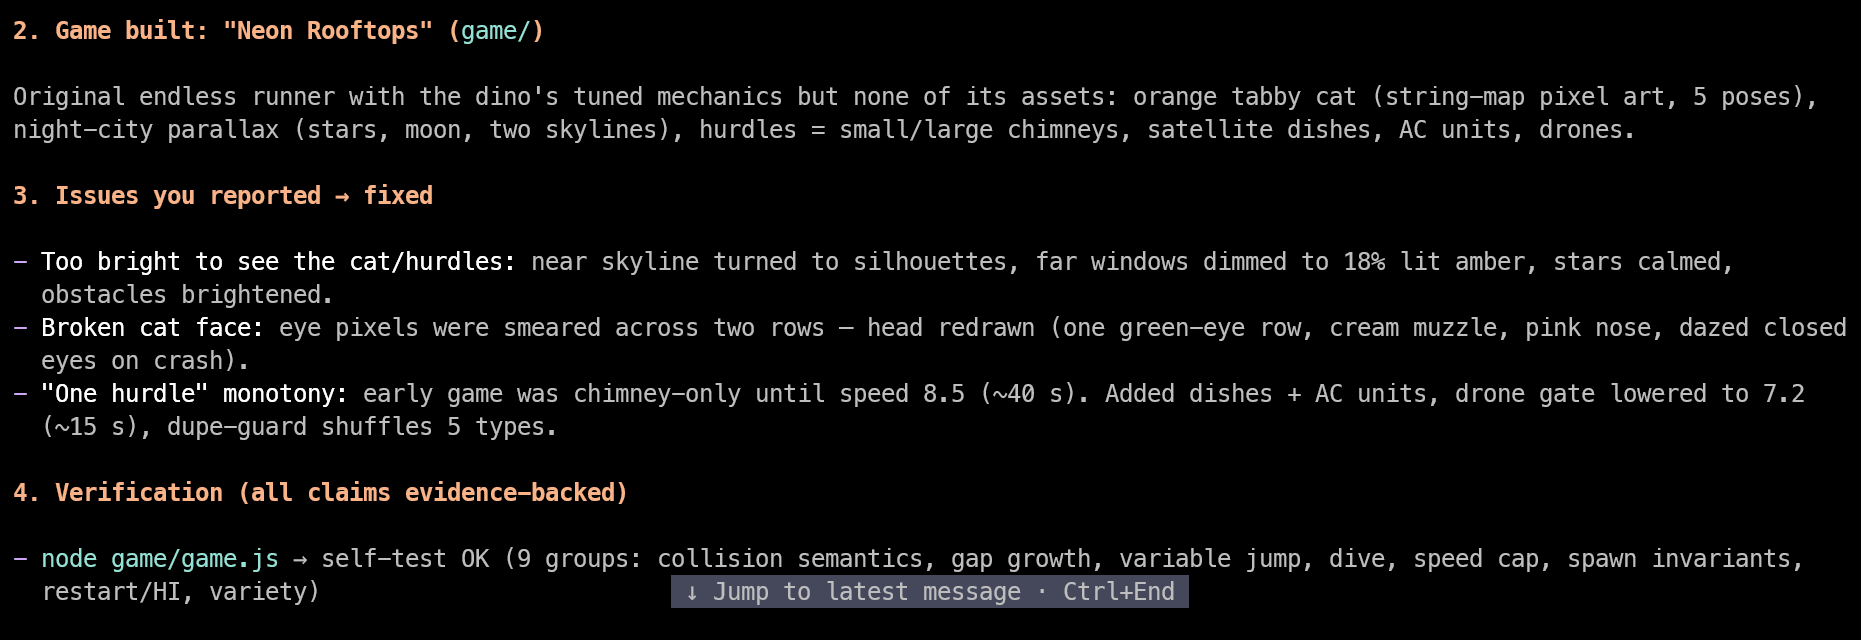
It also ran automated checks covering collision detection, jumping, speed, obstacle spawning, and restarting.
Finally, Pi automatically started a local development server at:
http://127.0.0.1:8123
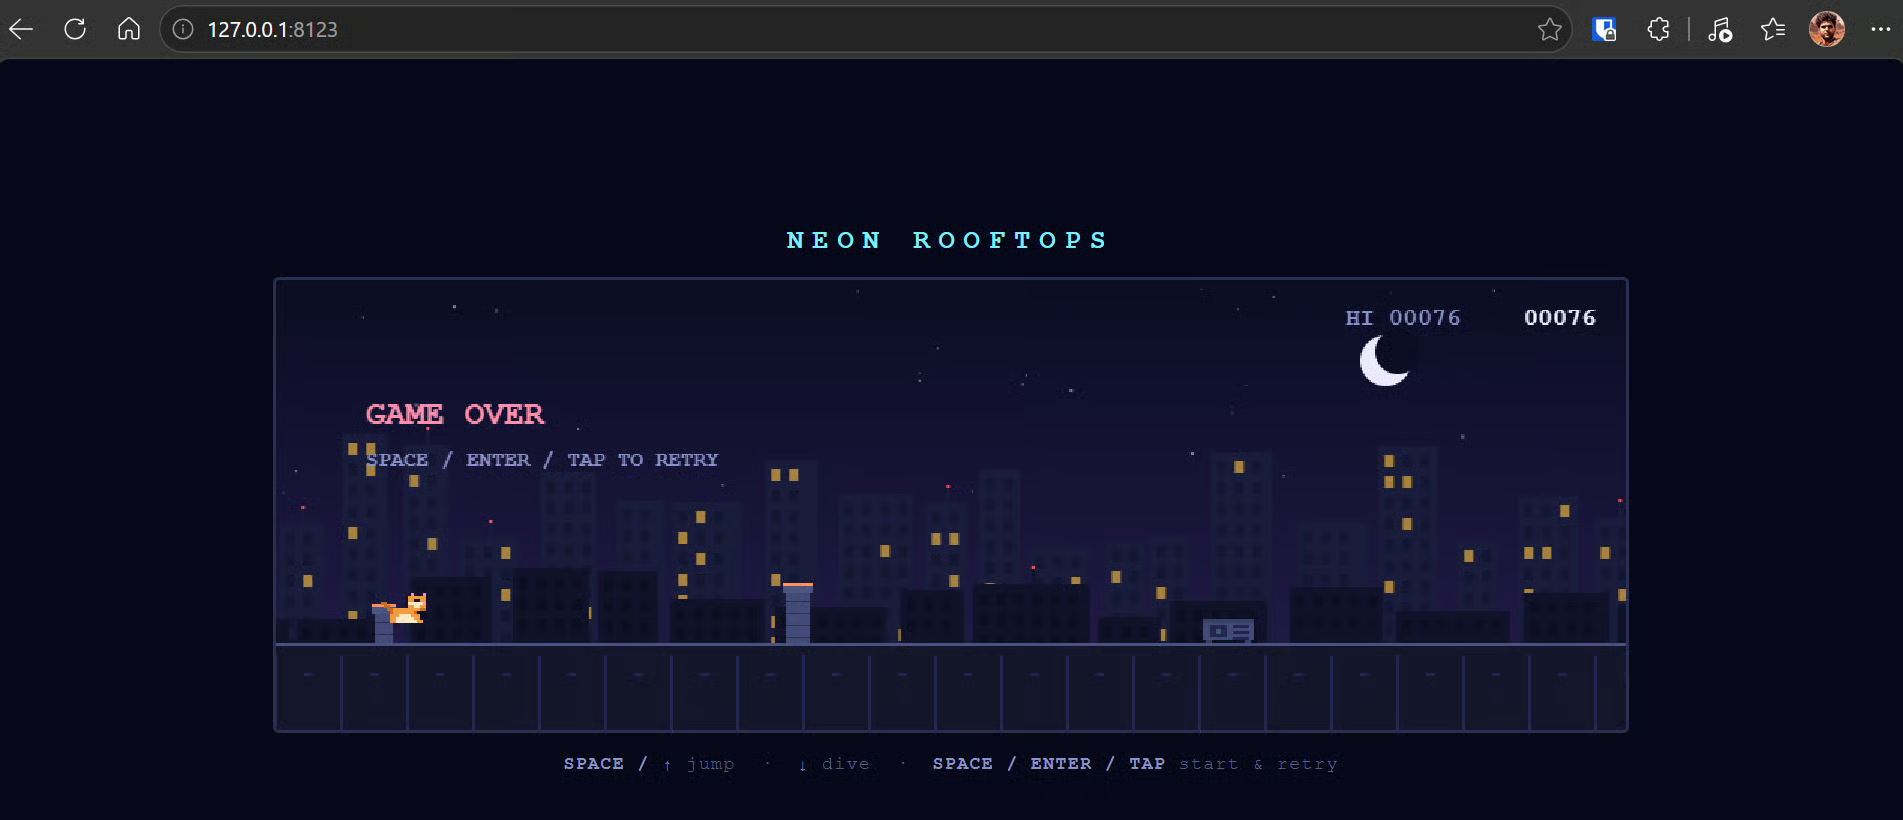
We could simply click the link in the terminal to open the game in our browser and start playing. There was no need to configure a server manually or install additional game development tools.
The result was a fully playable browser game with original graphics and familiar mechanics, created in just a few minutes.
What I found most interesting was the difference in effort.
Investigating the original application took time, but once Pi had enough information about how it worked, recreating the gameplay was surprisingly quick.
Our game was running perfectly in the browser, but I wanted to take it one step further.
Instead of starting a local server every time, I wanted a standalone Windows application that anyone could launch by double-clicking an executable file.
I asked Pi to handle the conversion.
Prompt 3: Create a Standalone Game
Convert our browser-based endless runner game into a standalone Windows desktop
application (.exe) that I can launch by double-clicking, without opening Chrome
or another external browser.
Keep the same gameplay and graphics, make it work offline, and package everything
so users do not need to install additional software.
Pi used Electron 33 and electron-packager to turn our browser game into a Windows desktop application. It created a lightweight Electron wrapper and a build script that packaged all the game files together.
The result was Neon Rooftops.exe, a Windows executable that opens the game in its own window.
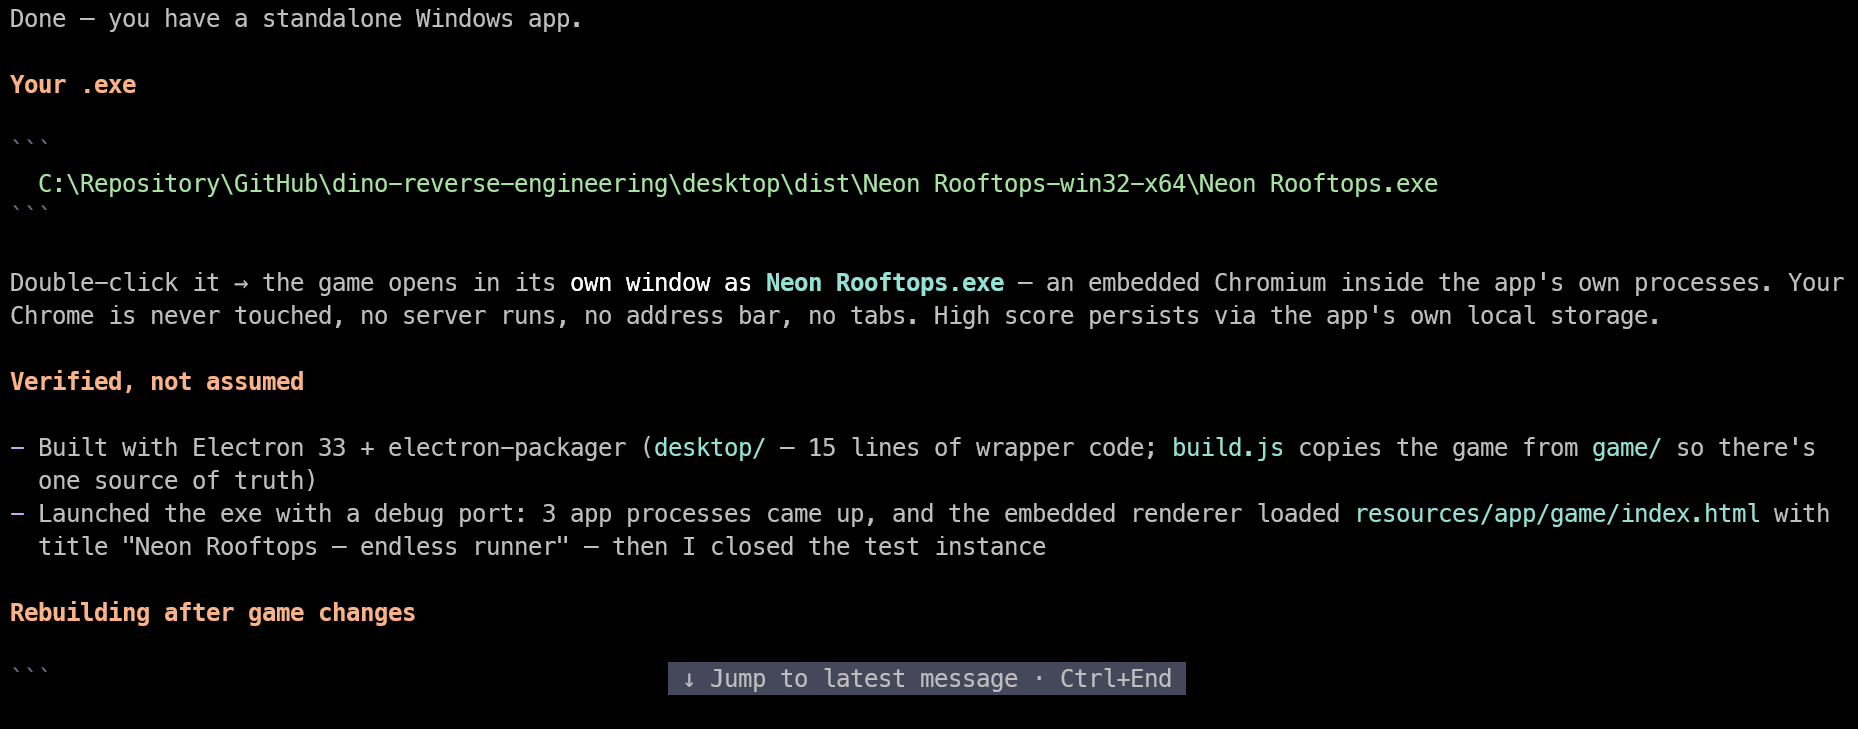
Pi also tested the executable by launching it and confirming that the game loaded successfully. Since Electron bundles its own Chromium runtime, players do not need Chrome, Node.js, Java, or a local web server.
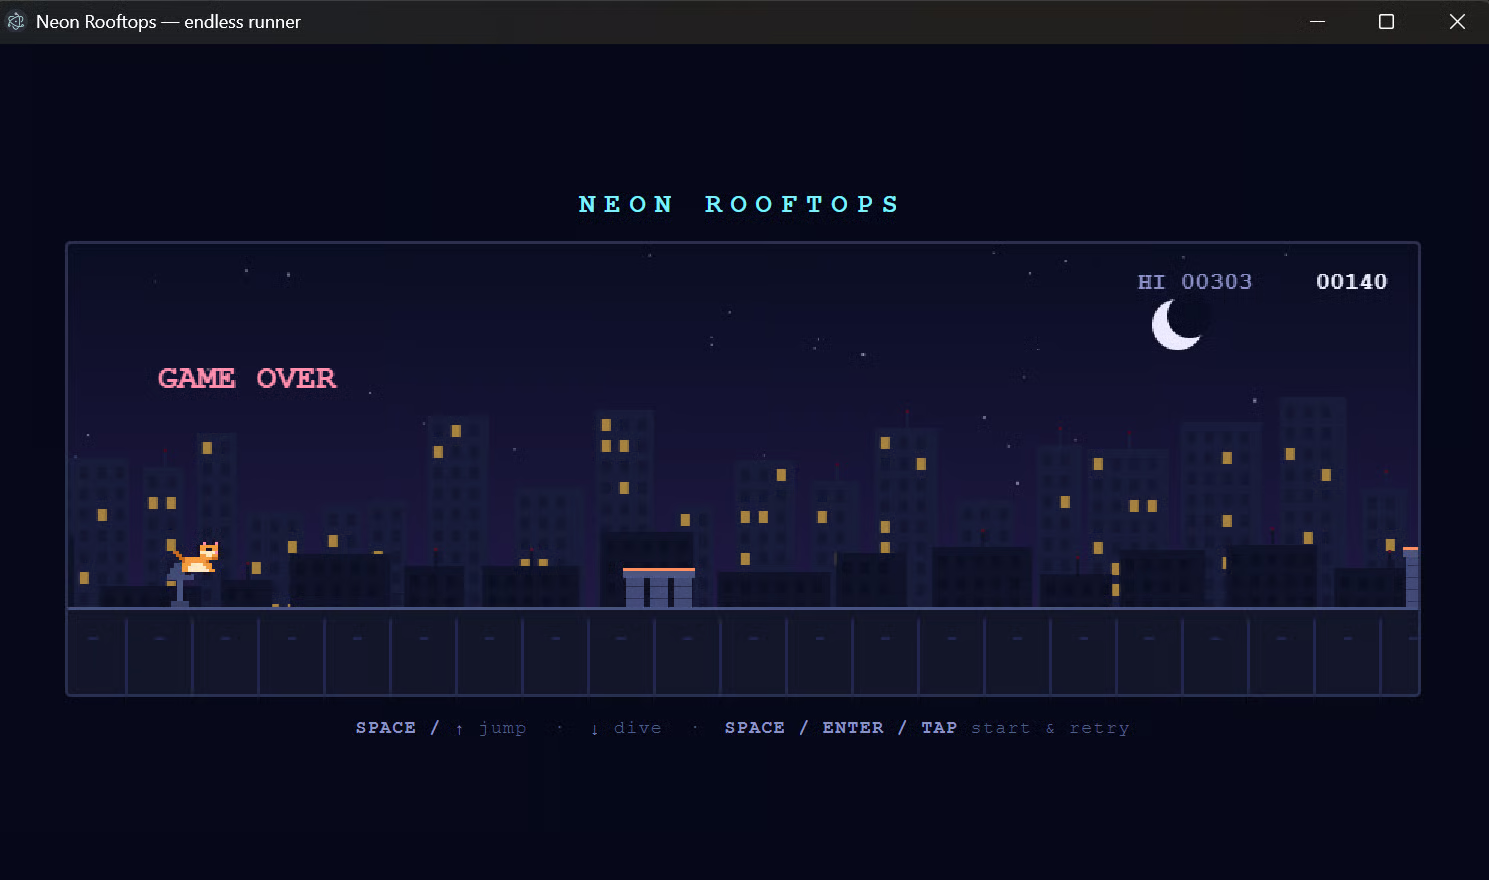
The game works offline, saves high scores locally, and can be launched by simply double-clicking the executable.
We now had a fully playable Windows desktop game, built from our original browser-based project.
Now that the game was working, I wanted to make it available for everyone to download and play without going through the entire development process.
Instead of manually creating a repository and uploading files, I asked Pi to handle everything using the GitHub CLI (gh).
Prompt 4: Publish the Game
Use GitHub CLI to create a public GitHub repository for Neon Rooftops,
upload the source code, add a README with instructions,
and publish a v1.0.0 release.
Package the standalone Windows application into a ZIP file so users
can download, extract, and play without installing Node.js, Java, Chrome,
or any other development tools.
Pi created the public repository, added an MIT license, prepared the README, and published the first release with the packaged Windows application.
You can explore the source code and download the game Neon Rooftops on GitHub.
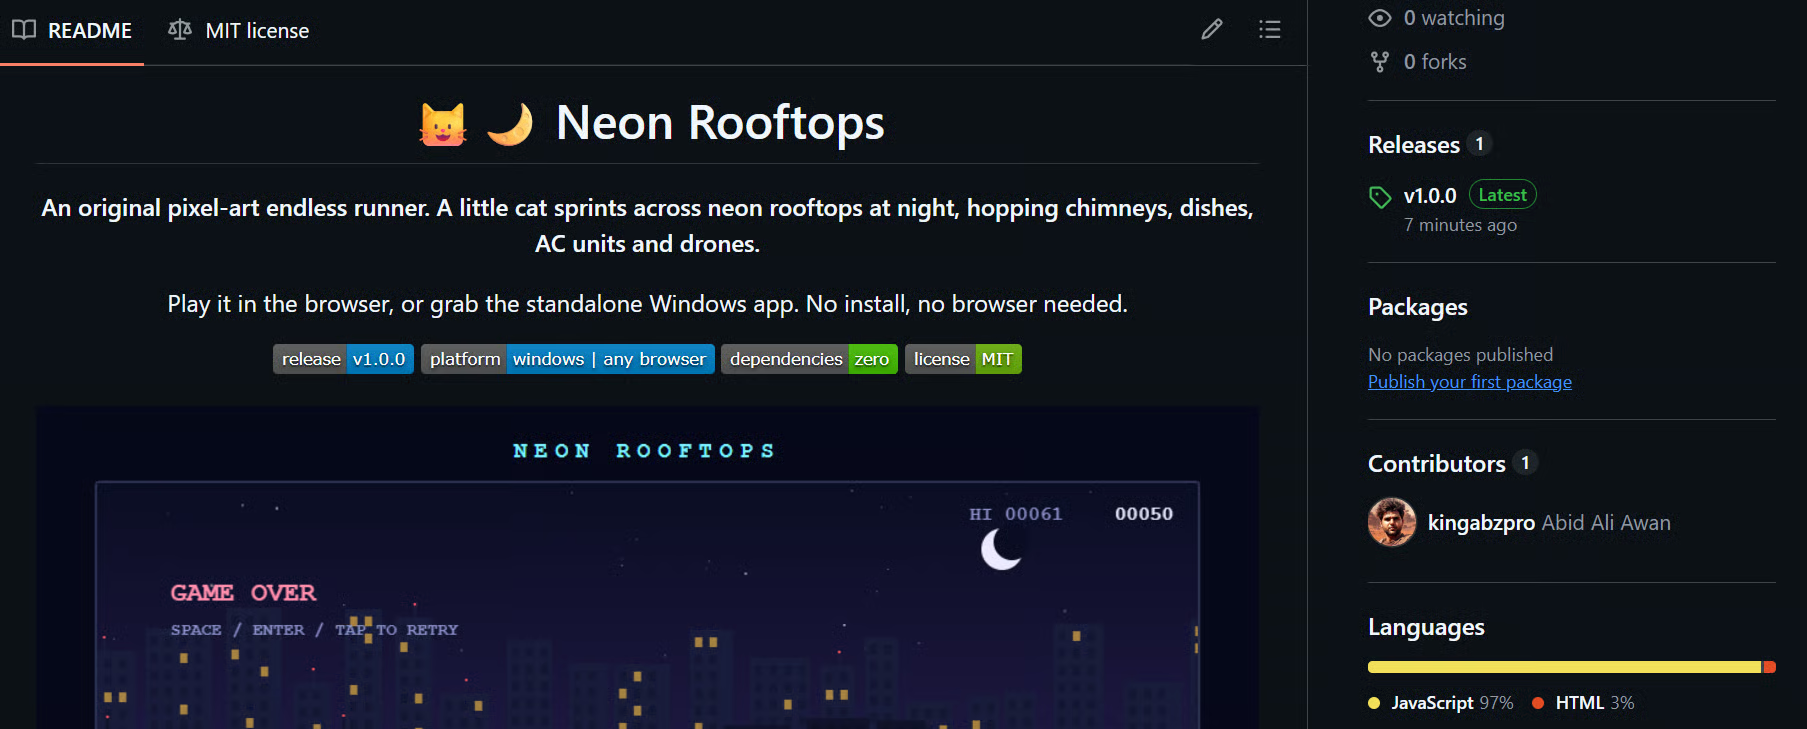
Source: kingabzpro/neon-rooftops
To play the game, simply:
That is it.
No installation, coding environment, browser, or internet connection is required after downloading and extracting the game. Just keep the extracted application files together.
What started as a simple experiment with REA and Pi Coding Agent has now turned into a complete desktop game, with original graphics, a standalone Windows executable, and a public GitHub release that anyone can try.
In this tutorial, we explored how REA and Pi Coding Agent can help us understand existing software without access to its original source code.
We investigated Chrome's Dinosaur Game, extracted and analyzed its JavaScript, and used what we learned to build Neon Rooftops, a completely different game with similar mechanics. We then converted it into a standalone Windows application and published it on GitHub for anyone to download and play.
What I find most interesting about Reverse Engineer Anything is its potential for the open-source community.
Imagine having an old printer, scanner, or other hardware that still works perfectly, but the manufacturer has stopped releasing drivers or supporting newer operating systems. REA could help developers understand the original binaries, investigate how the hardware communicates, and build compatible software. The same applies when you want to add new features to hardware that is no longer supported.
However, I strongly believe there should be a clear line between learning from software and stealing someone else's work.
I am completely against making an identical, feature-for-feature copy of proprietary software and distributing it for free or selling it at a lower price.
I believe deliberate infringement should have legal consequences. That said, reverse engineering itself is not necessarily illegal, and interoperability and independent implementations can be legally protected depending on the circumstances.
If you like a particular feature in an application such as Notion, why not learn how it works and build your own version of that feature? With today's AI coding agents, you can create impressive applications without copying an entire product. Take inspiration from good ideas, improve them, and build something original.
That is where I see the real value of REA: preserving abandoned software, extending the life of existing hardware, understanding complex systems, and helping developers create better alternatives.
Top DataCamp Courses
{count, plural, one {Kursus} other {Kursus}}
{count, plural, one {Kursus} other {Kursus}}
{count, plural, one {Program} other {Program}}
{count, plural, one {Tutorial} other {Tutorials}}
Dr Ana Rojo-Echeburúa
10 mnt
{count, plural, one {Tutorial} other {Tutorials}}
Abid Ali Awan
12 mnt
{count, plural, one {Tutorial} other {Tutorials}}
Bexruz (Bex) Tuychiev
10 mnt
{count, plural, one {Tutorial} other {Tutorials}}
Aashi Dutt
12 mnt
{count, plural, one {Tutorial} other {Tutorials}}
Khalid Abdelaty
11 mnt
{count, plural, one {Tutorial} other {Tutorials}}
Khalid Abdelaty