Leerpad
Grote taalmodellen ontwikkelen
16 Hr
Twijfel je om je prompts naar een cloudserver te sturen? Veiligheid is voor veel mensen een grote zorg, en met goede reden.
Je kiest ChatGPT of Claude, typt een prompt, en de aanvraag gaat naar andermans infrastructuur. Voor de meeste use-cases is dat prima. Maar als je met gevoelige data of eigen code werkt, kan dat een beveiligingsrisico zijn. Bovendien leggen cloudinterfaces je vast aan specifieke modellen, snelheidslimieten en prijsplannen.
Open WebUI is een zelfgehoste, browsergebaseerde interface om met LLM's te werken. Het lijkt op de UI van ChatGPT, maar draait op je eigen machine. Het maakt verbinding met Ollama, OpenAI-compatibele API's en lokale modellen, zodat jouw data blijft waar jij die neerzet.
In dit artikel laat ik je zien hoe je Open WebUI installeert met Docker, koppelt aan een lokaal model en het gebruikt voor echte taken zoals chat en codegeneratie.
Open WebUI is een browsergebaseerde chatinterface om met LLM's te werken – vergelijkbaar met ChatGPT, maar draaiend op je eigen machine.
De architectuur is zo simpel als maar kan. Er is een frontend-UI die je in je browser opent, en een backend die verbinding maakt met modelproviders zoals Ollama of elke OpenAI-compatibele API.
Open WebUI draait dus geen modellen – het praat alleen met welke backend je ook instelt.
Zie het als een universele voordeur voor je lokale AI-setup.
Dit betekent dat je de model-backend kunt wisselen zonder iets aan de interface te veranderen, en dat je de interface op de ene machine kunt draaien terwijl het model op een andere draait.
Met Open WebUI krijg je:
Als je ChatGPT of Claude hebt gebruikt, voelt de interface bekend aan. Het verschil zit in wat erachter draait. Daar gaan we zo op in.
Docker is de snelste manier om Open WebUI aan de praat te krijgen, en draait het ook volledig geïsoleerd.
Je hebt Docker geïnstalleerd op je machine nodig. Heb je dat nog niet, haal het dan van de officiële Docker-website.
Ollama is op dit moment optioneel. Wil je Open WebUI meteen aan een lokaal model koppelen, installeer dan eerst Ollama en haal minimaal één model binnen. Wil je alleen de interface starten en later koppelen, sla dit dan voorlopig over.
Voer dit commando uit om de Open WebUI-image te pullen en de container te starten:
docker run -d \
  -p 3000:8080 \
  -v open-webui:/app/backend/data \
  --name open-webui \
  --restart always \
  ghcr.io/open-webui/open-webui:main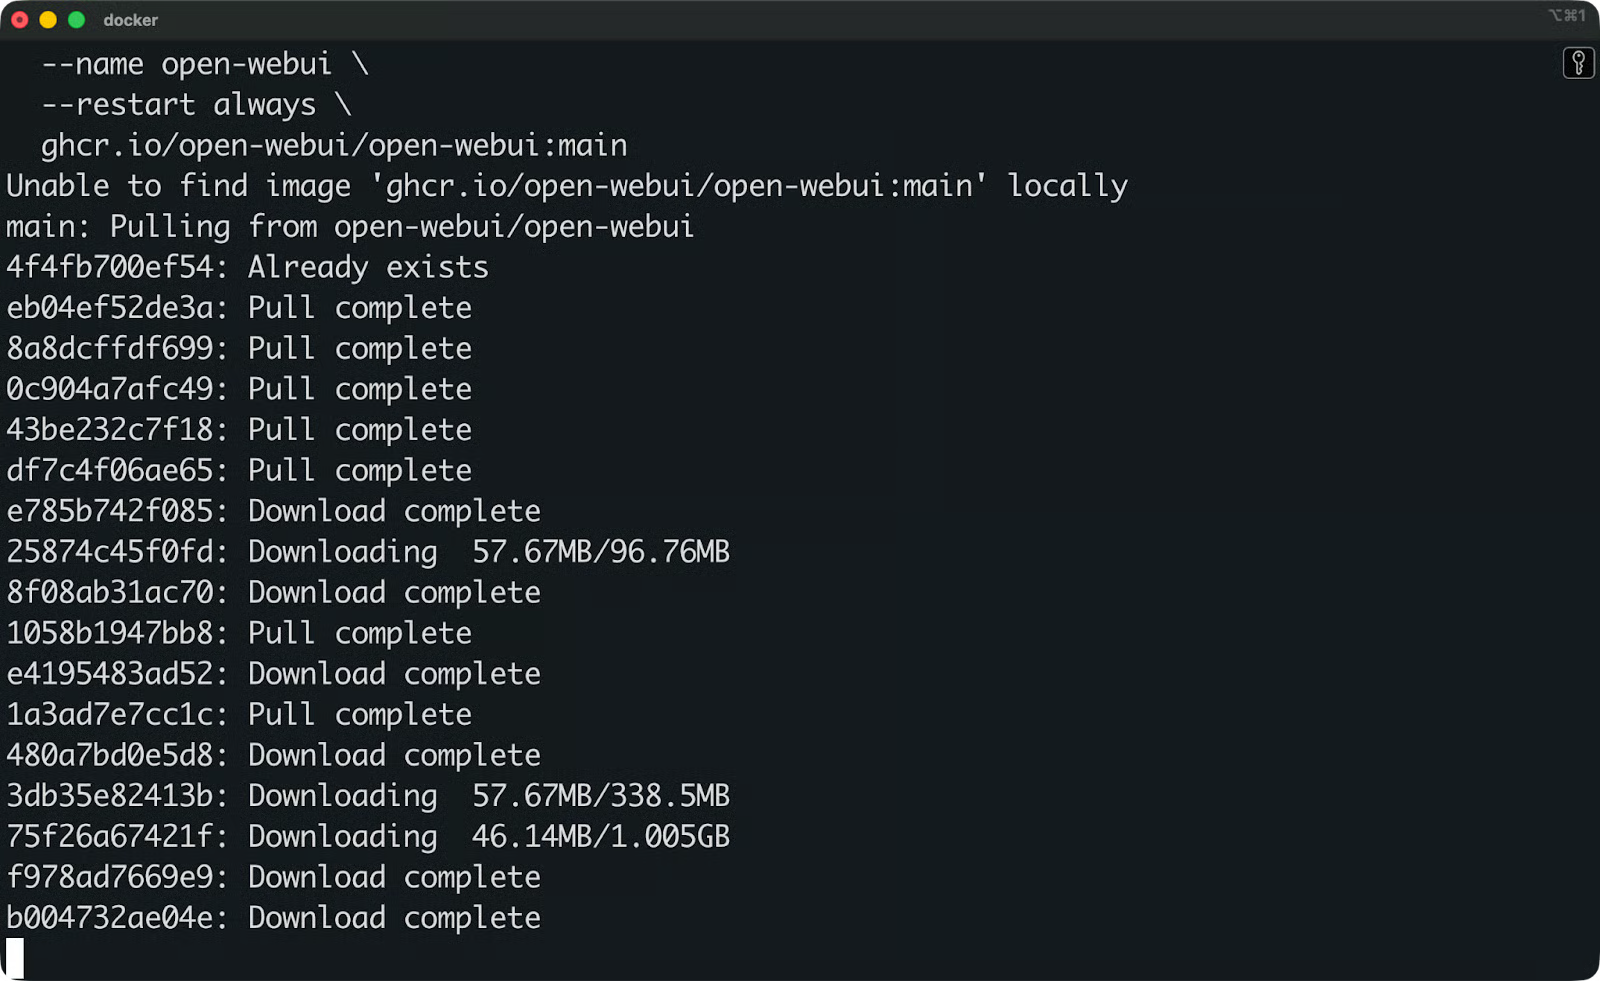
Open WebUI-image wordt gedownload
Dit doet elke vlag:
d draait de container op de achtergrond
p 3000:8080 koppelt poort 8080 binnen de container aan poort 3000 op jouw machine
v open-webui:/app/backend/data maakt een Docker-volume aan om je data te bewaren – gesprekken, instellingen en geüploade bestanden blijven bewaard na herstarts van de container
-restart always start de container opnieuw op als deze stopt of je machine herstart
-name open-webui geeft de container een leesbare naam zodat je er later naar kunt verwijzen
Zodra de container draait, open je je browser en ga je naar http://localhost:3000.
De eerste keer dat je de site opent, vraagt Open WebUI je om een beheerdersaccount aan te maken. Vul je naam, e-mailadres en wachtwoord in.
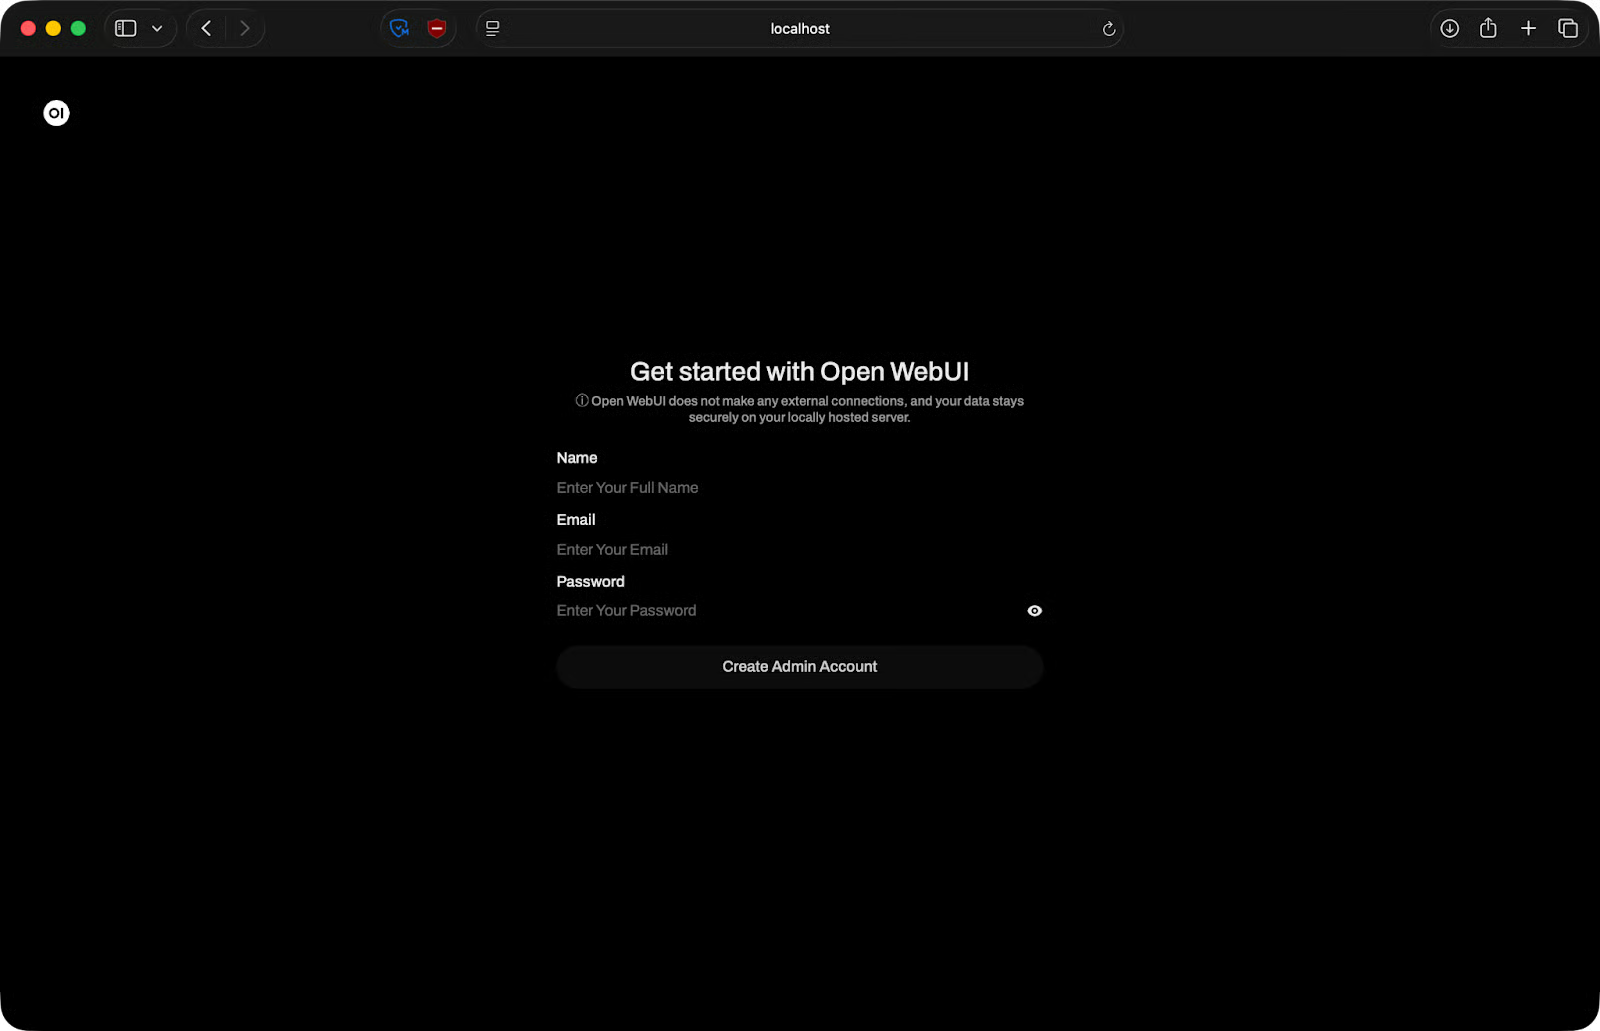
Open WebUI-installatiepagina
Daarna ben je binnen. De interface laadt en je bent klaar om een model te koppelen.
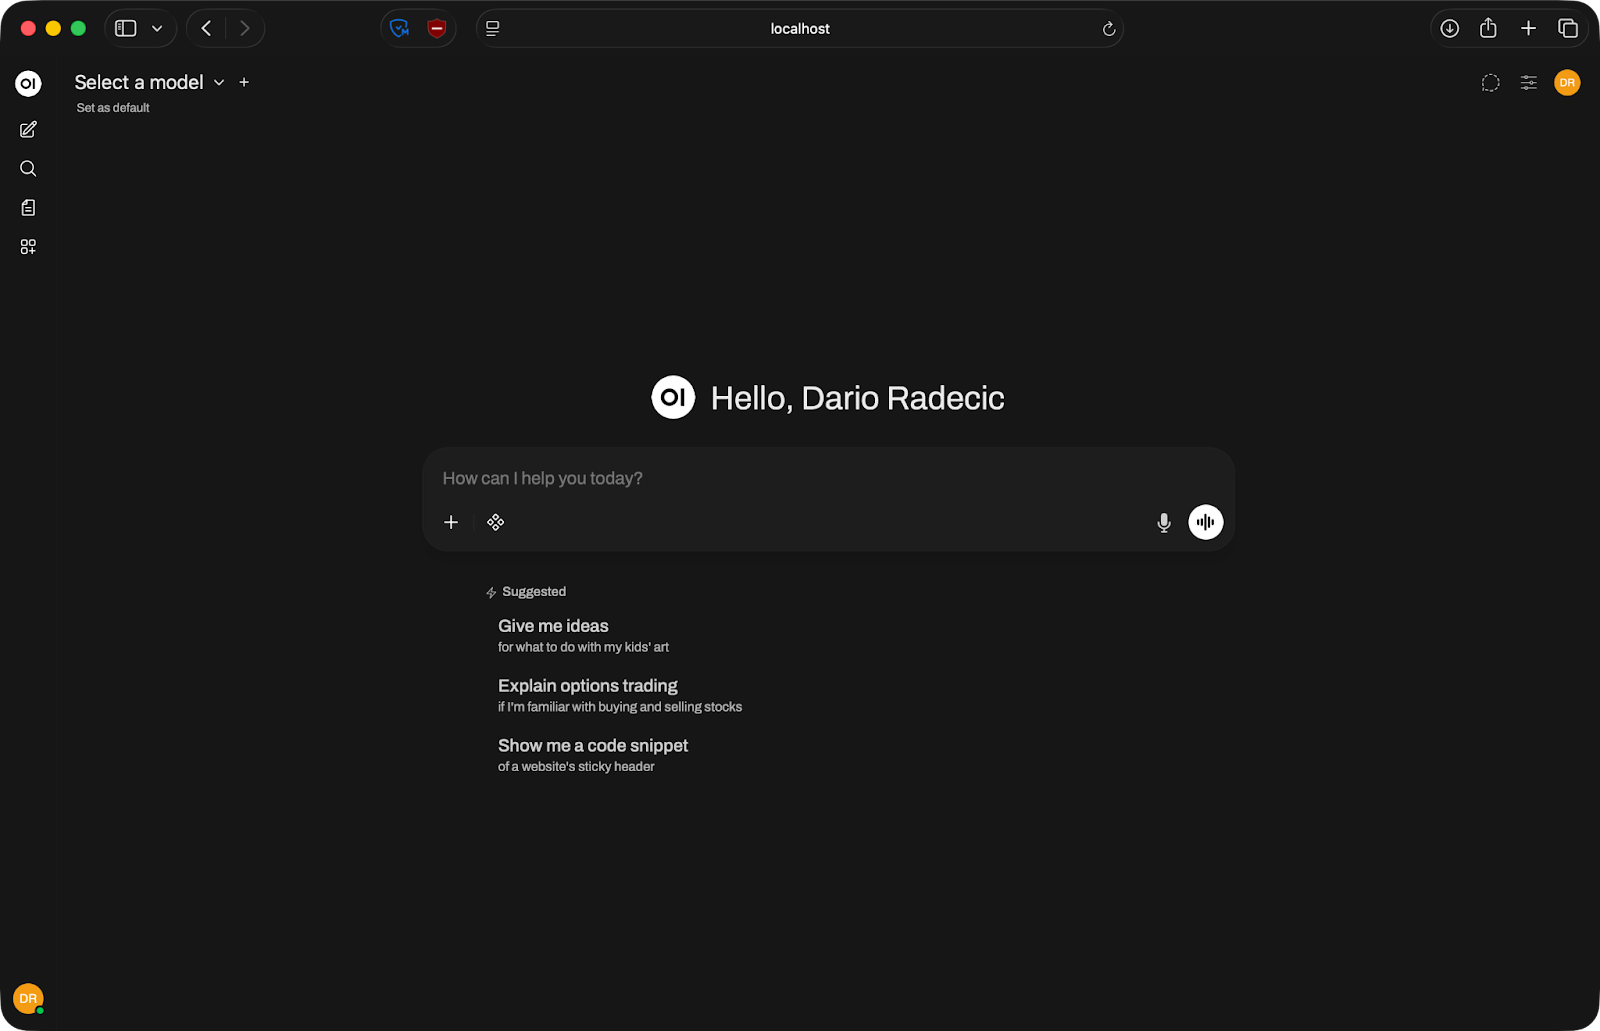
Open WebUI-startpagina
Ollama is de meest gebruikte backend voor Open WebUI omdat het lokale modellen draaien super eenvoudig maakt – één commando om een model te pullen, een ander om het te draaien.
Controleer eerst of Ollama daadwerkelijk draait. Open een terminal en check:
ollama serve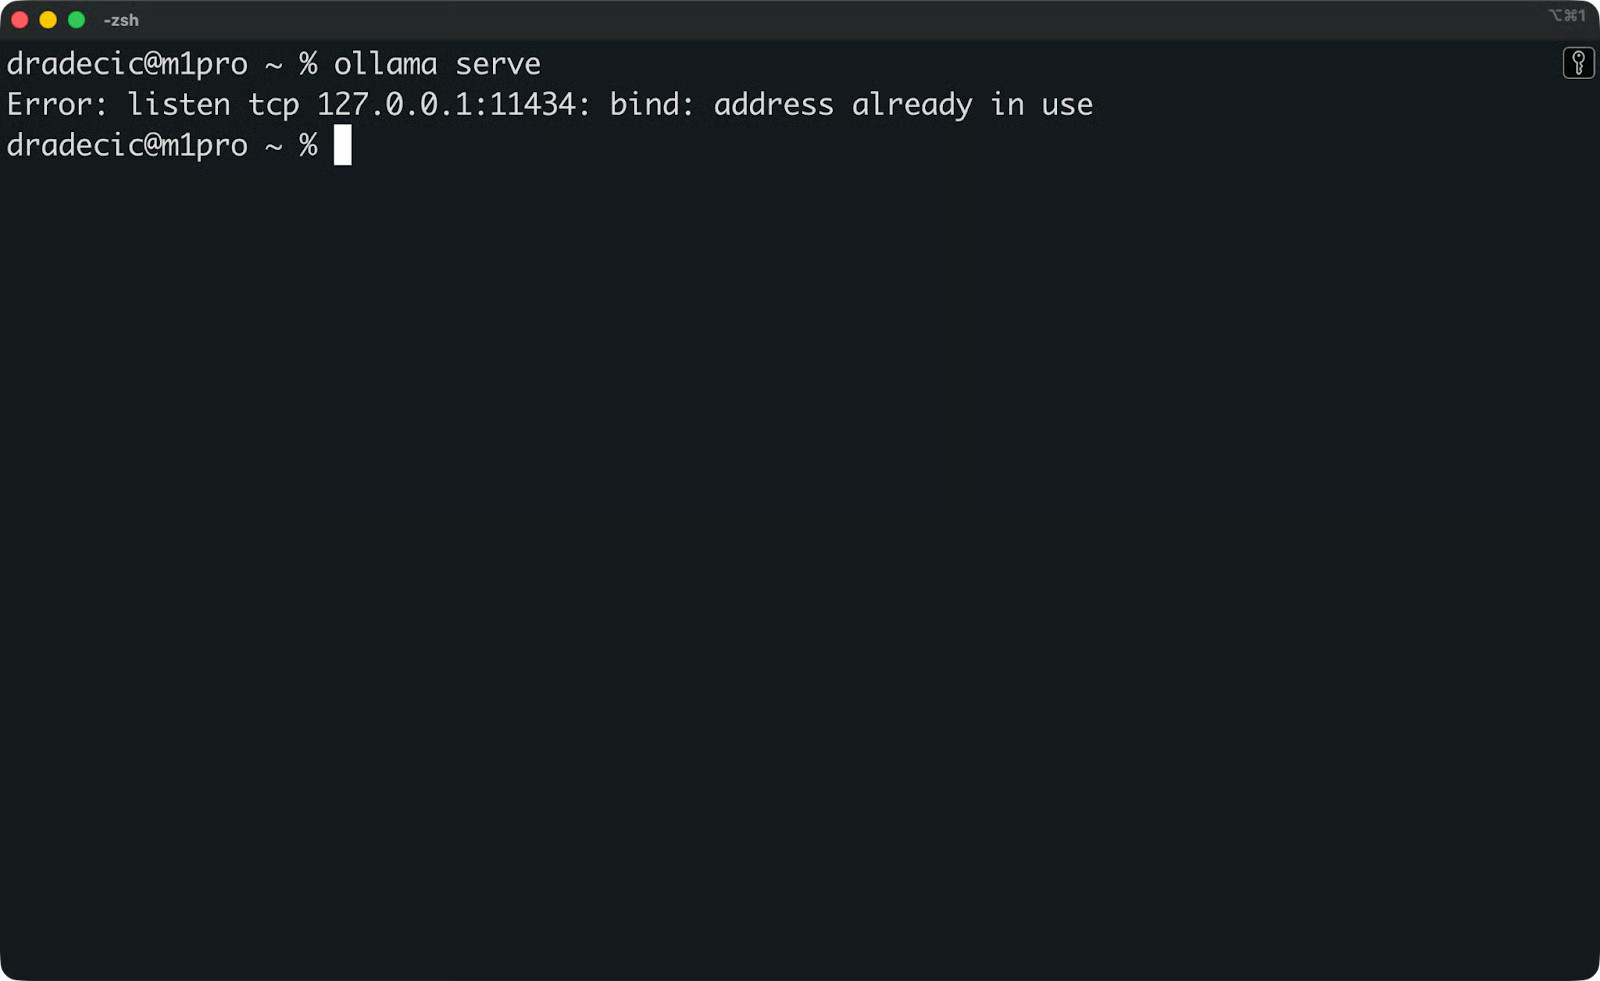
Controleren of Ollama draait
Als Ollama al als achtergrondservice draait, zie je een melding dat het adres al in gebruik is. Dat is prima – het betekent dat het actief is.
Controleer vervolgens of je minimaal één model hebt binnengehaald. Voer uit:
ollama list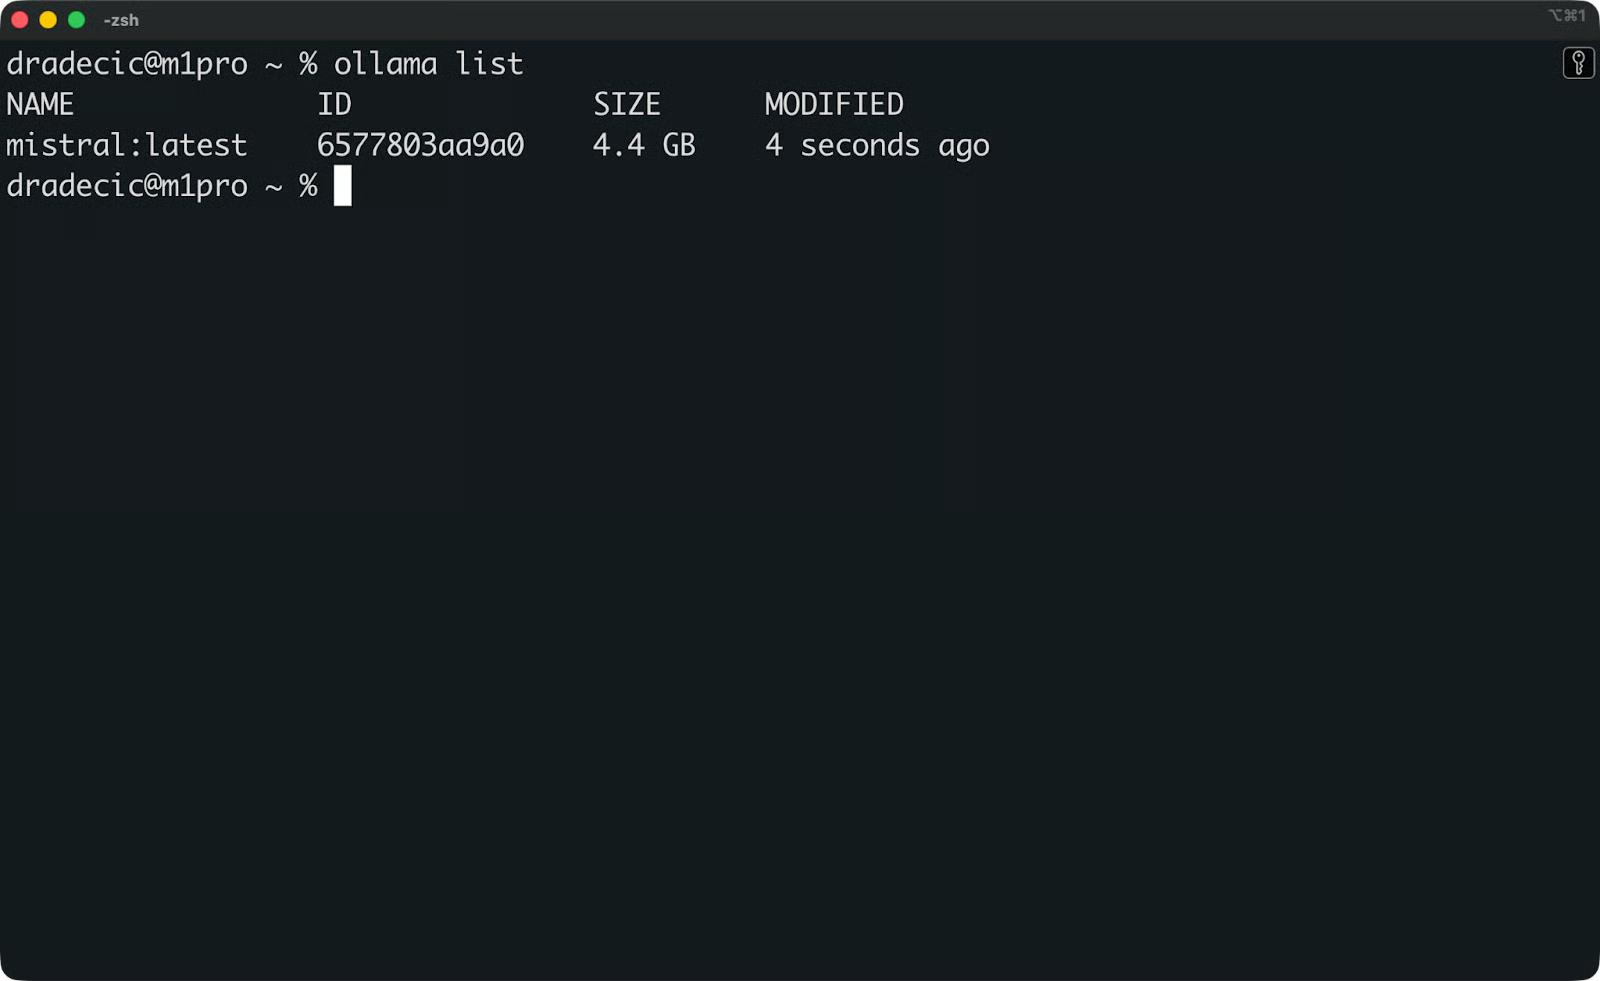
Beschikbare Ollama-modellen
Als de lijst leeg is, pull dan eerst een model. Mistral is een goed startpunt:
ollama pull mistral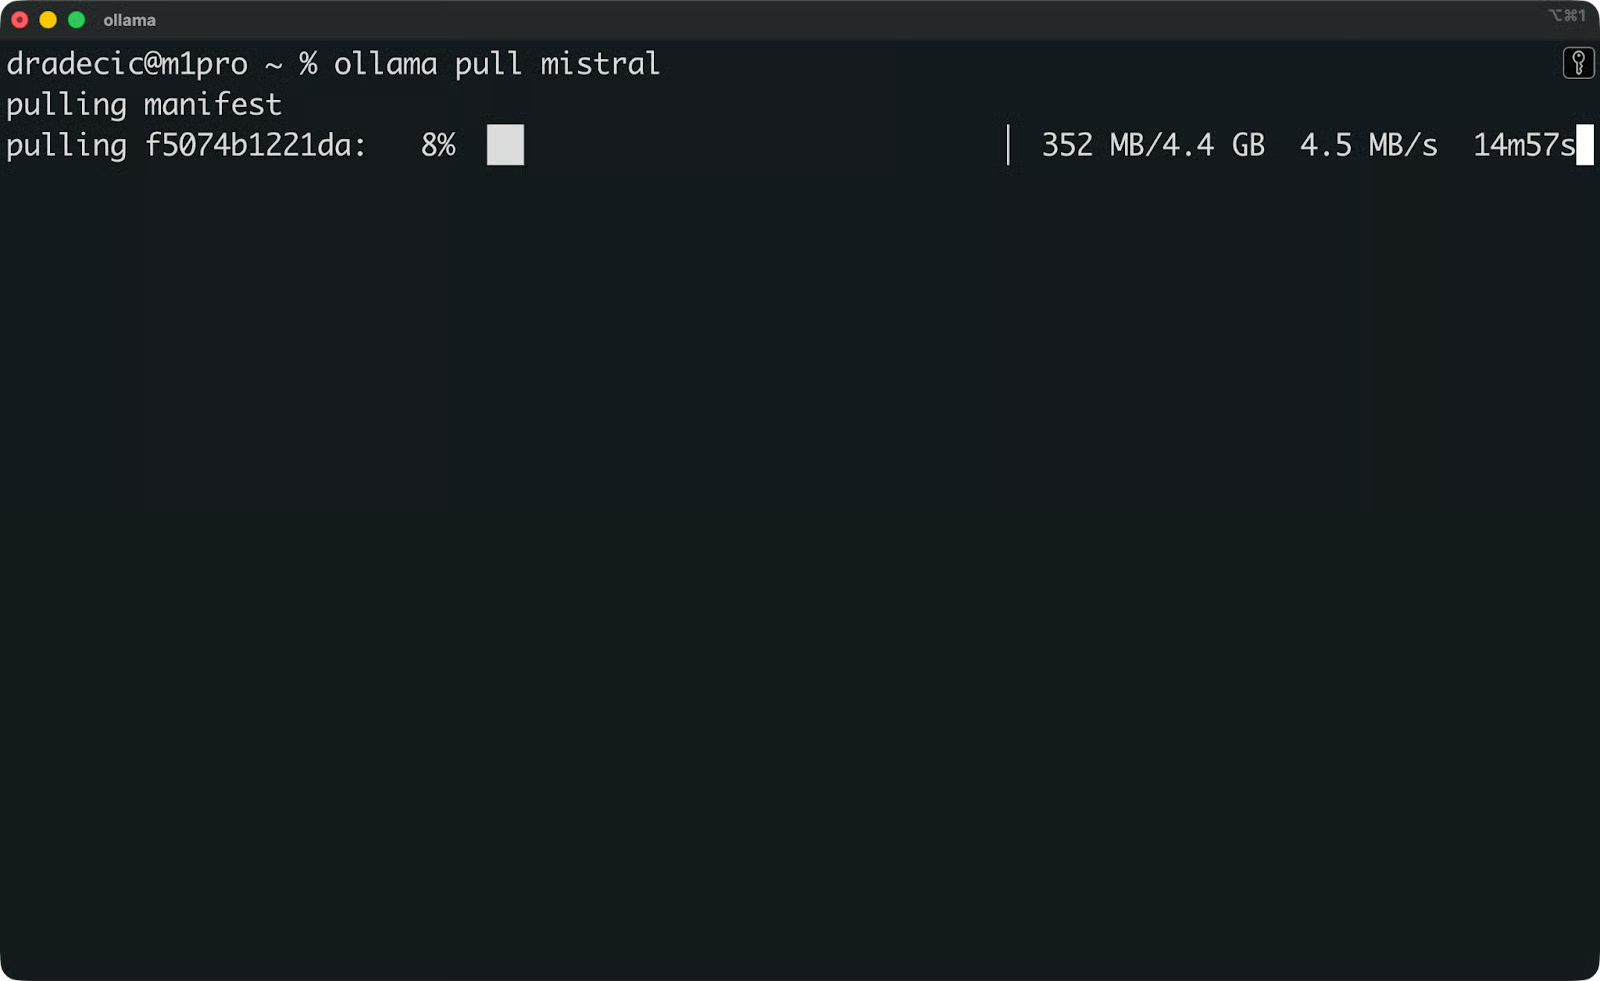
Mistral-model binnenhalen
Mistral is een solide, algemeen bruikbaar model dat goed draait op consumentenharde
ware.
Open nu Open WebUI in je browser op http://localhost:3000. Ga naar Settings - Connections en controleer de Ollama API-URL. Standaard is die ingesteld op http://host.docker.internal:11434.
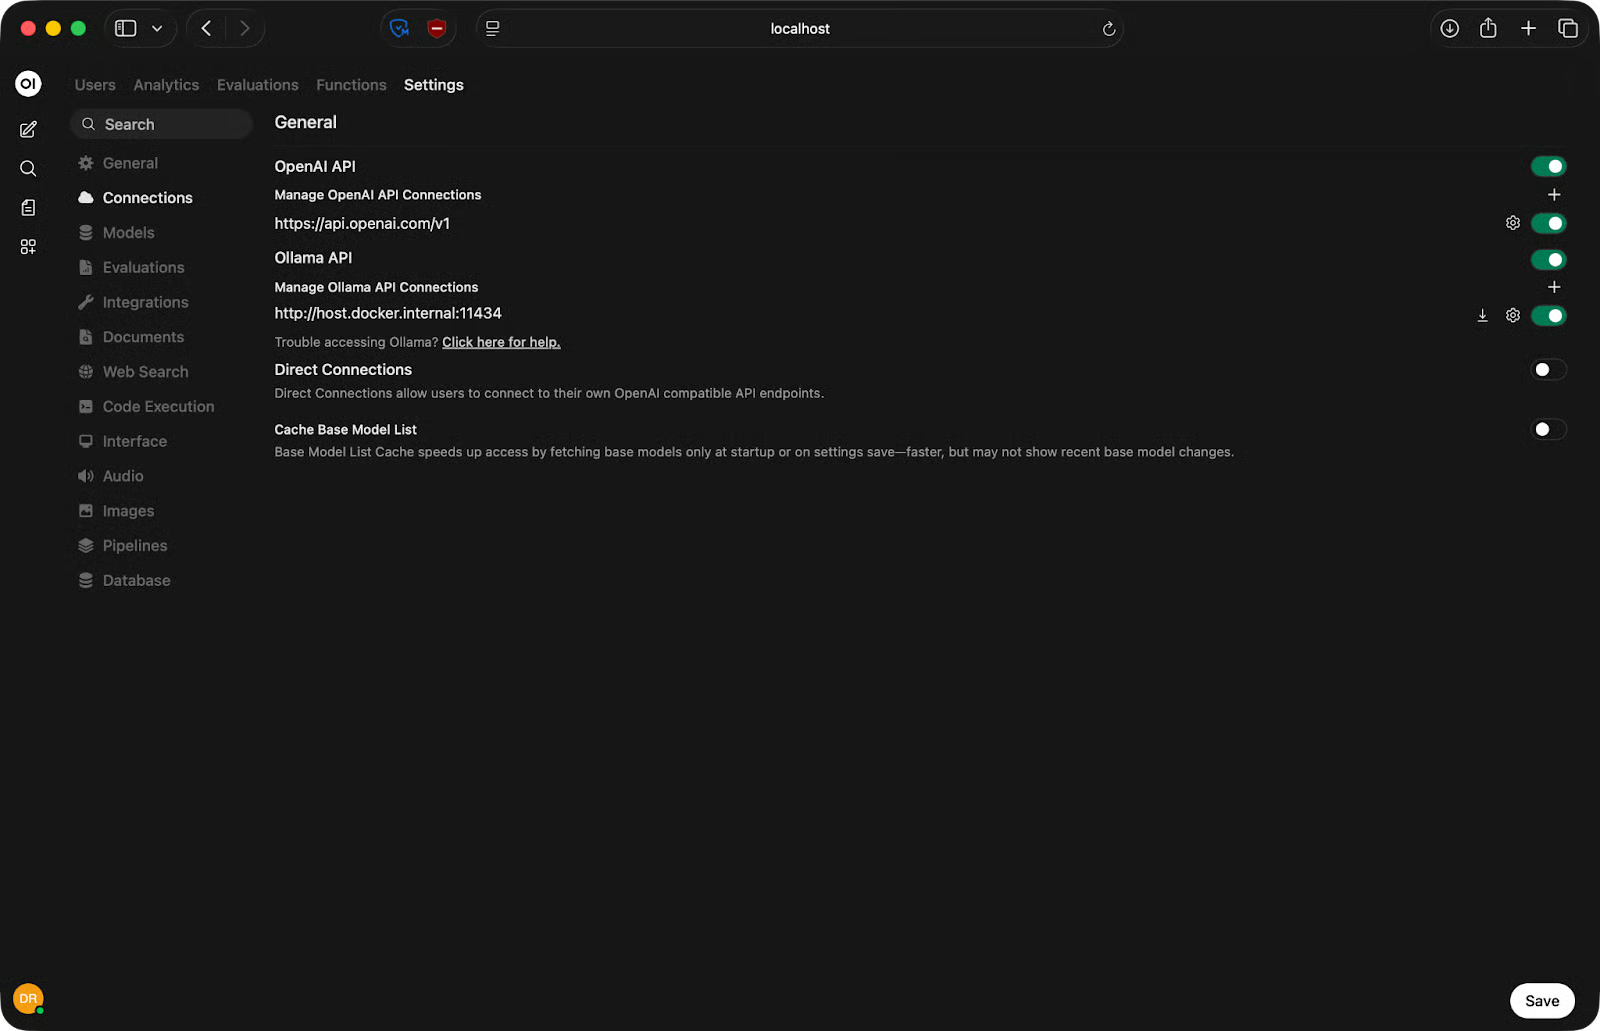
Ollama API-URL instellen
Dit werkt op Mac en Windows met Docker Desktop. Op Linux vervang je host.docker.internal door je daadwerkelijke host-IP:
http://<your-ip-address>:11434Klik op Save en ververs de pagina. Als de verbinding is gelukt, verschijnen je Ollama-modellen in de modelkiezer bovenaan het chatvenster. Selecteer er één en je kunt beginnen met chatten.
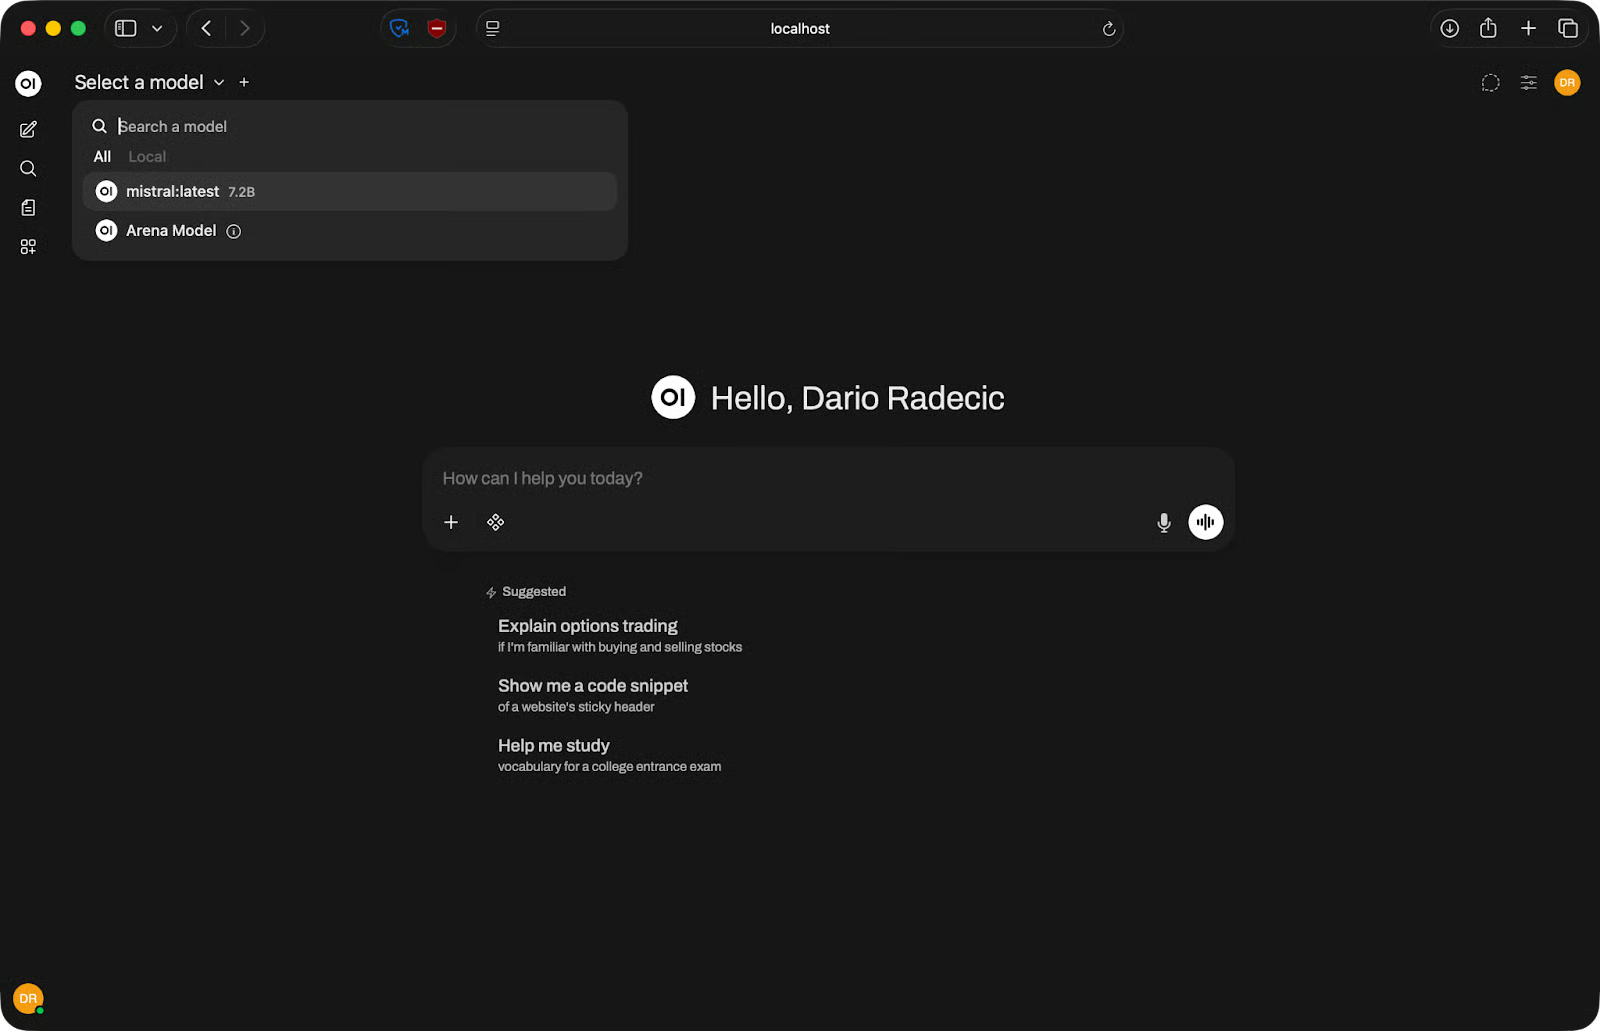
Beschikbare modellen
Als er geen modellen verschijnen, controleer dan of Ollama draait en of de API-URL klopt voor jouw OS.
Zodra je model is gekoppeld, voelt Open WebUI erg als ChatGPT – maar met een paar extra instellingen die handig zijn om te kennen.
Bovenaan het chatvenster zie je een dropdown om een model te selecteren. Klik erop en kies het model dat je wilt gebruiken. Als je meerdere backends hebt gekoppeld, verschijnen alle beschikbare modellen hier – Ollama-modellen, API-modellen, alles in één lijst.
Typ je prompt in het invoerveld onderaan en druk op Enter. Antwoorden stromen in realtime binnen, dus je hoeft niet te wachten tot de volledige output klaar is.
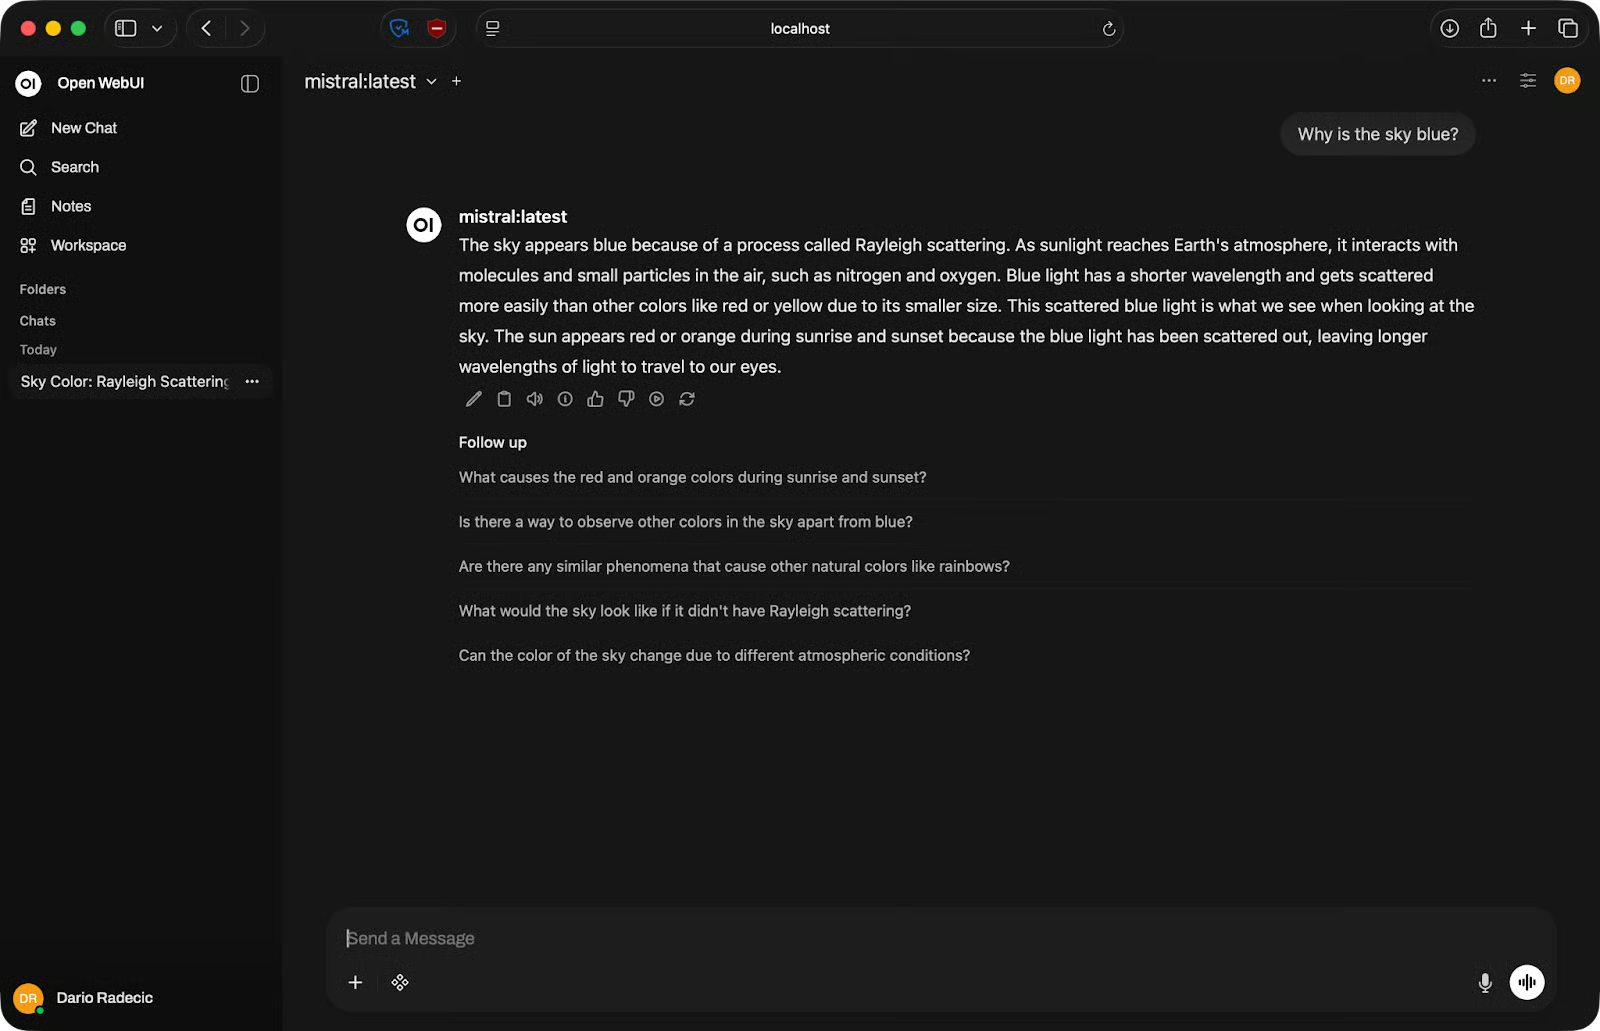
Voorbeeld van basis-chat
Elk gesprek wordt opgeslagen in de linkerzijbalk. Je kunt gesprekken hernoemen om het overzicht te bewaren, of verwijderen wat je niet nodig hebt. Klik op een eerder gesprek om verder te gaan waar je gebleven was.
Open WebUI werkt goed voor codegeneratie en debuggen. Beschrijf in gewone taal wat je nodig hebt en het model geeft een codeblok terug dat je kunt kopiëren.
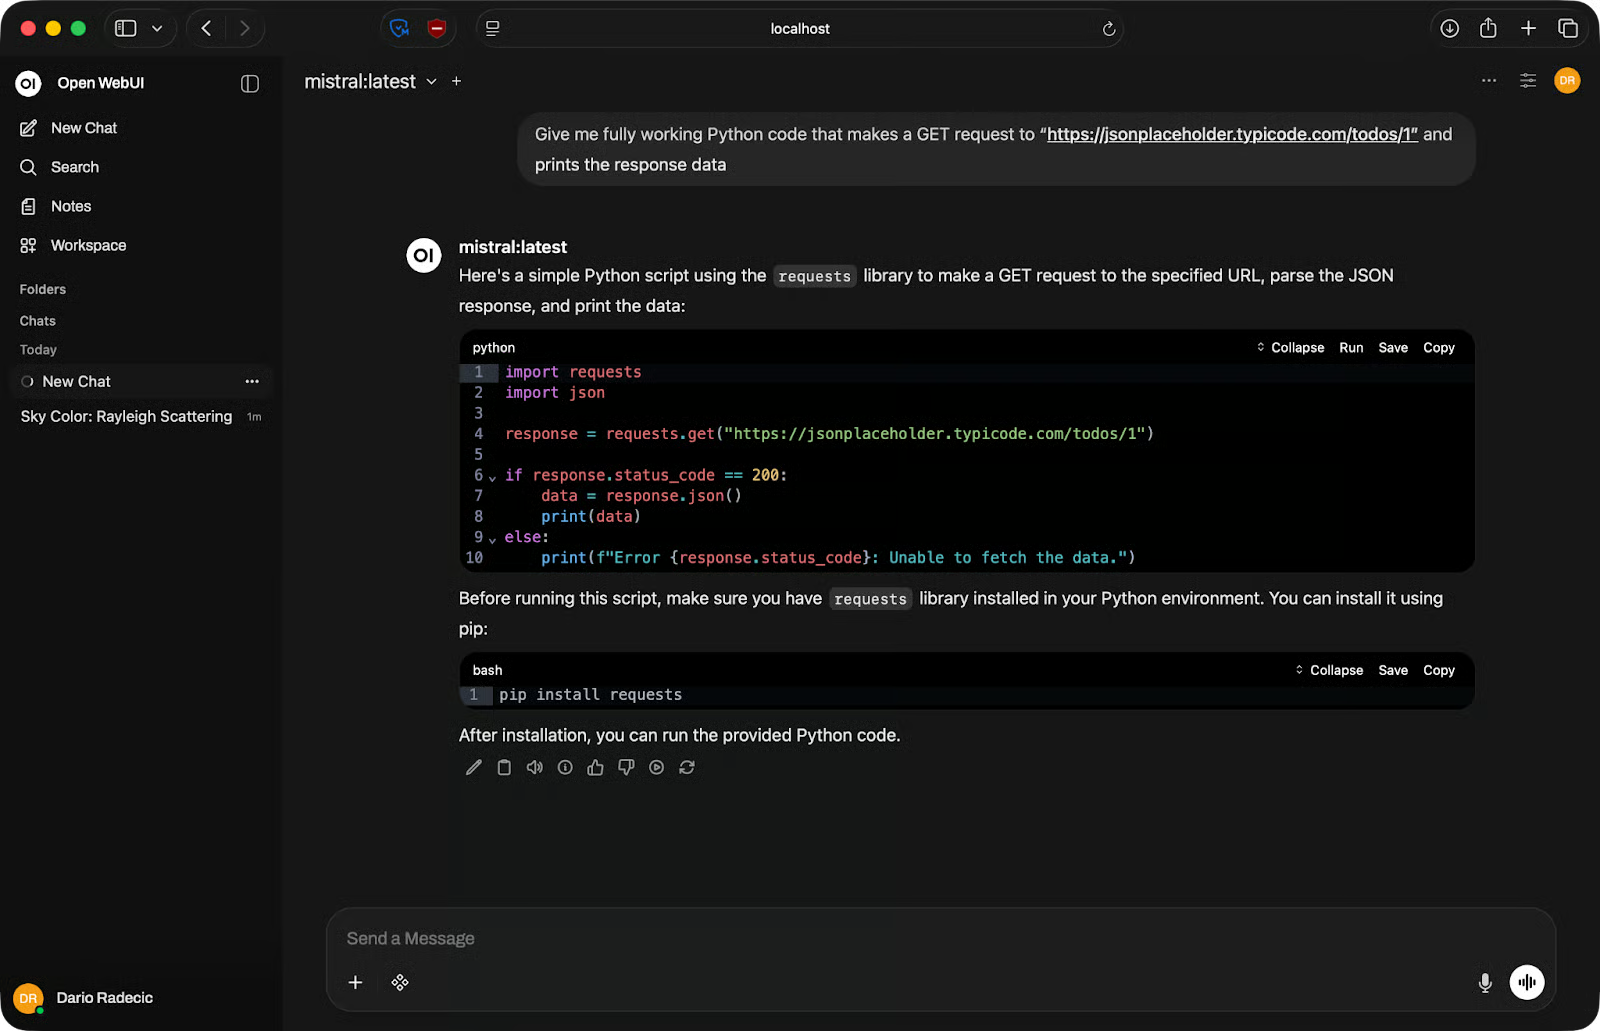
Codevoorbeeld
Voor debuggen plak je je code en foutmelding in de prompt. Wees specifiek – voeg de volledige foutuitvoer toe, niet alleen het fouttype. Hoe meer context je geeft, hoe nuttiger het antwoord.
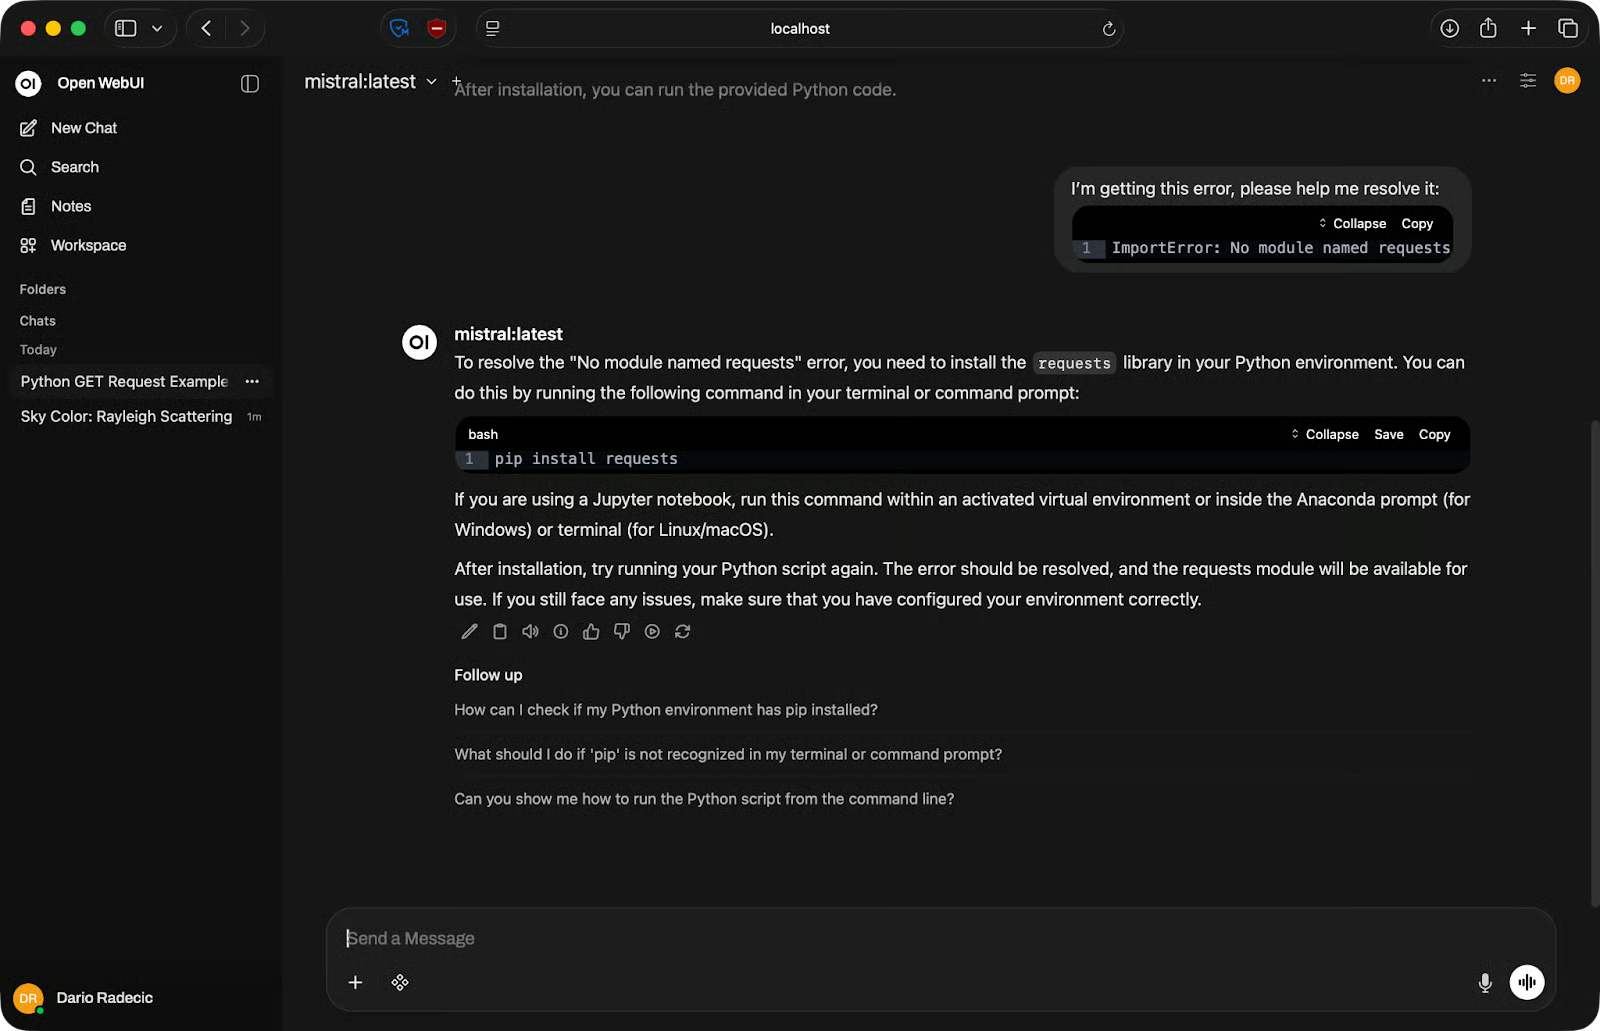
Debugvoorbeeld
Bij taken in meerdere stappen moet je niet alles in één prompt proberen te proppen. Hak het op. Vraag het model om een functie te schrijven, vraag daarna om foutafhandeling toe te voegen, en daarna om tests te schrijven. Kortere, gerichte prompts werken beter dan lange prompts die alles tegelijk proberen te doen.
Open WebUI ondersteunt bestandsuploads in de chat. Klik op het plus-icoon in het invoervak en voeg een document toe – PDF, tekstbestand of iets dergelijks.
Na upload wordt de inhoud van het bestand deel van de context van het gesprek. Je kunt het model vragen om samen te vatten, specifieke informatie te extraheren of vragen te beantwoorden op basis van wat er in het document staat.

Gesprek over een document
Houd er wel rekening mee dat het model alleen kan werken met wat in zijn contextvenster past – de maximale hoeveelheid tekst die het in één keer kan verwerken. Zeer grote bestanden kunnen worden afgekapt, dus splits ze op als je met lange documenten werkt.
Open WebUI heeft veel instellingen, dus laat me er een paar doornemen die voor jou echt relevant zijn.
Met de modelkiezer bovenaan het chatvenster kun je midden in een sessie van model wisselen zonder een nieuw gesprek te starten. Handig als je dezelfde prompt tegen verschillende modellen wilt testen – voer hem uit met Llama, daarna Mistral, en vergelijk de outputs naast elkaar.
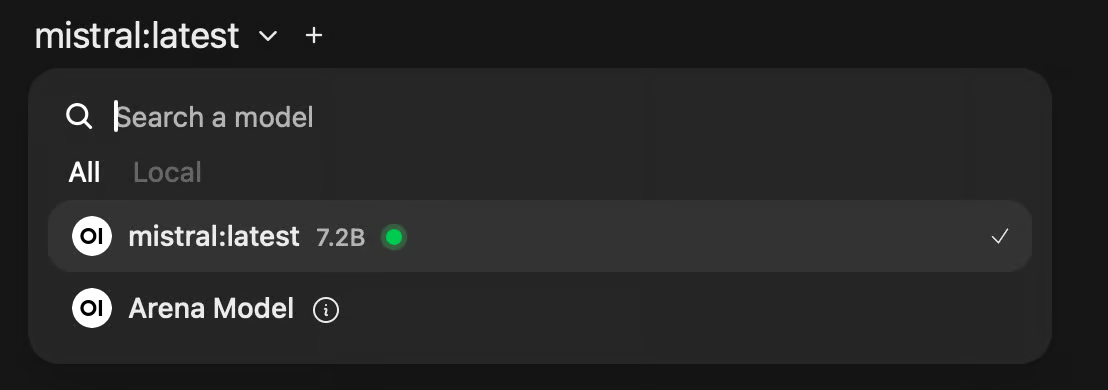
Modelselectie
Als je modellen beoordeelt voor een specifieke taak, scheelt dit een hoop tijd.
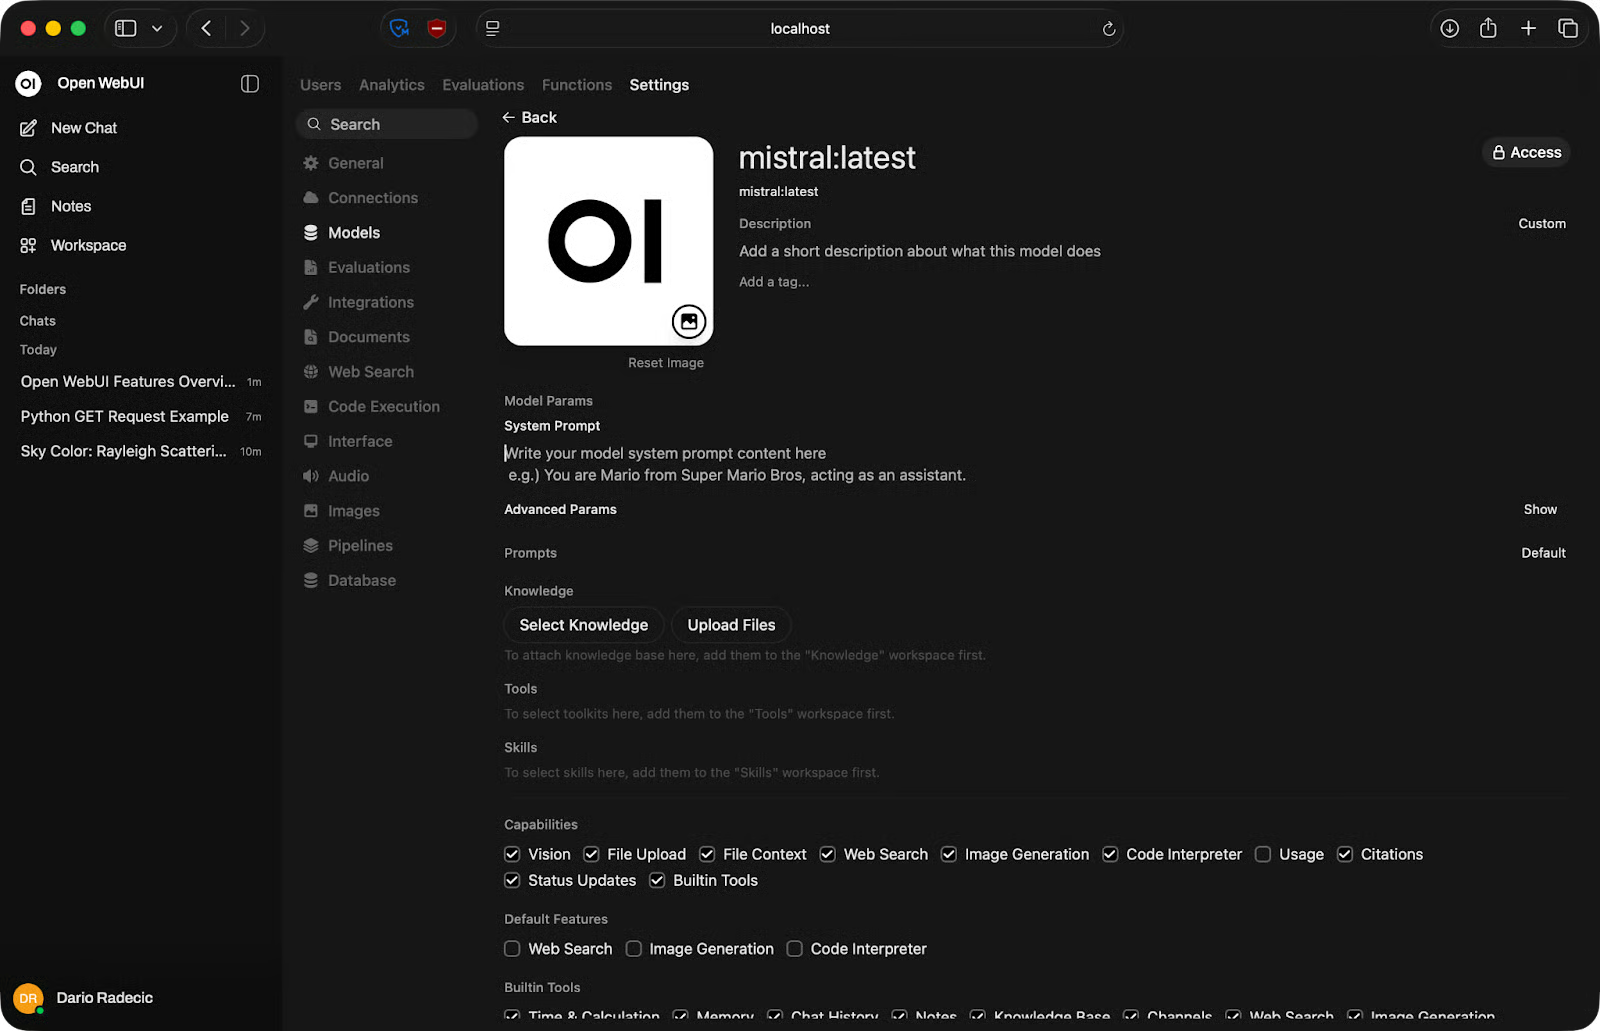
Elk gesprek wordt opgeslagen en vermeld in de linkerzijbalk. Je kunt sessies hernoemen naar iets betekenisvols, zodat je later niet door een lijst met "New Chat"-items hoeft te gaan.
Eerdere chatsessies
Dit maakt Open WebUI bruikbaar voor doorlopend werk. Je kunt terugkeren naar een codersessie, een half afgemaakte prompt vervolgen of een gesprek hergebruiken als referentie.
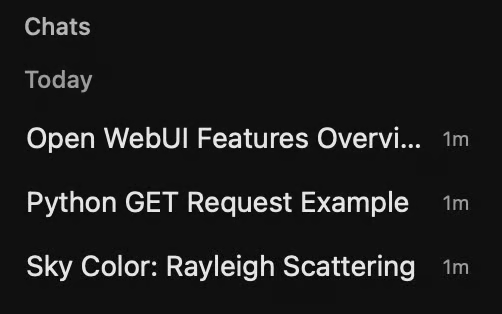
Voor Open WebUI maakt het niet uit wat erachter draait. Je kunt een lokaal Ollama-model koppelen voor privéwerk en een OpenAI-compatibele API voor taken waarbij je een closed-source model nodig hebt dat toch niet in je geheugen zou passen.
OpenAI-verbindingen beheren
Gebruik een klein lokaal model voor snelle taken en een groter API-gedragen model wanneer de klus dat vereist (en toestaat).
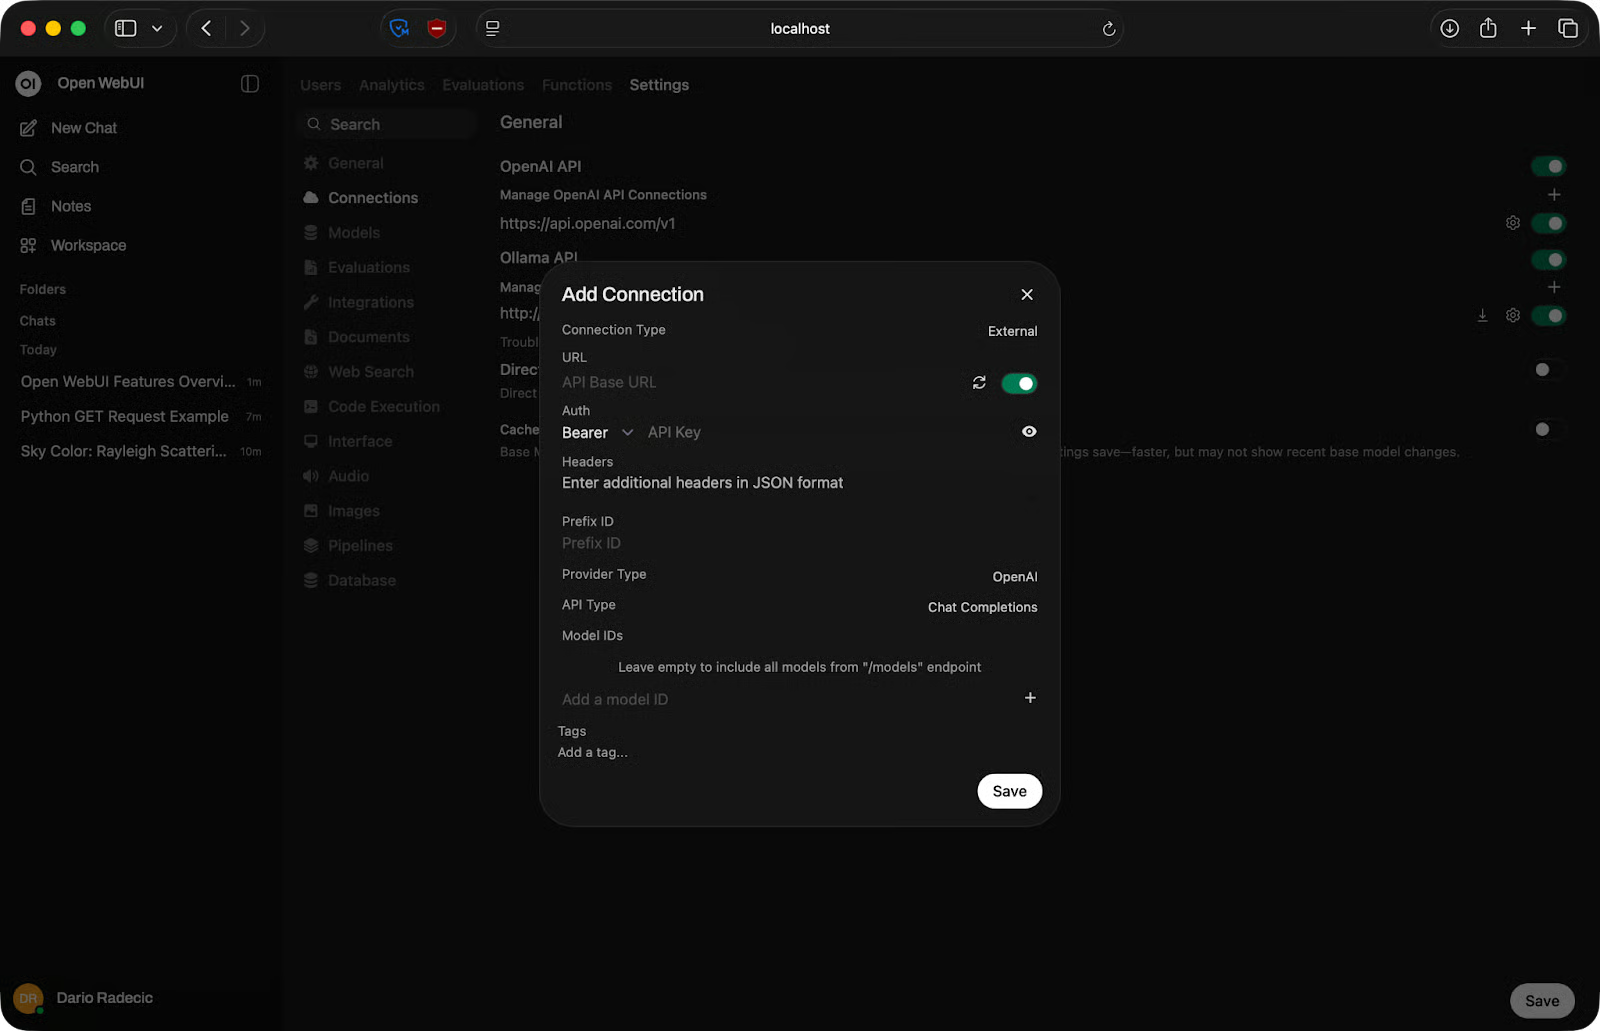
Je kunt heel wat instellen per LLM.
In de modelinstellingen kun je de systeemprompt aanpassen, een kennisbank (documenten) toevoegen en het model koppelen aan tools en skills. Je kunt ook instellen voor welke mogelijkheden het model wordt gebruikt, zoals visie, bestandsuploads, en selecteren of het model taken zoals websearch moet uitvoeren:
Modelinstellingen tweaken
Open WebUI probeert ChatGPT niet te vervangen. Het wordt juist gebruikt om een ander probleem op te lossen.
Het kerngrensverschil is waar je data naartoe gaat. Met ChatGPT gaat elke prompt naar de servers van OpenAI. Met Open WebUI blijft alles op je eigen machine – de interface, het model en de gespreksgeschiedenis.
De trade-off is performance. GPT-5 en vergelijkbare cloudmodellen zijn capabeler dan de meeste modellen die je lokaal kunt draaien. Als ruwe outputkwaliteit je prioriteit is, wint de cloud. Als privacy of offline toegang zwaarder weegt, wint lokaal.
Kosten spelen ook mee. ChatGPT Plus heeft een vast maandbedrag. Open WebUI is gratis, maar je betaalt met hardware – een machine met genoeg RAM en bij voorkeur een GPU.
De CLI van Ollama is prima voor snelle tests, maar niet bedoeld voor echt werk. Je typt een prompt, krijgt een antwoord, en dat is het. Er is geen geschiedenis, geen bestandsuploads en geen manier om modellen te vergelijken zonder van terminal te wisselen.
Open WebUI geeft Ollama een volwaardige interface. Modellen en backend zijn hetzelfde – maar dan met gespreksbeheer, instellingen en een UI die niet verdwijnt als je de terminal sluit.
Als je Ollama al gebruikt, kost Open WebUI erbovenop niets extra en maakt het de gebruikerservaring een stuk prettiger.
LM Studio is een desktopapp met een ingebouwde modelbrowser en een vergelijkbare chatinterface. Het is een goede optie als je een zelfstandige GUI wilt zonder Docker. Het nadeel is dat het aan je desktop vastzit – Open WebUI draait in een browser en is toegankelijk vanaf andere apparaten op je netwerk.
text-generation-webui is meer een tool voor power users. Het ondersteunt een breder scala aan modelformaten en heeft fijnmazigere instellingen, maar de setup is bewerkelijker en de interface is lastiger te navigeren. Open WebUI is het betere startpunt, tenzij je specifiek nodig hebt wat text-generation-webui biedt.
Je kunt deze tabel gebruiken voor een snelle vergelijking tussen Open WebUI en alternatieven:
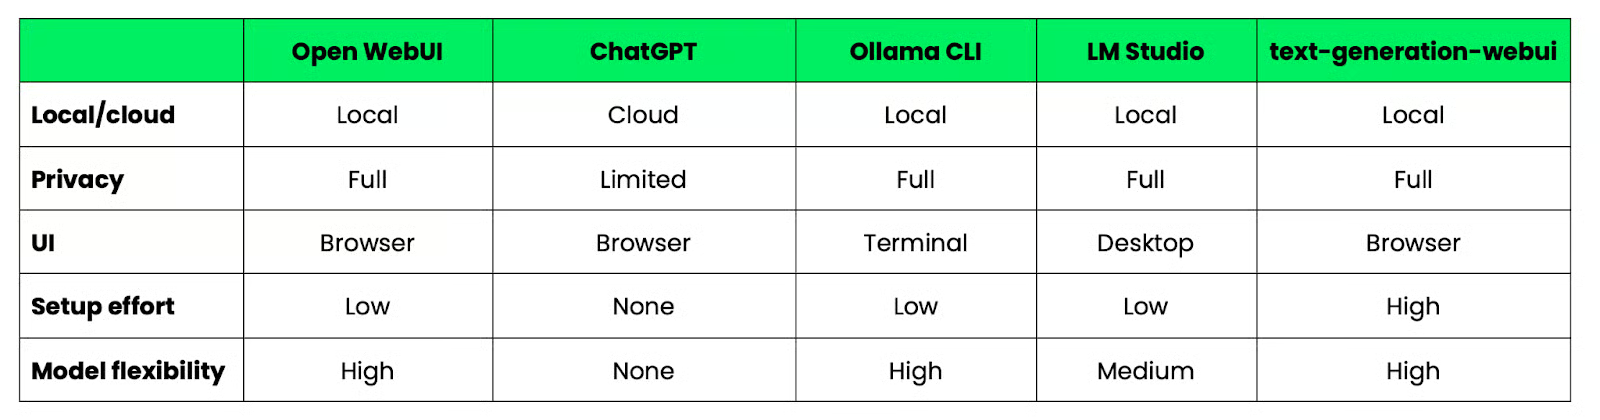
Open WebUI versus alternatieven
De meeste Open WebUI-problemen vallen in een van vijf categorieën – en de meeste hebben een snelle oplossing.
Voer direct na de mislukte start docker logs open-webui uit. De logs vertellen wat er misging. Negen van de tien keer is het een poortconflict of een probleem met volumerechten.
Als poort 3000 al in gebruik is op je machine, start de container niet. Los dit op door naar een andere hostpoort te mappen:
docker run -d -p 3001:8080 ...Ga daarna naar Open WebUI op http://localhost:3001 in plaats daarvan.
Bevestig eerst dat Ollama daadwerkelijk draait:
ollama serveControleer daarna de API-URL bij Settings - Connections. Op Mac en Windows moet die http://host.docker.internal:11434 zijn. Op Linux gebruik je het IP-adres van je hostmachine. Een verkeerde URL is de meest voorkomende reden dat de verbinding faalt.
Als de modelkiezer leeg is, heeft Open WebUI wel verbinding met Ollama maar geen modellen gevonden. Voer ollama list uit om te bevestigen dat je minimaal één model hebt binnengehaald. Is de lijst leeg, haal er dan een binnen:
ollama pull mistralVervers de Open WebUI-pagina na het binnenhalen – deze werkt niet automatisch bij.
Trage reacties zijn bijna altijd een hardwareprobleem, niet een Open WebUI-probleem. Het model is te groot voor je beschikbare RAM of je hebt geen GPU. Schakel over naar een kleiner model – 7B-parameter modellen draaien redelijk goed op de meeste moderne machines met 16 GB RAM. Op een setup die alleen CPU gebruikt, kun je trager reageren verwachten, ongeacht de modelgrootte.
Een paar gewoonten maken dagelijks een groot verschil in hoe goed Open WebUI voor je werkt.
Open WebUI past goed bij specifieke situaties – niet bij elke situatie. Hier is een lijst met momenten waarop je het zou moeten gebruiken:
Dat gezegd hebbende: Open WebUI is niet het juiste gereedschap als je de best mogelijke modeloutput nodig hebt en privacy geen zorg is. Een cloud-API helpt je dan beter.
Open WebUI geeft je een strakke, praktische interface om met lokale modellen te werken, en jij hebt volledige controle over de omgeving.
Er verlaat geen data je machine, geen snelheidslimieten, geen abonnement nodig. Jij kiest de modellen, beheert de instellingen en breidt de setup uit zoals jij wilt.
Begin het liefst simpel. Start de Docker-container, koppel een klein model zoals Llama of Mistral en stuur een paar prompts. Als dat werkt, kun je meer modellen toevoegen, systeemprompts configureren, externe API's koppelen en verder bouwen.
Voor het geval je je het afvraagt: je kunt Ollama ook met Docker draaien zonder lokale installatie. Lees onze recente gids om te zien hoe.
Leren met Datazcamp
Leerpad
Cursus
Cursus
blog
Adel Nehme
15 min