Kursus
Pengantar Docker
4 Hr
48.7K
Berganti-ganti sesi, menghafal sintaks, dan berharap Anda tidak salah ketik kueri destruktif lama-kelamaan melelahkan. Tidak ada rencana kueri visual, tidak ada penjelajah skema, dan tidak ada cara mudah untuk mencadangkan basis data. Berfungsi, tetapi jauh dari ideal.
pgAdmin 4 mengatasi hal ini dengan GUI berbasis peramban yang dibuat khusus untuk PostgreSQL. Menjalankannya di Docker berarti tanpa instalasi lokal. Anda hanya perlu memulai containernya.
Dalam artikel ini, saya akan menunjukkan cara menyiapkan PostgreSQL dan pgAdmin 4 dengan Docker Compose, menghubungkan kedua container, serta menggunakan Query Tool, penjelajah skema, dan fitur pencadangan di pgAdmin.
Untuk mengikuti panduan ini, Anda perlu Docker terpasang dan berjalan di mesin Anda. Jika Anda baru dengan Docker Compose, baca panduan kami untuk melihat bagaimana alat ini menyederhanakan pengembangan multi-container.
pgAdmin 4 adalah platform administrasi dan pengembangan PostgreSQL yang bersifat open-source dan berbasis peramban. Anda mengaksesnya melalui peramban web, jadi tidak ada aplikasi desktop yang perlu diinstal. Alat ini memberi Anda GUI untuk mengelola basis data, menjalankan kueri, meninjau skema, dan menangani pencadangan—semuanya tanpa menyentuh command line.
Citra Docker resmi adalah dpage/pgadmin4, dipelihara oleh tim pengembang pgAdmin.
Menjalankan pgAdmin 4 di Docker memiliki beberapa keunggulan nyata dibandingkan instalasi lokal. Pertama adalah portabilitas—seluruh lingkungan basis data Anda ada dalam sebuah berkas docker-compose.yml yang bisa Anda bagikan dengan rekan tim. Kedua, tidak ada konflik versi—pgAdmin berjalan di containernya sendiri, sepenuhnya terisolasi dari apa pun di mesin Anda. Dan saat selesai, docker compose down membersihkannya.
Ada banyak alat GUI manajemen basis data. Berikut perbandingan pgAdmin 4 dengan dua alternatif populer.

pgAdmin 4 versus alternatif populer
DBeaver dan TablePlus adalah alat yang bagus, tetapi tidak ada yang memiliki citra Docker resmi. Jika instance PostgreSQL Anda sudah berjalan di Docker, pgAdmin 4 sangat cocok—Anda hanya perlu menambahkan satu service ke docker-compose.yml dan semuanya berjalan bersama dalam jaringan yang sama.
Cara tercepat untuk menjalankan PostgreSQL dan pgAdmin 4 bersama adalah satu berkas docker-compose.yml. Jika Anda baru dengan topik ini, Panduan Docker Compose kami membahas dasarnya. Di sini, saya akan fokus pada konfigurasi spesifik pgAdmin.
Berikut berkas lengkap yang bisa Anda salin-tempel:
services:
  postgres:
    image: postgres:18
    container_name: postgres
    environment:
      POSTGRES_USER: admin
      POSTGRES_PASSWORD: secret
      POSTGRES_DB: mydb
    volumes:
      - postgres_data:/var/lib/postgresql
    networks:
      - pgnetwork

  pgadmin:
    image: dpage/pgadmin4:9.13
    container_name: pgadmin
    environment:
      PGADMIN_DEFAULT_EMAIL: you@yourdomain.com
      PGADMIN_DEFAULT_PASSWORD: password
      PGADMIN_LISTEN_PORT: 5050
    ports:
      - "5050:5050"
    volumes:
      - pgadmin_data:/var/lib/pgadmin
    depends_on:
      - postgres
    networks:
      - pgnetwork

volumes:
  postgres_data:
  pgadmin_data:

networks:
  pgnetwork:
Field depends_on memberi tahu Docker Compose untuk memulai container postgres sebelum pgadmin. Tanpanya, pgAdmin bisa saja mulai sebelum PostgreSQL siap dan gagal terhubung. Ini tidak menunggu PostgreSQL benar-benar sehat—hanya menunggu container mulai. Itu sudah cukup untuk menghindari sebagian besar kondisi balapan.
Dua variabel lingkungan wajib diisi:
PGADMIN_DEFAULT_EMAIL - alamat email yang akan Anda gunakan untuk masuk ke antarmuka web pgAdminPGADMIN_DEFAULT_PASSWORD - kata sandi untuk akun tersebutYang ketiga opsional tetapi sebaiknya Anda tentukan:
PGADMIN_LISTEN_PORT - port yang didengarkan pgAdmin di dalam container. Nilai defaultnya 80, tetapi menyetelnya ke 5050 membuat pemetaan port lebih rapi.Meski begitu, menulis kredensial langsung di berkas Compose adalah ide buruk, terutama jika berkas tersebut masuk ke version control. Pindahkan ke berkas .env sebagai gantinya.
Buat berkas .env di direktori yang sama dengan docker-compose.yml:
POSTGRES_USER=admin
POSTGRES_PASSWORD=secret
POSTGRES_DB=mydb
PGADMIN_DEFAULT_EMAIL=admin@example.com
PGADMIN_DEFAULT_PASSWORD=secret
Lalu referensikan variabelnya di berkas Compose Anda:
# postgres
environment:
  POSTGRES_USER: ${POSTGRES_USER}
  POSTGRES_PASSWORD: ${POSTGRES_PASSWORD}
  POSTGRES_DB: ${POSTGRES_DB}

# pgadmin
environment:
  PGADMIN_DEFAULT_EMAIL: ${PGADMIN_DEFAULT_EMAIL}
  PGADMIN_DEFAULT_PASSWORD: ${PGADMIN_DEFAULT_PASSWORD}
Docker Compose akan memuat berkas .env saat Anda menjalankan perintah, jadi tidak diperlukan konfigurasi tambahan. Ingat untuk menambahkan .env ke .gitignore agar kredensial Anda tidak masuk ke repo.
Volume yang dipetakan ke /var/lib/pgadmin adalah tempat pgAdmin menyimpan data, seperti data sesi, koneksi server yang disimpan, dan konfigurasi. Menghapus ini dari berkas compose berarti Anda akan kehilangan semuanya setiap kali container dimulai ulang.
Dalam berkas compose saat ini, Anda memiliki named volume yang dikelola Docker di mesin host Anda. Data akan bertahan melewati restart container, pembuatan ulang, dan pembaruan citra—selama Anda tidak secara eksplisit menghapus volumenya dengan docker volume rm.
Dengan docker-compose.yml siap, menjalankan stack cukup dengan satu perintah:
docker compose up -dFlag -d menjalankan kedua container dalam mode detached—mereka berjalan di latar belakang dan terminal Anda tetap bebas. Untuk memastikan keduanya berjalan:
docker psAnda akan melihat postgres dan pgadmin tercantum dengan status Up.
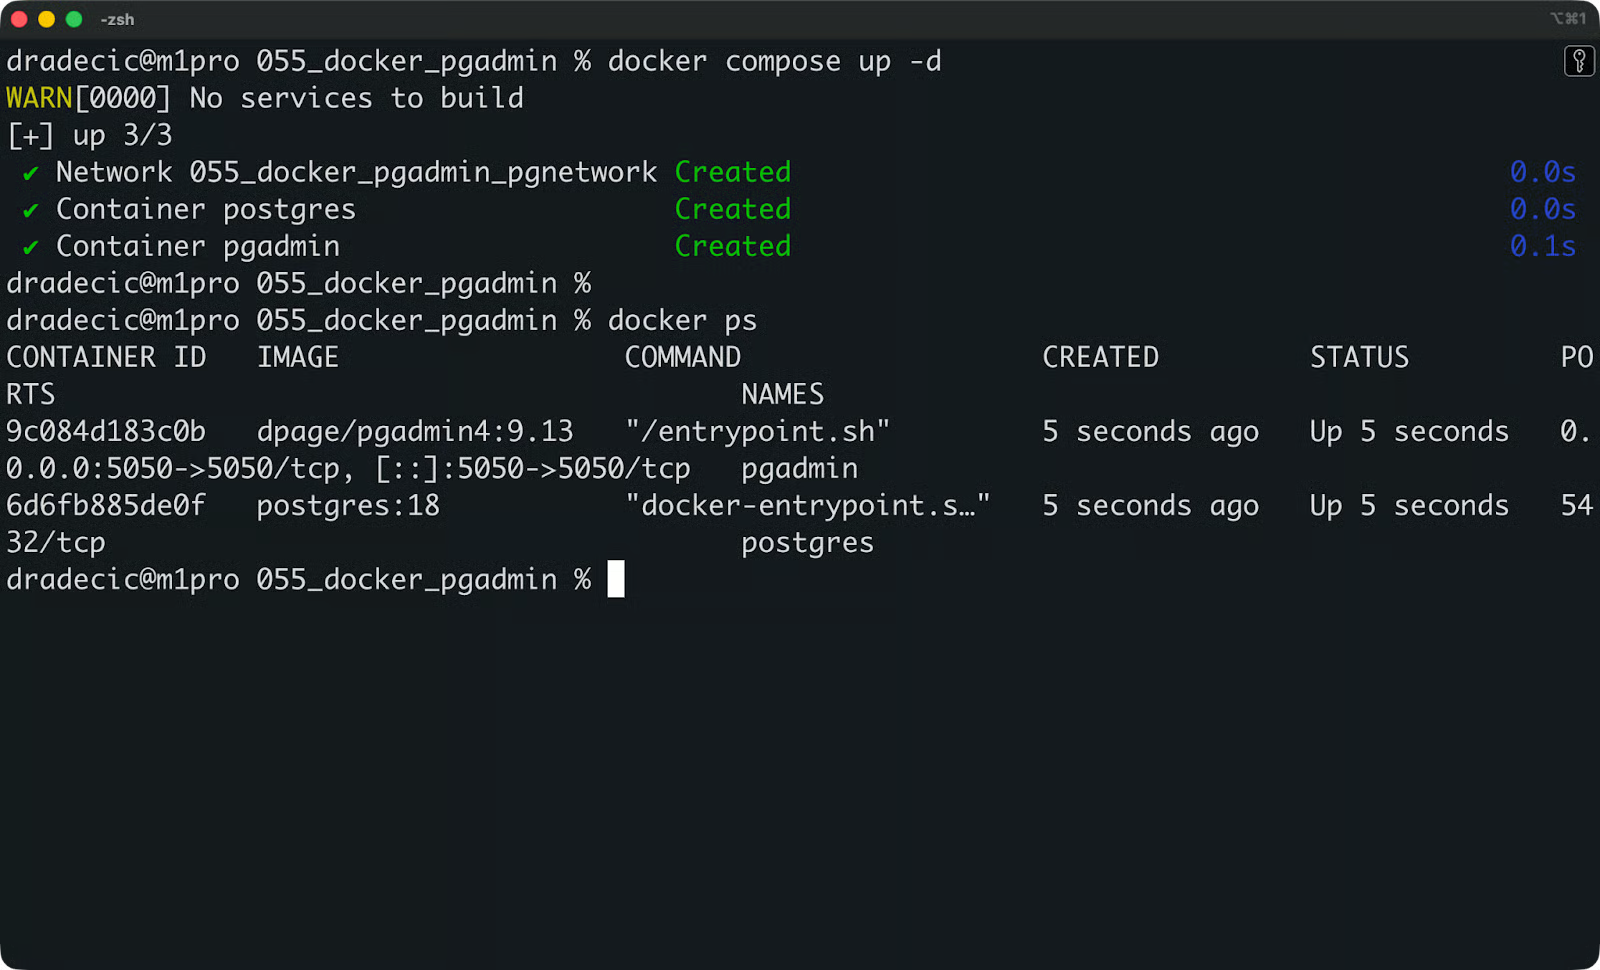
Status container
Jika ada yang tampak tidak beres, periksa log pgAdmin:
docker logs pgadminProses awal yang sehat terlihat seperti ini:
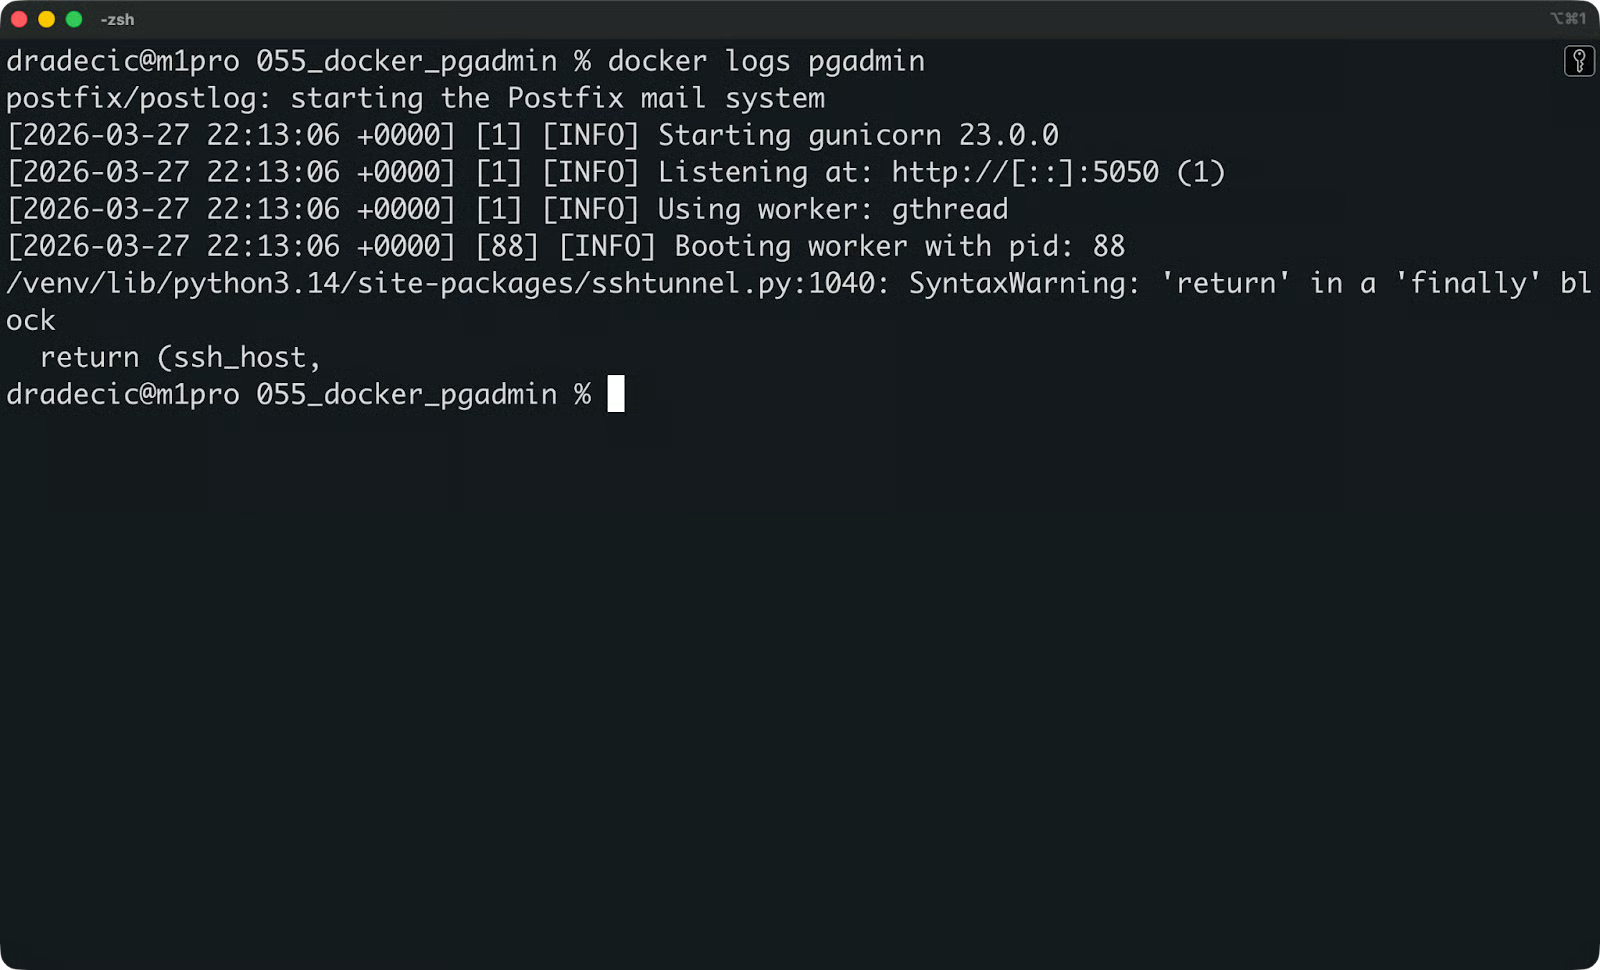
Log startup pgAdmin
Jika Anda melihat galat, kemungkinan besar salah satu dari tiga ini:
Otentikasi kata sandi gagal: PGADMIN_DEFAULT_PASSWORD Anda hilang atau salah format di berkas .env
Port sudah dialokasikan: ada proses lain yang berjalan di port 5050; ubah port host di berkas Compose Anda
Tidak ada berkas atau direktori: path volume salah atau container tidak memiliki izin untuk menulis ke sana
Setelah kedua container aktif dan log bersih, buka peramban Anda dan menuju ke http://localhost:5050:

Halaman masuk pgAdmin
Masuk dengan email dan kata sandi yang Anda tetapkan di PGADMIN_DEFAULT_EMAIL dan PGADMIN_DEFAULT_PASSWORD. Anda akan masuk ke dasbor pgAdmin, siap untuk mendaftarkan server PostgreSQL Anda:
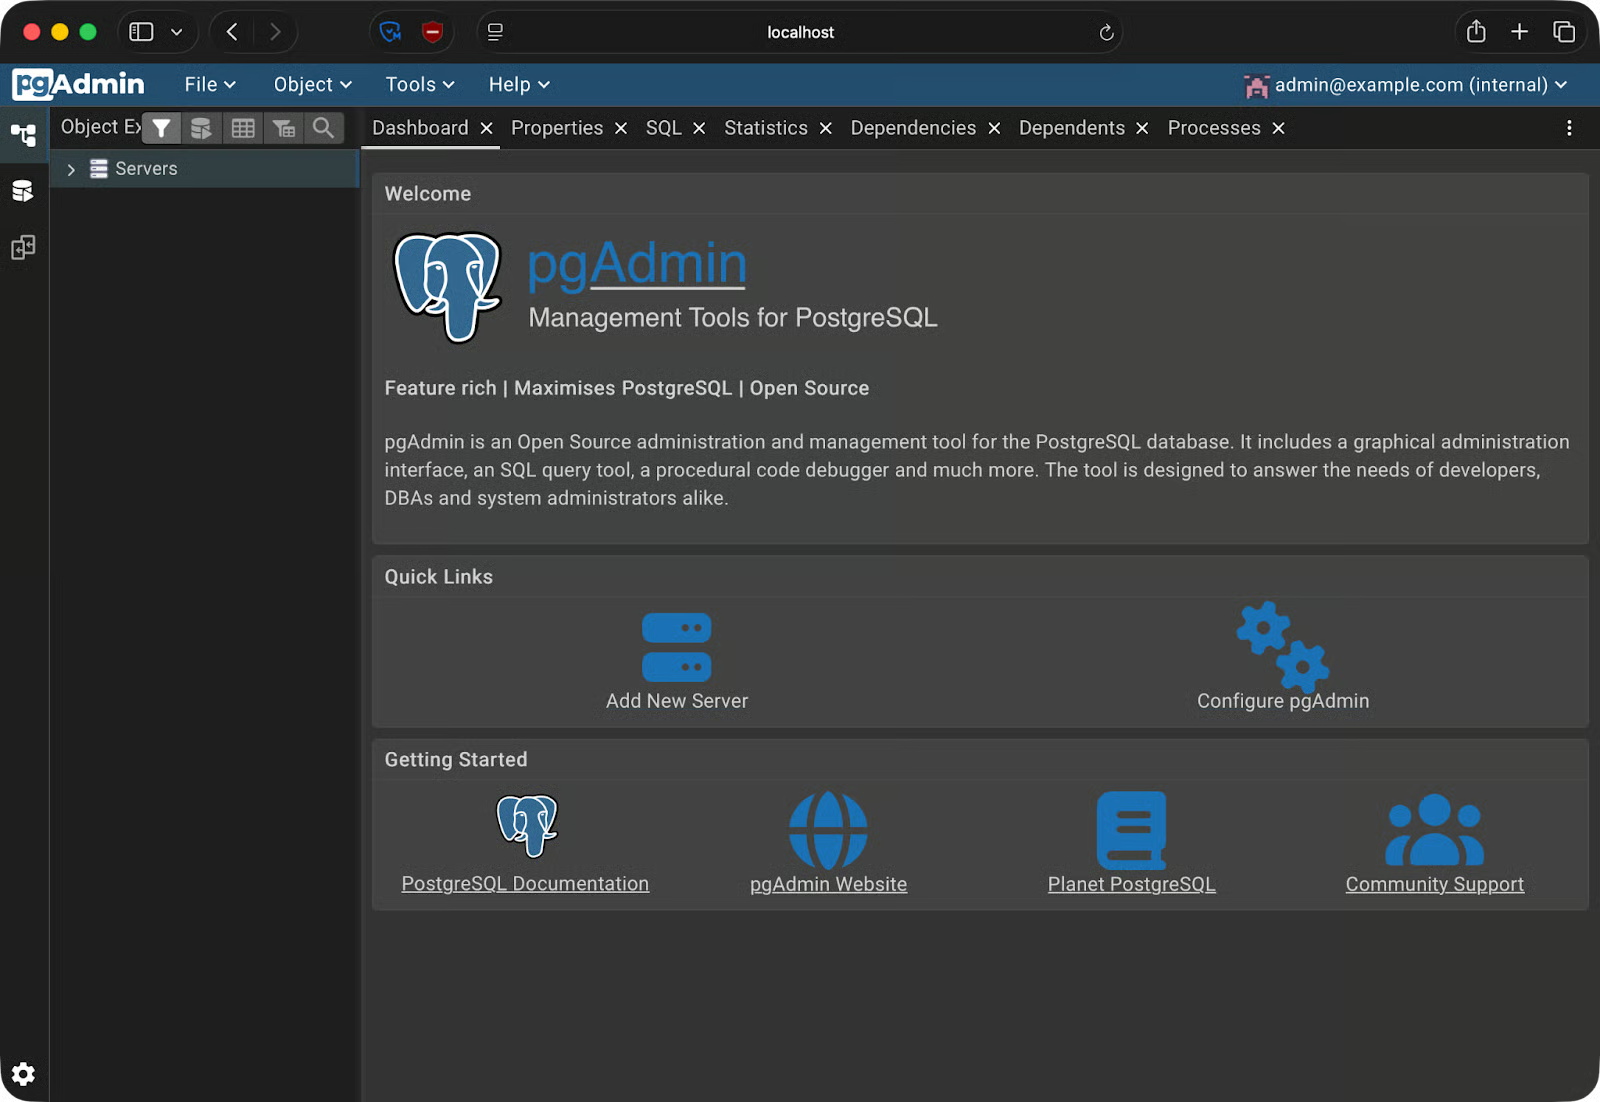
Halaman beranda pgAdmin
Di sidebar pgAdmin, klik kanan Servers - Register - Server. Sebuah dialog akan terbuka dengan dua tab yang perlu Anda isi: General dan Connection.
Beri nama server yang bermakna—misalnya local-dev-postgres. Ini hanya label di dalam pgAdmin, jadi pilih apa pun yang masuk akal untuk setup Anda.
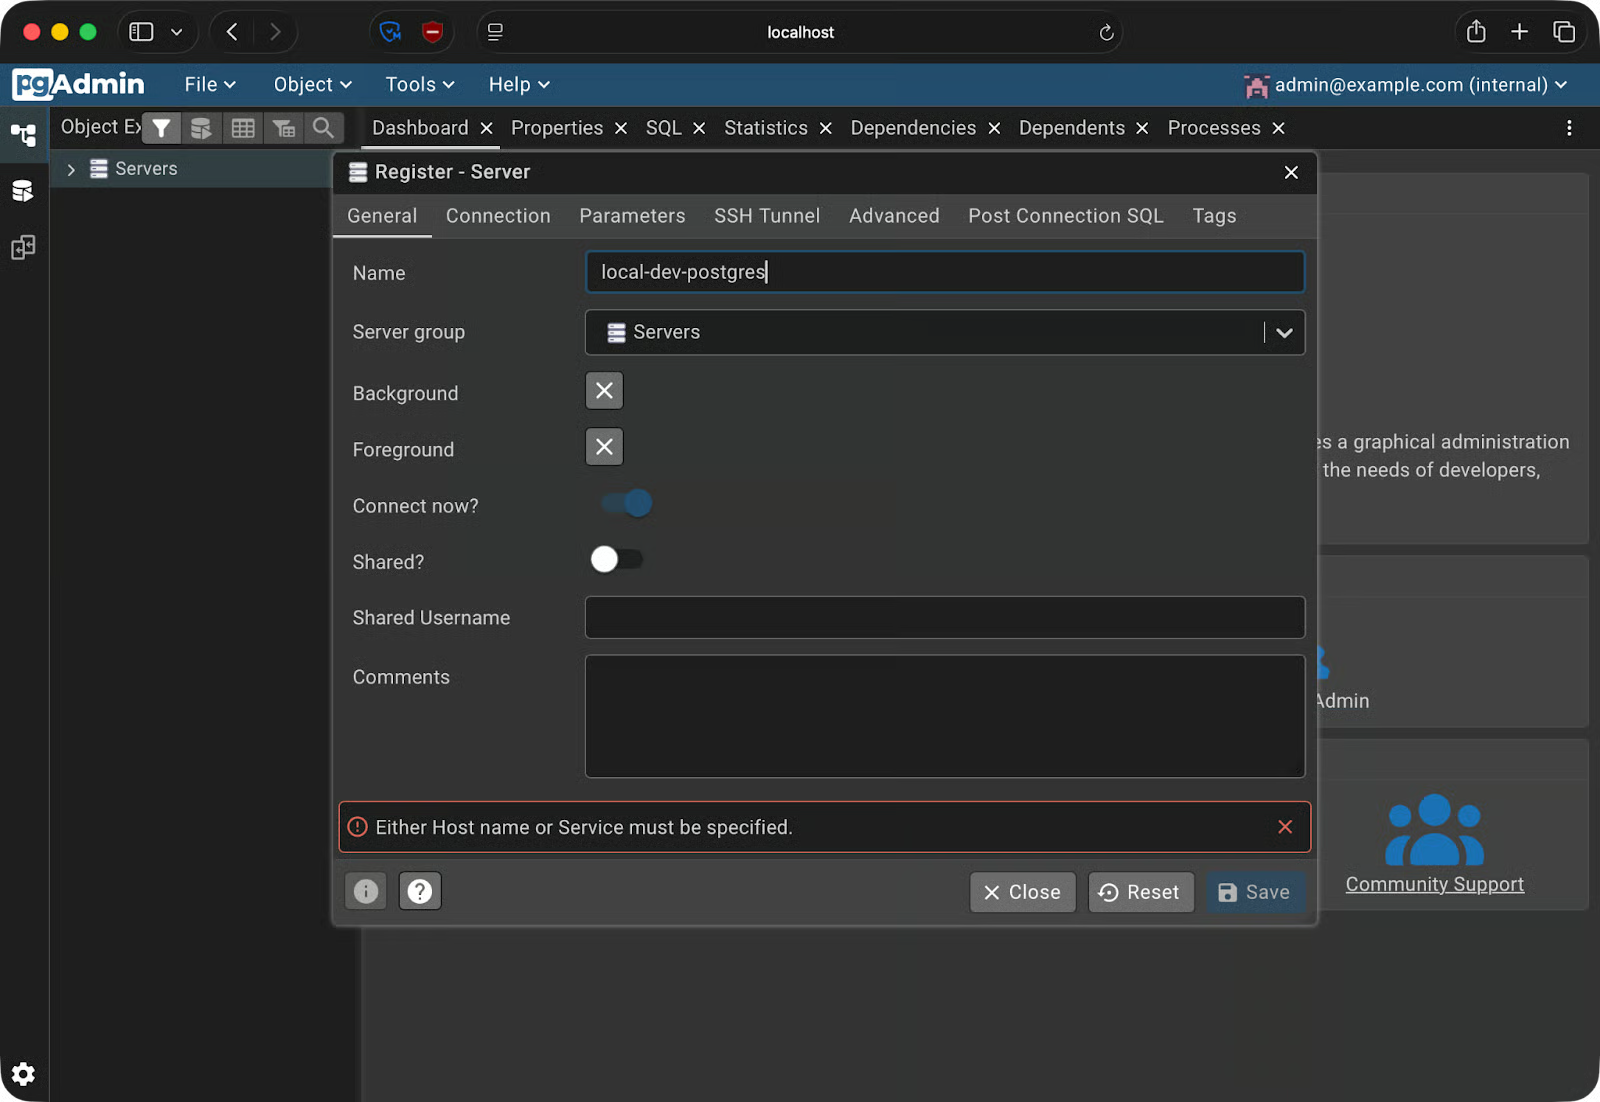
Pendaftaran server - Tab General
Jangan gunakan localhost di sini.
Di dalam jaringan Docker, localhost merujuk ke container itu sendiri—bukan mesin host Anda, dan bukan container PostgreSQL. Docker memiliki DNS internal, dan ia menyelesaikan nama container menggunakan nama service yang didefinisikan di docker-compose.yml Anda. Jadi jika service PostgreSQL Anda bernama postgres, itulah hostname yang Anda gunakan.
Isi field sebagai berikut:
Host name/address: postgres (nama service dari docker-compose.yml)
Port: 5432
Maintenance database: nilai POSTGRES_DB dari berkas Compose Anda (mis., mydb)
Username: nilai POSTGRES_USER (mis., admin)
Password: nilai POSTGRES_PASSWORD
Klik Save.

Pendaftaran server - Tab Connection
Jika semuanya benar, server akan muncul di sidebar dan Anda dapat membukanya untuk melihat basis data Anda:
Pendaftaran server berhasil
Ini berarti Anda sudah terhubung.
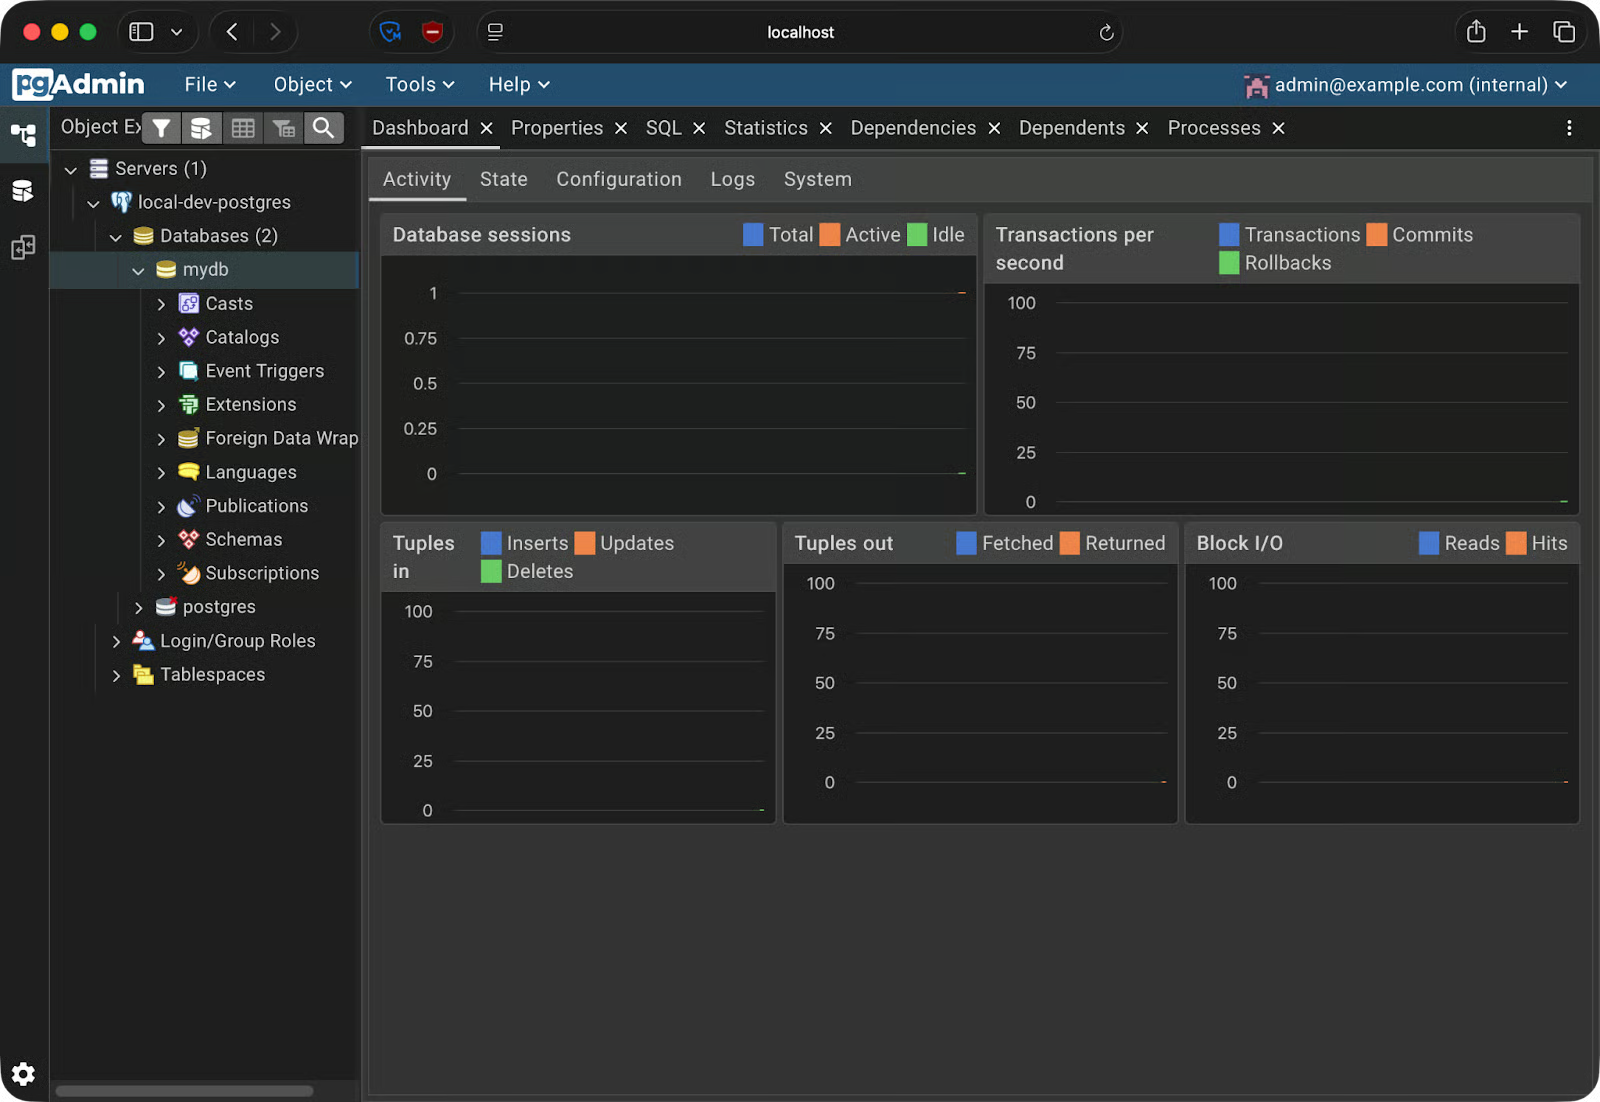
Karena Anda sudah terhubung, saya akan menunjukkan dasar-dasar pgAdmin 4 dan Postgres secara umum.
Buka Query Tool dengan mengeklik Tools - Query Tool dari menu atas. Antarmukanya memiliki tiga panel:
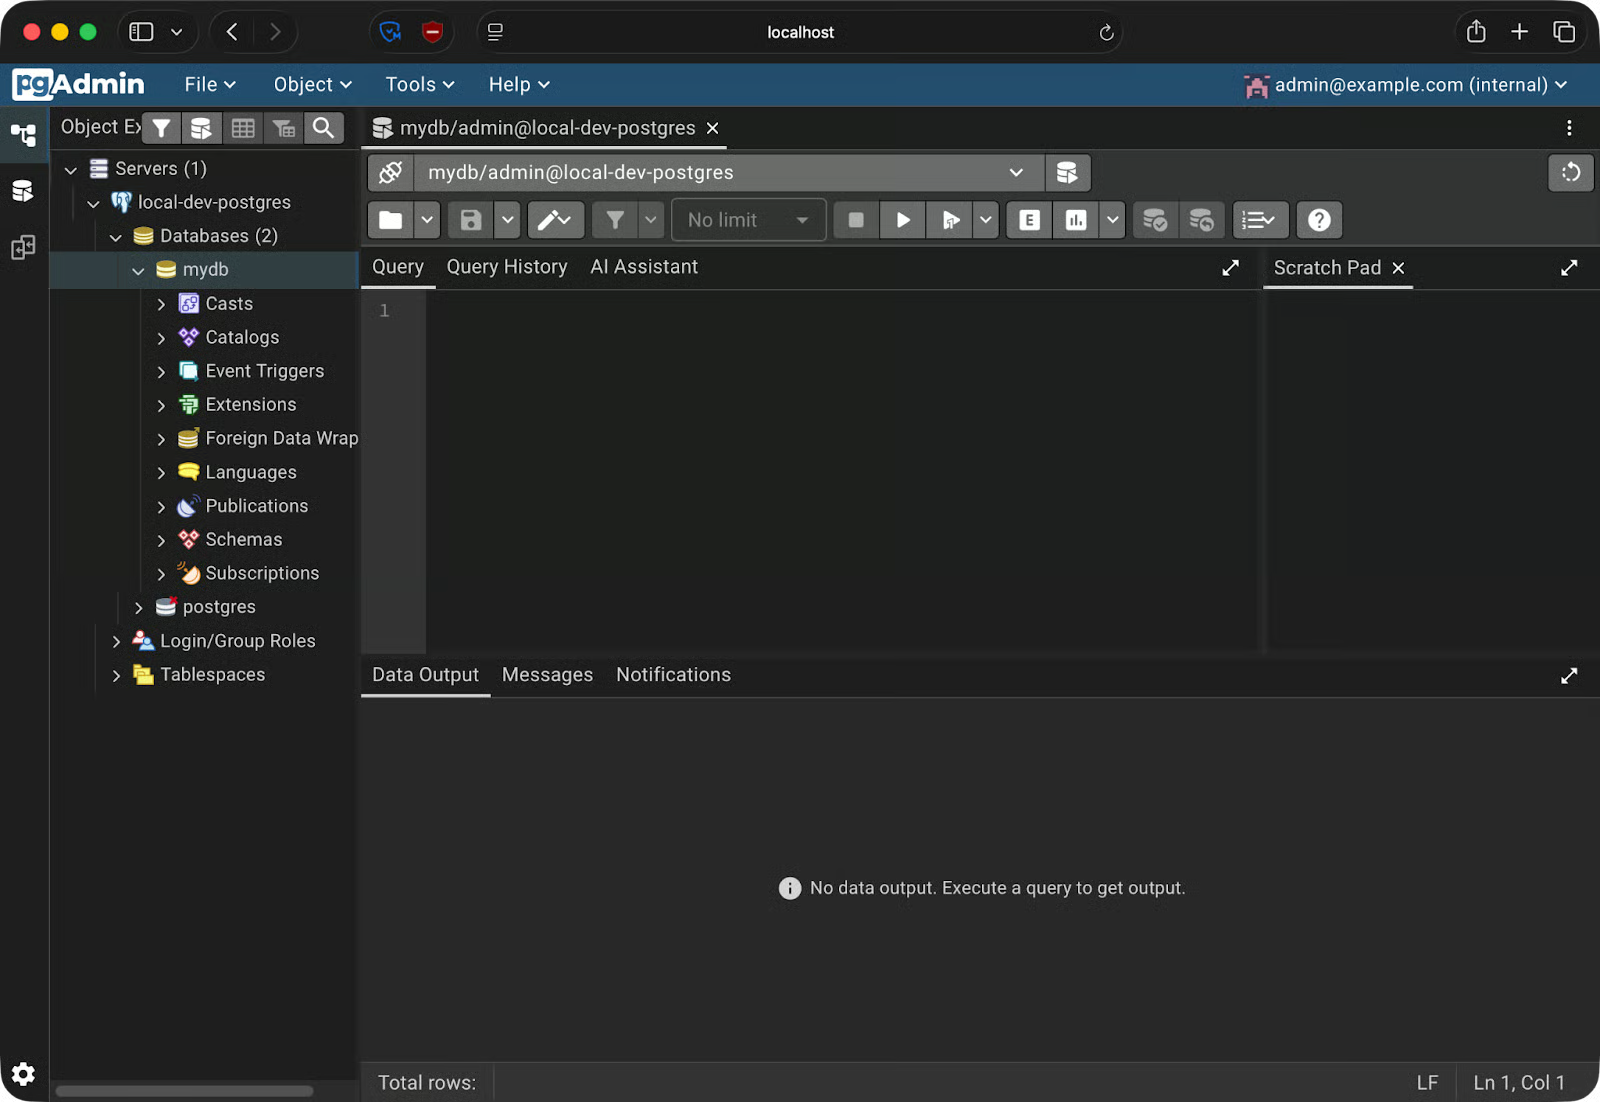
Query tool
Mari buat tabel orders sederhana dan tambahkan beberapa data. Anda dapat menjalankan setiap blok dengan menekan tombol Play atau menekan F5 sebagai pintasan.
Jalankan ini untuk membuat tabel:
CREATE TABLE orders (
    order_id SERIAL PRIMARY KEY,
    customer_name VARCHAR(100) NOT NULL,
    product VARCHAR(100) NOT NULL,
    quantity INT NOT NULL,
    order_date DATE DEFAULT CURRENT_DATE
);
Sisipkan beberapa baris:
INSERT INTO orders (customer_name, product, quantity)
VALUES
    ('Alice Johnson', 'Wireless Keyboard', 2),
    ('Bob Smith', 'USB-C Hub', 1),
    ('Carol White', 'Mechanical Keyboard', 3);
Dan sekarang kueri datanya:
SELECT * FROM orders;
Melakukan kueri data
Hasil ditampilkan di panel Data Output sebagai tabel. Anda dapat mengurutkan kolom, mengubah ukurannya, dan menyalin baris langsung dari grid.
Untuk melihat apa yang terjadi di balik layar saat Anda menjalankan kueri, jalankan EXPLAIN ANALYZE pada pernyataan SELECT Anda:
EXPLAIN ANALYZE SELECT * FROM orders WHERE customer_name = 'Alice Johnson';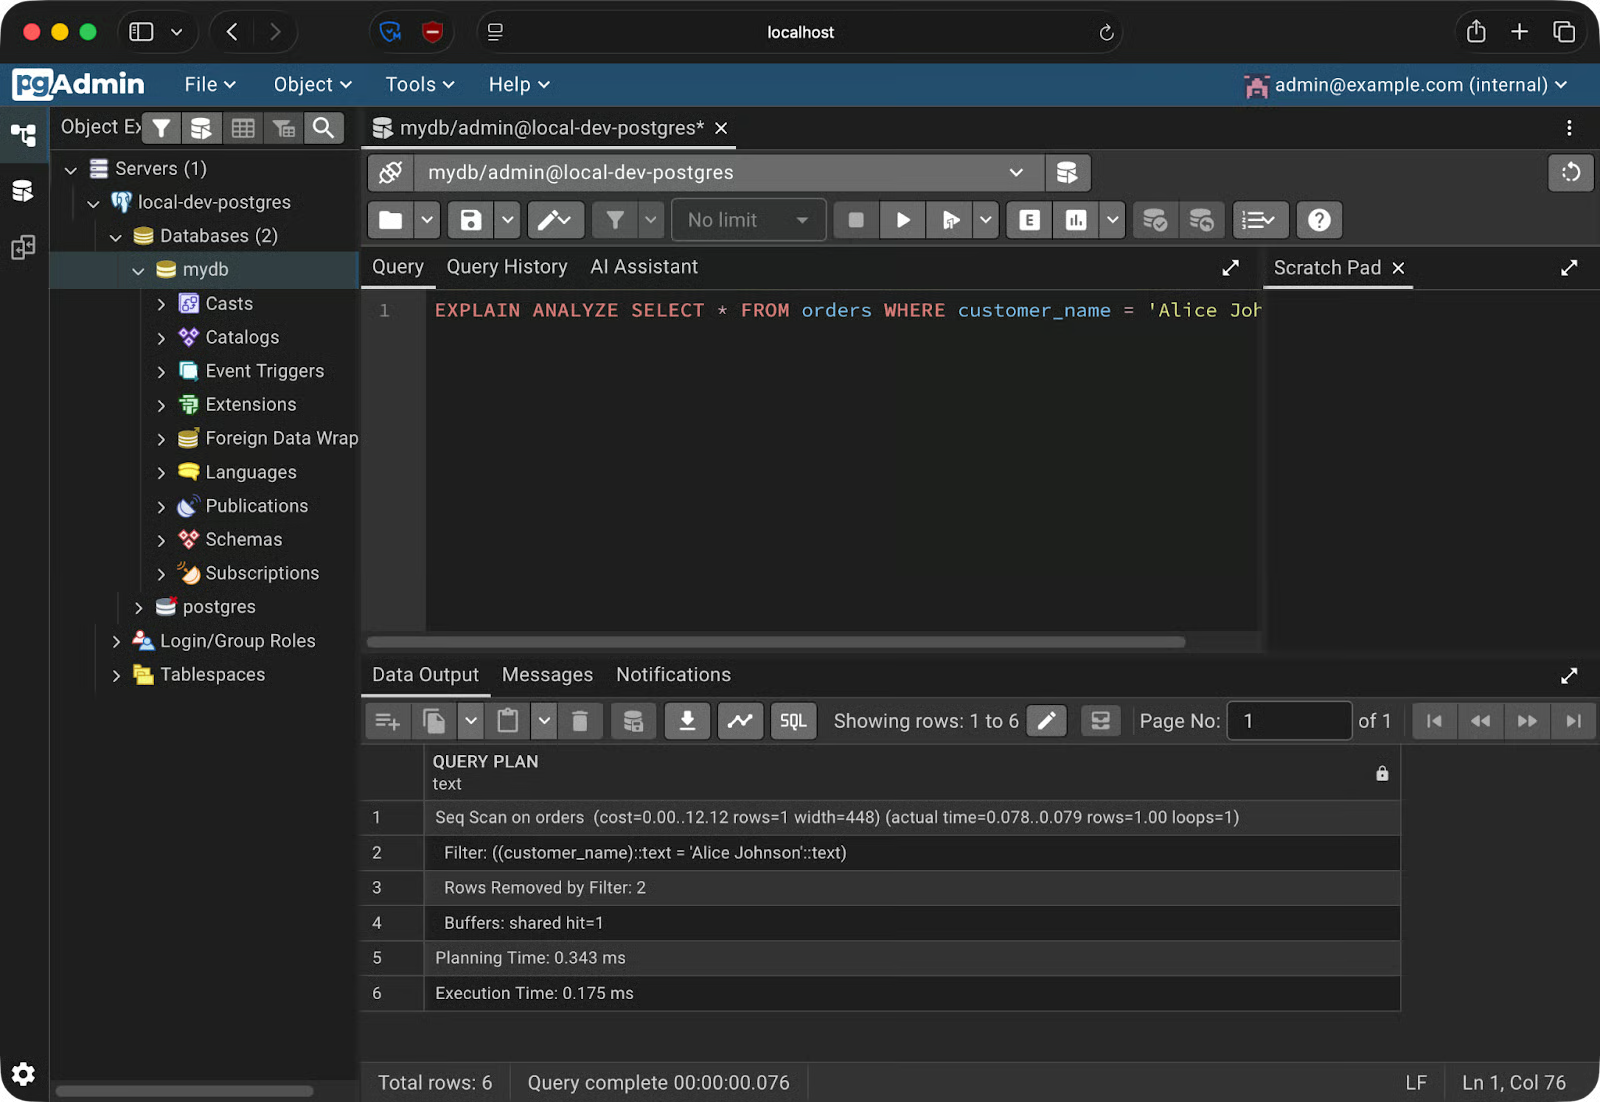
Hasil Explain Analyze
Panel Data Output menampilkan keluaran mentah. Namun pgAdmin punya opsi yang lebih baik. Klik tombol Explain di toolbar—dan pgAdmin akan merender rencana kueri sebagai grafik interaktif.
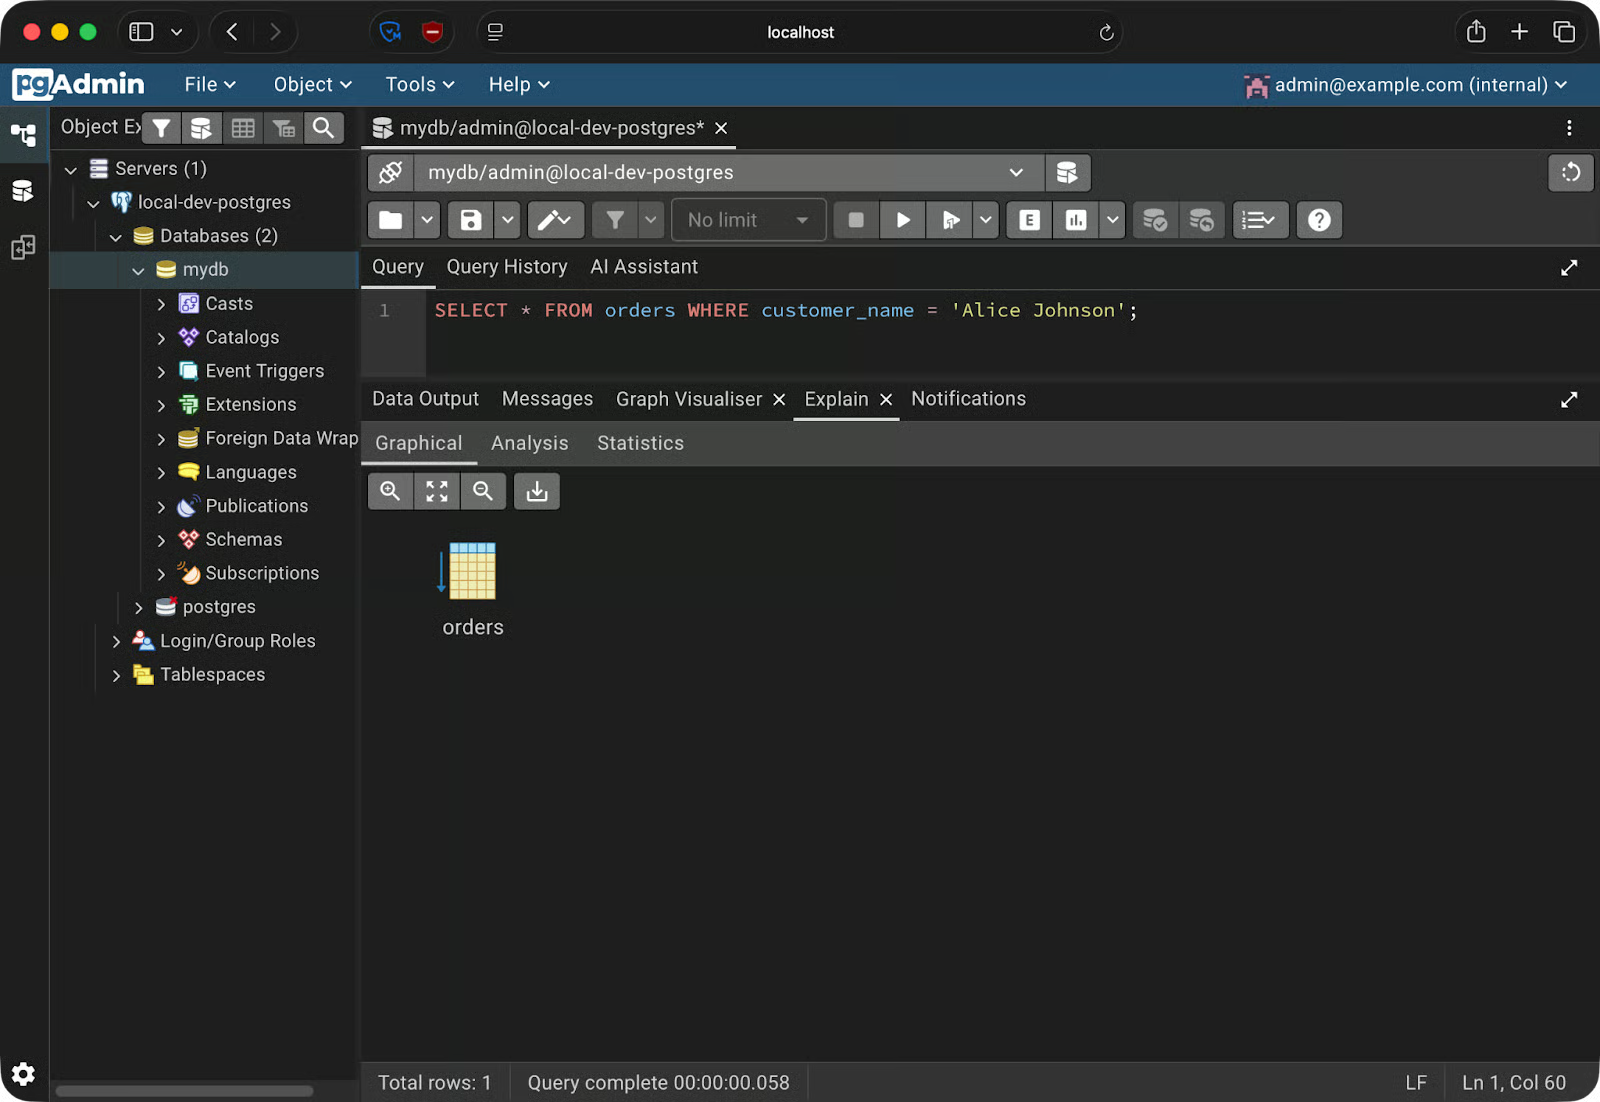
Rencana kueri sebagai grafik
Sekarang, ini sederhana untuk kueri ini, tetapi Anda akan mendapatkan banyak wawasan saat melakukan join tabel atau agregasi data yang lebih kompleks.
Ini penting karena membaca keluaran mentah EXPLAIN itu lambat dan rawan kesalahan. Rencana visual memudahkan melihat saat PostgreSQL melakukan pemindaian tabel penuh pada tabel besar, atau saat sebuah indeks ada tetapi tidak digunakan.
Sidebar pgAdmin memberi Anda tampilan lengkap struktur basis data—dan memungkinkan Anda memodifikasinya melalui GUI.
Pohon di sidebar berurutan: Servers - nama server Anda - Databases - basis data Anda - Schemas - public - Tables. Buka salah satu tabel dan Anda akan melihat Columns, Indexes, dan Constraints tercantum sebagai node turunan. Klik salah satunya untuk meninjau detail di panel kanan.
Untuk membuat tabel baru, klik kanan pada Tables di bawah skema Anda dan pilih Create - Table. Sebuah dialog akan terbuka dengan beberapa tab.
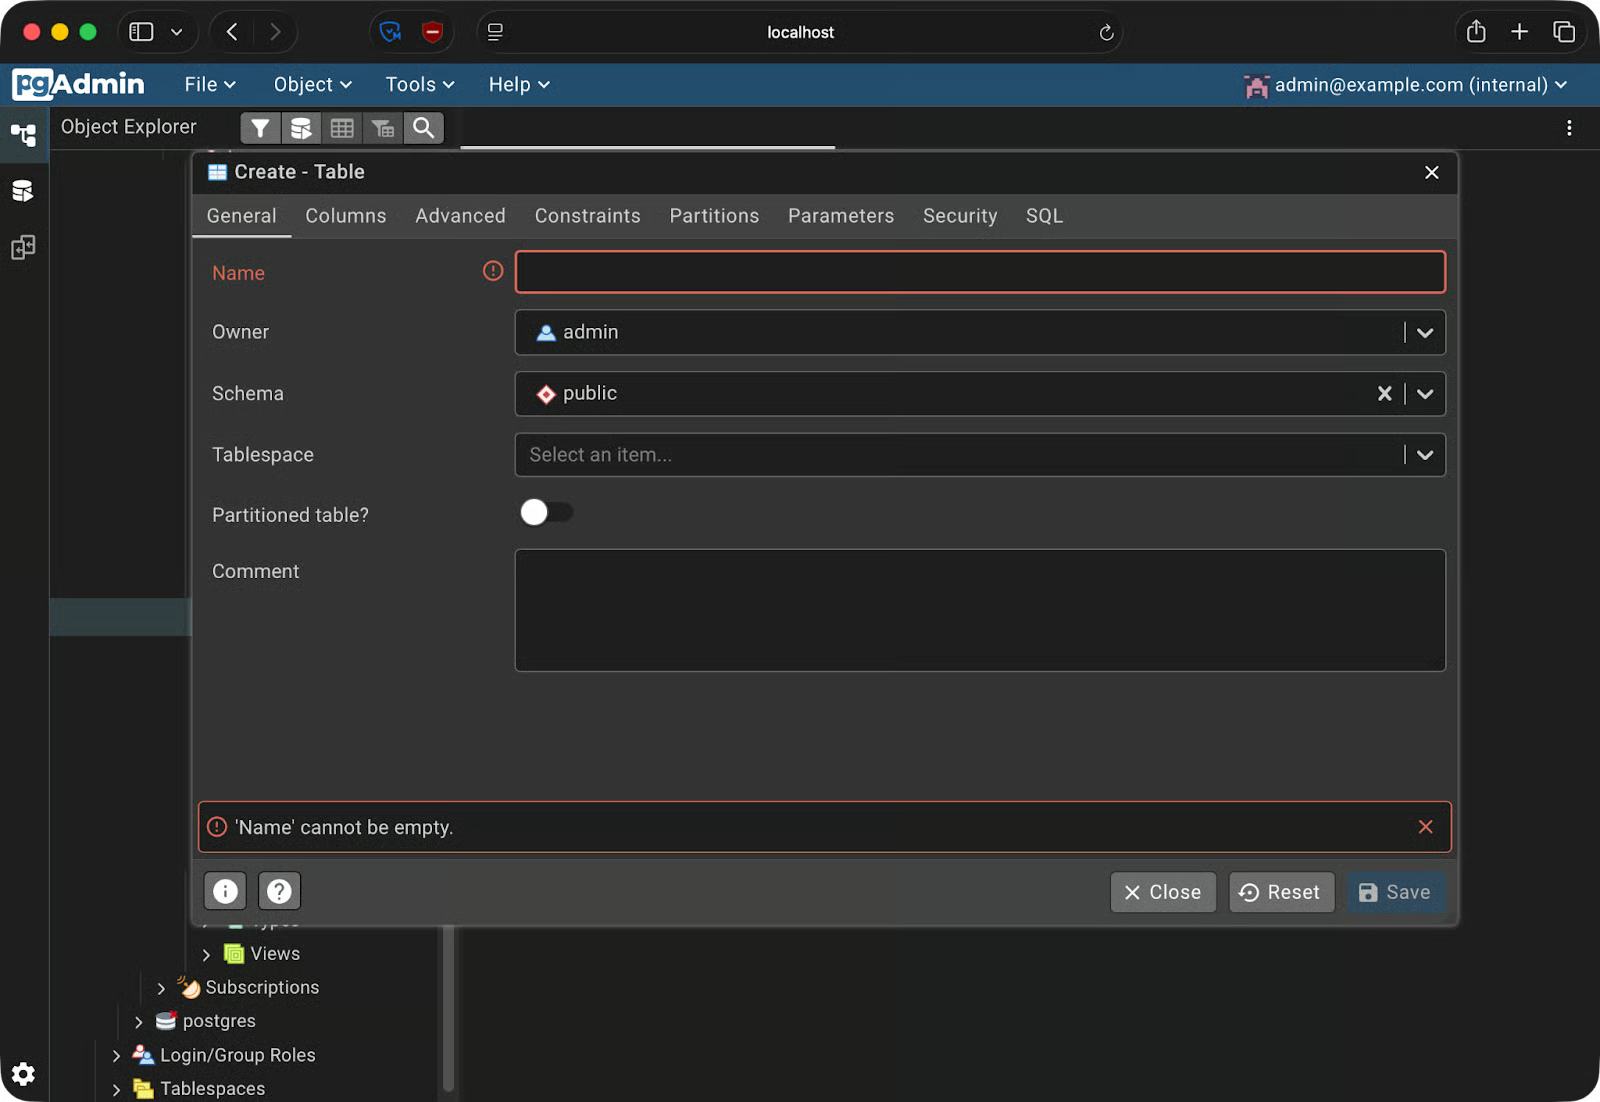
Membuat tabel
Tab General adalah tempat Anda menetapkan nama tabel. Beralih ke tab Columns untuk menambahkan kolom—setiap baris memungkinkan Anda menetapkan nama kolom, tipe data, panjang, dan apakah bisa bernilai null. Tab Constraints menangani primary key, foreign key, dan unique constraint.
Untuk menambahkan indeks ke tabel yang sudah ada, bentangkan tabel di sidebar, klik kanan Indexes, dan pilih Create - Index. Pilih kolom yang akan diindeks dan tipe indeks—btree adalah default dan cocok untuk sebagian besar kasus.
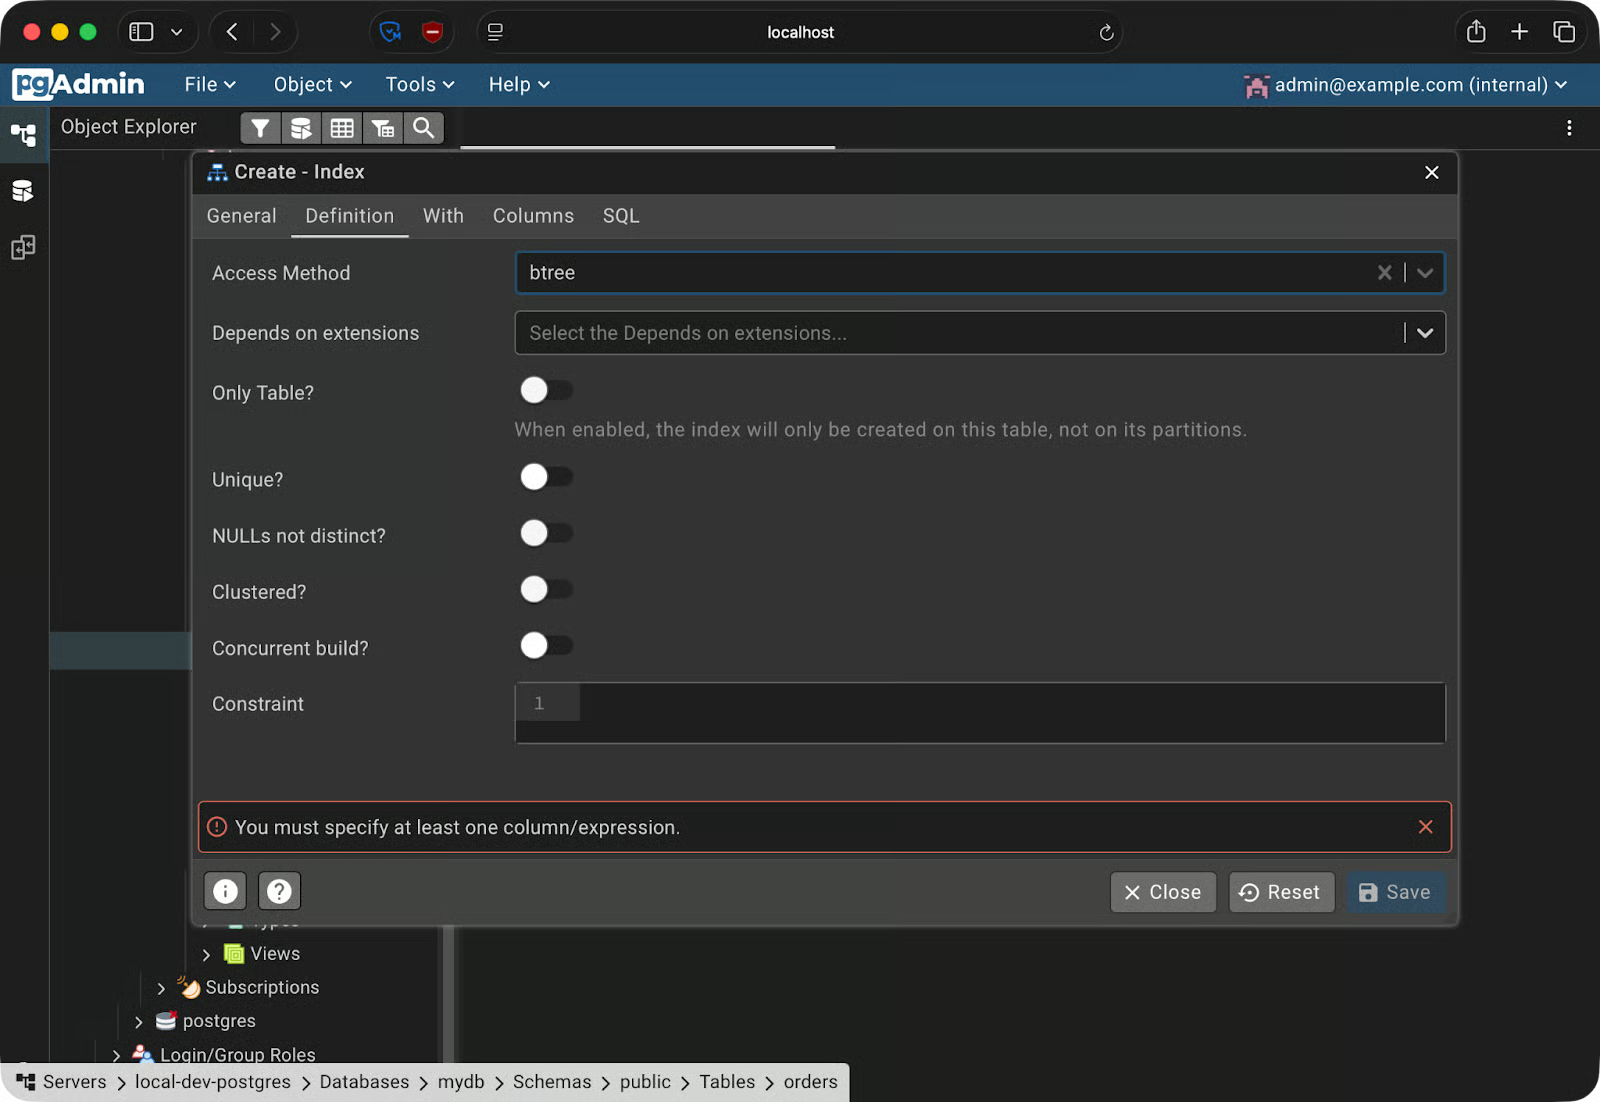
Membuat indeks
Untuk mencadangkan basis data, buka Tools - Backup. Anda perlu memilih format:
Setelah Anda memilih format dan path tujuan, pgAdmin menjalankan pg_dump di latar belakang dan menyimpan berkas ke mesin lokal Anda.
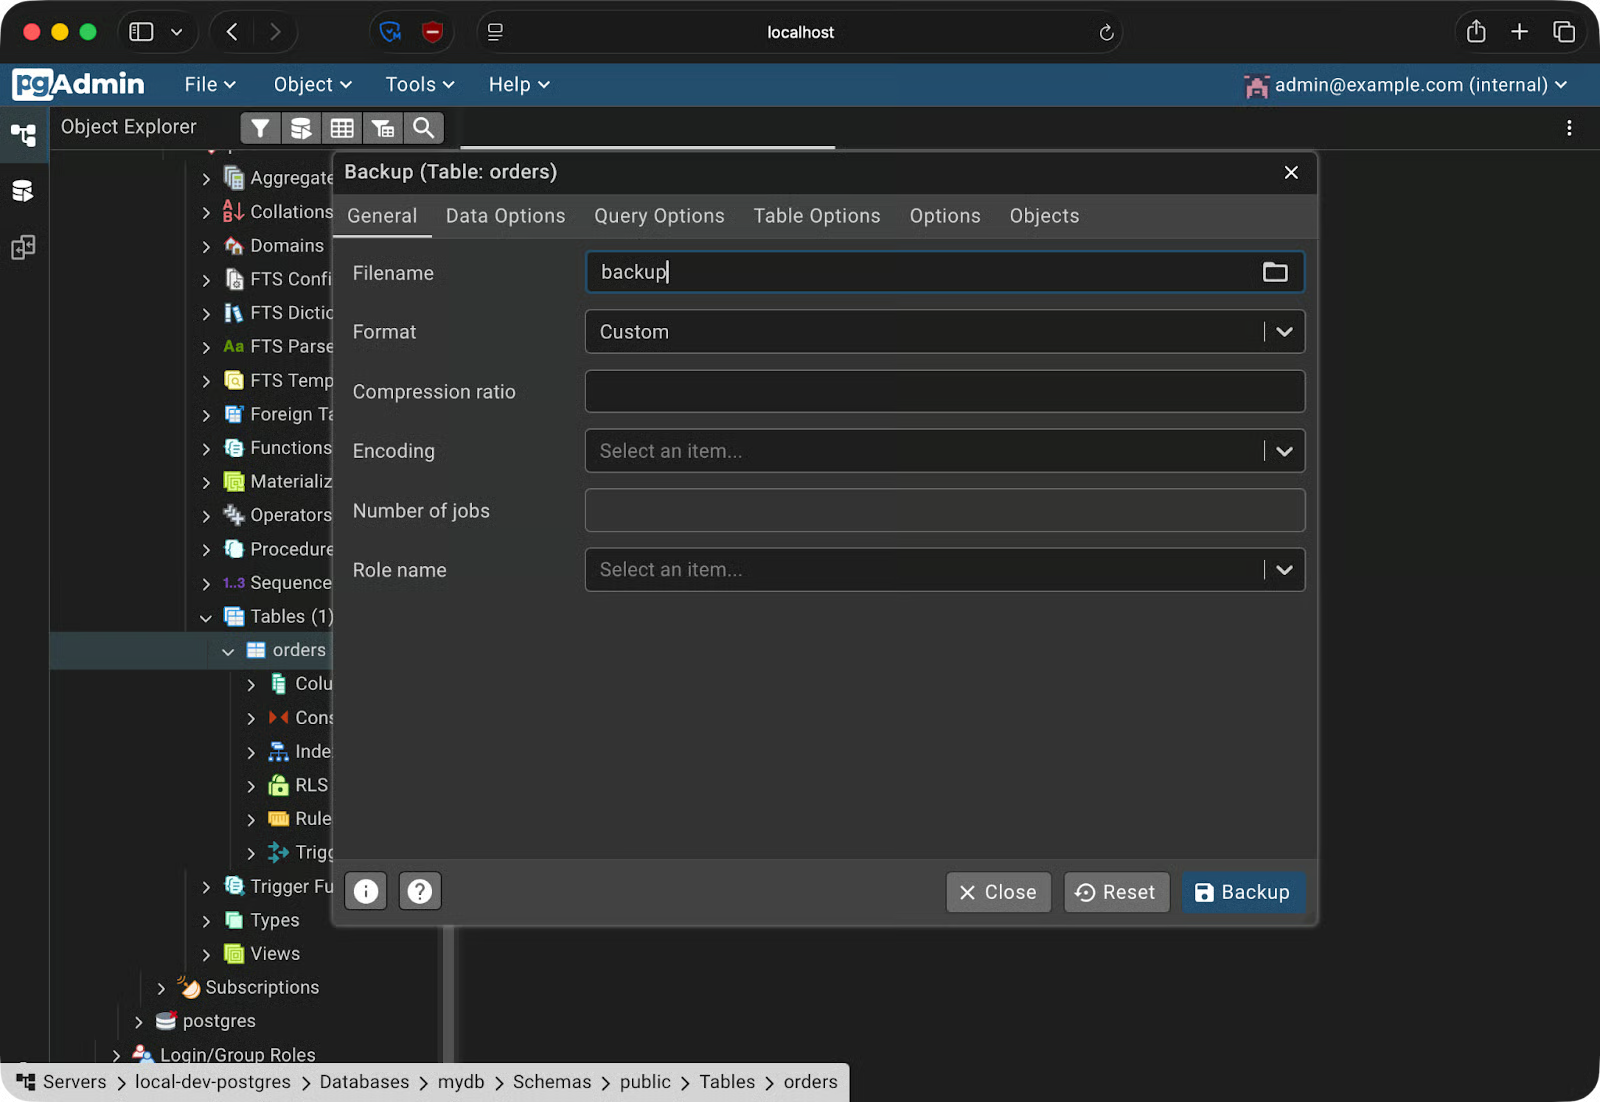
Membuat cadangan
Untuk memulihkan, buka Tools - Restore, pilih berkas cadangan Anda, dan arahkan ke basis data target.
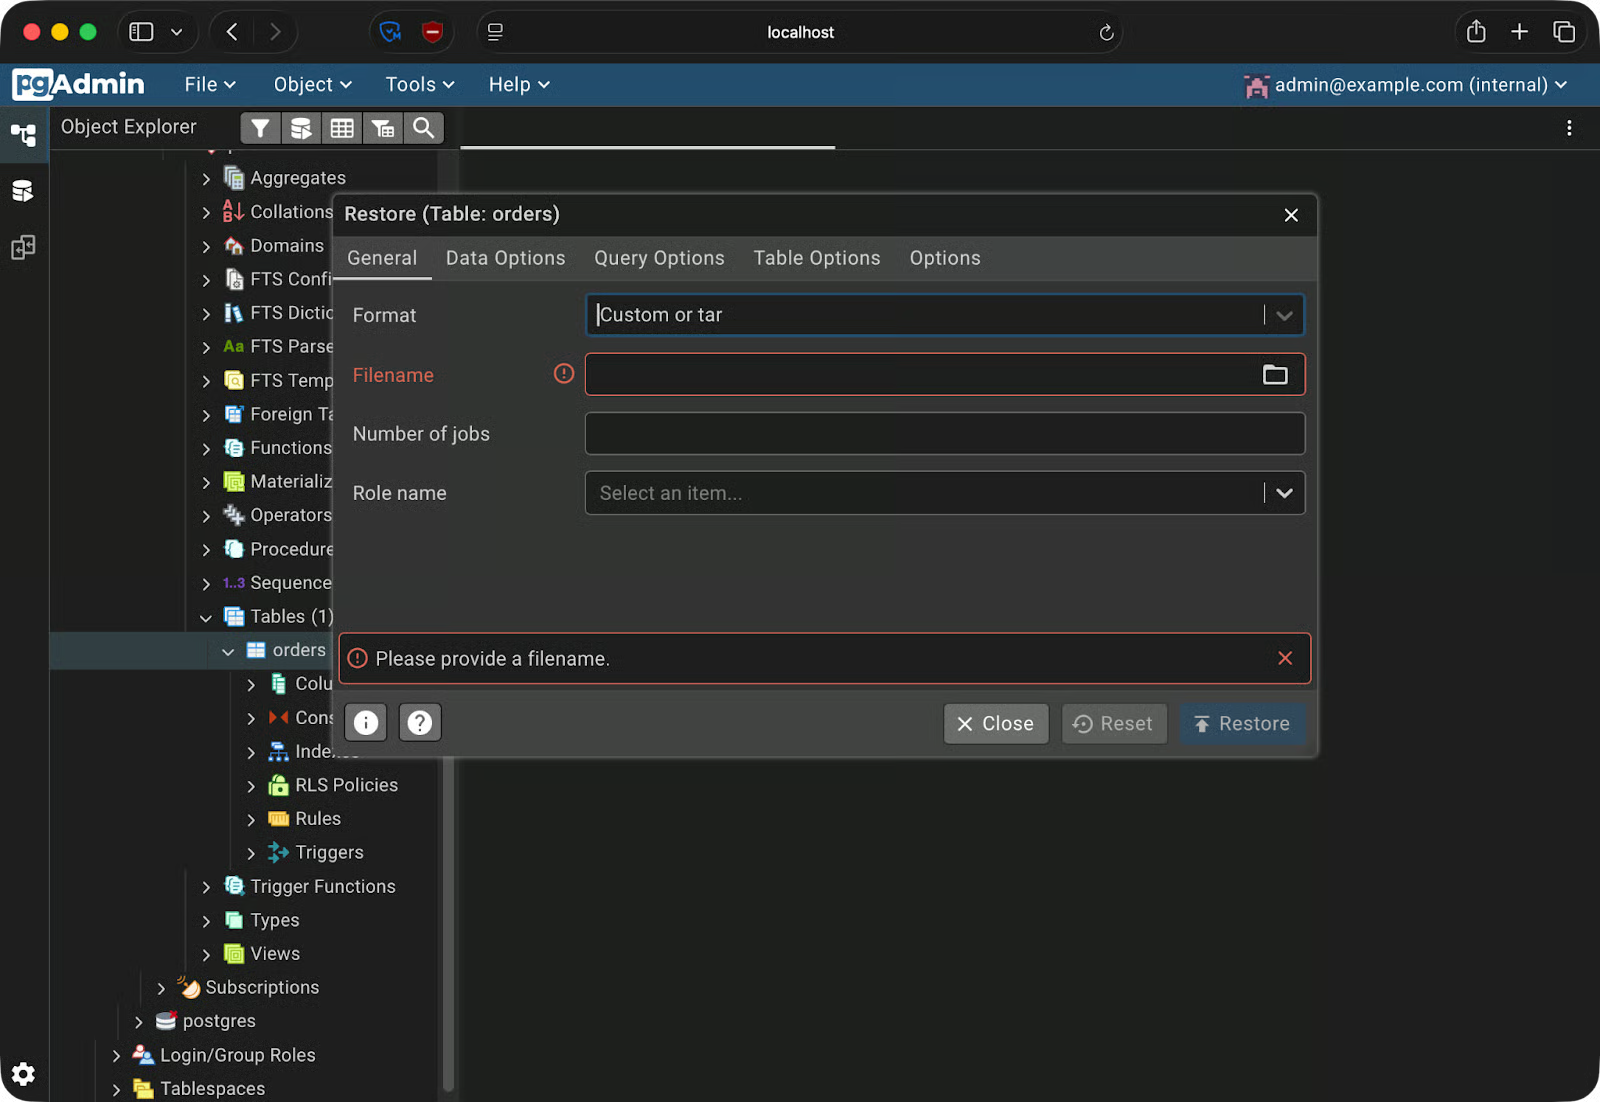
Memulihkan dari cadangan
Jika Anda bertanya-tanya mengapa ini berguna, bayangkan Anda sedang menguji migrasi destruktif pada basis data pengembangan. Ambil cadangan terlebih dahulu, jalankan migrasi, dan jika ada yang rusak, pulihkan cadangan untuk kembali ke kondisi yang diketahui.
Menjalankan pgAdmin 4 adalah satu hal. Namun menjaganya tetap berjalan mulus mengharuskan Anda mengetahui beberapa hal ekstra. Berikut beberapa kiat praktis.
Jika docker-compose.yml Anda masuk ke version control—dan biasanya memang begitu—kata sandi yang ditulis langsung akan ikut terbawa. Gunakan berkas .env untuk kredensial dan tambahkan ke .gitignore. Untuk lingkungan produksi, melangkahlah lebih jauh dan gunakan Docker secrets, yang memasang nilai sensitif sebagai berkas, bukan variabel lingkungan.
Secara default, Docker mengikat port ke 0.0.0.0, yang berarti semua antarmuka jaringan—termasuk yang publik. Di server jarak jauh, itu membuat instance pgAdmin Anda dapat diakses dari internet. Ikat secara eksplisit ke 127.0.0.1 sebagai gantinya:
ports:
  - "127.0.0.1:5050:5050"
Ini membuat pgAdmin hanya dapat diakses dari server itu sendiri. Gunakan tunnel SSH atau reverse proxy jika Anda memerlukan akses jarak jauh.
Menggunakan dpage/pgadmin4:latest akan menarik versi baru saat seseorang menjalankan docker compose pull berikutnya. Versi baru itu bisa berperilaku berbeda, merusak konfigurasi Anda, atau memperkenalkan perubahan tak terduga. Gunakan tag spesifik seperti dpage/pgadmin4:9.13 agar setiap rekan tim menjalankan versi yang persis sama.
servers.jsonJika seluruh tim Anda berbagi setup Compose yang sama, jangan membuat semua orang mendaftarkan server PostgreSQL setelah menyalakan stack. pgAdmin mendukung berkas servers.json yang mengisi koneksi saat startup. Mount berkas itu ke container seperti ini:
volumes:
  - ./servers.json:/pgadmin4/servers.json
Berikut tampilan servers.json minimal:
{
  "Servers": {
    "1": {
      "Name": "local-dev-postgres",
      "Group": "Servers",
      "Host": "postgres",
      "Port": 5432,
      "MaintenanceDB": "mydb",
      "Username": "admin",
      "SSLMode": "prefer"
    }
  }
}
Server akan muncul saat pgAdmin mulai—tanpa setup manual.
Dalam artikel ini, saya memandu Anda menyiapkan pgAdmin 4 di Docker dari nol. Anda menulis berkas Docker Compose yang menyalakan PostgreSQL dan pgAdmin 4 bersama, menghubungkan kedua container menggunakan DNS internal Docker, serta menggunakan fitur inti pgAdmin—Query Tool, penjelajah skema, dan alur kerja backup/restore.
Prinsip intinya adalah reprodusibilitas.
Sebuah berkas docker-compose.yml, servers.json, dan .env sudah cukup untuk memberikan rekan tim lingkungan basis data yang sepenuhnya terkonfigurasi. Ini akan memastikan masalah “berjalan di mesin saya” tidak terjadi lagi.
Untuk mendalami Docker dan kontainerisasi, lihat kursus Intermediate Docker kami. Penuh dengan kiat berguna tentang multi-stage builds, jaringan, dan ulasan mendalam tentang Compose.
Pelajari Docker bersama DataCamp
Kursus
Kursus
Kursus
blogs
Dario Radečić
15 mnt
blogs
Hugo Bowne-Anderson
13 mnt
blogs
Javier Canales Luna
14 mnt
blogs
David Woods
13 mnt