Course
Introduction to Docker
4 hr
48.6K
Switching between sessions, memorizing syntax, and hoping you didn't typo a destructive query gets old fast. There's no visual query plan, no schema browser, and no easy way to back up a database. It works, but it's far from ideal.
pgAdmin 4 fixes this with a browser-based GUI built specifically for PostgreSQL. And running it in Docker means zero local installation. You just have to start the container.
In this article, I'll show you how to set up PostgreSQL and pgAdmin 4 with Docker Compose, connect the two containers, and use pgAdmin's Query Tool, schema browser, and backup features.
To follow along, you'll need Docker installed and running on your machine. If you're new to Docker Compose, read our guide to check how it simplifies multi-container development.
pgAdmin 4 is an open-source, browser-based admin and development platform for PostgreSQL. You access it through a web browser, so there's no desktop app to install. It gives you a GUI to manage databases, run queries, inspect schemas, and handle backups - all without touching the command line.
The official Docker image is dpage/pgadmin4, maintained by the pgAdmin development team.
Running pgAdmin 4 in Docker has a couple of real advantages over a local install. First is portability - your whole database environment lives in a docker-compose.yml file you can share with teammates. Second, there are no version conflicts - pgAdmin runs in its own container, completely isolated from anything else on your machine. And when you're done, docker compose down wipes it clean.
There's no shortage of database management GUI tools. Here's how pgAdmin 4 compares with two popular alternatives.

pgAdmin 4 versus popular alternatives
DBeaver and TablePlus are good tools, but neither has an official Docker image. If your PostgreSQL instance is already running in Docker, pgAdmin 4 is the great fit - you just need to add one service to your docker-compose.yml and everything runs together in the same network.
The fastest way to get PostgreSQL and pgAdmin 4 running together is a single docker-compose.yml file. If you're new to the topic, our Docker Compose Guide covers the fundamentals. Here, I'll focus on the pgAdmin-specific configuration.
Here's the complete file you can copy-paste:
services:
  postgres:
    image: postgres:18
    container_name: postgres
    environment:
      POSTGRES_USER: admin
      POSTGRES_PASSWORD: secret
      POSTGRES_DB: mydb
    volumes:
      - postgres_data:/var/lib/postgresql
    networks:
      - pgnetwork

  pgadmin:
    image: dpage/pgadmin4:9.13
    container_name: pgadmin
    environment:
      PGADMIN_DEFAULT_EMAIL: you@yourdomain.com
      PGADMIN_DEFAULT_PASSWORD: password
      PGADMIN_LISTEN_PORT: 5050
    ports:
      - "5050:5050"
    volumes:
      - pgadmin_data:/var/lib/pgadmin
    depends_on:
      - postgres
    networks:
      - pgnetwork

volumes:
  postgres_data:
  pgadmin_data:

networks:
  pgnetwork:
The depends_on field tells Docker Compose to start the postgres container before pgadmin. Without it, pgAdmin might start before PostgreSQL is ready and fail to connect. It doesn't wait for PostgreSQL to be fully healthy - just for the container to start. It's still enough to avoid most race conditions.
Two environment variables are required:
PGADMIN_DEFAULT_EMAIL - the email address you'll use to log into the pgAdmin web interfacePGADMIN_DEFAULT_PASSWORD - the password for that accountA third one is optional but you should specify it:
PGADMIN_LISTEN_PORT - the port pgAdmin listens on inside the container. It defaults to 80, but setting it to 5050 keeps things cleaner when you're mapping ports.That said, hardcoding credentials in the Compose file is a bad idea, especially if the file ends up in version control. Move them to a .env file instead.
Create a .env file in the same directory as your docker-compose.yml:
POSTGRES_USER=admin
POSTGRES_PASSWORD=secret
POSTGRES_DB=mydb
PGADMIN_DEFAULT_EMAIL=admin@example.com
PGADMIN_DEFAULT_PASSWORD=secret
Then reference the variables in your Compose file:
# postgres
environment:
  POSTGRES_USER: ${POSTGRES_USER}
  POSTGRES_PASSWORD: ${POSTGRES_PASSWORD}
  POSTGRES_DB: ${POSTGRES_DB}

# pgadmin
environment:
  PGADMIN_DEFAULT_EMAIL: ${PGADMIN_DEFAULT_EMAIL}
  PGADMIN_DEFAULT_PASSWORD: ${PGADMIN_DEFAULT_PASSWORD}
Docker Compose picks up .env files when you run the command, so there’s no extra configuration needed. Just remember to add .env to your .gitignore and your credentials will stay out of the repo.
The volume mapped to /var/lib/pgadmin is where pgAdmin stores the data, such as session data, saved server connections, and configuration. Removing this from the compose file means you'll lose all of it every time the container restarts.
In the current compose file, you have a named volume that Docker manages on your host machine. The data persists container restarts, re-creations, and image updates - as long as you don't explicitly delete the volume with docker volume rm.
With your docker-compose.yml ready, starting the stack takes one command:
docker compose up -dThe -d flag runs both containers in detached mode - they start in the background and your terminal stays free. To verify both containers are running:
docker psYou should see both postgres and pgadmin listed with a status of Up.
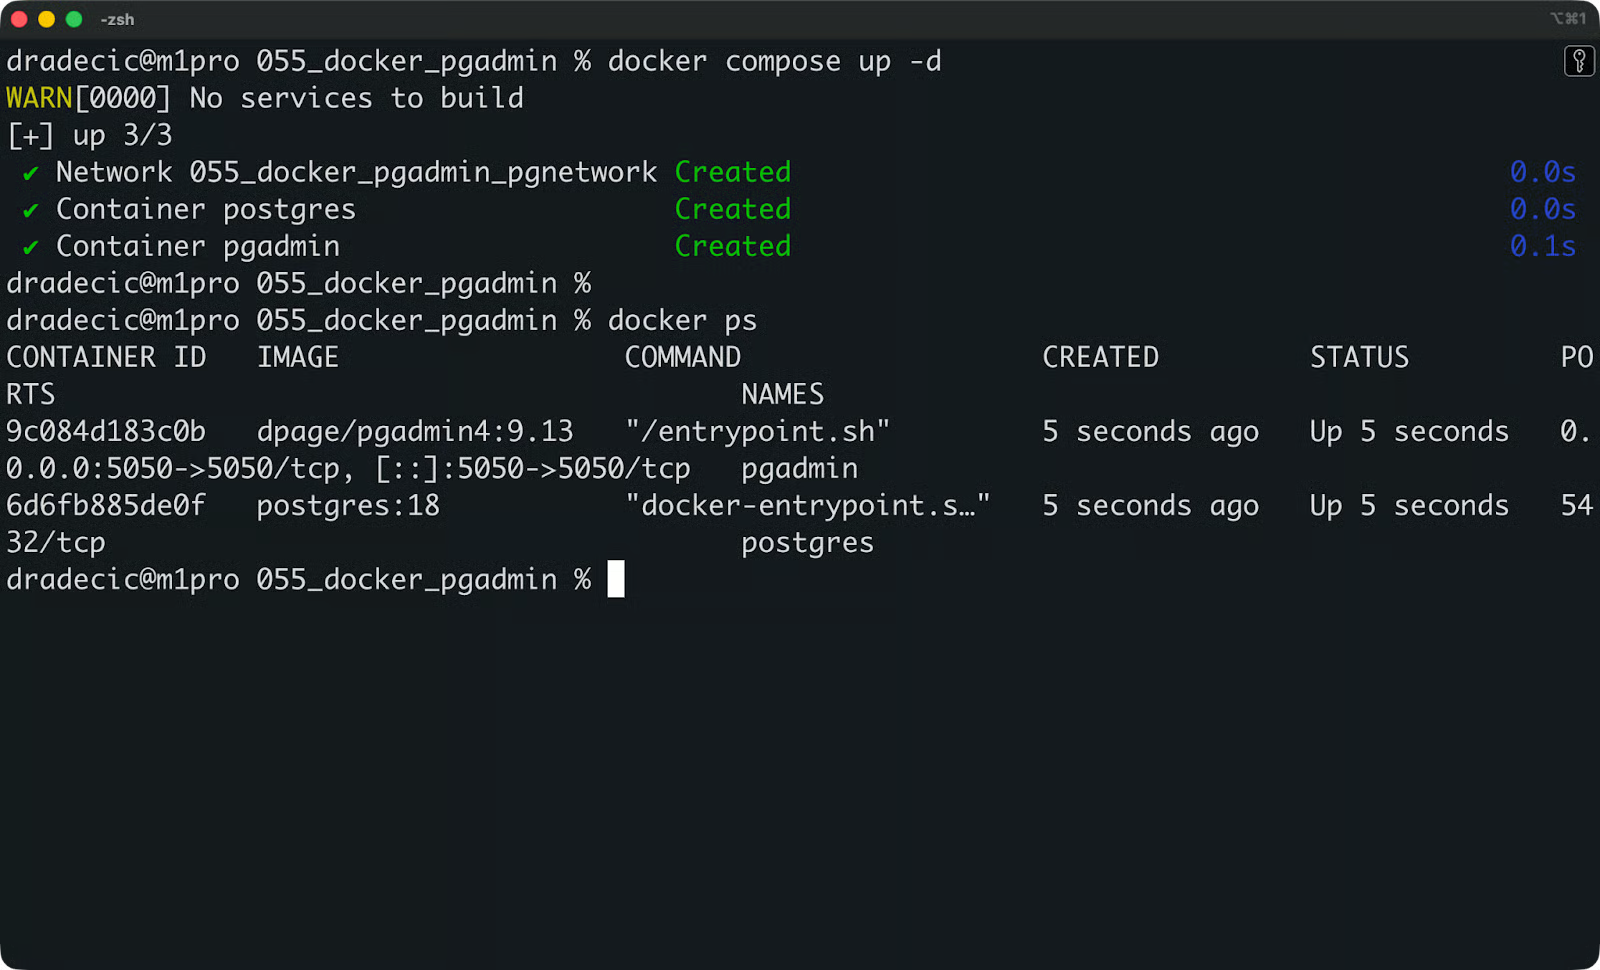
Container status
If something looks off, check the pgAdmin logs:
docker logs pgadminA healthy startup looks like this:
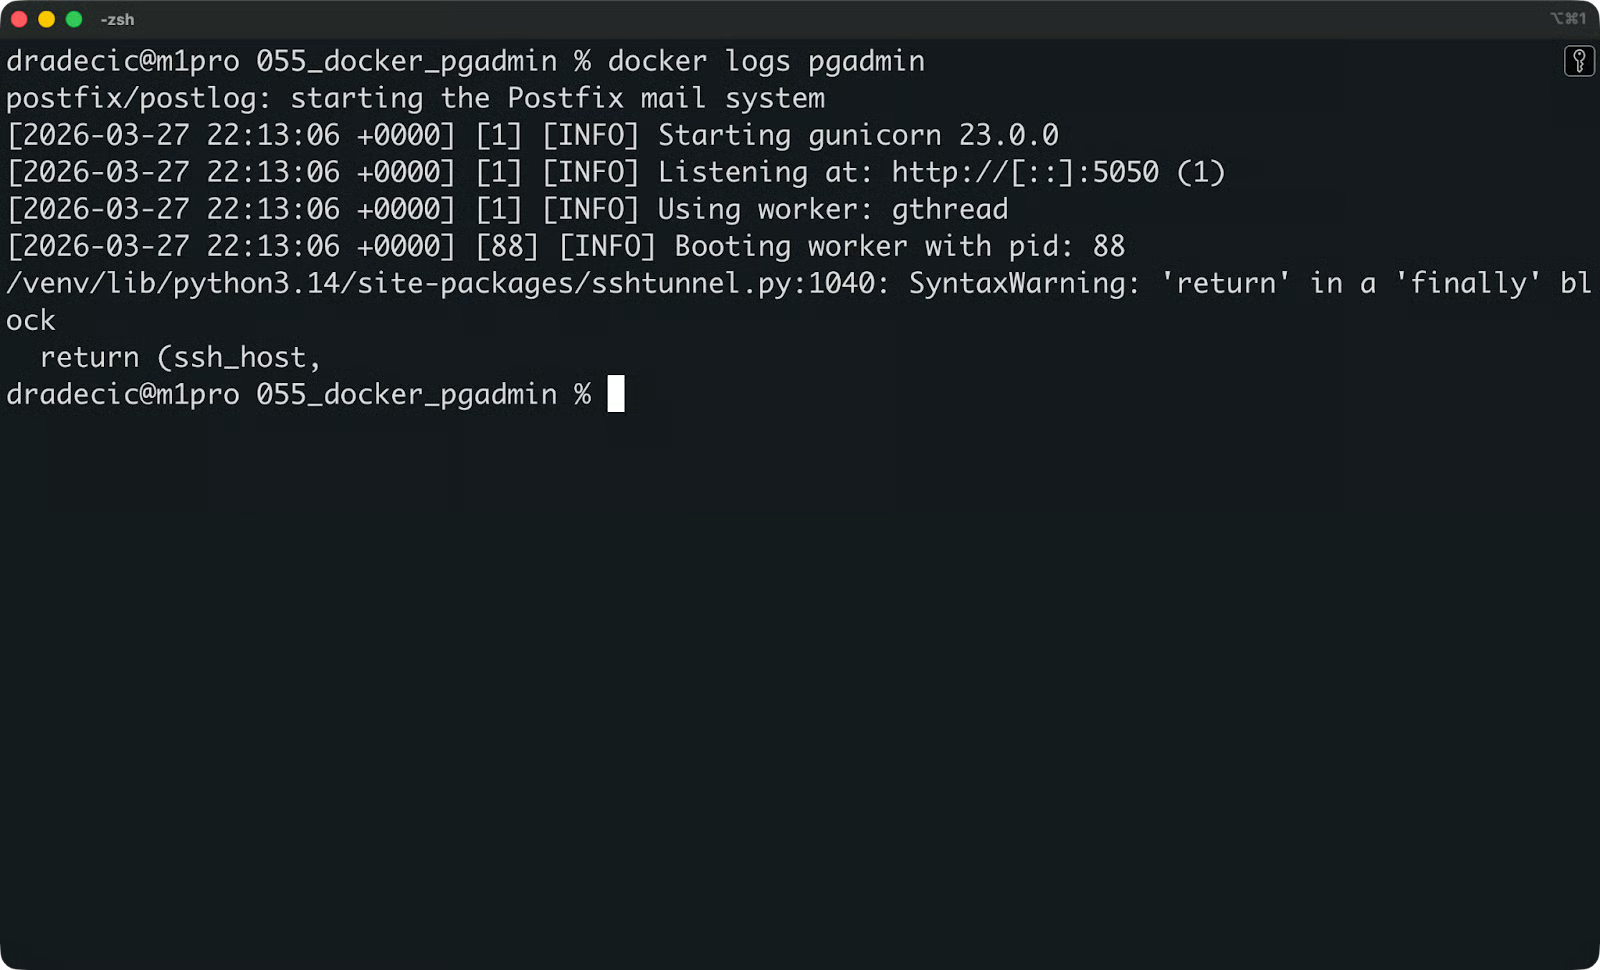
pgAdmin startup logs
If you see an error here, it’ll likely be one of these three:
Password authentication failed: your PGADMIN_DEFAULT_PASSWORD is missing or malformed in the .env file
Port is already allocated: something else is running on port 5050; change the host port in your Compose file
No such file or directory: the volume path is wrong or the container doesn't have permission to write to it
Once both containers are up and the logs look clean, open your browser and go to http://localhost:5050:

pgAdmin login page
Log in with the email and password you set in PGADMIN_DEFAULT_EMAIL and PGADMIN_DEFAULT_PASSWORD. You'll land on the pgAdmin dashboard, ready to register your PostgreSQL server:
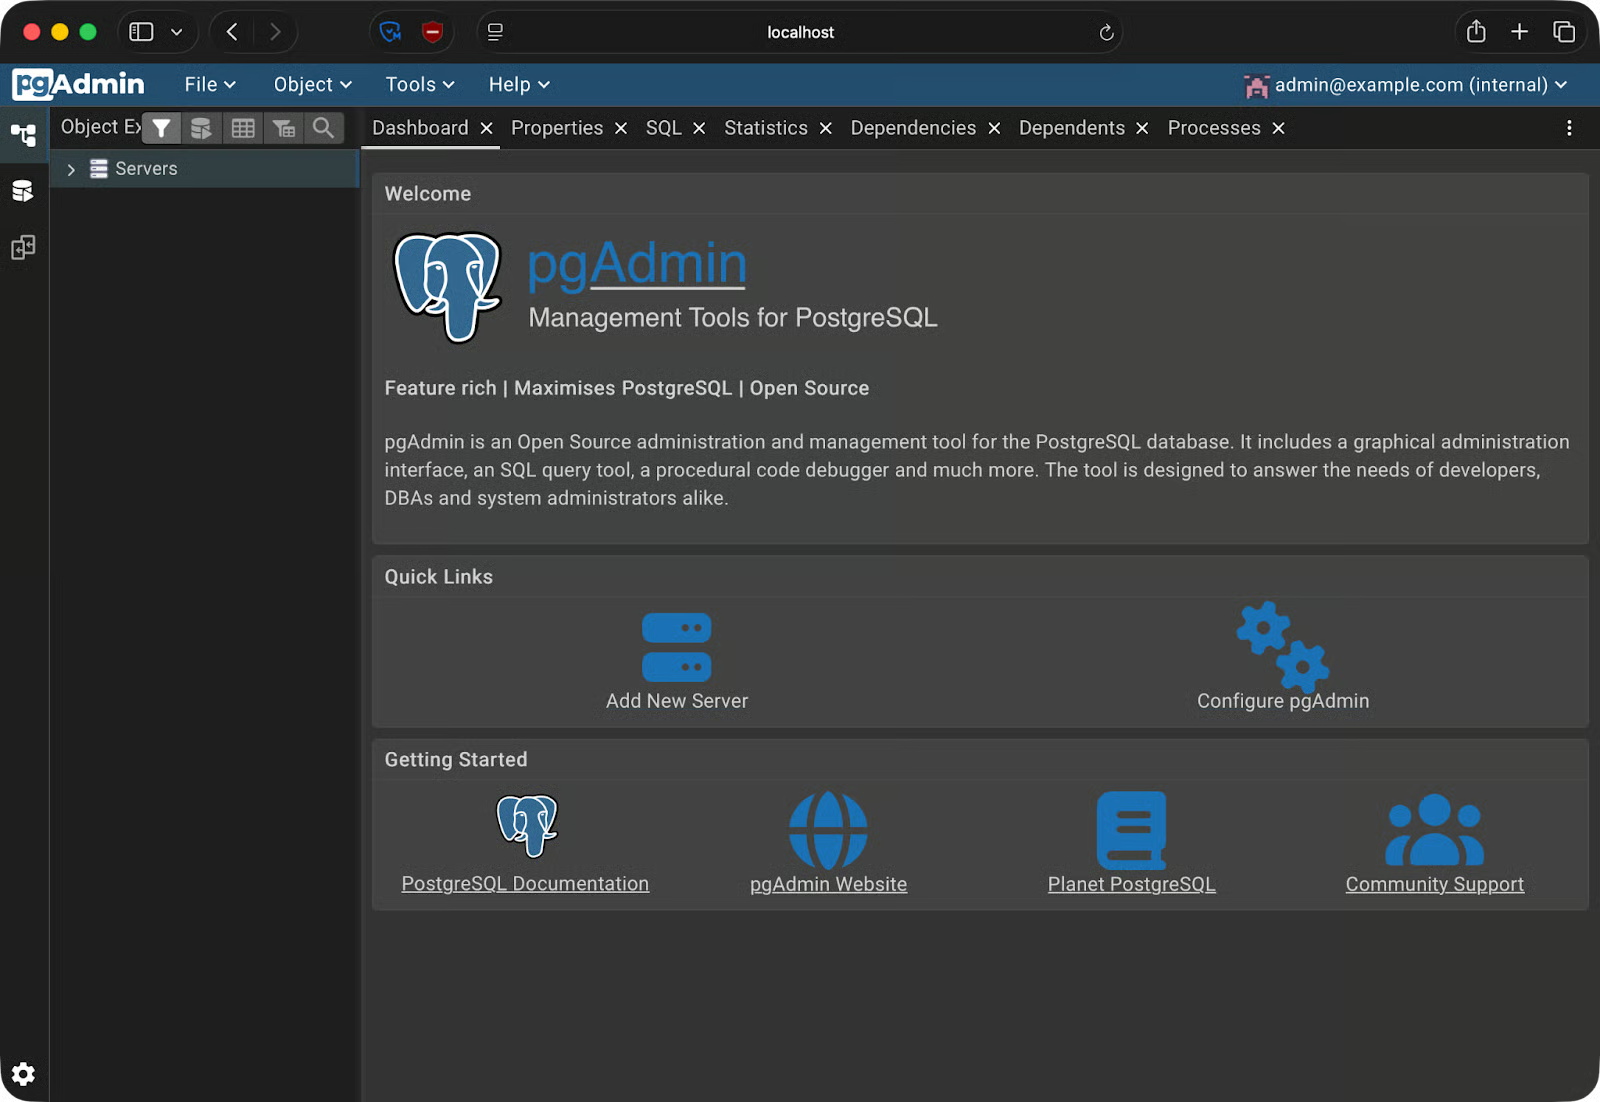
pgAdmin home page
In the pgAdmin sidebar, right-click Servers - Register - Server. A dialog opens with two tabs you need to fill out: General and Connection.
Give your server a meaningful name - something like local-dev-postgres. This is just a label inside pgAdmin, so pick anything that makes sense for your setup.
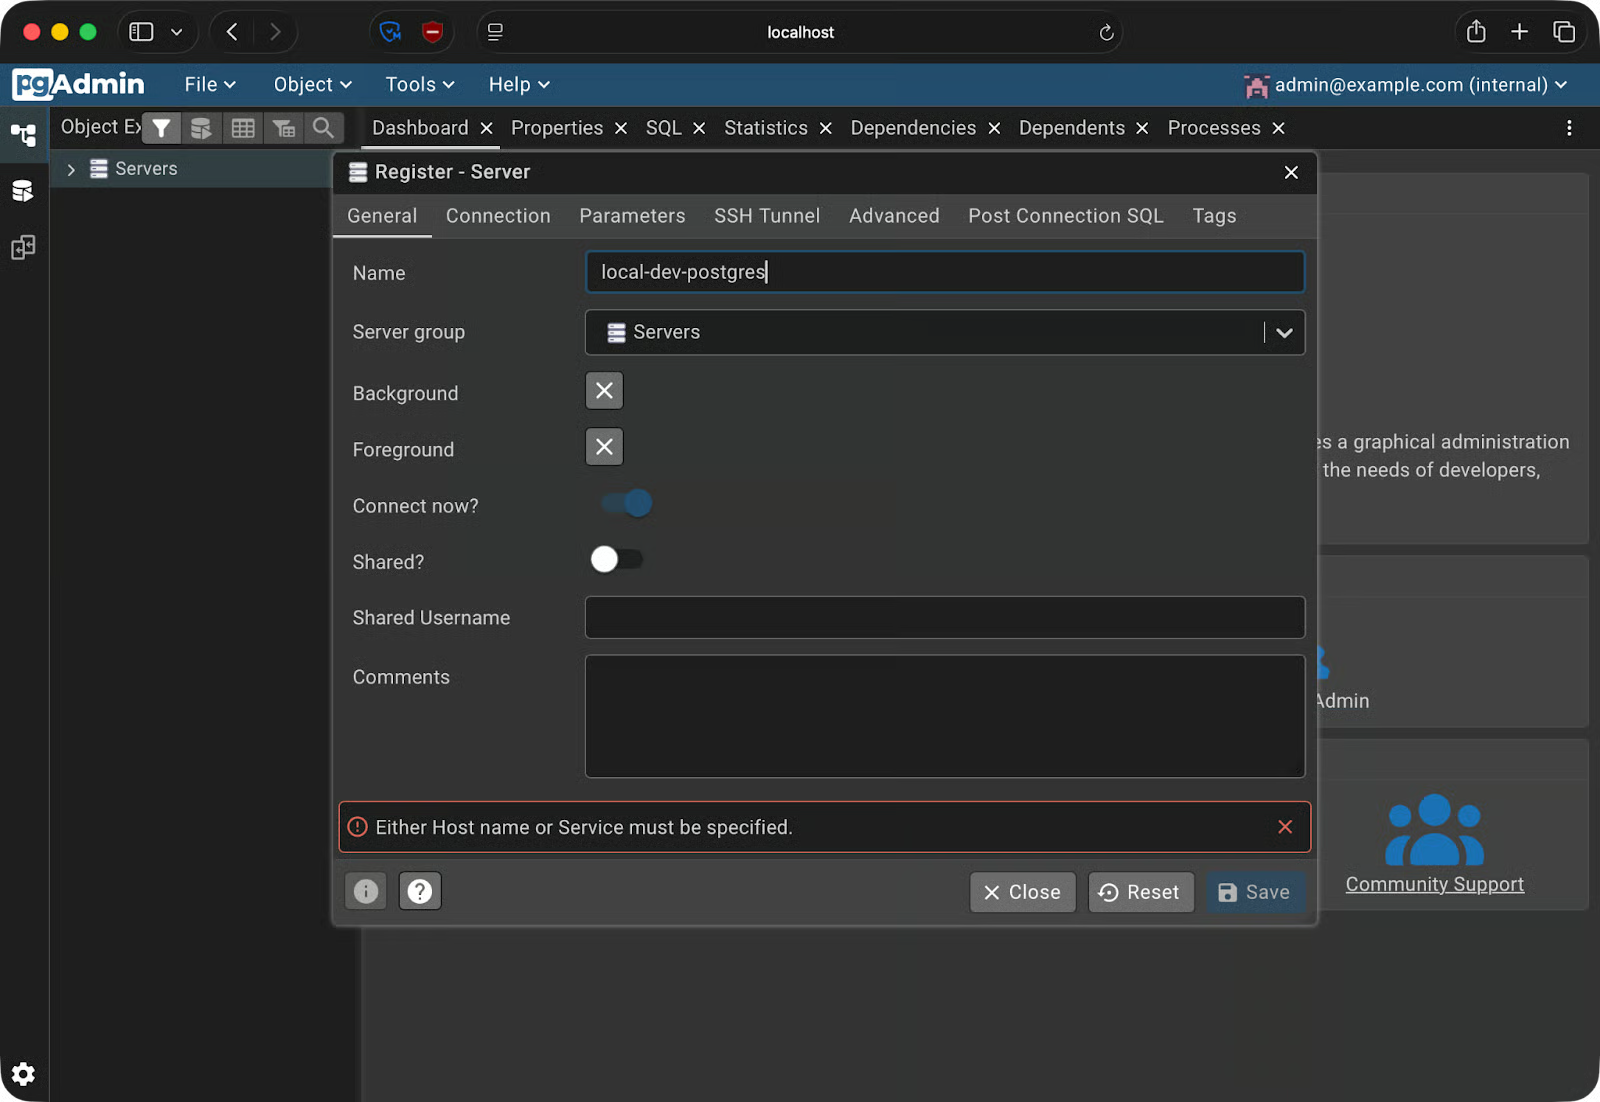
Server registration - General tab
Don't use localhost here.
Inside a Docker network, localhost refers to the container itself - not your host machine, and not the PostgreSQL container. Docker has its own internal DNS, and it resolves container names using the service names defined in your docker-compose.yml. So if your PostgreSQL service is named postgres, that's the hostname you use.
Fill in the fields as follows:
Host name/address: postgres (the service name from docker-compose.yml)
Port: 5432
Maintenance database: the value of POSTGRES_DB from your Compose file (e.g., mydb)
Username: the value of POSTGRES_USER (e.g., admin)
Password: the value of POSTGRES_PASSWORD
Click Save.

Server registration - Connection tab
If everything is correct, the server will appear in the sidebar and you’ll be able to expand it and view your databases:
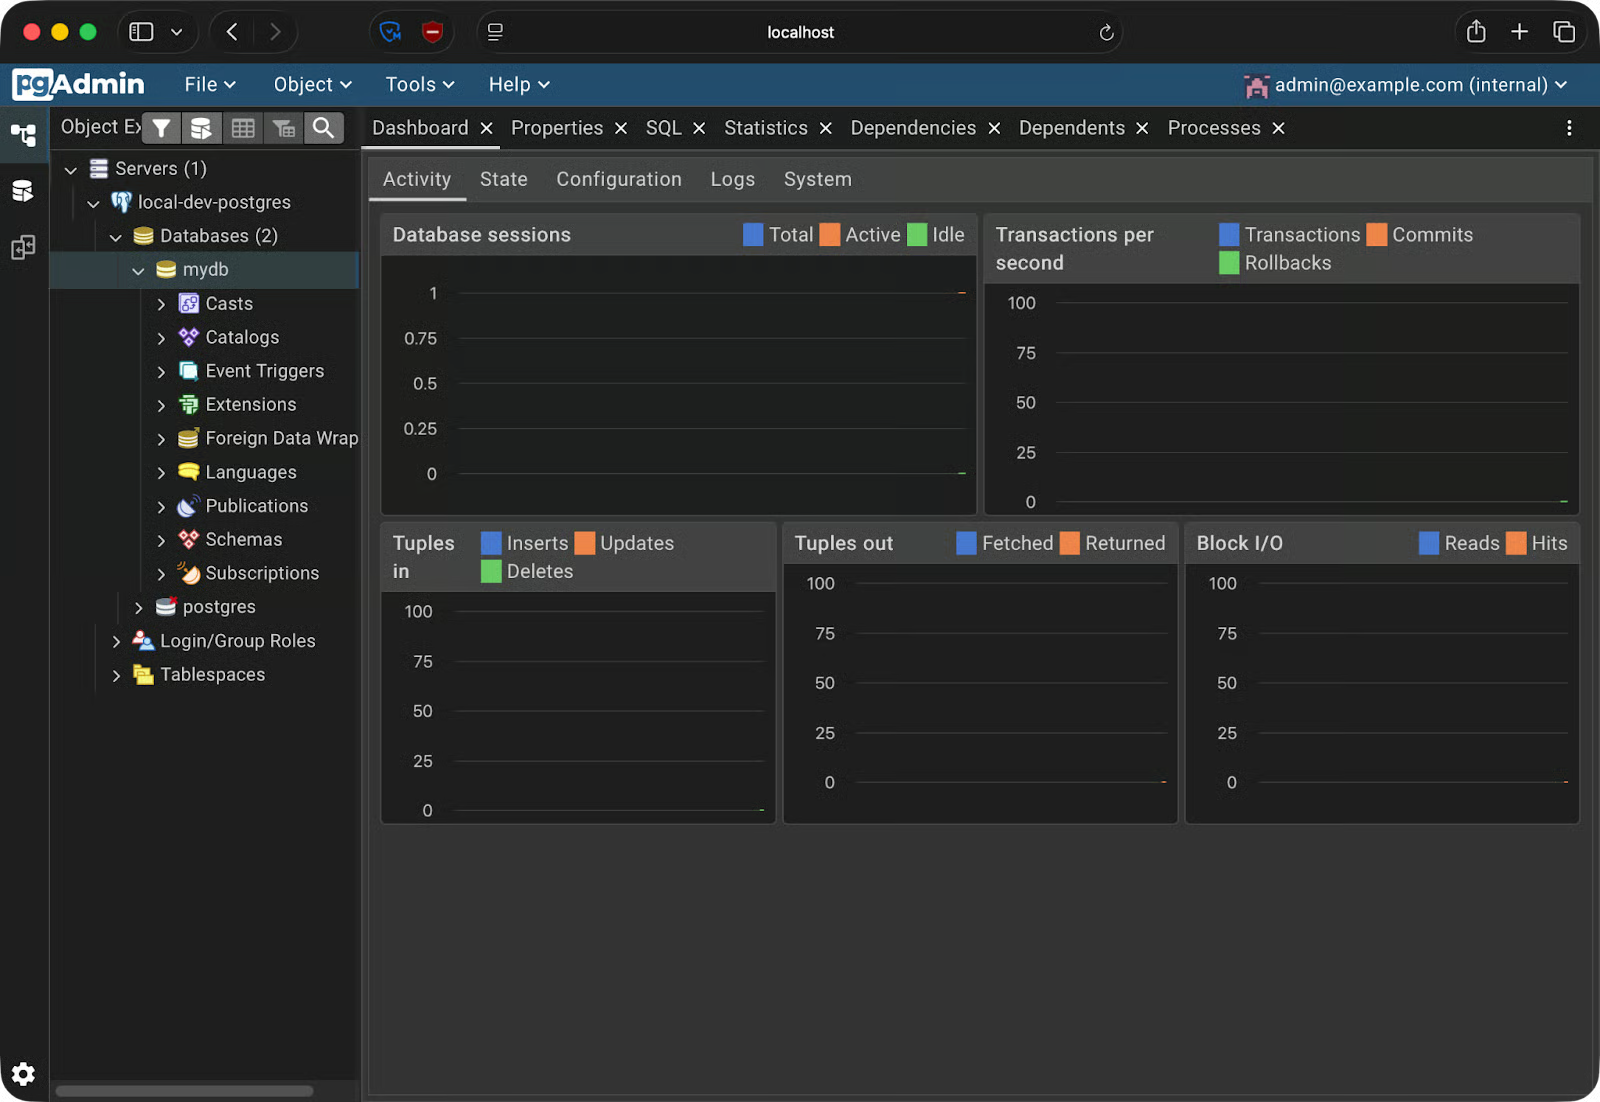
Successful server registration
This means you’re connected.
Since you’re now connected, I’ll show you the basics of pgAdmin 4 and Postgres in general.
Open the Query Tool by clicking Tools - Query Tool from the top menu. The interface has three panels:
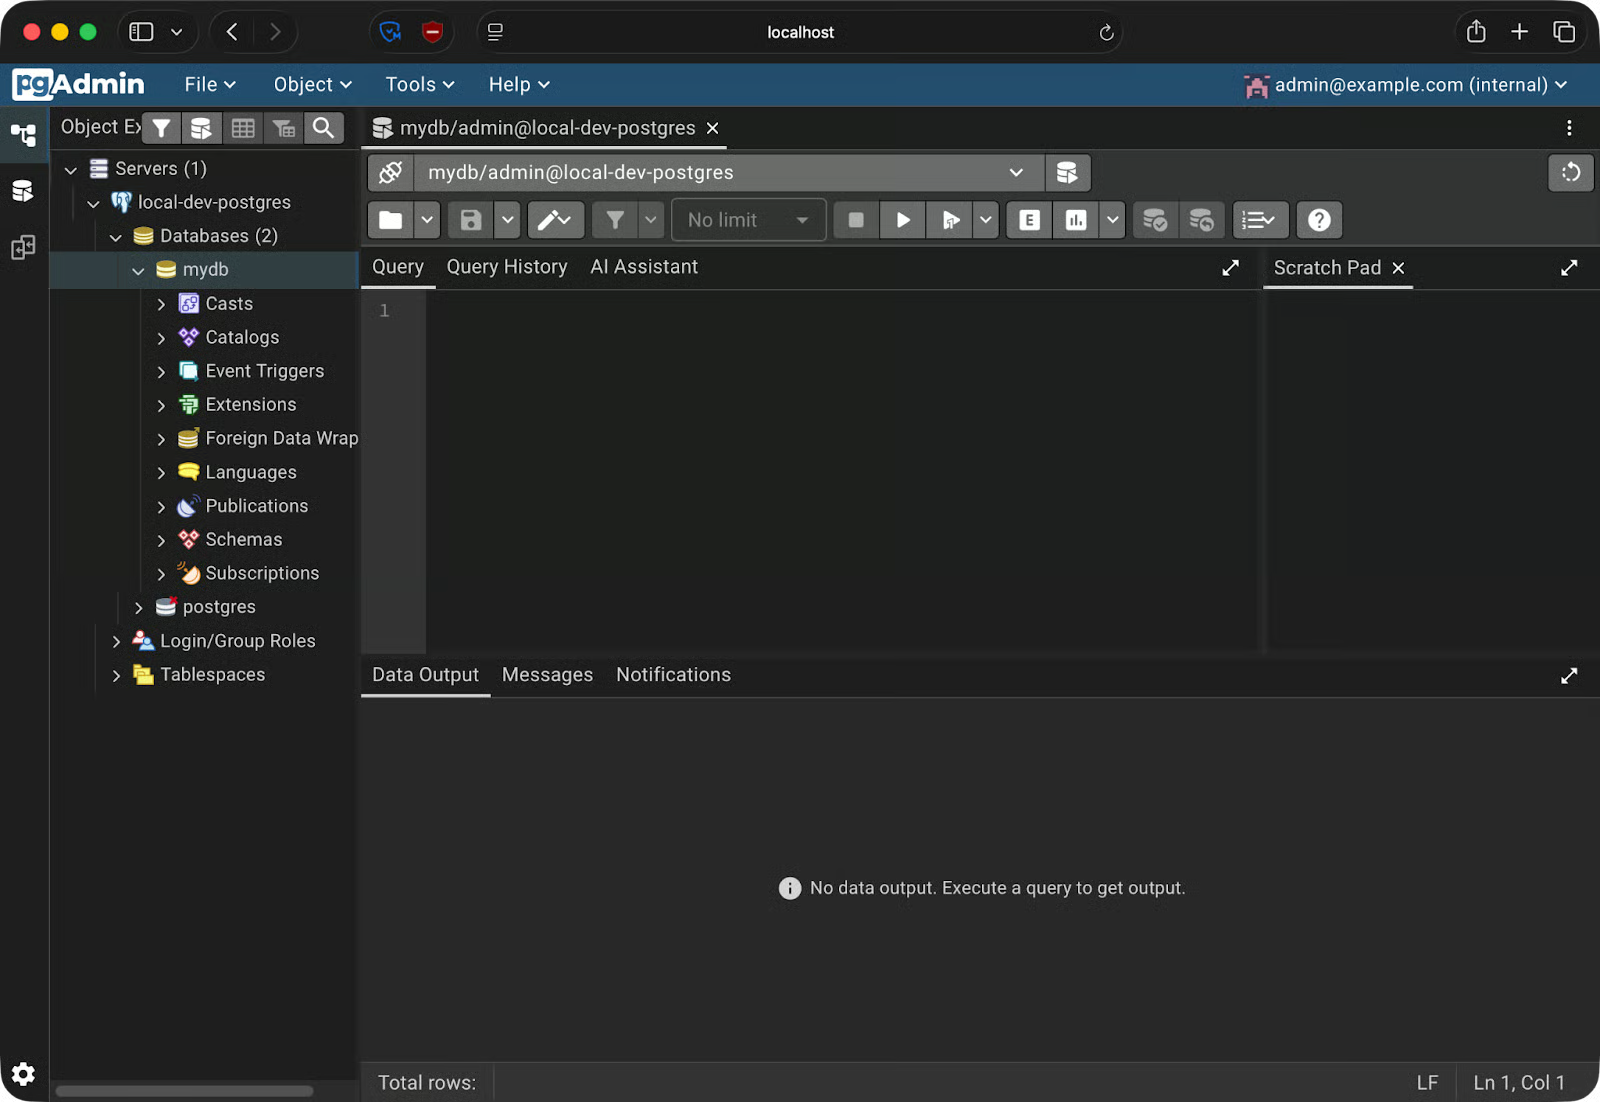
Query tool
Let's create a simple orders table and add some data. You can run each block by hitting the Play button or by pressing F5 which is a shortcut.
Run this to create the table:
CREATE TABLE orders (
    order_id SERIAL PRIMARY KEY,
    customer_name VARCHAR(100) NOT NULL,
    product VARCHAR(100) NOT NULL,
    quantity INT NOT NULL,
    order_date DATE DEFAULT CURRENT_DATE
);
Insert a few rows:
INSERT INTO orders (customer_name, product, quantity)
VALUES
    ('Alice Johnson', 'Wireless Keyboard', 2),
    ('Bob Smith', 'USB-C Hub', 1),
    ('Carol White', 'Mechanical Keyboard', 3);
And now just query the data:
SELECT * FROM orders;
Querying data
Results show up in the Data Output panel as a table. You can sort columns, resize them, and copy rows directly from the grid.
To see what happens behind the scenes when you run a query, run EXPLAIN ANALYZE on your SELECT statement:
EXPLAIN ANALYZE SELECT * FROM orders WHERE customer_name = 'Alice Johnson';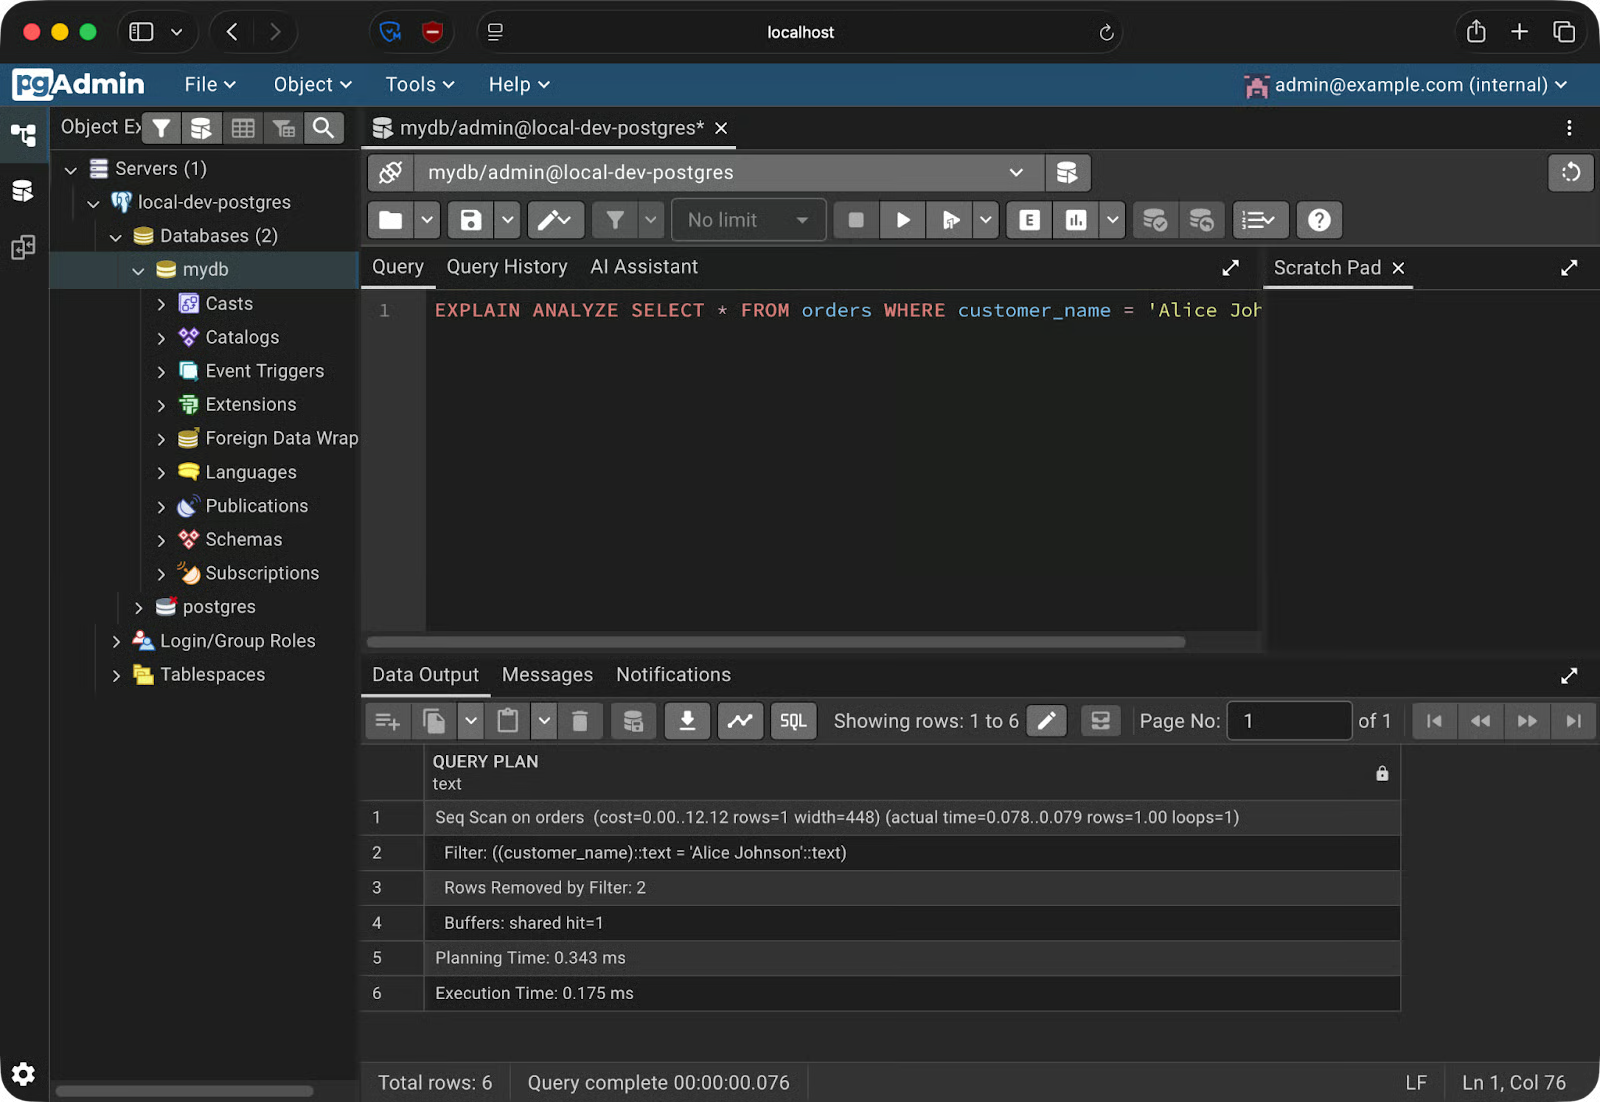
Explain Analyze results
The Data Output panel shows the raw output. But pgAdmin has a better option. Click the Explain button in the toolbar - and pgAdmin renders the query plan as an interactive graph.
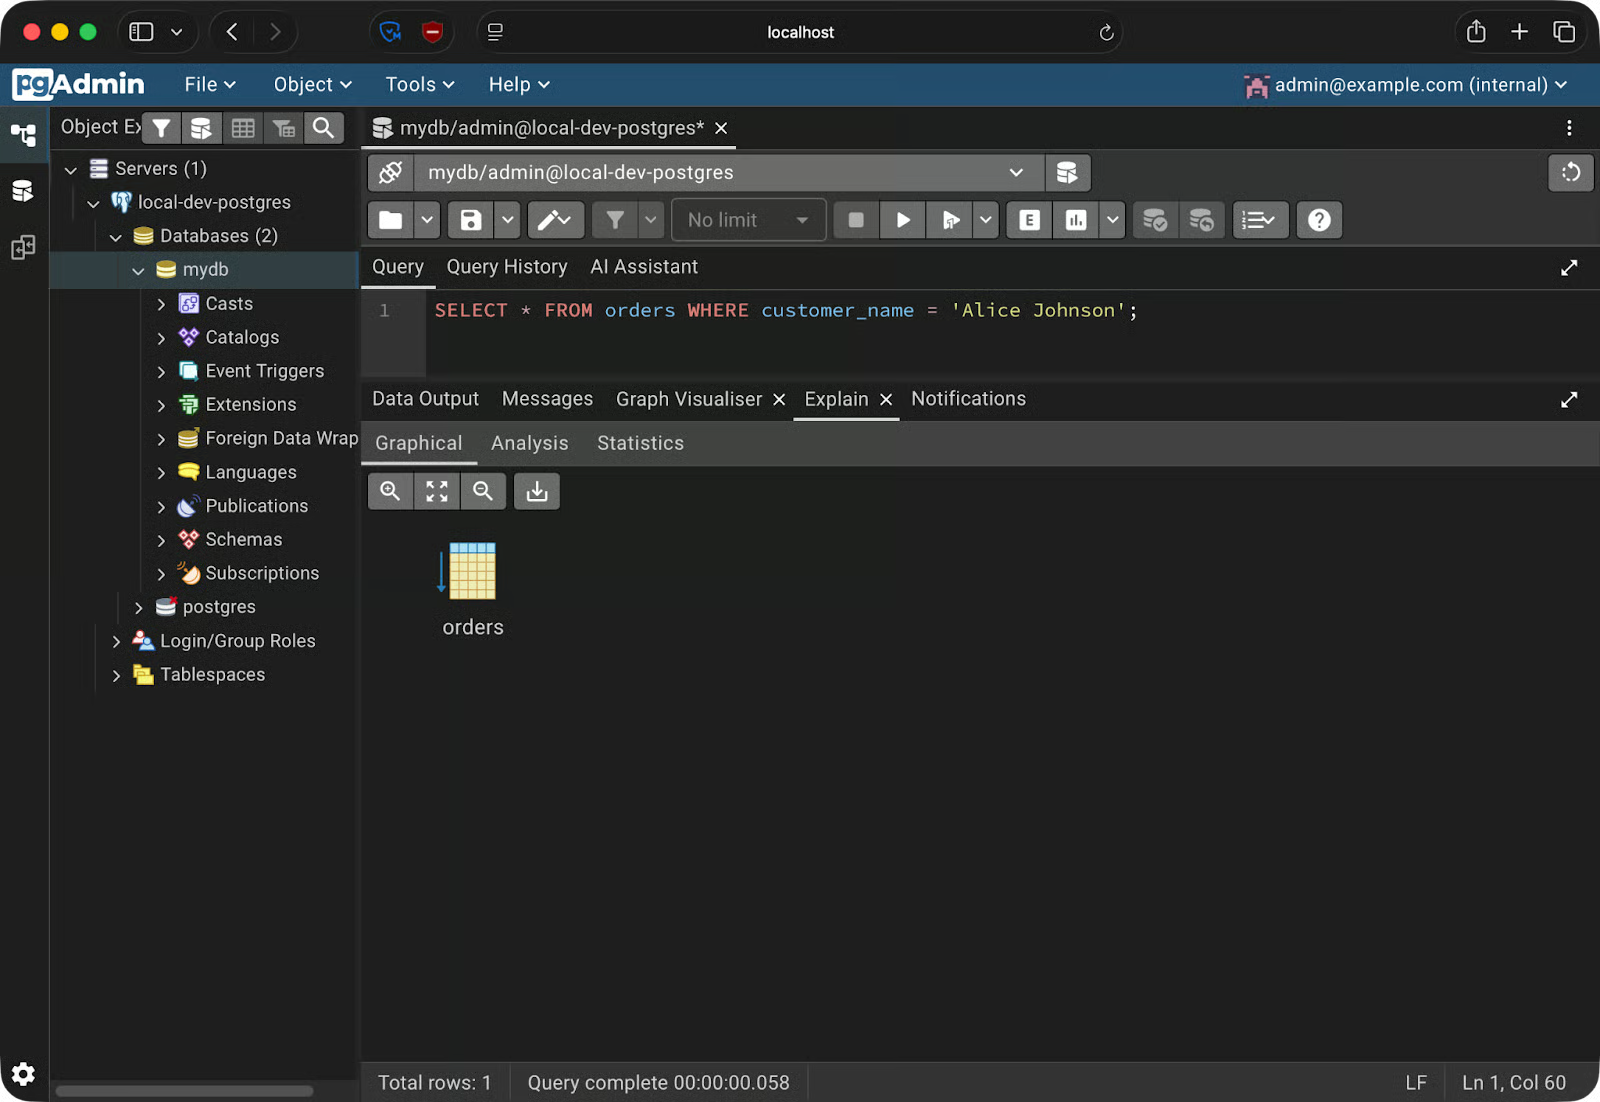
Query plan as a graph
Now, it’s simple for this query, but you’ll get a lot more if you’re joining tables or performing more complex data aggregations.
This matters because reading raw EXPLAIN output is slow and error-prone. The visual plan makes it obvious when PostgreSQL is doing a full table scan on a large table, or when an index exists but isn't being used.
pgAdmin's sidebar gives you a full view of your database structure - and lets you modify it through the GUI.
The sidebar tree goes: Servers - your server name - Databases - your database - Schemas - public - Tables. Expand any table and you'll see its Columns, Indexes, and Constraints listed as child nodes. Click any of them to inspect the details in the right panel.
To create a new table, right-click on Tables under your schema and select Create - Table. A dialog opens with a couple tabs.
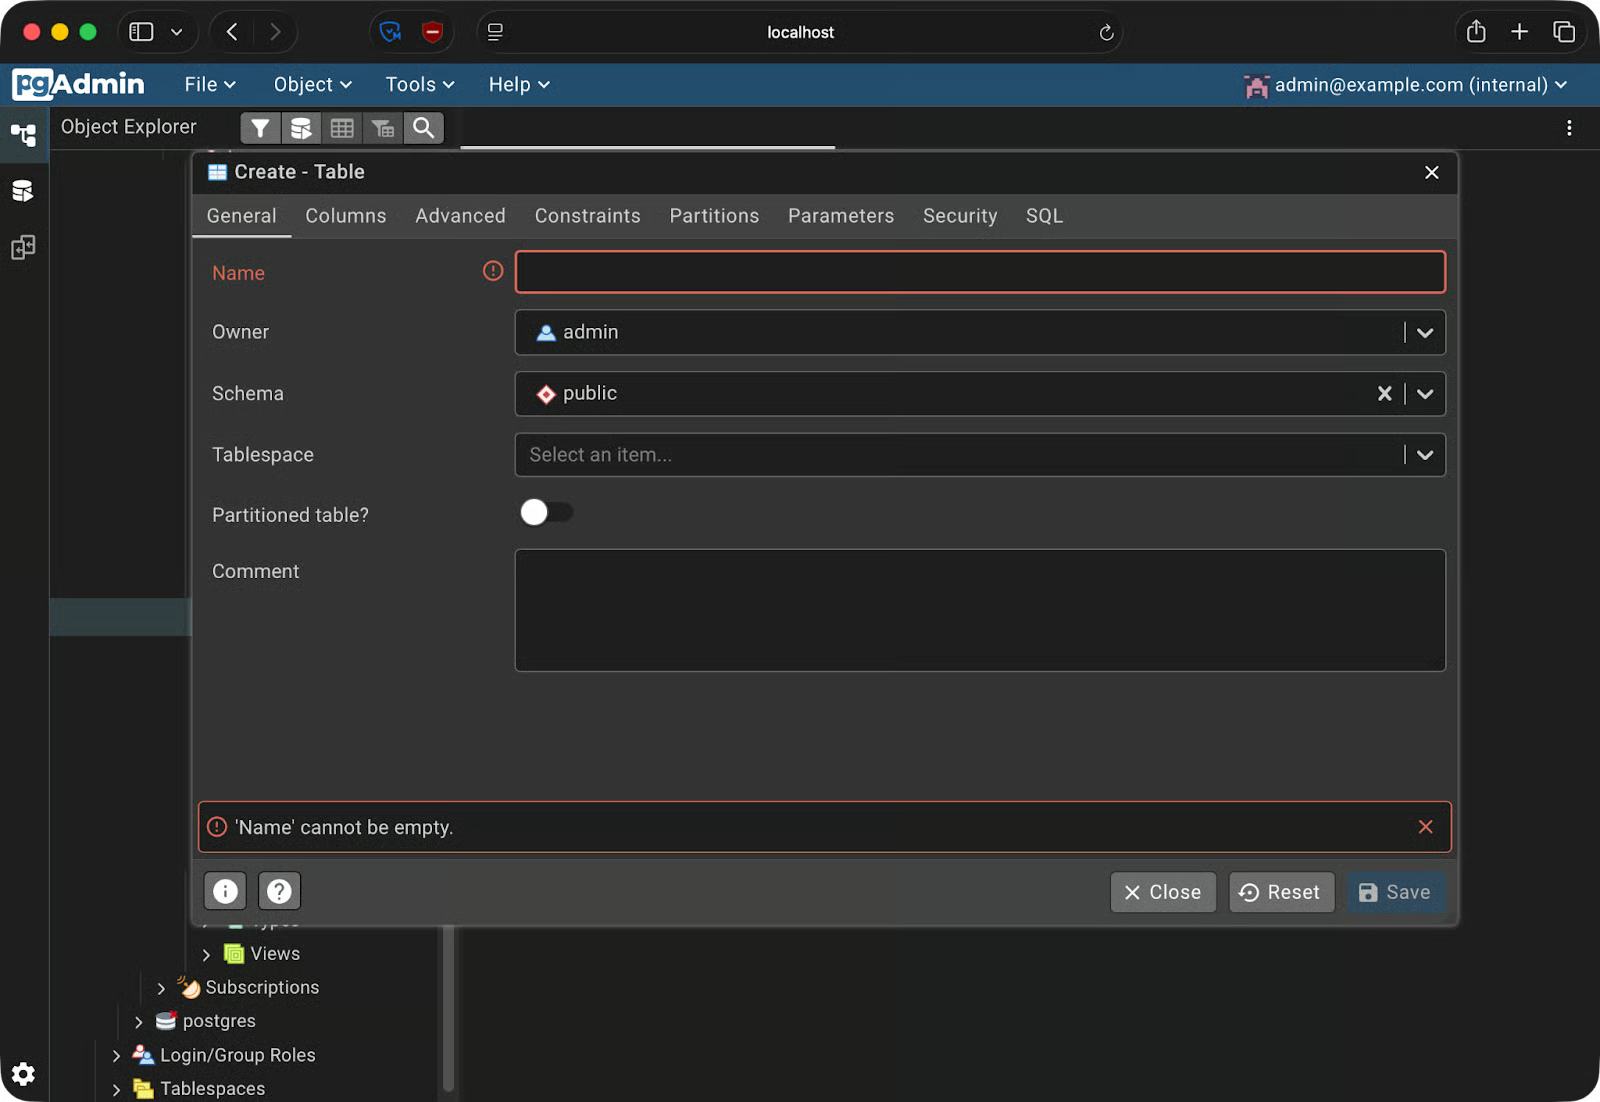
Creating tables
The General tab is where you set the table name. Switch to the Columns tab to add your columns - each row lets you set the column name, data type, length, and whether it's nullable. The Constraints tab takes care of primary keys, foreign keys, and unique constraints.
To add an index to an existing table, expand the table in the sidebar, right-click Indexes, and select Create - Index. Pick the columns to index and choose the index type - btree is the default and works for most cases.
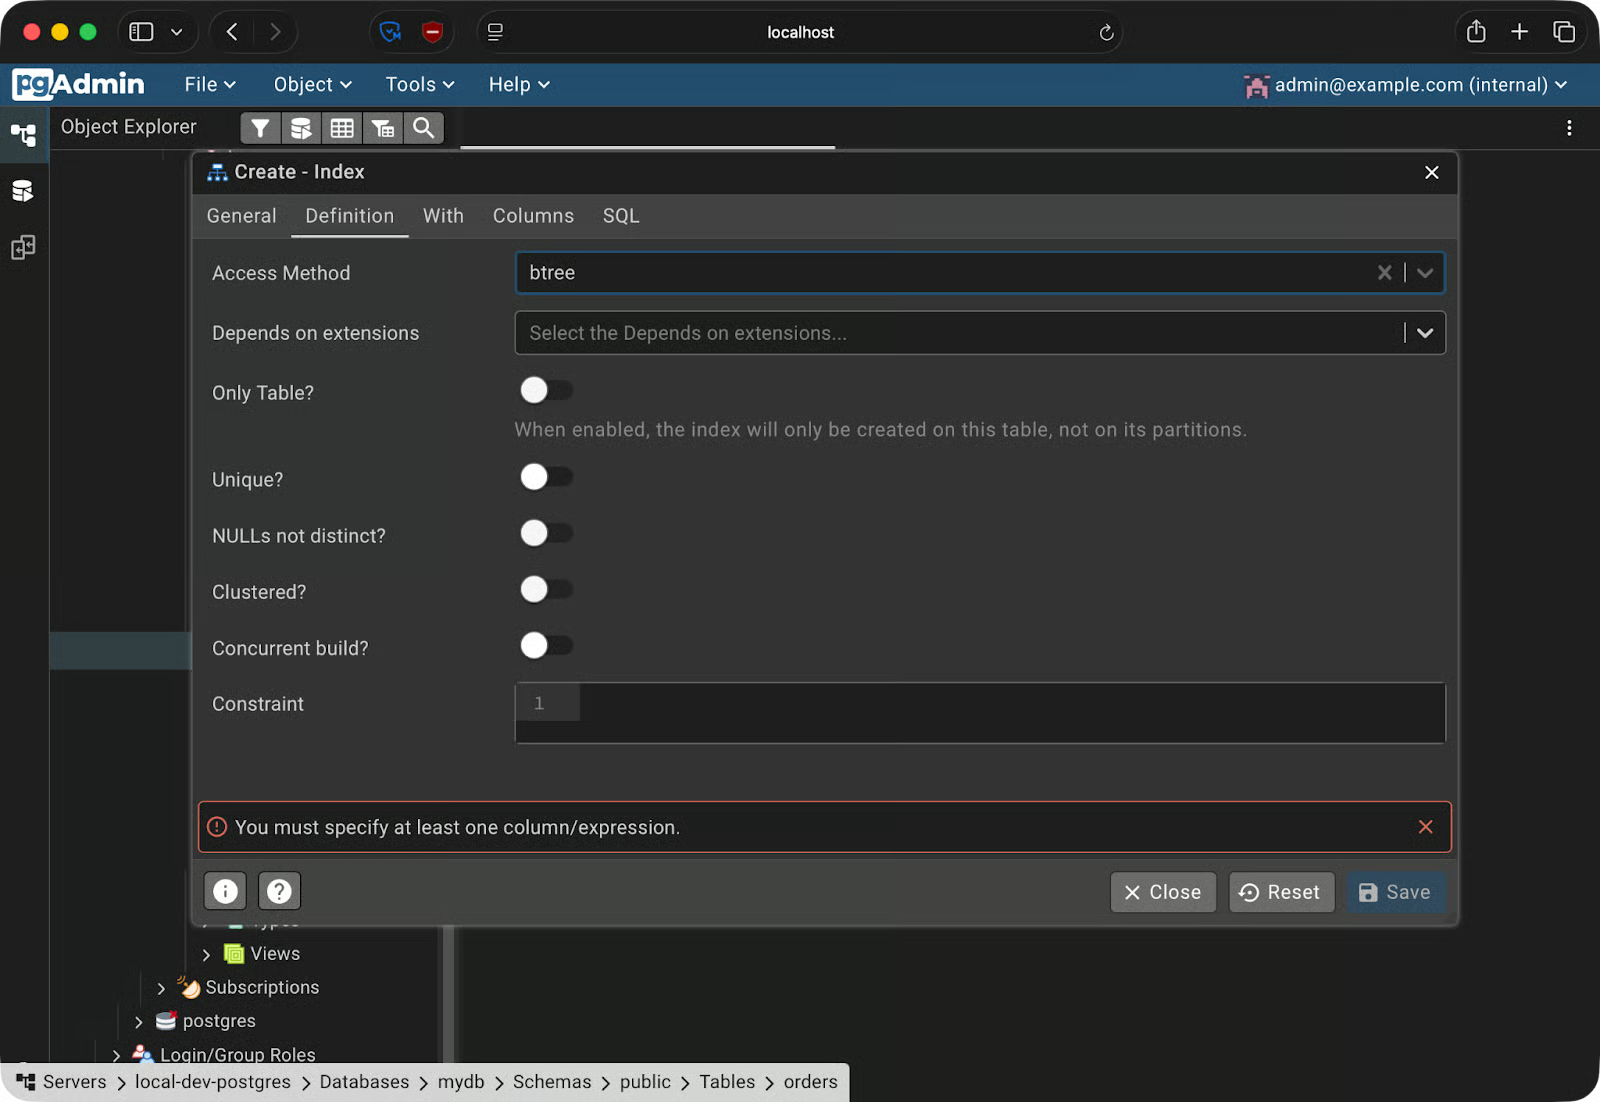
Creating an index
To back up a database, go to Tools - Backup. You'll need to pick a format:
After you select a format and a destination path, pgAdmin runs pg_dump in the background and saves the file to your local machine.
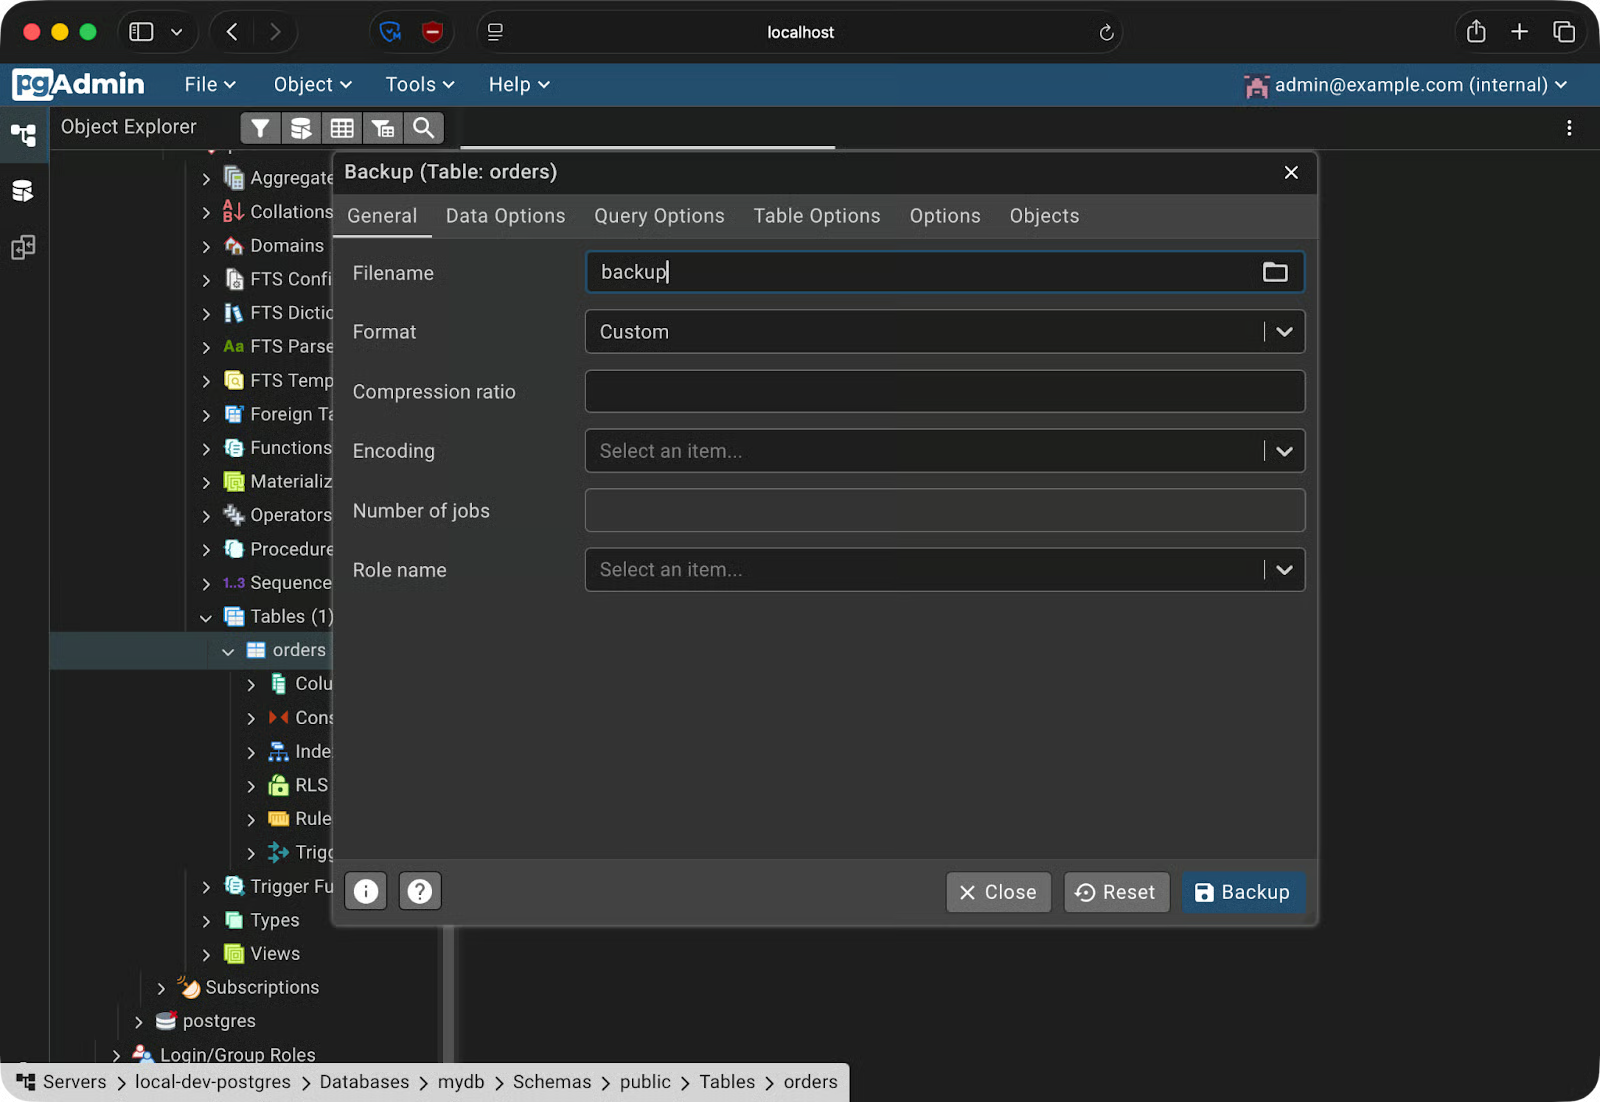
Creating a backup
To restore, go to Tools - Restore, select your backup file, and point it at the target database.
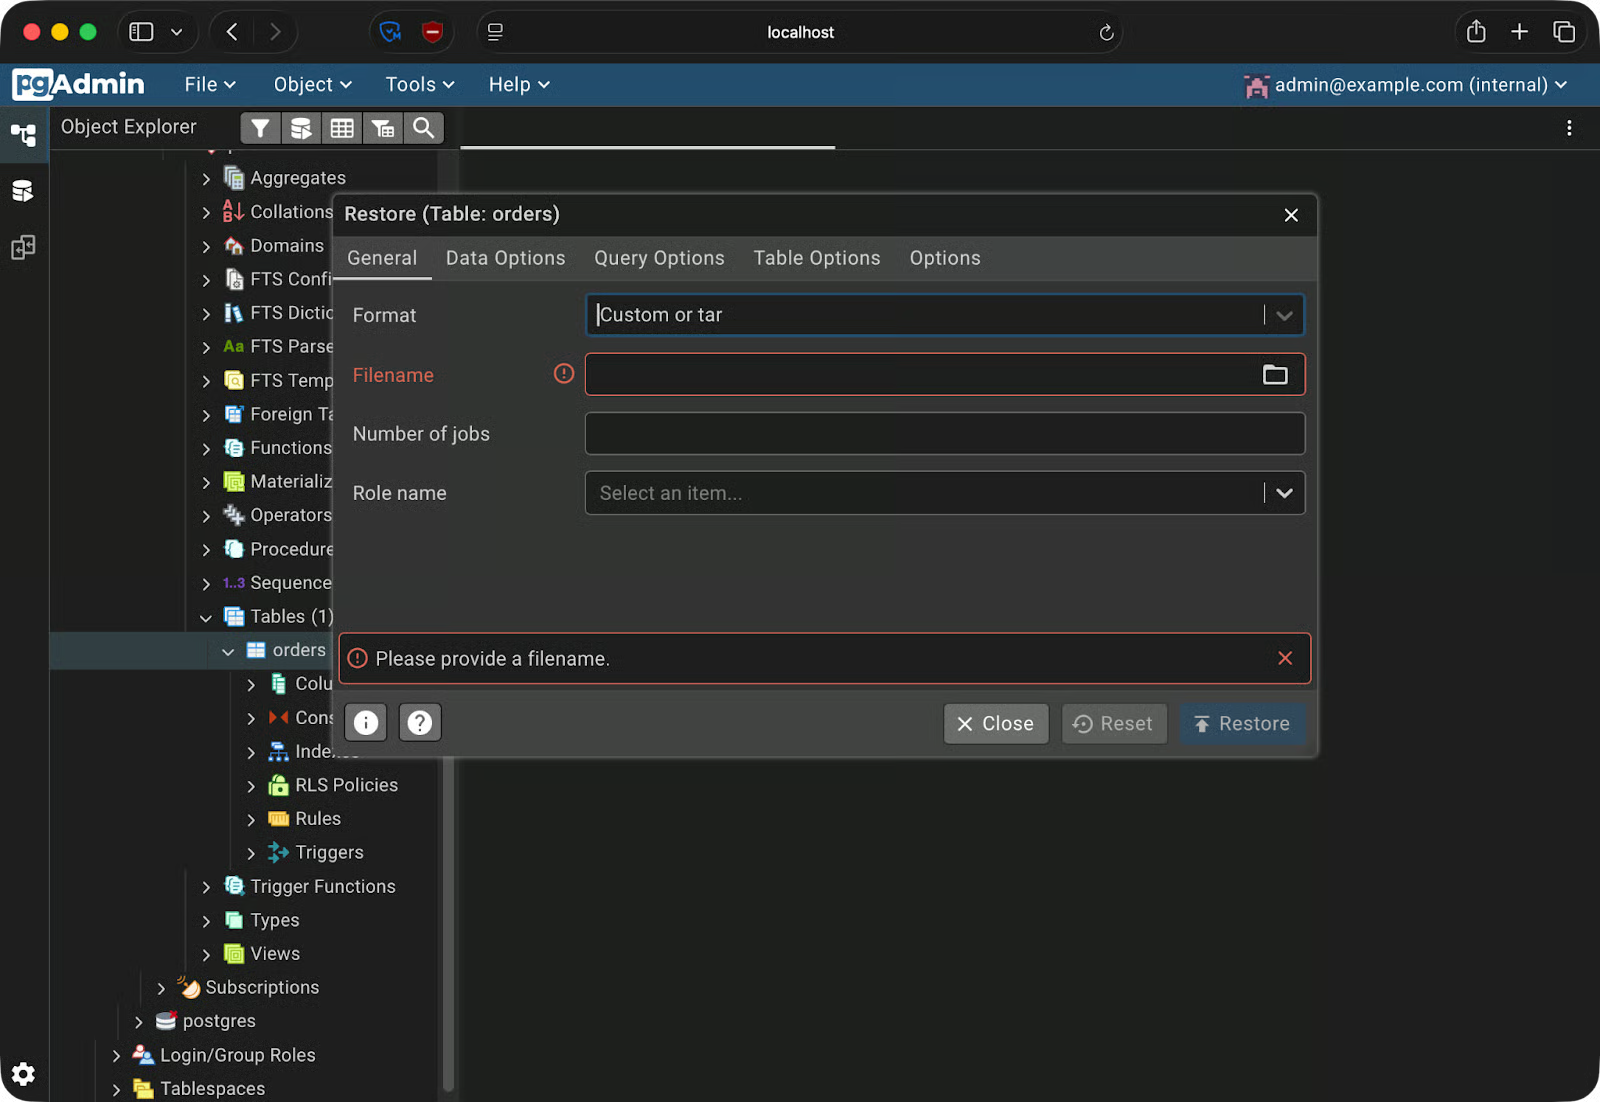
Restoring from a backup
If you’re wondering why this is useful, imagine you're testing a destructive migration on your dev database. Take a backup first, run the migration, and if something breaks, restore the backup to get back to a known state.
Getting pgAdmin 4 running is one thing. But keeping it running smoothly requires you to know a couple of extra things. Here are a few practical tips.
If your docker-compose.yml ends up in version control - and it usually does - hardcoded passwords go with it. Use a .env file for credentials and add it to .gitignore. For production environments, go a step further and use Docker secrets, which mount sensitive values as files rather than environment variables.
By default, Docker binds ports to 0.0.0.0, which means any network interface - including public ones. On a remote server, that makes your pgAdmin instance reachable from the internet. Bind explicitly to 127.0.0.1 instead:
ports:
  - "127.0.0.1:5050:5050"
This makes pgAdmin accessible only from the server itself. Use an SSH tunnel or a reverse proxy if you need remote access.
Using dpage/pgadmin4:latest will pull a new version the next time someone runs docker compose pull. That new version might behave differently, break your config, or introduce unexpected changes. Use a specific tag like dpage/pgadmin4:9.13 so every teammate runs the exact same version.
servers.jsonIf your whole team shares the same Compose setup, don't make everyone register the PostgreSQL server after spinning up the stack. pgAdmin supports a servers.json file that pre-populates connections on startup. Mount it into the container like this:
volumes:
  - ./servers.json:/pgadmin4/servers.json
Here’s what a minimal servers.json looks like:
{
  "Servers": {
    "1": {
      "Name": "local-dev-postgres",
      "Group": "Servers",
      "Host": "postgres",
      "Port": 5432,
      "MaintenanceDB": "mydb",
      "Username": "admin",
      "SSLMode": "prefer"
    }
  }
}
The server will show up when pgAdmin starts - no manual setup required.
In this article, I walked you through setting up pgAdmin 4 in Docker from scratch. You wrote a Docker Compose file that brings up PostgreSQL and pgAdmin 4 together, connected the two containers using Docker's internal DNS, and used pgAdmin's core features - the Query Tool, schema browser, and backup/restore workflow.
The core principle here is reproducibility.
A docker-compose.yml file, a servers.json, and a .env file are all you need to hand a teammate a fully configured database environment. This will make sure the “it works on my machine” problem never happens again.
To go deeper on Docker and containerization, check out our Intermediate Docker course. It’s packed with useful tips on multi-stage builds, networking, and a deep dive into Compose.
Learn Docker with DataCamp
Course
Course
Course
Tutorial
Dario Radečić
Tutorial
Dario Radečić
Tutorial
Oluseye Jeremiah
Tutorial
Bex Tuychiev
Tutorial
Derrick Mwiti
Tutorial
Benito Martin