

部件(Widgets)
部件在理念上类似于 HTML 中的 elements。在 Tkinter 中,针对不同元素类型有不同的部件。它们是标准的 GUI 元素,为用户提供按钮、文本、菜单和文本框等控件。
让我们结合示例来理解 Tkinter 中的这些部件(来源)。
-
Button:Button 部件具有开/关属性。当用户点击按钮时,Tkinter 中会触发一个事件。
语法:button_widget = tk.Button(widget, option=placeholder),其中
widget是父窗口/框架的参数,而option是一个占位符,可包含多种取值,如前景与背景颜色、字体、command(调用函数)、图片、按钮的高度与宽度等。 -
Canvas:Canvas 用于在 GUI 中绘制形状,支持多种绘图方法。
语法:canvas_widget = tk.Canvas(widget, option=placeholder),其中
widget是父窗口/框架参数,option可包含边框宽度、背景色、部件的高度与宽度等取值。 -
Checkbutton:Checkbutton 记录开/关或真/假状态。它允许您一次选择多个选项,也可以保持未选中。
语法:checkbutton_widget = tk.CheckButton(widget, option=placeholder),其中
widget是父窗口/框架参数,option可包含标题、文本、当部件在光标下时的背景与前景色、字体、图片等多种取值。 -
Entry:Entry 部件用于创建输入框或在 GUI 中获取用户输入文本。
语法:entry_widget = tk.Entry(widget, option=placeholder),其中
widget是父窗口/框架参数,option可包含边框宽度、背景色、按钮的宽度与高度等取值。 -
Frame:Frame 在 Tkinter 中用作容器,用于分组并恰当地组织部件。
语法:frame_widget = tk.Frame(widget, option=placeholder),其中
widget是父窗口/框架参数,option可包含边框宽度、部件的高度与宽度、highlightcolor(部件获得焦点时的颜色)。 -
Label:Label 用于创建单行的部件,如文本、图片等。
语法:label_widget = tk.Label(widget, option=placeholder),其中
widget是父窗口/框架参数,option可包含按钮字体、背景色、图片、按钮的宽度与高度等取值。
完整的部件列表请参阅 Python 官方文档。
几何管理(Geometry Management)
Tkinter 中的所有部件都有一些几何度量。这些几何度量可让您在父框架或父部件区域内组织部件。
几何管理类之一,即 pack(),我们已在此处介绍。
为此,Tkinter 为您提供了三种主要的几何管理器类:
- pack():以区块方式组织部件,并占据全部可用宽度。这是窗口中显示部件的常规方法。
- grid(): 以类似表格的结构组织部件。您将在本教程稍后详细学习。
- place():用于将部件放置在父部件中用户指定的明确位置。
布局与部件的组织
在本节中,您将同时使用 geometry 和 widgets,来看看 Tkinter 的魅力。
要在 window 中安排布局,您将使用 Frame 部件类。让我们创建一个简单程序,看看 Frame 的工作方式。
-
您将借助
pack类定义两个框架——top 和 bottom。Frame 类有助于在窗口之间创建分区。基本上,一个单一窗口会以 Frame 的形式复制为上下两个部分。 -
最后,您将在窗口中创建四个按钮,每个框架两个。您可以按参数为按钮命名并设置颜色。
import tkinter
# Let's create the Tkinter window.
window = tkinter.Tk()
window.title("GUI")
# You will first create a division with the help of Frame class and align them on TOP and BOTTOM with pack() method.
top_frame = tkinter.Frame(window).pack()
bottom_frame = tkinter.Frame(window).pack(side = "bottom")
# Once the frames are created then you are all set to add widgets in both the frames.
btn1 = tkinter.Button(top_frame, text = "Button1", fg = "red").pack() #'fg or foreground' is for coloring the contents (buttons)
btn2 = tkinter.Button(top_frame, text = "Button2", fg = "green").pack()
btn3 = tkinter.Button(bottom_frame, text = "Button3", fg = "purple").pack(side = "left") #'side' is used to left or right align the widgets
btn4 = tkinter.Button(bottom_frame, text = "Button4", fg = "orange").pack(side = "left")
window.mainloop()
运行上述代码,看看输出效果。

Grid
与 Frame 类似,grid 也是组织部件的另一种方式。它使用矩阵的行-列概念。让我们借助下图,将 grid 类和行-列的概念类比起来。

Grid 主要接收两个参数 row 和 column。如上图所示,假设 00 对应第一个按钮,01 对应第二个。要将两个按钮并排放置,grid 将分别以 00 和 01 作为行与列参数。
让我们使用 checkbutton 来理解 grid 类的工作方式。您将定义两个复选按钮,并为两个按钮指定文本。复选按钮的状态由 onvalue 和 offvalue 决定,而复选按钮的当前状态由 IntVar() 跟踪,并存储在单独的变量中。当 offvalue=1 且 onvalue=0 时,相应的复选按钮将被勾选。
至于 grid 类,您将传入参数 row,当 row=0 时按钮位于第一行,当 row=1 时位于第二行。
import tkinter
from tkinter import *
top = tkinter.Tk()
CheckVar1 = IntVar()
CheckVar2 = IntVar()
tkinter.Checkbutton(top, text = "Machine Learning",variable = CheckVar1,onvalue = 1, offvalue=0).grid(row=0,sticky=W)
tkinter.Checkbutton(top, text = "Deep Learning", variable = CheckVar2, onvalue = 0, offvalue =1).grid(row=1,sticky=W)
top.mainloop()
运行此代码,看看输出。
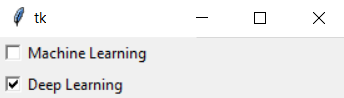
我们再通过另一个示例来理解 grid。在此示例中,您将在 row 的同时传入 column 参数。
import tkinter
# Let's create the Tkinter window
window = tkinter.Tk()
window.title("GUI")
# You will create two text labels namely 'username' and 'password' and and two input labels for them
tkinter.Label(window, text = "Username").grid(row = 0) #'username' is placed on position 00 (row - 0 and column - 0)
# 'Entry' class is used to display the input-field for 'username' text label
tkinter.Entry(window).grid(row = 0, column = 1) # first input-field is placed on position 01 (row - 0 and column - 1)
tkinter.Label(window, text = "Password").grid(row = 1) #'password' is placed on position 10 (row - 1 and column - 0)
tkinter.Entry(window).grid(row = 1, column = 1) #second input-field is placed on position 11 (row - 1 and column - 1)
# 'Checkbutton' class is for creating a checkbutton which will take a 'columnspan' of width two (covers two columns)
tkinter.Checkbutton(window, text = "Keep Me Logged In").grid(columnspan = 2)
window.mainloop()
看看上述代码的输出!
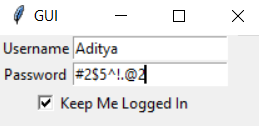
是不是很棒?实现非常简单,而且看起来与用 HTML 编写的界面十分相似。
绑定或命令函数
绑定或命令函数是在事件发生或被触发时调用的函数。
让我们通过一个示例来理解绑定函数。
您将定义一个按钮,当它被点击时,会调用名为 DataCamp_Tutorial 的函数。进一步地,函数 DataCamp_Tutorial 将创建一个内容为 GUI with Tkinter! 的新标签。
import tkinter
# Let's create the Tkinter window
window = tkinter.Tk()
window.title("GUI")
# creating a function called DataCamp_Tutorial()
def DataCamp_Tutorial():
tkinter.Label(window, text = "GUI with Tkinter!").pack()
tkinter.Button(window, text = "Click Me!", command = DataCamp_Tutorial).pack()
window.mainloop()
运行代码,观察输出。
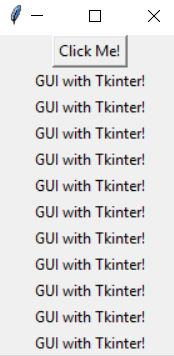
除了通过鼠标点击调用绑定函数外,还可以通过鼠标移动、悬停、点击、滚动等事件来触发。
现在我们来看 bind 函数,它提供了与上述相同的功能。
通过 bind 方法处理鼠标点击事件
Bind 方法为实现鼠标点击事件提供了非常简洁的方式。我们来看三个可直接与 bind 方法配合使用的预定义事件。
点击事件分为三类:leftClick、middleClick 和 rightClick。
<Button-1>是 bind 方法的左键点击事件参数,即当您点击左键时,bind 方法会调用作为第二个参数传入的函数。<Button-2>表示中键点击<Button-3>表示右键点击
现在,您将学习如何根据发生的事件调用特定函数。
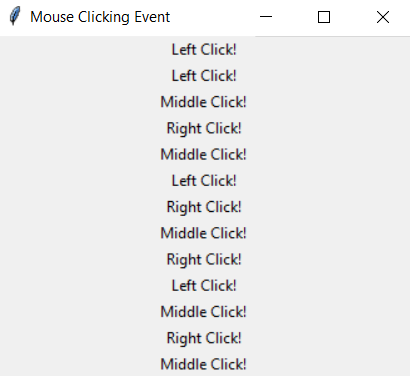
- 运行以下程序,分别点击鼠标左、中、右键以调用相应函数。
- 该函数会创建一个带有指定文本的新标签。
import tkinter
# Let's create the Tkinter window
window = tkinter.Tk()
window.title("GUI")
#You will create three different functions for three different events
def left_click(event):
tkinter.Label(window, text = "Left Click!").pack()
def middle_click(event):
tkinter.Label(window, text = "Middle Click!").pack()
def right_click(event):
tkinter.Label(window, text = "Right Click!").pack()
window.bind("<Button-1>", left_click)
window.bind("<Button-2>", middle_click)
window.bind("<Button-3>", right_click)
window.mainloop()
运行上述代码。
警告框
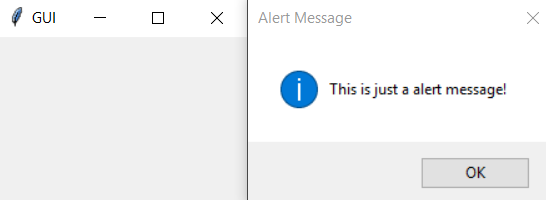
您可以使用 messagebox 方法在 Tkinter 中创建警告框。您也可以使用 messasgebox 方法创建提问。
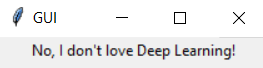
这里您将创建一个简单的警告框,并提出一个问题。要生成警告,您将使用 messagebox 函数 showinfo。要创建问题,您将使用 askquestion 方法,并根据问题的响应,在 GUI 上输出一个 Label。
import tkinter
import tkinter.messagebox
# Let's create the Tkinter window
window = tkinter.Tk()
window.title("GUI")
# Let's create a alert box with 'messagebox' function
tkinter.messagebox.showinfo("Alert Message", "This is just a alert message!")
# Let's also create a question for the user and based upon the response [Yes or No Question] display a message.
response = tkinter.messagebox.askquestion("Tricky Question", "Do you love Deep Learning?")
# A basic 'if/else' block where if user clicks on 'Yes' then it returns 1 else it returns 0. For each response you will display a message with the help of 'Label' method.
if response == 1:
tkinter.Label(window, text = "Yes, offcourse I love Deep Learning!").pack()
else:
tkinter.Label(window, text = "No, I don't love Deep Learning!").pack()
window.mainloop()
快速运行以上代码,看看输出。
渲染图片
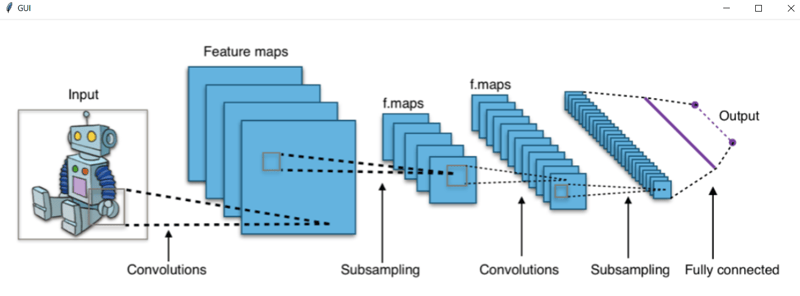
如果您一直坚持学习到这里,那么在 GUI 中添加图片和图标就会变得很容易。您只需使用 Tkinter 的 PhotoImage 方法,并将 file_path 作为参数传入即可。
事不宜迟,让我们快速编写代码,在 GUI 上显示一张图片。
import tkinter
# Let's create the Tkinter window
window = tkinter.Tk()
window.title("GUI")
# In order to display the image in a GUI, you will use the 'PhotoImage' method of Tkinter. It will an image from the directory (specified path) and store the image in a variable.
icon = tkinter.PhotoImage(file = "CNN.png")
# Finally, to display the image you will make use of the 'Label' method and pass the 'image' variriable as a parameter and use the pack() method to display inside the GUI.
label = tkinter.Label(window, image = icon)
label.pack()
window.mainloop()
如果您能坚持学到这里,做得很棒!
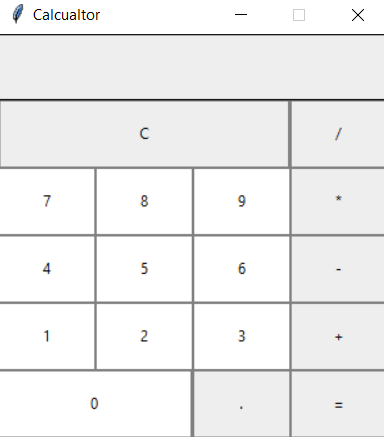
作为加餐,您将使用到目前为止所学的知识创建一个 计算器。让我们在一个精彩的收尾中结束本教程。
使用 Tkinter 创建计算器
每个 GUI 应用大致包括两个步骤。
- 创建用户界面
- 为 GUI 添加功能
让我们开始创建计算器。大多数代码都是不言自明的,部分代码行附有注释说明。
from tkinter import *
# Let's create the Tkinter window
window = Tk()
# Then, you will define the size of the window in width(312) and height(324) using the 'geometry' method
window.geometry("312x324")
# In order to prevent the window from getting resized you will call 'resizable' method on the window
window.resizable(0, 0)
#Finally, define the title of the window
window.title("Calcualtor")
# Let's now define the required functions for the Calculator to function properly.
# 1. First is the button click 'btn_click' function which will continuously update the input field whenever a number is entered or any button is pressed it will act as a button click update.
def btn_click(item):
global expression
expression = expression + str(item)
input_text.set(expression)
# 2. Second is the button clear 'btn_clear' function clears the input field or previous calculations using the button "C"
def btn_clear():
global expression
expression = ""
input_text.set("")
# 3. Third and the final function is button equal ("=") 'btn_equal' function which will calculate the expression present in input field. For example: User clicks button 2, + and 3 then clicks "=" will result in an output 5.
def btn_equal():
global expression
result = str(eval(expression)) # 'eval' function is used for evaluating the string expressions directly
# you can also implement your own function to evalute the expression istead of 'eval' function
input_text.set(result)
expression = ""
expression = ""
# In order to get the instance of the input field 'StringVar()' is used
input_text = StringVar()
# Once all the functions are defined then comes the main section where you will start defining the structure of the calculator inside the GUI.
# The first thing is to create a frame for the input field
input_frame = Frame(window, width = 312, height = 50, bd = 0, highlightbackground = "black", highlightcolor = "black", highlightthickness = 1)
input_frame.pack(side = TOP)
# Then you will create an input field inside the 'Frame' that was created in the previous step. Here the digits or the output will be displayed as 'right' aligned
input_field = Entry(input_frame, font = ('arial', 18, 'bold'), textvariable = input_text, width = 50, bg = "#eee", bd = 0, justify = RIGHT)
input_field.grid(row = 0, column = 0)
input_field.pack(ipady = 10) # 'ipady' is an internal padding to increase the height of input field
# Once you have the input field defined then you need a separate frame which will incorporate all the buttons inside it below the 'input field'
btns_frame = Frame(window, width = 312, height = 272.5, bg = "grey")
btns_frame.pack()
# The first row will comprise of the buttons 'Clear (C)' and 'Divide (/)'
clear = Button(btns_frame, text = "C", fg = "black", width = 32, height = 3, bd = 0, bg = "#eee", cursor = "hand2", command = lambda: btn_clear()).grid(row = 0, column = 0, columnspan = 3, padx = 1, pady = 1)
divide = Button(btns_frame, text = "", fg = "black", width = 10, height = 3, bd = 0, bg = "#eee", cursor = "hand2", command = lambda: btn_click("")).grid(row = 0, column = 3, padx = 1, pady = 1)
# The second row will comprise of the buttons '7', '8', '9' and 'Multiply (*)'
seven = Button(btns_frame, text = "7", fg = "black", width = 10, height = 3, bd = 0, bg = "#fff", cursor = "hand2", command = lambda: btn_click(7)).grid(row = 1, column = 0, padx = 1, pady = 1)
eight = Button(btns_frame, text = "8", fg = "black", width = 10, height = 3, bd = 0, bg = "#fff", cursor = "hand2", command = lambda: btn_click(8)).grid(row = 1, column = 1, padx = 1, pady = 1)
nine = Button(btns_frame, text = "9", fg = "black", width = 10, height = 3, bd = 0, bg = "#fff", cursor = "hand2", command = lambda: btn_click(9)).grid(row = 1, column = 2, padx = 1, pady = 1)
multiply = Button(btns_frame, text = "*", fg = "black", width = 10, height = 3, bd = 0, bg = "#eee", cursor = "hand2", command = lambda: btn_click("*")).grid(row = 1, column = 3, padx = 1, pady = 1)
# The third row will comprise of the buttons '4', '5', '6' and 'Subtract (-)'
four = Button(btns_frame, text = "4", fg = "black", width = 10, height = 3, bd = 0, bg = "#fff", cursor = "hand2", command = lambda: btn_click(4)).grid(row = 2, column = 0, padx = 1, pady = 1)
five = Button(btns_frame, text = "5", fg = "black", width = 10, height = 3, bd = 0, bg = "#fff", cursor = "hand2", command = lambda: btn_click(5)).grid(row = 2, column = 1, padx = 1, pady = 1)
six = Button(btns_frame, text = "6", fg = "black", width = 10, height = 3, bd = 0, bg = "#fff", cursor = "hand2", command = lambda: btn_click(6)).grid(row = 2, column = 2, padx = 1, pady = 1)
minus = Button(btns_frame, text = "-", fg = "black", width = 10, height = 3, bd = 0, bg = "#eee", cursor = "hand2", command = lambda: btn_click("-")).grid(row = 2, column = 3, padx = 1, pady = 1)
# The fourth row will comprise of the buttons '1', '2', '3' and 'Addition (+)'
one = Button(btns_frame, text = "1", fg = "black", width = 10, height = 3, bd = 0, bg = "#fff", cursor = "hand2", command = lambda: btn_click(1)).grid(row = 3, column = 0, padx = 1, pady = 1)
two = Button(btns_frame, text = "2", fg = "black", width = 10, height = 3, bd = 0, bg = "#fff", cursor = "hand2", command = lambda: btn_click(2)).grid(row = 3, column = 1, padx = 1, pady = 1)
three = Button(btns_frame, text = "3", fg = "black", width = 10, height = 3, bd = 0, bg = "#fff", cursor = "hand2", command = lambda: btn_click(3)).grid(row = 3, column = 2, padx = 1, pady = 1)
plus = Button(btns_frame, text = "+", fg = "black", width = 10, height = 3, bd = 0, bg = "#eee", cursor = "hand2", command = lambda: btn_click("+")).grid(row = 3, column = 3, padx = 1, pady = 1)
# Finally, the fifth row will comprise of the buttons '0', 'Decimal (.)', and 'Equal To (=)'
zero = Button(btns_frame, text = "0", fg = "black", width = 21, height = 3, bd = 0, bg = "#fff", cursor = "hand2", command = lambda: btn_click(0)).grid(row = 4, column = 0, columnspan = 2, padx = 1, pady = 1)
point = Button(btns_frame, text = ".", fg = "black", width = 10, height = 3, bd = 0, bg = "#eee", cursor = "hand2", command = lambda: btn_click(".")).grid(row = 4, column = 2, padx = 1, pady = 1)
equals = Button(btns_frame, text = "=", fg = "black", width = 10, height = 3, bd = 0, bg = "#eee", cursor = "hand2", command = lambda: btn_equal()).grid(row = 4, column = 3, padx = 1, pady = 1)
window.mainloop()
结语
恭喜您完成本教程!
基于您在本教程中的所学,您已经可以开始制作一些简单的 GUI 应用。您还需要进一步学习更多用于样式和与 GUI 对象交互的方法。
一个很有用的练习是尝试开发类似计算器的应用,这将帮助您增强信心,并更全面地了解使用 Tkinter 可以实现什么。
仍有许多内容值得深入,您可能想要探索 Tkinter 中的类这一概念,相关内容可参考这份文档。
如对本教程有任何疑问,欢迎在下方评论区留言。
在开始之前,您应当先熟悉 Python,再来学习 Tkinter。如果您是 Python 新手,请查看 DataCamp 的 Python 入门 课程以及我们的Python 学习指南。
简介
大多数情况下,您会在命令行终端或 IDE(集成开发环境)中编写并运行代码,程序按预期在终端或 IDE 内输出结果。不过,如果您希望系统拥有一个更美观的用户界面,或者您的应用(用例)需要一个 GUI,该怎么办呢?
GUI 本质上就是一种桌面应用程序,为您提供一个可与计算机交互的界面,丰富您向代码发出命令(命令行输入)的体验。它们被用于在台式机、笔记本电脑以及其他电子设备上执行各种任务等。
一些使用 GUI 的应用示例包括:
另一个有趣的用例是:在笔记本电脑上使用 GUI 控制无人机,GUI 可能包含用于操纵无人机的按钮,以及一个可实时显示无人机摄像头画面的屏幕。
让我们看看 Python 提供的用于开发 GUI 的一些框架:
最后,也是本教程要讨论的框架:Tkinter!
注意:
Tkinter在 Python3 中预装,您无需另行安装。现在,让我们借助 Tkinter 构建一个非常简单的 GUI,并通过流程图来理解其工作方式。
让我们拆解上述流程图,了解每个组件的作用!
Tkinter模块。tkinter.Tk()方法初始化窗口管理器,并将其赋值给一个变量。该方法会创建一个空白窗口,顶部带有关闭、最大化和最小化按钮,和常见 GUI 一样。window.title(title_of_the_window)将窗口标题重命名为您喜欢的内容。Label的widget,用于在窗口中插入一些文本。geometry management属性pack(),以所需大小显示该部件。在终端中运行以上代码后,您应会看到类似下图的输出。
同样,您也可以使用
Button小部件,GUI 将显示一个按钮,而不是文本(Label)。您已经学会了在 Tkinter 中使用部件,接下来我们来了解 Tkinter 中还有哪些其他部件,以及它们各自的功能。