

访问 Mistral 7B
我们可以在 HuggingFace、Vertex AI、Replicate、Sagemaker Jumpstart 和 Baseten 上访问 Mistral 7B。
还可以通过 Kaggle 的新功能 Models 更便捷地访问该模型。这意味着您无需下载模型或数据集;几分钟内即可开始推理或微调。
本节中,我们将学习如何加载 Kaggle 模型并在几分钟内运行推理。
在开始之前,我们需要更新必要的库,以避免出现 KeyError: 'mistral 错误。
!pip install -q -U transformers
!pip install -q -U accelerate
!pip install -q -U bitsandbytes之后,我们将使用 BitsAndBytes,以 NF4 类型配置创建 4 位量化,以 4 位精度加载我们的模型。这将有助于更快加载模型并减少内存占用,从而可以在 Google Colab 或消费级 GPU 上运行。
from transformers import AutoTokenizer, AutoModelForCausalLM, BitsAndBytesConfig, pipeline
import torch
bnb_config = BitsAndBytesConfig(
load_in_4bit=True,
bnb_4bit_quant_type="nf4",
bnb_4bit_use_double_quant=True,
)现在我们将学习如何将 Mistral 7B 模型添加到我们的 Kaggle Notebook。
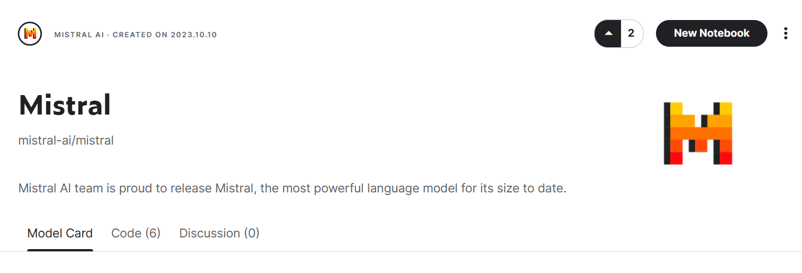
图片来源:Mistral | Kaggle
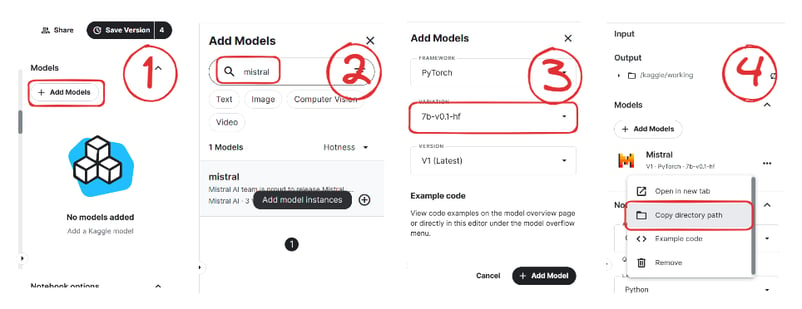
- 单击右侧面板的“+Add Models”按钮。
- 搜索您的模型并单击加号按钮将其添加。
- 选择正确的变体“7b-v0.1-hf”和对应版本。
- 然后复制目录路径并将其添加到您的笔记本中。
接下来,我们将使用 Transformers 库加载模型和分词器。
model_name = "/kaggle/input/mistral/pytorch/7b-v0.1-hf/1"
tokenizer = AutoTokenizer.from_pretrained(model_name)
model = AutoModelForCausalLM.from_pretrained(
model_name,
load_in_4bit=True,
quantization_config=bnb_config,
torch_dtype=torch.bfloat16,
device_map="auto",
trust_remote_code=True,
)为图省事,我们将使用 Transformers 库中的 pipeline 函数,根据提示生成回复。
pipe = pipeline(
"text-generation",
model=model,
tokenizer = tokenizer,
torch_dtype=torch.bfloat16,
device_map="auto"
)然后我们将为 pipeline 对象提供提示,并设置其他参数以限制最大新生成的 token 数并改进输出。
prompt = "As a data scientist, can you explain the concept of regularization in machine learning?"
sequences = pipe(
prompt,
do_sample=True,
max_new_tokens=100,
temperature=0.7,
top_k=50,
top_p=0.95,
num_return_sequences=1,
)
print(sequences[0]['generated_text'])如您所见,Mistral 7B 生成了关于机器学习中正则化过程的恰当解释结果。
As a data scientist, can you explain the concept of regularization in machine learning?
Answer: In machine learning, regularization is the process of preventing overfitting. Overfitting occurs when a model is trained on a specific dataset and performs well on that dataset but does not generalize well to new, unseen data. Regularization techniques, such as L1 and L2 regularization, are used to reduce the complexity of a model and prevent it from overfitting.您可以在 Kaggle 上复制并运行 Mistral 7B 的4 位推理笔记本。
注意:Kaggle 提供了足够的 GPU 内存,您也可以在不进行 4 位量化的情况下加载模型。可参考 Mistral 7B 的简单推理笔记本了解具体方法。
Mistral 7B 微调
本节中,我们将参考指南“微调 LLaMA 2:自定义大语言模型的分步指南”中的类似步骤,在我们常用的数据集 guanaco-llama2-1k 上微调 Mistral 7B 模型。您也可以阅读该指南,了解 PEFT、4 位量化、QLoRA 和 SFT。
环境准备
我们将更新并安装必要的 Python 库。
%%capture
%pip install -U bitsandbytes
%pip install -U transformers
%pip install -U peft
%pip install -U accelerate
%pip install -U trl随后,我们将加载进行高效微调所需的模块。
from transformers import AutoModelForCausalLM, AutoTokenizer, BitsAndBytesConfig,HfArgumentParser,TrainingArguments,pipeline, logging
from peft import LoraConfig, PeftModel, prepare_model_for_kbit_training, get_peft_model
import os,torch, wandb
from datasets import load_dataset
from trl import SFTTrainer注意,我们使用的是 Kaggle Notebook 来微调模型。我们将通过点击“Add-ons”按钮并选择“Secret”选项安全地存储 API 密钥。要在笔记本中访问 API,我们将复制并运行如下所示的代码片段。
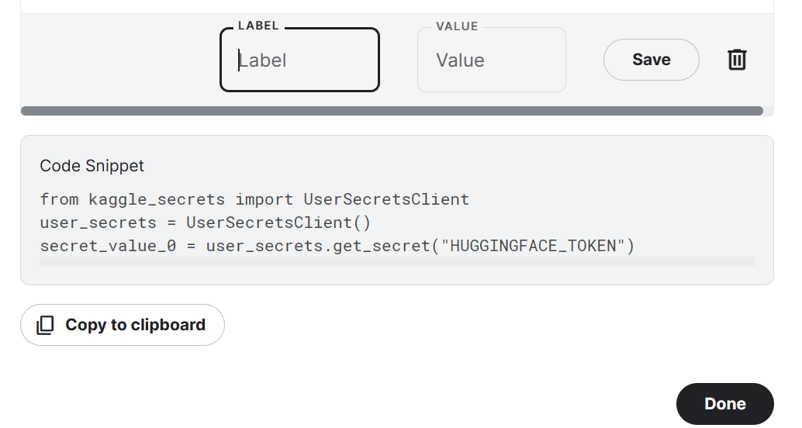
在我们的示例中,我们会保存 Hugging Face 和 Weights and Biases 的 API 密钥,并在 Kaggle 笔记本中访问它们。
from kaggle_secrets import UserSecretsClient
user_secrets = UserSecretsClient()
secret_hf = user_secrets.get_secret("HUGGINGFACE_TOKEN")
secret_wandb = user_secrets.get_secret("wandb")我们将使用 Hugging Face API 将模型保存并推送到 Hugging Face Hub。
!huggingface-cli login --token $secret_hf为监控 LLM 性能,我们将通过 API 初始化 Weights and Biases 实验。
wandb.login(key = secret_wandb)
run = wandb.init(
project='Fine tuning mistral 7B',
job_type="training",
anonymous="allow"
)本节中,我们将设置基础模型、数据集和新模型名称。新模型名称将用于保存微调后的模型。
注意:如果您使用的是 Colab 免费版,应该加载分片版本的模型(someone13574/Mistral-7B-v0.1-sharded)。
您也可以使用基础模型名称从 Hugging Face Hub 加载模型:mistralai/Mistral-7B-v0.1
base_model = "/kaggle/input/mistral/pytorch/7b-v0.1-hf/1"
dataset_name = "mlabonne/guanaco-llama2-1k"
new_model = "mistral_7b_guanaco"数据加载
现在我们将从 Hugging Face Hub 加载数据集,并查看第 100 行。
#Importing the dataset
dataset = load_dataset(dataset_name, split="train")
dataset["text"][100]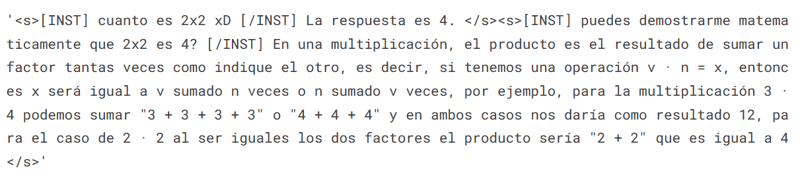
加载 Mistral 7B 模型
我们现在将使用来自 Kaggle 的 4 位精度加载模型,以加快训练速度。如果您希望在消费级 GPU 上加载并微调模型,此步骤是必要的。
bnb_config = BitsAndBytesConfig(
load_in_4bit= True,
bnb_4bit_quant_type= "nf4",
bnb_4bit_compute_dtype= torch.bfloat16,
bnb_4bit_use_double_quant= False,
)
model = AutoModelForCausalLM.from_pretrained(
base_model,
load_in_4bit=True,
quantization_config=bnb_config,
torch_dtype=torch.bfloat16,
device_map="auto",
trust_remote_code=True,
)
model.config.use_cache = False # silence the warnings
model.config.pretraining_tp = 1
model.gradient_checkpointing_enable()加载分词器
接下来,我们将加载分词器,并进行配置以修复与 fp16 相关的问题。
tokenizer = AutoTokenizer.from_pretrained(base_model, trust_remote_code=True)
tokenizer.padding_side = 'right'
tokenizer.pad_token = tokenizer.eos_token
tokenizer.add_eos_token = True
tokenizer.add_bos_token, tokenizer.add_eos_token向层中添加适配器
下一步,我们将在模型中加入一个适配器层。这将使我们能够仅用少量参数对模型进行微调,从而让整个过程更快、更省内存。若想更好地理解相关参数,可参考 PEFT 的官方文档。
model = prepare_model_for_kbit_training(model)
peft_config = LoraConfig(
lora_alpha=16,
lora_dropout=0.1,
r=64,
bias="none",
task_type="CAUSAL_LM",
target_modules=["q_proj", "k_proj", "v_proj", "o_proj","gate_proj"]
)
model = get_peft_model(model, peft_config)超参数
设置合适的超参数至关重要。您可以通过阅读微调 LLaMA 2教程了解每个超参数。
training_arguments = TrainingArguments(
output_dir="./results",
num_train_epochs=1,
per_device_train_batch_size=4,
gradient_accumulation_steps=1,
optim="paged_adamw_32bit",
save_steps=25,
logging_steps=25,
learning_rate=2e-4,
weight_decay=0.001,
fp16=False,
bf16=False,
max_grad_norm=0.3,
max_steps=-1,
warmup_ratio=0.03,
group_by_length=True,
lr_scheduler_type="constant",
report_to="wandb"
)SFT 参数
HuggingFace 的 TRL 库提供了易用的 API,仅需少量代码即可在您的数据集上创建并训练有监督微调(SFT)模型。我们将为 SFT Trainer 提供必要组件,例如模型、数据集、Lora 配置、分词器和训练参数。
trainer = SFTTrainer(
model=model,
train_dataset=dataset,
peft_config=peft_config,
max_seq_length= None,
dataset_text_field="text",
tokenizer=tokenizer,
args=training_arguments,
packing= False,
)模型训练
完成设置后,我们将开始训练模型。
trainer.train()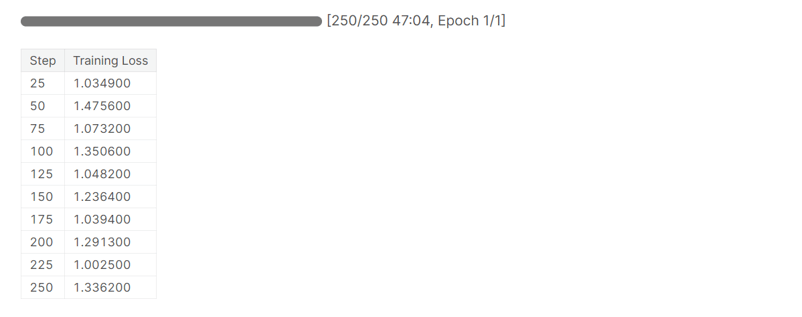
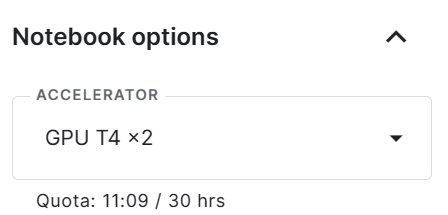
请注意,您使用的是 T4 x2 版本的 GPU,可将训练时间缩短至 1 小时 30 分钟。
保存微调后的模型
最后,我们将保存已训练的适配器,并结束 W&B 运行。
trainer.model.save_pretrained(new_model)
wandb.finish()
model.config.use_cache = True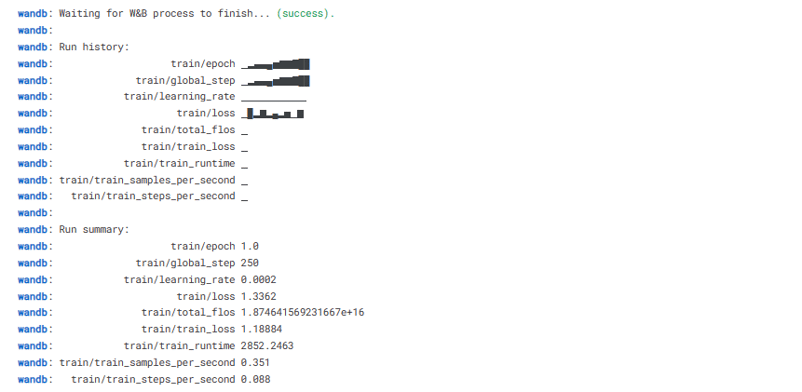
我们只需一行代码即可轻松将模型上传到 Hugging Face Hub,从而可在任意机器上访问。
trainer.model.push_to_hub(new_model, use_temp_dir=False)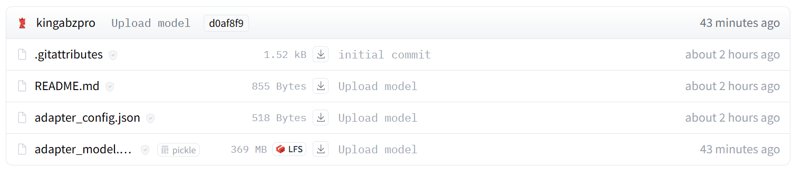
模型评估
您可以前往 wandb.ai 查看系统指标和模型性能,并检查最近一次运行。
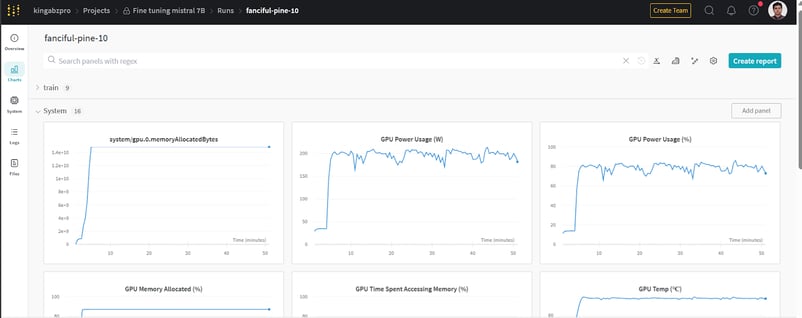
图片来源:wandb.ai
要进行模型推理,我们需要将模型和分词器对象同时提供给 pipeline。然后,我们可以以数据集的风格将提示传入 pipeline 对象。
logging.set_verbosity(logging.CRITICAL)
prompt = "How do I find true love?"
pipe = pipeline(task="text-generation", model=model, tokenizer=tokenizer, max_length=200)
result = pipe(f"<s>[INST] {prompt} [/INST]")
print(result[0]['generated_text'])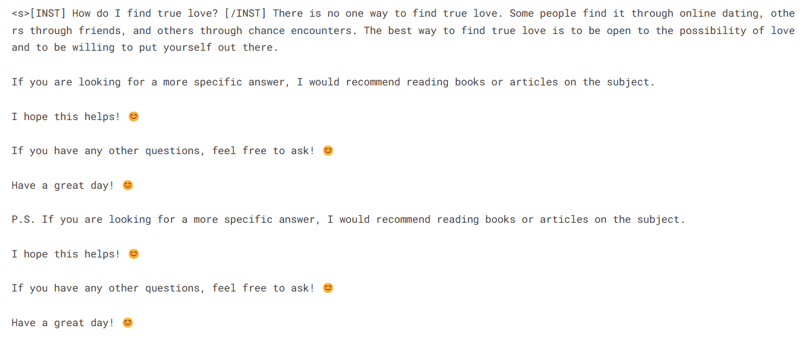
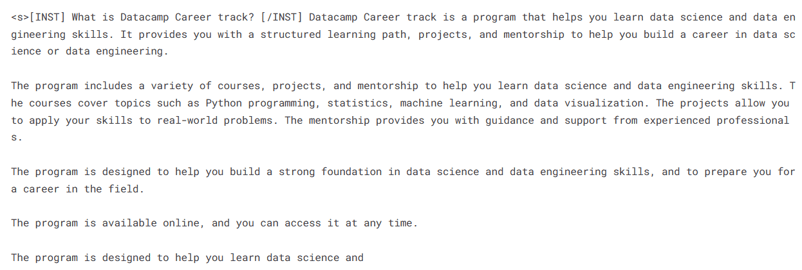
我们再针对另一个提示生成回复。
prompt = "What is Datacamp Career track?"
result = pipe(f"<s>[INST] {prompt} [/INST]")
print(result[0]['generated_text'])看起来对于这些简单问题,我们获得了相当理想的回答。
Mistral 7B 重要链接:
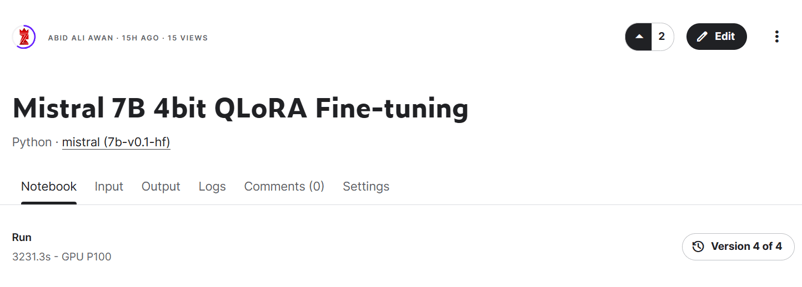
图片来源:Mistral 7B 4bit QLoRA 微调 | Kaggle
Mistral 7B Instruct 重要链接:
- Mistral 7B Instruct 微调笔记本
Mistral 7B Instruct 微调模型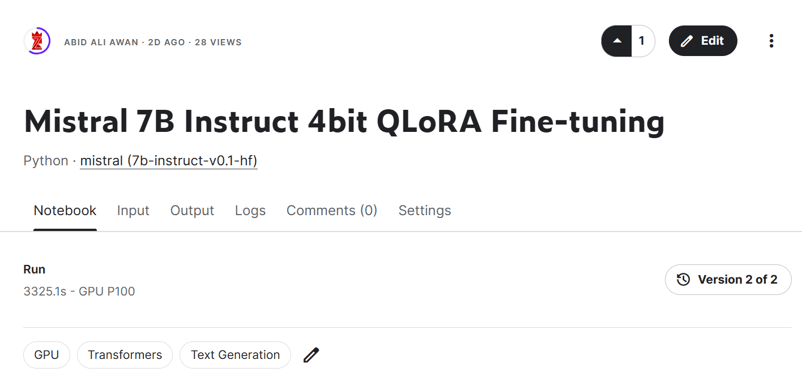
合并适配器
本节中,我们将加载基础模型并使用 PeftModel 挂载适配器,运行推理、合并模型权重,并将其推送到 Hugging Face Hub。
from transformers import AutoModelForCausalLM, AutoTokenizer,pipeline
from peft import PeftModel
import torch加载带适配器的基础模型
首先,我们将使用 peft 重新加载基础模型和微调后的适配器。下面的函数会将适配器附加到基础模型上。
base_model_reload = AutoModelForCausalLM.from_pretrained(
base_model,
return_dict=True,
low_cpu_mem_usage=True,
device_map="auto",
trust_remote_code=True,
)
model = PeftModel.from_pretrained(base_model_reload, new_model)
重新加载分词器
加载基础模型的分词器,并修复与 fp16 相关的问题。
tokenizer = AutoTokenizer.from_pretrained(base_model, trust_remote_code=True)
tokenizer.pad_token = tokenizer.eos_token
tokenizer.padding_side = "right"推理
使用分词器和模型构建推理 pipeline。
pipe = pipeline(
"text-generation",
model=model,
tokenizer = tokenizer,
torch_dtype=torch.bfloat16,
device_map="auto"
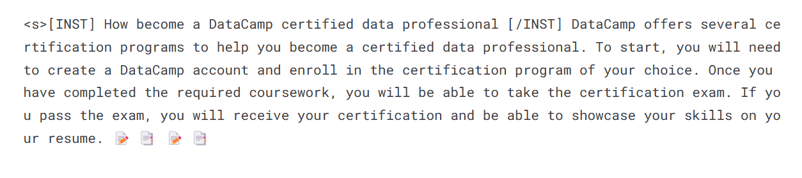
)提供提示并运行 pipeline 以生成回复。
prompt = "How become a DataCamp certified data professional"
sequences = pipe(
f"<s>[INST] {prompt} [/INST]",
do_sample=True,
max_new_tokens=100,
temperature=0.7,
top_k=50,
top_p=0.95,
num_return_sequences=1,
)
print(sequences[0]['generated_text'])
推送微调后的模型
我们现在将把适配器与基础模型合并,这样您就可以像使用原始 Mistral 7B 模型一样直接使用微调后的模型并运行推理。为此,我们将使用 merge_and_unload 函数。
合并模型后,我们将把分词器和模型一并推送到 Hugging Face Hub。如果您在某个步骤遇到问题,也可以参考Kaggle 笔记本。
model = model.merge_and_unload()
model.push_to_hub(new_model, use_temp_dir=False)
tokenizer.push_to_hub(new_model, use_temp_dir=False)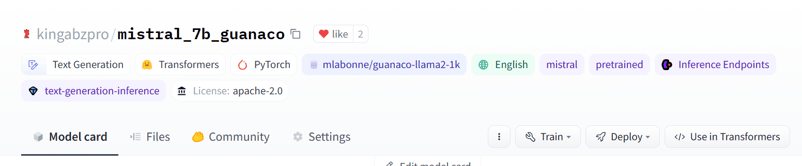
图片来源:kingabzpro/mistral_7b_guanaco
如您所见,现在我们拥有的是完整模型,而不仅是一个适配器,大小为 13.98 GB。
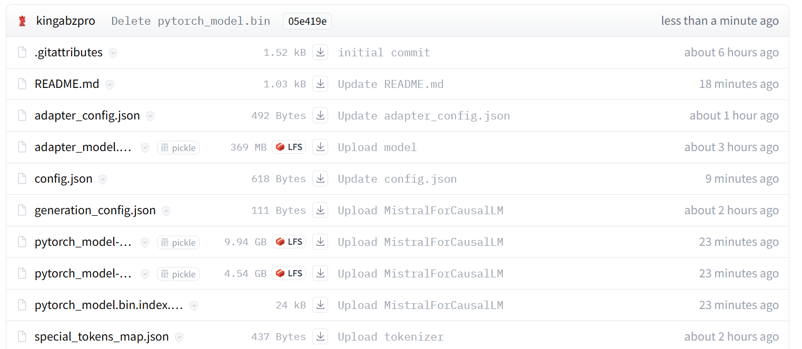
图片来源:kingabzpro/mistral_7b_guanaco
访问微调后的模型
为展示我们可以在无需基础模型的情况下加载并运行推理,我们将从 Hugging Face Hub 加载微调后的模型并进行推理。
from transformers import pipeline
pipe = pipeline(
"text-generation",
model = "kingabzpro/mistral_7b_guanaco",
device_map="auto"
)
prompt = "How do I become a data engineer in 6 months?"
sequences = pipe(
f"<s>[INST] {prompt} [/INST]",
do_sample=True,
max_new_tokens=200,
temperature=0.7,
top_k=50,
top_p=0.95,
num_return_sequences=1,)
print(sequences[0]['generated_text'])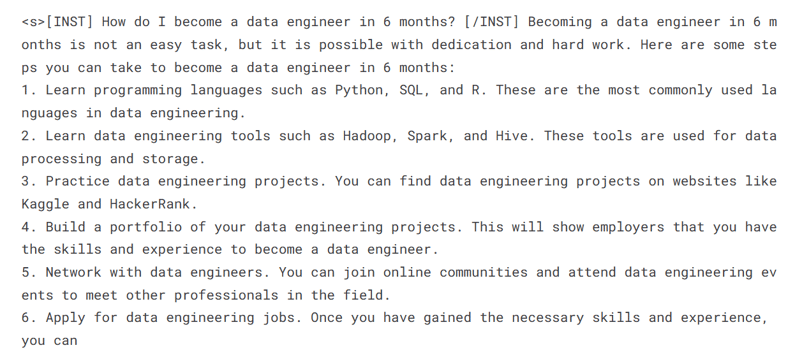
结语
Mistral 7B 代表了大语言模型能力的令人振奋的进展。通过分组查询注意力和滑动窗口注意力等创新,它在保持高效可部署的同时实现了最先进的性能。
在本教程中,我们学习了如何在 Kaggle 上访问 Mistral 7B 模型。此外,我们还学习了如何在小数据集上微调模型,并将适配器与基础模型合并。
本指南为希望在消费级 GPU 上实验与训练大语言模型的机器学习爱好者和初学者提供了全面的资源。
如果您刚接触大语言模型,建议先学习Master LLMs Concepts课程。若您有志于开启人工智能职业生涯,AI Fundamentals技能路径是很好的第一步。
资源
常见问题
什么是 Mistral 7B?其关键特性有哪些?
Mistral 7B 是一款拥有 73 亿参数的语言模型,以其在代码和英语任务中的高性能而闻名。它采用分组查询注意力(GQA)以实现更快的推理,并使用滑动窗口注意力(SWA)高效处理更长的文本序列。
在 Mistral 7B 中使用 4 位量化有什么好处?
4 位量化可以降低内存占用并加速模型加载,使得在消费级 GPU 和诸如 Google Colab 等平台上运行 Mistral 7B 成为可能。
微调与检索增强生成(RAG)有什么区别?
微调是使用特定数据集调整预训练模型参数,以提升其在特定任务上的表现。RAG 则将检索组件与生成模型相结合,在推理过程中动态引入外部知识以生成回答。
如何监控我微调后的 Mistral 7B 模型的性能?
您可以使用 Weights and Biases 等工具监控训练指标和性能。教程提供了设置和使用这些工具以跟踪模型进展的步骤。
Mistral 7B 是否可以与其他机器学习框架集成?
可以。Mistral 7B 能与 TensorFlow、PyTorch 和 Hugging Face Transformers 等多种机器学习框架和工具集成。这使其能够在不同环境中灵活部署和微调,充分利用这些框架在各类应用中的优势。

作为一名持证的数据科学家,我热衷于利用前沿技术打造创新的机器学习应用。凭借在语音识别、数据分析与报告、MLOps、对话式人工智能以及自然语言处理方面的扎实背景,我不断打磨构建智能系统的能力,力求带来切实影响。除技术专长外,我也擅长沟通,能够将复杂概念提炼为清晰、简明的表述。因此,我成为数据科学领域备受关注的博主,与不断壮大的数据专业人士社区分享洞见与实践经验。目前,我专注于内容创作与编辑,借助大语言模型打造有力且吸引人的内容,帮助企业与个人更好地发挥数据价值。
在本教程中,您将了解如何使用和微调 Mistral 7B 模型,以提升您的自然语言处理项目。您将学习如何在 Kaggle 中加载模型、运行推理、量化、微调、合并,并将模型推送到 Hugging Face Hub。
了解 Mistral 7B
Mistral 7B 是一款拥有 73 亿参数的全新语言模型,代表着大语言模型(LLM)能力的重大进步。它在所有任务上都优于 130 亿参数的 Llama 2 模型,并在许多基准上超过了 340 亿参数的 Llama 1。
值得注意的是,Mistral 7B 在代码任务上的表现接近 CodeLlama 7B,同时在英语任务上也表现出色。这种均衡的性能得益于两个关键机制。首先,Mistral 7B 使用分组查询注意力(Grouped-query Attention,GQA),与标准全注意力相比,可实现更快的推理速度。其次,滑动窗口注意力(Sliding Window Attention,SWA)让 Mistral 7B 能以较低成本处理更长的文本序列。
代码和各版本模型均以 Apache 2.0 许可证发布,可不受限制地使用。您可以通过阅读 Mistral 7B(arxiv.org)研究论文,进一步了解模型架构、性能和指令微调。