
Cursus
Conteneurisation et virtualisation avec Docker et Kubernetes
13 h
Vous venez d'arrêter le conteneur Docker afin de mettre à jour un fichier de configuration, mais lorsque vous l'avez redémarré, toutes les données avaient disparu. J'ai déjà vécu cette situation.
Cela se produit car les conteneurs sont éphémères par défaut : lorsqu'ils sont supprimés, toutes les données stockées dans leur couche inscriptible disparaissent. Les applications réelles ne peuvent pas fonctionner de cette manière. Il est nécessaire de disposer de bases de données persistantes, de fichiers de configuration qui survivent aux redémarrages et de journaux auxquels vous pouvez réellement accéder.
Le montage Docker résout ce problème en connectant le stockage du conteneur à des emplacements externes. Il existe trois types : les volumes pour les données de production, les montages liés pour les flux de travail de développement et les tmpfs pour les fichiers temporaires stockés en mémoire.
Dans cet article, je vais vous expliquer comment choisir le type de support adapté à votre utilisation et comment l'installer correctement. Pour bien comprendre tous les aspects abordés dans cet article, il est nécessaire d'avoir une bonne connaissance de Docker et de la conteneurisation. Veuillez vous inscrire à notre cours Docker intermédiaire pour vous familiariser rapidement avec le sujet.
Les conteneurs Docker utilisent un système de fichiers en couches qui traite tout comme temporaire par défaut.
Lorsque vous créez une image Docker, chaque instruction de votre fichier Dockerfile génère une nouvelle couche en lecture seule. Ces couches s'empilent les unes sur les autres comme un jeu de cartes. Si vous téléchargez une image Ubuntu avec Python installé, vous obtiendrez une couche pour le système d'exploitation de base et une autre pour Python.
Le problème est que toutes ces couches sont en lecture seule. Il n'est pas possible de les modifier.
Lorsque vous démarrez un conteneur, Docker ajoute une couche supplémentaire au-dessus : la couche de conteneur inscriptible.
C'est ici que tous les changements se produisent. Chaque fichier que vous créez, chaque configuration que vous modifiez et chaque enregistrement de tableau que vous ajoutez sont conservés ici.
Cela semble intéressant, mais le problème est que cette couche est liée au cycle de vie du conteneur.
Lorsque vous arrêtez et supprimez le conteneur avec ` docker rm`, la couche inscriptible disparaît. Tout ce sur quoi vous avez travaillé a disparu. Docker ne demandera pas de confirmation. Il supprime simplement tout.
Cette conception est pertinente pour les applications sans état qui n'ont pas besoin de mémoriser quoi que ce soit entre deux exécutions. Cependant, les applications réelles ne sont pas sans état.
La couche inscriptible présente deux problèmes majeurs pour les environnements de production.
Tout d'abord, vous risquez de perdre des données lorsque les conteneurs s'arrêtent. Quelle est l'utilité d'un conteneur de base de données qui perd toutes ses lignes après un redémarrage ? Je ne vois pas d'autre solution que d'exécuter des tests d'intégration pour votre application.
Deuxièmement, il n'est pas possible de partager des données entre les conteneurs. Supposons que vous exécutiez une application web et un processus d'arrière-plan qui ont tous deux besoin d'accéder aux mêmes fichiers. Si ces fichiers se trouvent dans la couche inscriptible d'un conteneur, l'autre conteneur ne peut pas les voir.
Les montages Docker résolvent ces deux problèmes en connectant les conteneurs à un stockage qui existe en dehors du cycle de vie du conteneur. Vous pouvez monter un répertoire à partir de votre machine hôte ou d'un volume géré par Docker. Vos données sont conservées même lorsque les conteneurs sont supprimés. Plusieurs conteneurs peuvent être montés au même emplacement et partager des fichiers en temps réel.
C'est pourquoi il est nécessaire d'utiliser des supports. Passons maintenant en revue les différents types de montures, puis je vous expliquerai comment elles fonctionnent.
Docker propose trois méthodes pour gérer les données persistantes, chacune résolvant des problèmes différents. Voici les fonctionnalités de chaque type et les situations dans lesquelles il est recommandé de les utiliser.
Les volumes constituent la solution par défaut de Docker pour le stockage persistant.
Docker crée et gère les volumes pour vous dans un répertoire dédié sur votre machine hôte. Il n'est pas nécessaire de connaître l'emplacement de ce répertoire, tout est géré pour vous. Cela rend les volumes portables entre différents systèmes et sûrs à utiliser en production.
Lorsque vous retirez un conteneur, le volume reste inchangé. Si vous démarrez un nouveau conteneur et y attachez le même volume, toutes vos données seront conservées à l'endroit où vous les avez laissées.
Les volumes sont particulièrement adaptés aux bases de données de production, à l'état des applications et à toutes les données dont la perte serait préjudiciable.
Les montages liés connectent un répertoire spécifique de votre machine hôte directement à un conteneur.
Vous sélectionnez le chemin d'accès exact sur votre hôte, par exemple /home/user/project, et Docker le mappe dans le conteneur. Lorsque vous modifiez un fichier sur votre hôte, le conteneur détectera immédiatement le changement. Si vous modifiez un fichier dans le conteneur, il apparaîtra sur votre hôte.
Cette synchronisation en temps réel rend les montages liés idéaux pour le développement.
Cependant, les montages liés comportent des risques. Ils exposent les chemins d'accès hôtes aux conteneurs et dépendent de structures de répertoires spécifiques qui peuvent ne pas exister sur d'autres machines.
Les montages tmpfs stockent les données dans la mémoire de votre hôte plutôt que sur le disque.
Aucune donnée n'est enregistrée dans le système de fichiers. Lorsque le conteneur s'arrête, les données disparaissent complètement. Cela rend les montages tmpfs utiles pourl' e de données temporaires que vous ne souhaitez pas conserver, telles que les jetons d'authentification, les données de session ou les fichiers cache que vous reconstruirez de toute façon.
Cela dit, les montages tmpfs sont limités par la mémoire RAM disponible et ne fonctionnent que sur les hôtes Linux.
Les volumes constituent la solution de stockage prête à l'emploi de Docker, et il est recommandé de les utiliser par défaut, sauf si vous avez une raison particulière de ne pas le faire.
Ils sont entièrement gérés par Docker, fonctionnent de manière cohérente sur différentes plateformes et résistent à la suppression des conteneurs grâce à leur conception. Si vous gérez des bases de données, stockez l'état d'une application ou traitez des données qui doivent survivre à un seul conteneur, les volumes constituent la solution.
Docker stocke les volumes dans un répertoire dédié sur votre machine hôte :
/var/lib/docker/volumes/~/Library/Containers/com.docker.docker/Data/vms/0/data/\\wsl$\docker-desktop-data\data\docker\volumes\, en supposant que le backend WSL2 est utilisé.Veuillez noter que vous ne gérez pas ce répertoire directement. Docker gère la création, les autorisations et le nettoyage via sa propre API. Cette séparation signifie que les volumes fonctionnent de la même manière, que vous utilisiez Linux, Mac ou Windows, ce qui rend votre configuration de conteneurs portable entre les environnements de développement et de production.
Il est important de noter ici que les volumes existent indépendamment de tout conteneur. Lorsque vous créez un volume, que vous l'attachez à un conteneur, que vous exécutez votre application, puis que vous arrêtez et supprimez ce conteneur, le volume reste exactement où il est, avec toutes vos données intactes.
Si vous démarrez un nouveau conteneur et que vous y associez le même volume, vos données seront toujours présentes.
Il est possible de créer un volume nommé avant de démarrer un conteneur :
docker volume create mydata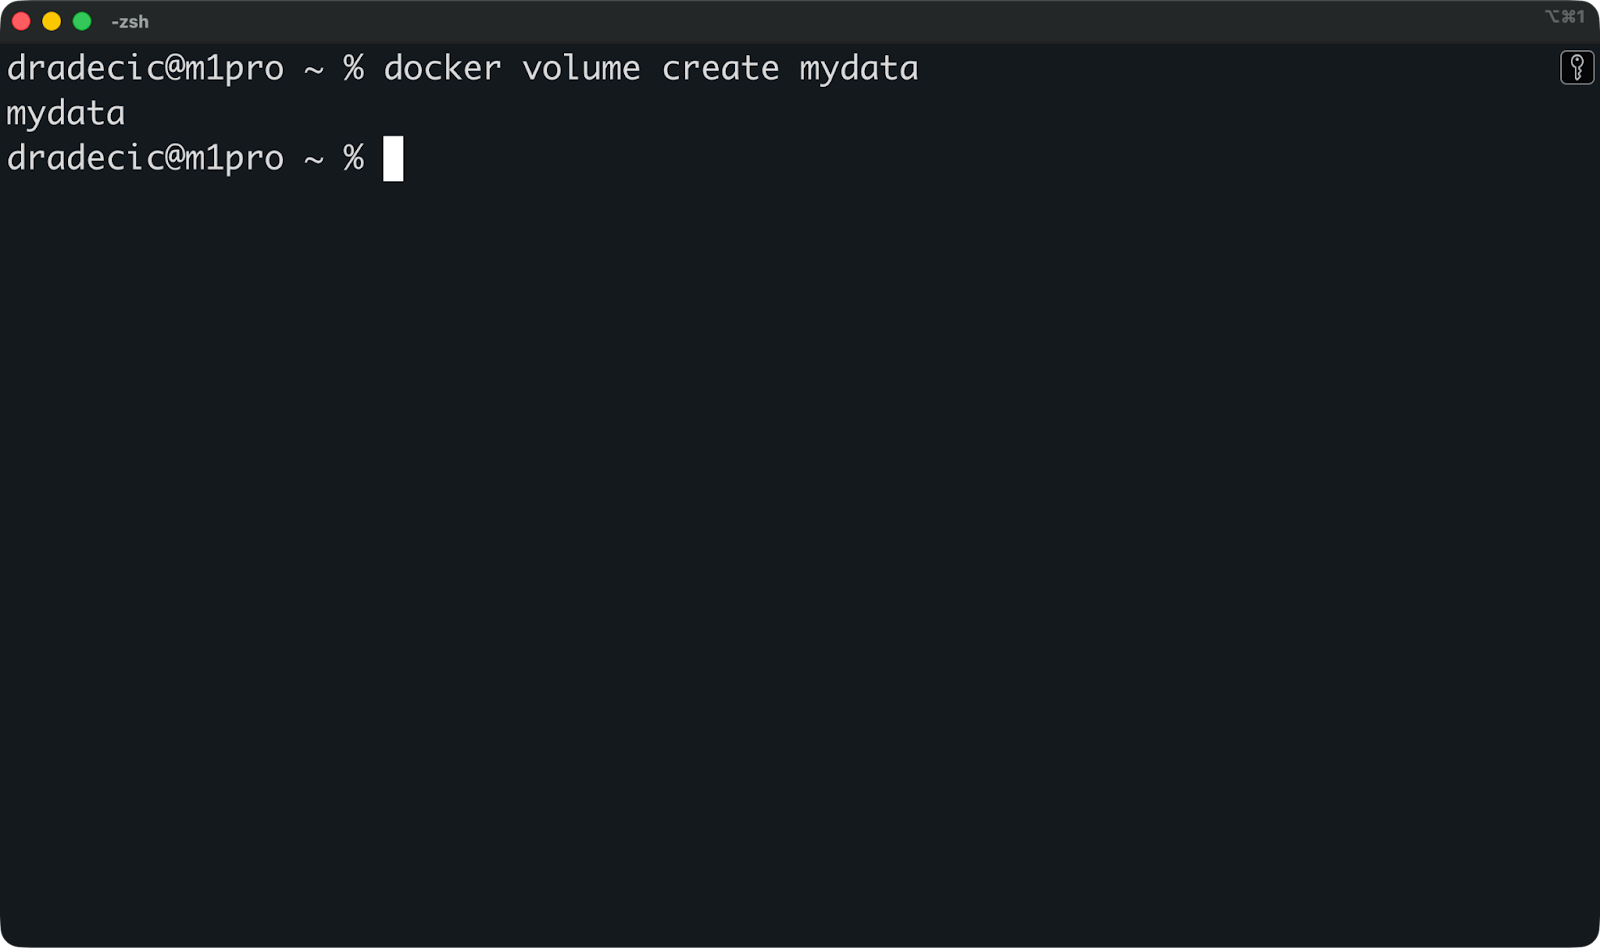
Veuillez ensuite l'attacher lorsque vous exécutez un conteneur en utilisant le drapeau ` --mount ` :
docker run -d \
  --name postgres-db \
  --mount source=mydata,target=/var/lib/postgresql/data \
  postgres:18
Cela permet de monter le volume mydata sur /var/lib/postgresql/data à l'intérieur du conteneur, où Postgres stocke ses fichiers de base de données.
Vous pouvez maintenant arrêter et supprimer ce conteneur, puis en démarrer un nouveau avec le même volume :
docker rm -f postgres-db

docker run -d \
  --name postgres-db-new \
  --mount source=mydata,target=/var/lib/postgresql/data \
  postgres:18
Votre base de données est rétablie avec toutes les tables et toutes les lignes intactes.
C'est l'objectif principal des volumes : la persistance des données tout au long du cycle de vie des conteneurs.
Vous pouvez exécuter cette commande pour vérifier quels volumes existent sur votre système :
docker volume ls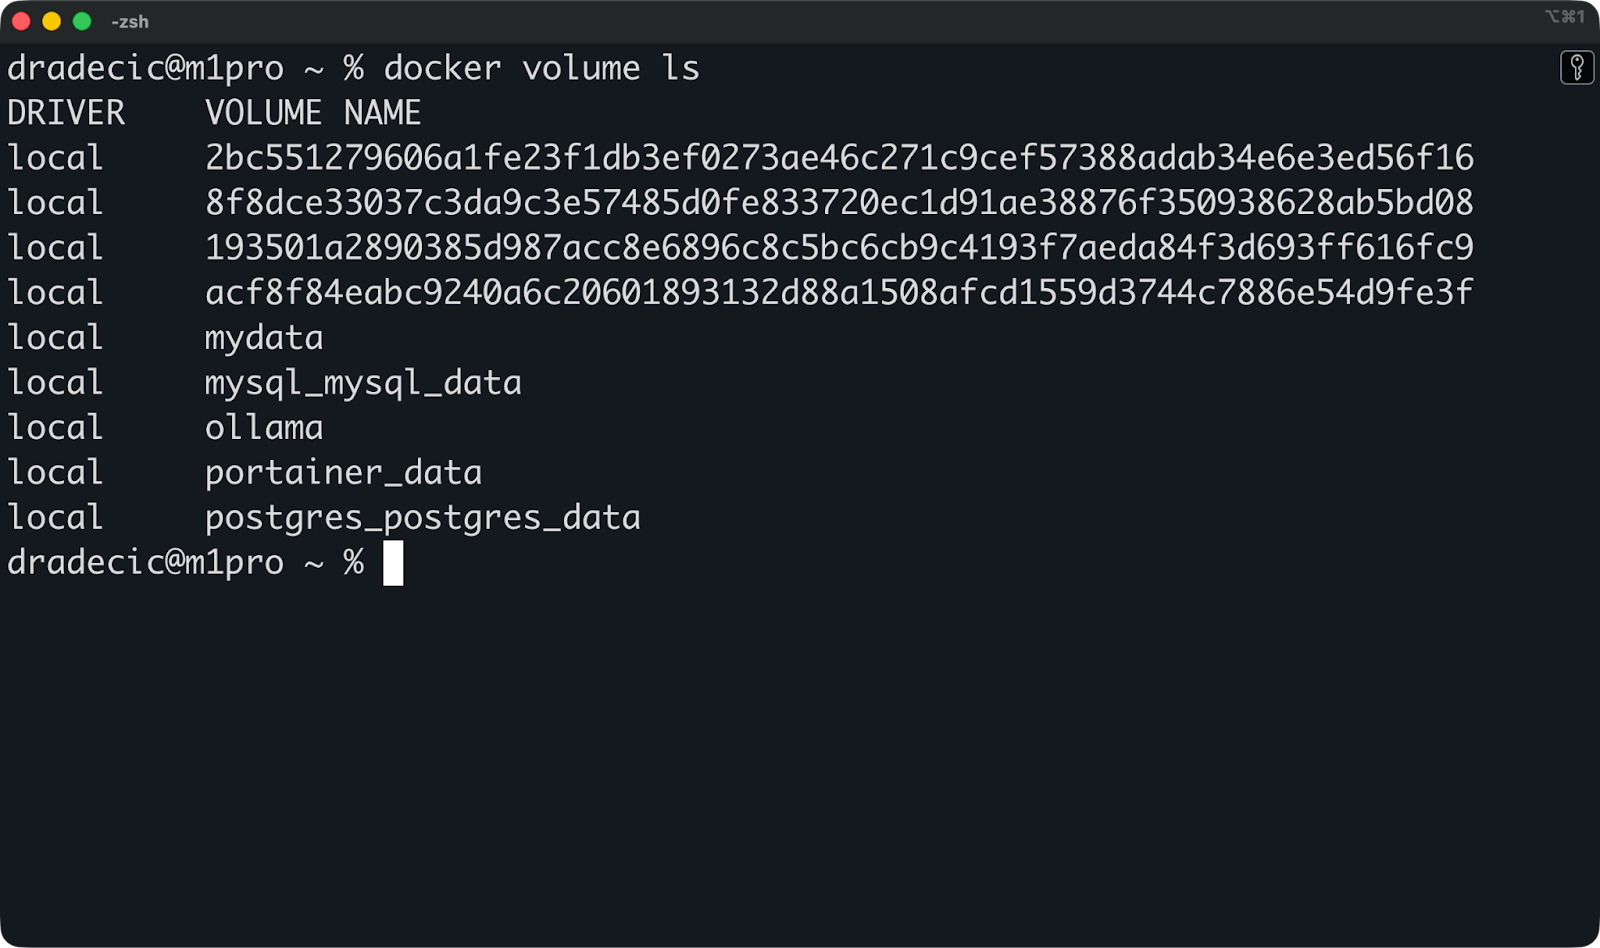
Ensuite, vous pouvez exécuter cette commande pour inspecter un volume spécifique afin de déterminer où il est stocké et quels conteneurs l'utilisent :
docker volume inspect mydata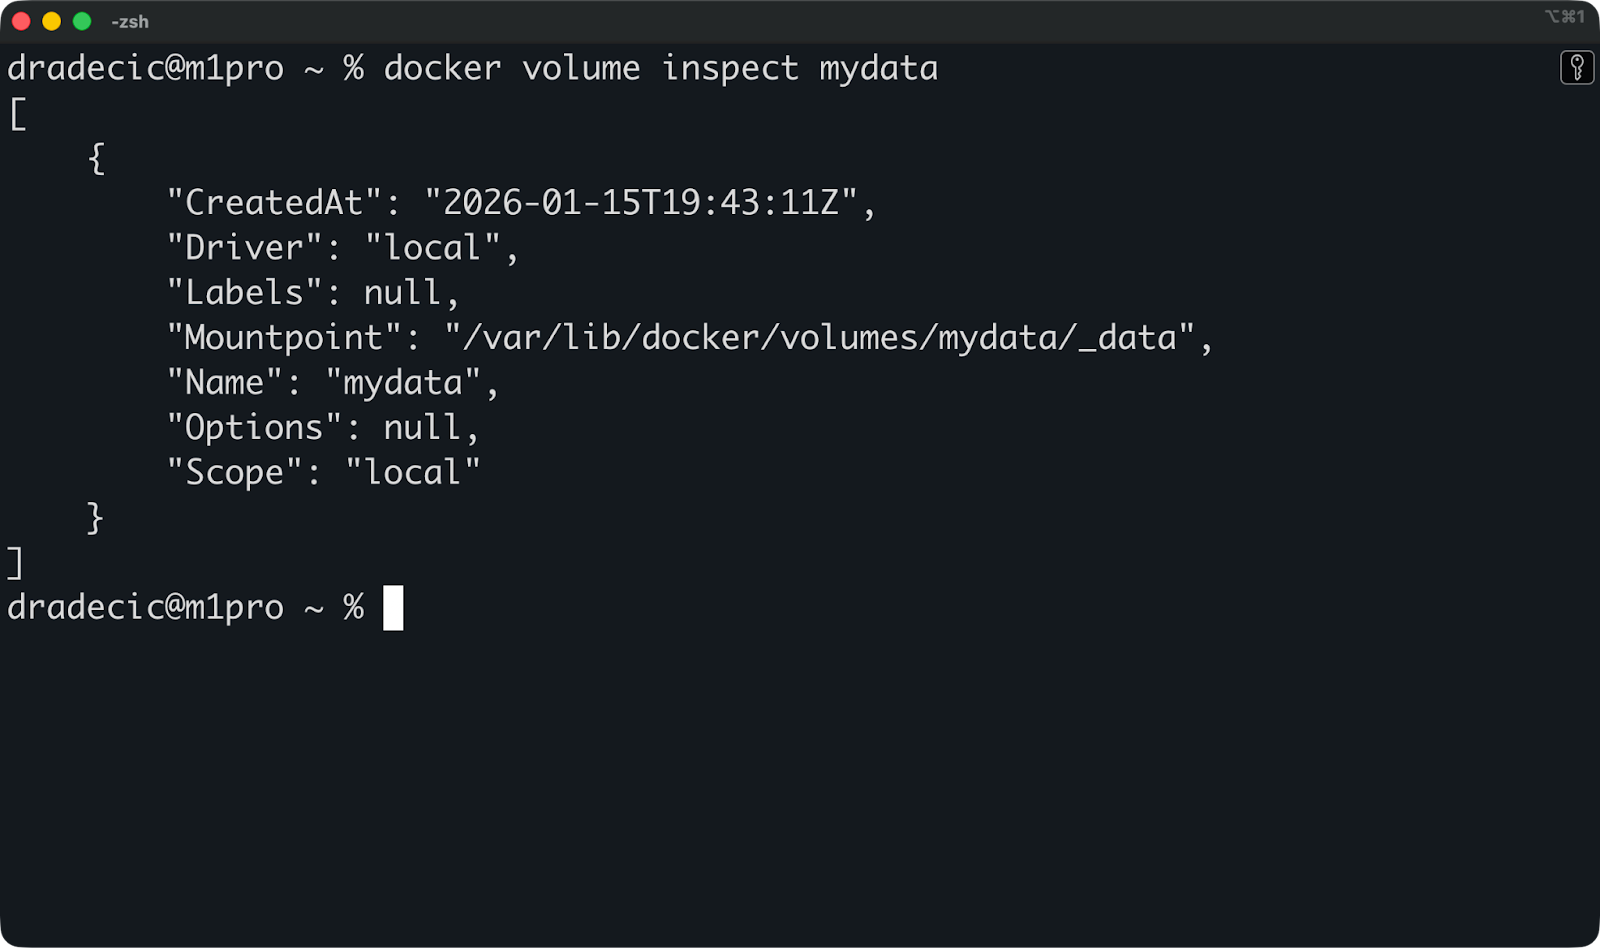
Ceci affiche le point de montage sur votre hôte ainsi que des métadonnées utiles. Cependant, il est rarement nécessaire d'accéder directement à ce répertoire, car cette tâche est gérée par Docker.
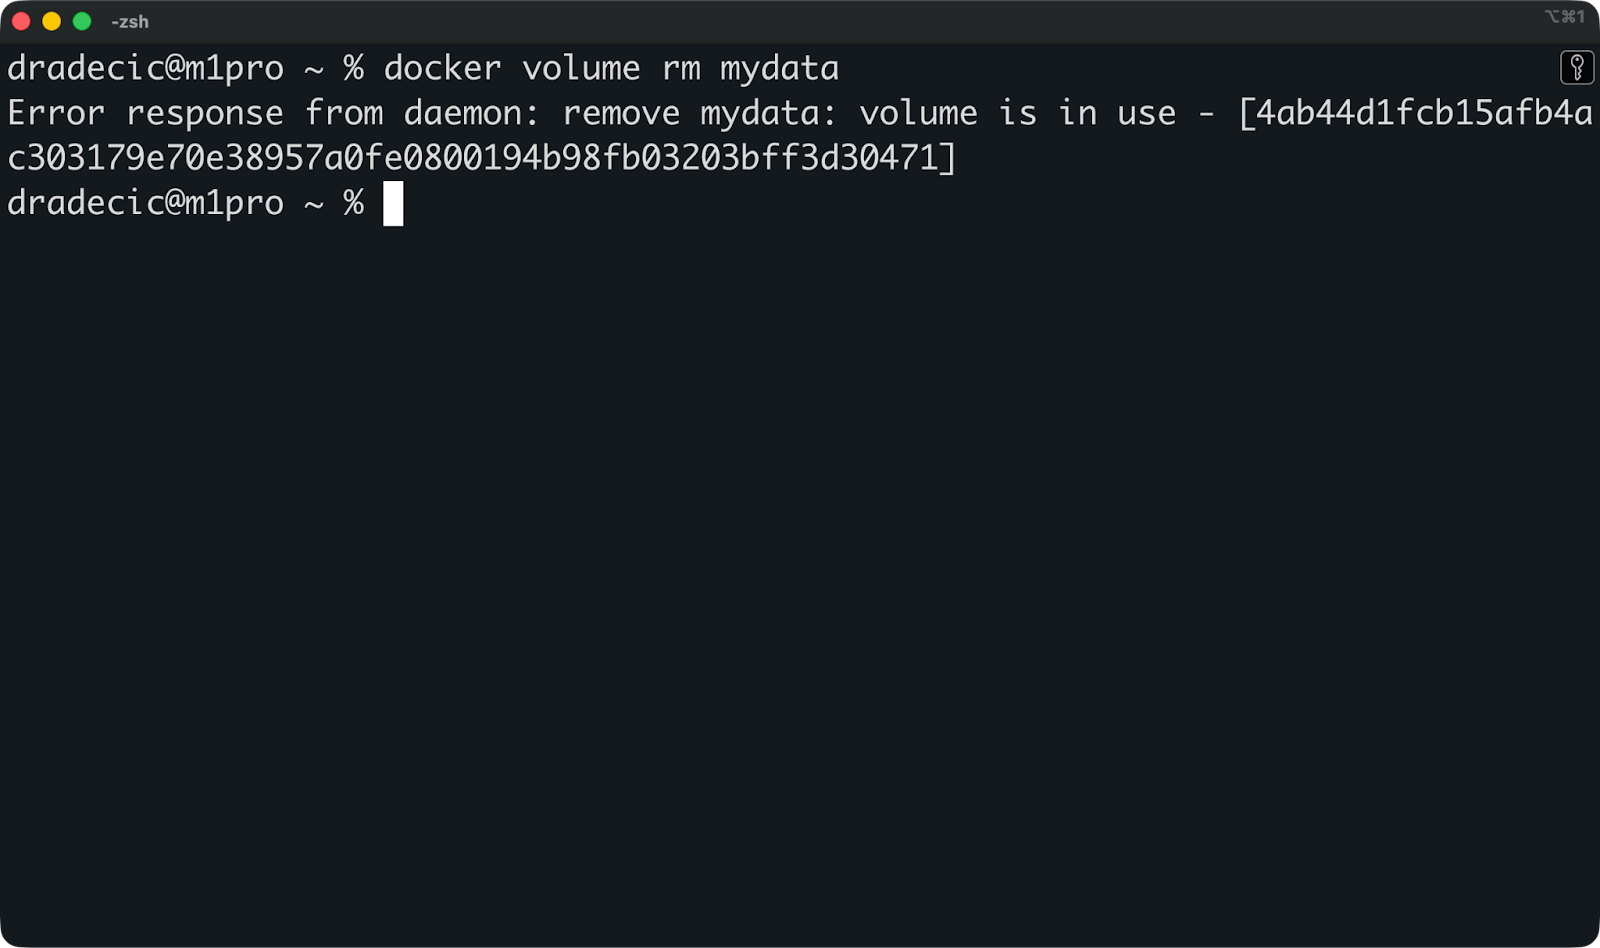
Si vous avez terminé avec le volume et souhaitez le supprimer, veuillez exécuter cette commande :
docker volume rm mydataDocker ne vous autorise pas à supprimer un volume associé à un conteneur en cours d'exécution. Veuillez d'abord arrêter le conteneur, puis supprimer le volume.
Enfin, si vous souhaitez nettoyer les ressources et récupérer de l'espace disque, vous pouvez exécuter cette commande pour supprimer tous les volumes inutilisés en une seule fois :
docker volume prune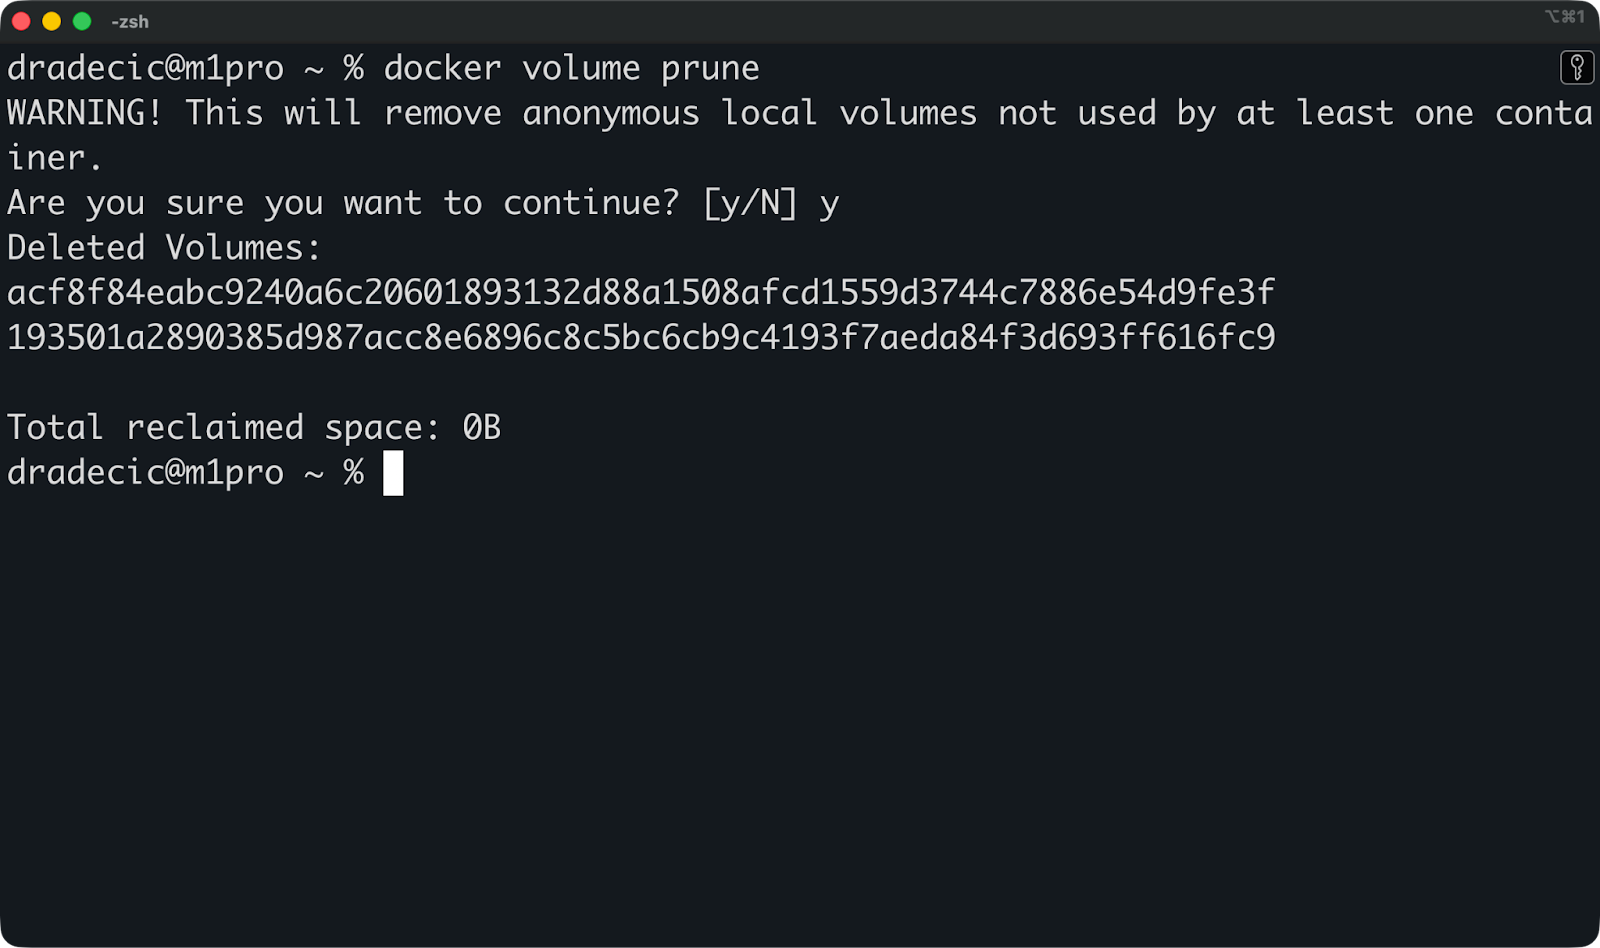
Pour les configurations de production, Docker prend en charge les pilotes de volume qui se connectent à des systèmes de stockage externes tels que NFS, AWS EFS ou le stockage en bloc dans le cloud. Vous devez spécifier le pilote lors de la création du volume, et Docker se charge du reste. Cela vous permet de stocker des données entièrement en dehors de votre machine hôte, ce qui est important pour les configurations à haute disponibilité où les conteneurs se déplacent entre les serveurs.
Ensuite, nous aborderons les montages liés.
Les montages liés vous permettent d'accéder directement au système de fichiers hôte depuis l'intérieur d'un conteneur, ce qui explique pourquoi les développeurs les apprécient particulièrement.
Ils sont idéaux pour le développement local, mais présentent des inconvénients qui les rendent risqués pour la production. Vous bénéficiez d'une synchronisation des fichiers en temps réel et d'aucune étape de compilation, mais vous perdez en portabilité et vous vous exposez à des failles de sécurité.
Un montage lié mappe un répertoire spécifique de votre machine hôte directement dans un conteneur.
Vous indiquez le chemin d'accès exact, par exemple /home/user/myapp, et Docker le rend accessible à l'intérieur du conteneur. Il n'y a pas de copie, pas de stockage géré par Docker, pas de couche d'abstraction. Le conteneur identifie vos fichiers hôtes réels.
Si vous modifiez un fichier sur votre hôte, le conteneur détecte immédiatement le changement. De même, si vous modifiez un fichier à l'intérieur du conteneur, il se met à jour sur votre hôte. Les deux parties travaillent sur les mêmes fichiers en temps réel.
Voici un montage à reliure en action :
docker run -d \
  --name dev-app \
  --mount type=bind,source=/Users/dradecic/Desktop/app,target=/app \
  python:3.14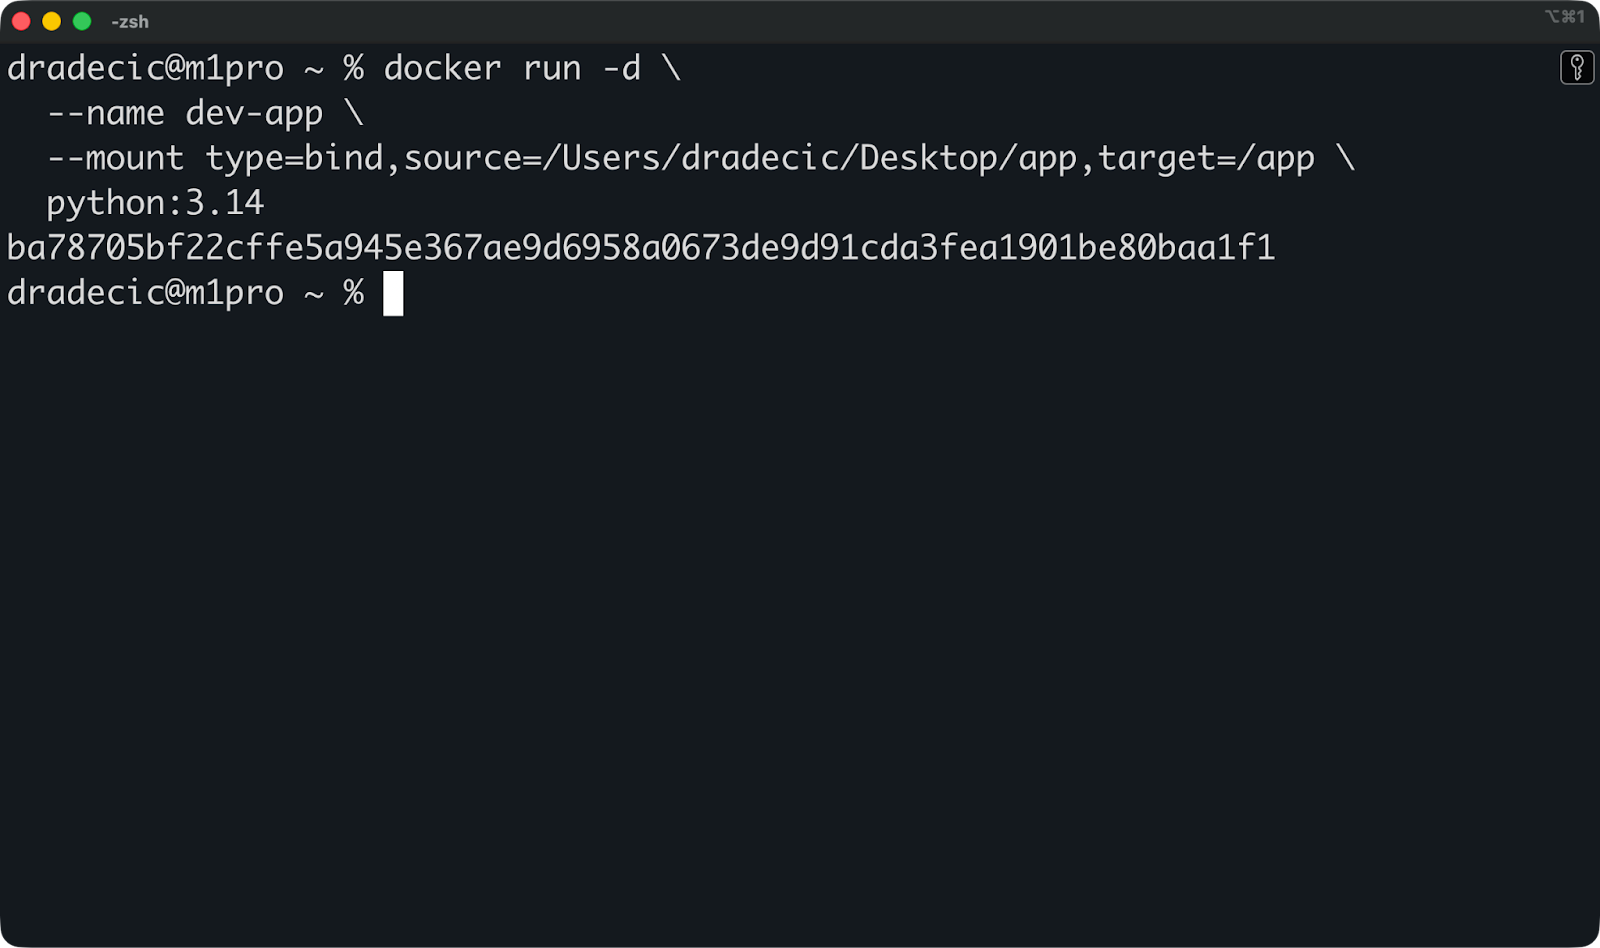
Cela monte /Users/dradecic/Desktop/app depuis mon hôte vers /app à l'intérieur du conteneur. Lorsque je modifie un fichier Python dans /Users/dradecic/Desktop/app à l'aide de votre éditeur de texte, l'application conteneurisée détecte immédiatement le changement.
Vous pouvez également utiliser la syntaxe plus courte :
Le cas d'utilisation le plus courant consiste à monter votre code source pendant le développement.
Supposons que vous développiez une application FastAPI. Vous pouvez monter votre répertoire de projet dans le conteneur, activer le rechargement à chaud, et vous disposez d'un environnement de développement complet :
docker run -d \
  --name fastapi-dev \
  --mount type=bind,source=/Users/dradecic/Desktop/app,target=/app \
  -w /app \
  -p 8000:8000 \
  python:3.14 \
  sh -c "pip install fastapi uvicorn && uvicorn main:app --reload --host 0.0.0.0"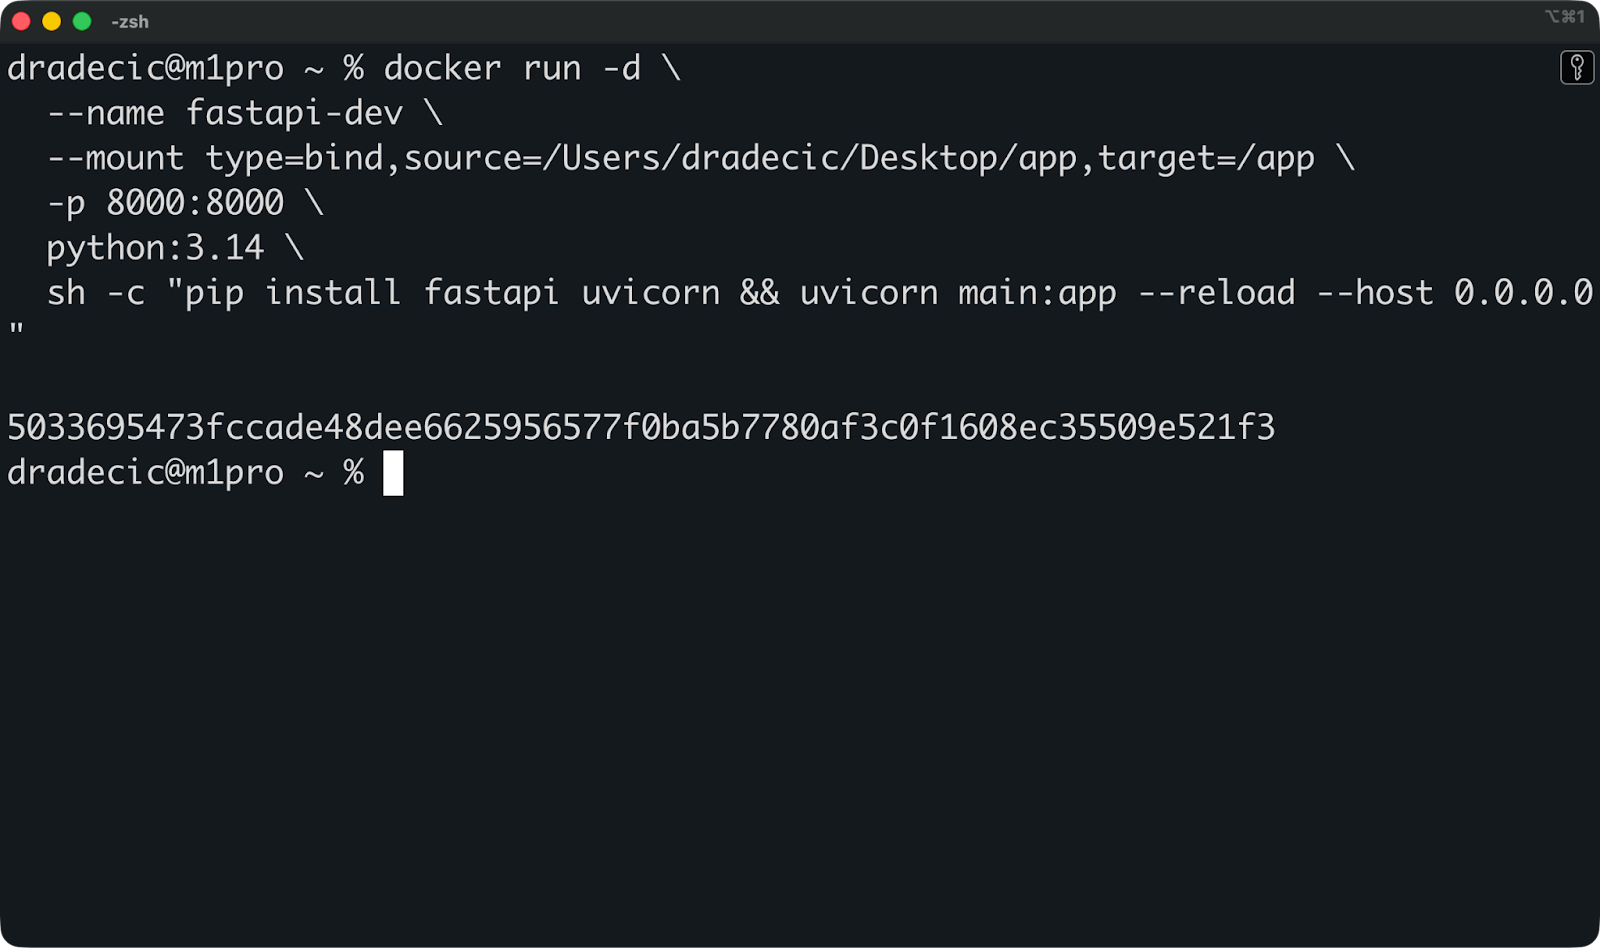
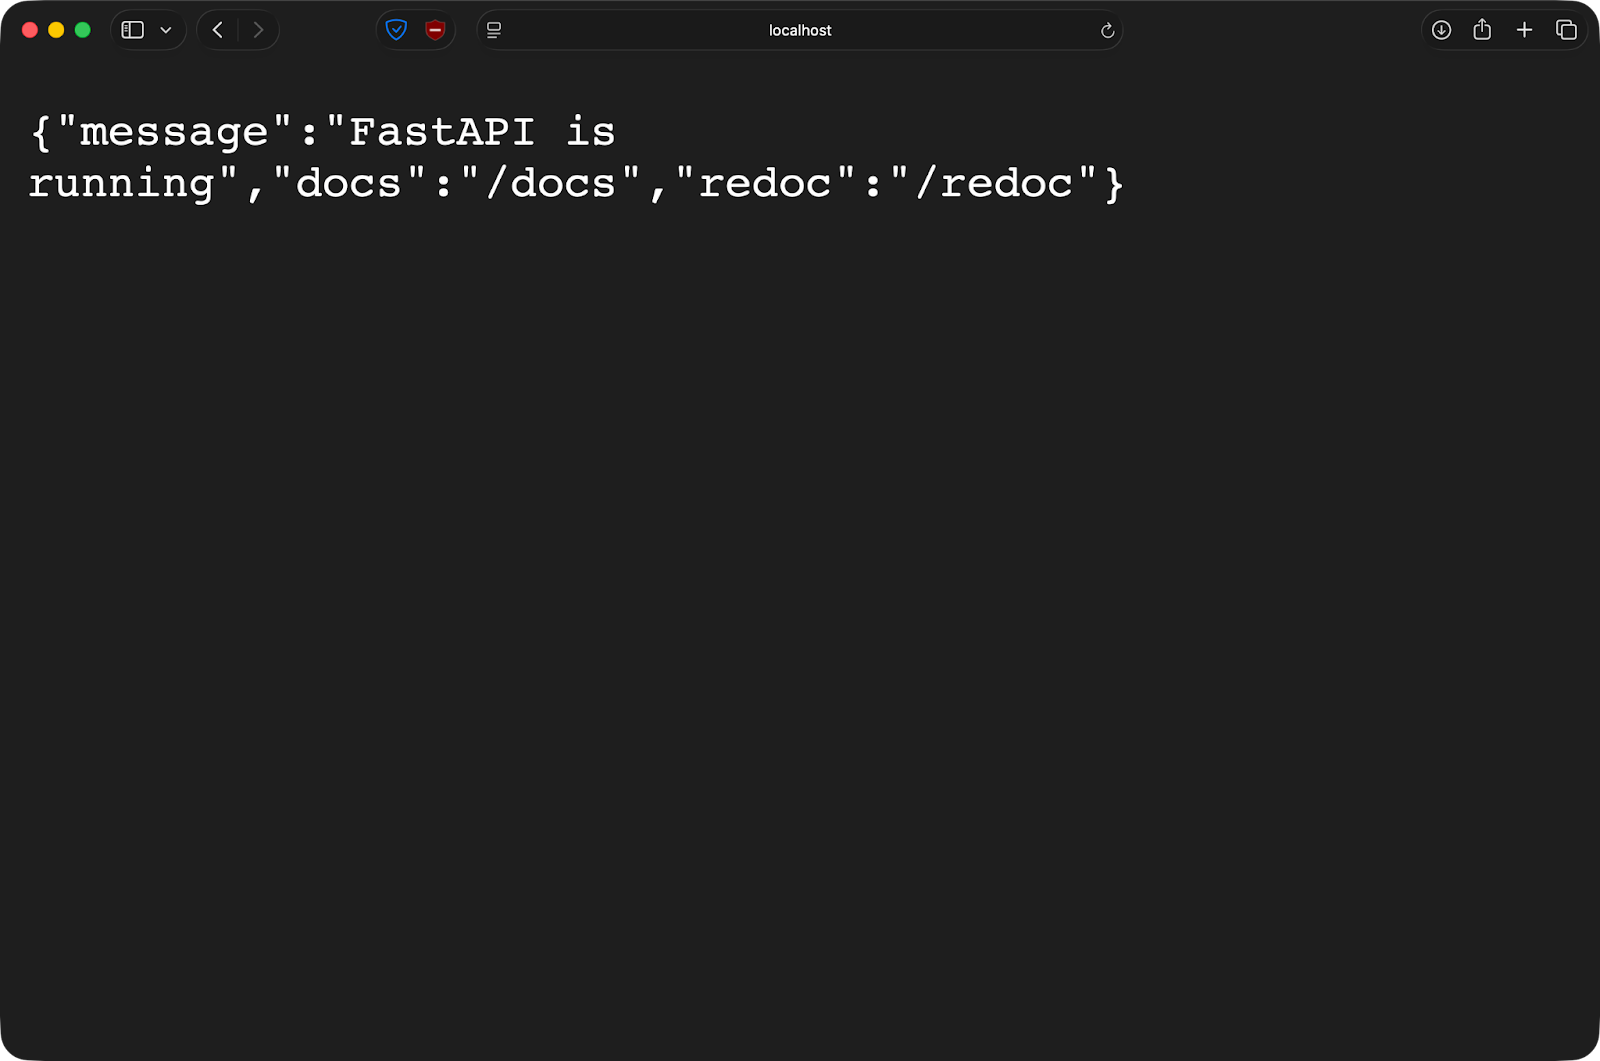
À titre de référence, voici mon fichier main.py:
from fastapi import FastAPI
from pydantic import BaseModel

app = FastAPI(
    title="FastAPI Docker Demo",
    description="A minimal FastAPI app running inside Docker",
    version="1.0.0",
)

class Item(BaseModel):
    name: str
    price: float
    in_stock: bool = True

@app.get("/")
def read_root():
    return {
        "message": "FastAPI is running",
        "docs": "/docs",
        "redoc": "/redoc",
    }

@app.get("/health")
def health_check():
    return {"status": "ok"}

@app.post("/items")
def create_item(item: Item):
    return {
        "message": "Item received",
        "item": item,
    }
Après avoir exécuté la commande Docker, l'application est accessible depuis mon ordinateur hôte sur le port 8000 :
Si vous modifiez le fichier main.py dans votre éditeur, veuillez enregistrer le fichier. FastAPI se rechargera automatiquement. Il n'est pas nécessaire de recréer des images ni de redémarrer les conteneurs. Vous écrivez du code comme vous le feriez localement, mais votre application s'exécute dans un environnement de conteneur cohérent.
Les montages liés exposent le système de fichiers hôte aux conteneurs, ce qui peut entraîner des problèmes de sécurité.
Un conteneur avec un montage bind peut lire et écrire des fichiers sur votre hôte. Exécutez un conteneur en tant que root (ce qui est le comportement par défaut) et il aura un accès root aux fichiers montés. Un code malveillant ou un conteneur compromis peut modifier ou supprimer tout élément du répertoire monté.
La portabilité est un autre sujet.
Les montages liés dépendent de l'existence de chemins d'accès spécifiques sur l'hôte. Le fichier /Users/dradecic/Desktop/app n'existe pas sur votre ordinateur ni sur un serveur de production. Cela remet en cause la promesse des conteneurs de « fonctionner partout ».
Les différences entre les plateformes sont également un élément à prendre en compte. Windows et Mac utilisent une machine virtuelle pour exécuter Docker, de sorte que les montages liés passent par une couche de traduction supplémentaire. Cela ralentit les opérations sur les fichiers et peut entraîner des problèmes mineurs avec la surveillance des fichiers et les liens symboliques.
Les environnements de production ne devraient jamais utiliser de montages liés.
Ils dépendent trop des chemins d'accès spécifiques à l'hôte, présentent trop de risques du point de vue de la sécurité et sont difficiles à contrôler en termes de versions. Les volumes permettent de résoudre tous ces problèmes, ce qui explique pourquoi ils constituent la norme de production.
Considérez les montages liés comme un outil de développement : rapide, pratique et puissant, mais à ne pas utiliser en production.
Les montages tmpfs stockent les données dans la mémoire RAM de votre hôte plutôt que sur le disque. Cela les rend idéales pour les données que vous ne souhaitez pas conserver.
Un montage tmpfs existe entièrement en mémoire.
Docker alloue de la mémoire vive sur votre machine hôte et la rend disponible en tant que système de fichiers à l'intérieur du conteneur. Un fichier écrit sur un montage tmpfs n'affecte jamais votre disque. Les données sont conservées en mémoire jusqu'à l'arrêt du conteneur.
Lorsque vous arrêtez le conteneur, tout ce qui se trouve dans le montage tmpfs est supprimé. Aucun nettoyage n'est nécessaire, aucun fichier résiduel, aucune trace de ce qui s'y trouvait. À chaque redémarrage du conteneur, vous obtenez un nouveau montage tmpfs vide.
En résumé, les montages tmpfs sont destinés aux données que vous ne souhaitez pas conserver, telles que les calculs temporaires, les jetons de session ou les informations sensibles qui ne doivent pas être conservées après utilisation.
Le cas d'utilisation le plus courant est le stockage de secrets ou de données sensibles.
Supposons que vous exécutiez un conteneur qui nécessite une clé API ou un mot de passe de base de données. Veuillez le stocker dans un montage tmpfs, et le secret ne sera jamais enregistré sur le disque. Lorsque le conteneur s'arrête, le secret disparaît de la mémoire. Il n'y a aucun fichier susceptible d'être accidentellement soumis au contrôle de version ou laissé exposé sur le système de fichiers.
Les caches constituent également une solution appropriée. Les artefacts de compilation, le code compilé ou les dépendances téléchargées que vous allez de toute façon régénérer n'ont pas besoin d'être conservés. Veuillez les placer dans tmpfs pour un accès plus rapide pendant la durée de vie du conteneur, puis les supprimer lorsque vous avez terminé.
Les fichiers temporaires fonctionnent également bien dans ce contexte. Il peut s'agir de données de session, de fichiers de verrouillage ou de résultats de traitement intermédiaires qui ne sont pertinents que pendant l'exécution du conteneur.
Veuillez exécuter cette commande pour créer un montage tmpfs en utilisant le drapeau d' --tmpfs:
docker run -d \
  --name temp-app \
  --tmpfs /tmp:rw,size=100m \
  python:3.14
Cela crée un montage tmpfs de 100 Mo à l'emplacement /tmp à l'intérieur du conteneur. L'option « size » limite la quantité de RAM que le montage peut utiliser.
Vous pouvez également utiliser la syntaxe --mount:
docker run -d \
  --name temp-app \
  --mount type=tmpfs,destination=/tmp,tmpfs-size=104857600 \
  python:3.14
La valeur d' tmpfs-size est exprimée en octets - 104857600 octets équivalent à 100 Mo.
Si vous ne spécifiez pas de limite de taille, tmpfs utilise jusqu'à la moitié de la mémoire vive (RAM) de votre système. Cela est risqué, pour des raisons évidentes. Veuillez toujours définir des limites de taille explicites.
Le seul inconvénient majeur est que les montages tmpfs ne fonctionnent que sous Linux.
Mac et Windows Docker Desktop ne les prennent pas en charge car ils exécutent Docker dans une machine virtuelle Linux, et tmpfs nécessite une prise en charge directe du noyau.
Docker propose deux méthodes pour définir les montages, et le choix de la syntaxe appropriée facilite la lecture et le débogage de vos commandes.
Les deux approches sont efficaces, mais l'une d'elles s'adapte mieux lorsque vous avez besoin d'options avancées ou de plusieurs montages dans un seul conteneur.
Le drapeau --mount utilise des paires clé-valeur explicites, tandis que -v ou --volume utilise une chaîne séparée par des deux-points.
Voici le même montage de volume avec les deux syntaxes :
# Using --mount
docker run -d \
  --mount type=volume,source=mydata,target=/app/data \
  python:3.14

# Using -v
docker run -d \
  -v mydata:/app/data \
  python:3.14
Les deux créent un volume nommé mydata et le montent sur /app/data dans le conteneur.
Veuillez utiliser --mount pour toute configuration au-delà des paramètres de base. C'est plus détaillé, mais les clés explicites indiquent clairement la fonction de chaque partie. Lorsque vous ajoutez des options telles que l'accès en lecture seule ou des pilotes de volume personnalisés, le résultat reste lisible, tandis que la commande ` -v` peut apparaître comme une chaîne cryptique.
La syntaxe -v convient parfaitement aux workflows de développement simples où vous saisissez les commandes manuellement.
L'option « readonly » empêche les conteneurs de modifier les données montées :
docker run -d \
  --mount type=volume,source=mydata,target=/app/data,readonly \
  python:3.14
Ceci est utile pour les fichiers de configuration ou les données de référence que les conteneurs doivent lire mais ne jamais modifier. Un conteneur qui tente d'écrire sur un montage en lecture seule rencontre une erreur d'autorisation.
Pour les volumes, l'option ` volume-nocopy ` évite de copier les données existantes de l'image du conteneur vers le volume :
docker run -d \
  --mount type=volume,source=mydata,target=/app/data,volume-nocopy \
  python:3.14
Par défaut, Docker copie tout ce qui se trouve au point de montage dans l'image vers un nouveau volume. Lorsque vous définissez volume-nocopy, vous obtenez un volume vide, quel que soit le contenu de l'image.
Pour les montages tmpfs, l'option ` tmpfs-size ` définit une limite de mémoire :
docker run -d \
  --mount type=tmpfs,target=/tmp,tmpfs-size=104857600 \
  python:3.14
Ceci limite le montage tmpfs à 100 Mo. Sans cela, un montage tmpfs peut utiliser toute la mémoire RAM disponible.
Lorsque vous montez un répertoire qui existe déjà dans l'image du conteneur, le montage masque complètement tout ce qui s'y trouvait.
Supposons que votre image dispose d'un répertoire /app/data contenant des fichiers de configuration intégrés. Lorsque vous montez un volume sur /app/data, ces fichiers de configuration disparaîtront. Le conteneur ne voit que ce qui se trouve dans le volume.
Ceci s'applique à tous les types de montage : volumes, montages liés et tmpfs. Le contenu monté est prioritaire et le répertoire d'origine devient inaccessible tant que le montage est actif.
Docker Compose facilite la définition et le partage des montages entre plusieurs conteneurs dans votre pile d'applications.
Au lieu de saisir de longues commandes d'docker run s avec des indicateurs de montage, vous pouvez déclarer tous les paramètres dans un fichier docker-compose.yml. Permettez-moi de vous expliquer comment procéder.
Voici un fichier Compose contenant des exemples de volume et de montage lié :
services:
  service-1:
    image: ubuntu:latest
    command: sleep infinity
    volumes:
      - ./code:/app          # Bind mount for development
      - shared:/data         # Named volume shared with worker

  service-2:
    image: ubuntu:latest
    command: sleep infinity
    volumes:
      - shared:/data         # Same volume as service-1

volumes:
  shared:
La clé volumes sous chaque service définit ce qui est monté. Les chemins relatifs tels que ./code créent des montages liés, tandis que les noms tels que shared font référence à des volumes nommés.
La section de haut niveau volumes définit les volumes nommés que Compose crée et gère. service-1 et service-2 montent le même volume shared, ils voient donc les mêmes fichiers. Veuillez créer un fichier à partir d'un conteneur, et l'autre conteneur pourra le lire immédiatement.
La commande « sleep infinity » permet de maintenir les conteneurs en cours d'exécution afin que vous puissiez les exécuter, à des fins de démonstration uniquement.
Veuillez commencer votre pile avec docker compose up -d, puis vérifiez si les montages fonctionnent :
# Write data to the shared volume from app
docker compose exec service-1 sh -c "echo 'test' > /data/file.txt"

# Read it from worker
docker compose exec service-2 cat /data/file.txt
Si les deux commandes fonctionnent, vos volumes sont correctement configurés.
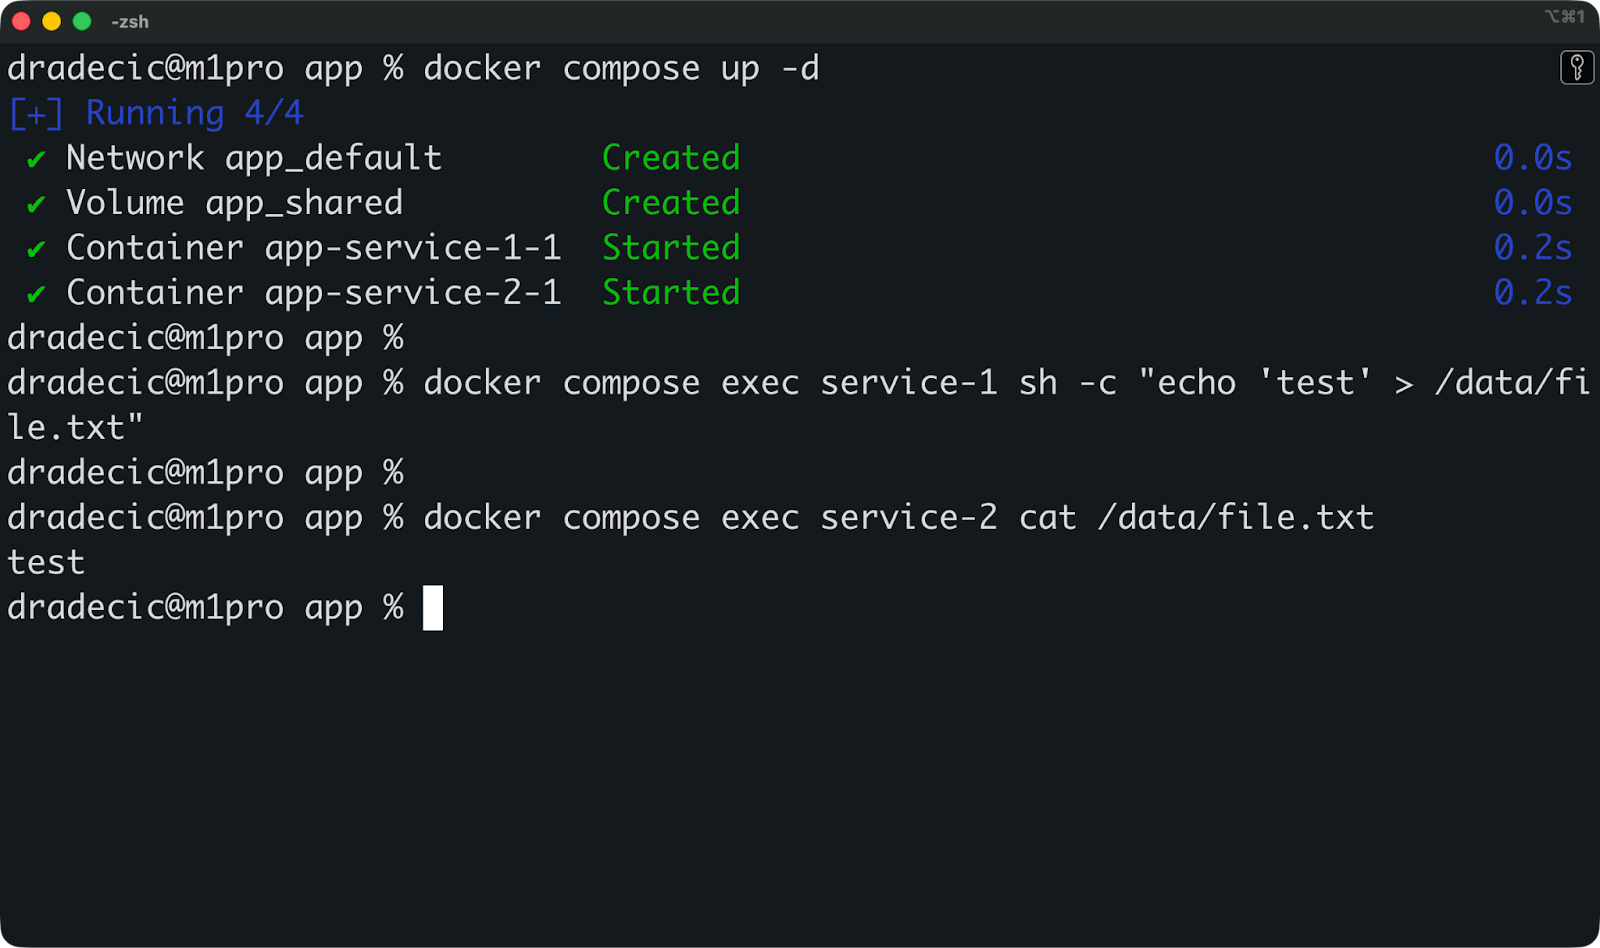
Vous pouvez maintenant exécuter cette commande pour arrêter et supprimer tout :
docker compose downVos volumes nommés seront toujours présents. Si vous relancez la pile avec docker compose up -d, les données que vous avez précédemment enregistrées seront toujours présentes. Voici comment les bases de données persistent d'un déploiement à l'autre : le volume survit au conteneur.
Pour supprimer des volumes lorsque vous arrêtez la pile, veuillez ajouter l'option -v :
docker compose down -vCela supprime tous les volumes définis dans votre fichier Compose. Veuillez l'utiliser lorsque vous souhaitez repartir à zéro.
Le modèle le plus courant consiste à utiliser un conteneur d'initialisation distinct pour amorcer le volume partagé :
services:
  init:
    image: ubuntu:latest
    command: sh -c "mkdir -p /source && echo 'initial data' > /source/seed.txt && cp /source/* /dest/"
    volumes:
      - shared:/dest

  service-1:
    image: ubuntu:latest
    command: sleep infinity
    depends_on:
      - init
    volumes:
      - shared:/data

  service-2:
    image: ubuntu:latest
    command: sleep infinity
    depends_on:
      - init
    volumes:
      - shared:/data

volumes:
  shared:
Le conteneur init génère des données initiales et les copie dans le volumepartagé, puis se ferme. service-1 et service-2 démarrent après et trouvent les données initialisées prêtes à l'emploi.
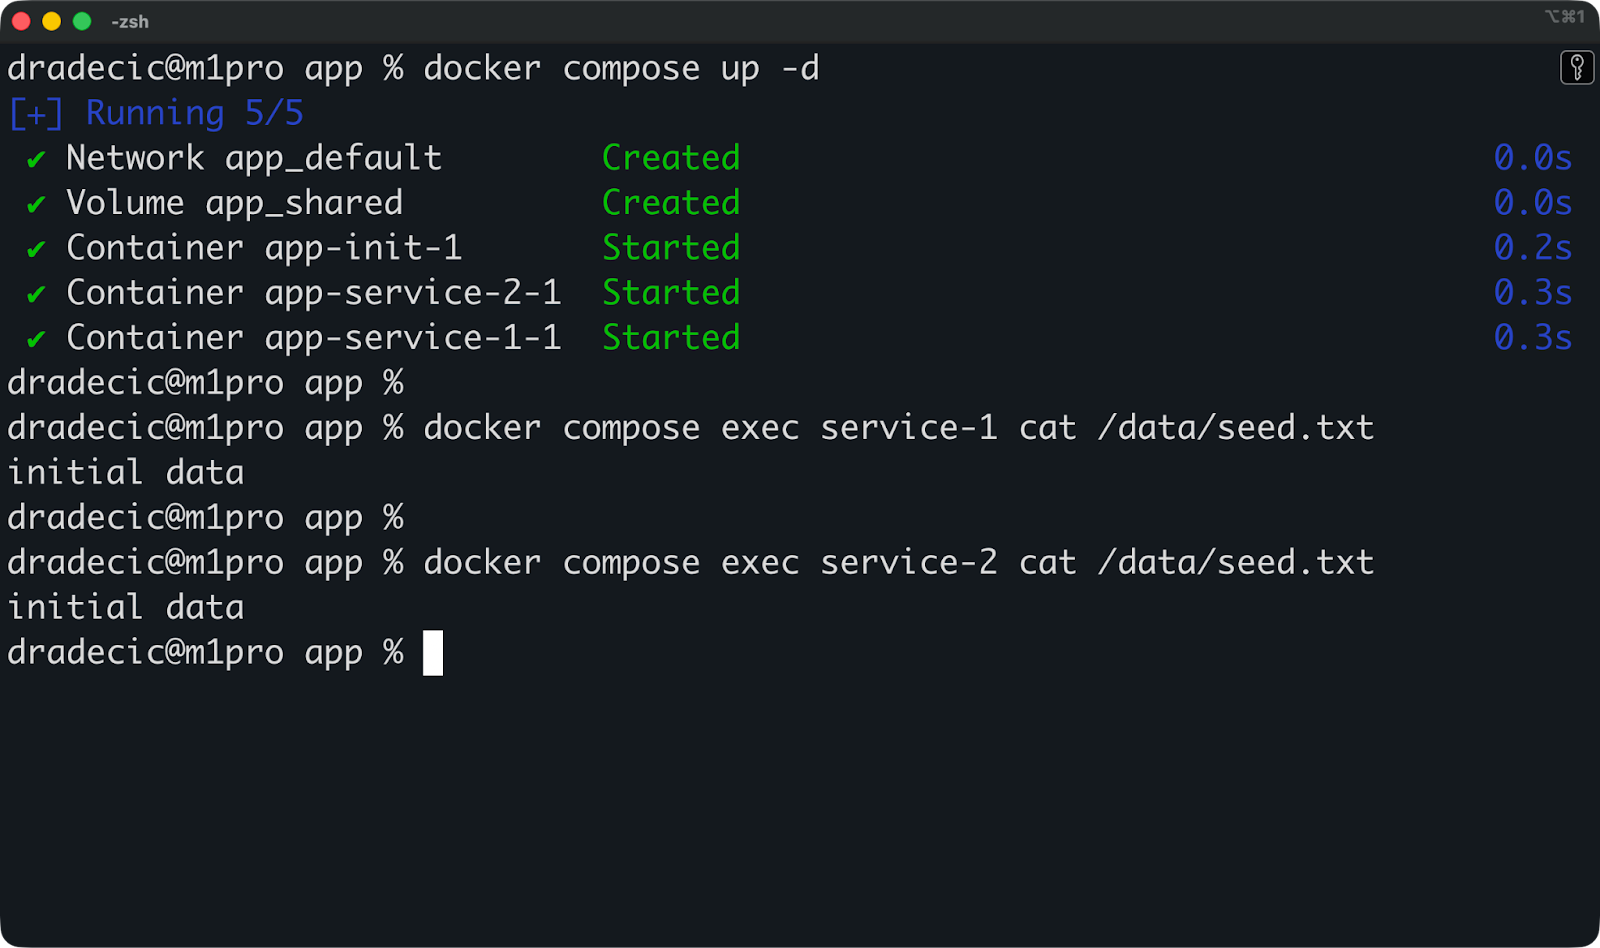
Compose gère la complexité liée à la coordination de plusieurs conteneurs et de leur stockage partagé dans un seul fichier contrôlé par version.
Le choix d'un type de montage inapproprié peut ralentir vos conteneurs ou créer des failles de sécurité dont vous ignoriez l'existence. Veuillez lire cette section si vous souhaitez éviter cette situation.
Les volumes offrent les meilleures performances sous Linux, car ils sont stockés directement sur le système de fichiers hôte, sans couche de traduction.
Sur Mac et Windows, Docker fonctionne à l'intérieur d'une machine virtuelle Linux. Les volumes continuent de fonctionner correctement car ils restent à l'intérieur de cette machine virtuelle. D'autre part, les montages liés doivent synchroniser les fichiers entre votre système d'exploitation hôte et la machine virtuelle Linux, ce qui ajoute une surcharge. Les opérations sur les fichiers montés via bind peuvent être considérablement plus lentes sur Mac et Windows par rapport à Linux natif.
tmpfs est l'option la plus rapide pour les opérations de lecture et d'écriture, car toutes les opérations s'effectuent dans la mémoire RAM. Aucune E/S disque, aucune surcharge du système de fichiers. Cependant, vous êtes limité par la mémoire disponible, et les données disparaissent lorsque le conteneur s'arrête.
Si vous utilisez Linux et que vous avez besoin d'une performance optimale, veuillez utiliser des volumes. Si vous utilisez Mac ou Windows et constatez un ralentissement des opérations sur les fichiers pendant le développement, vous rencontrez probablement des surcoûts liés au montage lié. Passer aux volumes pour les charges de travail de production.
Chaque montage permet aux conteneurs d'accéder à des éléments extérieurs à leur système de fichiers isolé, ce qui présente un risque.
Les supports de fixation constituent la principale préoccupation. Si vous montez /home/user dans un conteneur, un conteneur compromis peut lire vos clés SSH, modifier la configuration de votre shell ou supprimer des fichiers dans l'ensemble de votre répertoire personnel. Veuillez exécuter ce conteneur en tant qu'administrateur - paramètre par défaut - et il disposera d'un accès de niveau administrateur à ces fichiers.
Les volumes réduisent ce risque car ils sont isolés dans le répertoire de stockage de Docker. Un conteneur ne peut pas monter des chemins d'accès hôte arbitraires via des volumes. Cependant, les volumes peuvent toujours entraîner des fuites de données entre les conteneurs si vous les partagez de manière imprudente.
Les montages tmpfs minimisent le risque de persistance : les secrets stockés en mémoire disparaissent lorsque les conteneurs s'arrêtent. Cependant, ils ne protègent pas contre les attaques d'exécution où un conteneur compromis lit des secrets à partir de la mémoire.
La règle générale est que les montages rompent l'isolation des conteneurs, veuillez donc les utiliser avec précaution.
Veuillez monter uniquement les conteneurs nécessaires et rien de plus.
Au lieu de monter l'intégralité de votre répertoire de projet, veuillez monter uniquement le sous-répertoire utilisé par le conteneur. Au lieu de monter /var/log avec un accès en écriture, veuillez le monter en lecture seule si le conteneur n'a besoin que de lire les journaux.
Veuillez utiliser l'option readonly chaque fois que cela est possible :
docker run -d \
  --mount type=bind,source=/app/config,target=/config,readonly \
  ubuntu:latest
Cela empêche les conteneurs de modifier les données montées, limitant ainsi les dommages s'ils sont compromis.
Exécutez les conteneurs en tant qu'utilisateurs non root afin de réduire l'impact des vulnérabilités liées au montage lié. Veuillez créer un utilisateur dans votre fichier Dockerfile et basculer vers celui-ci avant le démarrage du conteneur :
RUN useradd -m appuser
USER appuser
Veuillez nettoyer régulièrement les volumes inutilisés à l'aide de l'utilitaire de gestion des volumes ( docker volume prune). Les anciens volumes s'accumulent au fil du temps, occupent de l'espace disque et peuvent contenir des données sensibles provenant de conteneurs supprimés.
Veuillez ne jamais monter des répertoires hôtes sensibles tels que /, /etc ou /var, sauf si vous avez une raison spécifique et comprenez les risques encourus. Chaque support doit avoir un objectif clair et une portée minimale.
Les problèmes de montage se manifestent généralement sous la forme d'erreurs d'autorisation, de fichiers manquants ou de conteneurs qui ne démarrent pas, et ils sont presque toujours causés par le même ensemble de problèmes.
Voici comment diagnostiquer et résoudre les problèmes les plus courants que vous pourriez rencontrer.
Des erreurs d'autorisation peuvent survenir lorsque l'utilisateur à l'intérieur du conteneur n'a pas accès aux fichiers montés.
Les conteneurs Docker s'exécutent en tant que root par défaut. Lorsque root crée un fichier dans un montage bind, ce fichier appartient à root sur votre hôte. Si vous essayez de le modifier avec votre compte utilisateur habituel, vous obtiendrez une erreur d'autorisation refusée.
L'inverse est également vrai. Si vous montez un répertoire dont vous êtes propriétaire dans un conteneur fonctionnant en tant qu'utilisateur non root, il est possible que le conteneur ne puisse pas y écrire.
Vous pouvez vérifier la propriété des fichiers à l'aide de la commande « ls -la » sur le répertoire monté :
ls -la /path/to/mounted/directorySi les fichiers appartiennent à root mais que votre conteneur s'exécute sous un autre utilisateur, il y a une incompatibilité. Veuillez résoudre ce problème en exécutant le conteneur en tant qu'utilisateur propriétaire des fichiers :
docker run -d \
  --user $(id -u):$(id -g) \
  -v ./data:/app/data \
  ubuntu:latest
Cela exécute le conteneur en tant qu'utilisateur actuel plutôt qu'en tant que root, en accord avec la propriété des fichiers dans le montage lié.
En ce qui concerne les volumes, Docker gère automatiquement les autorisations lorsque les conteneurs créent des fichiers. Cependant, si des erreurs apparaissent, veuillez vérifier sous quel utilisateur l'application conteneurisée s'exécute et si elle dispose d'un accès en écriture au point de montage.
L'erreur la plus courante consiste à monter un chemin qui n'existe pas sur l'hôte.
Veuillez tenter de monter /home/user/project lorsque ce répertoire n'existe pas, et Docker créera un répertoire vide appartenant à root. Votre conteneur démarre, mais il monte le mauvais élément : un répertoire vide au lieu de votre projet réel.
Veuillez toujours vérifier que les chemins d'accès existent avant de les monter :
ls /home/user/projectSi le répertoire n'existe pas, veuillez le créer au préalable ou corriger le chemin d'accès dans votre commande de montage.
Dans Docker Compose, les chemins relatifs sont résolus à partir du répertoire contenant votre fichier d'docker-compose.yml. Si votre fichier se trouve dans /home/user/app/ et que vous utilisez ./data, Docker recherchera /home/user/app/data.
Déplacez le fichier Compose et le montage sera interrompu.
Une autre erreur fréquente consiste à monter le mauvais chemin cible à l'intérieur du conteneur. Veuillez monter le répertoire /app/data lorsque votre application s'attend à /data, sinon l'application ne pourra pas trouver ses fichiers. Veuillez vérifier la documentation de votre application ou le fichier Dockerfile pour confirmer où les données doivent être placées.
Sous Linux, les montages liés fonctionnent directement avec le système de fichiers hôte.
Sur Mac et Windows, Docker fonctionne à l'intérieur d'une machine virtuelle Linux. Les montages liés synchronisent les fichiers entre votre système d'exploitation hôte et cette machine virtuelle, ce qui peut entraîner des problèmes de synchronisation. Les outils de surveillance des fichiers, qui actualisent votre application lorsque des fichiers sont modifiés, peuvent parfois manquer des mises à jour en raison de retards de synchronisation.
Mac et Windows gèrent également les autorisations d'accès aux fichiers de manière différente. La machine virtuelle convertit les autorisations entre le système d'exploitation hôte et Linux, ce qui peut entraîner l'affichage de fichiers avec des droits de propriété incorrects à l'intérieur des conteneurs.
Les liens symboliques ne fonctionnent pas de manière fiable dans les montages liés sur Mac et Windows. La machine virtuelle ne peut pas toujours résoudre les liens symboliques qui pointent vers l'extérieur du répertoire monté, ce qui peut entraîner l'apparition de fichiers manquants ou endommagés à l'intérieur des conteneurs.
Les montages tmpfs ne fonctionnent pas du tout sur Mac et Windows, car la machine virtuelle n'expose pas tmpfs à l'hôte. Si vous essayez d'utiliser un montage tmpfs, Docker l'ignorera silencieusement ou générera une erreur selon la version.
Si vous développez sur Mac ou Windows et rencontrez des problèmes de synchronisation de fichiers, veuillez passer à des volumes nommés pour améliorer les performances et la fiabilité. Utilisez les montages liés pour les workflows de développement où la synchronisation en temps réel est plus importante que la cohérence parfaite.
Pour conclure, veuillez utiliser des volumes pour les données de production qui doivent être conservées, telles que les bases de données, les fichiers téléchargés, l'état des applications, c'est-à-dire tout ce que vous ne pouvez pas vous permettre de perdre. Ils sont gérés par Docker, portables sur toutes les plateformes et constituent le choix le plus sécurisé pour les données importantes.
Les montages liés sont destinés aux workflows de développement qui nécessitent une synchronisation des fichiers en temps réel entre votre hôte et vos conteneurs. Lorsque vous modifiez le code dans votre éditeur, les modifications apparaissent instantanément dans votre application conteneurisée. Cependant, veuillez les exclure de la production, car ils dépendent fortement des chemins d'accès spécifiques à l'hôte et créent des risques de sécurité inutiles.
Lorsque vous serez prêt à approfondir vos connaissances en matière de conteneurisation et de virtualisation, veuillez consulter notre cours : Conteneurisation et virtualisation avec Docker et Kubernetes.
Apprenez Docker avec DataCamp
Cursus
Cours
Cours