Cursus
Fondamentaux d’OpenAI
15 h
There is a boom in agent-centric IDEs like Cursor AI and Windsurf that can understand your source code, suggest changes, and even run commands for you. All you have to do is talk to the AI agent and vibe with it, hence the term "vibe coding."
OpenAI, perhaps feeling left out of the vibe coding movement, recently released their open-source tool that uses a reasoning model to understand source code and help you debug or even create an entire project with a single command.
In this tutorial, we will learn about OpenAI’s Codex CLI and how to set it up locally. After that, we will use the Codex command to build a website using a screenshot. We will also work on a complex project like training a machine learning model and developing model inference with a custom user interface.
We keep our readers updated on the latest in AI by sending out The Median, our free Friday newsletter that breaks down the week’s key stories. Subscribe and stay sharp in just a few minutes a week:
You can learn more about Cursor AI and Windsurf in separate guides, and get some hands-on experience with our OpenAI Fundamentals skill track.
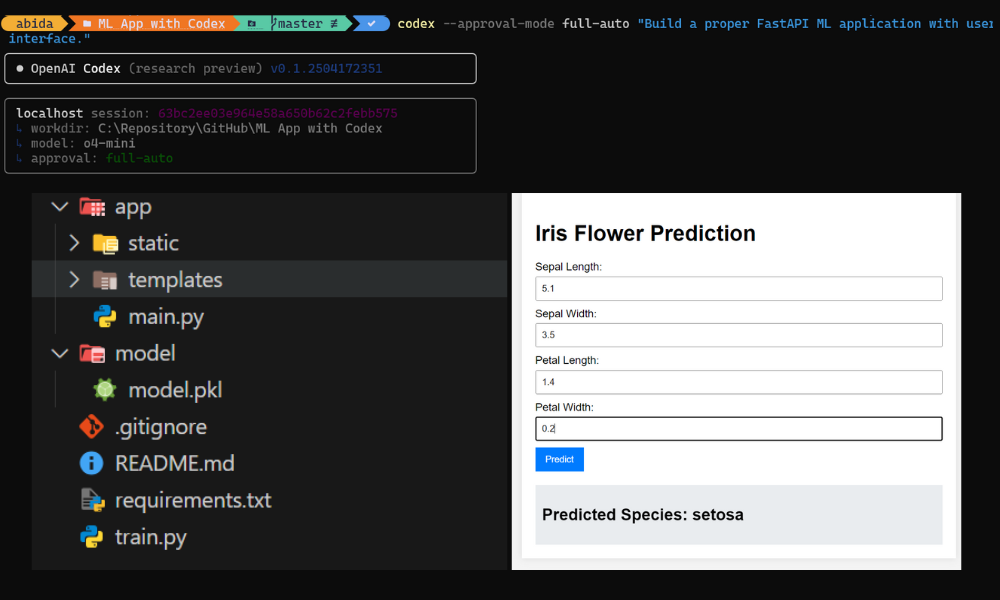
Image by Author
OpenAI Codex CLI is an open-source command-line tool that brings the power of OpenAI's latest reasoning models (o4) directly to your terminal. This Lightweight CLI tool lets you read, modify, and execute code directly on your local machine.
It is designed to help developers build features more quickly, fix bugs, and better understand unfamiliar code. Importantly, because the CLI operates locally, your source code remains secure within your environment unless you share it.
Here are the key features of Codex CLI:
Here is more information on approval modes:
If you are new to AI and want to learn the basics, we highly recommend completing the AI Fundamentals track.
Follow these steps to set up OpenAI Codex CL on your system.
Before installing Codex CLI, ensure your system meets the following requirements:
$PROFILESet-Alias sh.exe "C:\Program Files\Git\bin\bash.exe"npm install -g @openai/codexexport OPENAI_API_KEY="your-api-key-here"codex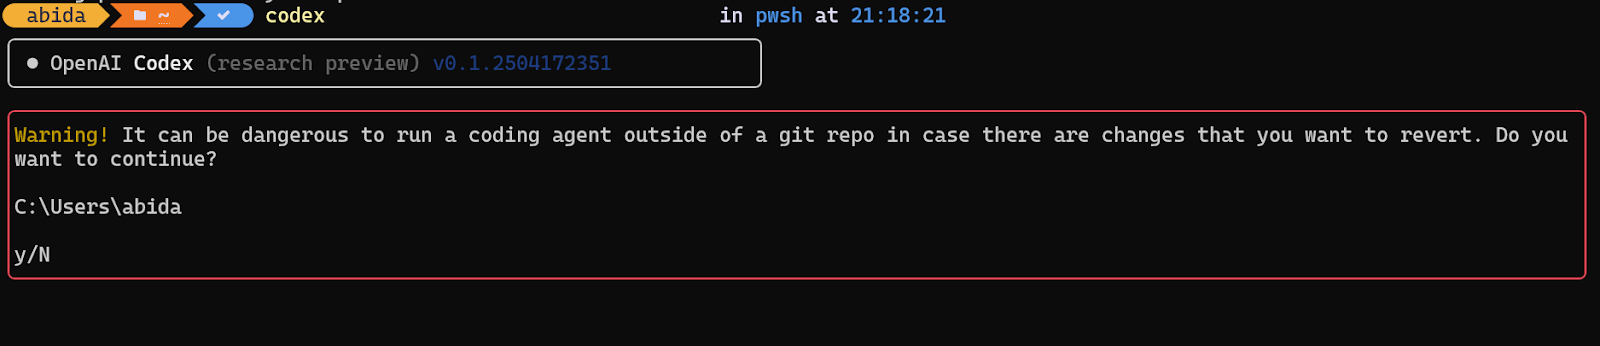
cd command:cd <project-directory>git initcodexIn this mode, you can interact with the AI agent conversationally, similar to ChatGPT. Simply type your coding-related queries, and the AI will assist you by generating, debugging, or modifying code as needed.
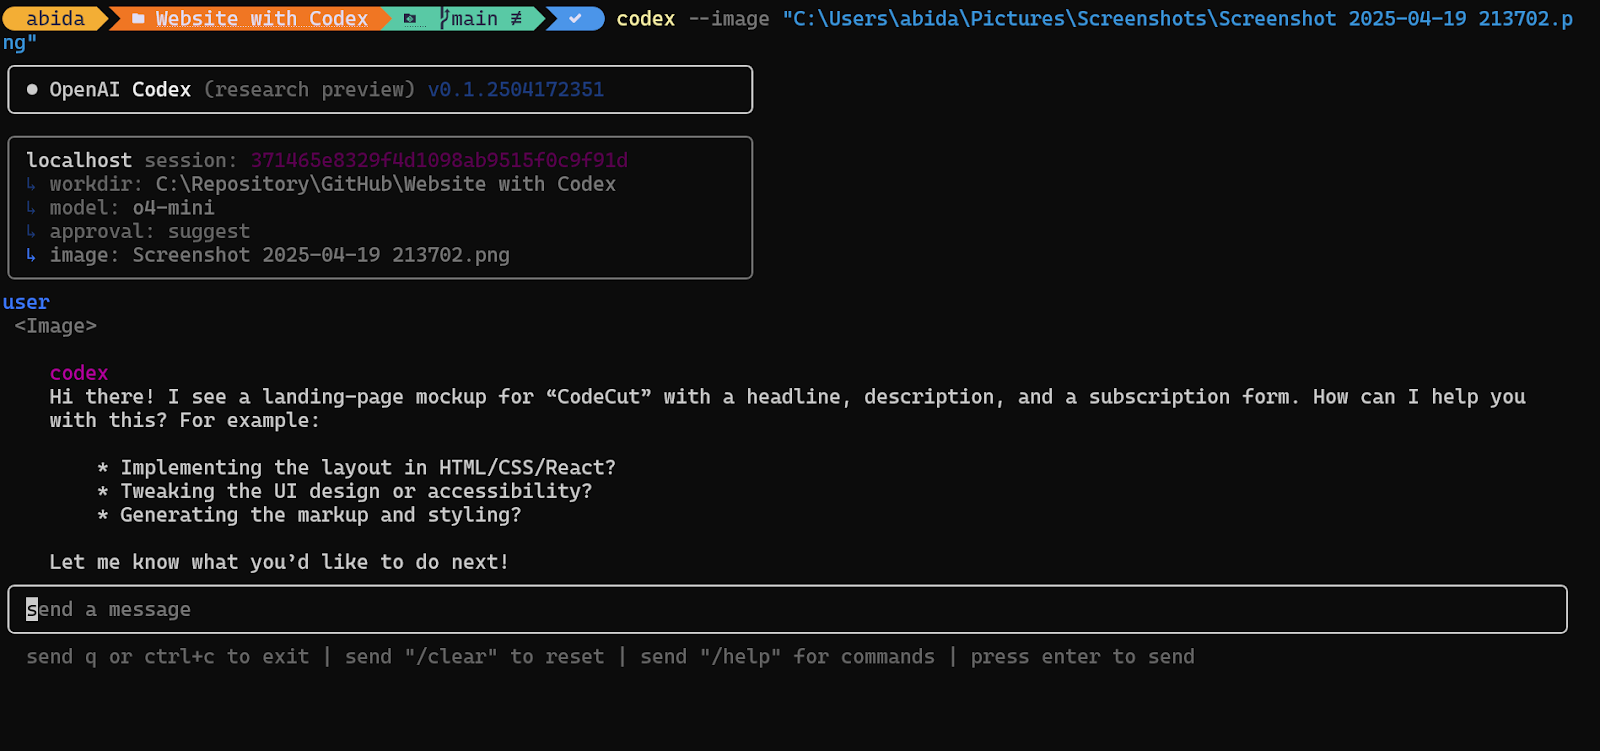
In this project, we will use Codex CLI to build a website inspired by CodeCut using a screenshot of its design. Why CodeCut? I’m a big fan of Khuyen Tran’s work, and I wanted to replicate her website’s style while adding my own unique flavor to it.
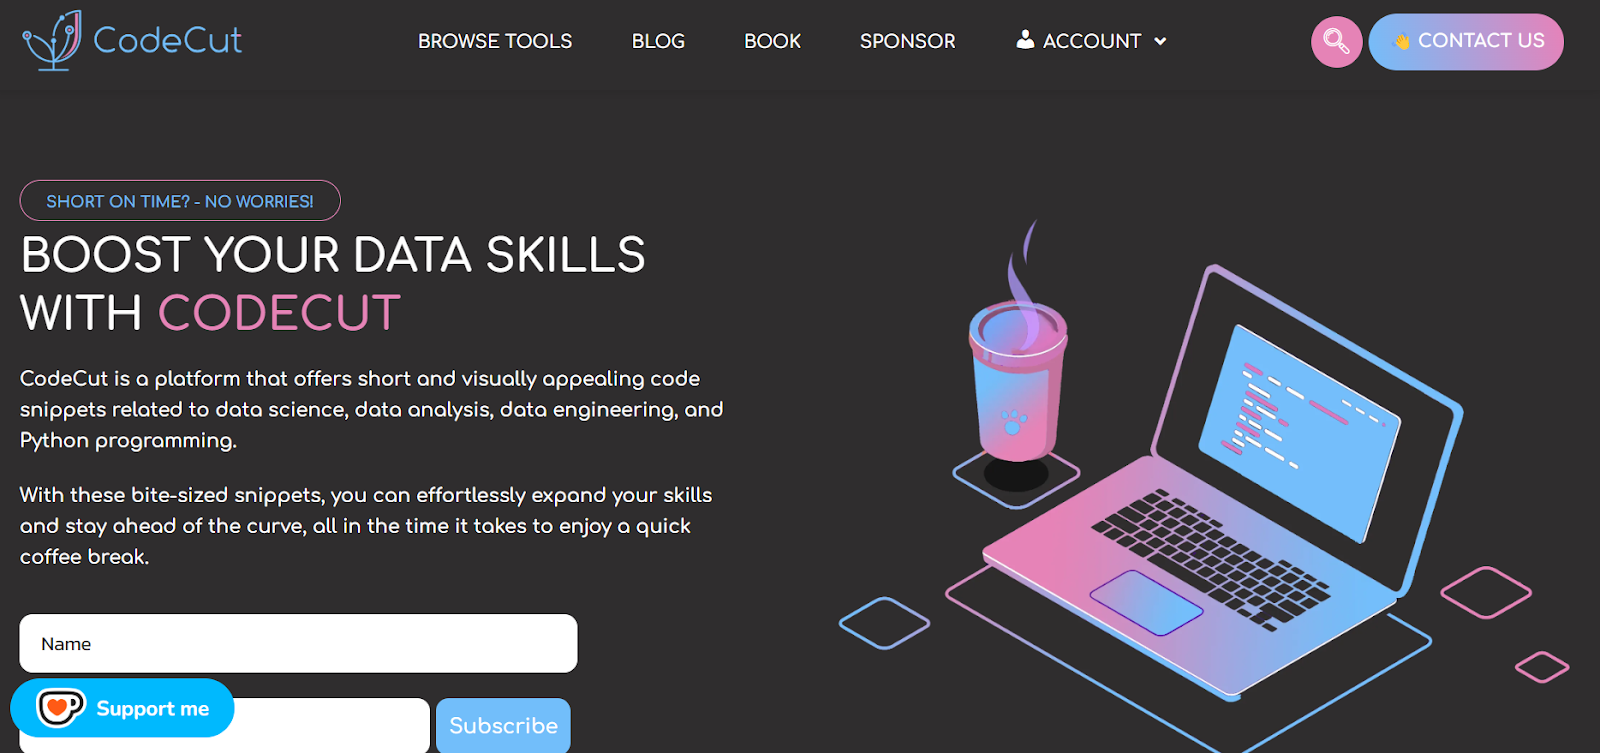
Source: CodeCut
codex --image "C:\Users\abida\Pictures\Screenshots\Screenshot 2025-04-19 213702.png"By default, it uses the new O4-Mini model. You can learn the basics of the O4 model by reading the O4-Mini: Tests, Features, O3 Comparison, Benchmarks, and More guide.
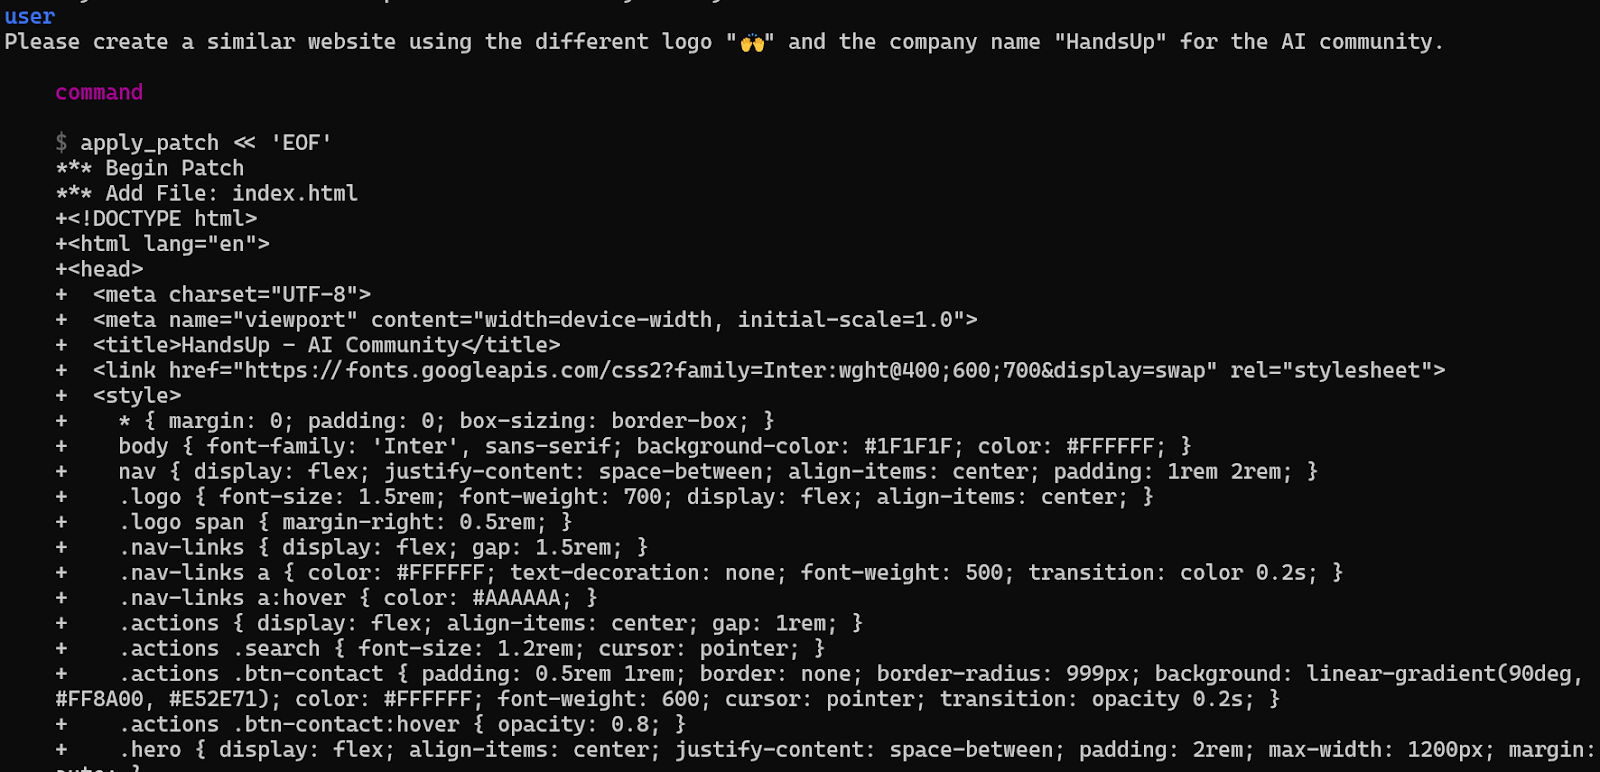
assets folder and replace the current image with your selected illustration. Be sure to rename the new file using the name of the original hero image. The original image was quite simple, and I would like to use an illustration that shows everyone raising their hands in an office space.index.html file to see your website. 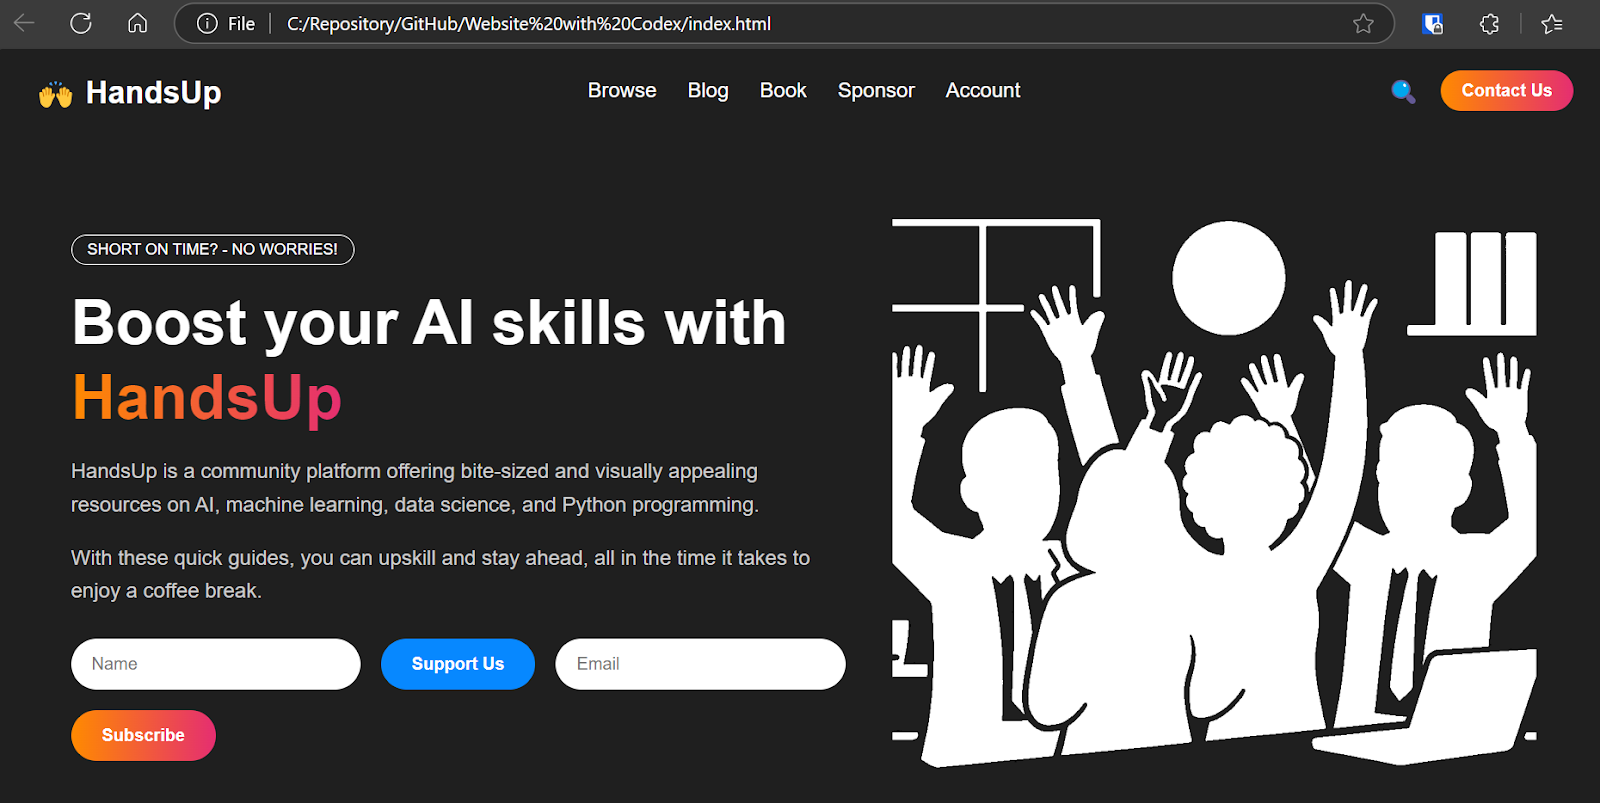
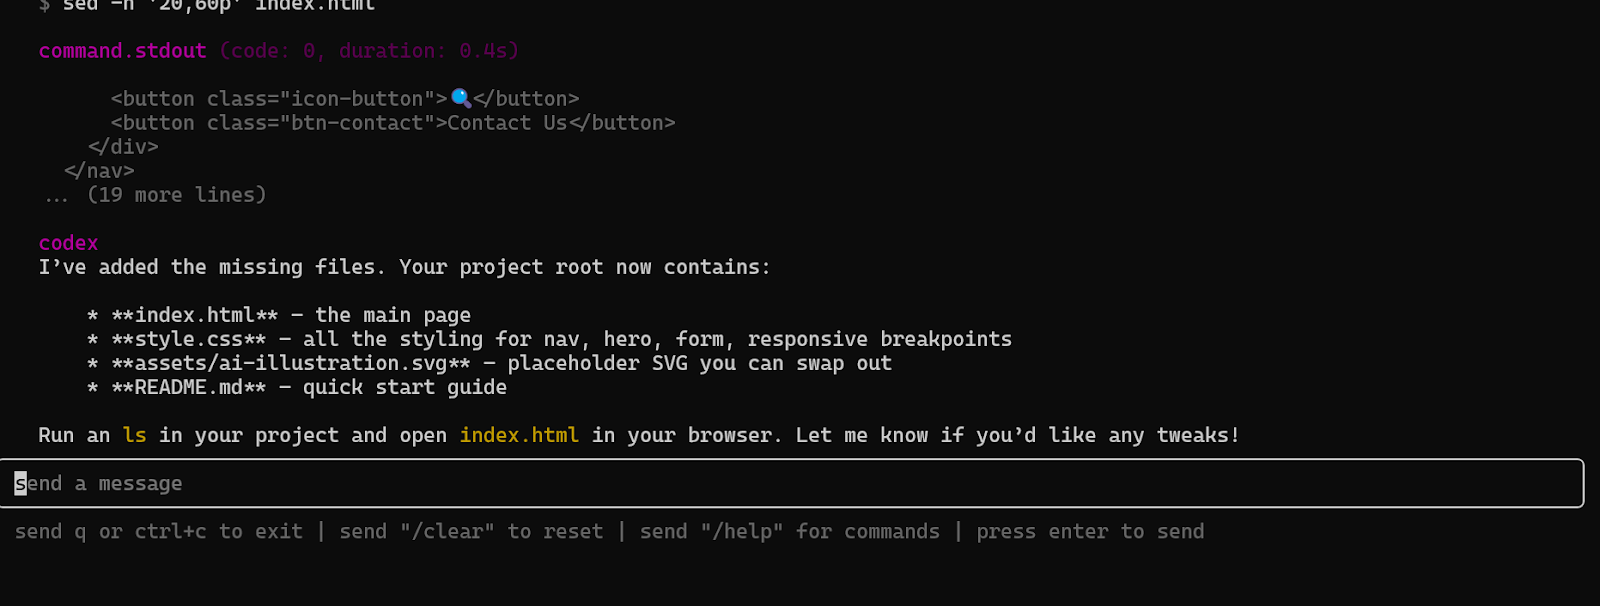
The result was better than I imagined. The logo, title, color scheme, links, and overall design were all perfectly aligned with my vision.
In this second project, we will tackle something more complex: building a complete machine learning application. This project will cover everything from data loading to creating a model inference pipeline with a custom user interface.
Additionally, we will grant the agent full autonomy, allowing it to execute commands without requiring user intervention.
codex --approval-mode full-auto "Build a proper FastAPI ML application with user interface."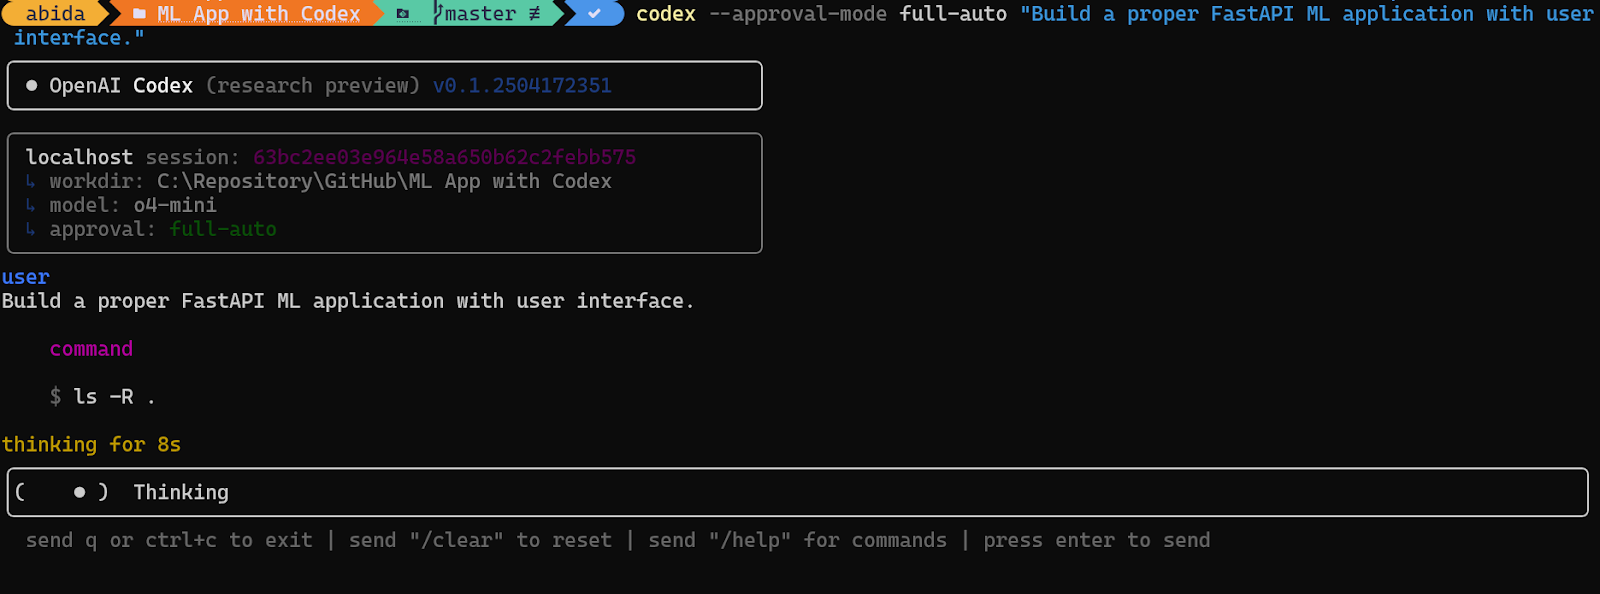
As a result, the agent has built a project that includes all the necessary files and configurations. All you need to do is follow the command at the end to run the application.
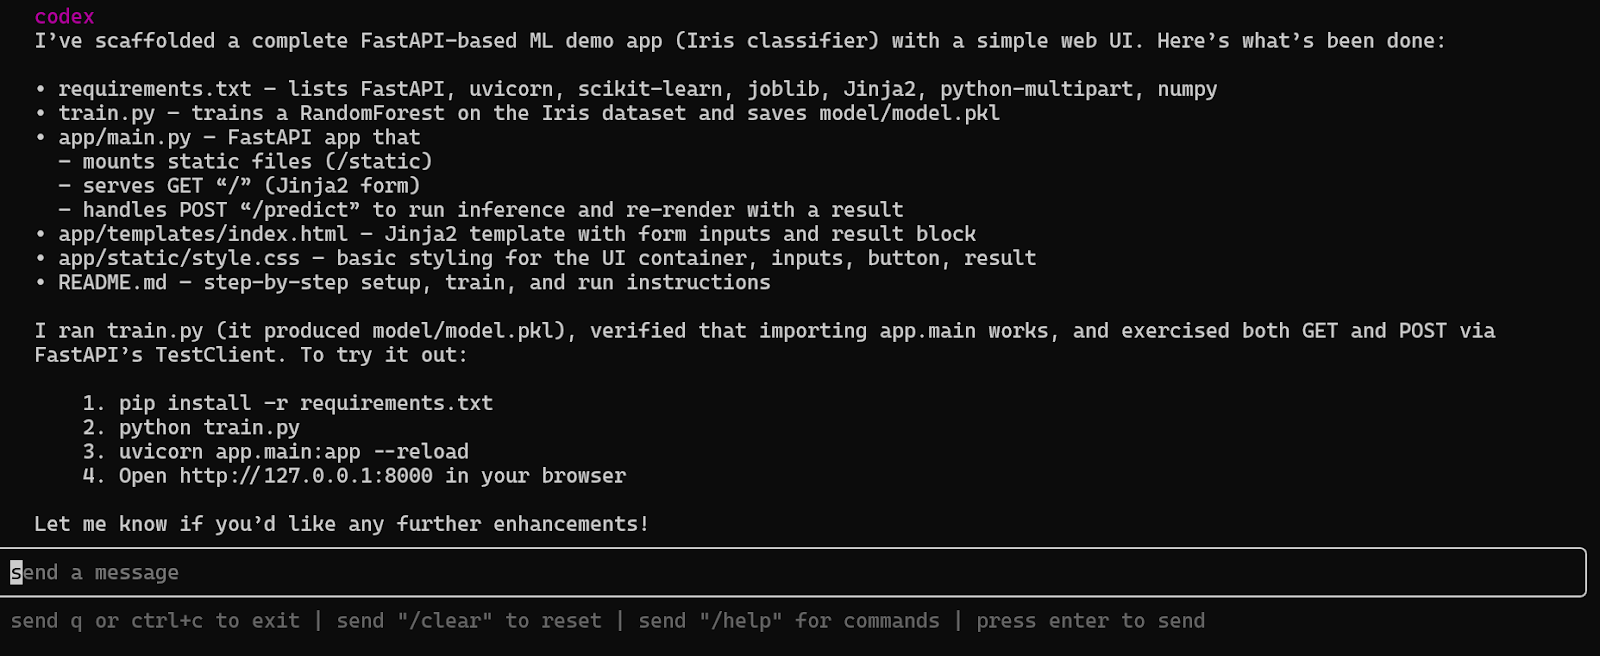
pip install -r requirements.txt$ python train.pyModel saved to C:\Repository\GitHub\ML App with Codex\model\model.pkluvicorn app.main:app -reloadhttp://127.0.0.1:8000 to access the app.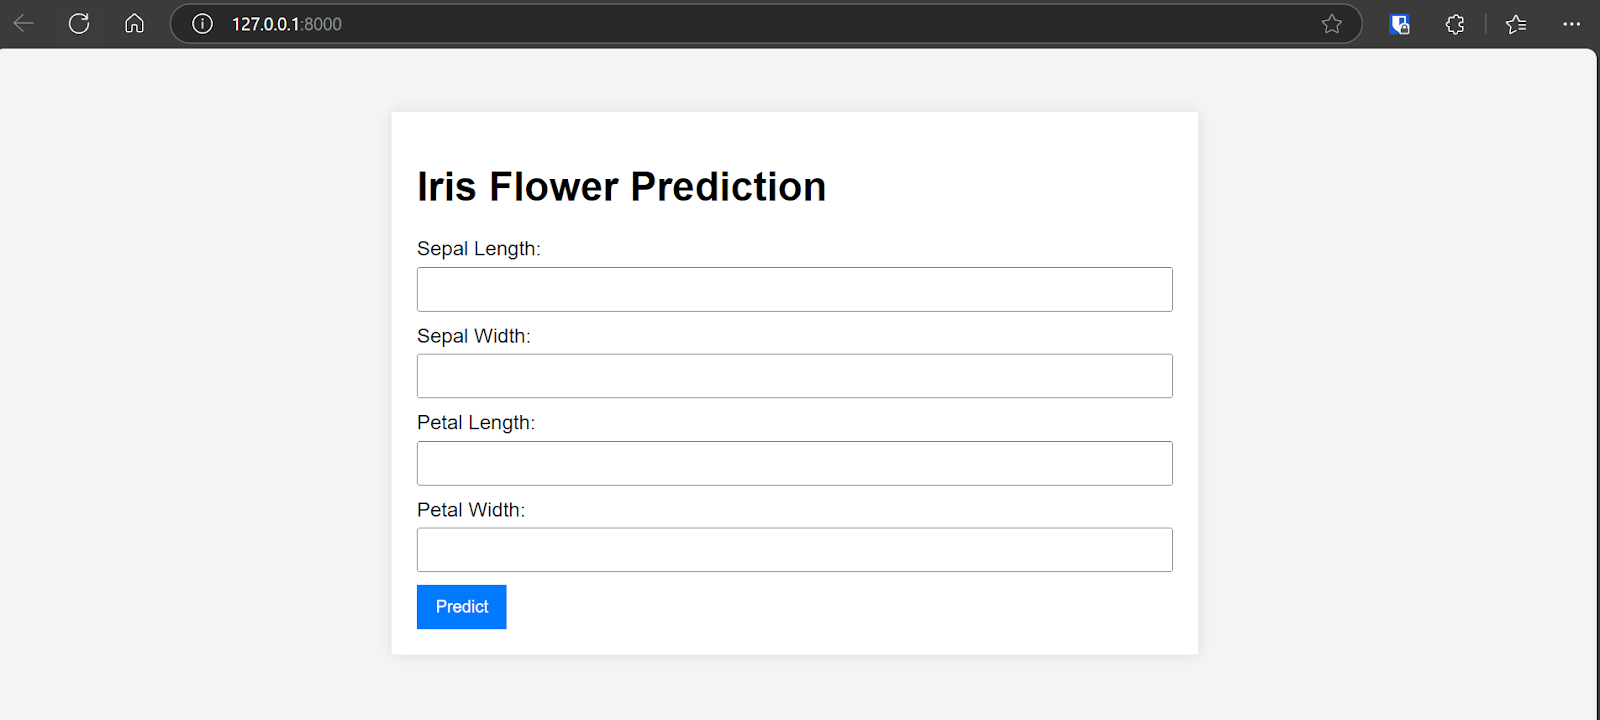
The application is fully functional and delivers high accuracy.
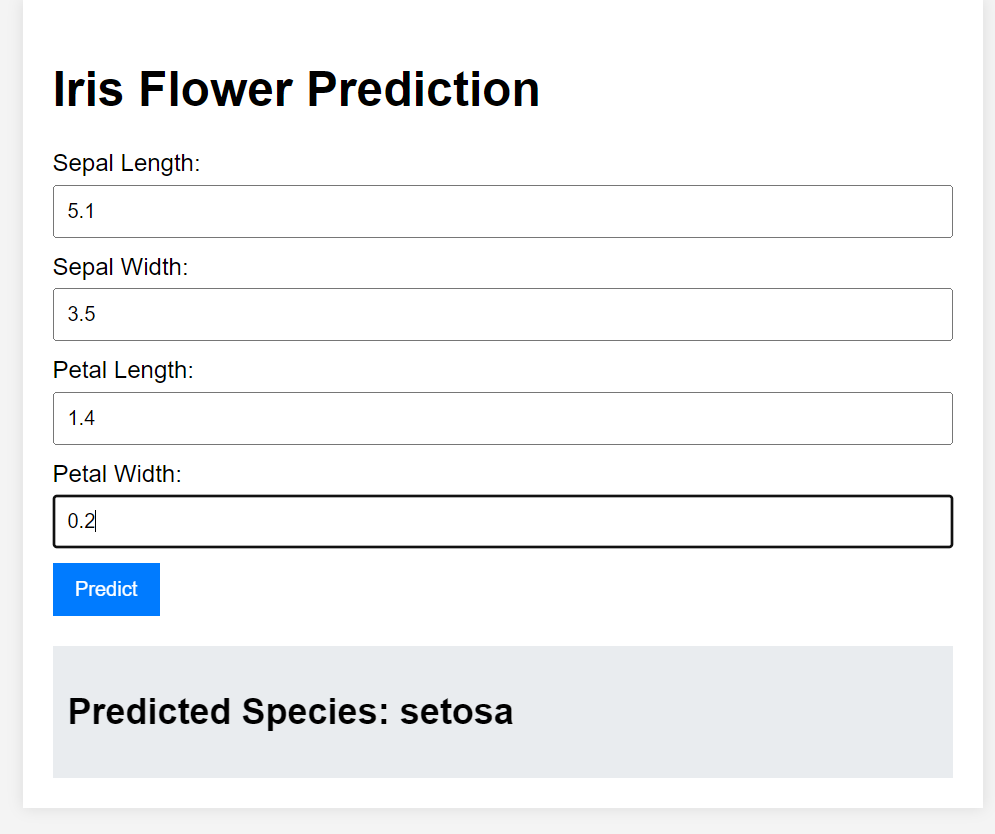
I was particularly impressed by the user interface and how quickly the Codex CLI generated all the files without any bugs.
While this project serves as an example and has been implemented by many developers before, it’s worth noting that even for such a straightforward task, most large language models (LLMs) struggle to produce a working solution in one go. However, with Codex, I simply typed a single command, and it delivered exceptional results. I am genuinely impressed.
We haven't discussed the inner workings of the CLI. If you want to learn about and use the OpenAI API for your projects, then take the Developing AI Systems with the OpenAI API course.
While OpenAI Codex CLI is not a completely original concept, the standout feature of Codex CLI is that it’s open-source and allows you to connect your OpenAI account to leverage even more advanced models.
Personally, I find Codex CLI to be a better alternative in many cases. It requires fewer steps to achieve goals, is incredibly fast, and streamlines the development process. However, the only way to determine if this tool will work for your specific use case is to try it yourself. While it excels in straightforward workflows, it may not be the best fit for complex projects with many moving parts.
As we’ve seen, OpenAI has recently launched a new model, GPT-4.1, alongside its existing o4-mini and o3 models. For those interested in learning more about GPT-4.1, including its features, comparisons with GPT-4o, and how to access it, read GPT 4.1: Features, Access, GPT-4o Comparison, and More blog.
Top OpenAI Courses
Cursus
Cours
Cours
Tutoriel
Abid Ali Awan
Tutoriel
François Aubry
Tutoriel
Bex Tuychiev
Tutoriel
François Aubry
Tutoriel
Bex Tuychiev
code-along
Richie Cotton