Kursus
Pengembangan Kode dengan Bantuan AI untuk Developer
1 Hr 30 Min
9.9K
Note: Bonsai 2 27B is now available, based on Qwen3.8 27B
Qwen3.6-27B has become a popular choice for running a capable reasoning and coding model locally. It is fast and powerful, but a full 27-billion-parameter model still requires a significant amount of memory.
Using conventional quantization can reduce those requirements, but it may also cause noticeable performance degradation.
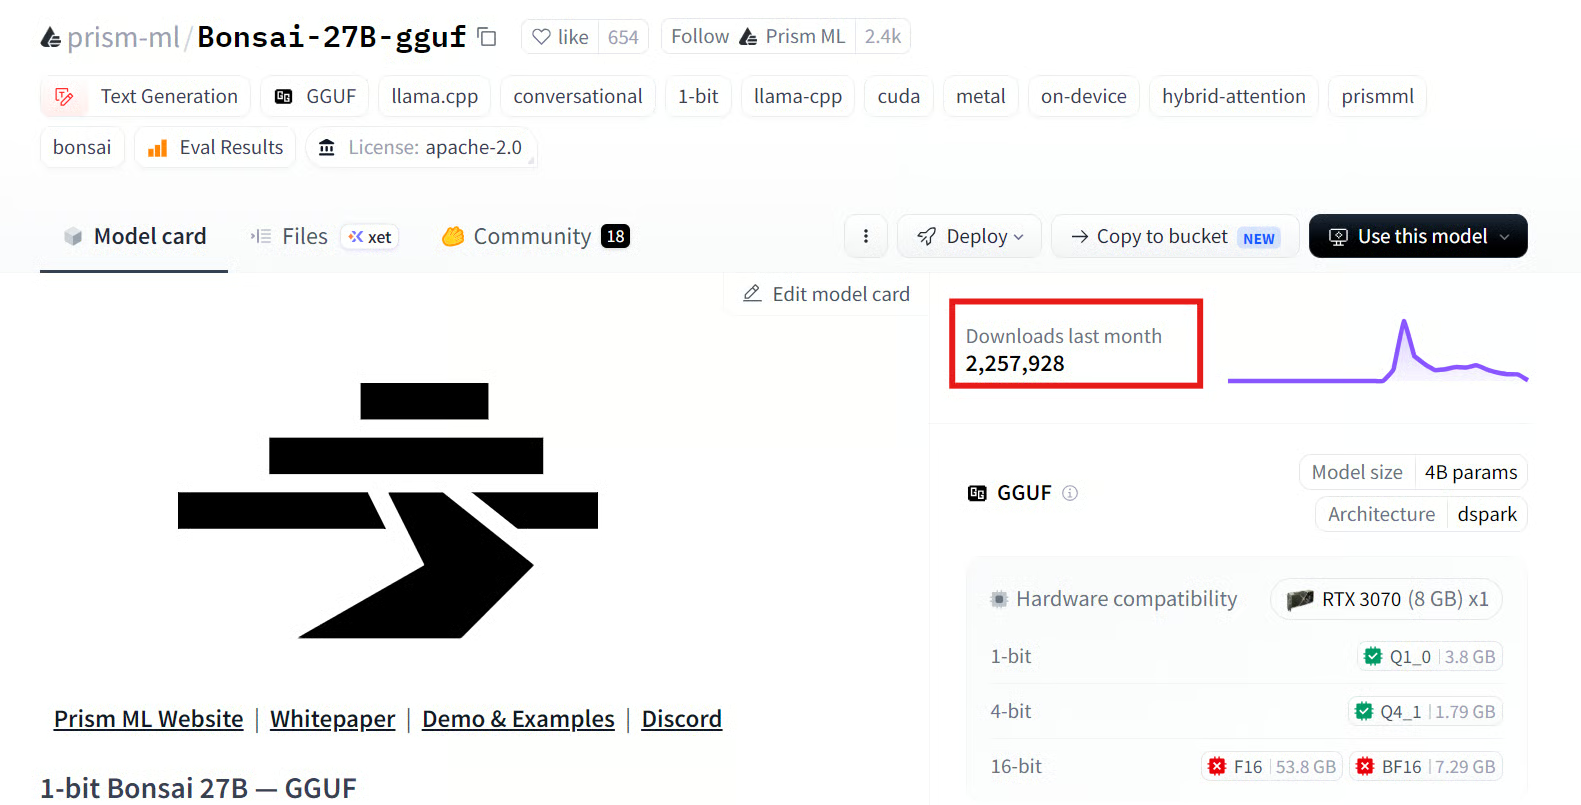
Source: prism-ml/Bonsai-27B-gguf
Prism ML approached this problem differently with Bonsai 27B, a highly compressed 1-bit version of Qwen3.6-27B.
According to Prism ML, Bonsai retains almost 90% of the original model’s benchmark performance while reducing the model weights to approximately 3.9 GB.
This makes it possible to experiment with a 27B-class reasoning model on much more accessible consumer hardware.
In this tutorial, I will use the 1-bit Bonsai-27B-Q1_0.gguf model and Prism ML’s custom setup script. The script automatically downloads the model, selects a compatible prebuilt runtime, and configures it for the available hardware.
I will then test Bonsai from the command line, launch its local web interface, access it through an OpenAI-compatible API, and connect it to the Pi coding agent.
What makes Bonsai 27B interesting is that it is not simply another conventionally quantized Qwen model.
Most local GGUF models are compressed after training by reducing the numerical precision of an existing model.
Bonsai takes a more aggressive approach by adapting the model around binary weights, allowing much of the network to operate using values close to either −1 or +1.
This matters because running large language models is often limited by memory capacity and memory bandwidth, rather than raw computing power alone.
Reducing the precision of the weights lowers the amount of data that must be stored and moved during inference.
With an optimized runtime, this can make a large 27B model practical on consumer hardware that would normally struggle to load or run it.
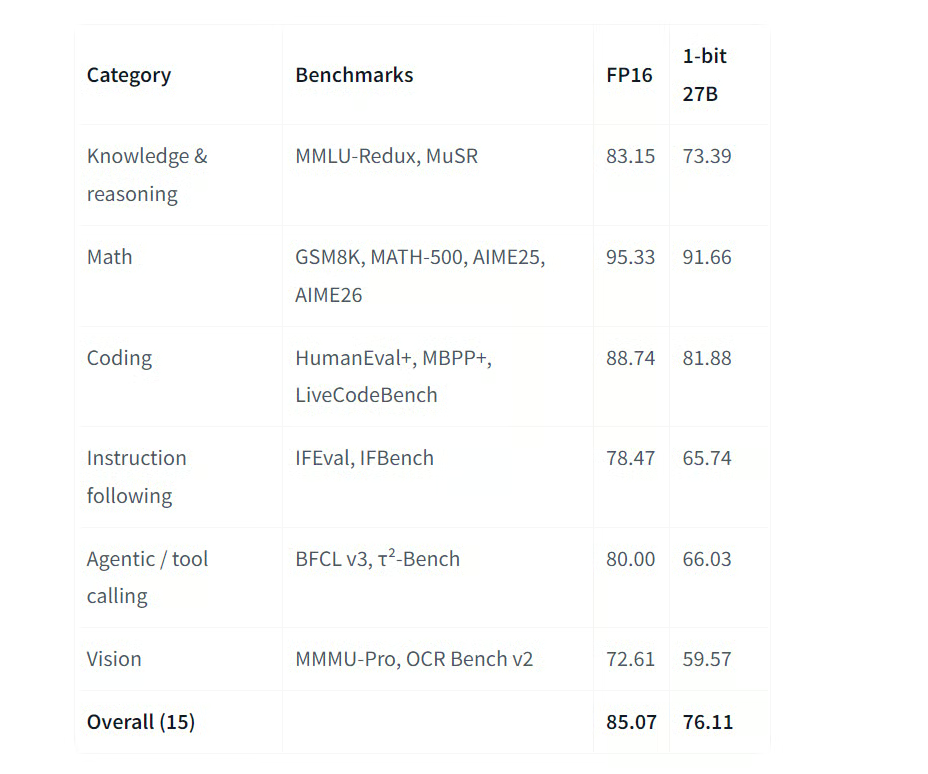
Source: prism-ml/Bonsai-27B-gguf · Hugging Face
Bonsai also preserves capabilities needed for more than basic chat.
It supports reasoning, coding, structured tool calls, long-context prompts, and agentic workflows.
It can also run behind an OpenAI-compatible API, making it easier to connect with coding agents, retrieval systems, automation tools, and applications that already support OpenAI-style endpoints.
However, Bonsai should not be treated as identical to the full-precision Qwen3.6-27B model.
Extreme compression still involves trade-offs and may affect instruction following, tool selection, reasoning consistency, and output quality differently across tasks.
Its main advantage is the balance it provides: large-model capabilities with substantially lower hardware requirements.
Before starting, make sure your system has:
A dedicated GPU is optional because Bonsai can also run using the CPU.
However, CPU inference will generally be slower, particularly when the model generates long reasoning responses.
For this guide, I am using a single NVIDIA RTX 5070 Ti with 16 GB of VRAM.
This provides enough memory to load the approximately 3.9 GB model weights entirely on the GPU and leaves additional memory for the KV cache, model activations, and runtime overhead.
However, available VRAM also determines how much context you can use.
Although Bonsai 27B supports conversations exceeding 256K tokens, loading its complete training context can consume a large amount of additional memory and may exhaust systems with limited RAM or VRAM.
Prism ML therefore uses a memory-aware default context size rather than automatically allocating the complete 262K-token window.
In this tutorial, we will initially use a smaller 8,192-token context window for command-line testing. We will then increase it when launching the server, depending on the available memory.
A smaller context window is sufficient for most coding and chat tasks and provides faster startup with lower memory usage.
Open a terminal and clone the official Bonsai demo repository:
git clone https://github.com/PrismML-Eng/Bonsai-demo.git
cd Bonsai-demo
The repository includes scripts for downloading the model, detecting your hardware, selecting the correct runtime binary, running the model from the terminal, and launching a local server.
Run the following setup command:
BONSAI_FAMILY=bonsai \
BONSAI_MODEL=27B \
BONSAI_OPENWEBUI=0 \
BONSAI_CODE_INTERPRETER=0 \
./setup.sh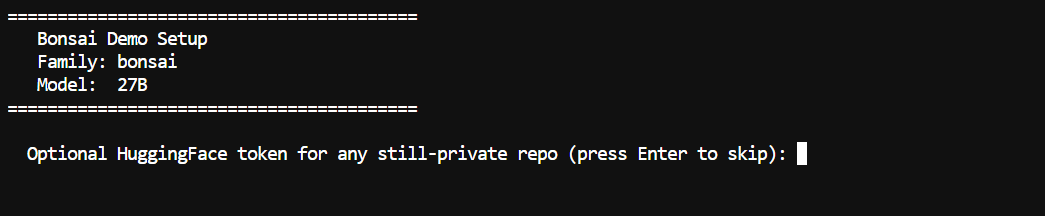
During setup, you may be asked to enter a Hugging Face access token.
This is optional for public model files, so you can skip it by pressing Enter.
However, using a token may help avoid anonymous download limits.

The script downloads approximately 7.15 GB of files, including:
Bonsai-27B-Q1_0.gguf language modelmmproj)Setting BONSAI_FAMILY=bonsai selects the compact 1-bit Bonsai model instead of the larger ternary version.
The following options disable two additional environments:
BONSAI_OPENWEBUI=0
BONSAI_CODE_INTERPRETER=0
Open WebUI is not required for this tutorial because the included server binary already provides a lightweight browser-based chat interface.
The code-interpreter environment is also unnecessary for the basic local setup.
During installation, the setup script automatically:
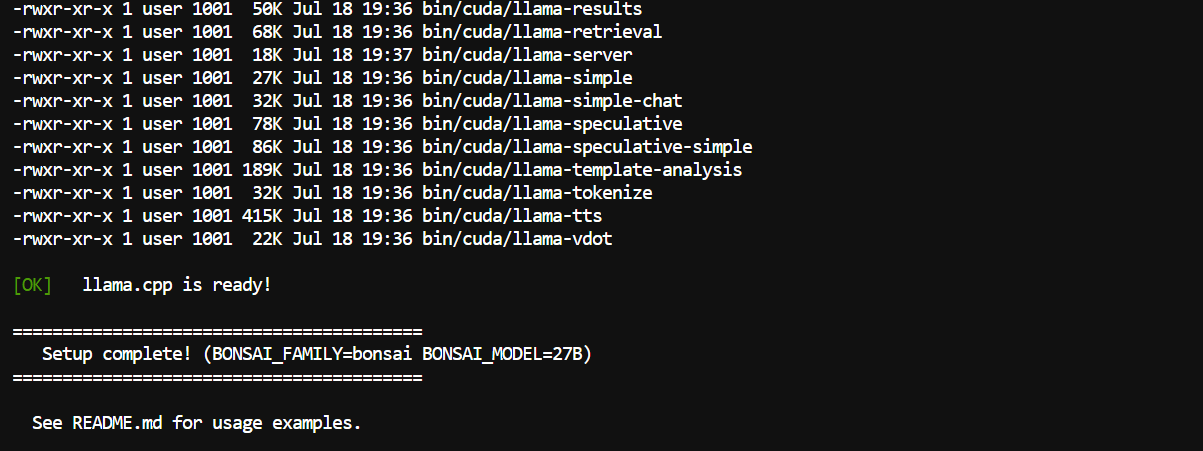
This automated setup is especially useful because you do not need to manually compile llama.cpp or select a CUDA, ROCm, Vulkan, Metal, or CPU binary yourself.
I recommend the llama.cpp tutorial if you need a quick primer.
After installation, test the model directly from the terminal using the included llama.cpp command-line interface:
BONSAI_FAMILY=bonsai \
BONSAI_MODEL=27B \
BONSAI_CTX=8192 \
./scripts/run_llama.sh \
-p "Create a simple Python function that calculates compound interest."
This command:
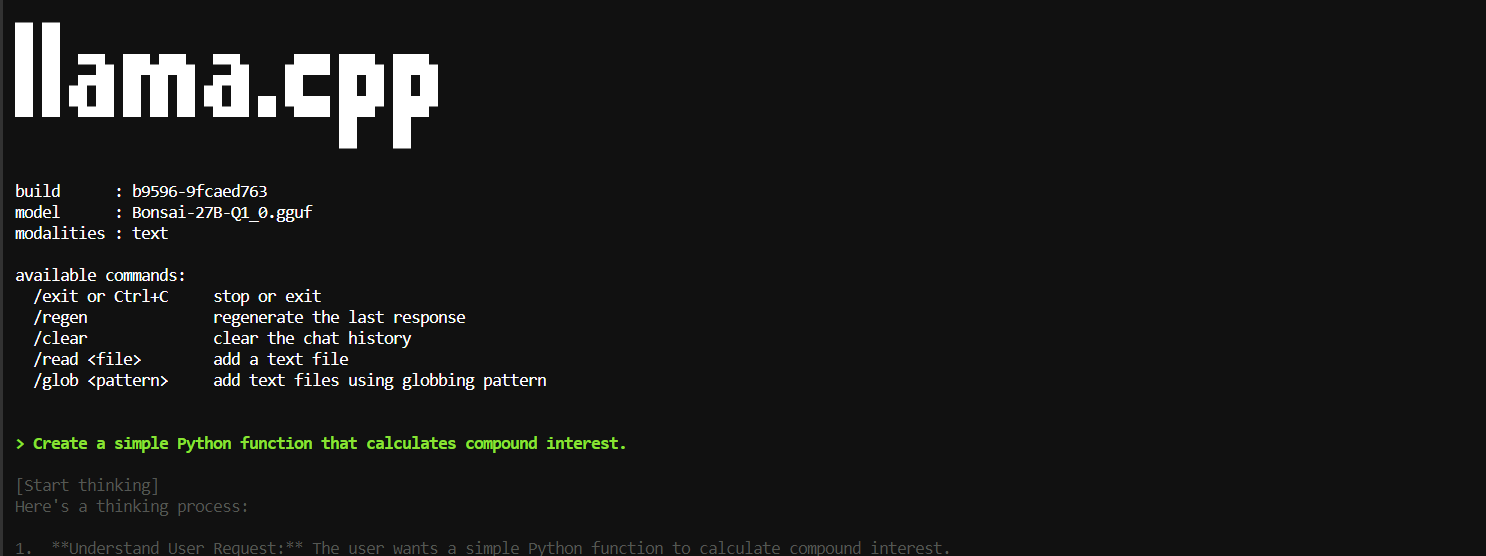
The first launch may take a few moments while the model is loaded into system memory or GPU VRAM.
Once ready, the terminal displays the active model, build information, and available commands before generating the response.
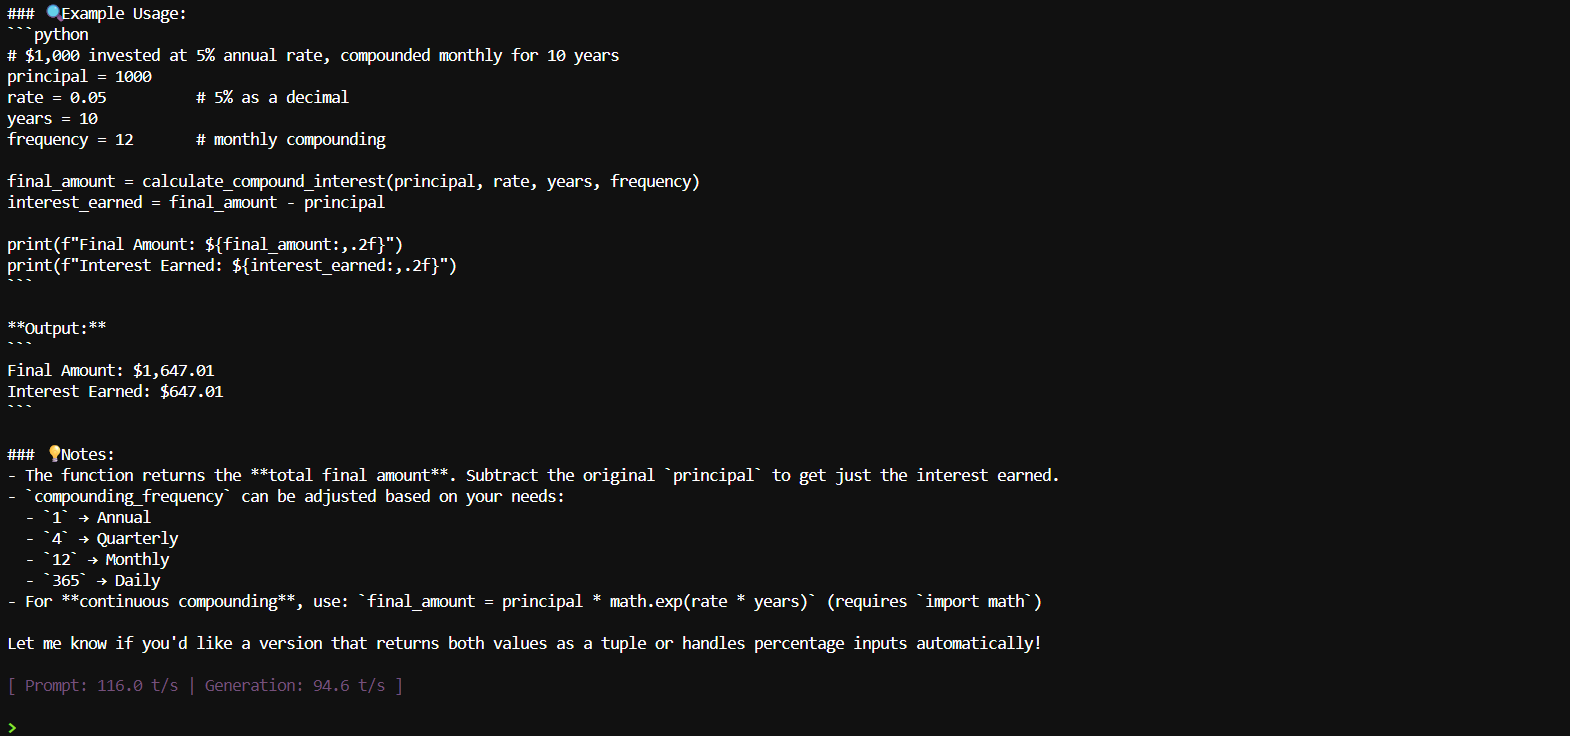
As shown in the output, Bonsai first produces its reasoning process and then generates a complete Python example, including the function, usage instructions, and calculated result.
After the first response, the session remains open, allowing you to enter additional prompts without restarting the model.
First, press Ctrl+C to close the interactive CLI session from the previous step.
Then start the local Bonsai server:
BONSAI_FAMILY=bonsai \
BONSAI_MODEL=27B \
BONSAI_CTX=100000 \
./scripts/start_llama_server.sh \
--alias bonsai-27b \
--host 0.0.0.0 \
--port 8910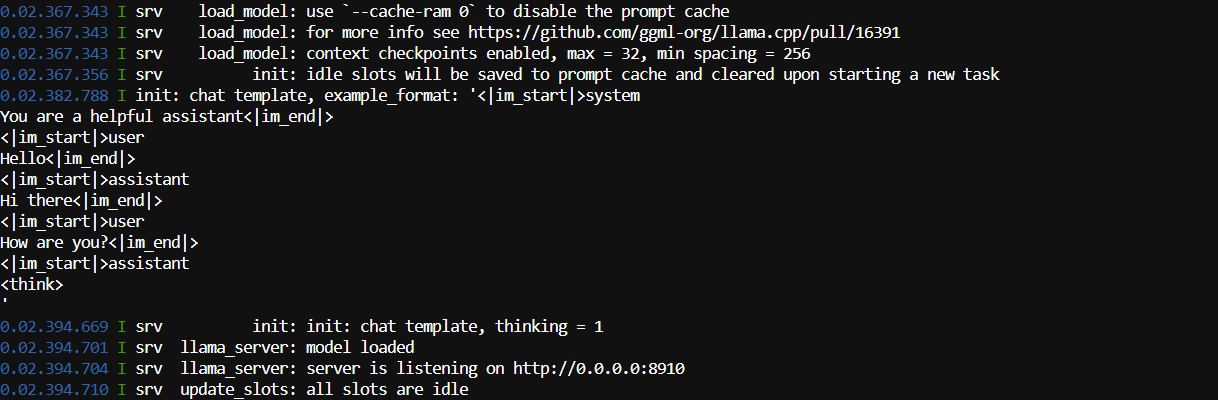
This command:
bonsai-27bA 100,000-token context window requires significantly more memory than the earlier 8,192-token CLI test. Reduce BONSAI_CTX if the model fails to start or your system runs out of RAM or VRAM.
Because --host 0.0.0.0 exposes the server to your local network, avoid using it on an untrusted network. For local access only, replace it with:
--host 127.0.0.1Keep this terminal open while using the model. Closing it will stop the server.
The Bonsai server provides:
The OpenAI-compatible API is available at:
http://127.0.0.1:8910/v1Open a second terminal and send a request to the chat-completions endpoint:
curl http://127.0.0.1:8910/v1/chat/completions \
  -H "Content-Type: application/json" \
  -d '{
    "model": "bonsai-27b",
    "messages": [
      {
        "role": "user",
        "content": "Write a Python function for loading and validating a CSV file."
      }
    ],
    "max_tokens": 1000
  }'
The request uses the same structure as the OpenAI Chat Completions API:
model selects the server alias created earliermessages contains the conversationmax_tokens limits the number of generated tokensThe API returned JSON at about 95 tokens per second, but the response stopped at the 1,000-token limit, so increase "max_tokens" to 3000 for a complete answer before connecting Bonsai to applications, agents, or Python programs.
Open the following address in your browser:
http://127.0.0.1:8910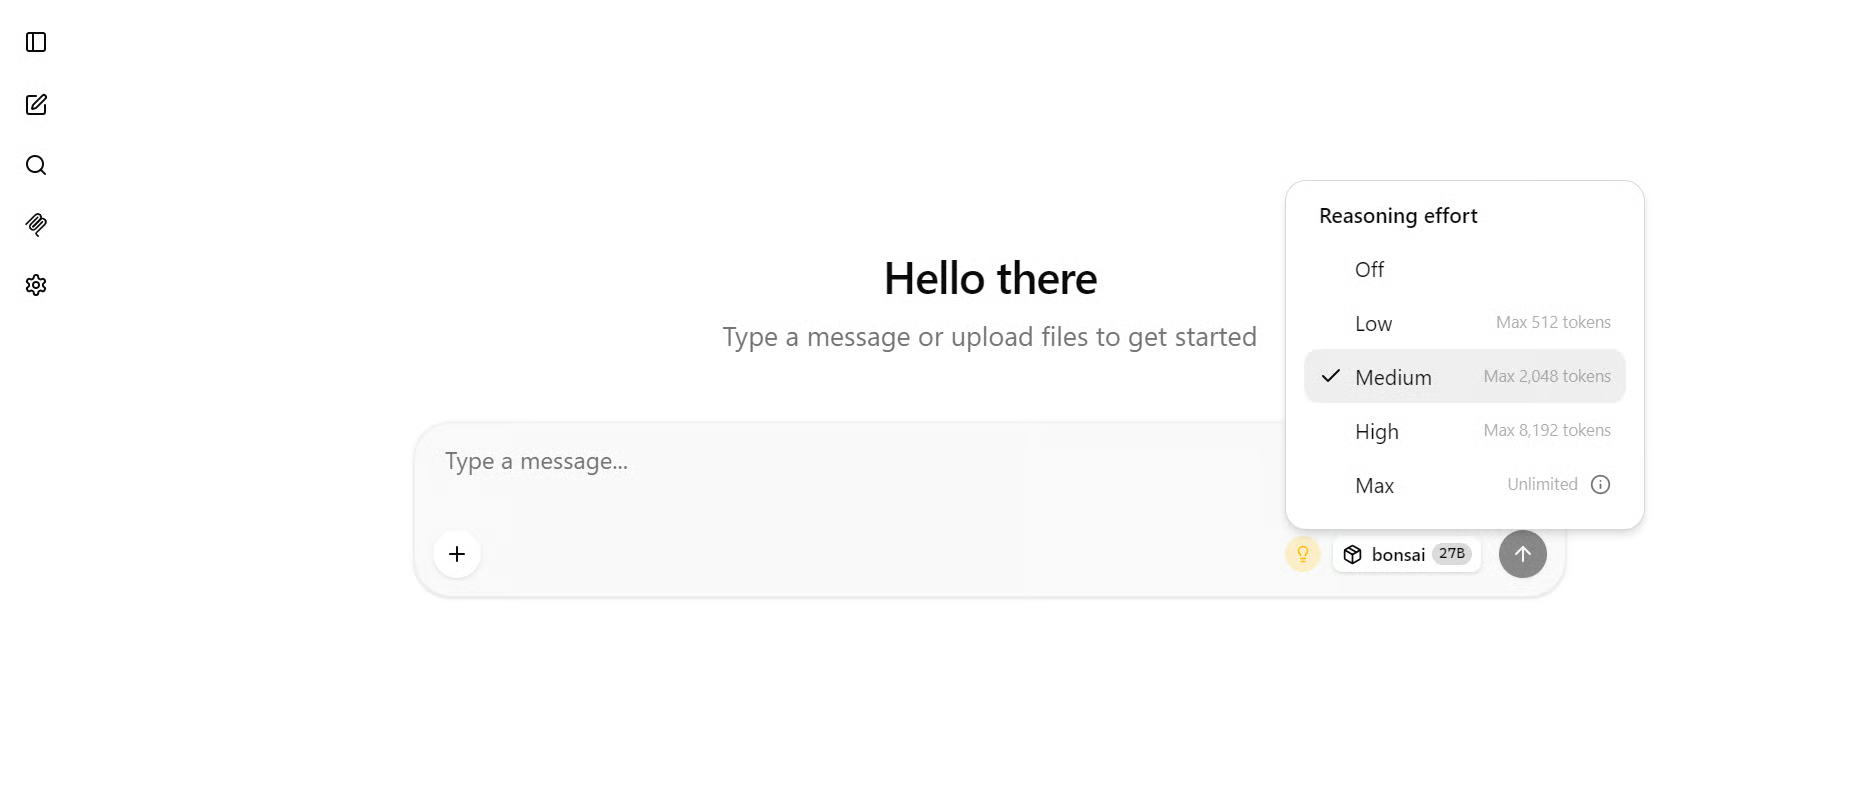
The built-in llama.cpp interface lets you chat with Bonsai, upload files, and adjust the reasoning effort from Off to Max.
Test it with a coding prompt such as:
Create a Python command-line application that converts CSV files to JSON.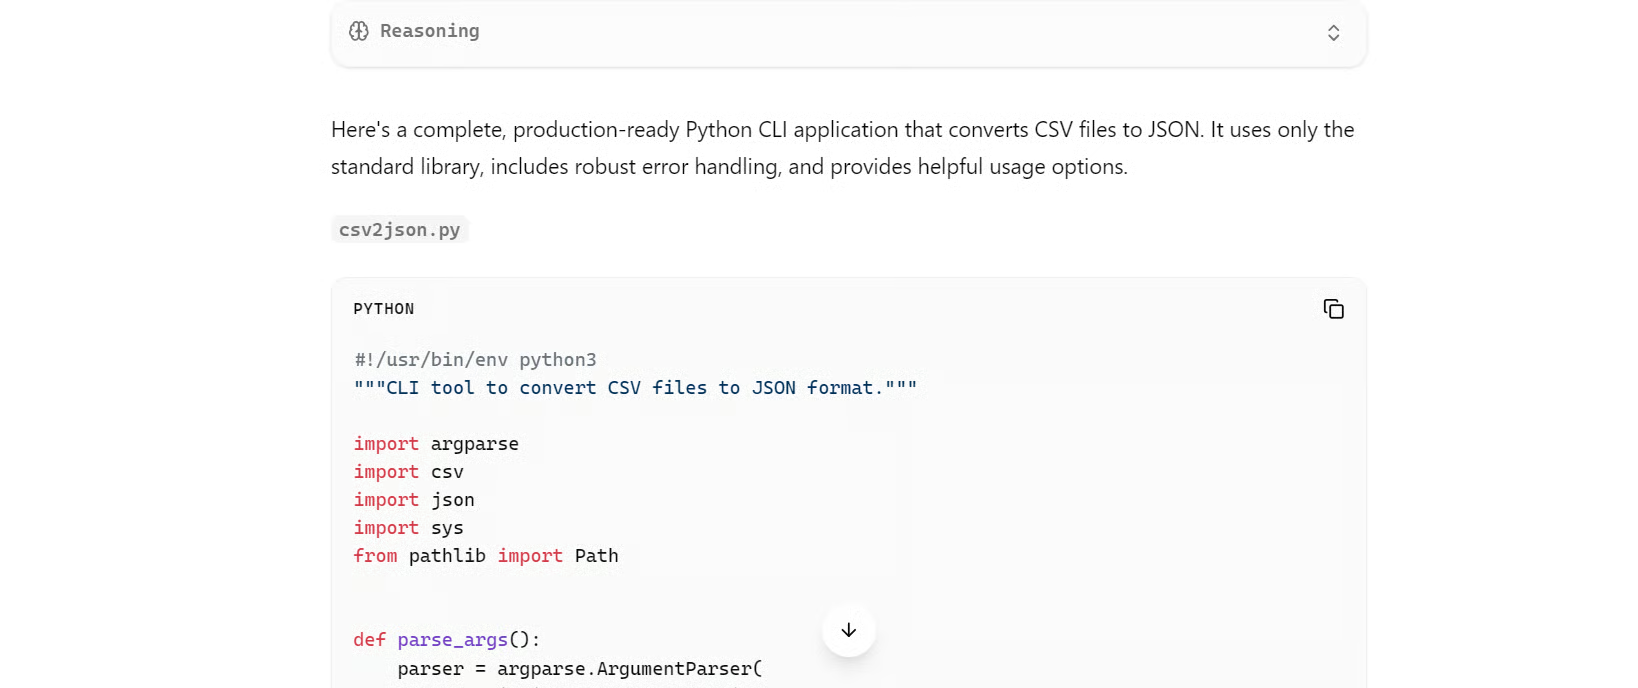
Bonsai generated a complete Python script at approximately 92 tokens per second on my RTX 5070 Ti.
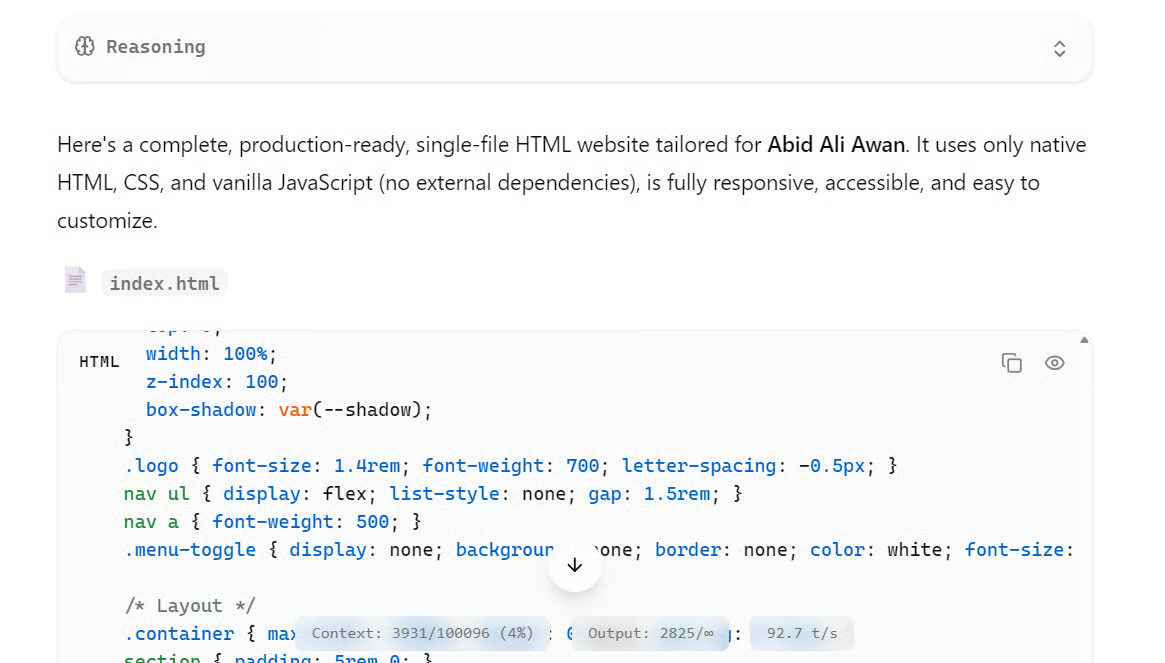
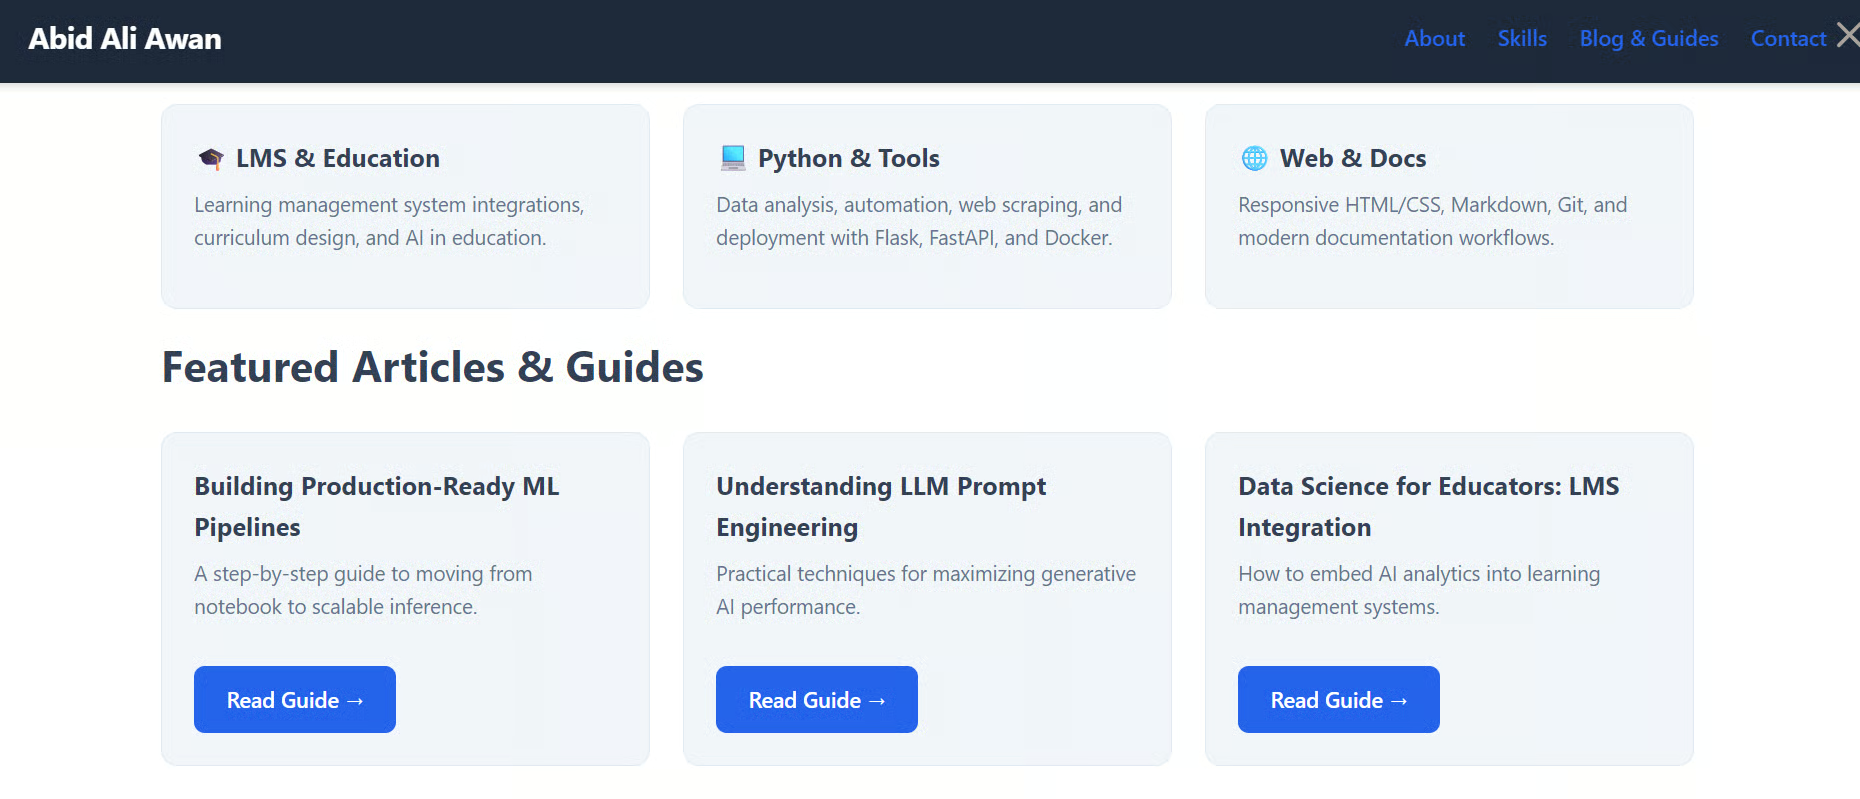
I also asked it to create a personal portfolio website.
Although the code worked, I was not satisfied with the generated UI, as the design looked basic and generic.
This suggests that Bonsai is capable of producing functional code, but it may require more detailed prompts and several revisions to create a polished interface.
Pi is a terminal-based coding agent that we use to test Bonsai 27B in a real agentic coding workflow through its local OpenAI-compatible API.
Open a new terminal and install the Pi coding agent:
curl -fsSL https://pi.dev/install.sh | sh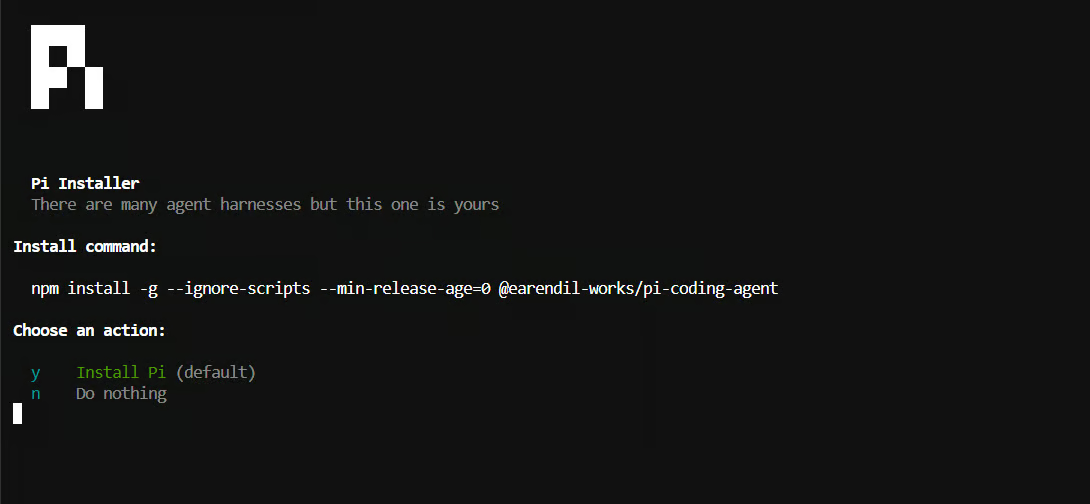
When prompted, press Enter or type y to continue with the default installation.
Confirm that Pi was installed successfully:
pi --versionAt the time of testing, the installed version was:
0.82.0Make sure the Bonsai server is still running, then launch a new terminal and create Pi’s configuration directory:
mkdir -p ~/.pi/agentCreate the custom model configuration file:
nano ~/.pi/agent/models.jsonPaste the following configuration:
{
  "providers": {
    "bonsai-local": {
      "baseUrl": "http://127.0.0.1:8910/v1",
      "api": "openai-completions",
      "apiKey": "local",
      "compat": {
        "supportsDeveloperRole": false,
        "supportsReasoningEffort": false
      },
      "models": [
        {
          "id": "bonsai-27b",
          "name": "Bonsai 27B Local",
          "reasoning": true,
          "input": ["text"],
          "contextWindow": 100000,
          "maxTokens": 50000,
          "cost": {
            "input": 0,
            "output": 0,
            "cacheRead": 0,
            "cacheWrite": 0
          }
        }
      ]
    }
  }
}
This configuration connects Pi to the local OpenAI-compatible endpoint, registers the model as Bonsai 27B Local, and matches the server’s 100,000-token context setting.
Save and close the file:
Ctrl + O
Enter
Ctrl + X
Pi automatically loads custom model providers from ~/.pi/agent/models.json.
Make sure the Bonsai server is still running, then create a new project directory:
mkdir simple-python
cd simple-python
Start Pi using the local Bonsai model:
pi --provider bonsai-local --model bonsai-27b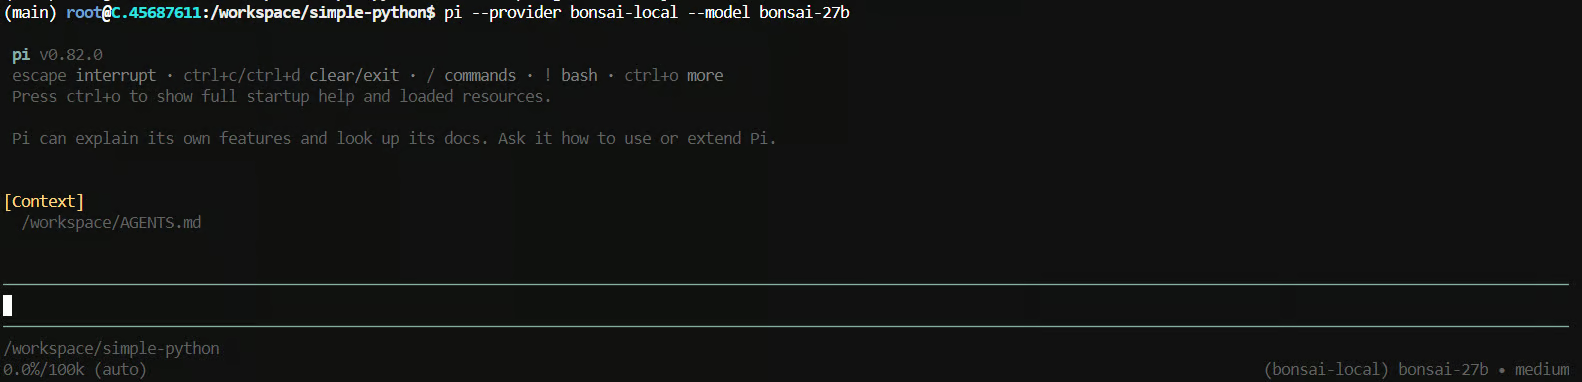
Enter a prompt such as:
Build a simple Python application with a FastAPI backend and a modern,
responsive web interface that accepts user input, processes it,
and displays the result.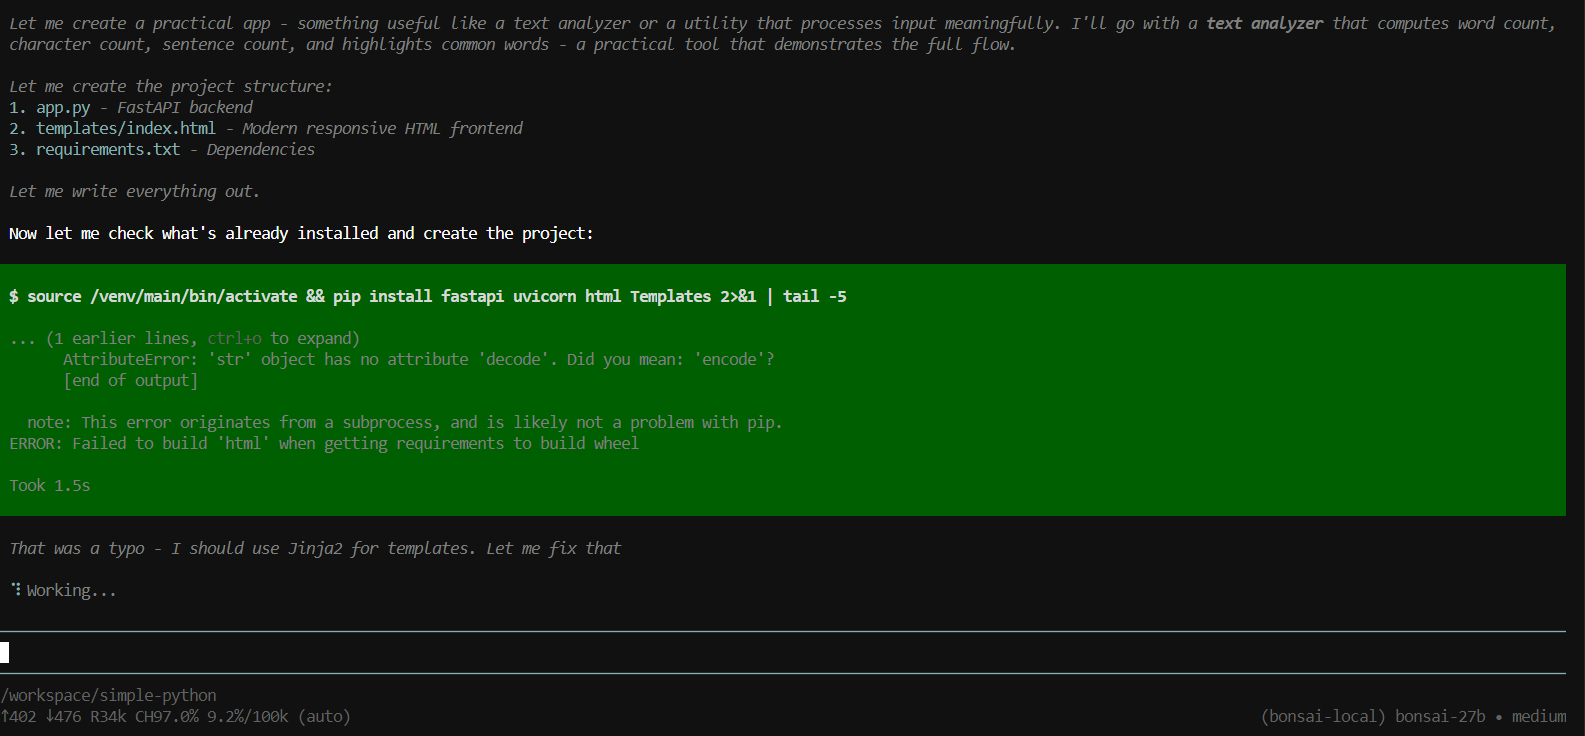
Pi began reasoning, created the project files, installed the required packages, and produced a text-analysis application with a FastAPI backend and responsive frontend.
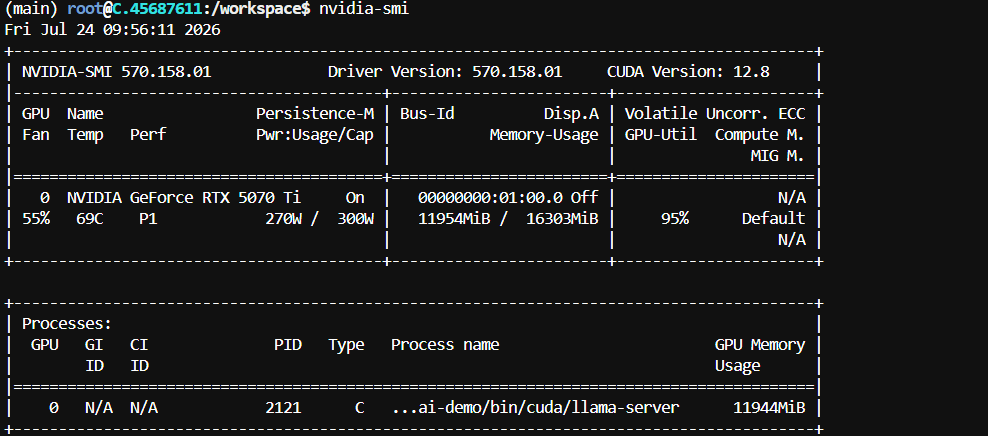
While the model was running with a 100,000-token context window, nvidia-smi showed approximately 11.9 GB of VRAM usage on my RTX 5070 Ti:
At the end of the run, Pi confirmed that the task was complete and produced a clear summary of everything it had done.
This included the files it created, the application’s main features, the tests it performed, and the exact commands needed to run the project locally.
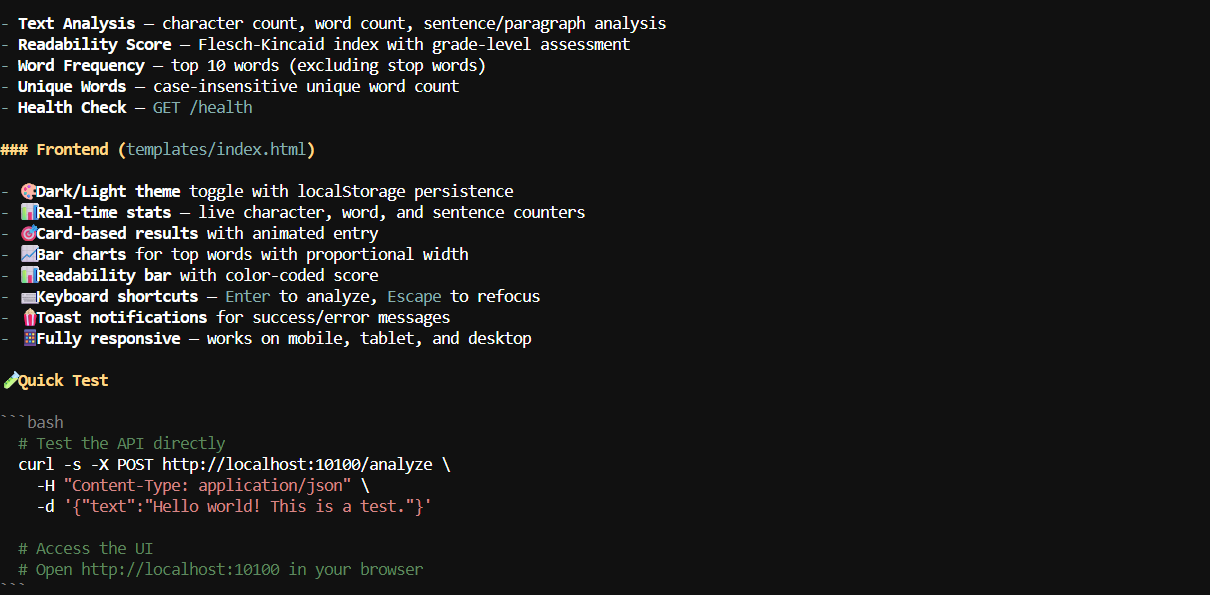
After generation, Pi summarized the files and features it created.
I tested the backend using:
curl -s -X POST http://localhost:10100/analyze \
  -H "Content-Type: application/json" \
  -d '{"text":"Hello world! This is a test."}'
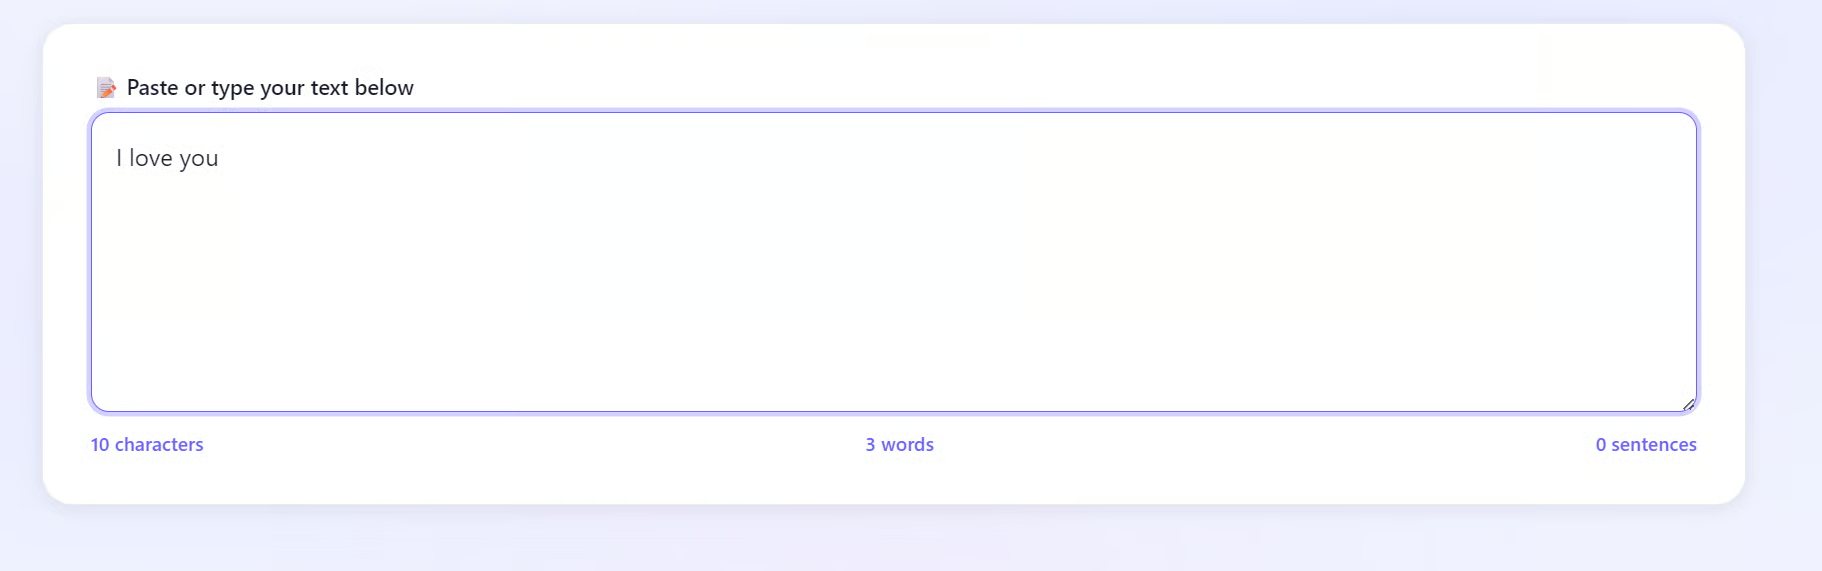
The API worked, and the interface looked better than the earlier website generated through the basic web UI.
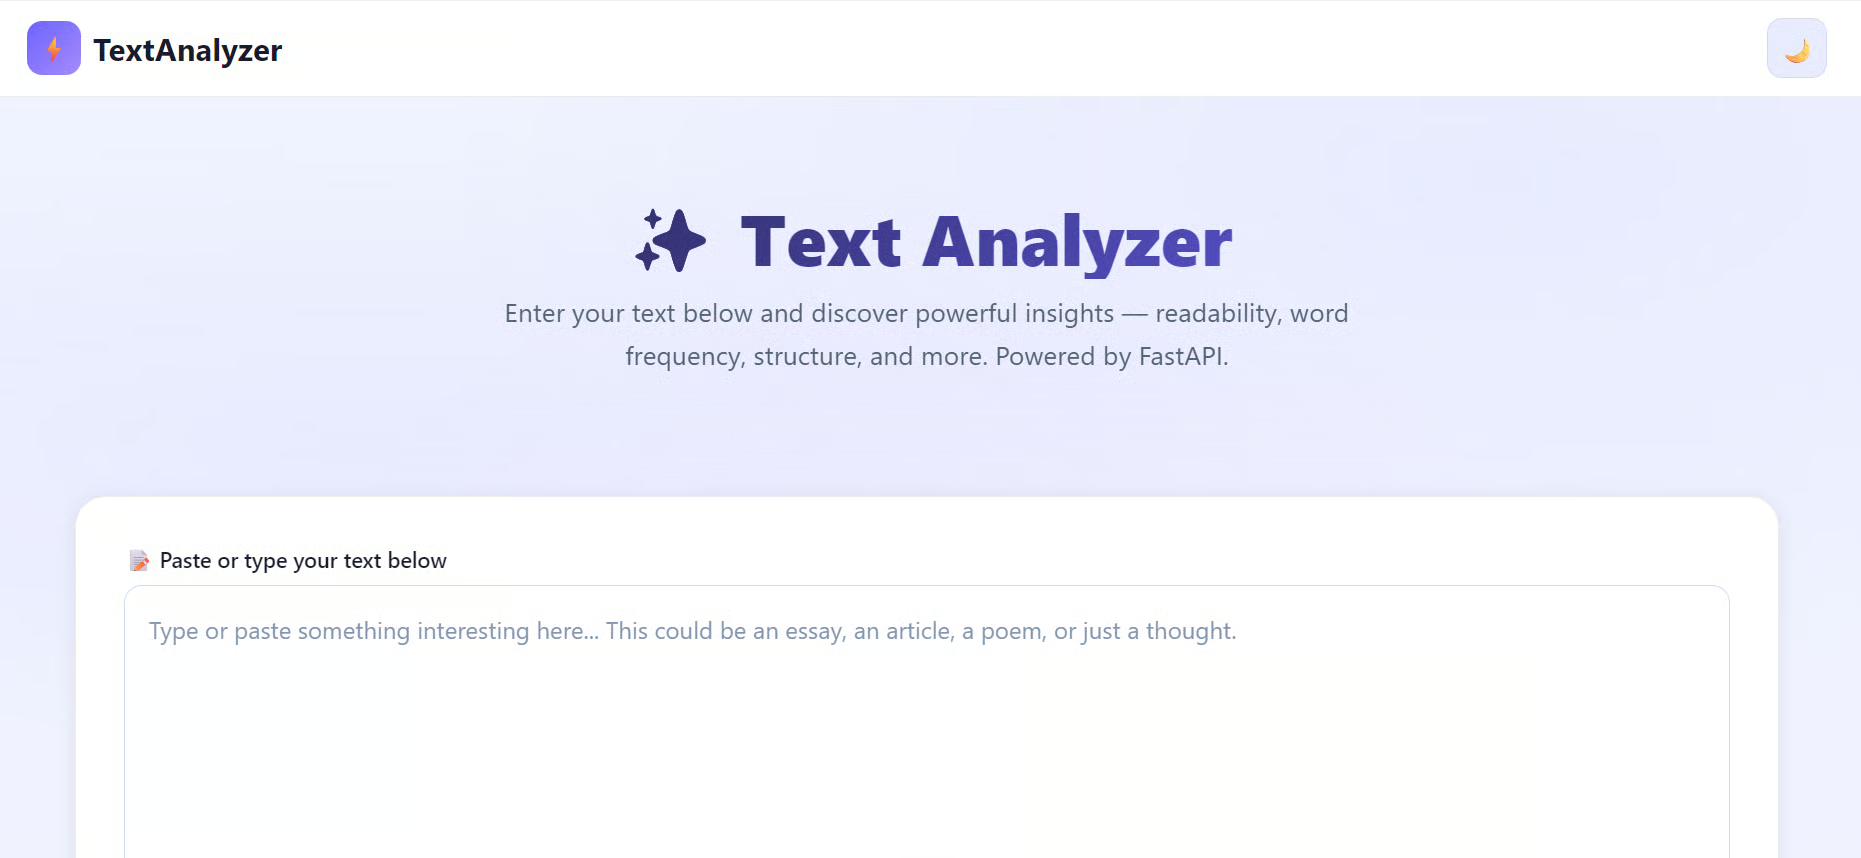
However, the application was still incomplete: some buttons and controls were missing, and the frontend did not display all the statistics available from the backend API.
This shows that Bonsai can build a functional full-stack application, but the result still needs testing and refinement.
In my testing, Bonsai 27B still feels like a heavily compressed model.
Its output quality is not quite on par with a Q4-quantized Qwen3.6-27B, which I have tested previously and found more reliable for coding-agent workflows.
The Q4 version requires more memory, but it delivers stronger reasoning, better code generation, and more consistent results.
That said, Bonsai 27B remains remarkably capable for a model with a footprint of roughly 3.8 GB.
It understands instructions, creates project files, runs commands, tests its work, and can build functional applications locally. Within this size category, it is one of the most capable models I have tried.
For serious coding-agent work, I would still choose the Q4 version of Qwen3.6-27B, especially since my RTX 3090 has 24 GB of VRAM and can handle the larger model comfortably.
Even so, I really enjoyed using Bonsai 27B and was impressed by the broader Prism ML ecosystem. Its automated setup, optimized runtime, built-in web interface, OpenAI-compatible API, and agent integrations make it far easier for more people to run and experience a large reasoning model locally on consumer hardware.
Top DataCamp Courses
Kursus
Kursus
Program
blogs
Matt Crabtree
9 mnt
Tutorials
Abid Ali Awan
7 mnt
Tutorials
Aashi Dutt
12 mnt
Tutorials
Abid Ali Awan
11 mnt
Tutorials
Abid Ali Awan
7 mnt
Tutorials
Abid Ali Awan
10 mnt