Programma
Ingegnere AI associato per scienziati dei dati
40 h
MiniMax M2.7 si distingue da molti modelli open-weight perché è progettato per workflow agentici complessi, inclusi l’uso di tool, task di coding multi-step e ragionamento orientato alla produttività.
Anche se rientra nella fascia di modelli di medie dimensioni piuttosto che in quella dei più grandi, MiniMax M2.7 punta a offrire ottime prestazioni in coding e ragionamento con un footprint di deployment molto più pratico.
In questa guida userò Hyperbolic perché offre l’accesso on-demand H200 più economico, provisioning rapido e un modo semplice per avviare macchine GPU Linux per il serving di modelli in stile locale.
Imparerai a:
Avviare una macchina Hyperbolic H200 Linux
Installare llama.cpp per l’inferenza locale
Scaricare la versione UD-IQ4_XS GGUF di MiniMax M2.7 di Unsloth
Eseguire llama-server come API locale compatibile con OpenAI
Collegare il modello locale a OpenCode per workflow di coding agentico
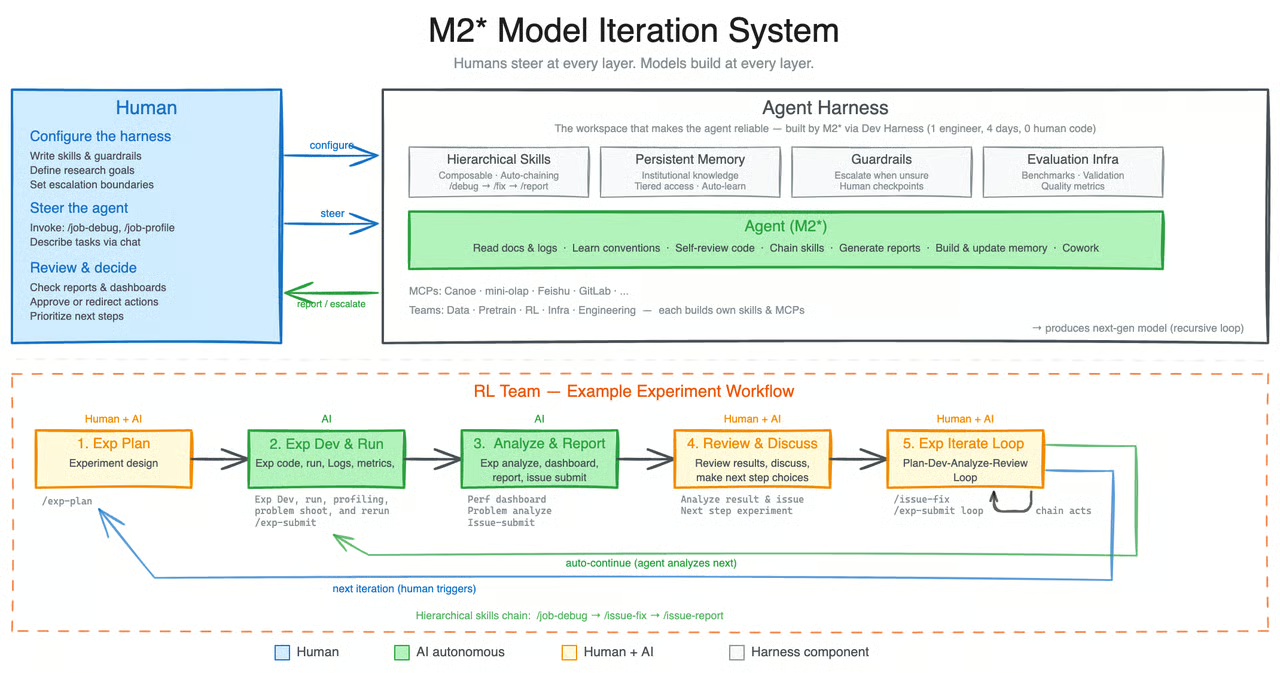
MiniMax M2.7 introduce una direzione più incentrata sugli agenti rispetto ai modelli open precedenti, come MiniMax M2.5. Ciò che lo fa emergere non è solo la capacità di coding o di ragionamento, ma il fatto che sia progettato per partecipare al proprio processo di miglioramento.
Secondo MiniMax, M2.7 è il loro primo modello a contribuire in profondità alla propria evoluzione aiutando a creare harness agentici complessi, gestendo task di produttività elaborati e lavorando con team di agenti, skill avanzate e ricerca dinamica di tool.
Un cambiamento importante con M2.7 è il workflow di auto-evoluzione. Durante lo sviluppo, il modello è stato usato per aggiornare la propria memoria, creare skill complesse per esperimenti di reinforcement learning e perfezionare il proprio processo di apprendimento in base ai risultati di quegli esperimenti.
Tutto questo fa sì che M2.7 sembri meno un modello statico standard e più un sistema costruito per il miglioramento iterativo.
Fonte: MiniMaxAI/MiniMax-M2.7 · Hugging Face
Quello che trovo più interessante è che MiniMax sta posizionando M2.7 come qualcosa in più di un altro modello open. Per me indica un modo più sostenibile di migliorare e addestrare i modelli, in cui i sistemi avanzati possono avere un ruolo più attivo nel proprio sviluppo.
Invece di affidarsi solo a enormi dataset freschi, mostra come nuovi metodi di training e loop di auto-miglioramento possano spingere ancora oltre le prestazioni del modello.
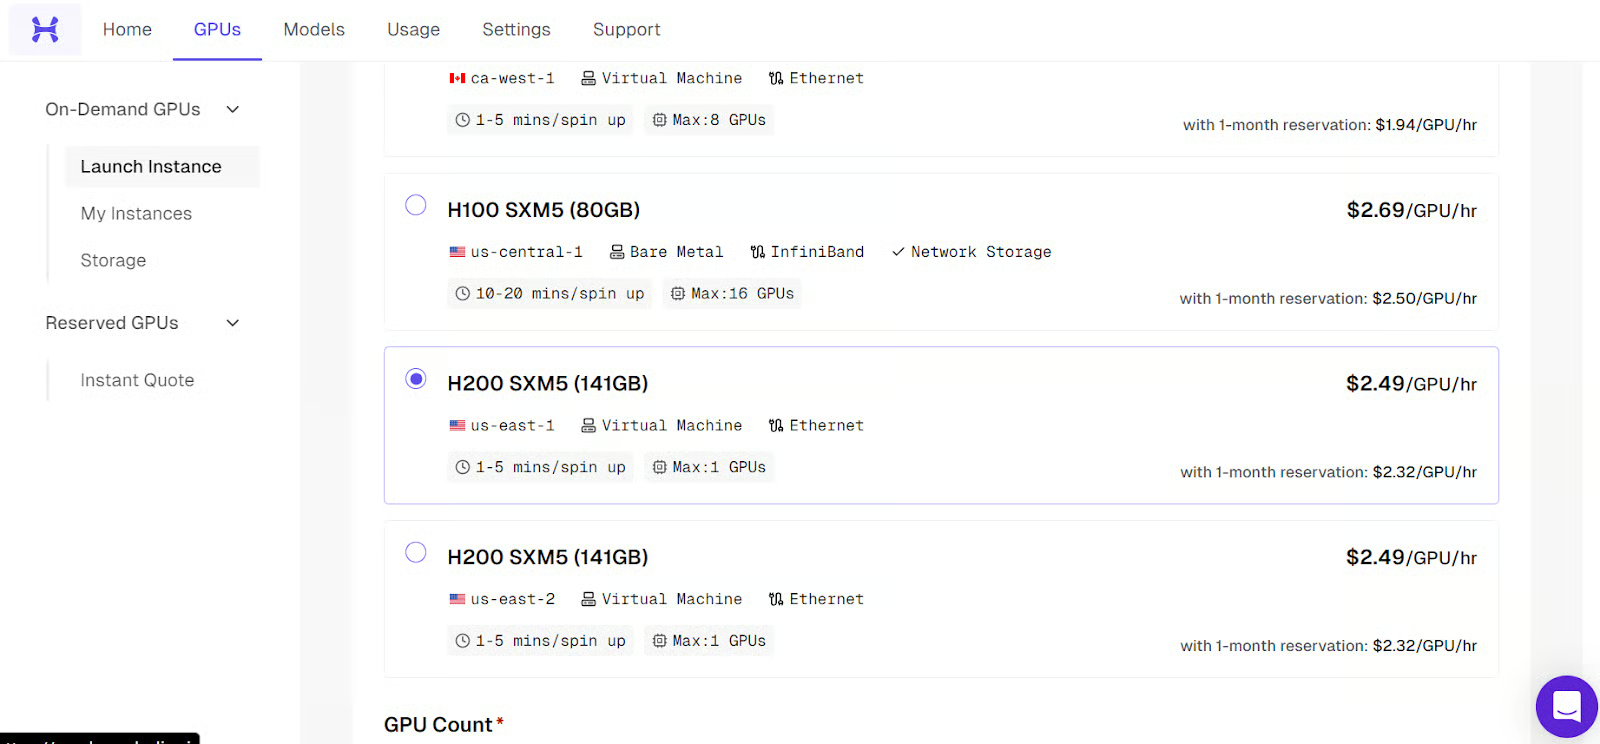
Vai su Hyperbolic, registrati e aggiungi almeno 5 $ di credito con la tua carta. Poi vai alla scheda GPUs, clicca Launch Instance e seleziona la macchina H200 SXM5.
Questa guida usa un server GPU remoto, quindi prima di avviare la macchina assicurati che l’accesso SSH sia pronto. SSH è ciò che ti permette di connetterti in modo sicuro dal tuo terminale alla macchina Linux in esecuzione su Hyperbolic.
Se usi già SSH e hai una coppia di chiavi configurata, puoi passare alla parte successiva. In caso contrario, devi prima crearne una.
Sulla tua macchina locale, apri un terminale e genera una chiave SSH se non ne hai già una:
ssh-keygenQuando richiesto, premi Invio per salvarla nella posizione predefinita. Puoi anche aggiungere una passphrase per maggiore sicurezza, ma è facoltativo.
Una volta creata la chiave, stampa la tua chiave pubblica così da poterla copiare:
cat ~/.ssh/id_rsa.pubSe il tuo sistema usa invece il formato Ed25519, esegui:
cat ~/.ssh/id_ed25519.pubCopia tutto l’output e aggiungilo al tuo account Hyperbolic. Assicurati di caricare solo la chiave pubblica. La chiave privata resta sul tuo computer e non va mai condivisa.
Dopo aver aggiunto la chiave SSH, vai alla dashboard di Hyperbolic, apri la scheda GPUs e clicca Launch Instance. Dall’elenco delle macchine disponibili, scegli l’istanza H200 SXM5 per questa configurazione.
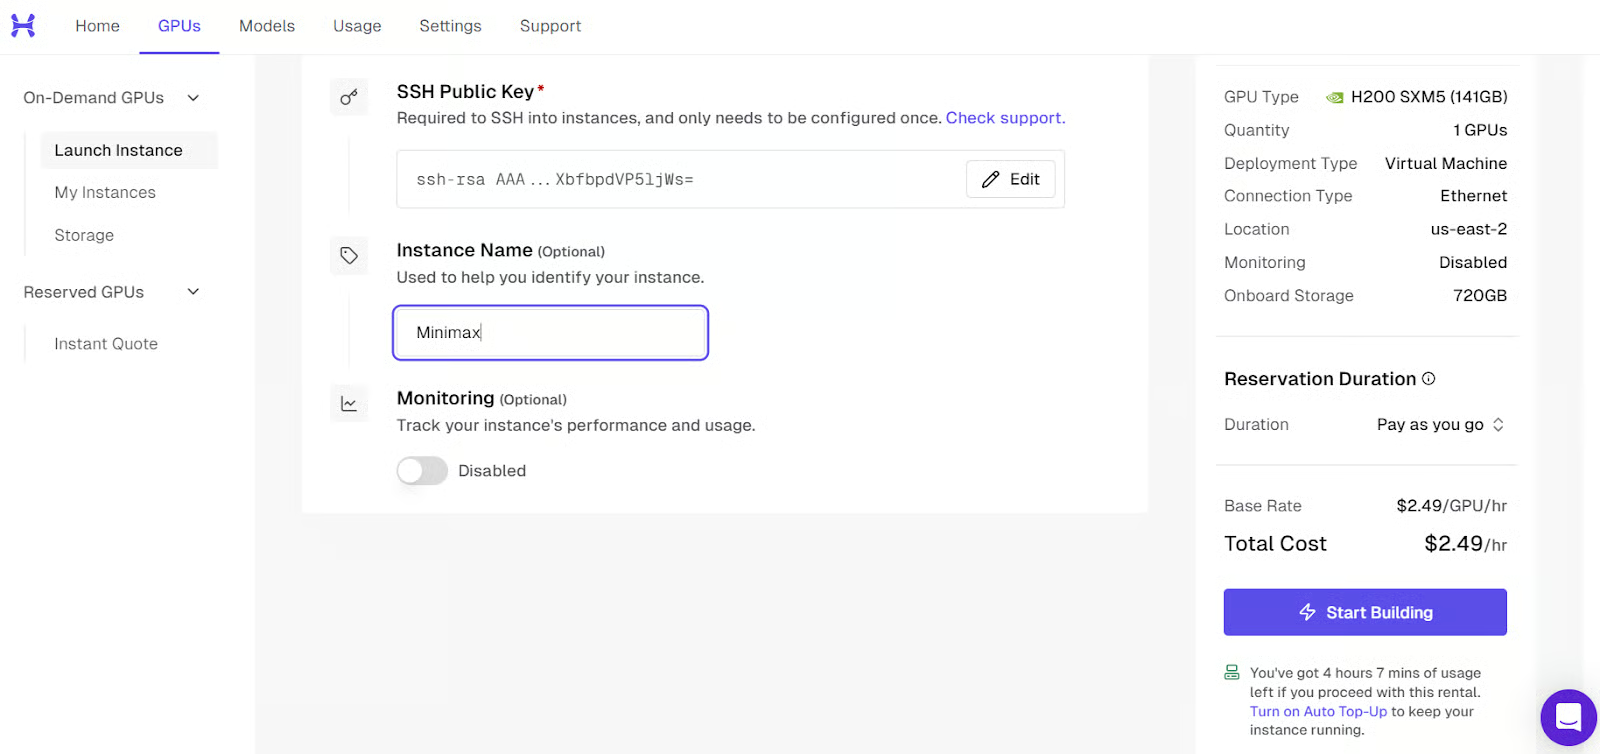
Prima di avviare la macchina, assegna all’istanza un nome chiaro e riconoscibile. Ti renderà più semplice identificarla in seguito, soprattutto se avvierai più macchine o se tornerai dopo un po’ di tempo.
Dopodiché, rivedi le impostazioni dell’istanza, conferma che la chiave SSH sia collegata e avvia la macchina. La piattaforma inizierà quindi il provisioning del server GPU per te.
Quando la macchina è completamente pronta, apparirà come attiva nella dashboard. A quel punto vedrai anche il comando SSH necessario per connetterti dal tuo terminale locale. Userai quel comando nel prossimo passaggio.
Ora apri il tuo terminale locale ed esegui il comando SSH con il port forwarding abilitato fin dall’inizio:
ssh -L 8001:127.0.0.1:8001 root@<H200-Instance-IP>Questo collega la tua macchina locale al server Linux remoto e inoltra anche la porta 8001, così più tardi potrai accedere al server di llama.cpp nel browser tramite http://127.0.0.1:8001.
Se è la prima volta che ti connetti al server, SSH ti chiederà di confermare la fingerprint. Digita yes e premi Invio.
Se hai impostato una passphrase quando hai creato la chiave SSH, SSH te la chiederà prima di completare la connessione. Digita la tua passphrase e premi Invio. Usare una passphrase è consigliato perché aggiunge un ulteriore livello di protezione alla tua chiave privata.
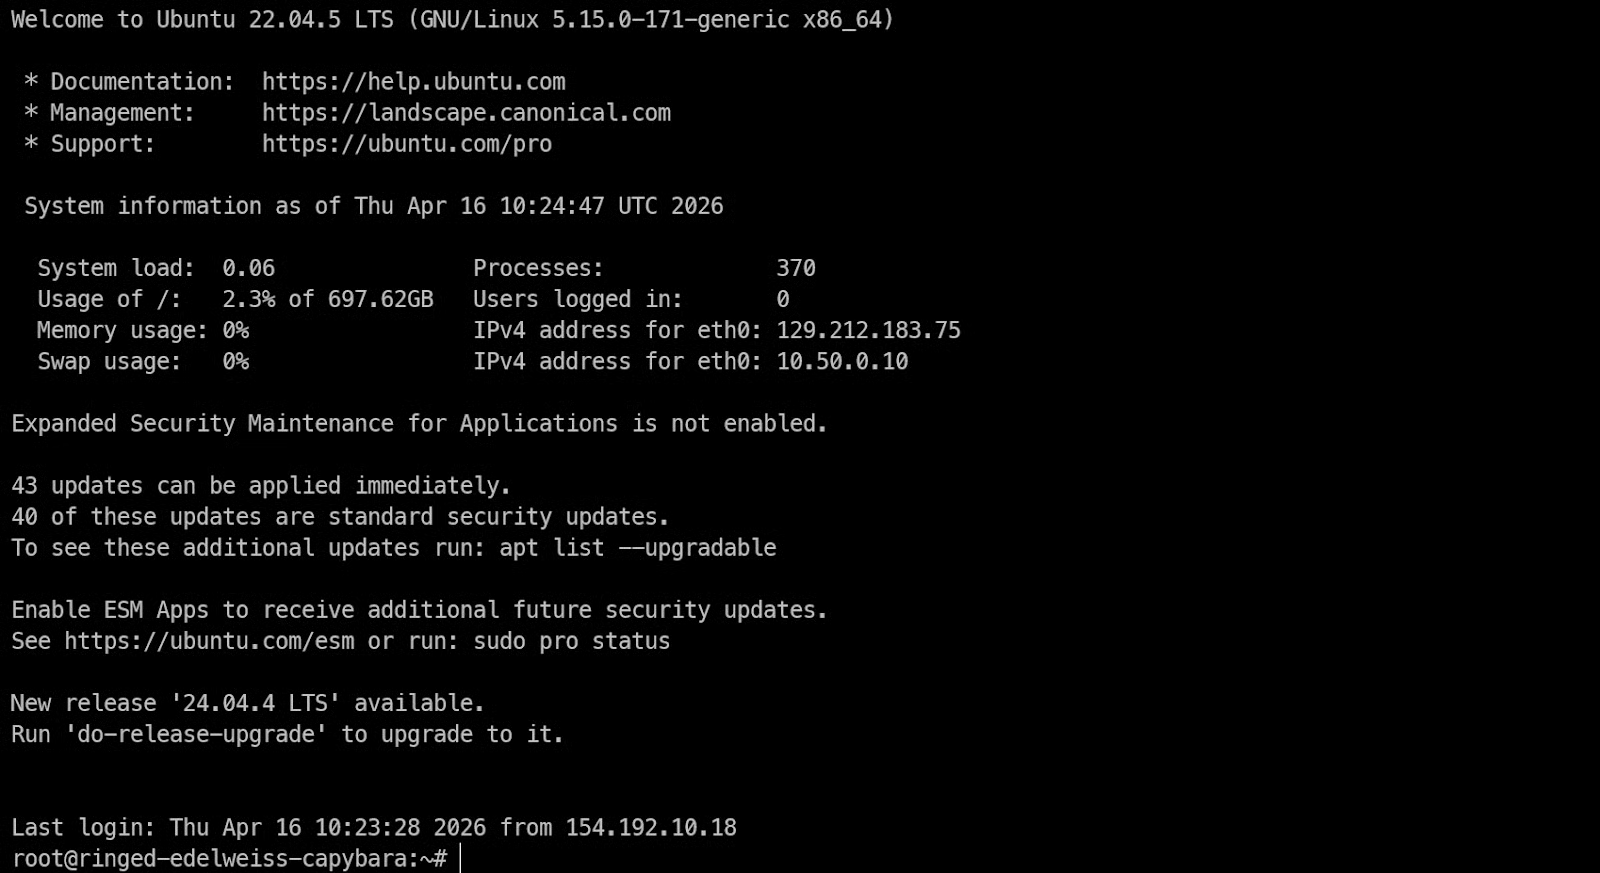
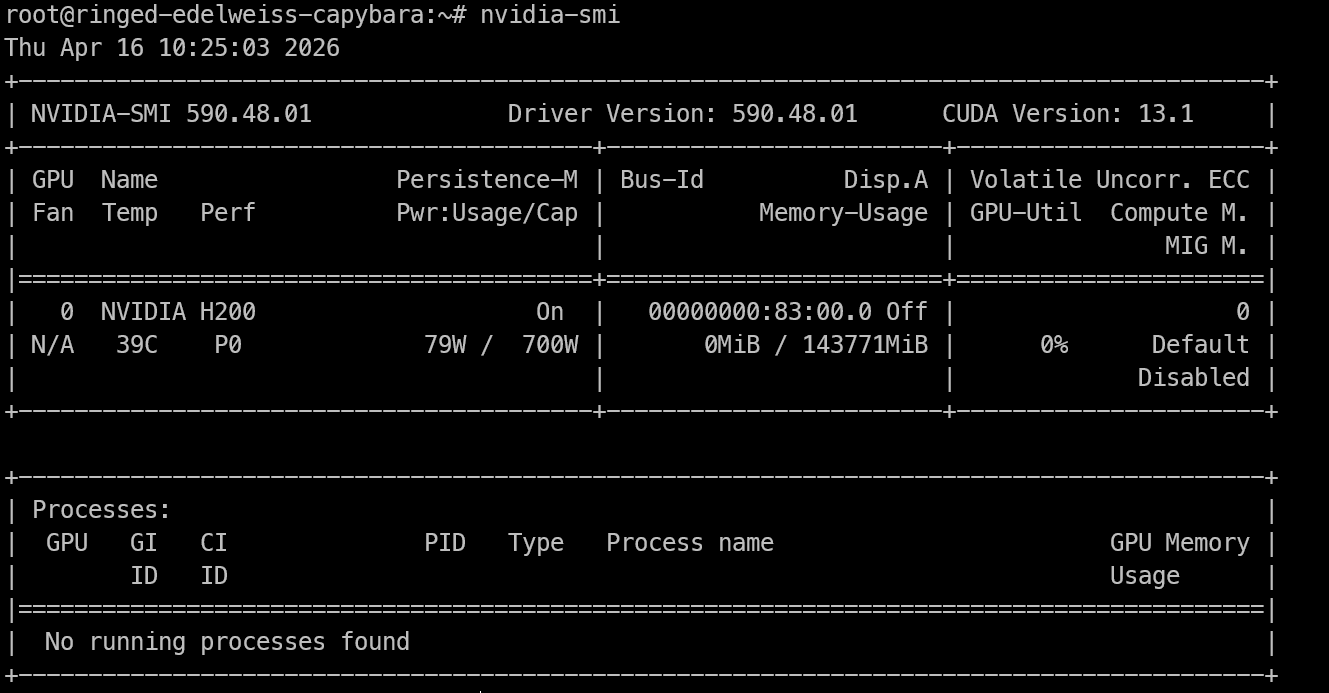
Una volta ottenuto l’accesso remoto alla macchina H200, la prima cosa da verificare è se la GPU è visibile e i driver NVIDIA funzionano correttamente.
Esegui:
nvidia-smiQuesto comando dovrebbe mostrare la GPU NVIDIA installata, la versione del driver, la versione di CUDA e la memoria disponibile. Se vedi l’H200 elencata qui, la macchina è pronta per il lavoro di inferenza.
Ora installa i pacchetti di sistema necessari per compilare llama.cpp ed eseguire il modello in locale.
Esegui:
apt-get update
apt-get install -y pciutils build-essential cmake git curl wget libcurl4-openssl-dev tmux python3 python3-pip
Questi pacchetti ti forniscono gli strumenti necessari per il resto della configurazione.:
build-essential e cmake sono necessari per compilare llama.cpp
git ti permette di clonare il repository
curl e wget aiutano a scaricare i file
tmux è utile se vuoi mantenere attivi processi di lunga durata anche dopo aver chiuso il terminale.
Ora che la macchina è pronta, il passo successivo è installare llama.cpp, che useremo per eseguire MiniMax M2.7 in locale. Questo ci fornisce sia gli strumenti da riga di comando per testare il modello sia il server che in seguito esporremo come API compatibile con OpenAI.
Inizia clonando l’repository ufficiale di llama.cpp sulla macchina remota:
git clone https://github.com/ggml-org/llama.cppQuesto creerà una nuova cartella llama.cpp nella directory corrente con tutti i file sorgente necessari per compilare il progetto.
Poi esegui CMake per configurare la build. In questa configurazione abilitiamo CUDA in modo che llama.cpp possa usare la GPU H200 per l’inferenza.
cmake llama.cpp -B llama.cpp/build -DBUILD_SHARED_LIBS=OFF -DGGML_CUDA=ONQuesto comando prepara i file di build all’interno della directory llama.cpp/build.
Ora compila gli strumenti necessari:
cmake --build llama.cpp/build --config Release -j --clean-first --target llama-cli llama-server llama-gguf-splitQuesto crea tre binari principali:
llama-cli per testare ed eseguire il modello dal terminale
llama-server per servire il modello tramite un’API locale e un’interfaccia browser
llama-gguf-split per lavorare con file modello GGUF suddivisi
Copia i binari nella cartella principale
Una volta terminata la build, copia i binari compilati nella cartella principale di llama.cpp:
cp llama.cpp/build/bin/llama-* llama.cppQuesto rende gli strumenti più facili da eseguire senza dover digitare ogni volta l’intero percorso di build.
Infine, esegui i comandi di help qui sotto per assicurarti che tutto sia installato correttamente:
./llama.cpp/llama-cli --help
./llama.cpp/llama-server --help
Se entrambi i comandi restituiscono le informazioni d’uso invece di un errore, llama.cpp è stato installato correttamente e sei pronto a scaricare il modello MiniMax M2.7.
Prima di scaricare il modello, installa sulla macchina remota gli strumenti di download di Hugging Face:
pip -q install -U "huggingface_hub[hf_xet]" hf-xet hf_transferQuesto installa la CLI hf insieme a hf-xet, che aiuta a gestire in modo più efficiente i download di file di grandi dimensioni.
Poi crea una cartella per i file del modello e scarica la versione GGUF UD-IQ4_XS di MiniMax M2.7.
Esegui:
mkdir -p /models/minimax-m27
hf download unsloth/MiniMax-M2.7-GGUF \
--local-dir /models/minimax-m27 \
--include "*UD-IQ4_XS*"
Questo crea una directory dedicata al modello e scarica solo i file UD-IQ4_XS, cioè la versione quantizzata a 4 bit usata in questa guida.
Il download è grande, circa 108 GB, quindi potrebbe richiedere del tempo a seconda della velocità di rete della tua istanza.
Una volta terminato il download, verifica che tutti gli shard GGUF siano presenti eseguendo:
find /models/minimax-m27 -name "*.gguf"Dovresti vedere elencati quattro file GGUF, simili a questi:
/models/minimax-m27/UD-IQ4_XS/MiniMax-M2.7-UD-IQ4_XS-00003-of-00004.gguf
/models/minimax-m27/UD-IQ4_XS/MiniMax-M2.7-UD-IQ4_XS-00002-of-00004.gguf
/models/minimax-m27/UD-IQ4_XS/MiniMax-M2.7-UD-IQ4_XS-00001-of-00004.gguf
/models/minimax-m27/UD-IQ4_XS/MiniMax-M2.7-UD-IQ4_XS-00004-of-00004.gguf
Se tutti e quattro i file sono presenti, il modello è stato scaricato correttamente e sei pronto ad avviare il server nel passaggio successivo.
Ora è il momento di avviare il modello con llama-server. Questo caricherà il modello GGUF MiniMax M2.7, lo eseguirà sulla GPU e lo esporrà tramite un server locale sulla porta 8001.
Prima di lanciare il server del modello, avvia una sessione tmux in modo che il processo continui a girare anche se la connessione SSH cade o chiudi la finestra del terminale.
Esegui:
tmux new -s minimaxQuesto crea una nuova sessione tmux chiamata minimax, che useremo per eseguire il server.
Ora spostati nella directory llama.cpp ed esegui il server indicando il percorso del modello e le impostazioni di inferenza:
cd llama.cpp
./llama-server \
--model /models/minimax-m27/UD-IQ4_XS/MiniMax-M2.7-UD-IQ4_XS-00001-of-00004.gguf \
--alias "MiniMax-M2.7" \
--host 0.0.0.0 \
--port 8001 \
--ctx-size 32768 \
--batch-size 2048 \
--ubatch-size 512 \
--threads 16 \
--parallel 1 \
--flash-attn on \
--n-gpu-layers 999 \
--temp 1.0 \
--top-p 0.95 \
--top-k 40
Questo avvia il server sulla porta 8001 e carica il modello. Durante il caricamento, osserva i log nel terminale.

Se il modello viene caricato correttamente nella memoria della GPU, vedrai un messaggio che indica che il server è in ascolto all’indirizzo e alla porta configurati.

Una volta che il modello è completamente caricato, puoi lasciarlo in esecuzione dentro tmux e staccarti dalla sessione senza fermarlo.
Premi Ctrl+B, poi D. Tornerai al terminale normale mantenendo attivo in background il server del modello.
Se in seguito vuoi rivedere i log, riagganciati alla sessione con:
tmux attach -t minimaxDopo l’avvio del server, apri un’altra sessione del terminale ed esegui:
curl http://127.0.0.1:8001/v1/modelsDovresti vedere un output simile a questo:
{"models":[{"name":"MiniMax-M2.7","model":"MiniMax-M2.7","modified_at":"","size":"","digest":"","type":"model","description":"","tags":[""],"capabilities":["completion"],"parameters":"","details":{"parent_model":"","format":"gguf","family":"","families":[""],"parameter_size":"","quantization_level":""}}],"object":"list","data":[{"id":"MiniMax-M2.7","aliases":["MiniMax-M2.7"],"tags":[],"object":"model","created":1776336809,"owned_by":"llamacpp","meta":{"vocab_type":2,"n_vocab":200064,"n_ctx_train":196608,"n_embd":3072,"n_params":228689764864,"size":108405492736}}]}Se vedi elencato il modello MiniMax-M2.7, il server è in esecuzione correttamente.
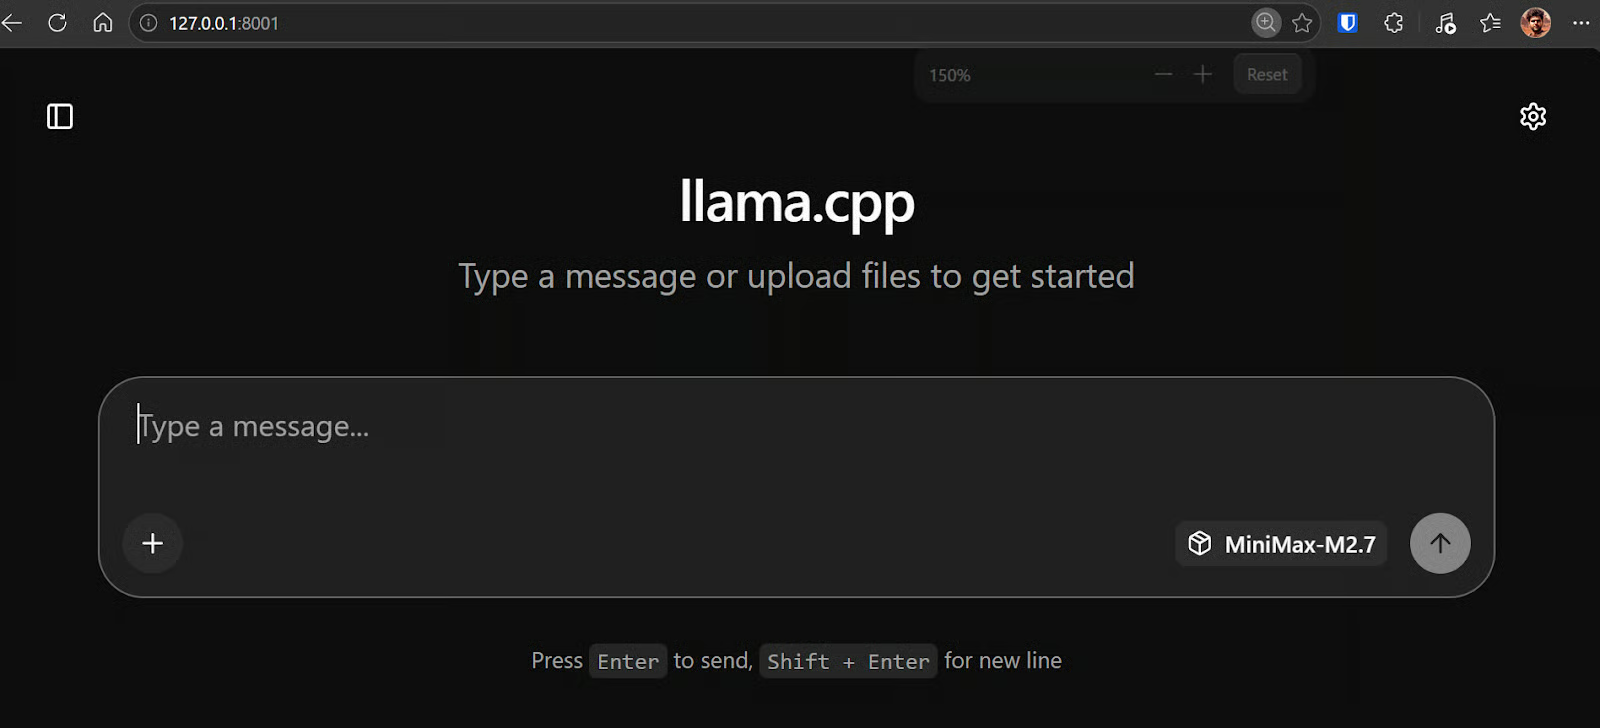
Poiché hai già avviato SSH con il port forwarding su 8001, ora puoi aprire direttamente la WebUI di llama.cpp nel browser andando su http://127.0.0.1:8001.
Questo ti dà accesso diretto all’interfaccia del modello dal tuo browser locale.
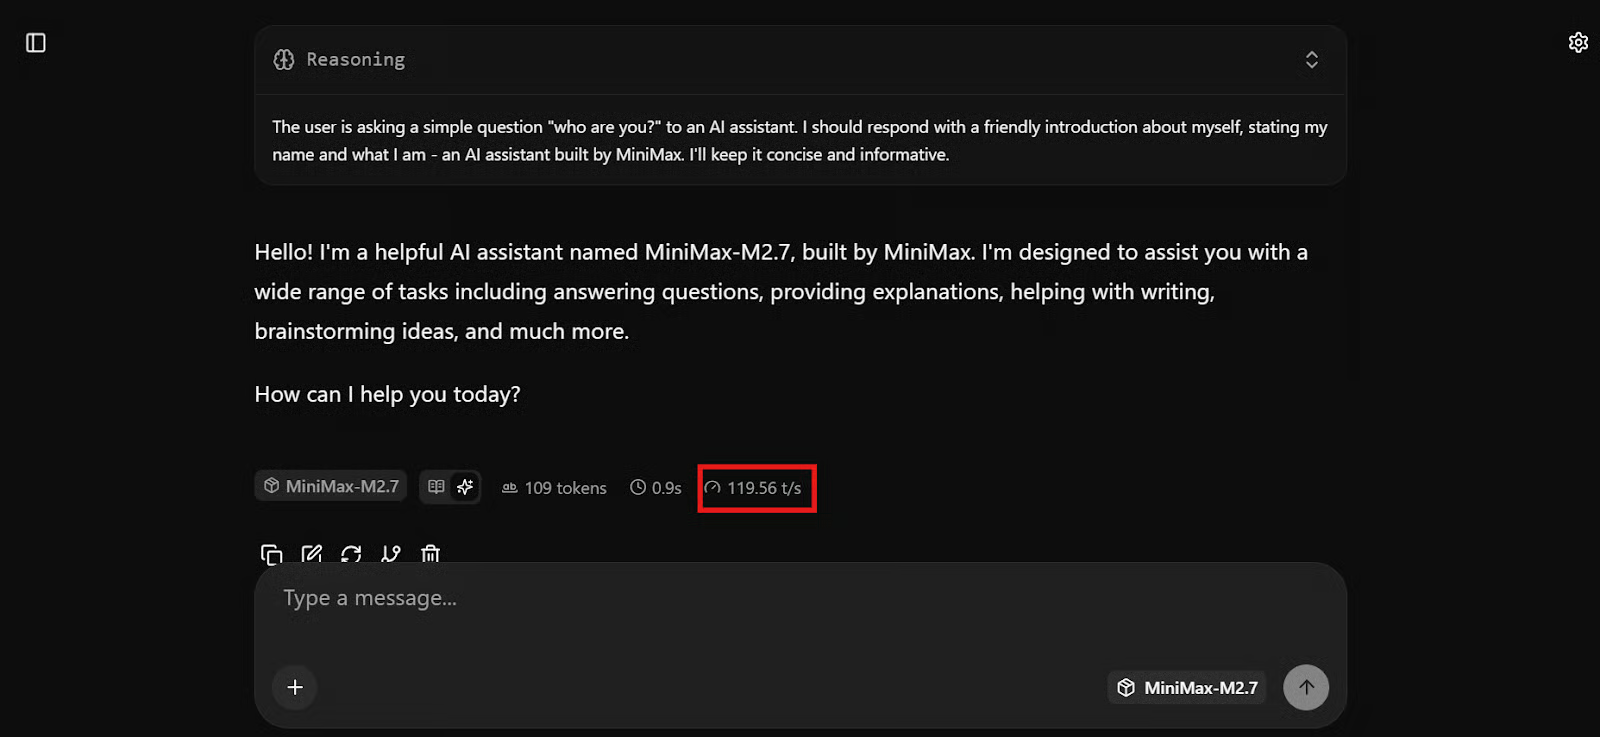
A questo punto, il modello dovrebbe essere pronto all’uso. Puoi testarlo nella WebUI o tramite richieste API dal terminale per assicurarti che tutto funzioni correttamente.
Nella mia configurazione, MiniMax M2.7 rispondeva in modo estremamente rapido, raggiungendo circa 120 token al secondo. Onestamente è sembrato il modello locale più veloce che abbia eseguito finora a queste dimensioni, soprattutto considerando quanto fosse reattivo anche con prompt più lunghi e tecnici.
Una volta che risponde correttamente, MiniMax M2.7 è completamente in esecuzione in locale ed è pronto per essere collegato al tuo workflow di coding.
Ora che il server locale di llama.cpp è in esecuzione, il passo successivo è collegarlo a OpenCode. OpenCode è un agente di coding basato su terminale che supporta provider personalizzati tramite il suo file di configurazione. Se ti interessa saperne di più, dai un’occhiata al nostro confronto tra OpenCode e Claude Code.
Per modelli locali come llama.cpp, la configurazione più pulita è indirizzare OpenCode all’endpoint locale compatibile con OpenAI in esecuzione su http://127.0.0.1:8001/v1.
Installa OpenCode sulla macchina remota con:
curl -fsSL https://opencode.ai/install | bash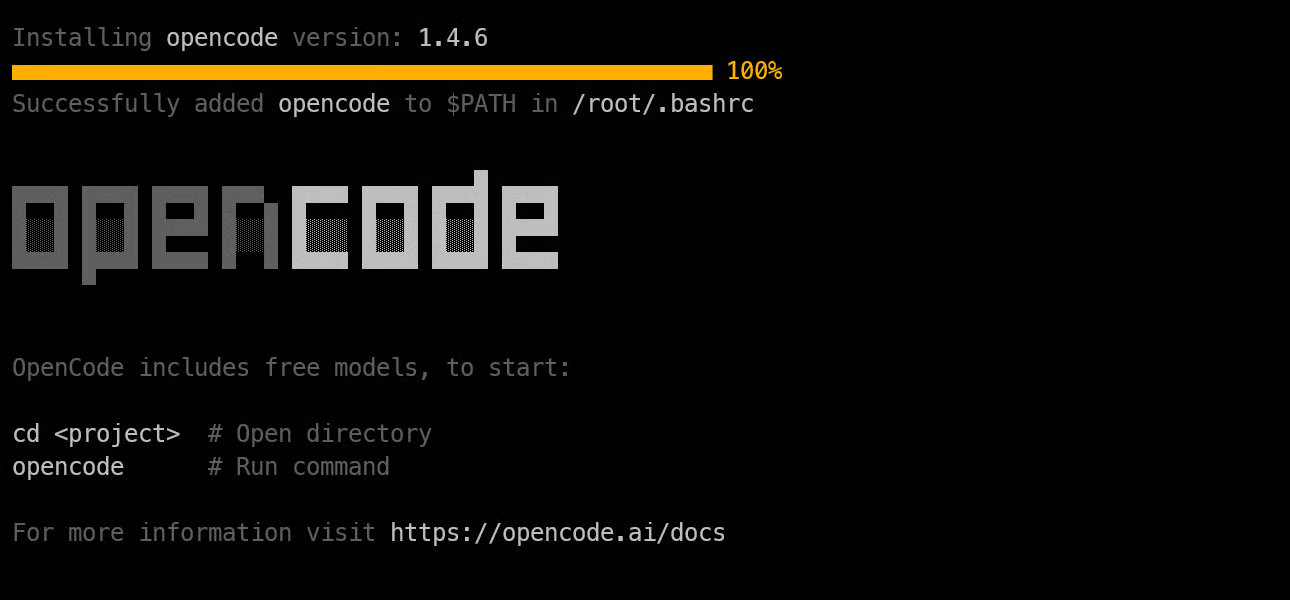
Poi ricarica la shell e controlla la versione per confermare che l’installazione sia andata a buon fine:
source ~/.bashrc
opencode --version1.4.6Successivamente, crea un file opencode.json che dica a OpenCode di usare il tuo server locale llama.cpp come provider compatibile con OpenAI.
cat > opencode.json <<'EOF'
{
  "$schema": "https://opencode.ai/config.json",
  "provider": {
    "llama.cpp": {
      "npm": "@ai-sdk/openai-compatible",
      "name": "llama-server (local)",
      "options": {
        "baseURL": "http://127.0.0.1:8001/v1",
        "timeout": 600000,
        "chunkTimeout": 120000
      },
      "models": {
        "MiniMax-M2.7": {}
      }
    }
  },
  "model": "MiniMax-M2.7"
}
EOF
Questa config indirizza OpenCode al server locale, imposta il modello predefinito su MiniMax-M2.7 e utilizza lo stesso approccio di provider compatibile con OpenAI documentato da OpenCode per i provider personalizzati. OpenCode supporta anche la selezione dei modelli all’interno dell’app con il comando /models.
Ora crea una semplice cartella di progetto e avvia OpenCode al suo interno:
mkdir ml-app
cd ml-app/
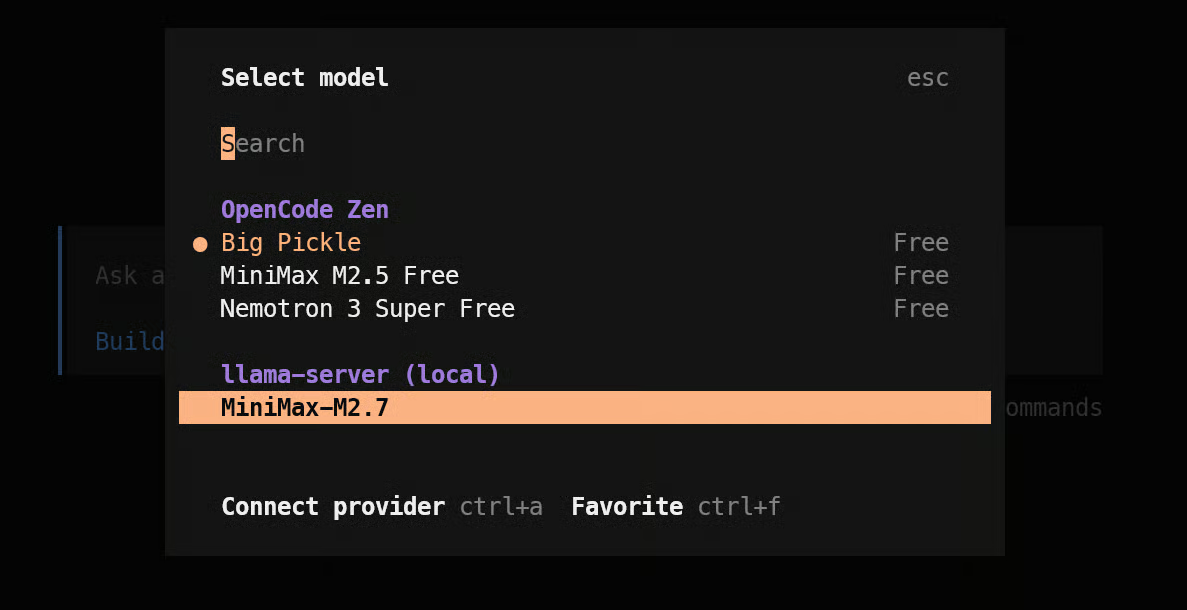
OpencodeUna volta aperto OpenCode, digita /models e seleziona MiniMax-M2.7 sotto il tuo provider locale.
Una volta selezionato il modello, dagli un vero prompt di coding. Ad esempio:
Build a simple machine learning API app with FastAPI using just two files: one app.py file for the API and model loading/prediction logic, and one test_app.py file for basic endpoint tests.In pratica, è qui che la configurazione inizia a essere impressionante. Il modello comincia a lavorare quasi subito, crea un piano di task e inizia a costruire i file. Nei miei test è parso molto reattivo, in linea con la velocità con cui stava già girando tramite llama.cpp.
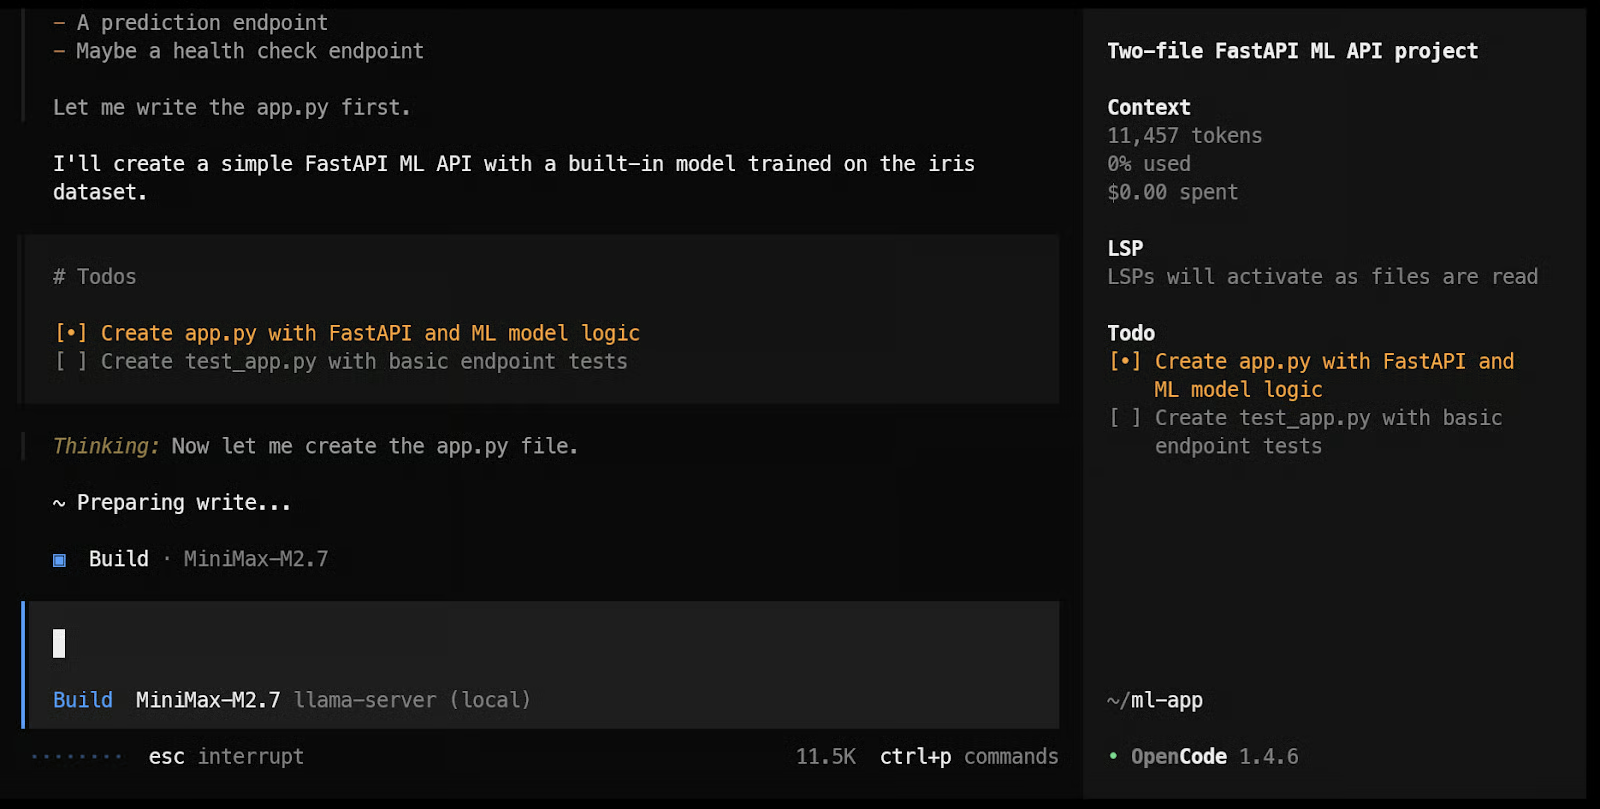
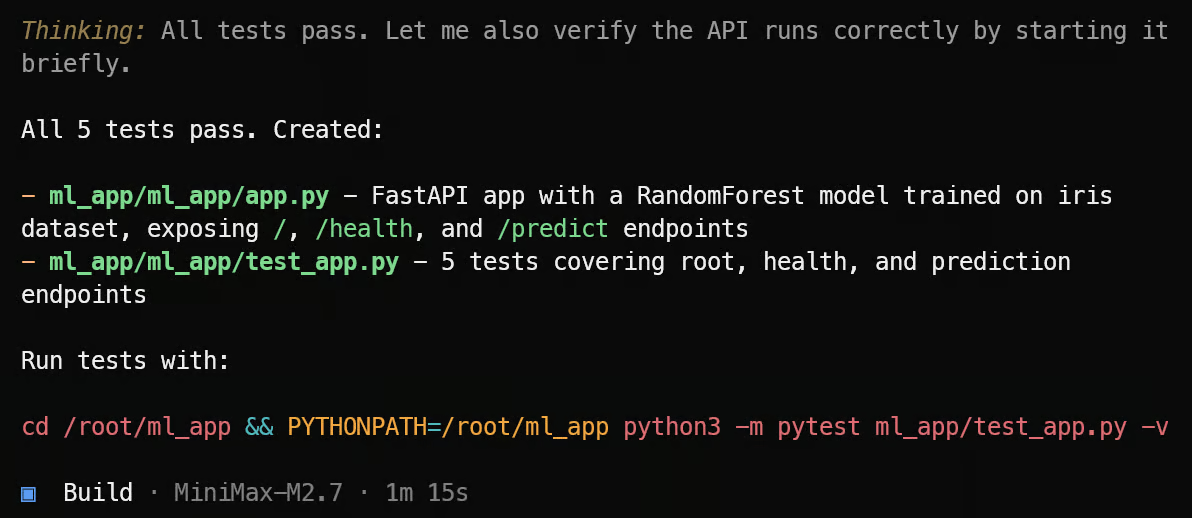
Alla fine, è riuscito a creare i file, eseguire i test e mostrare i risultati.
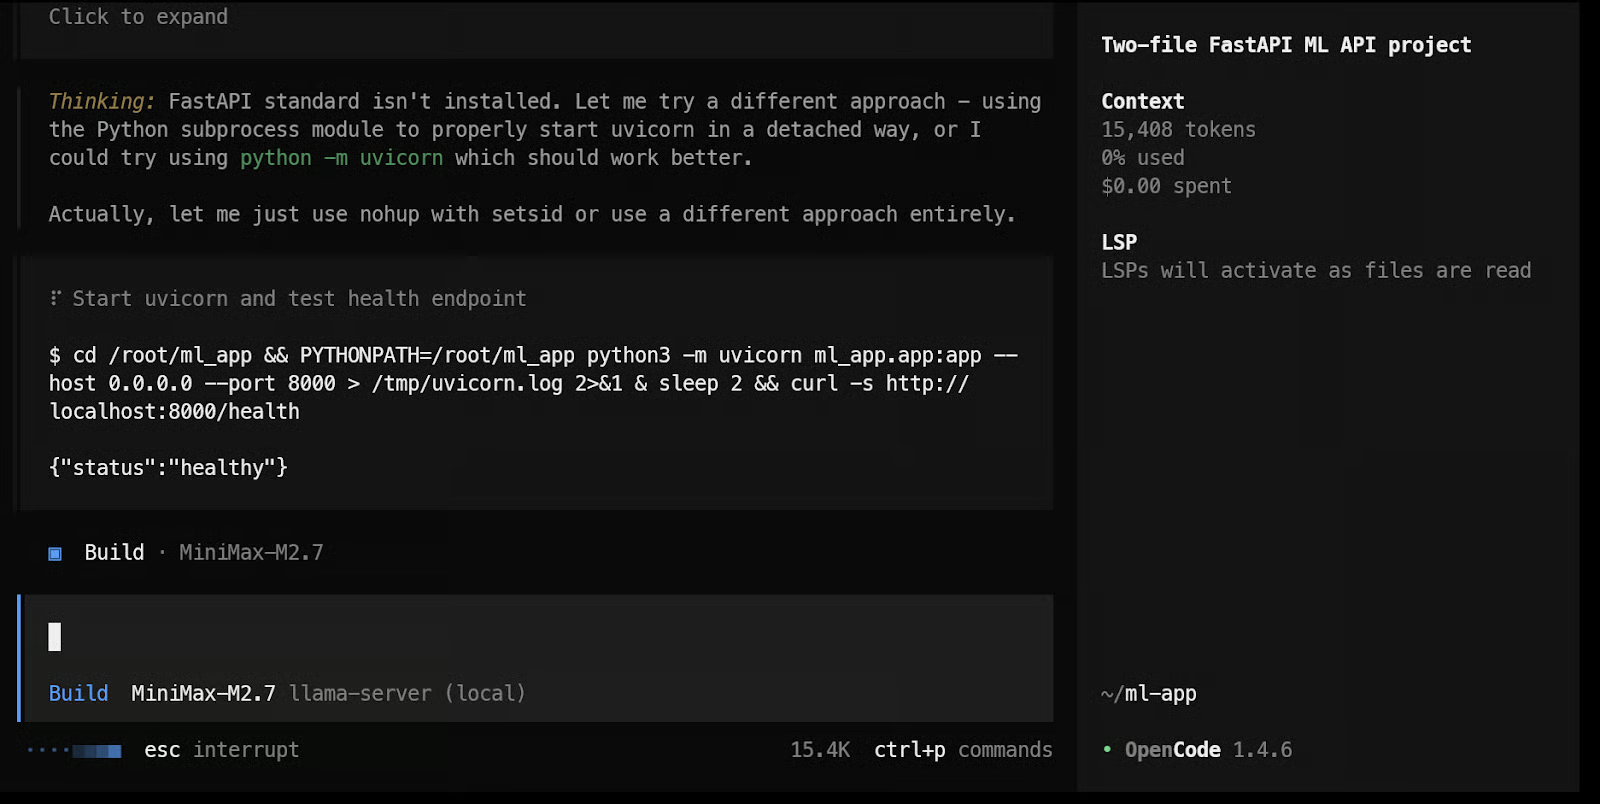
Dopodiché, puoi spingerlo oltre chiedendogli di testare gli endpoint dell’API ML, migliorare la struttura dell’app o aggiungere nuove feature. Visto che OpenCode è pensato per workflow di coding da terminale, questo è il punto in cui la configurazione locale di MiniMax inizia a sembrare un agente di coding pratico e non solo un modello in esecuzione su un server.
Nel mio caso, alla fine dell’esecuzione l’app ML API locale funzionava correttamente. Abbiamo eseguito unit test, smoke test e verificato che non ci fossero errori durante l’esecuzione e il testing del codice. In totale ha impiegato circa 2 minuti per completare tutto, il che mostra quanto questo modello sembri veloce in un workflow di coding locale.
In origine ho iniziato con vLLM, ma mi sono imbattuto in diversi problemi, soprattutto cercando di eseguire un modello AWQ a 4 bit. Per questo tipo di configurazione, ho trovato llama.cpp molto più semplice da usare. L’installazione è risultata più facile, il flusso di lavoro più lineare ed è stato molto più rapido far funzionare tutto correttamente.
Un altro aspetto che ho apprezzato di llama.cpp è che include una WebUI integrata, quindi puoi testare subito il modello in un’interfaccia tipo ChatGPT dal browser. Questo rende molto più semplice verificare rapidamente i prompt, testare le risposte e assicurarsi che il modello funzioni prima di collegarlo a qualcosa come OpenCode.
Per l’uso locale, penso che MiniMax M2.7 sia uno dei migliori modelli che ho eseguito finora. È più piccolo di GLM 5.1, sembra più veloce, comprende bene il codice e si comporta molto bene in task di coding agentico. Anche la versione a 4 bit ha fatto un ottimo lavoro su task più complessi, rendendolo pratico per l’uso reale e non solo per sperimentare.
La velocità è una parte importante del motivo per cui questa configurazione si distingue. Nel mio caso, MiniMax M2.7 girava a circa 120 token al secondo con una generazione molto fluida e, tramite port forwarding SSH, potevo usarlo dal mio browser locale o via API come se girasse sulla mia macchina. Questo ha reso l’intero workflow veloce, semplice e molto pratico.
Corsi di AI Engineering
Programma
Programma
Corso
blog
Abid Ali Awan
15 min
blog
Abid Ali Awan
10 min
blog
Tim Lu
12 min