
Kurs
LangGraph ile Çoklu Aracılı Sistemler
2 sa 45 dk
9K
Alıştırma and program your progress.
Google Ile Devam EdinGrok 4.6, Grok Build’i çalıştıran en yeni yapay zeka modelidir ve kodlama, aracısal görevler ve karmaşık bilgi çalışmaları için tasarlanmıştır. Grok Build, bu yetenekleri doğrudan terminalinize getirir; projeler planlayabilir, dosyalar oluşturup düzenleyebilir, paketler yükleyebilir, komutlar çalıştırabilir, kodu test edebilir ve onayınızla hataları düzeltebilir.
Bu kılavuzda Grok Build’i inceleyecek, temel özelliklerini gösterecek ve oturumlar arası belleğini, proje yönergelerini, yeniden kullanılabilir becerilerini ve güvenlik ayarlarını yapılandıracağım.
Ardından; ortamı kurmaktan veriyi analiz etmeye, modelleri eğitmekten sonuçları değerlendirmeye ve bir tahmin uygulaması oluşturmaya kadar uçtan uca bir makine öğrenimi projesi inşa etmek için onu kullanacağız.
Grok Build, SpaceXAI’nin doğrudan terminalinizin içinde çalışan kodlama aracısıdır.
Aynı kategoriye giren araçlar arasında Claude Code ve OpenCode bulunur: Ne inşa etmek istediğinizi doğal bir dille anlatırsınız; aracısı, bilgisayarınızdaki dosyalar ve araçlarla çalışarak görevi tamamlar.
Mevcut bir projeyi keşfedebilir, dosyalar oluşturup düzenleyebilir, paketler yükleyebilir, komutlar çalıştırabilir, kodu test edebilir, hataları tespit edip sorunları giderebilir.
Grok Build şaşırtıcı derecede kullanıcı dostudur. Her adım için ayrıntılı kod talimatları vermeniz gerekmez ve aracısal beceriler, MCP yapılandırmaları ve proje ayarları dahil olmak üzere diğer kodlama aracılarından yapılandırmaları yeniden kullanabilir.
Bu özellikler, özellikle benzer araçları zaten kullanıyorsanız, kurulum ve yapılandırma sürecini çok daha akıcı hissettirir.
Başlıca dezavantajı kullanım sınırıdır.
Grok Build ücretsiz planda mevcut olsa da, kapsamlı bir projede çalışırken ücretsiz kullanım hakkı hızla tükenebilir.
Tam SuperGrok planının ücreti ayda 30 ABD dolarıdır; bu da bazı rakip araçlarla karşılaştırıldığında pahalı görünebilir. Örneğin Claude Pro ayda 20 ABD dolarıdır ve Claude Code’a erişim içerir.
Fiyatına rağmen, Grok Build özellikle yalnızca küçük kod parçacıkları üretmenin ötesinde işler yapabilen bir yapay zeka asistanı isteyen kullanıcılar için yetenekli ve ulaşılabilir bir kodlama aracısıdır.
Grok Build, Plan Modu ve bir AGENTS.md dosyası aracılığıyla proje yönergeleri gibi standart kodlama-aracısı özelliklerini içerir.
Bununla birlikte, belleği, medya üretimi, arka plan otomasyonu, aracı yönetimi ve uzantı sistemi onu daha büyük projeler için daha kullanışlı kılar.
Grok, farklı oturumlar arasında proje komutları, teknik kararlar, klasör yapıları ve kodlama kuralları gibi yararlı bilgileri hatırlayabilir.
Bu, projeye geri döndüğünüzde her seferinde aynı açıklamaları yapmanız gerekmediği anlamına gelir.
Grok, kendi bağlamına sahip bağımsız çocuk aracılar oluşturabilir.
Örneğin bir aracı kod tabanını keşfederken, bir diğeri plan oluşturabilir, testler yazabilir veya ayrı bir özellikle çalışabilir.
Orijinal konuşmanızı kaybetmeden farklı bir yaklaşımı denemek için bir oturumu çatallayabilirsiniz.
Geri alma özelliği, bir şeyler ters gittiğinde daha önceki bir aşamaya dönmenizi de sağlar.
Git worktree’leri, Grok’un depo içinde yalıtılmış bir kopya üzerinde çalışmasına olanak tanır.
Bu, deneysel özellikleri denerken veya aynı anda birden çok aracı çalıştırırken ana projeyi korur.
Görselleri ve videoları doğrudan Grok Build içinde /imagine ve /imagine-video komutlarıyla üretebilirsiniz.
Bu, görsel varlıklar, maketler veya demo içerik gerektiren uygulamalar geliştirirken faydalı olabilir.
/loop komutu, Grok’un bir istemi seçilen aralıklarla tekrar etmesini sağlar. Örneğin testlerinizi kontrol etmesini, bir dağıtımı izlemesini veya birkaç dakikada bir yeni hataları raporlamasını isteyebilirsiniz.
Grok Build, terminal arayüzünde gezinirken Vim tarzı klavye kontrollerini tercih eden kullanıcılar için bir Vim Modu içerir. /vim-mode ile etkinleştirip devre dışı bırakabilirsiniz.
Kişilikler, aracılara farklı davranış stilleri, odak alanları veya çalışma kuralları tanımlamanızı sağlar.
Bunları /personas ile yönetebilir ve farklı alt aracılara uygulayabilirsiniz.
Aracı Panosu, tüm oturumlarınızın canlı bir genel görünümünü sunar.
Hangi aracılar çalışıyor, girdi bekliyor, tamamlandı veya başarısız oldu görebilir ve panodan doğrudan herhangi bir oturumu açabilirsiniz.
Kancalar, Grok’un belirli olaylardan önce veya sonra komutları otomatik olarak çalıştırmasına veya bir HTTP uç noktasını çağırmasına olanak tanır.
Bunları tehlikeli komutları engellemek, düzenlemelerden sonra kodu biçimlendirmek, araç kullanımını kaydetmek veya bir görev tamamlandığında bildirim göndermek için kullanabilirsiniz.
Eklentiler, Grok Build’i ek aracılar, kancalar, MCP sunucuları, dil sunucuları ve diğer işlevlerle genişletir. Mevcut Claude Code eklentileri, tamamen yeni bir kurulum gerektirmeden de otomatik olarak keşfedilebilir.
Yerleşik Pazar, yapılandırılmış kaynaklardan eklentileri doğrudan Grok Build içinde göz atıp yüklemenize olanak tanır. /marketplace komutuyla açabilirsiniz.
Makine öğrenimi projesini oluşturmadan önce Grok Build’i kurmalı, SpaceXAI hesabımıza bağlamalı ve özel bir proje klasörü içinde açmalıyız.
Terminalinizi açın ve işletim sisteminize uygun komutu çalıştırın.
macOS, Linux veya WSL için:
curl -fsSL https://x.ai/cli/install.sh | bashWindows PowerShell için:
irm https://x.ai/cli/install.ps1 | iexYükleyici, Grok Build’i indirir ve sisteminize grok komutunu ekler.
Ardından aşağıdaki komutu çalıştırarak oturum açın:
grok login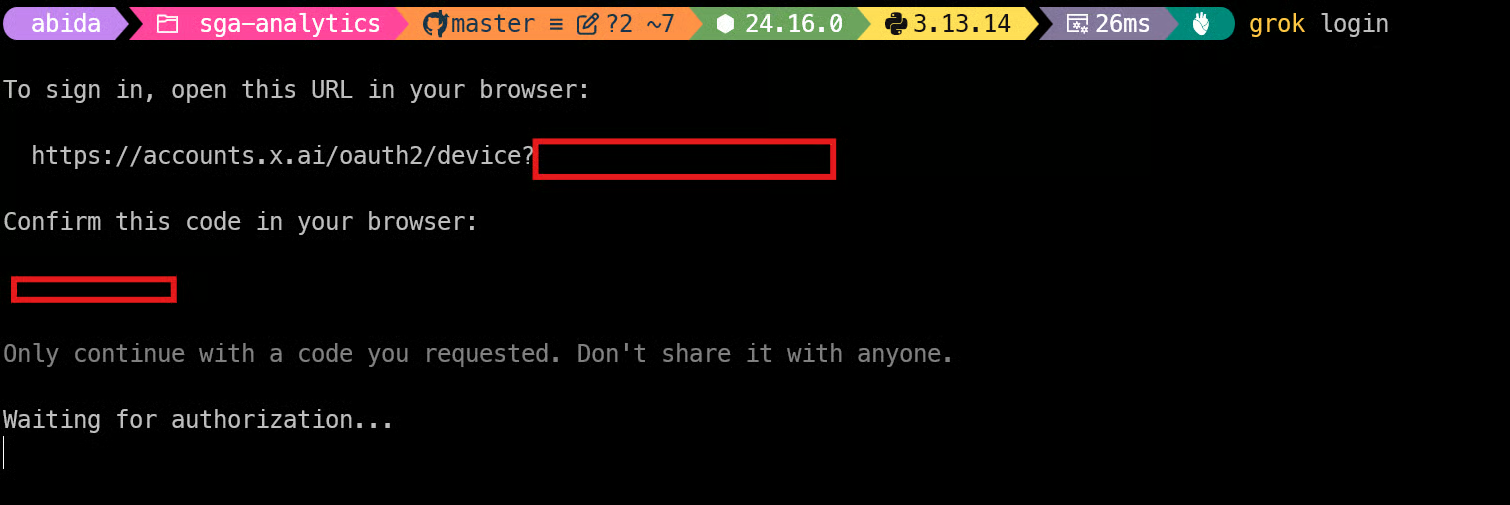
Grok Build, SpaceXAI hesabınıza giriş yapıp erişimi onaylayabileceğiniz bir tarayıcı penceresi açacaktır.
Bu işlemi genellikle yalnızca bir kez tamamlamanız gerekir.
Makine öğrenimi projesi için ayrı bir klasör oluşturun ve içine geçin:
mkdir machine-learning-project
cd machine-learning-project
Şimdi Grok Build’i klasör içinde başlatın:
grok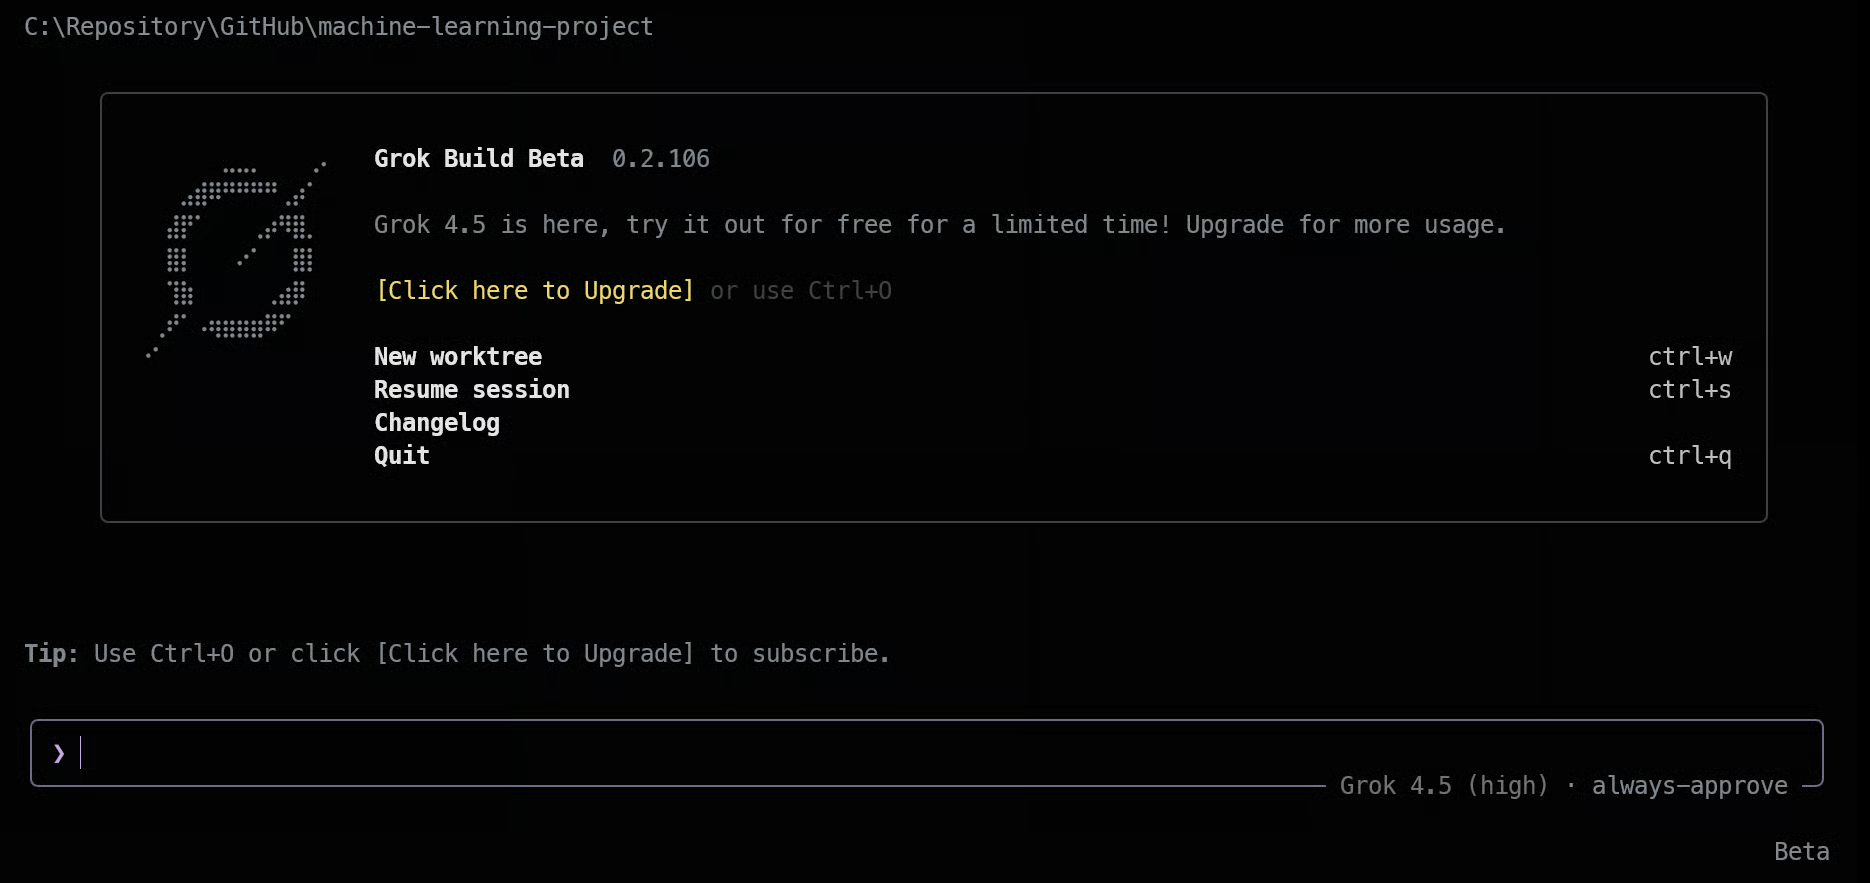
Herhangi bir şey oluşturmadan önce, Grok Build’i önemli proje bilgilerini hatırlayacak, daha güvenli izin kurallarına uyacak ve her oturumda aynı geliştirme yönergelerini uygulayacak şekilde yapılandıracağız.
Oturumlar arası bellek, terminali kapattıktan sonra daha sonra projeye döndüğünüzde Grok’un yararlı bilgileri hatırlamasını sağlar.
Grok Build’i bellek açık şekilde başlatın:
grok --experimental-memoryGrok Build içinde önemli bir notu elle kaydedebilirsiniz:
/remember This project uses uv for package management and pytest for testing.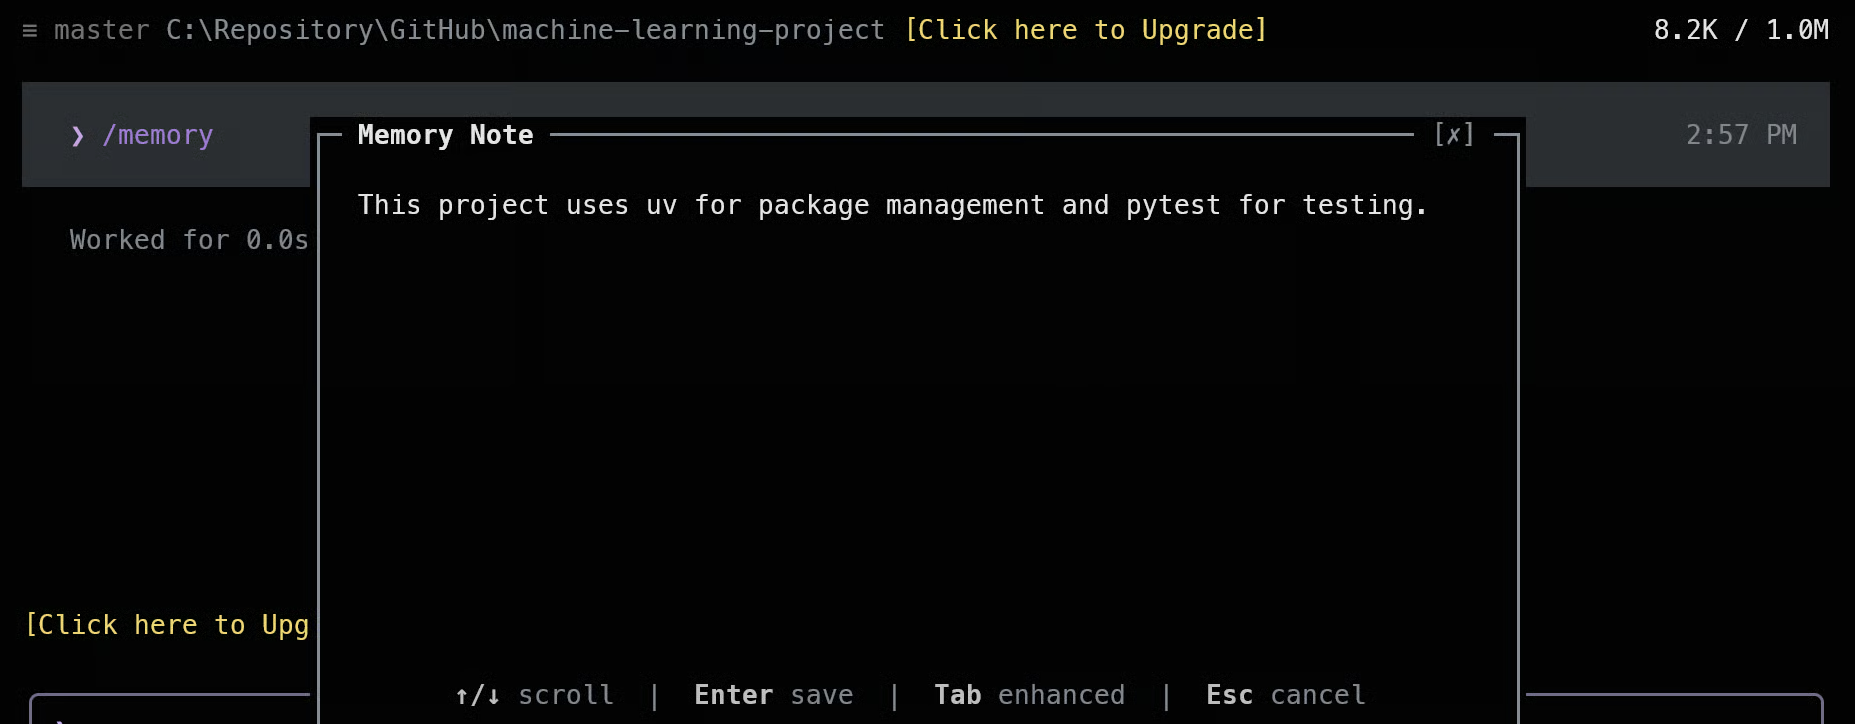
Kaydedilen bilgileri görüntülemek ve yönetmek için /memory komutunu da kullanabilirsiniz.
Belleği; önemli komutlar, teknoloji tercihleri, klasör yapıları ve kodlama kuralları gibi kalıcı ayrıntılar için kullanın.
Geçici yönergeler mevcut oturum içinde kalmalıdır.
Grok Build varsayılan olarak Sor modunu kullanır; bu da henüz izin verilmemiş araçları çalıştırmadan önce onay istediği anlamına gelir.
Normal geliştirmeyi akıcı kılarken riskli eylemleri açıkça engellemek için proje düzeyinde izin kuralları ekleyeceğiz.
Yapılandırmayı hazırlaması için Grok’tan isteyin:
Create a safe .grok/config.toml configuration for this project.
Allow normal file editing, Git inspection, testing, and linting,
but deny access to secret files, destructive shell commands, Git pushes,
force pushes, and changes outside the project folder.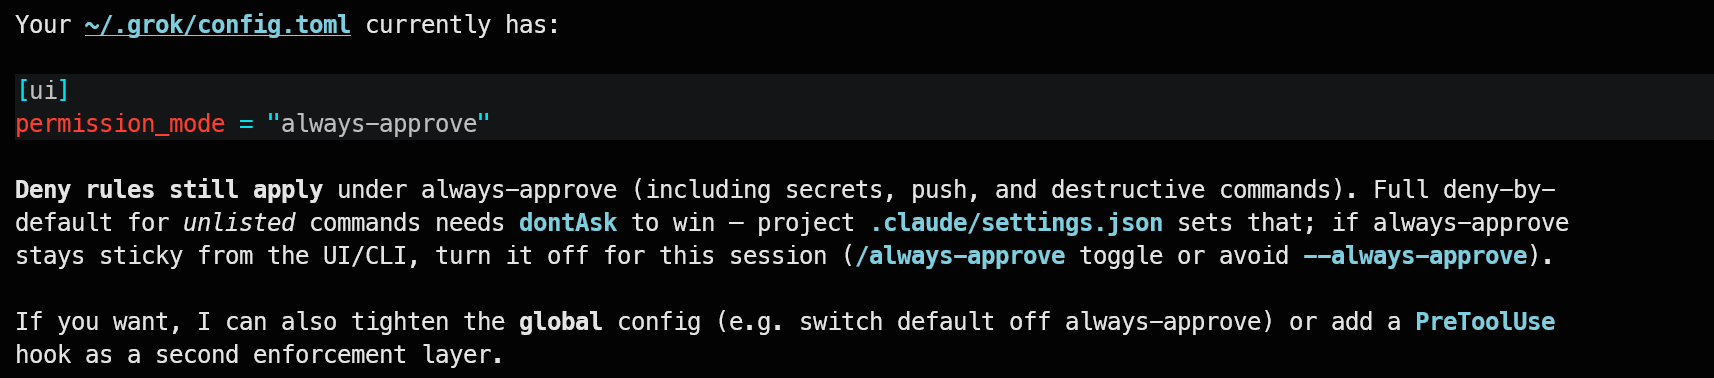
Ardından, proje boyunca Grok’un uyması gereken kuralları içeren bir AGENTS.md dosyası oluşturun.
Grok, depo içinde çalıştığında bu dosyayı otomatik olarak yükler; böylece her oturumda aynı yönergeleri tekrarlamanız gerekmez.
Aşağıdaki istemi kullanın:
Create a short AGENTS.md file for an end-to-end machine learning project.
Protect the raw data, prevent data leakage, use reusable Python modules,
manage packages with uv, add tests, commit every major change, and validate
each stage before continuing.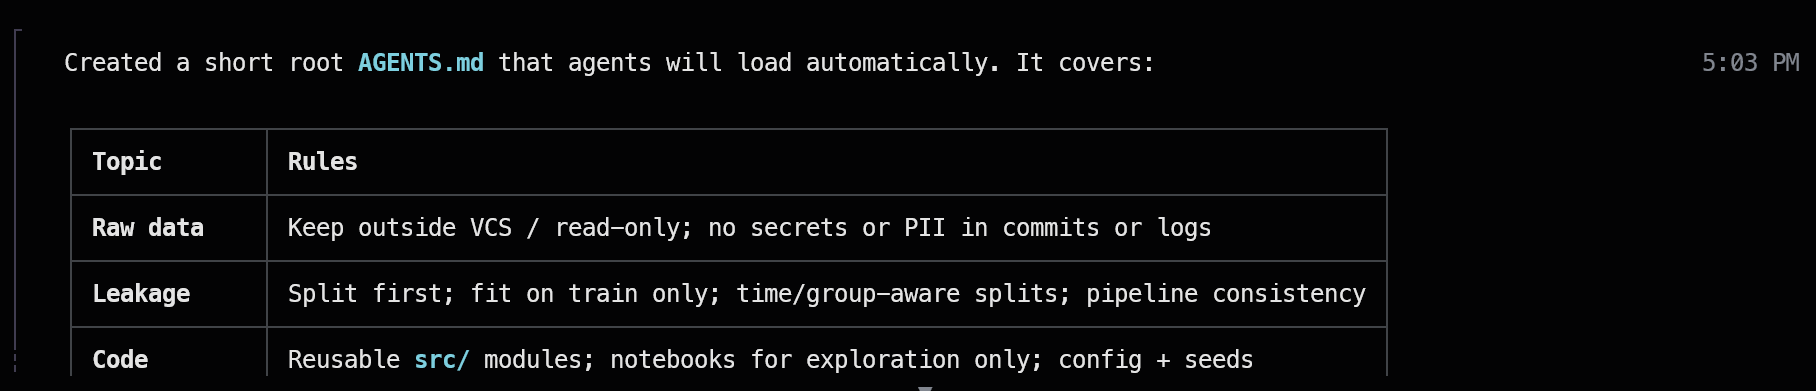
Yönergeleri kısa ve spesifik tutun; Grok, odaklı proje kurallarına daha tutarlı şekilde uyma eğilimindedir.
Son olarak; Grok’un proje kurallarını, ayarlarını, becerilerini, eklentilerini ve MCP sunucularını keşfettiğini kontrol edin:
grok inspect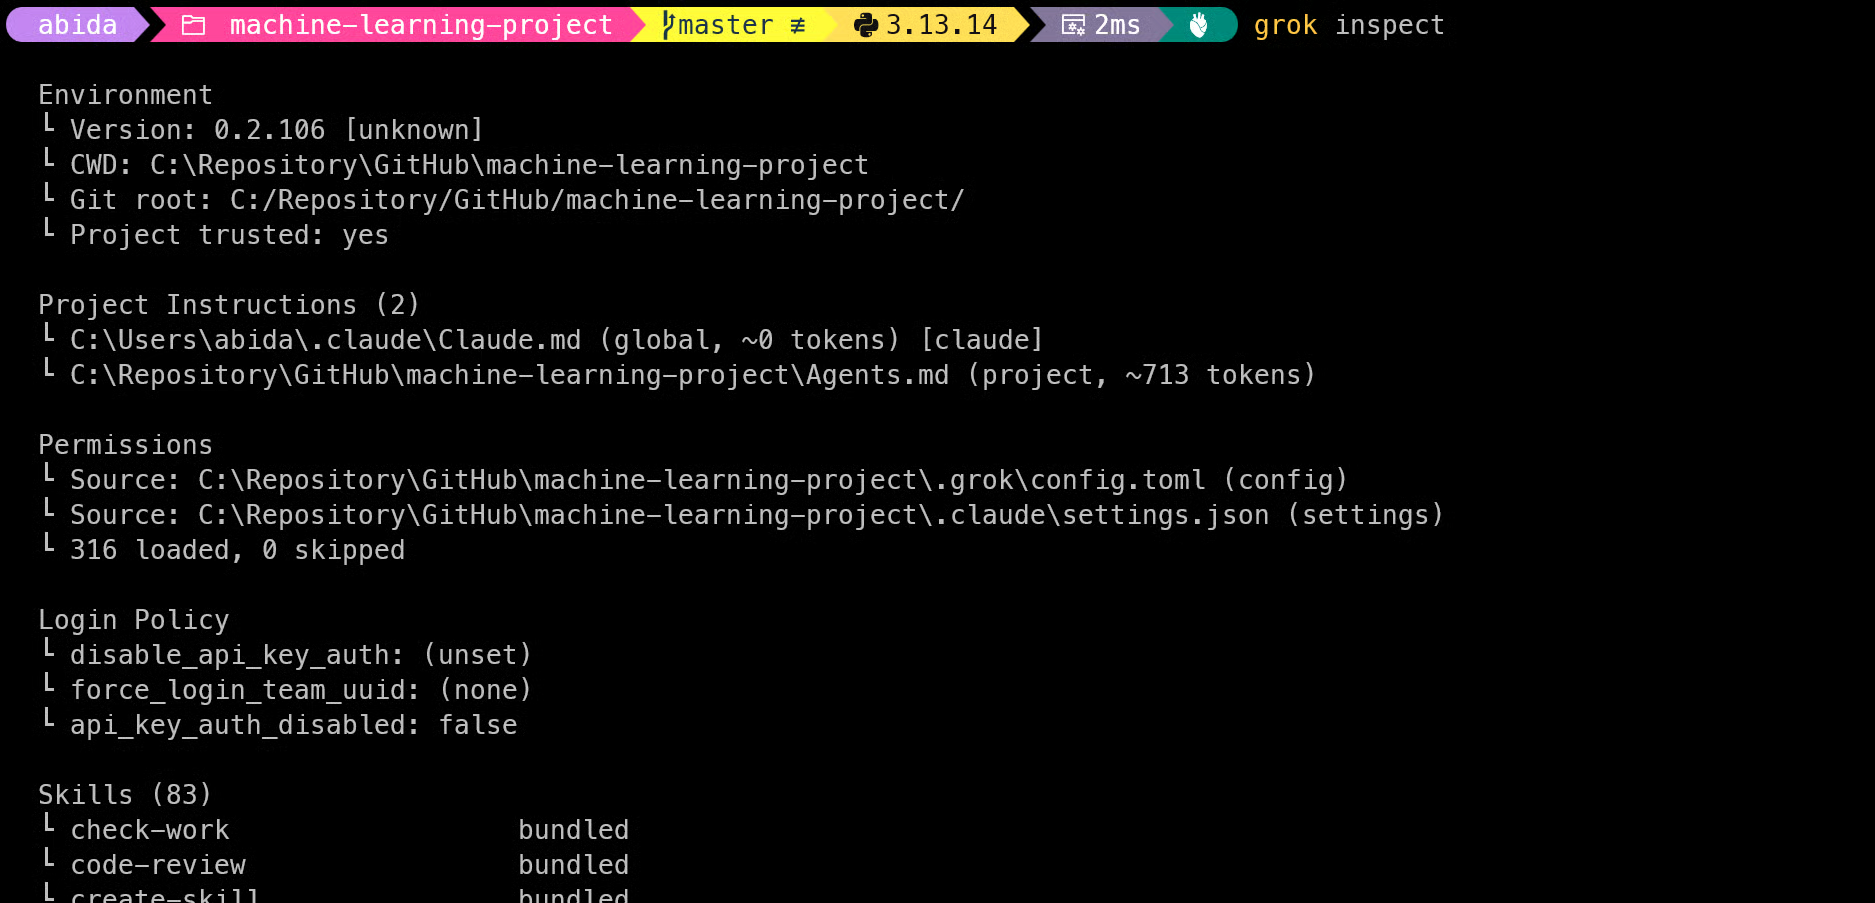
Her şey doğru görünüyorsa, makine öğrenimi projesini oluşturmaya başlayabiliriz.
Artık Grok Build kuruldu ve yapılandırıldı; sıfırdan eksiksiz bir makine öğrenimi projesi oluşturmak için onu kullanabiliriz.
Başlangıç olarak Plan Modu’na geçin; böylece Grok, herhangi bir dosyayı değiştirmeden önce görevi inceleyip projeyi nasıl inşa etmeyi düşündüğünü açıklayabilir:
/planArdından aşağıdaki istemi girin:
Build an end-to-end machine learning project from scratch.
Check whether Git and uv are installed, initialize the repository,
create a uv environment, install the required packages, organize the project,
download a toy dataset, analyze and clean the data, create visualizations,
train and compare models, evaluate the best model, build a simple prediction
CLI application, add tests, and document the results.
Plan hazır olduğunda dikkatle okuyun. Grok’tan eksik adımları eklemesini, gereksiz işleri çıkarmasını veya kullanmayı düşündüğü araç ve kütüphaneleri değiştirmesini isteyebilirsiniz.
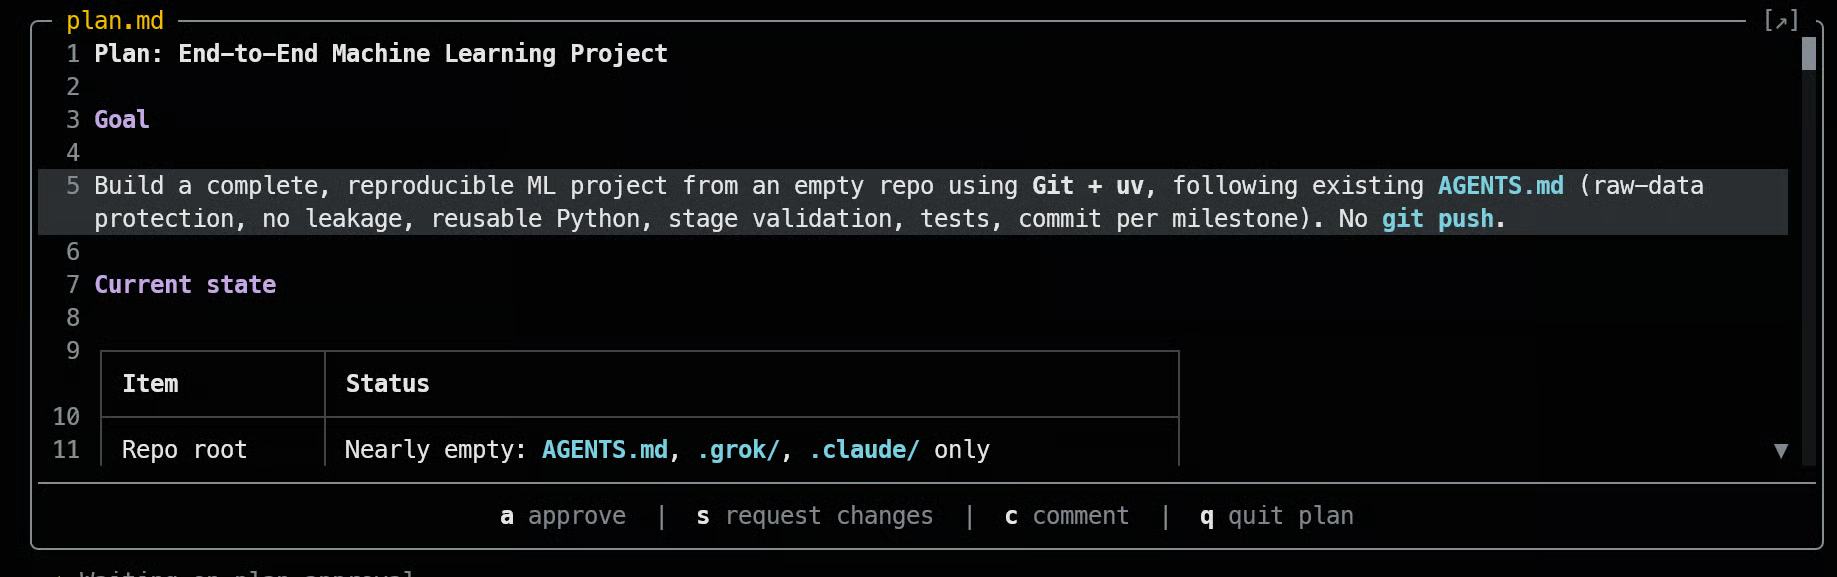
Her şey doğru görünüyorsa planı onaylayın. Grok bunun ardından projeyi oluşturmaya, paketleri kurmaya, kod yazmaya, testleri çalıştırmaya ve yaptığı değişiklikleri göstermeye başlayacaktır.
Projeyi oluştururken ücretsiz kullanım sınırına ulaştık.
Büyük kodlama görevleri, normal sohbet taleplerinden daha fazla kullanım tüketir; bu nedenle Grok verileri analiz ederken, modelleri eğitirken, hataları düzeltirken ve testleri çalıştırırken bu sınıra hızla ulaşılabilir.
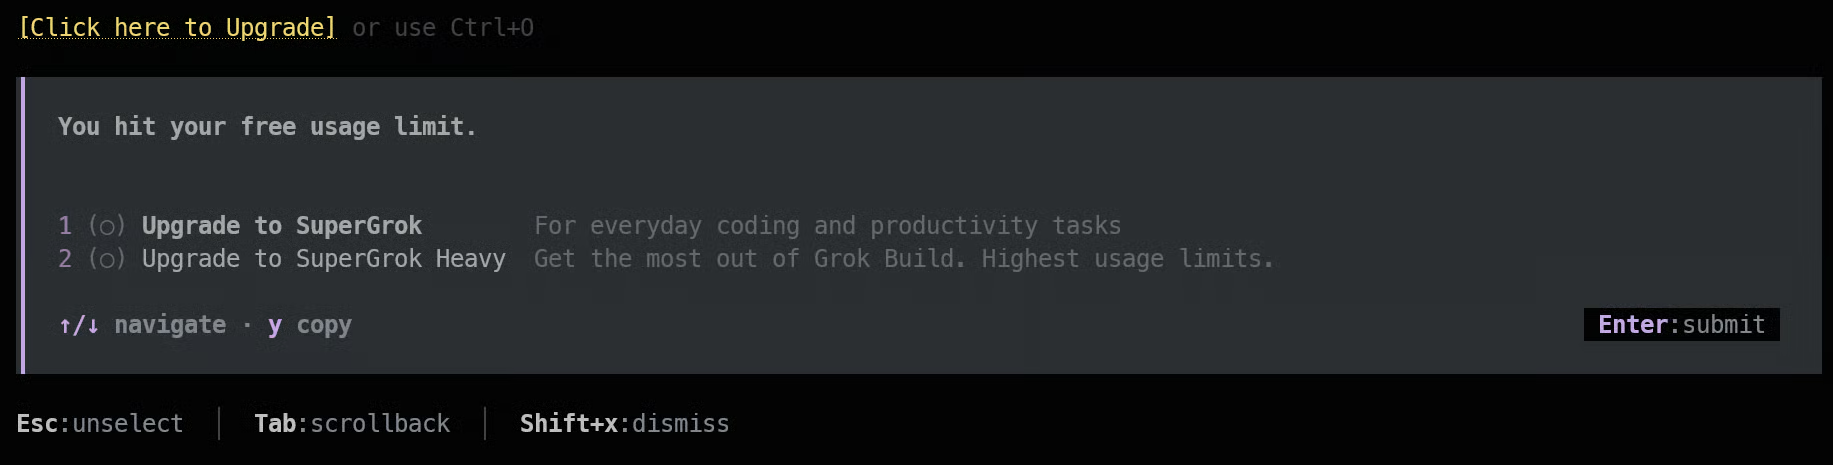
SuperGrok’un güncel ücreti ayda 30 ABD dolarıdır ve Grok’un özelliklerinde daha yüksek kullanım limitleri sağlar.
Ucuz değildir; ancak küçük birkaç istemi denemek yerine eksiksiz bir proje inşa ederken ek kullanım hakkı faydalı olabilir.
Yükseltmeden sonra aynı oturuma dönün ve şunu yazın:
continue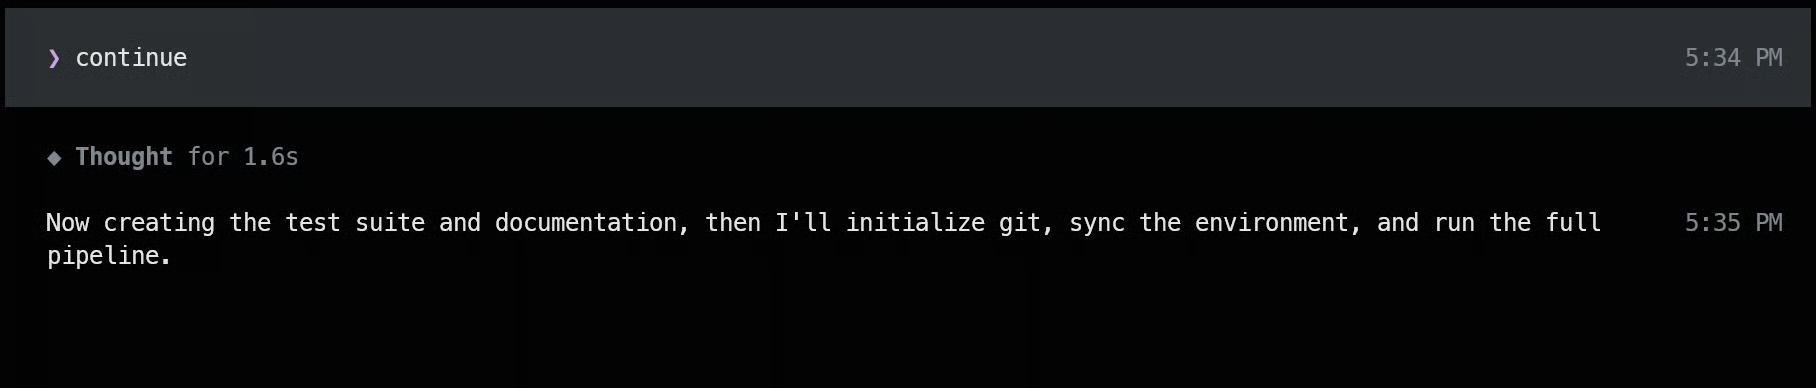
Grok kaldığı yerden devam ederek projeyi inşa etmeyi sürdürecektir.
Çalışma tamamlandığında, Grok neler oluşturduğunu açıklayan bir özet sunar. Buna veri analizi, görselleştirmeler, model karşılaştırma sonuçları, değerlendirme metrikleri, testler, proje yapısı ve tahmin uygulamasını çalıştırma talimatları dahildir.
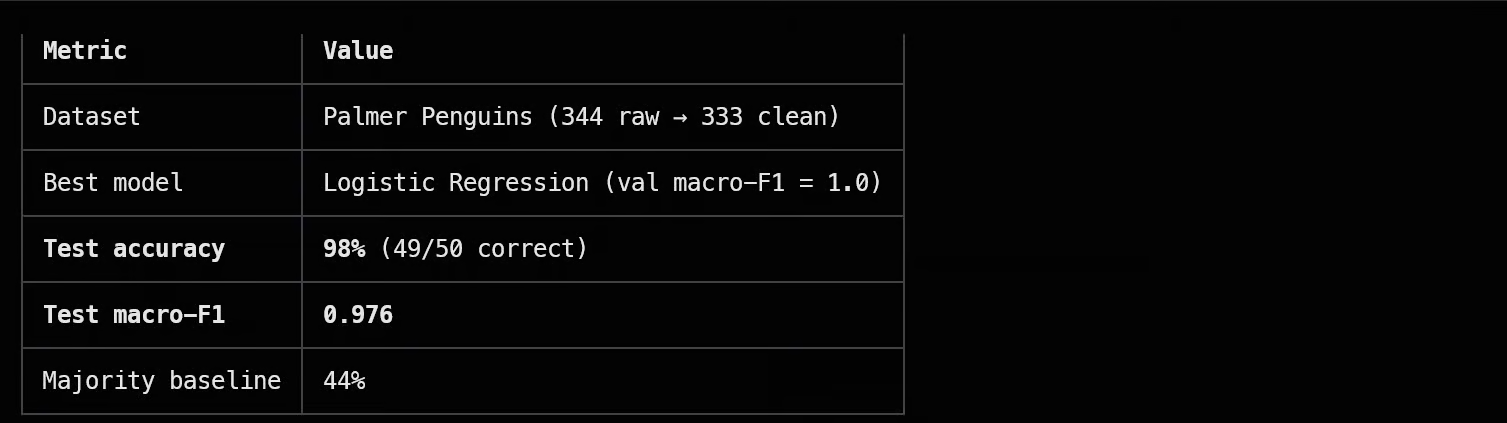
Projemizde Grok, Palmer Penguins veri seti üzerinde bir lojistik regresyon modeli eğitti.
En iyi model yaklaşık %98 doğruluk ve %97,6 F1 skoru elde etti; bu da bu küçük sınıflandırma projesi için mükemmel bir sonuçtur.
Proje klasörünü VS Code’da açıp oluşturulan dosyaları tek tek inceleyebilirsiniz.
Bu; Grok’un kaynak kodu, veri işleme hattını, testleri, raporları ve komut satırı uygulamasını nasıl organize ettiğini anlamak için faydalıdır.
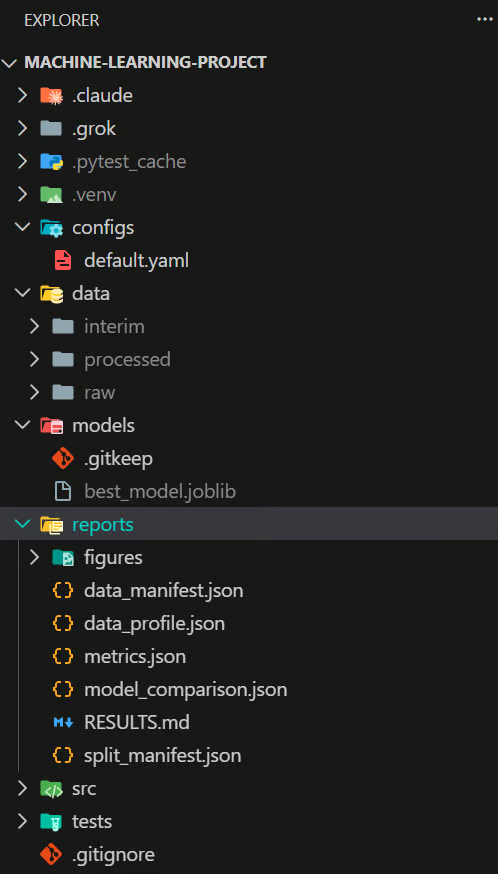
Projeyi Grok oluşturmuş olsa da, kodu gözden geçirmek ve her parçanın nasıl çalıştığını anlamak hâlâ önemlidir.
Proje klasörü içinde başka bir terminal açın ve şu komutu çalıştırın:
uv run penguins predict \
  --bill-length 39.1 \
  --bill-depth 18.7 \
  --flipper 181 \
  --body-mass 3750 \
  --sex male \
  --island Torgersen
CLI uygulaması, değerlendirme sırasında kullanılan aynı önişleme hattı ve eğitilmiş modeli kullanarak değerleri işler. Testimizde beklenen penguen türünü döndürdü ve tahmin uygulamasının doğru çalıştığını doğruladı.
Genel olarak, Grok Build’in çok iyi ve şaşırtıcı derecede olgun bir kodlama aracısı olduğunu düşünüyorum.
Onu SuperGrok aboneliğinizle kullanabilir veya bir API anahtarıyla doğrudan SpaceXAI API’sine bağlayabilirsiniz.
Daha da önemlisi, Grok modelleriyle sınırlı değilsiniz.
Grok Build, OpenAI uyumlu ve Anthropic uyumlu API’ler üzerinden özel modelleri destekler; bu da yerelde çalışan açık kaynaklı bir modeli bağlayabileceğiniz veya başka bir API sağlayıcısı kullanabileceğiniz anlamına gelir.
Resmi özel model yapılandırma kılavuzunu izleyerek bunu kurabilirsiniz.
Ayrıca eklentiler, pazar yerleri, yeniden kullanılabilir beceriler, aracılar, kancalar ve MCP sunucularıyla sorunsuz çalışır.
Grok, her şeyi tekrar kurmanıza gerek kalmadan mevcut Claude Code becerilerini, eklentilerini, MCP yapılandırmalarını ve yönerge dosyalarını otomatik olarak keşfedebilir.
Genel deneyim oldukça kullanıcı dostu.
Güncellemeler Grok Build başlatıldığında otomatik olarak kontrol edilir; grok update komutu ise en son sürümü elle kurmanıza olanak verir.
Kurulum ve yapılandırmadan, model değiştirmeye ve araç eklemeye kadar her şey basit ve iyi tasarlanmış hissettiriyor.
OpenCode ile karşılaştırıldığında, Grok Build şu anda bana daha cilalı ve olgun bir ürün gibi geliyor.
Özellikler ve genel kodlama deneyimi açısından Claude Code’a şimdiden oldukça yakın ve gelişmeye devam edeceğini düşünüyorum.
Ana endişem hâlâ maliyet ve sınırlı ücretsiz kullanım; ancak abonelik dışında Grok Build için beklentilerim yüksek.
Öne Çıkan DataCamp Kursları
Kurs
Kurs
Alıştırma and program your progress.
Google Ile Devam Edinblog
Abid Ali Awan
14 dk.
blog
Dario Radečić
15 dk.
Eğitim
Kurtis Pykes
8 dk.
Eğitim
Adel Nehme