Curso
Sistemas Multiagentes com LangGraph
2 h 45 min
9K
Pratique e programa seu progresso.
Continuar Com O GoogleGrok 4.6 é o modelo de IA mais recente por trás do Grok Build, feito para programação, tarefas agenticas e trabalho com conhecimento complexo. O Grok Build leva essas capacidades direto para o seu terminal, onde ele pode planejar projetos, criar e editar arquivos, instalar pacotes, executar comandos, testar código e corrigir erros com a sua aprovação.
Neste guia, vou explorar o Grok Build, mostrar seus principais recursos e configurar sua memória entre sessões, instruções do projeto, habilidades reutilizáveis e ajustes de segurança.
Depois, vamos usá-lo para construir um projeto completo de machine learning, do setup do ambiente e análise dos dados ao treinamento de modelos, avaliação dos resultados e criação de um aplicativo de predição.
O Grok Build é o agente de código da SpaceXAI que roda diretamente no seu terminal.
Ele está na mesma categoria de ferramentas como Claude Code e OpenCode: você descreve em linguagem natural o que quer construir, e o agente trabalha com os arquivos e ferramentas do seu computador para concluir a tarefa.
Ele pode explorar um projeto existente, criar e editar arquivos, instalar pacotes, executar comandos, testar o código, identificar erros e corrigir problemas.
O Grok Build também é surpreendentemente fácil de usar. Você não precisa fornecer instruções de código detalhadas para cada etapa, e ele consegue reaproveitar configurações de outros agentes de código, incluindo habilidades de agente, configurações MCP e ajustes do projeto.
Esses recursos deixam a instalação e a configuração muito mais fluidas, especialmente se você já usa ferramentas semelhantes.
A principal desvantagem é o limite de uso.
Embora o Grok Build esteja disponível no plano gratuito, a franquia pode acabar rápido ao trabalhar em um projeto completo.
O plano SuperGrok completo custa US$ 30 por mês, o que parece caro em comparação com algumas ferramentas concorrentes. O Claude Pro, por exemplo, custa US$ 20 por mês e inclui acesso ao Claude Code.
Apesar do preço, o Grok Build é um agente de código competente e acessível, especialmente para quem quer um assistente de IA que faça mais do que apenas gerar pequenos trechos de código.
O Grok Build inclui recursos padrão de agentes de código, como o Plan Mode e instruções de projeto por meio de um arquivo AGENTS.md.
Mas sua memória, geração de mídia, automação em segundo plano, gerenciamento de agentes e sistema de extensões o tornam mais útil para projetos maiores.
O Grok consegue lembrar informações úteis entre sessões, incluindo comandos do projeto, decisões técnicas, estrutura de pastas e regras de código.
Isso significa que você não precisa explicar o mesmo projeto toda vez que voltar.
O Grok pode criar agentes filhos independentes com seu próprio contexto.
Por exemplo, um agente pode explorar a base de código enquanto outro cria um plano, escreve testes ou trabalha em um recurso separado.
Você pode bifurcar uma sessão para testar uma abordagem diferente sem perder a conversa original.
O rewind também permite voltar para um estágio anterior quando algo dá errado.
As worktrees do Git permitem que o Grok trabalhe dentro de uma cópia isolada do repositório.
Isso protege o projeto principal enquanto você testa recursos experimentais ou executa vários agentes ao mesmo tempo.
Você pode gerar imagens e vídeos diretamente no Grok Build usando os comandos /imagine e /imagine-video.
Isso é útil ao criar apps que precisam de assets visuais, mockups ou conteúdo de demonstração.
O comando /loop permite que o Grok repita um prompt em um intervalo definido. Por exemplo, você pode pedir para checar seus testes, monitorar um deploy ou reportar novos erros a cada poucos minutos.
O Grok Build inclui um modo Vim para quem prefere os atalhos de teclado do Vim ao navegar na interface do terminal. Você pode ativar ou desativar com /vim-mode.
Personas permitem dar aos agentes estilos comportamentais diferentes, áreas de foco ou regras de trabalho.
Você pode gerenciá-las com /personas e aplicá-las a subagentes diferentes.
O Agent Dashboard mostra uma visão ao vivo de todas as suas sessões.
Você vê quais agentes estão trabalhando, aguardando input, concluídos ou com falha, e pode abrir qualquer sessão direto do painel.
Hooks permitem que o Grok execute comandos automaticamente ou chame um endpoint HTTP antes ou depois de eventos específicos.
Você pode usá-los para bloquear comandos perigosos, formatar código após edições, registrar uso de ferramentas ou enviar um alerta quando uma tarefa terminar.
Plugins expandem o Grok Build com agentes adicionais, hooks, servidores MCP, language servers e outras funcionalidades. Plugins existentes do Claude Code também podem ser descobertos automaticamente sem exigir uma configuração totalmente nova.
O Marketplace integrado permite navegar e instalar plugins de fontes configuradas diretamente no Grok Build. Você pode abri-lo com o comando /marketplace.
Antes de construir o projeto de machine learning, precisamos instalar o Grok Build, conectar nossa conta SpaceXAI e abri-lo em uma pasta dedicada ao projeto.
Abra seu terminal e execute o comando para o seu sistema operacional.
Para macOS, Linux ou WSL:
curl -fsSL https://x.ai/cli/install.sh | bashPara Windows PowerShell:
irm https://x.ai/cli/install.ps1 | iexO instalador baixa o Grok Build e adiciona o comando grok ao seu sistema.
Em seguida, faça login executando:
grok login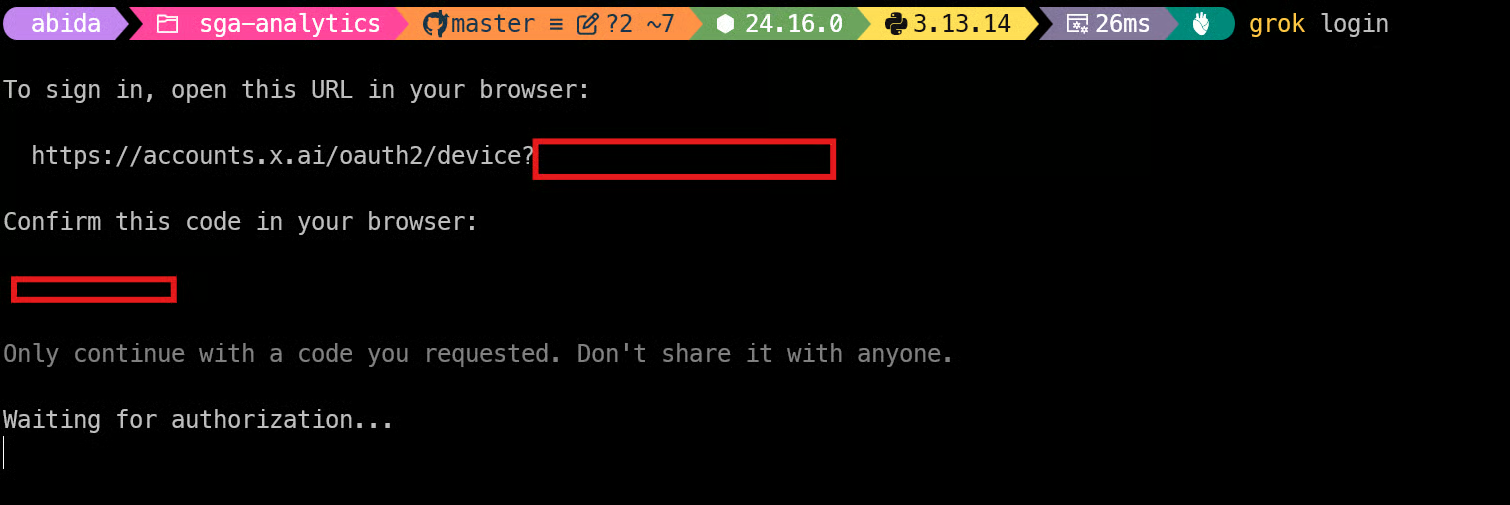
O Grok Build abrirá uma janela do navegador para você acessar sua conta SpaceXAI e aprovar o acesso.
Normalmente, você só precisa concluir esse processo uma vez.
Crie uma pasta separada para o projeto de machine learning e entre nela:
mkdir machine-learning-project
cd machine-learning-project
Agora inicie o Grok Build dentro da pasta:
grok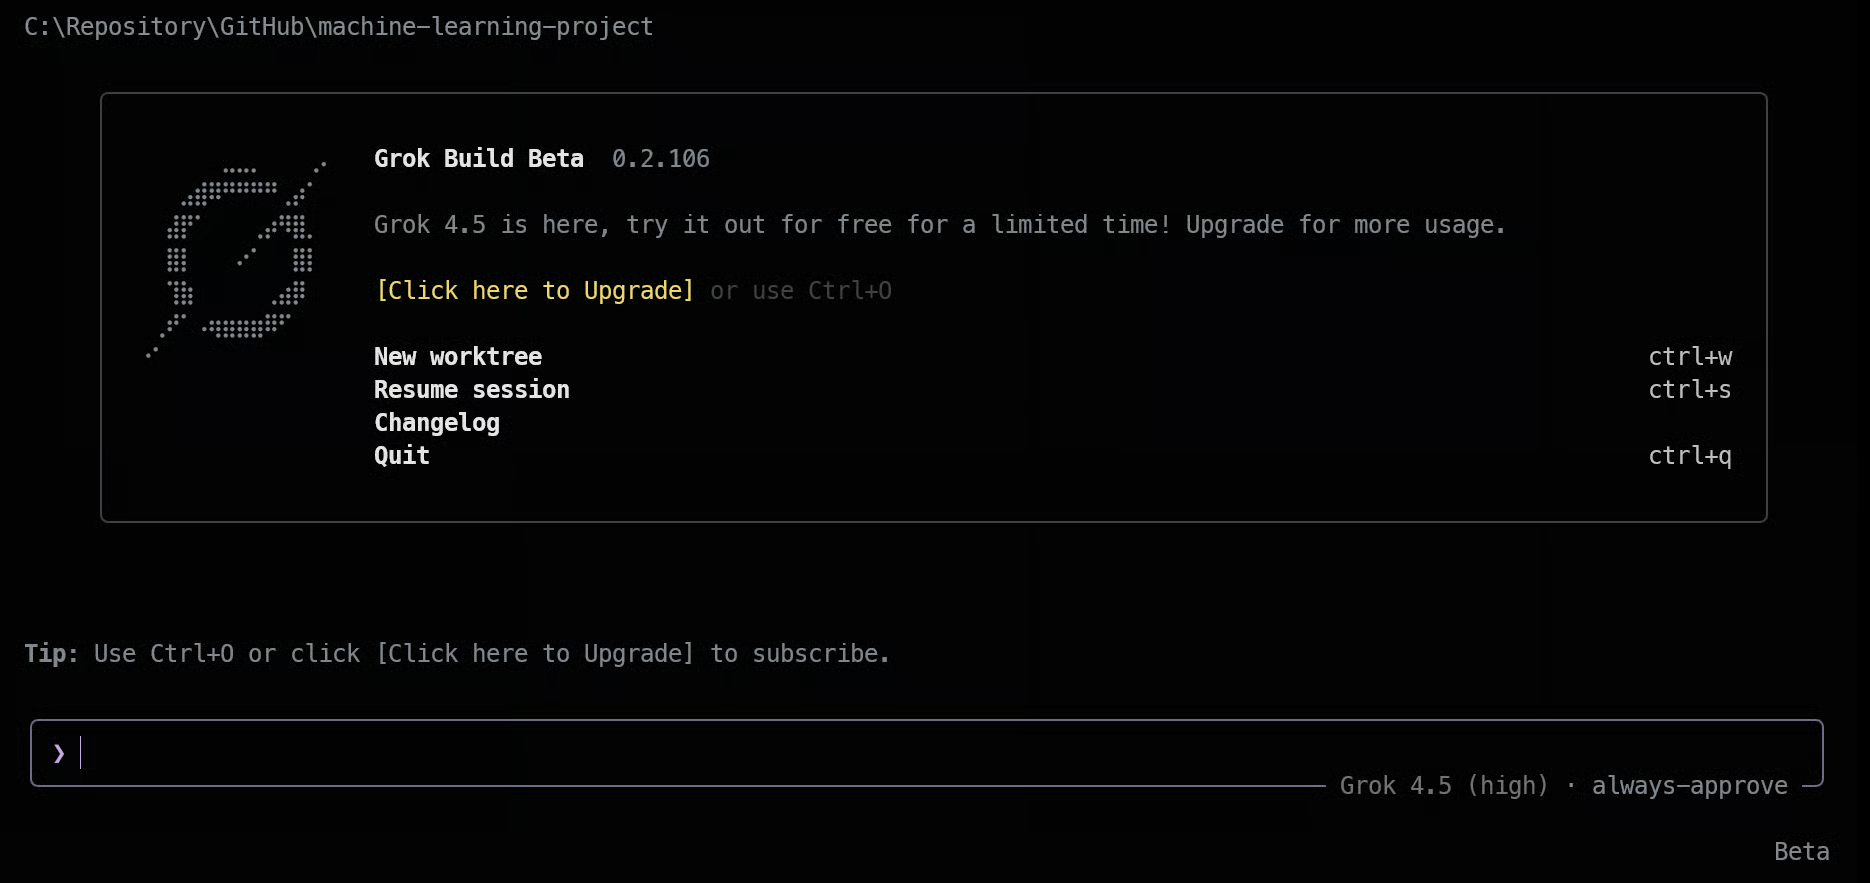
Antes de construir qualquer coisa, vamos configurar o Grok Build para lembrar informações importantes do projeto, seguir regras de permissão mais seguras e aplicar as mesmas instruções de desenvolvimento em todas as sessões.
A memória entre sessões permite que o Grok lembre informações úteis depois que você fecha o terminal e volta ao projeto mais tarde.
Inicie o Grok Build com a memória ativada:
grok --experimental-memoryDentro do Grok Build, você pode salvar manualmente uma nota importante:
/remember Este projeto usa uv para gerenciamento de pacotes e pytest para testes.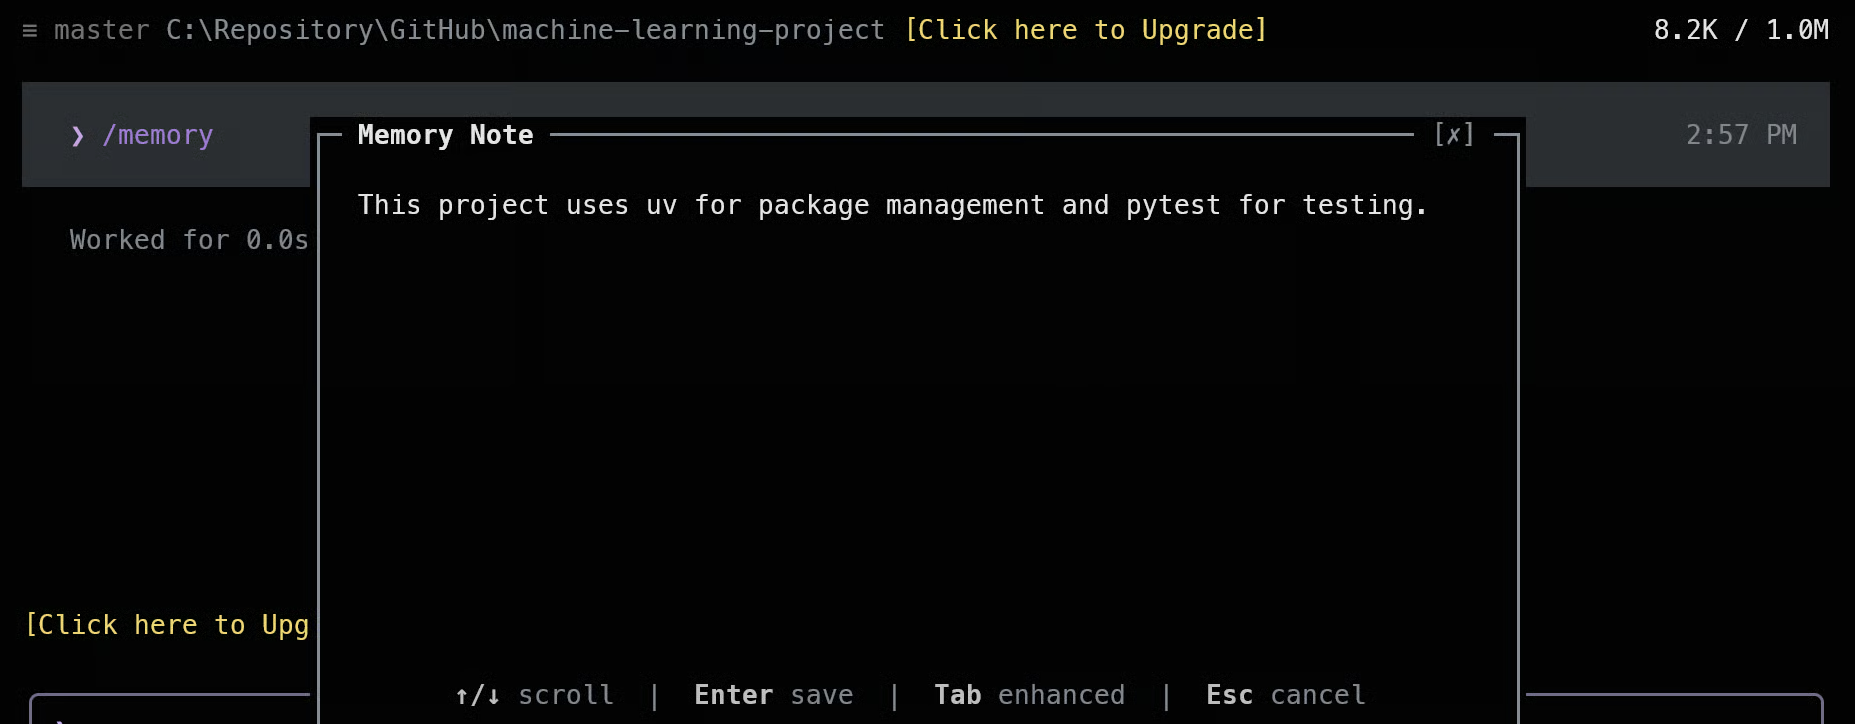
Você também pode usar /memory para ver e gerenciar as informações salvas.
Use a memória para detalhes estáveis, como comandos importantes, escolhas de tecnologia, estrutura de pastas e convenções de código.
Instruções temporárias devem ficar apenas na sessão atual.
O Grok Build usa o Ask mode por padrão, ou seja, ele pede aprovação antes de usar ferramentas que ainda não foram liberadas.
Vamos adicionar regras de permissão no nível do projeto para deixar o desenvolvimento normal mais fluido e, ao mesmo tempo, bloquear ações arriscadas de forma explícita.
Peça ao Grok para preparar a configuração:
Crie uma configuração segura .grok/config.toml para este projeto.
Permita edição normal de arquivos, inspeção do Git, testes e lint,
mas negue acesso a arquivos secretos, comandos destrutivos no shell, pushes de Git,
force pushes e alterações fora da pasta do projeto.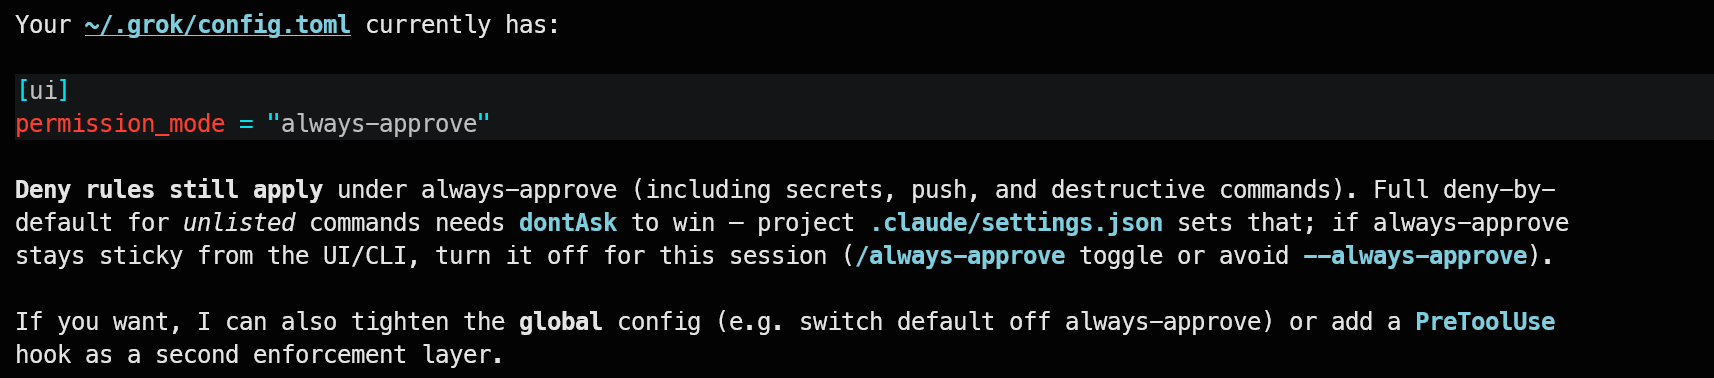
Agora, crie um arquivo AGENTS.md com as regras que o Grok deve seguir ao longo do projeto.
O Grok carrega esse arquivo automaticamente sempre que trabalha dentro do repositório, então você não precisa repetir as mesmas instruções em toda sessão.
Use o seguinte prompt:
Crie um AGENTS.md curto para um projeto de machine learning de ponta a ponta.
Proteja os dados brutos, evite vazamento de dados, use módulos Python reutilizáveis,
administre pacotes com uv, adicione testes, faça commits de cada mudança importante e
valide cada etapa antes de continuar.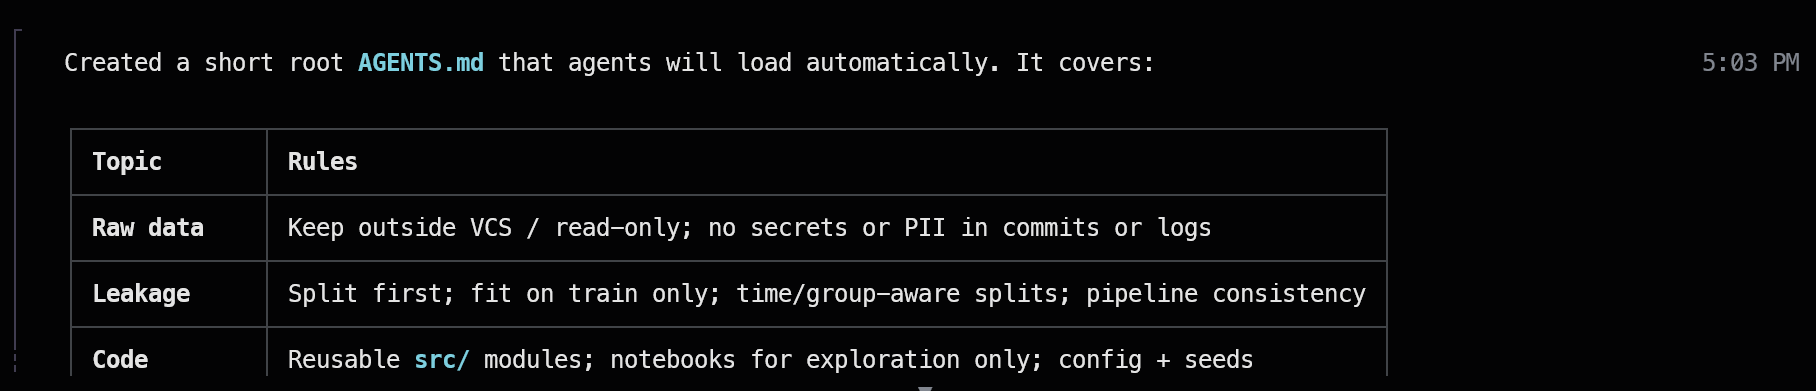
Mantenha as instruções curtas e específicas — o Grok tende a seguir regras focadas com mais consistência.
Por fim, confira se o Grok identificou as regras do projeto, configurações, habilidades, plugins e servidores MCP:
grok inspect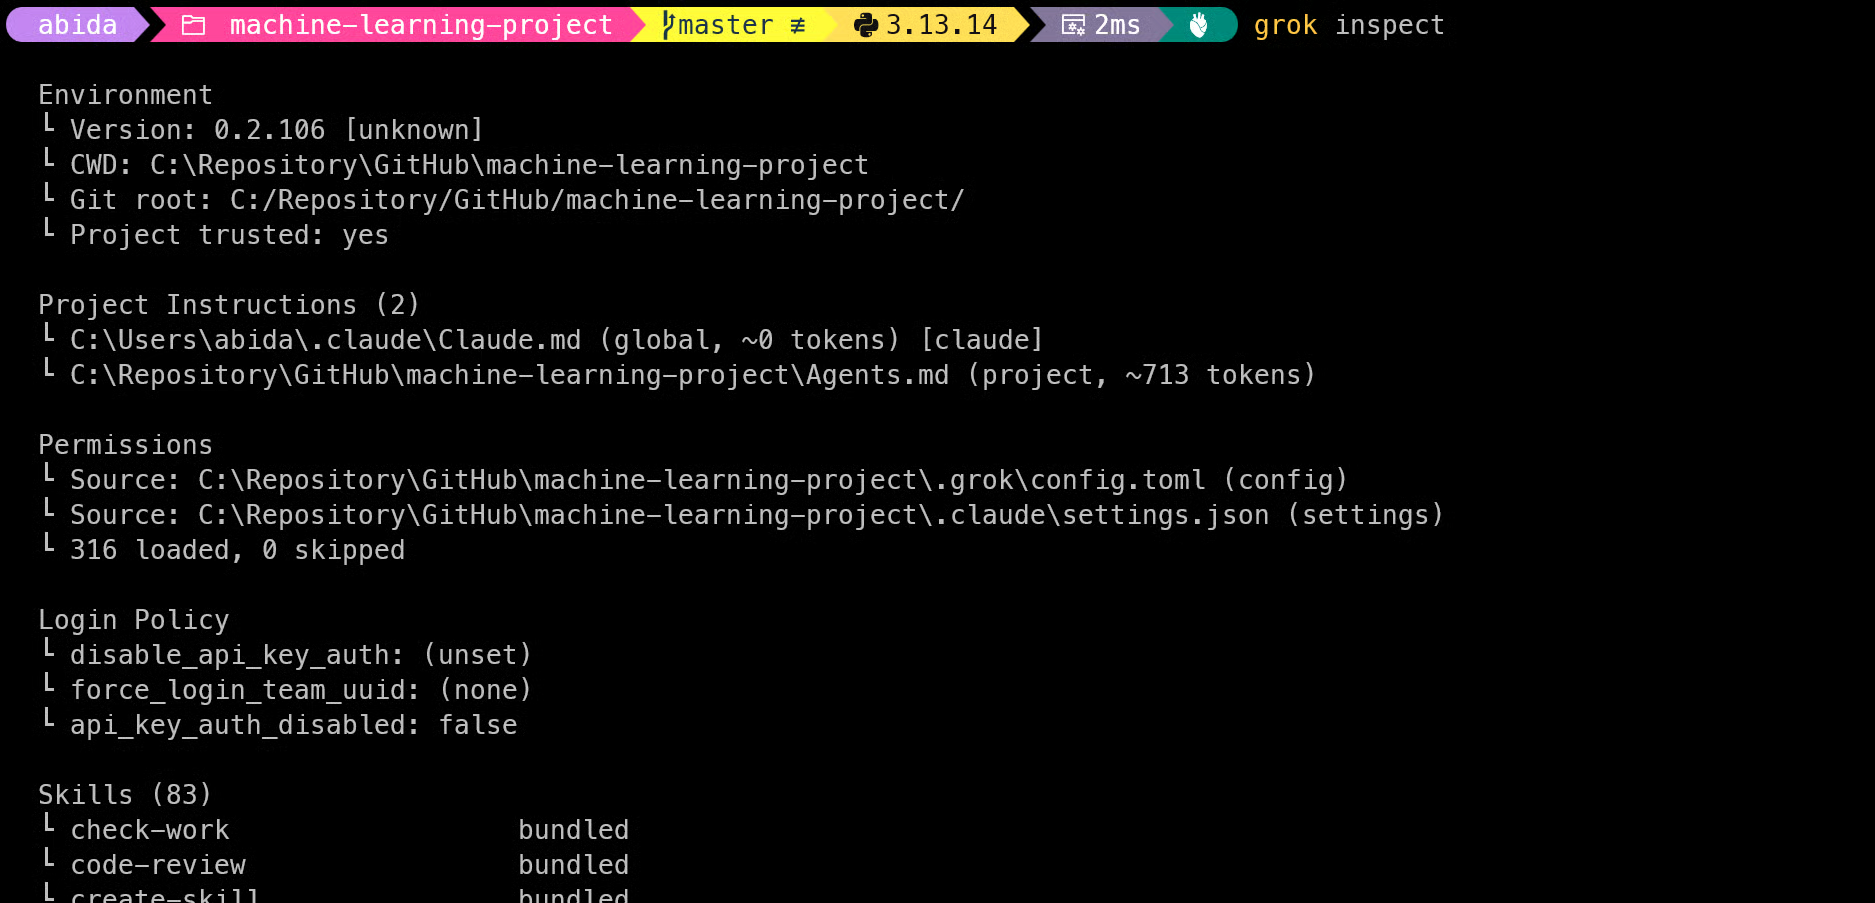
Quando tudo aparecer corretamente, podemos começar a construir o projeto de machine learning.
Agora que o Grok Build está instalado e configurado, vamos usá-lo para criar o projeto completo de machine learning do zero.
Comece ativando o Plan Mode, para que o Grok analise a tarefa e explique como pretende construir o projeto antes de mudar qualquer arquivo:
/planDepois, insira o seguinte prompt:
Construa um projeto de machine learning de ponta a ponta do zero.
Confira se Git e uv estão instalados, inicialize o repositório,
crie um ambiente uv, instale os pacotes necessários, organize o projeto,
baixe um dataset de exemplo, analise e limpe os dados, crie visualizações,
treine e compare modelos, avalie o melhor modelo, construa um aplicativo
CLI simples de predição, adicione testes e documente os resultados.
Quando o plano estiver pronto, leia com atenção. Você pode pedir ao Grok para incluir etapas que faltam, remover trabalho desnecessário ou trocar as ferramentas e bibliotecas que ele pretende usar.
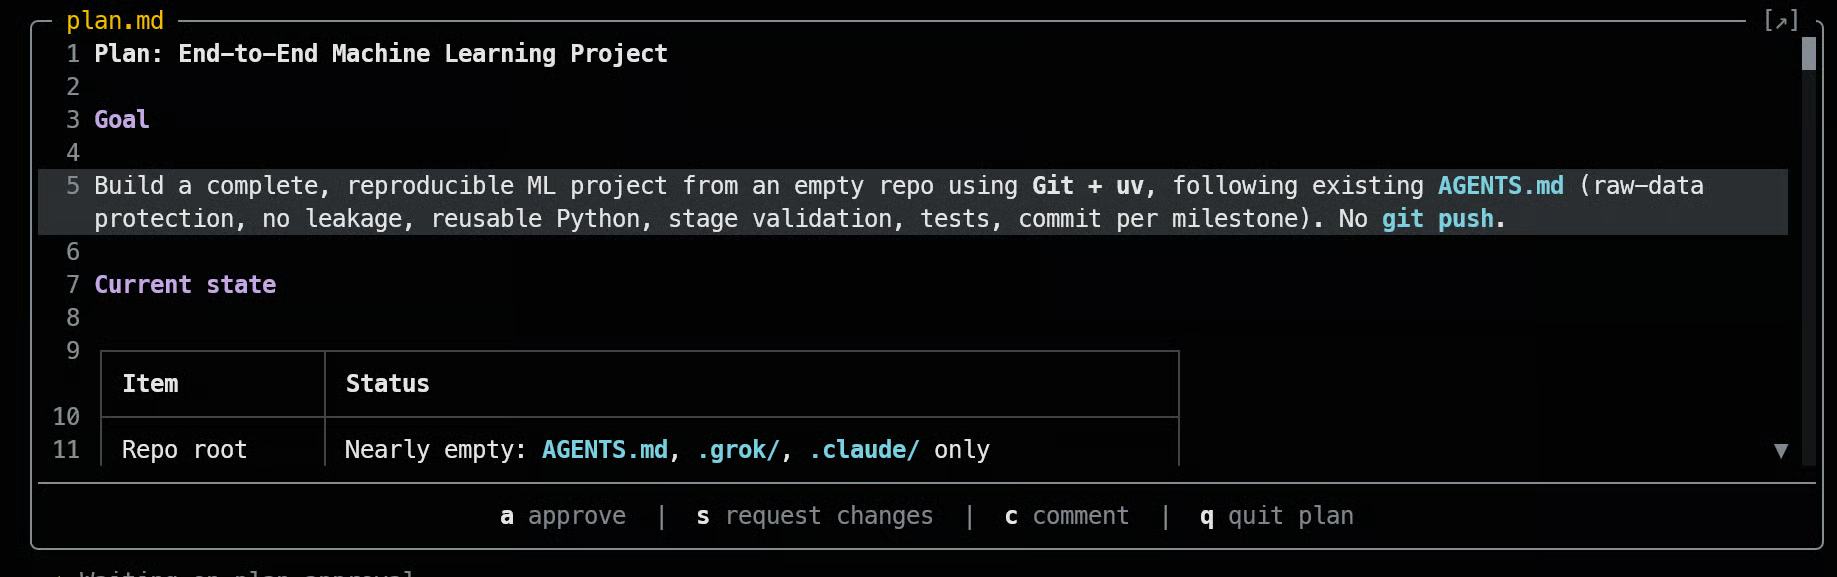
Quando tudo estiver certo, aprove o plano. O Grok então começará a criar o projeto, instalar pacotes, escrever código, rodar testes e mostrar as mudanças que fizer.
Durante a construção do projeto, atingimos o limite de uso gratuito.
Tarefas grandes de código consomem mais uso do que conversas comuns, então isso pode acontecer rápido quando o Grok está analisando dados, treinando modelos, corrigindo erros e rodando testes.
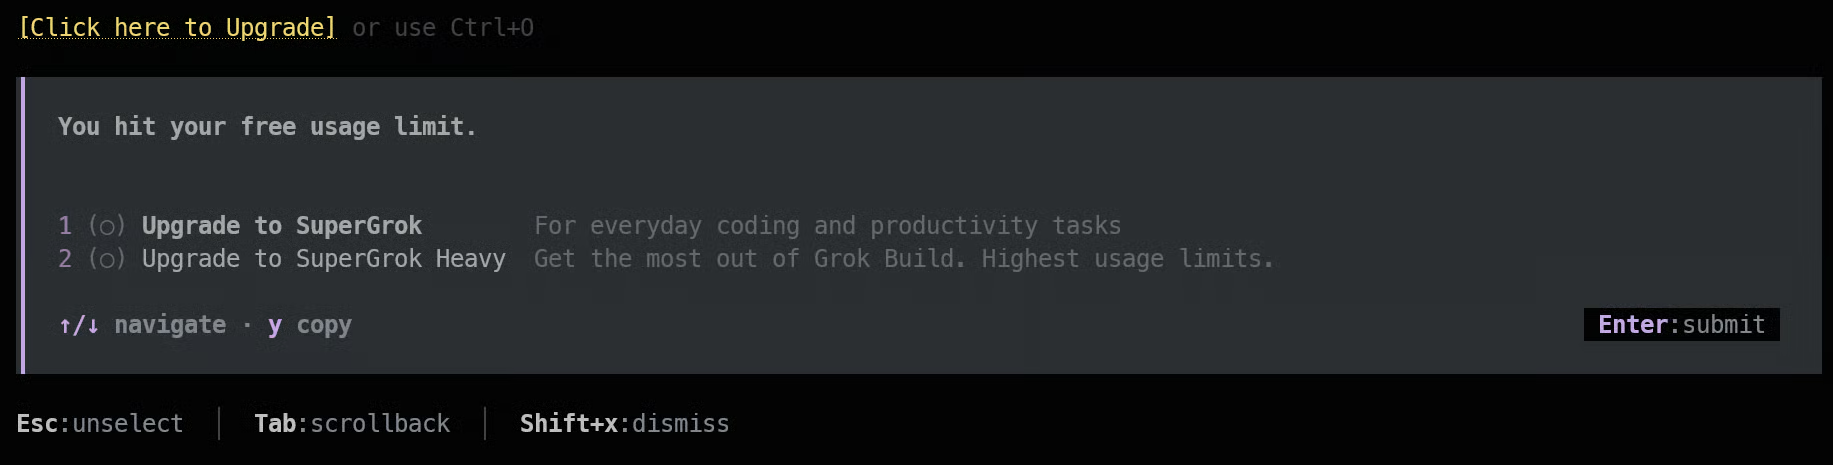
Atualmente, o SuperGrok custa US$ 30 por mês e oferece limites maiores de uso em todos os recursos do Grok.
Não é barato, mas a franquia extra pode ser útil quando você está construindo um projeto completo, e não só testando alguns prompts pequenos.
Depois do upgrade, volte para a mesma sessão e digite:
continue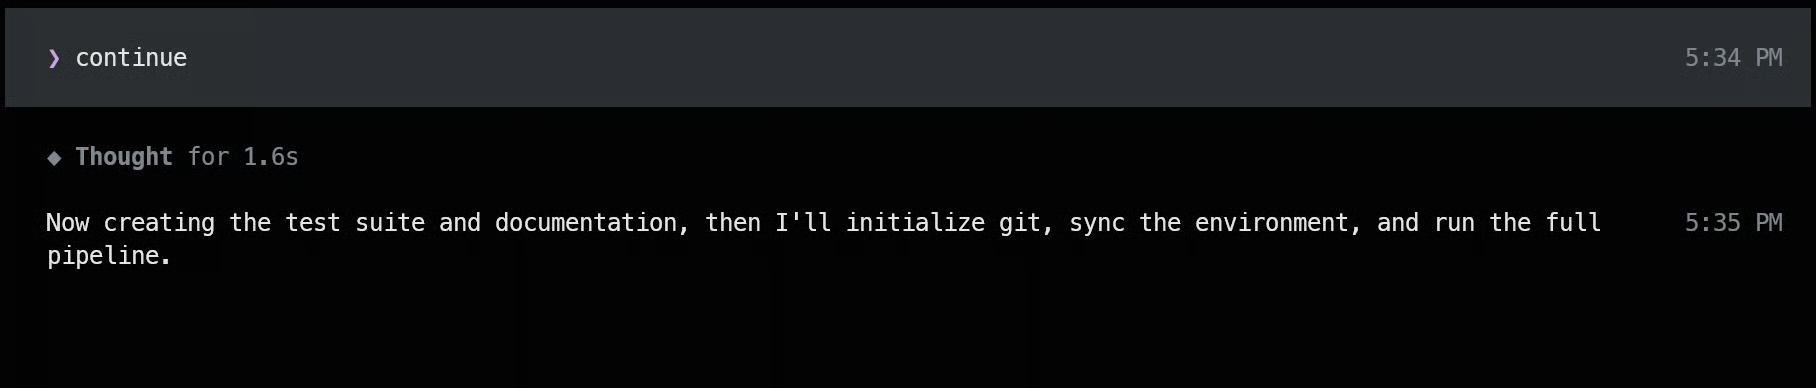
O Grok vai retomar de onde parou e continuar construindo o projeto.
Ao concluir, o Grok fornece um resumo explicando o que foi criado. Isso inclui a análise dos dados, visualizações, resultados da comparação de modelos, métricas de avaliação, testes, estrutura do projeto e instruções para rodar o aplicativo de predição.
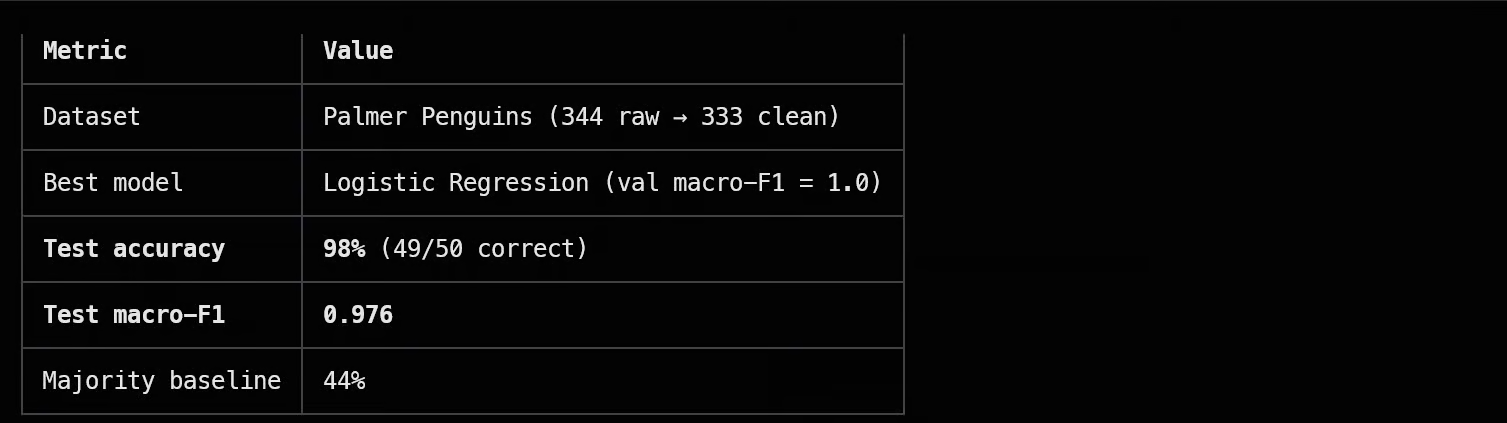
No nosso projeto, o Grok treinou um modelo de regressão logística no dataset Palmer Penguins.
O melhor modelo alcançou cerca de 98% de acurácia e um F1-score de 97,6%, um excelente resultado para este pequeno projeto de classificação.
Você pode abrir a pasta do projeto no VS Code e explorar os arquivos gerados, um a um.
Isso ajuda a entender como o Grok organizou o código-fonte, o pipeline de processamento de dados, os testes, relatórios e o aplicativo de linha de comando.
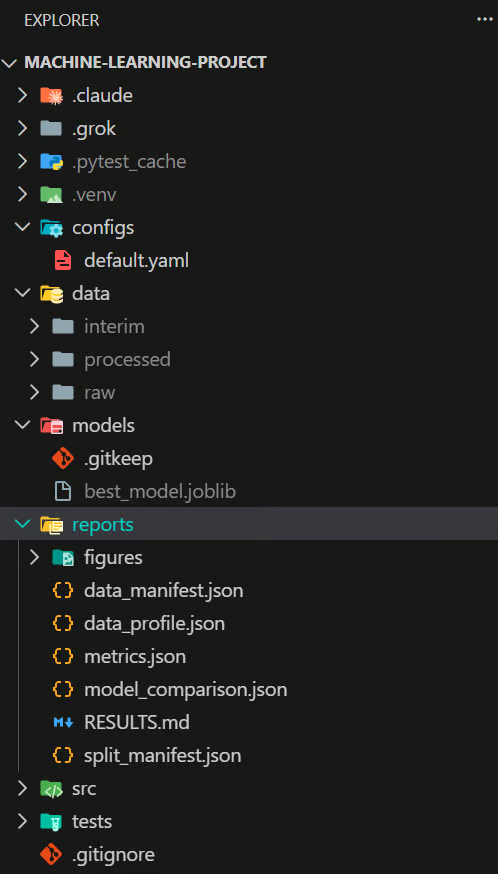
Mesmo que o Grok tenha criado o projeto para a gente, ainda é importante revisar o código e entender como cada parte funciona.
Abra outro terminal dentro da pasta do projeto e execute o comando a seguir:
uv run penguins predict \
  --bill-length 39.1 \
  --bill-depth 18.7 \
  --flipper 181 \
  --body-mass 3750 \
  --sex male \
  --island Torgersen
O app de CLI processa os valores usando o mesmo pipeline de pré-processamento e o modelo treinado usados na avaliação. No nosso teste, ele retornou a espécie de pinguim esperada, confirmando que o aplicativo de predição funcionou corretamente.
No geral, considero o Grok Build um agente de código muito bom e surpreendentemente refinado.
Você pode usá-lo com sua assinatura SuperGrok ou conectá-lo diretamente à API da SpaceXAI usando uma chave de API.
Mais importante: você não fica limitado aos modelos do Grok.
O Grok Build suporta modelos personalizados por meio de APIs compatíveis com OpenAI e Anthropic, o que significa que você também pode conectar um modelo open source rodando localmente ou usar outro provedor de API.
Você pode seguir o guia oficial de configuração de modelos personalizados para fazer isso.
Ele também funciona muito bem com plugins, marketplaces, habilidades reutilizáveis, agentes, hooks e servidores MCP.
O Grok consegue descobrir automaticamente habilidades do Claude Code, plugins, configurações MCP e arquivos de instrução existentes, sem você precisar configurar tudo de novo.
A experiência geral é muito amigável.
As atualizações são verificadas automaticamente quando o Grok Build inicia, e o comando grok update permite instalar manualmente a versão mais recente.
Tudo — da instalação e configuração à troca de modelos e adição de ferramentas — parece simples e bem pensado.
Comparado ao OpenCode, o Grok Build hoje me passa a impressão de ser o produto mais polido e maduro.
Ele já está próximo do Claude Code em termos de recursos e experiência geral de programação, e a tendência é continuar evoluindo.
Minha principal preocupação continua sendo o custo e o uso gratuito limitado, mas tirando a assinatura, tenho altas expectativas para o Grok Build.
Os melhores cursos da DataCamp
Curso
Curso
Pratique e programa seu progresso.
Continuar Com O Googleblog
Abid Ali Awan
15 min
Tutorial
Matt Crabtree
6 min
Tutorial
Abid Ali Awan
12 min
Tutorial
Moez Ali
12 min
Tutorial
Zoumana Keita
8 min
Tutorial
Moez Ali
11 min