Course
Introduction to Deep Learning in Python
4 hr
245K
In this tutorial, you will learn what Generative Adversarial Networks (GANs) are without going into the details of the math. After, you will learn how to code a simple GAN which can create digits!
The easiest way to understand what GANs are is through a simple analogy:
Suppose there is a shop which buys certain kinds of wine from customers which they will later resell.
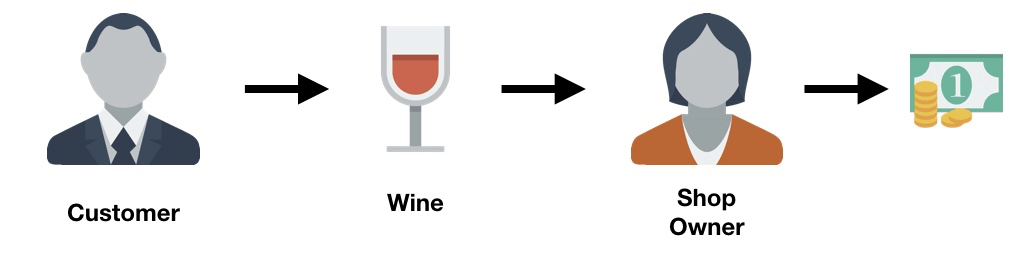
However, there are nefarious customers who sell fake wine in order to get money. In this case, the shop owner has to be able to distinguish between the fake and authentic wines.
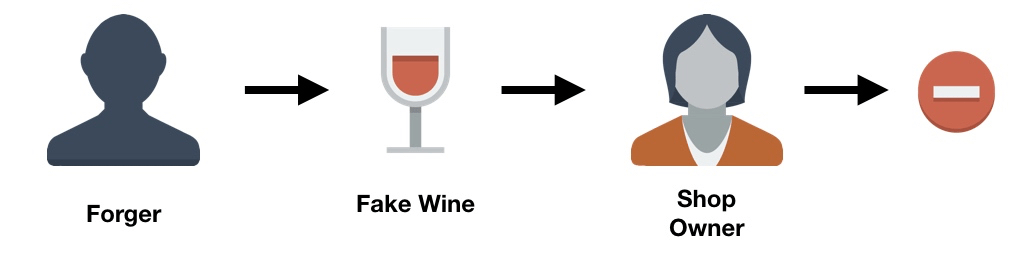
You can imagine that initially, the forger might make a lot of mistakes when trying to sell the fake wine and it will be easy for the shop owner to identify that the wine is not authentic. Because of these failures, the forger will keep on trying different techniques to simulate the authentic wines and some will eventually be successful. Now that the forger knows that certain techniques got past the shop owner's checks, he can start to further improve the fake wines based on those techniques.
At the same time, the shop owner would probably get some feedback from other shop owners or wine experts that some of the wines that she has are not original. This means that the shop owner would have to improve how she determines whether a wine is fake or authentic. The goal of the forger is to create wines that are indistinguishable from the authentic ones, and the goal of the shop owner is to accurately tell if a wine is real or not.
This back-and-forth competition is the main idea behind GANs.
Using the example above, we can come up with the architecture of a GAN.
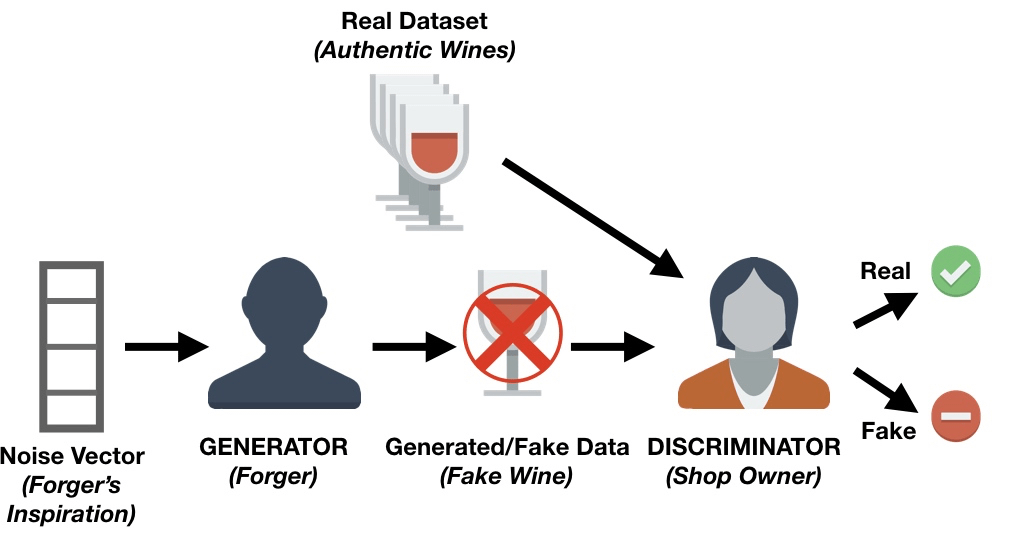
There are two major components within GANs: the generator and the discriminator. The shop owner in the example is known as a discriminator network and is usually a convolutional neural network (since GANs are mainly used for image tasks) which assigns a probability that the image is real.
The forger is known as the generative network, and is also typically a convolutional neural network (with deconvolution layers). This network takes some noise vector and outputs an image. When training the generative network, it learns which areas of the image to improve/change so that the discriminator would have a harder time differentiating its generated images from the real ones.
The generative network keeps producing images that are closer in appearance to the real images while the discriminative network is trying to determine the differences between real and fake images. The ultimate goal is to have a generative network that can produce images which are indistinguishable from the real ones.
Now that you understand what GANs are and the main components of them, we can now begin to code a very simple one. You will use Keras and if you are not familiar with this Python library you should read this tutorial before you continue. This tutorial is based on the GAN developed here.
The first thing you would need to do is install the following packages via pip
kerasmatplotlibtensorflowtqdmYou will use matplotlib for plotting, tensorflow as the Keras backend library and tqdm to show a fancy progress bar for each epoch (iteration).
The next step is to create a Python script. In this script, you will first need to import all the modules and functions you will use. An explanation of each will be given as they are used.
import os
import numpy as np
import matplotlib.pyplot as plt
from tqdm import tqdm


from keras.layers import Input
from keras.models import Model, Sequential
from keras.layers.core import Dense, Dropout
from keras.layers.advanced_activations import LeakyReLU
from keras.datasets import mnist
from keras.optimizers import Adam
from keras import initializers
You now want to set some variables:
# Let Keras know that we are using tensorflow as our backend engine
os.environ["KERAS_BACKEND"] = "tensorflow"

# To make sure that we can reproduce the experiment and get the same results
np.random.seed(10)

# The dimension of our random noise vector.
random_dim = 100
Before you can start building the discriminator and generator, you should first gather and pre-process the data. You will use the popular MNIST dataset which has a set of images of single digits ranging from 0 to 9.
def load_minst_data():
    # load the data
    (x_train, y_train), (x_test, y_test) = mnist.load_data()
    # normalize our inputs to be in the range[-1, 1]
    x_train = (x_train.astype(np.float32) - 127.5)/127.5
    # convert x_train with a shape of (60000, 28, 28) to (60000, 784) so we have
    # 784 columns per row
    x_train = x_train.reshape(60000, 784)
    return (x_train, y_train, x_test, y_test)
Note that the mnist.load_data() is part of Keras and allows you to easily import the MNIST dataset into your workspace.
Now, you can create your generator and discriminator networks. You will use the Adam optimizer for both networks. For both the generator and discriminator, you will create a neural network with three hidden layers with the activation function being the Leaky Relu. You should also add dropout layers for the discriminator to improve its robustness on unseen images.
# You will use the Adam optimizer
def get_optimizer():
    return Adam(lr=0.0002, beta_1=0.5)

def get_generator(optimizer):
    generator = Sequential()
    generator.add(Dense(256, input_dim=random_dim, kernel_initializer=initializers.RandomNormal(stddev=0.02)))
    generator.add(LeakyReLU(0.2))

    generator.add(Dense(512))
    generator.add(LeakyReLU(0.2))

    generator.add(Dense(1024))
    generator.add(LeakyReLU(0.2))

    generator.add(Dense(784, activation='tanh'))
    generator.compile(loss='binary_crossentropy', optimizer=optimizer)
    return generator

def get_discriminator(optimizer):
    discriminator = Sequential()
    discriminator.add(Dense(1024, input_dim=784, kernel_initializer=initializers.RandomNormal(stddev=0.02)))
    discriminator.add(LeakyReLU(0.2))
    discriminator.add(Dropout(0.3))

    discriminator.add(Dense(512))
    discriminator.add(LeakyReLU(0.2))
    discriminator.add(Dropout(0.3))

    discriminator.add(Dense(256))
    discriminator.add(LeakyReLU(0.2))
    discriminator.add(Dropout(0.3))

    discriminator.add(Dense(1, activation='sigmoid'))
    discriminator.compile(loss='binary_crossentropy', optimizer=optimizer)
    return discriminator
It is finally time to bring the generator and discriminator together!
def get_gan_network(discriminator, random_dim, generator, optimizer):
    # We initially set trainable to False since we only want to train either the
    # generator or discriminator at a time
    discriminator.trainable = False
    # gan input (noise) will be 100-dimensional vectors
    gan_input = Input(shape=(random_dim,))
    # the output of the generator (an image)
    x = generator(gan_input)
    # get the output of the discriminator (probability if the image is real or not)
    gan_output = discriminator(x)
    gan = Model(inputs=gan_input, outputs=gan_output)
    gan.compile(loss='binary_crossentropy', optimizer=optimizer)
    return gan
For completeness, you can create a function which will save your generated images every 20 epochs. Since this is not at the core of this lesson, you do not need to fully understand the function.
# Create a wall of generated MNIST images
def plot_generated_images(epoch, generator, examples=100, dim=(10, 10), figsize=(10, 10)):
    noise = np.random.normal(0, 1, size=[examples, random_dim])
    generated_images = generator.predict(noise)
    generated_images = generated_images.reshape(examples, 28, 28)

    plt.figure(figsize=figsize)
    for i in range(generated_images.shape[0]):
        plt.subplot(dim[0], dim[1], i+1)
        plt.imshow(generated_images[i], interpolation='nearest', cmap='gray_r')
        plt.axis('off')
    plt.tight_layout()
    plt.savefig('gan_generated_image_epoch_%d.png' % epoch)
You have now coded the majority of your network. All that remains is to train this network and take a look at the images that you created.
def train(epochs=1, batch_size=128):
    # Get the training and testing data
    x_train, y_train, x_test, y_test = load_minst_data()
    # Split the training data into batches of size 128
    batch_count = x_train.shape[0] / batch_size

    # Build our GAN netowrk
    adam = get_optimizer()
    generator = get_generator(adam)
    discriminator = get_discriminator(adam)
    gan = get_gan_network(discriminator, random_dim, generator, adam)

    for e in xrange(1, epochs+1):
        print '-'*15, 'Epoch %d' % e, '-'*15
        for _ in tqdm(xrange(batch_count)):
            # Get a random set of input noise and images
            noise = np.random.normal(0, 1, size=[batch_size, random_dim])
            image_batch = x_train[np.random.randint(0, x_train.shape[0], size=batch_size)]

            # Generate fake MNIST images
            generated_images = generator.predict(noise)
            X = np.concatenate([image_batch, generated_images])

            # Labels for generated and real data
            y_dis = np.zeros(2*batch_size)
            # One-sided label smoothing
            y_dis[:batch_size] = 0.9

            # Train discriminator
            discriminator.trainable = True
            discriminator.train_on_batch(X, y_dis)

            # Train generator
            noise = np.random.normal(0, 1, size=[batch_size, random_dim])
            y_gen = np.ones(batch_size)
            discriminator.trainable = False
            gan.train_on_batch(noise, y_gen)

        if e == 1 or e % 20 == 0:
            plot_generated_images(e, generator)

if __name__ == '__main__':
    train(400, 128)
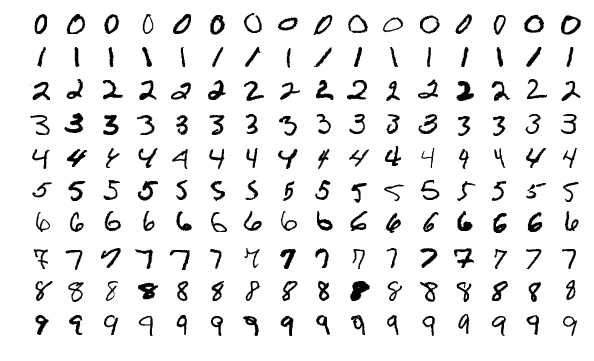
After training for 400 epochs, you can view the images that were generated. Looking at the images produced after the first epoch, you can see that it does not have any real structure, looking at the image after 40 epochs, the digits start to take shape and lastly, the images produced after 400 epochs show clear digits even though a couple are still unrecognizable.
| Results after 1 epoch | Results after 40 epochs | Results after 400 epochs |
|---|---|---|
!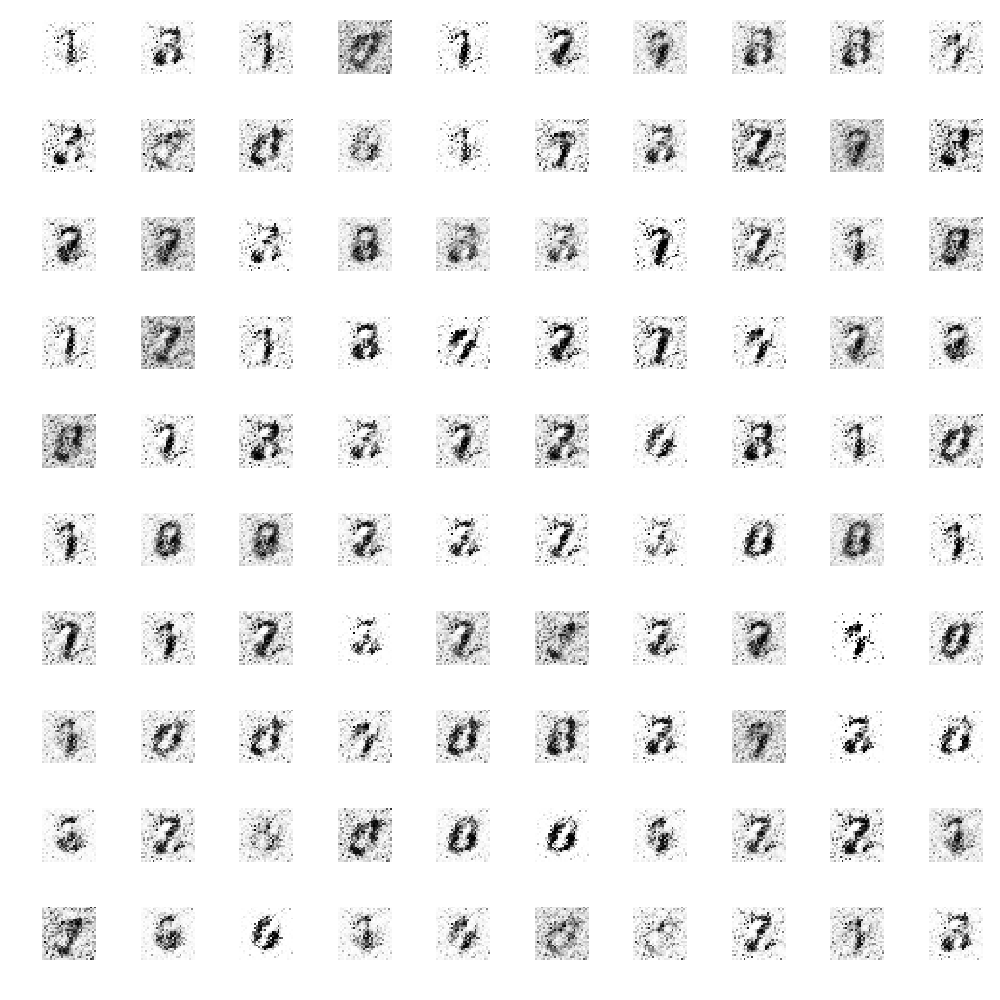 |
 |
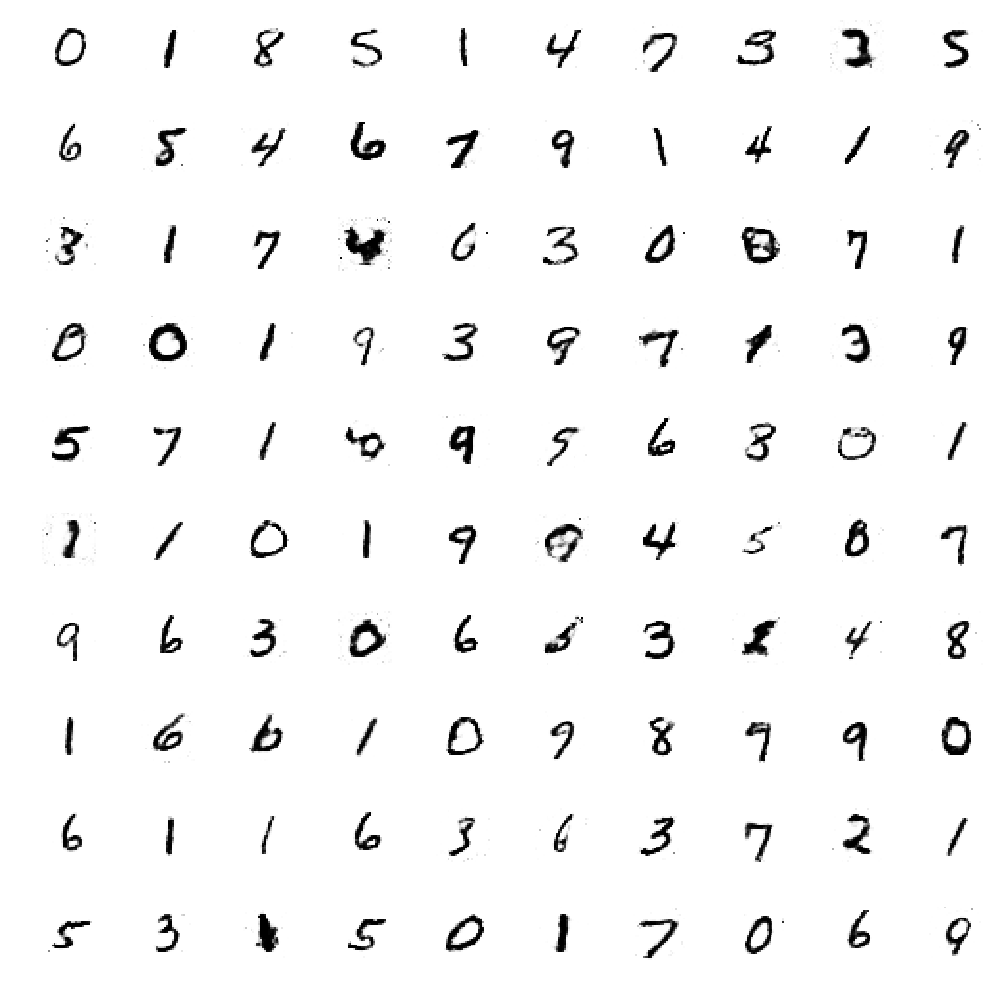 |
This code takes approximately 2 minutes per epoch on a CPU and that is the main reason this code was selected. You can experiment by using more epochs and by adding more (and different) layers to both the generator and discriminator. However, when using more complex and deep architectures the runtime will also increase if you are using only a CPU. However, do not let that stop you from experimenting!
Congrats, you've made it to the end of this tutorial, in which you learned the basics of Generative Adversarial Networks (GANs) in an intuitive way! Also, you implemented your first model with the help of the Keras library. If you want to know more about deep learning with Python, consider taking DataCamp's Deep Learning in Python course.
Learn more about Python and Deep Learning
Course
Course
Course
blog
Richie Cotton
5 min
blog
Yesha Shastri
8 min
blog
Bex Tuychiev
5 min
podcast
Richie Cotton
31 min
podcast
Richie Cotton
36 min
tutorial
Gary Alway
8 min