Kurs
Image Processing in Python
4 Std.
55.9K
FLUX.2 is a modern text-to-image model built for high-quality, controllable generation. In this tutorial, I'll show you how to use the FLUX.2-dev variant to build a Capsule Wardrobe Visualizer where we upload 2–10 clothing images (shirts, pants, jackets, shoes, etc.), the model samples combinations of those pieces, and the app returns a grid of outfits that mix and match them in different ways.
The result is an interactive tool that allows you to visually explore outfit combinations, powered by a diffusion model optimized for GPU memory.
If you're keen to learn more about the principles behind this tutorial, I recommend checking out the Deep Learning for Images with PyTorch course.
FLUX.2 is a family of text-to-image models optimized for different points on the quality, speed, and flexibility spectrum, rather than a single monolithic checkpoint. It introduces several important capabilities:
In practice, you’ll usually see three core variants:
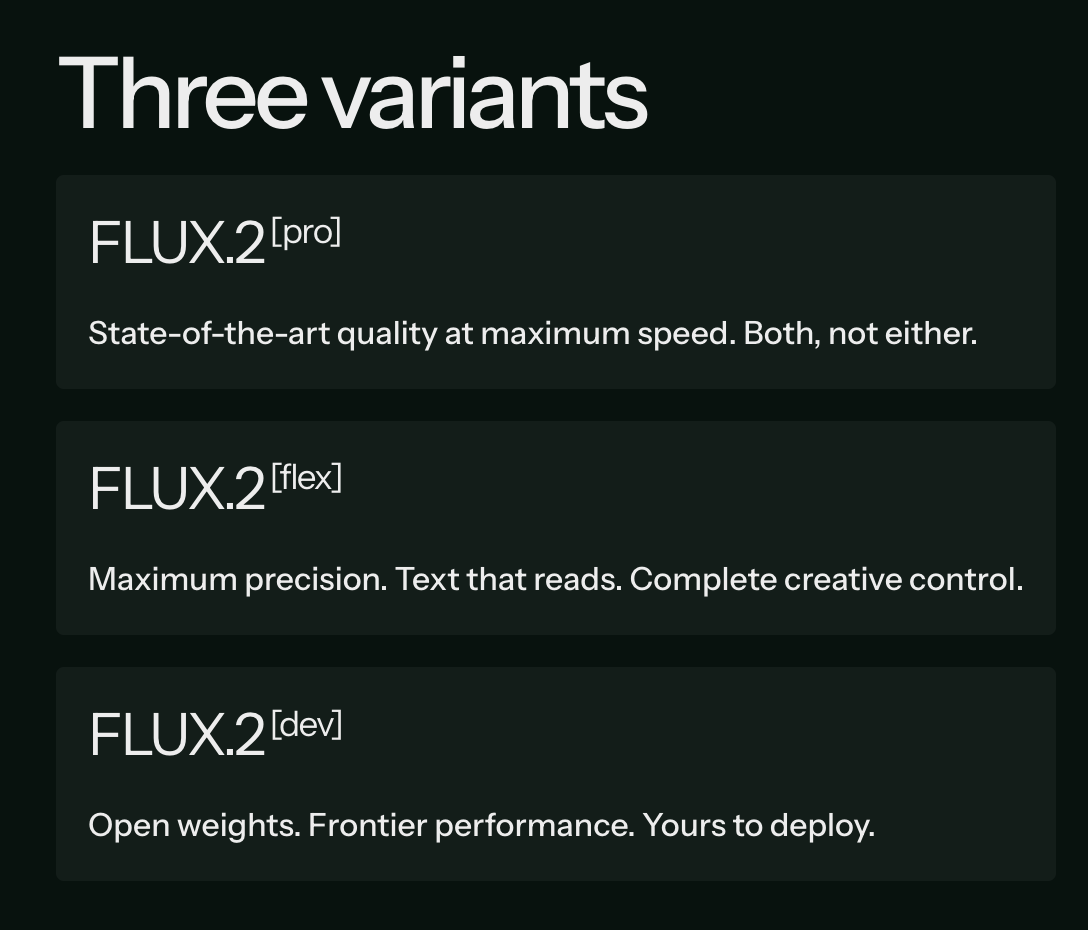
Compared to Pro and Flex, the Dev variant is specifically designed for people who want to experiment and is exactly what we need for our interactive capsule-wardrobe grid.
The original FLUX.2 line is already powerful, but FLUX.2-Dev plus 4-bit quantization makes this demo much easier to run, iterate, and extend. Here’s why:
In short, FLUX.2-Dev (4-bit) gives us the best mix of memory, speed, and quality for an interactive capsule wardrobe tool.
In this section, we’ll implement a capsule wardrobe visualizer with a FLUX 2 model wrapped in a Gradio application. At a high level, the app does three things:
In the video below, you can see an abridged version of the workflow. The video is sped up for demonstration purposes (the actual generation process can take several minutes):
First, install the latest diffusers library from GitHub and the other dependencies.
!pip install -q "git+https://github.com/huggingface/diffusers.git@main" \
               "transformers>=4.44.0" accelerate safetensors bitsandbytes gradio pillow
Then log in to Hugging Face so you can pull the 4-bit FLUX.2-dev weights:
from huggingface_hub import login
login()
Pass in the HF Token when instructed and log in to HF to pull the model. Then, perform a quick sanity check to see if CUDA is available and which GPU we’re on:
import torch, diffusers, bitsandbytes as bnb
print("diffusers:", diffusers.__version__)
print("CUDA available:", torch.cuda.is_available())
!nvidia-smi
If you see your GPU in the nvidia-smi output and CUDA available: True, you’re good to go.
Now we load the 4-bit FLUX.2-dev components from the diffusers/FLUX.2-dev-bnb-4bit repo.
from diffusers import Flux2Pipeline, Flux2Transformer2DModel
from transformers import Mistral3ForConditionalGeneration
import torch
bnb_repo = "diffusers/FLUX.2-dev-bnb-4bit"
torch_dtype = torch.bfloat16
device = "cuda"
print("Loading 4-bit transformer...")
transformer = Flux2Transformer2DModel.from_pretrained(
    bnb_repo,
    subfolder="transformer",
    torch_dtype=torch_dtype,
    device_map="auto",
)
print("Loading 4-bit text encoder...")
text_encoder = Mistral3ForConditionalGeneration.from_pretrained(
    bnb_repo,
    subfolder="text_encoder",
    torch_dtype=torch_dtype,
    device_map="auto",
)
print("Building Flux2 pipeline...")
pipe = Flux2Pipeline.from_pretrained(
    bnb_repo,
    transformer=transformer,
    text_encoder=text_encoder,
    torch_dtype=torch_dtype,
).to(device)
pipe.set_progress_bar_config(disable=False)
print("Loaded. Example param device:", next(pipe.transformer.parameters()).device)
Once the dependencies are installed, we can load FLUX.2 using the diffusers library and pair it with a Mistral 3 text encoder from transformers. Here’s how that looks in code:
Flux2Transformer2DModel: This is the core U-Net–like transformer responsible for the denoising process and is loaded in 4-bit quantized form.Mistral3ForConditionalGeneration: This model is used as a text encoder, turning your text prompt into conditioning signals for the diffusion process.Flux2Pipeline: This pipeline composes the transformer, text encoder, and supporting components into a single, callable interface for image generation.Using device_map="auto" and torch_dtype=torch.bfloat16 keeps things flexible across different GPU setups while staying memory efficient.
The app lets users upload multiple wardrobe images. We need a few utilities to do so:
import gradio as gr
import random, json
from typing import List, Union
from PIL import Image
MAX_REFS = 10
def files_to_pil(files: List[Union[str, dict]]) -> List[Image.Image]:
    images = []
    for f in files:
        path = f.get("name") if isinstance(f, dict) else f
        if not path:
            continue
        img = Image.open(path).convert("RGB")
        images.append(img)
    return images
def preprocess_refs(refs: List[Image.Image], max_size: int = 512) -> List[Image.Image]:
    processed = []
    for img in refs:
        img = img.convert("RGB")
        img.thumbnail((max_size, max_size), Image.LANCZOS)
        processed.append(img)
    return processed
The above code defines two key helper functions.
files_to_pil() function takes the file objects returned by Gradio, extracts their paths, and opens each file as an RGB PIL.Image.preprocess_refs() function resizes these images to a maximum size of 512 × 512 while preserving their aspect ratio, which is important for both speed and memory usage.In addition, we cap the number of reference images with MAX_REFS = 10 so we do not overload the conditioning set.
Instead of sending a single flat text prompt, I built a structured JSON-like prompt that describes:
def build_outfit_prompt(outfit_indices: List[int], labels: List[str]) -> str:
    item_phrases = [
        f"{labels[idx]} from reference image {idx+1}" for idx in outfit_indices
    ]
    outfit_items_str = ", ".join(item_phrases)
    mistral_prompt = """A professional full-body studio photograph of a high-end fashion editorial shoot, set against a flawless seamless neutral gray backdrop (#f5f5f5) in a controlled studio environment. The scene is bathed in soft, diffused three-point lighting (key, fill, and subtle rim) that eliminates harsh shadows, ensuring even illumination across the subject while preserving dimensionality and texture.
At the center of the frame stands a full-body adult model, exuding quiet confidence in a relaxed yet poised stance—one foot slightly forward, weight balanced, body angled subtly to the right. The model’s expression is natural, with a neutral gaze directed just off-camera, evoking a modern, minimalist lookbook aesthetic.
The outfit—meticulously styled and tailored—is the focal point, captured with ultra-realistic 8K resolution and razor-sharp detail. Fabrics display tactile depth: the weave of knits, the drape of silks, the sheen of leathers, and the crispness of cotton are all rendered with commercial-grade precision. The shallow depth of field (50mm prime lens, f/2.8) keeps the subject in crystalline focus while softly blurring the backdrop, emphasizing the outfit’s textures and proportions.
The composition adheres to classic fashion photography rules: vertical framing, ample headroom, and a slightly dynamic angle (eye-level) that flatters the model’s posture. The color palette is controlled and sophisticated, dominated by the outfit’s hues against the neutral gray, with subtle tonal contrasts to highlight layers and accessories.
Every element—from the studio-quality lighting to the catalog-ready styling—conveys luxury, clarity, and commercial appeal, designed to showcase the outfit as a covetable, high-end ensemble."""
    prompt_dict = {
        "scene": mistral_prompt,
        "subjects": [
            {
                "description": (
                    "The model is styled in an outfit composed of: "
                    + outfit_items_str
                    + ". Each garment should closely match the color, fabric, and key design details of its reference image."
                )
            }
        ]
    }
    return json.dumps(prompt_dict)
The build_outfit_prompt() function does three important things:
outfit_indices and labels to generate phrases such as "wardrobe piece 1 from reference image 1", which are joined into a single string describing the selected garments for this particular outfit.prompt_dict with a scene and subjects field, then serialize that dictionary to JSON so it can be passed as a single prompt string to the pipeline.Conceptually, we treat each uploaded wardrobe image as a “wardrobe piece i” and ask the model to “compose an outfit using wardrobe piece 1, wardrobe piece 3, and wardrobe piece 4,” while preserving each piece’s color, fabric, and key design details.
Note: Since we use a Mistral model as the text encoder in this pipeline, I also used Mistral to help draft the long studio-description prompt(mistral_prompt) via Meta prompting. This keeps the style aligned with what the encoder “expects” and makes it easy to tweak the wording directly in code.
The heart of the demo is capsule_fn, which:
def make_grid(images: List[Image.Image], rows: int, cols: int) -> Image.Image:
    w, h = images[0].size
    grid = Image.new("RGB", (cols * w, rows * h), (255, 255, 255))
    for idx, img in enumerate(images):
        r, c = divmod(idx, cols)
        grid.paste(img, (c * w, r * h))
    return grid
def capsule_fn(files, rows, cols, height, width, steps, guidance, seed):
    if not files or len(files) < 2:
        return None
    images = files_to_pil(files)
    images = images[:MAX_REFS]
    refs = preprocess_refs(images, max_size=512)
    labels = [f"wardrobe piece {i+1}" for i in range(len(refs))]
    random.seed(int(seed))
    tiles = []
    num_tiles = rows * cols
    for i in range(num_tiles):
        k = min(len(refs), random.randint(2, 3))
        outfit_idxs = random.sample(range(len(refs)), k=k)
        prompt = build_outfit_prompt(outfit_idxs, labels)
        generator = torch.Generator(device=device).manual_seed(int(seed) + i)
        out = pipe(
            prompt=prompt,
            image=refs,
            height=height,
            width=width,
            num_inference_steps=steps,
            guidance_scale=guidance,
            generator=generator,
        )
        tiles.append(out.images[0])
    grid = make_grid(tiles, rows, cols)
    return grid
The two functions above form the core engine of the capsule wardrobe demo.
make_grid() function creates a blank canvas large enough for a rows × cols layout, then pastes each generated outfit image into the correct position, producing a single grid image.capsule_fn() function prepares the user’s wardrobe images as references, randomly selects 2–3 pieces per tile, builds a structured outfit prompt, and calls the FLUX.2 pipeline with the chosen resolution, steps, guidance, and seed. It collects all generated tiles and passes them to the make_grid() function, so the user sees a final grid of mix-and-match outfits.This step connects the capsule wardrobe engine to the Gradio app. The user uploads wardrobe images, chooses grid and generation settings, and gets a composite outfit grid back.
inputs = [
gr.File(file_types=["image"], file_count="multiple", label="Wardrobe pieces (2–10 images)"),
gr.Slider(1, 4, value=2, step=1, label="Grid rows"),
gr.Slider(1, 4, value=2, step=1, label="Grid cols"),
gr.Slider(384, 896, value=512, step=64, label="Image height"),
gr.Slider(256, 640, value=384, step=64, label="Image width"),
gr.Slider(10, 30, value=16, step=2, label="Diffusion steps"),
gr.Slider(1.0, 7.0, value=2.5, step=0.5, label="Guidance scale"),
gr.Number(value=42, precision=0, label="Seed")
]
iface = gr.Interface(
fn=capsule_fn,
inputs=inputs,
outputs=gr.Image(type="pil", label="Capsule wardrobe grid"),
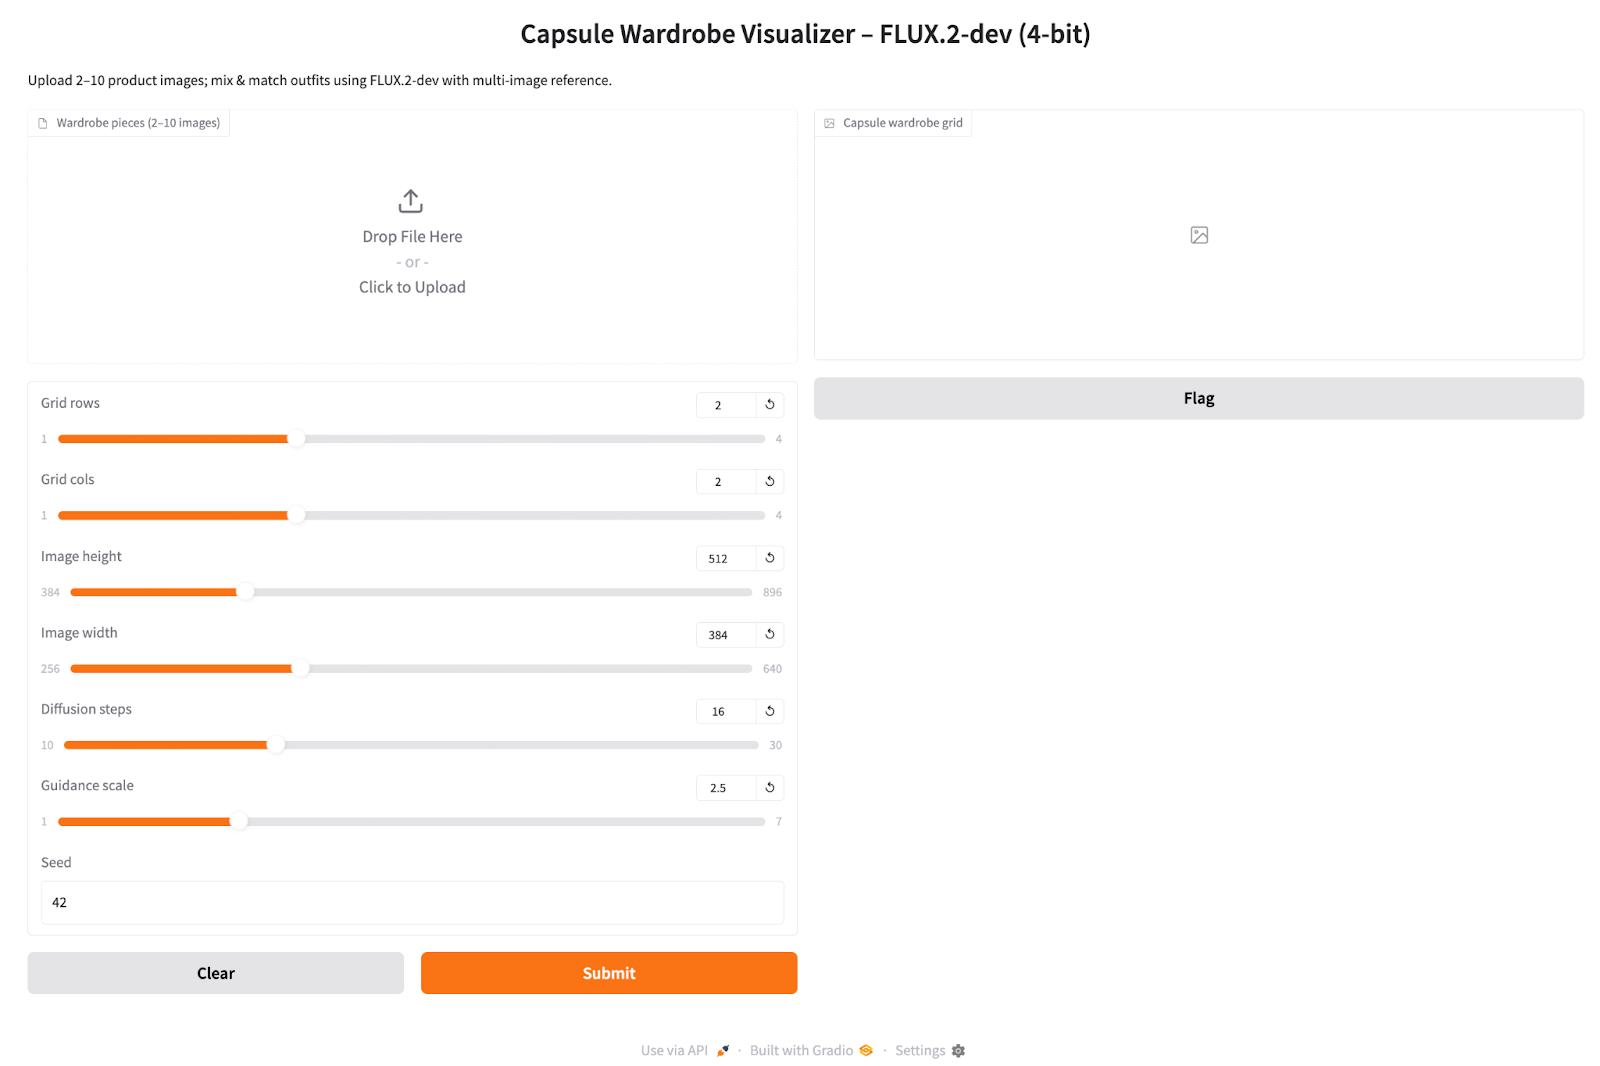
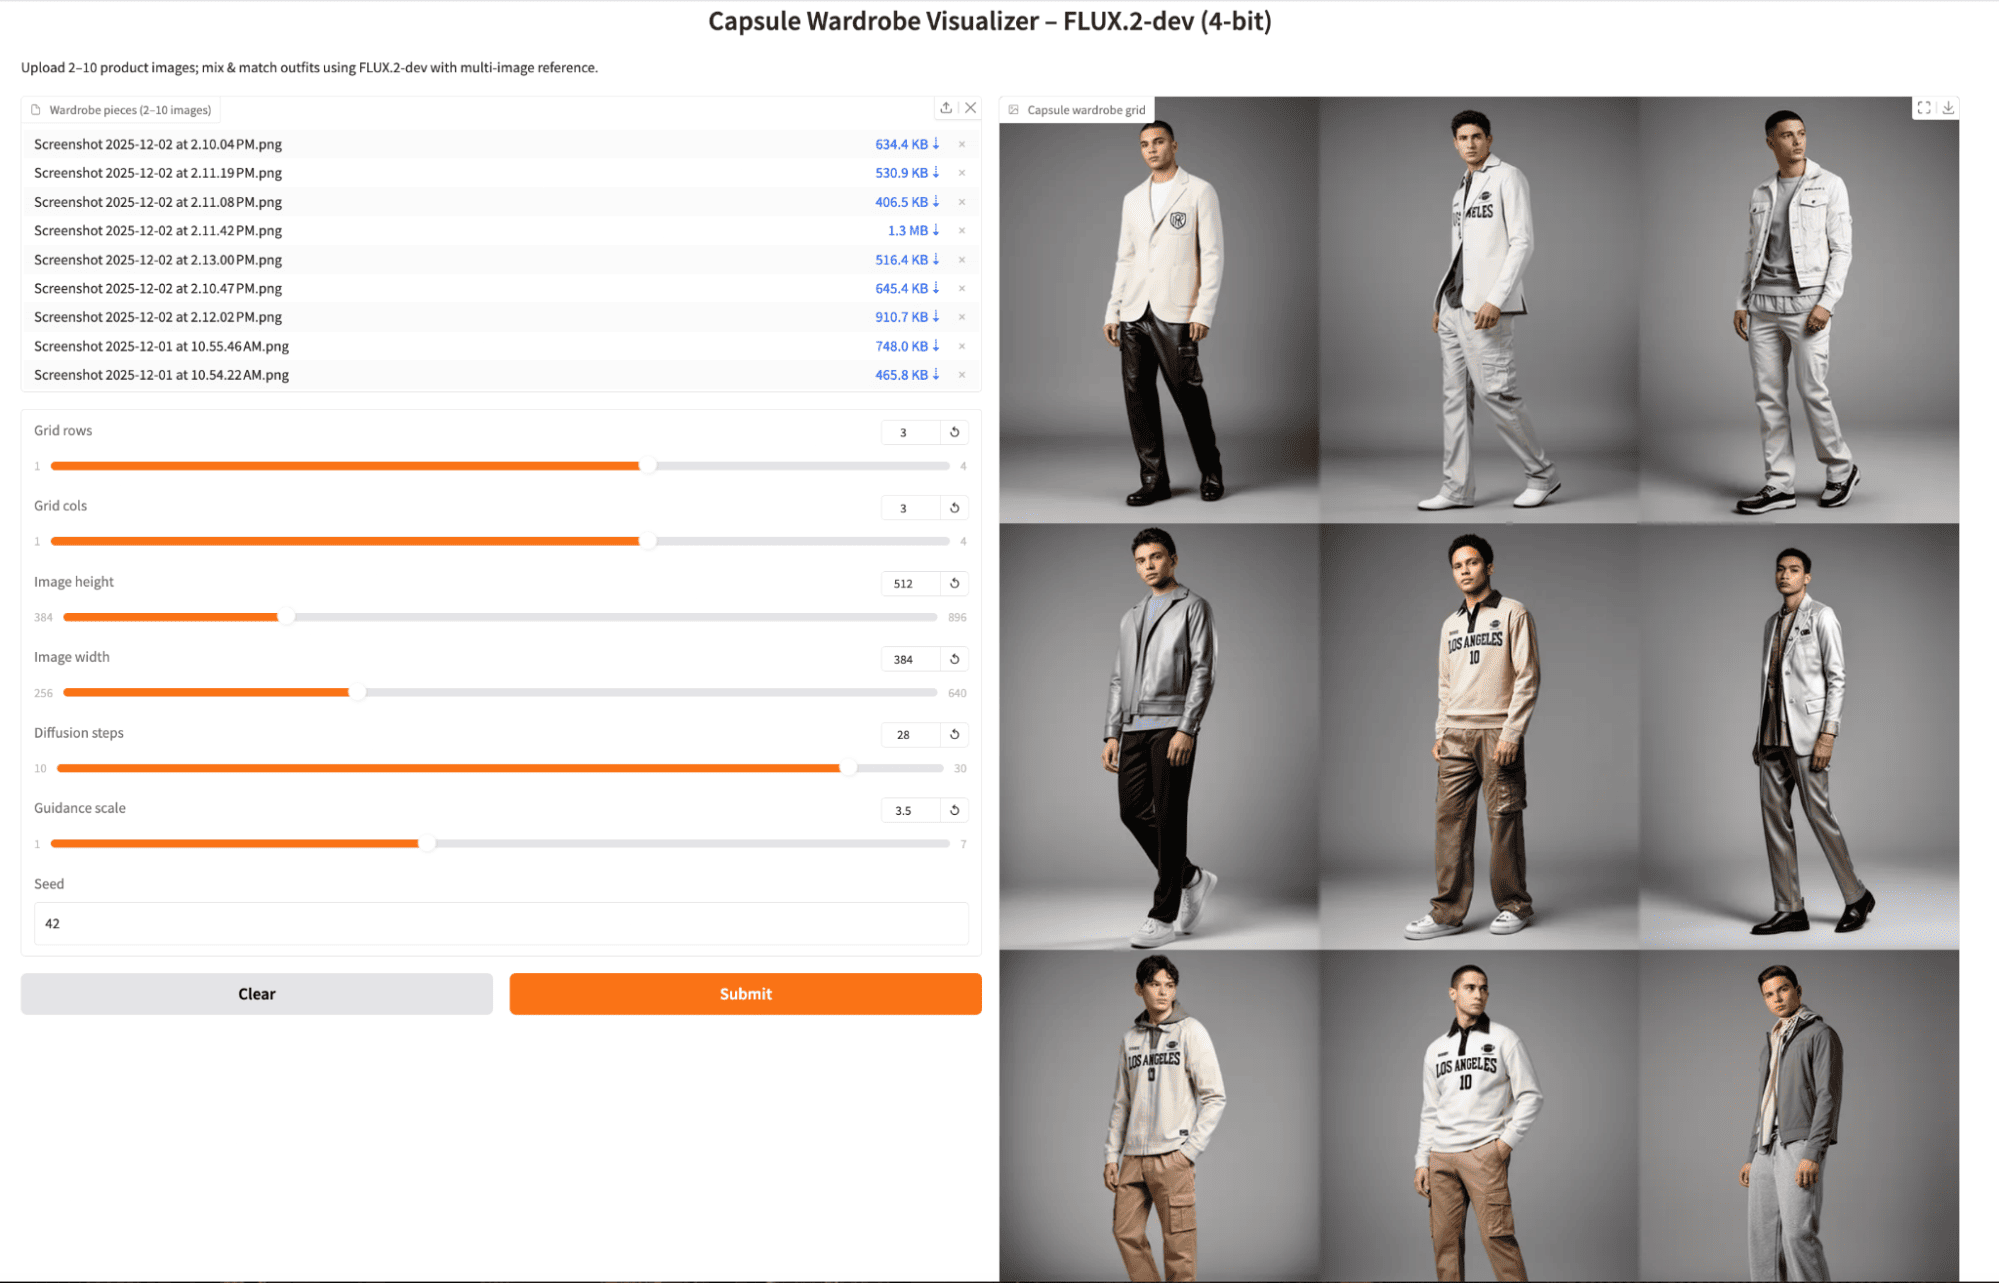
title="Capsule Wardrobe Visualizer – FLUX.2-dev (4-bit)",
description="Upload 2–10 product images; mix & match outfits using FLUX.2-dev with multi-image reference.",
)
iface.launch(share=True, debug = True)Here is how we build the Gradio app:
gr.Interface call connects these inputs to the capsule_fn function and declares a single gr.Image output. The launch(share=True, debug=True) call starts the Gradio server, exposes a public shareable link for demos, and enables debug logging in the console to help diagnose any issues.Once the interface is live:
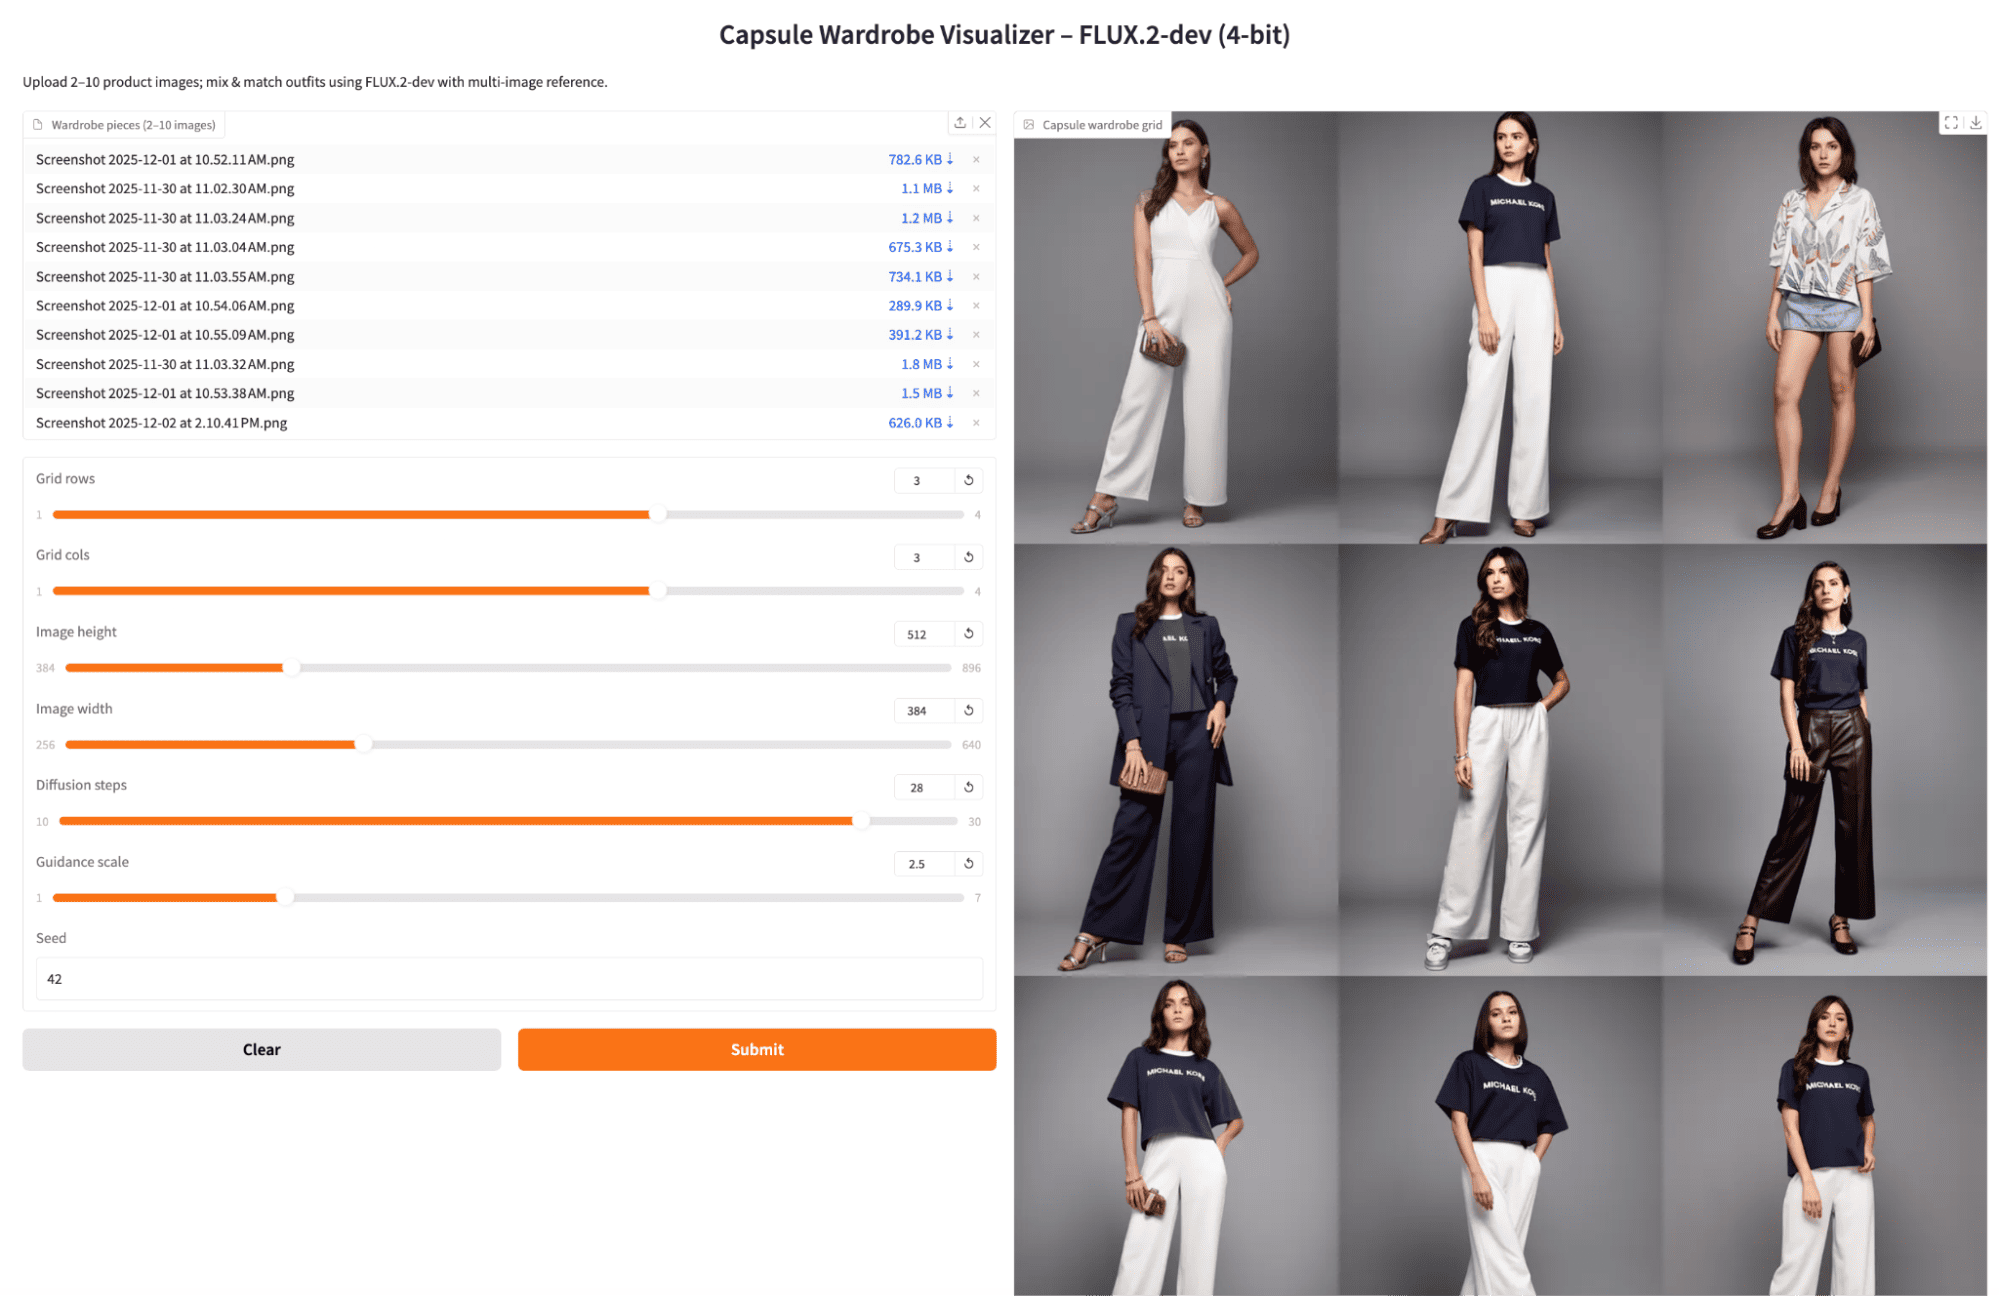
To understand how FLUX.2-dev behaves in practice, I ran a few small experiments with the final app. I varied the diffusion steps and guidance scale, and I tried both multiple images of the same garment and one image per unique garment to see how much variety the model produces.
I first uploaded several images of the same outfit shot from different angles, kept the default diffusion steps, and moderate guidance. The model produced consistent studio lighting and fabric details, with outfits that felt like variations of a single capsule set.

Next, I kept the same reference images but increased the diffusion steps to 28 (and slightly adjusted guidance). The grid became a bit sharper and more polished, but still focused on recombining the same core garments. The trade-off was a small but noticeable increase in generation time per batch.

Finally, I uploaded one product shot per distinct garment and generated another 3x3 grid. The resulting outfits were much more varied across cells, mixing different tops and bottoms in interesting ways. Some repetition still appeared, but overall, the grid felt closer to a true capsule wardrobe, with more diverse combinations for the same seed and settings.
FLUX.2-dev in 4-bit form is a great model for image applications. In this tutorial, we set up a 4-bit FLUX.2-dev pipeline with diffusers and built a multi-image reference workflow that treats wardrobe pieces as conditioning hints, and wrapped everything in a Gradio app.
The result is a powerful Capsule Wardrobe Visualizer that can act as a prototype for fashion e-commerce tooling, or simply a playful way to remix your own closet. From here, you can plug the same pipeline into broader agentic systems, such as an LLM that suggests outfits based on dress code or weather, or connect it to a real product catalog backend.
Top DataCamp Courses
Kurs
Kurs
Kurs
Tutorial
Bhavishya Pandit
Tutorial
Aashi Dutt
Tutorial
Abid Ali Awan
Tutorial
Bex Tuychiev
Tutorial
Aashi Dutt
code-along
Francisco Quintana