


Cours
Concepts des grands modèles de langage (LLM)
2 h
99.8K
Are you looking to expand your AI knowledge with a hands-on project? In this tutorial, we will explore Cohere Command R+, including how to access it online and locally. We will also dive into key features of the Cohere Python API and build an AI project using LangChain and Tavily.
The exciting part begins with the project. If you are already familiar with Cohere models and their features, feel free to skip directly to the project section. There, you will learn how to build an AI agent that uses multiple tools in sequence to complete a task.
If you are new to AI and want to learn more about the field, consider taking the AI Fundamentals track. You will gain actionable knowledge on popular AI topics such as ChatGPT, Large Language Models (LLMs), generative AI, and more.
Command R+ is Cohere's latest and state-of-the-art LLM. The model excels in conversational interactions and long-context tasks. It is particularly optimized for complex Retrieval Augmented Generation (RAG) workflows and multi-step tool use, making it a powerful tool for enterprise-scale applications.
Image by author
These are some of the most relevant features of the Command R+ model.
To gain a deeper understanding of Cohere models, be sure to read the Cohere API Tutorial: Getting Started With Cohere Models.
There are different ways to access the Cohere models, most of which are free.
You can access the online LLM playground or download the model locally and use it with a chat application. Moreover, you can also access it through the Cohere API. Let’s review each one of these methods.
The most straightforward way to access Cohere Command R+ online is through the HuggingChat website. It has no limitations, and you can also connect it with six available tools for different tasks like image generation or internet search.
1. Go to the https://huggingface.co/chat/ website.
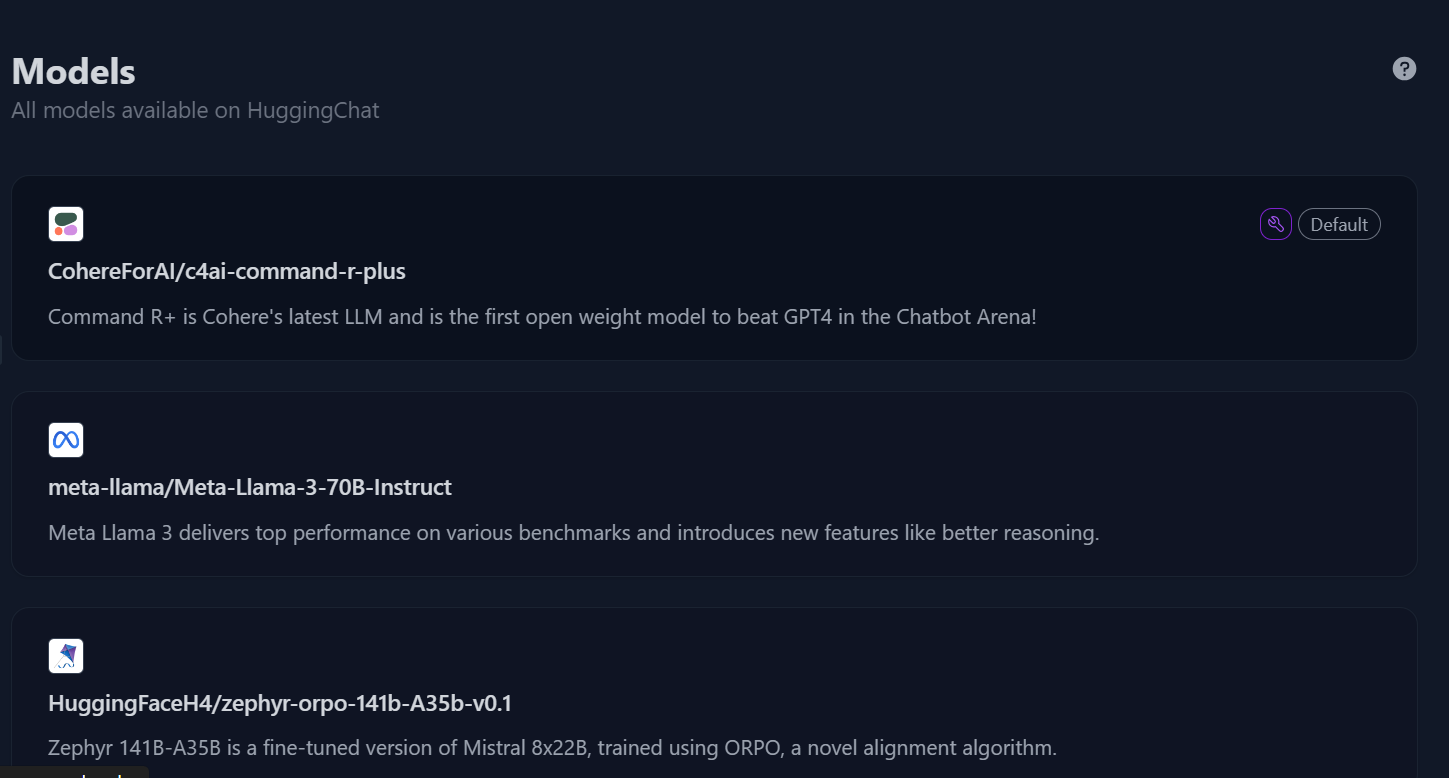
2. On the left panel, click the “Models” button to access the model's menu, then select the “c4ai-command-r-plus” model.
Models directory in Hugging Chat. Image source: HuggingChat
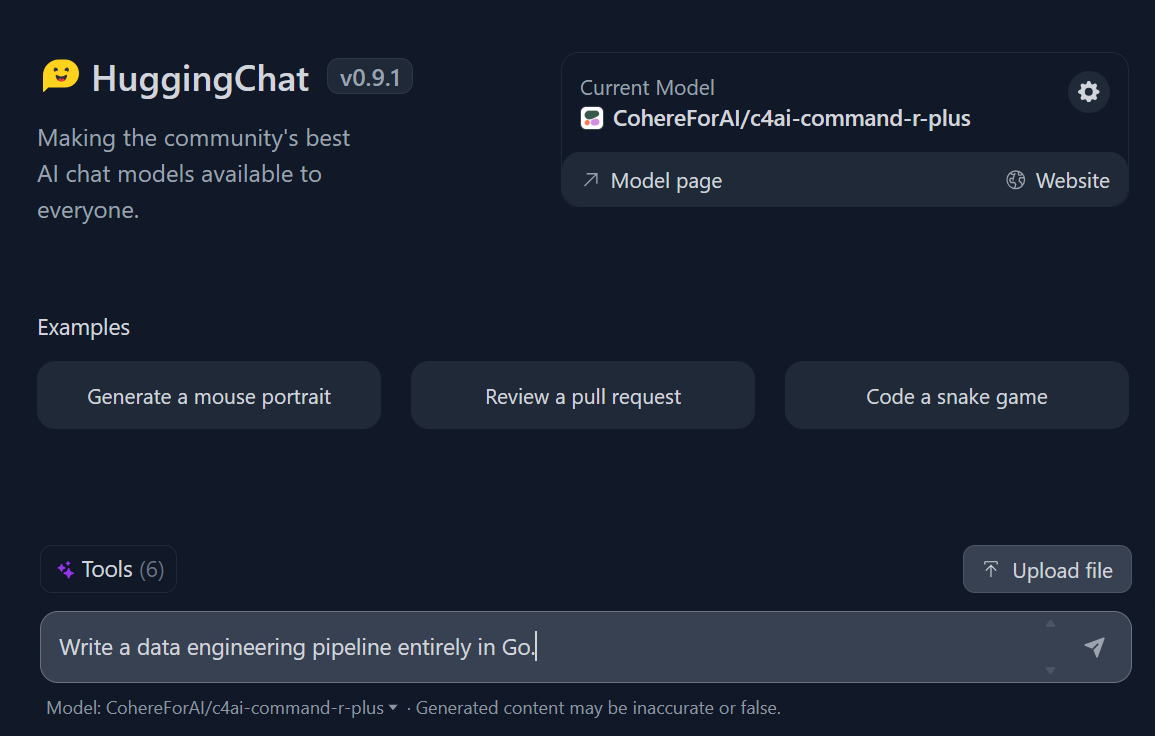
3. Start writing the query, and it will generate a fast and highly accurate response.
Prompting in Hugging Chat. Image source: HuggingChat
You can use Command R+ locally in two ways: by downloading the model to your local machine or by providing an API key to the Jan chat application.
Let’s explore the second option.
1. Download and install Jan from https://jan.ai/ website.
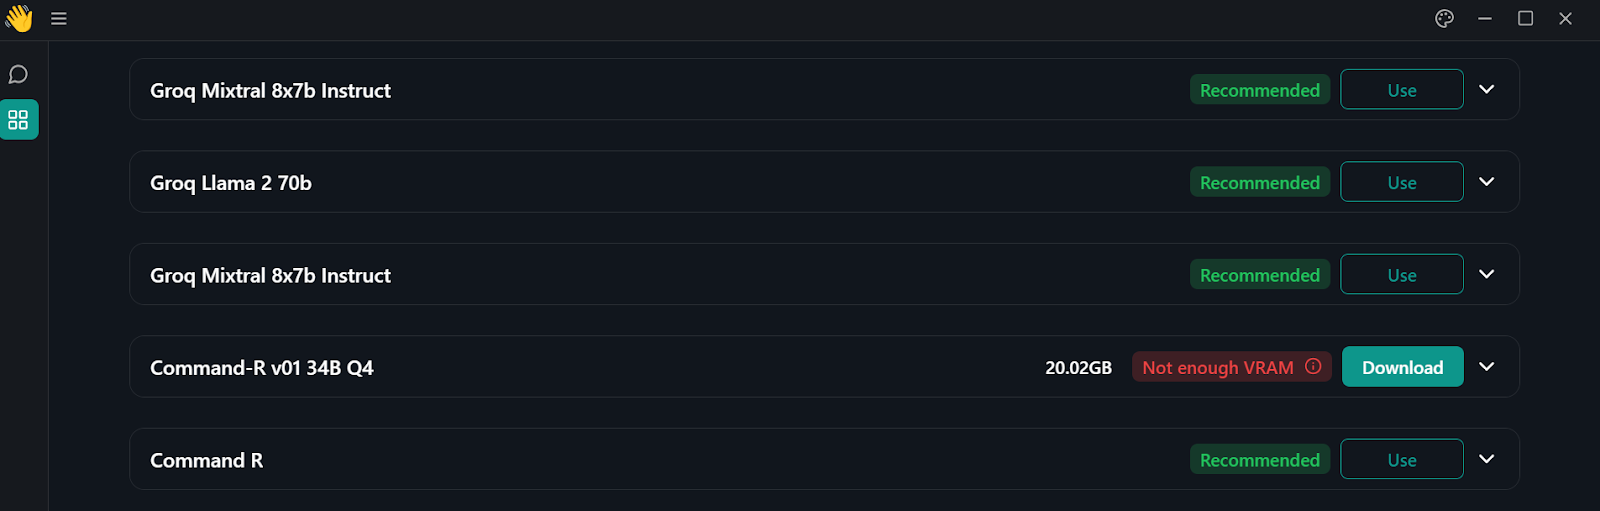
2. Go to the model hub by clicking the windows button on the left panel.
Model directory in Jan application
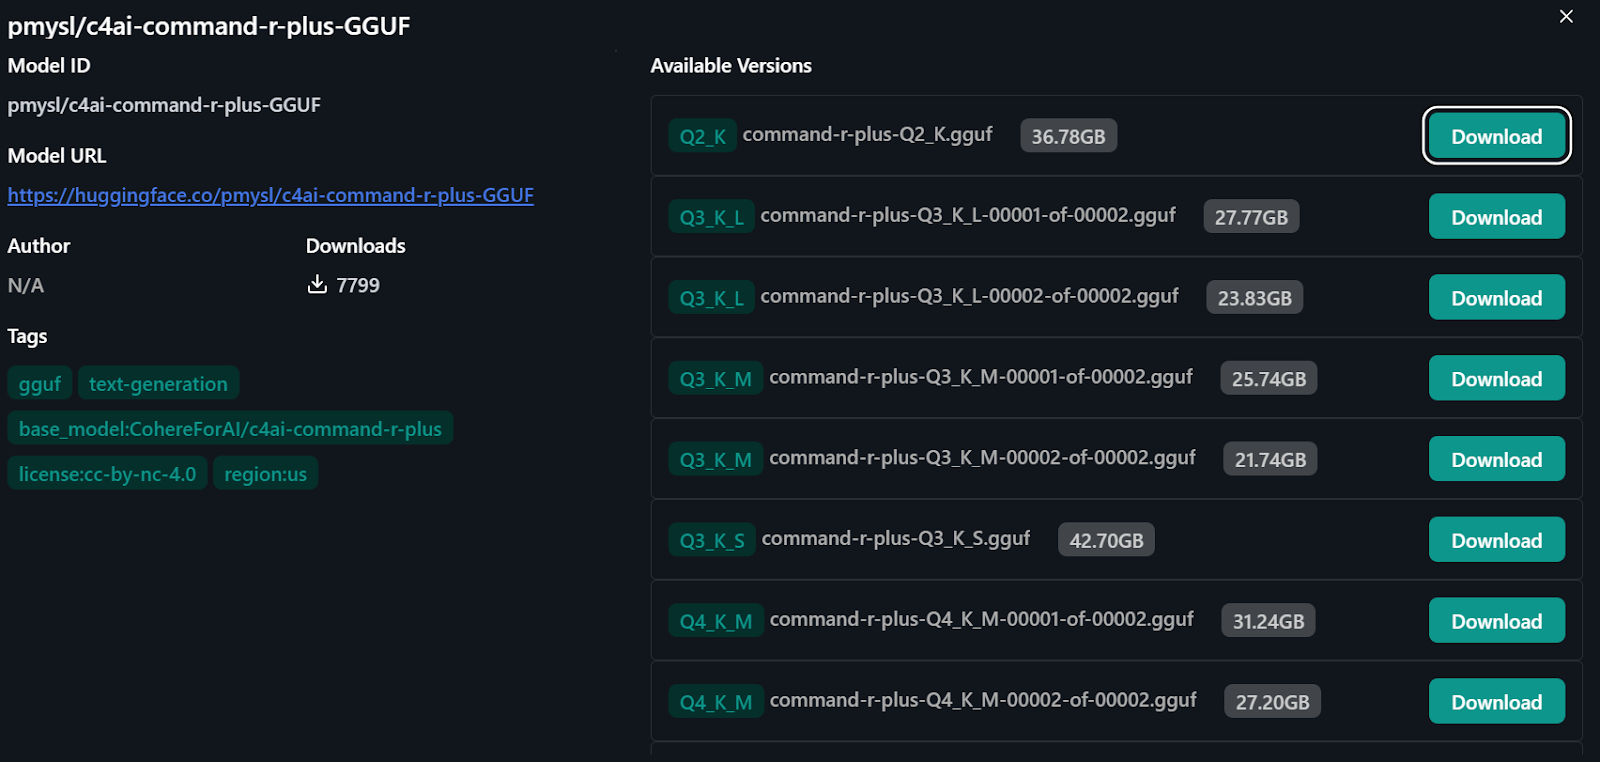
3. To access the Command R+ model, type “pmysl/c4ai-command-r-plus-GGUF ” in the model hub search bar.
4. Download and start using the model's “Q4_K_M version”, which is around 31.24GB.
Importing the model from Hugging face
Another way to use the Command R+ model locally is to connect the Cohere API with the Jan application.
1. Go to the https://coral.cohere.com/ website and sign in.
2. Go to the “Dashboard”.
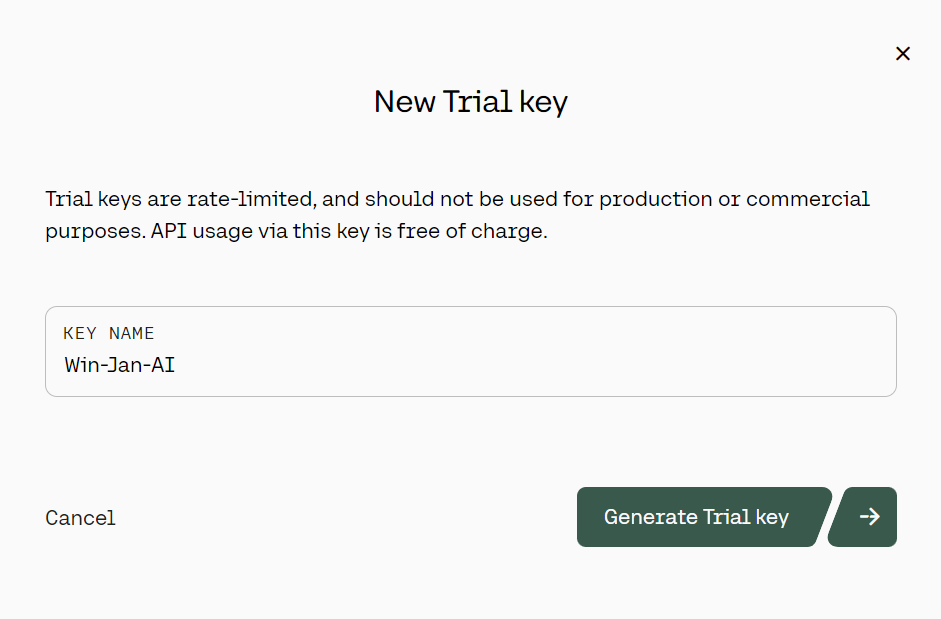
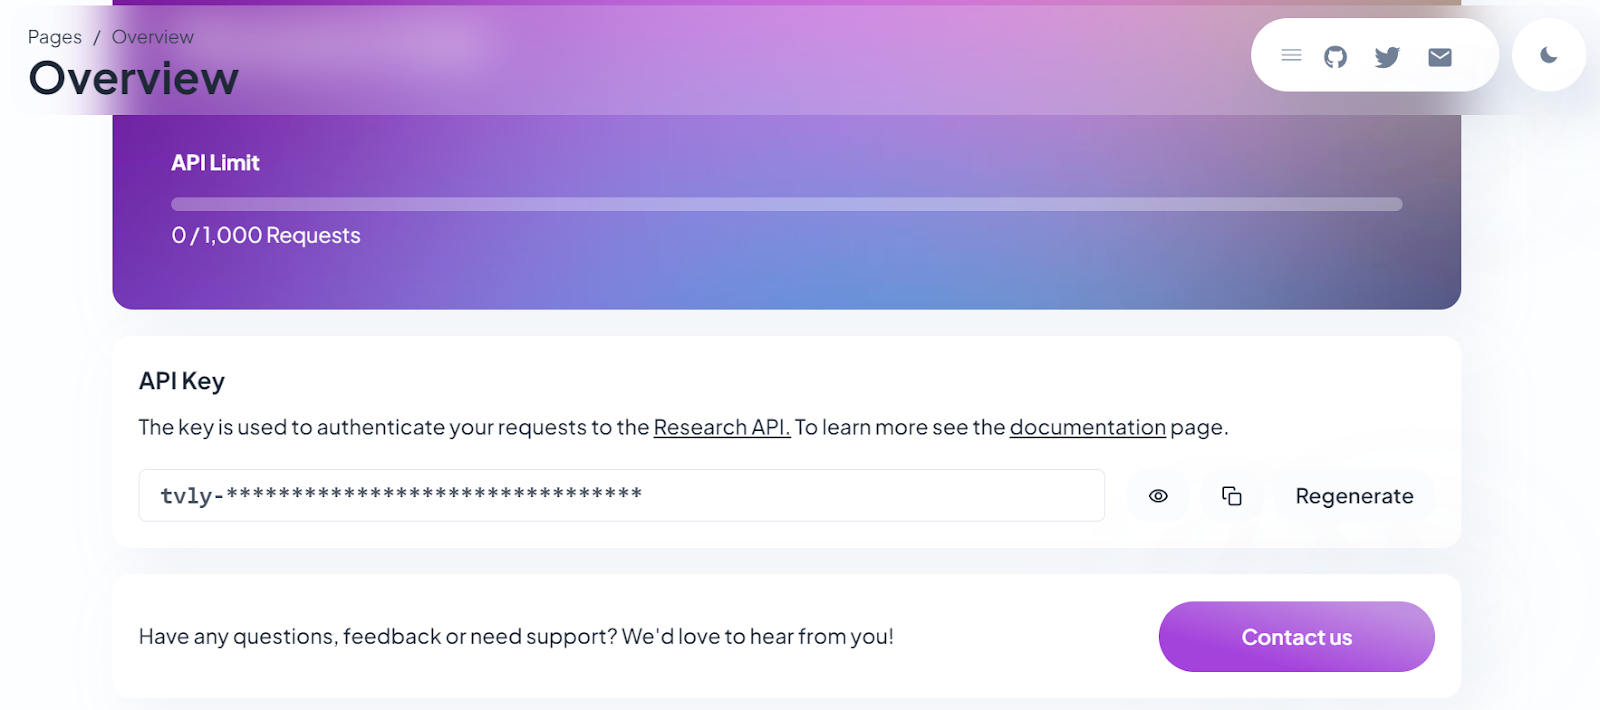
3. On the left panel, click the “API keys” button, then scroll down and click on the “+ Create Trail key.”
Generating the Cohere trial API key. Source: cohere.com
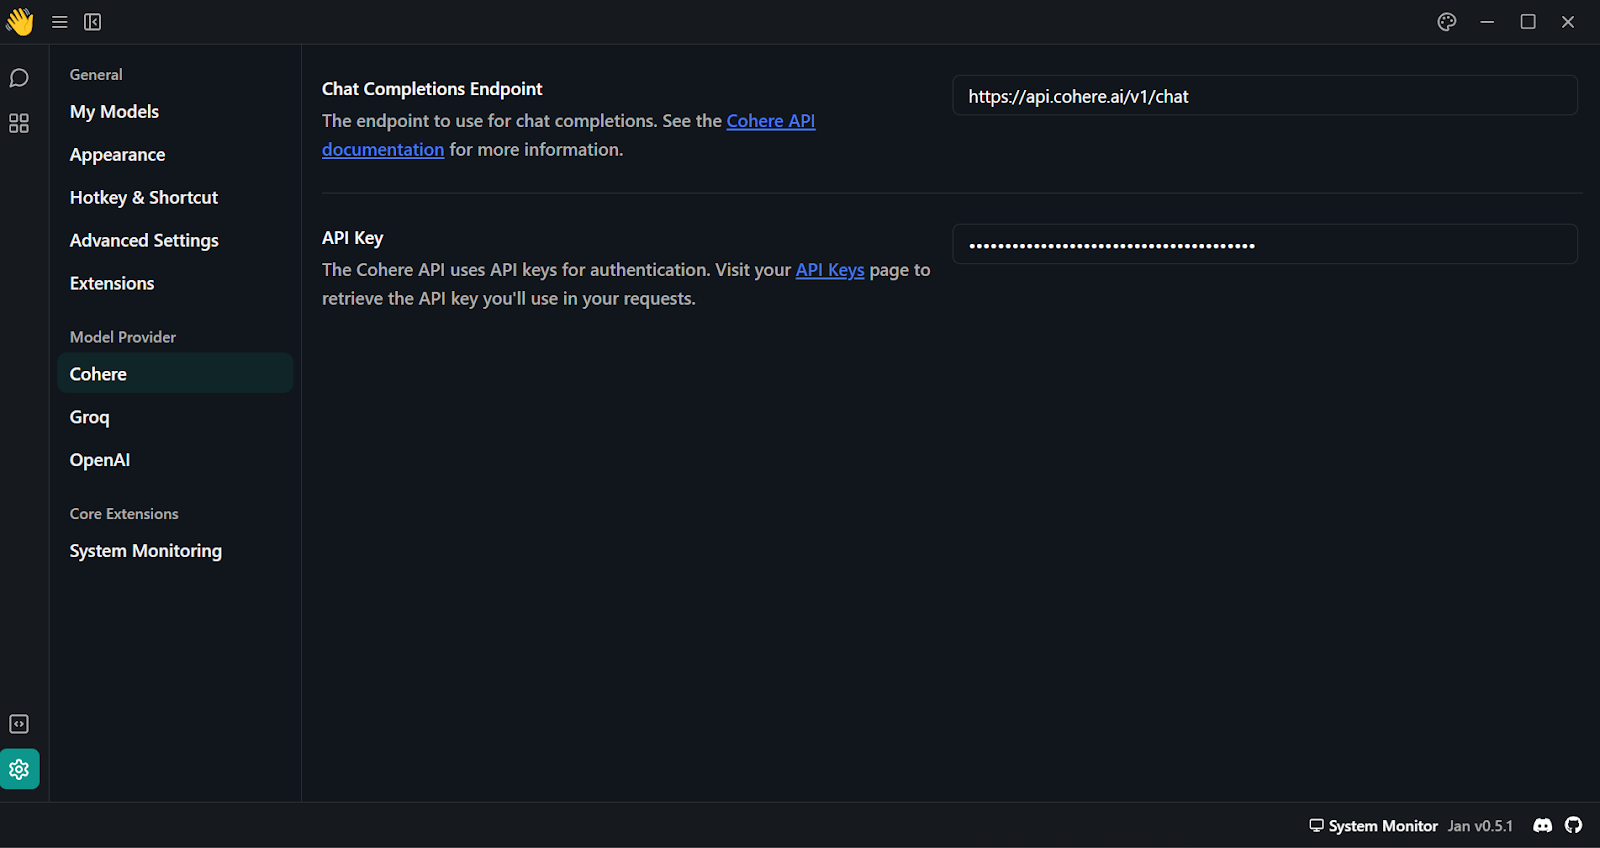
4. After generating the Cohere API key, paste it into the “Model Provider” section. You can access this menu by going to “Settings” and looking for “Cohere.”
Adding Cohere API key in Jan application
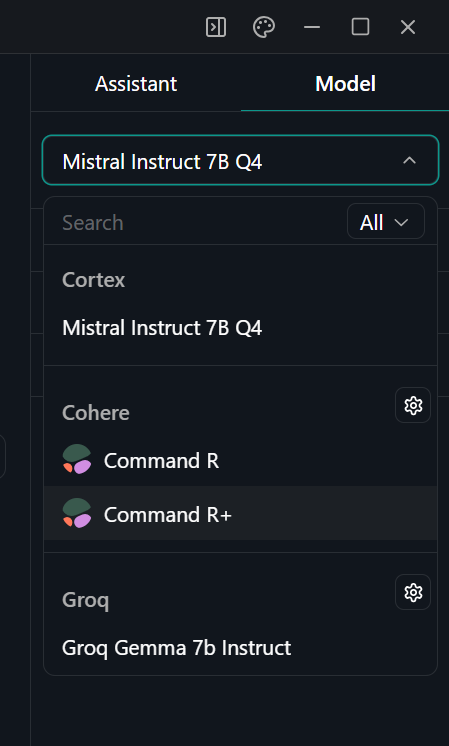
5. Select the Command R+ model by going to the “Thread” menu and, on the right panel, select the suitable model.
Selecting the model in the Jan application
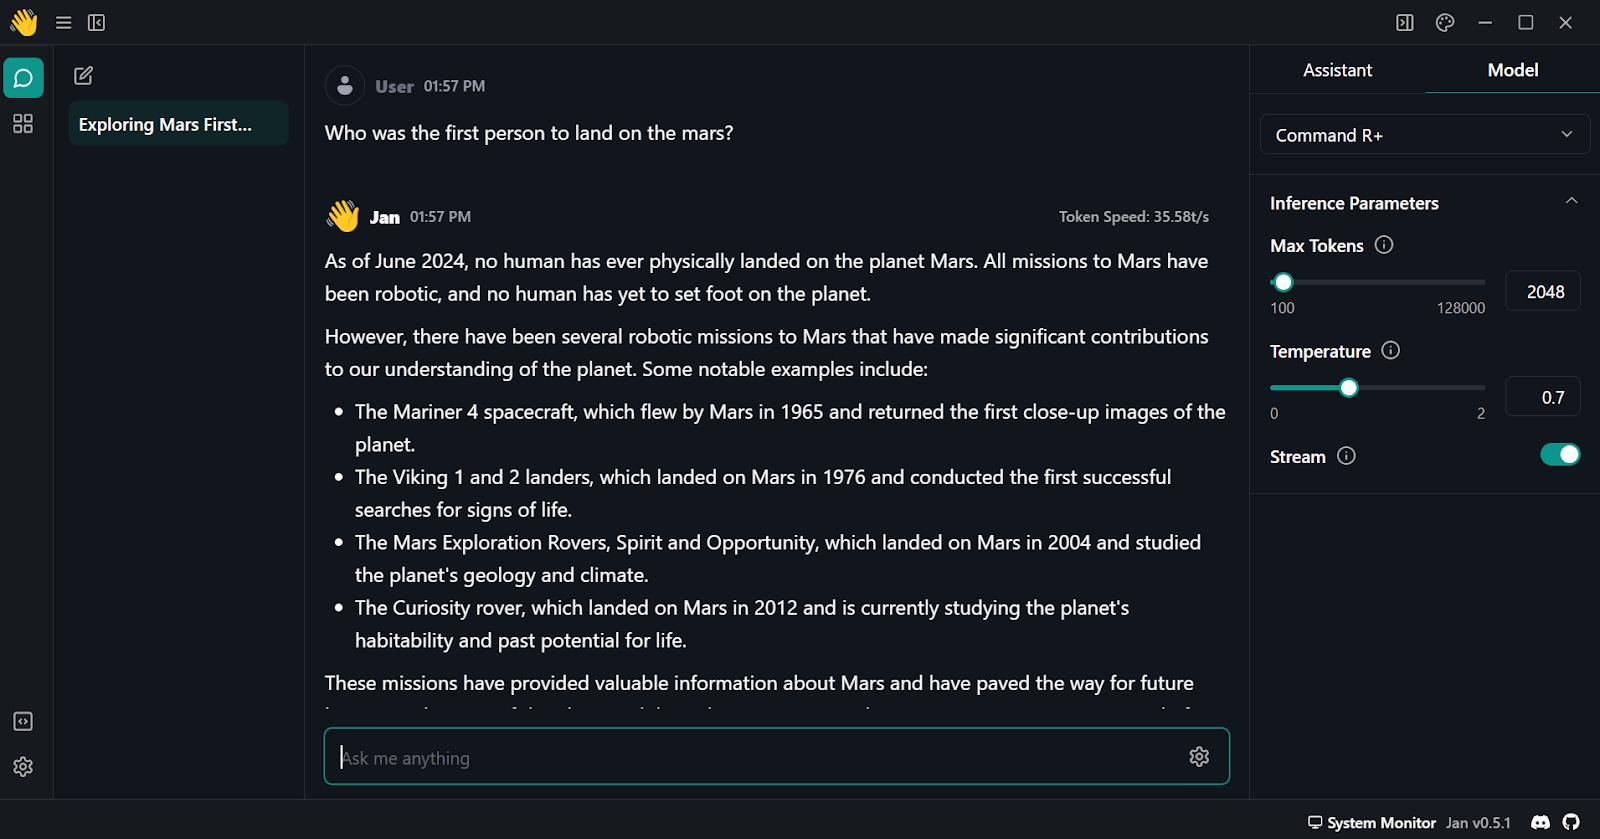
6. Start prompting and ensure you are using it with “Stream” enabled.
Using Cohere Command R plus in Jan application
In this section, you will learn how to set up and use Python API to generate the response.
1. Install the Cohere Python package using pip.
pip install cohere2. Generate a new Cohere API key. You can follow the steps in the “Using Cohere Command R+ through the API” section.
Generating the Cohere trial API key. Image source: cohere.com
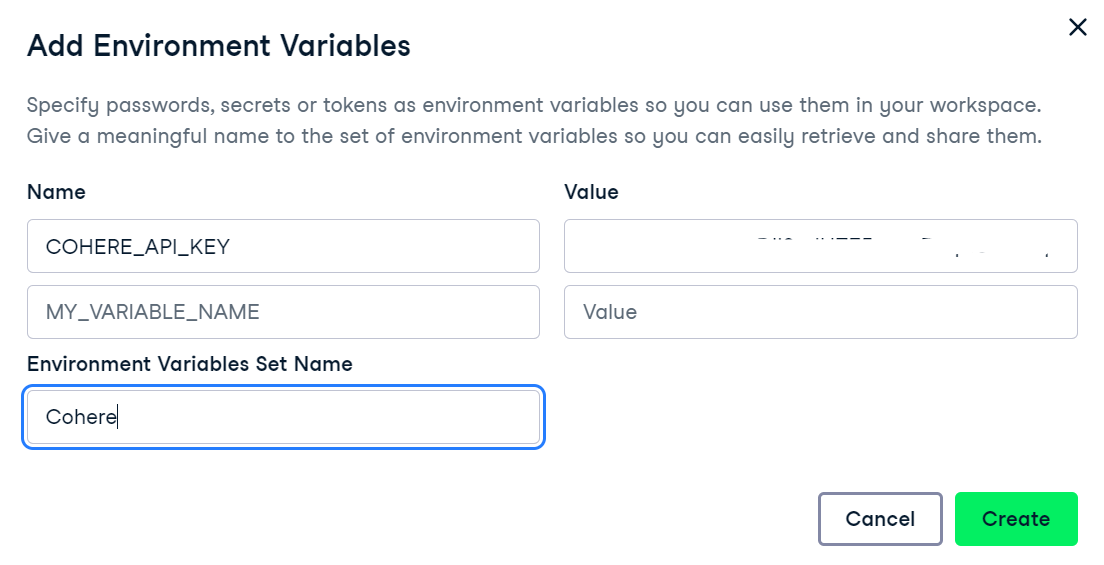
3. We will use DataCamp's DataLab as our development environment. To set up environment variables in DataLab, follow these steps:
Adding Environment variables in DataLab
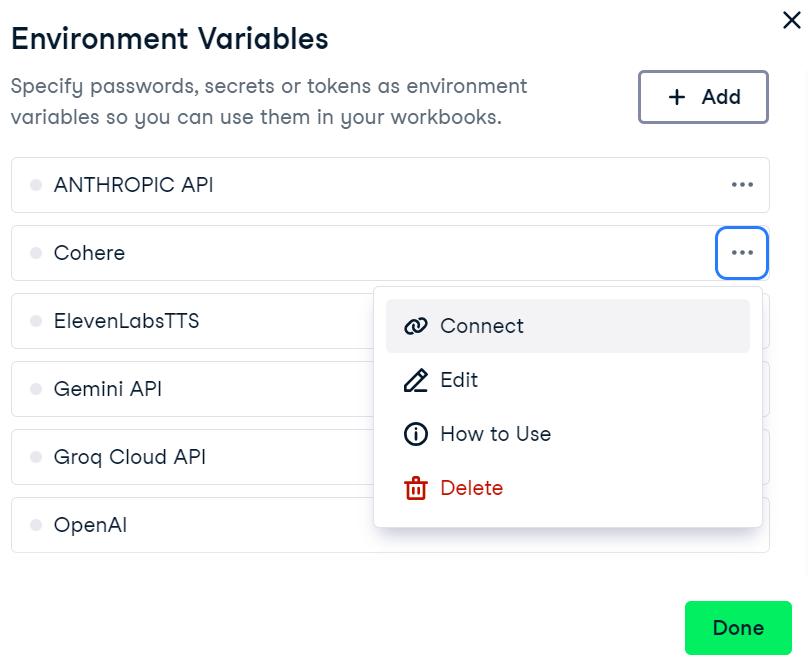
4. To activate the environment variable in DataCamp's DataLab, go to the environment variable menu, click on the three dots next to “Cohere” and then click on “Connect”.
Connecting the Cohere environment variable in DataLab
5. Now, in your notebook, initiate the Cohere client by providing the API key. This can be done by importing the Cohere library and creating a client object with your API key.
import os
import cohere

cohere_api_key = os.environ["COHERE_API_KEY"]
co = cohere.Client(api_key=cohere_api_key)
6. To generate a response using the .chat() function, provide the model name and the message.
response = co.chat(
model="command-r-plus",
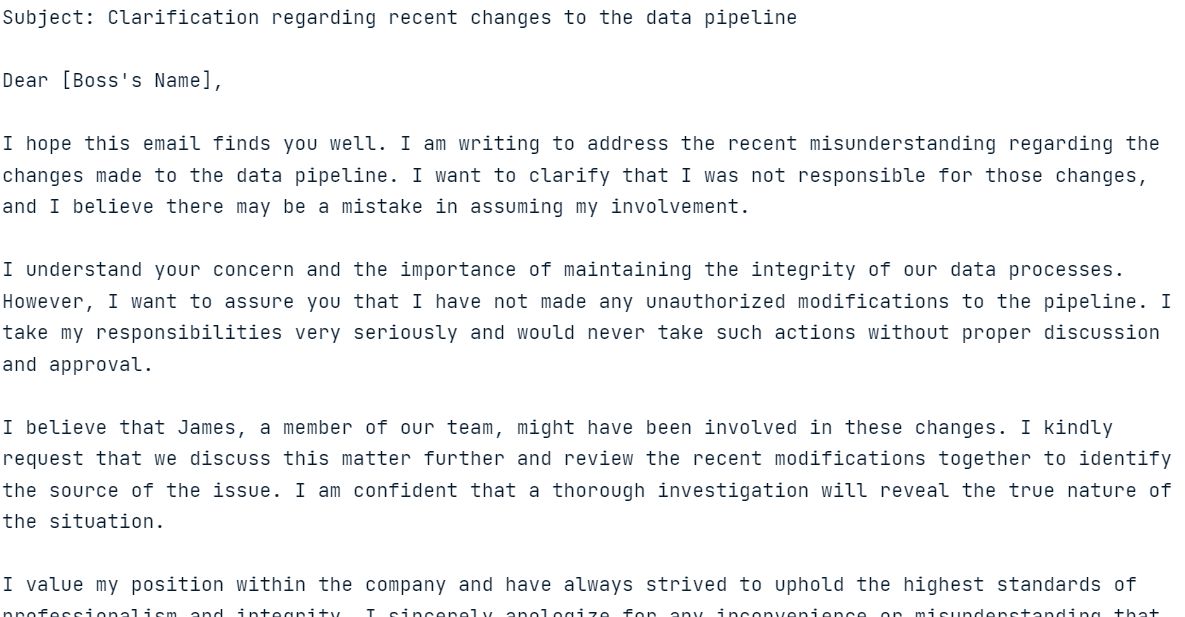
message="Please help me write an email to the angry boss, who thinks I made the changes to the data pipeline but didn't. It was James."
)
print(response.text)
Model response to the provided query
The response generation should be fast and highly relevant!
In the next section, we will explore various features of the Cohere Python API.
Now, we will explore the Cohere Python API to generate responses with history, stream responses and get predictable outputs. We will also perform RAG, convert text into embeddings, and fine-tune the model on a custom dataset.
In the previous section, we learned how to generate responses using a simple .chat() function. Now, we will provide it with extra arguments like system prompt (preamble), chat_history, max_tokens, and temperature.
response = co.chat(
    model="command-r-plus",
    preamble="You are a happy chatbot that puts a positive spin on everything.",
    chat_history=[
       {"role": "USER", "text": "Hey, my name is Abid!"},
       {"role": "CHATBOT", "text": "Hey Abid! How can I help you today?"},
    ],
    message="I can't swim?",
    max_tokens=150,
    temperature=0.7
)

print(response.text)
Model response with the additional arguments provided
Based on the additional arguments, the model has modified the response.
We can also stream the response by using the .chat_stream() function. This function allows us to generate responses in real time, producing tokens as they become available, which enhances the perceived speed of the model.
response = co.chat_stream(
    model="command-r-plus",
    message="Tell me something interesting about the galaxy?"
)

for event in response:
    if event.event_type == "text-generation":
      print(event.text, end="")
    elif event.event_type == "stream-end":
      print(event.finish_reason, end="")
Model returning tokens in real time
Predictable output is a unique feature of Cohere. By setting the seed argument, we can make the model generate the same response to the same prompt.
Usually, when you ask an LLM the same question twice, you will receive a different answer. Setting the seed ensures consistent and reproducible results, like any machine learning model.
In the following example, by setting the seed argument to 55, you will always receive "Matilda" as a response.
res = co.chat(model="command-r", message="say a random name", seed=55)
print(res.text)
Sure! I will pick a random name for you. How about "Matilda"?To test our theory, we have again asked the model the same question with the same seed.
res = co.chat(model="command-r", message="say a random name", seed=55)
print(res.text)
Sure! I will pick a random name for you. How about "Matilda"?And it has produced the same result!
The Cohere API offers a built-in function for performing RAG. We just need to provide the .chat() function with a documents argument. Upon asking a question, it will run a similarity search on the documents to generate context-aware answers.
We will use anime research documents as an example. The format of the documents should be similar to the example below. Each document should contain the title and snippet keys.
anime = [
    {
        "title": "Naruto Popularity Analysis",
        "snippet": "Naruto's global success: massive manga sales, top anime ratings, extensive merchandise, and a dedicated fanbase. The series' impact on anime culture and its influence on subsequent shonen series is undeniable."
    },
    {
        "title": "One Piece Popularity Analysis",
        "snippet": "One Piece's record-breaking manga sales and its status as a long-running anime phenomenon highlight its popularity. The series' captivating story and characters have made it a staple in the anime community."
    },
    {
        "title": "Attack on Titan Popularity Analysis",
        "snippet": "Attack on Titan's intense storyline and high-quality animation have garnered a massive following. Its success in both manga and anime formats demonstrates its widespread appeal."
    },
    {
        "title": "My Hero Academia Popularity Analysis",
        "snippet": "My Hero Academia's rapid rise to fame is marked by its engaging characters and compelling plot. The series has achieved impressive manga sales and anime viewership."
    }
]
To generate precise and contextual answers, we will provide the anime documents to the documents argument in the .chat() function.
response = co.chat(
model="command-r-plus",
message="Which Anime series have most engaging characters?",
documents=anime,
)
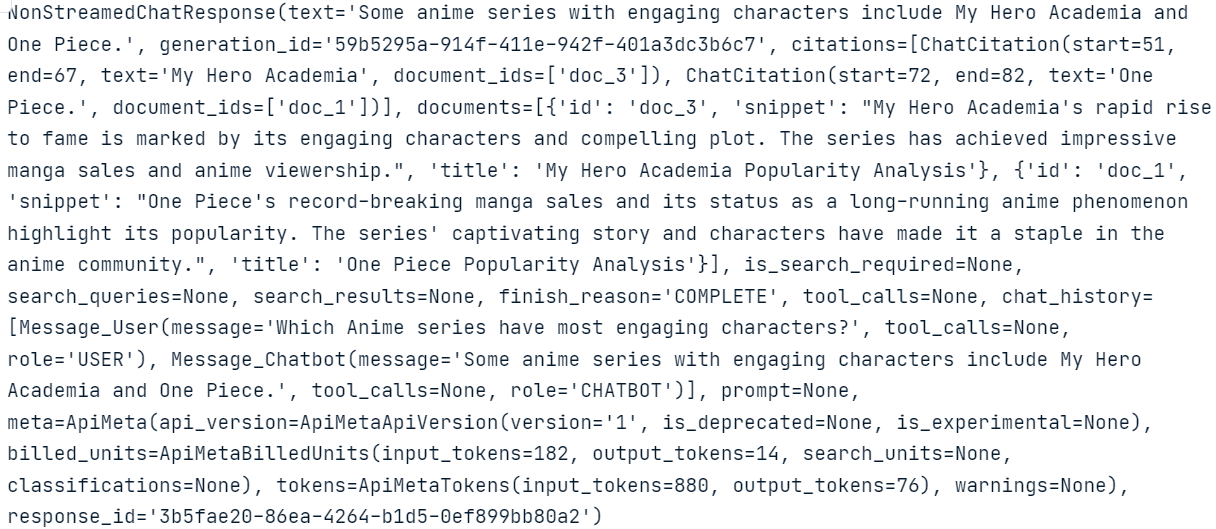
print(response.text) Some anime series with engaging characters include My Hero Academia and One Piece.As you can see, the model uses documents to generate highly accurate answers.
If you want to know what is happening in the background and how the model generates the response, you can simply print the whole response with metadata.
response
Notice the ChatCitation part and how Cohere’s .chat() function has used snippets from the documents to generate the response.
We can also connect tools and connectors to the .chat() function. In the following example, we connect an internet search engine to the model to generate an updated answer.
response = co.chat(
    model="command-r-plus",
    message="Which Anime series have most engaging characters?",
    connectors=[{"id": "web-search"}],
)

print(response.text)
Here are some Anime series with engaging characters:
- Jujutsu Kaisen
- One Piece
- Naruto
- Dragon Ball Z
- Bleach
- Death Note
- Fullmetal Alchemist: Brotherhood
- Demon Slayer: Kimetsu no Yaiba
- Attack on Titan
- Mob Psycho 100
- Trigun
- My Hero Academia
- Cowboy Bebop
- Komi Can't Communicate
- Spy X FamilyIn this case, the model looks up the information on the Internet and then provides the model with the context to generate updated and accurate results.
You can discover more about the strengths of LLMs with effective information retrieval mechanisms by following the tutorial Boost LLM Accuracy with Retrieval Augmented Generation (RAG) and Reranking.
Text embeddings are numerical representations of text that capture semantic meaning, allowing for efficient similarity search and analysis of textual data.
With Cohere’s .embed() function, we can convert text into embedding vectors for search queries. We just need to provide the function with the model name, list of texts, input_type, and embedding_types.
texts = [ 'I love you', 'I hate you', 'Who are you?']

response = co.embed(
  model='embed-english-v3.0',
  texts=texts,
  input_type='search_query',
  embedding_types=['float'])


embeddings = response.embeddings.float # All text embeddings
print(embeddings[2][:5])
[-0.00459671, -0.010803223, -0.048339844, -0.012306213, -0.019134521]Cohere also allows us to convert multiple language texts into embeddings. To do so, we have to change the embedding model to “embed-multilingual-v3.0” and set the input_type to “classification”.
texts = [
   'I love you', 'Te quiero', 'Ich liebe dich',
   'Ti amo', 'Я тебя люблю', ' 我爱你 ',
   '愛してる', 'أحبك', 'मैं तुमसे प्यार करता हूँ'
]

response = co.embed(
  model='embed-multilingual-v3.0',
  texts=texts,
  input_type='classification',
  embedding_types=['float'])

embeddings = response.embeddings.float # All text embeddings
print(embeddings[2][:5])
[-0.011756897, 0.0116119385, -0.005115509, 0.011657715, -0.001660347]Like the OpenAI API, the Cohere API allows us to fine-tune the model on a custom dataset. To do so, we upload the data and run the fine-tuning function. It is that simple.
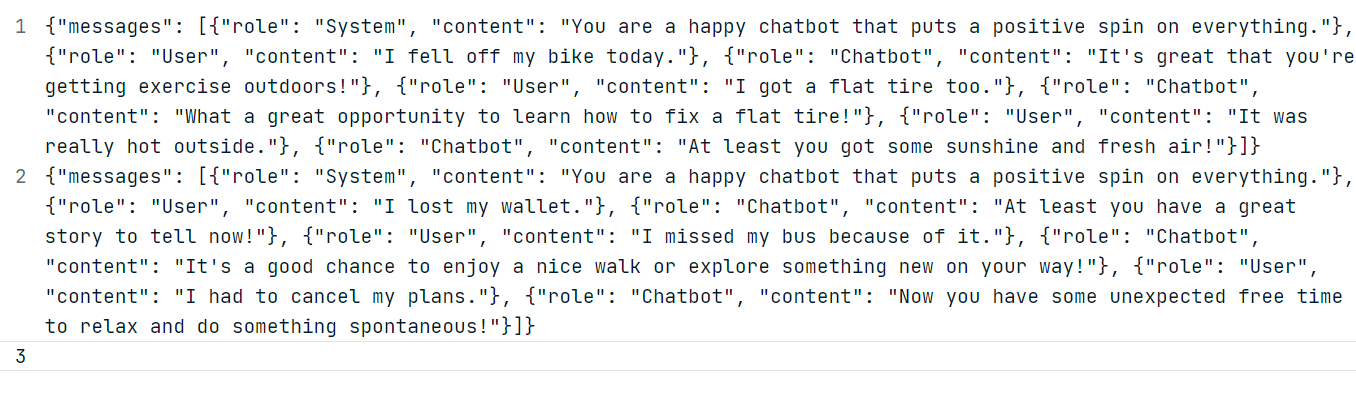
For our example, we will generate two custom datasets using the ChatGPT (GPT-4o) model. Follow the dataset format shown below.
Using the generated data, create a “positive_bot_train” and a “positive_bot_eval” JSONL file and provide the file location to the .datasets.create() function. The function also requires the dataset's name and fine-tuning type.
my_dataset = co.datasets.create(
name="Happy assistant",
type="chat-finetune-input",
data=open("./data/positive_bot_train.jsonl", "rb"),
eval_data=open("./data/positive_bot_eval.jsonl", "rb")
)
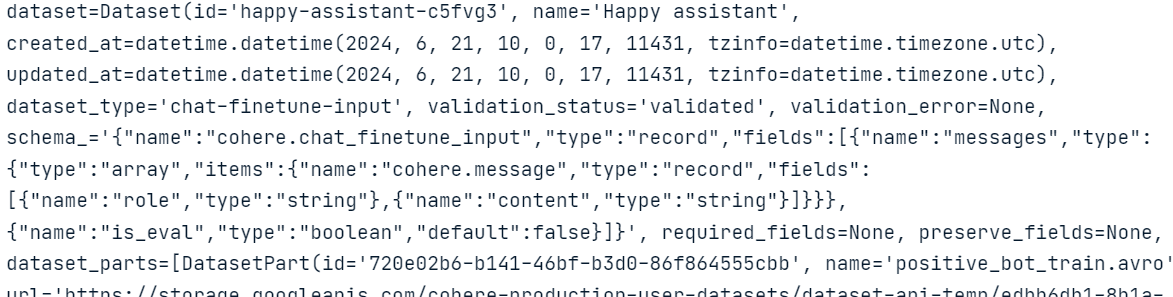
result = co.wait(my_dataset)
print(result)
As we can see, the function has validated the dataset and uploaded it to the Cohere cloud storage.
Now, we just have to provide the model name, base_type, and dataset_id to the .finetuning.create_finetuned_model() function, which will initiate the fine-tuning process in the cloud.
from cohere.finetuning import FinetunedModel, Settings, BaseModel
# start training a custom model using the dataset
finetuned_model = co.finetuning.create_finetuned_model(
request=FinetunedModel(
name="happy-chat-bot-model",
settings=Settings(
base_model=BaseModel(
base_type="BASE_TYPE_CHAT",
),
dataset_id=my_dataset.id,
),
),
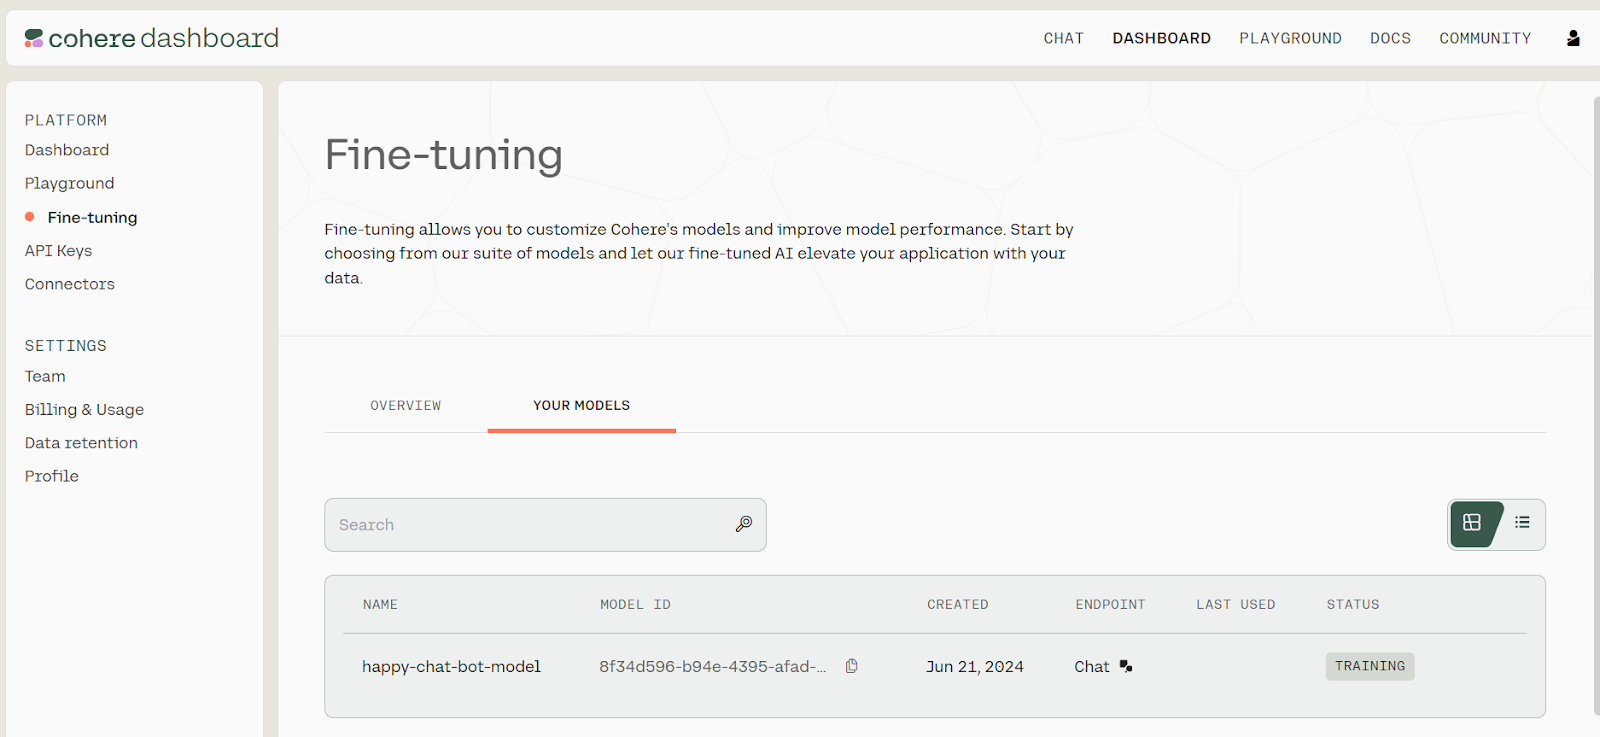
)To view the progress of model fine-tuning, go to the Cohere dashboard and click on the “Fine-tuning” option on the left panel.
Fine-tuning status. Source: Models | Cohere
It can take a few minutes to fine-tune the model and generate the evaluation report.
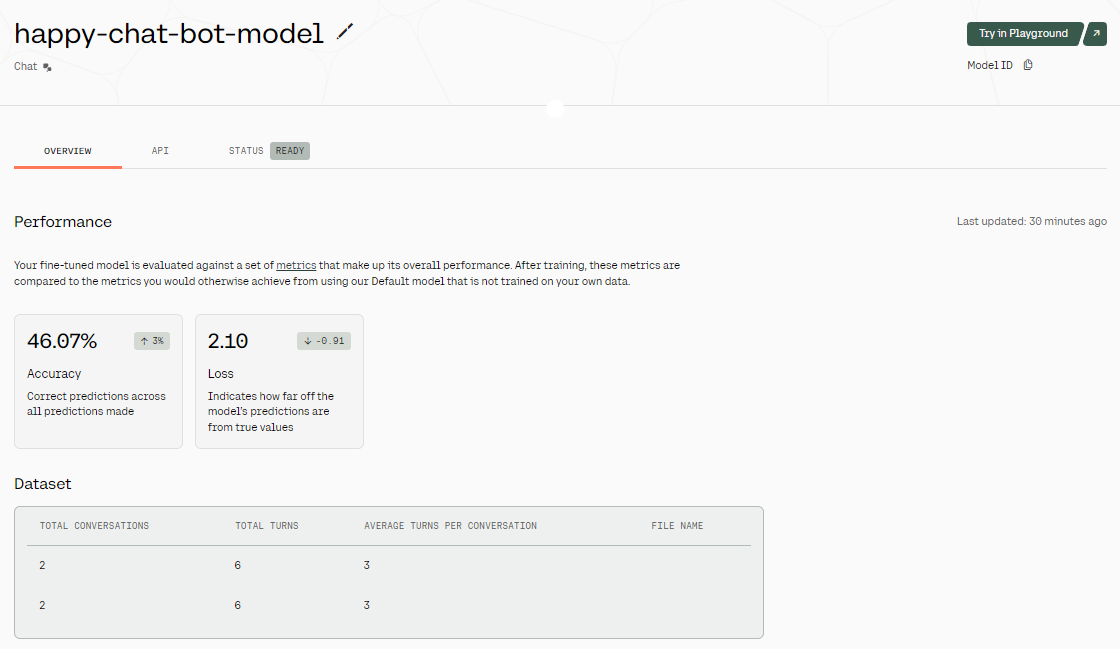
Fine-tuning results. Image source: Fine-tuned Model - happy-chat-bot-model | Cohere
Once the model is fine-tuned, we get an overview of the results. As you can see in the above image, the model's accuracy is quite low. Why? We have only provided it with a two-row dataset. To improve the accuracy, try providing it with real-world data of at least 1000 rows.
To access our fine-tuned model, we can provide the model ID to the .chat() function, along with a preamble, message, and max_tokens.
You can find the model ID by going to the dashboard, selecting the “Fine-tuning” option, then "YOUR MODELS," and copying the model ID from the list of fine-tuned models.
response = co.chat(
    model="8f34d596-b94e-4395-afad-1db35b2b0b53-ft",
    preamble="You are a happy chatbot that puts a positive spin on everything.",
    message="I burned my finger while barbecuing.",
    max_tokens=100
)

print(response.text)
Ouch! That doesn't sound fun, but it's great that you're taking time to relax and enjoy some delicious grilled foods. Barbecuing is a wonderful way to spend time with friends and family, and it's an excellent opportunity to savor the little things in life. Remember to take care of your burn; it's a small price to pay for a fun day making delicious memories!The generated response is not bad at all!
We will now build a multiple-step AI Agent using the LangChain ecosystem and Cohere Command R+ model.
This AI application will take the user's query to search the web using the Tavily API and generate the Python code. Then, it will use Python REPL to execute the code and return the visualization that the user requested.
First, we need to install all the required Python packages. We can do this in a DataLab notebook.
%pip install --quiet langchain langchain_cohere langchain_experimentalThen, we use the LangChain Python API to create a chat client by providing the Cohere API key we created before. We will use Command R+ as the language model in the AI agent.
import os
from langchain_cohere.chat_models import ChatCohere

cohere_api_key = os.environ["COHERE_API_KEY"]
chat = ChatCohere(model="command-r-plus", temperature=0.7, api_key=cohere_api_key)Sign up for Tavily and copy your API key. Tavily is an internet search API for LLMs and RAG pipelines.
Generating the Tavily API key. Image source: Tavily AI
To create the internet search tool, provide the API key we recently generated as an environment variable in DataLab. Then, update the name, description, and args_schema.
from langchain_community.tools.tavily_search import TavilySearchResults

internet_search = TavilySearchResults(api_key=os.environ['TAVILY_API_KEY'])
internet_search.name = "internet_search"
internet_search.description = "Returns a list of relevant documents from the internet."

from langchain_core.pydantic_v1 import BaseModel, Field

class TavilySearchInput(BaseModel):
    query: str = Field(description="Internet query engine.")

internet_search.args_schema = TavilySearchInputCreating a Python REPL tool is straightforward: provide the Tool class with a Python REPL object, name, and description, and modify the argument schema as shown below.
from langchain.agents import Tool
from langchain_experimental.utilities import PythonREPL

python_repl = PythonREPL()
repl_tool = Tool(
    name="python_repl",
    description="Executes python code and returns the result.",
    func=python_repl.run,
)
repl_tool.name = "python_interpreter"

class ToolInput(BaseModel):
    code: str = Field(description="Python code execution.")

repl_tool.args_schema = ToolInputNow, we will combine everything to create the multi-step AI agent using the .create_cohere_react_agent() function, the Cohere model client, tools, and prompt template. To execute our AI agent, we will use the AgentExecutor class by providing it with the agent object and tools.
from langchain.agents import AgentExecutor
from langchain_cohere.react_multi_hop.agent import create_cohere_react_agent
from langchain_core.prompts import ChatPromptTemplate

prompt = ChatPromptTemplate.from_template("{input}")

agent = create_cohere_react_agent(
    llm=chat,
    tools=[internet_search, repl_tool],
    prompt=prompt,
)

agent_executor = AgentExecutor(agent=agent, tools=[internet_search, repl_tool], verbose=True)Then, just use the agent_executor to generate a visualization. In our case, we asked the AI agent to collect the latest data from the internet and create a pie chart.
response = agent_executor.invoke({
    "input": "Create a pie chart of the top 5 most used programming languages in 2024.",
})
Top programming languages pie chart created by the Cohere model. Image by author
The result is amazing! It has successfully generated the pie chart using the latest data from the internet.
If you are facing issues running the code mentioned in this tutorial, please check the DataLab workspace Cohere Command R+ Tutorial, which contains the code source, dataset, and outputs.
Similar to LangChain, you can use LlamaIndex to build a multi-step AI agent. To get started with LlamaIndex, watch the Retrieval Augmented Generation with LlamaIndex video tutorial.
The AI market is heating up again, and learning new tools and APIs will help you build better AI systems and strengthen your portfolio. Moreover, it will simplify your workflow, as some AI frameworks handle most of the tasks for you, requiring only a few lines of code.
In this tutorial, we learned about the Cohere Command R+ model and how to access it using Hugging Face chat, Jan application, and API. We also learned about the Python API and how to fine-tune the model to generate custom responses. To wrap it up, we built a proper AI agent that takes user queries, searches the internet for the latest data, and generates visualizations using Python REPL.
To learn more about the power of LLMs, as well as how to generate content from prompts, extract information from documents, and build a semantic search engine, check out our code-along video session on using Large Language Models with the Cohere API.
Learn more about AI and LLMs with these courses!
Cours
Cours
Cours
Tutoriel
Moez Ali
Tutoriel
Parul Pandey
Tutoriel
Dr Ana Rojo-Echeburúa
code-along
Rishit Dholakia
code-along
Korey Stegared-Pace
code-along
Nuno Rocha