
Kursus
Pengembangan Kode dengan Bantuan AI untuk Developer
1 jam 30 menit
11.1K
Kimi K2.7 Code adalah model koding andalan dari Moonshot, dibuat untuk tugas pengembangan perangkat lunak praktis seperti menulis dan men-debug kode, menavigasi codebase besar, dan menangani pekerjaan rekayasa multi-langkah.
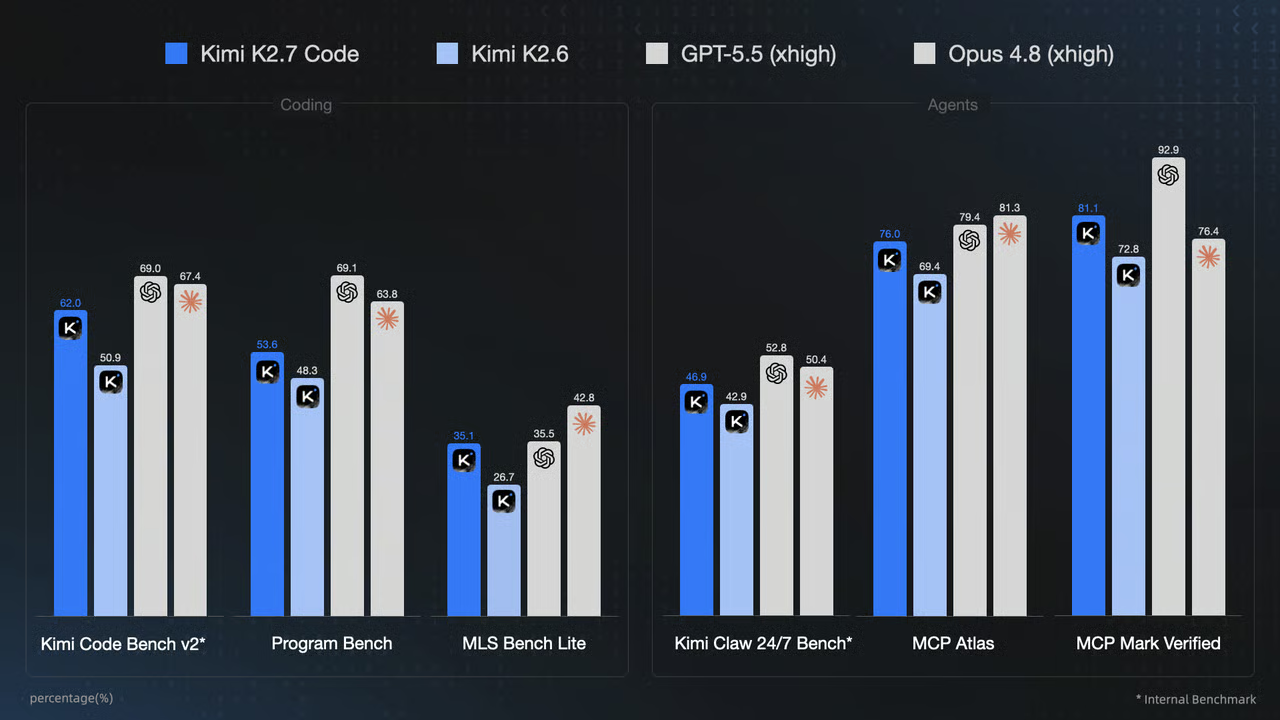
Sumber: Kimi K2.7 Code: Open-Source Agentic Coding Model
Dipadukan dengan Pi, agen koding yang ringan dan sangat mudah diperluas, keduanya menciptakan lingkungan pengembangan lokal yang fleksibel yang mendukung skills, paket, alat baris perintah, memori persisten, dan pengujian browser tanpa menambah kompleksitas yang tidak perlu.
Alih-alih memasang MCP untuk setiap tugas, Pi dapat menggabungkan penalaran Kimi dengan alat pengembang andal seperti GitHub CLI, Vercel CLI, Hugging Face CLI, pytest, Ruff, dan uv.
Ini memungkinkan riset, pembangunan, pengujian, deployment, dan pemeliharaan proyek nyata dari satu alur kerja agen koding.
Dalam panduan ini, saya akan menunjukkan cara menyiapkan Kimi K2.7 Code dengan Pi dari awal hingga akhir.
Anda akan mengonfigurasi kunci API Moonshot, menambahkan Olostep untuk riset, Context7 untuk dokumentasi terbaru, Webwright untuk pengujian browser, dan Hermes Memory untuk konteks lintas sesi.
Anda juga akan memasang tema dan keterampilan engineering yang berguna, menghubungkan CLI praktis untuk GitHub, Vercel, dan Hugging Face, membuat proyek data science Python yang dapat direproduksi, serta menguji alur kerja lengkap dengan membangun, memvalidasi, dan memublikasikan aplikasi machine learning kecil.
Saya juga menyarankan Anda membaca panduan saya tentang cara menjalankan Kimi K2.7 Code secara lokal.
Pi adalah agen koding yang ringan dan berjalan langsung di terminal Anda.
Ia dapat bekerja dengan file lokal Anda, menjalankan perintah, menggunakan skills dan paket yang terpasang, serta terhubung ke model koding pilihan Anda.
Pilih perintah pemasangan untuk sistem operasi Anda.
Windows PowerShell
powershell -c "irm https://pi.dev/install.ps1 | iex"macOS atau Linux
curl -fsSL https://pi.dev/install.sh | shAnda juga dapat memasang Pi melalui npm:
npm install -g --ignore-scripts @earendil-works/pi-coding-agentSebelum menggunakan Kimi K2.7 Code di Pi, tambahkan kunci API Moonshot Anda sebagai variabel lingkungan.
Pi kemudian dapat mengakses kunci tersebut secara otomatis saat Anda memilih Moonshot sebagai penyedia model.
Windows PowerShell
setx MOONSHOT_API_KEY "your_moonshot_api_key"Tutup dan buka kembali PowerShell setelah menjalankan perintah ini. Variabel lingkungan baru hanya tersedia di sesi terminal yang baru dibuka.
Git Bash, macOS, atau Linux
export MOONSHOT_API_KEY="your_moonshot_api_key"Perintah ini hanya berlaku untuk sesi terminal saat ini. Agar kunci tetap tersedia setelah Anda memulai ulang terminal, tambahkan baris yang sama ke profil shell Anda, seperti ~/.bashrc atau ~/.zshrc.
Jaga kerahasiaan kunci API Anda. Jangan menambahkannya ke repositori Git, notebook publik, tangkapan layar, file .env.example, atau AGENTS.md.
Setelah kunci disetel, jalankan Pi:
piLalu buka pemilih model:
/model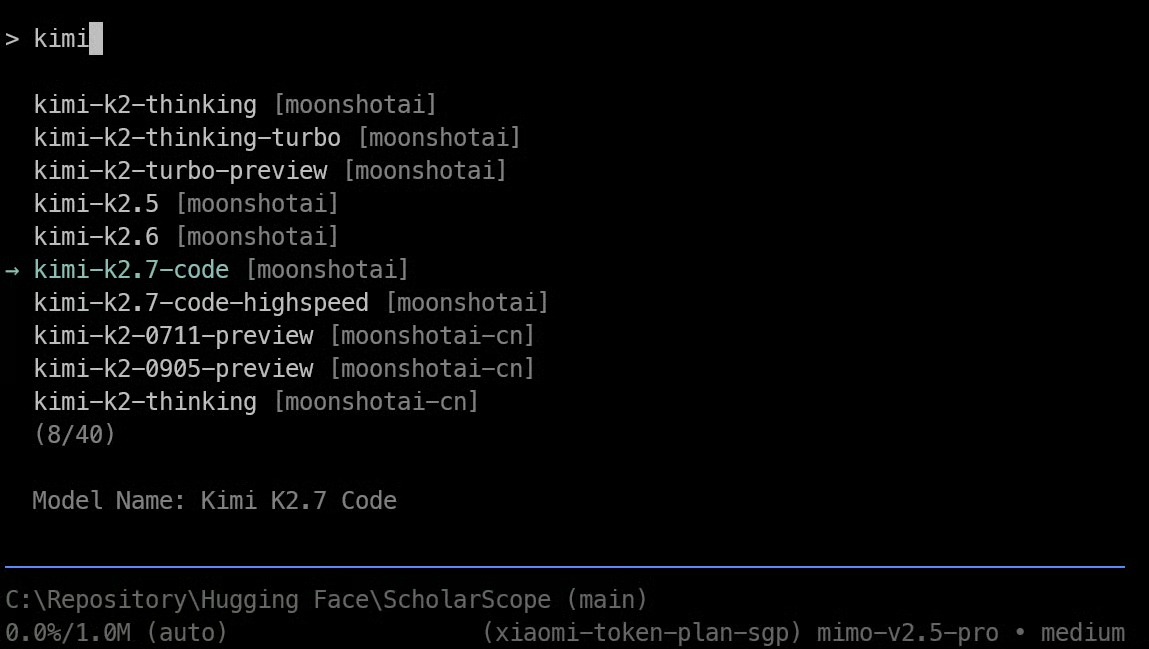
Pilih moonshotai sebagai penyedia dan pilih kimi-k2.7-code.
Pi seharusnya otomatis mendeteksi variabel lingkungan MOONSHOT_API_KEY dan menggunakannya untuk autentikasi.
Olostep memberi Pi akses ke alur kerja riset untuk penelusuran web, scraping, perayapan dokumentasi, debugging, dan ekstraksi data terstruktur.
Ini membantu Pi menemukan informasi terkini saat suatu tugas memerlukan lebih dari sekadar pengetahuan bawaan model.
Sebelum melanjutkan, buat akun Olostep, buat kunci API, dan simpan secara lokal sebagai variabel lingkungan bernama OLOSTEP_API_KEY.
Ini memungkinkan Pi dan skrip yang dibuatnya untuk melakukan autentikasi dengan Olostep tanpa menyimpan secret di file proyek Anda.
Selanjutnya, pasang skills Olostep langsung ke direktori skills global Pi:
npx -y olostep-cli@latest add skills \
 --no-global \
 --agent-skills-dir ~/.pi/agent/skills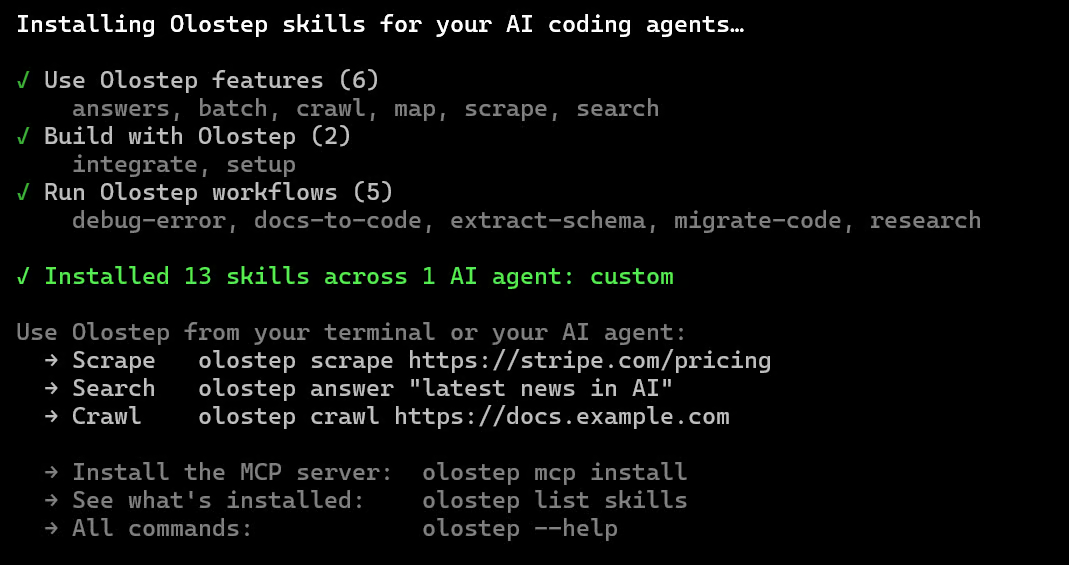
Ini memasang skills Olostep ke:
~/.pi/agent/skills/Context7 memberi Pi akses ke dokumentasi pustaka yang terkini dan spesifik versi serta contoh kode. Ini membantu mencegah penggunaan API usang saat Pi bekerja dengan framework, SDK, dan paket Python yang bergerak cepat.
Sebelum pemasangan, buat akun Context7, hasilkan kunci API dari dasbor Context7, dan simpan secara lokal sebagai variabel lingkungan bernama CONTEXT7_API_KEY.
Jaga kerahasiaan kunci dan jangan commit ke repositori atau menyertakannya dalam tangkapan layar, notebook, atau file instruksi proyek.
Pasang paket resmi Context7 untuk Pi:
pi install npm:@upstash/context7-piIni menambahkan alat dokumentasi Context7, sebuah skill yang membimbing Pi untuk menggunakannya saat diperlukan, dan perintah /c7-docs untuk pencarian manual.
Setelah memulai ulang Pi, ia dapat mengambil dokumentasi yang relevan sebelum menulis kode yang bergantung pada pustaka eksternal.
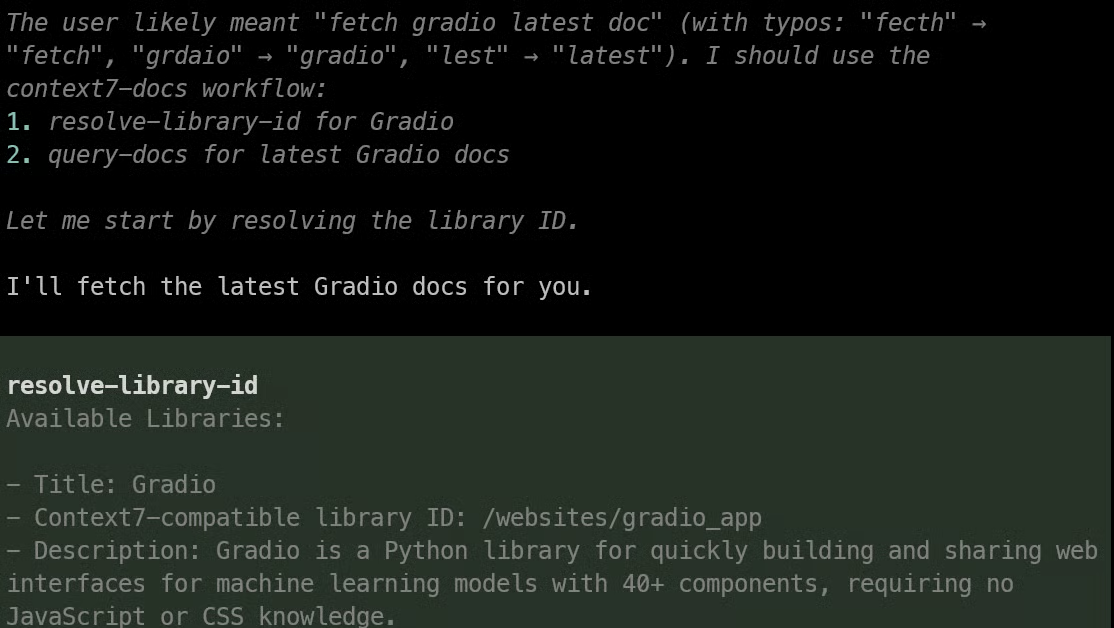
Pi mendukung paket tema pihak ketiga, sehingga mudah untuk mempercantik antarmuka terminal tanpa mengubah cara kerja agen.
Paket @spences10/pi-themes mencakup beberapa tema gelap yang rapi, termasuk Catppuccin Mocha, Dracula, Gruvbox Dark, Nord, One Dark, dan Tokyo Night.
Pasang paket tema komunitas:
pi install npm:@spences10/pi-themesLalu buka Pi:
piBuka menu pengaturan:
/settings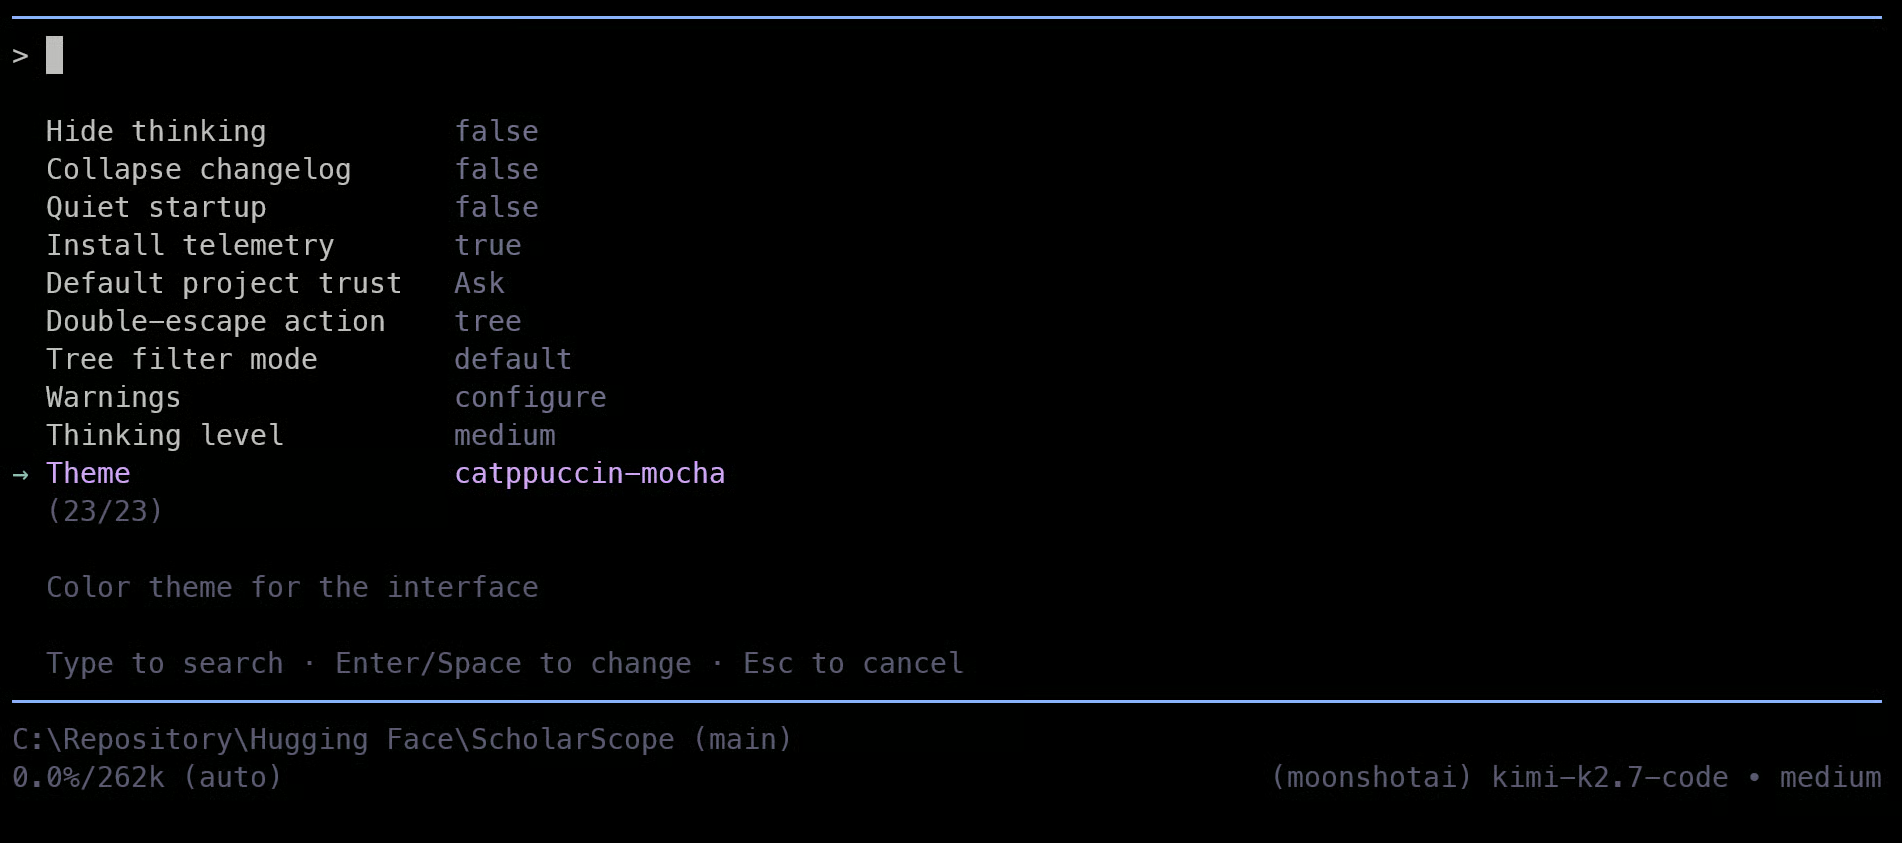
Pilih Catppuccin Mocha dari tema yang tersedia. Ini adalah tema gelap yang bersih dengan kontras kuat dan cocok sebagai bawaan untuk sesi koding yang panjang.
Anda dapat mengganti tema kapan saja melalui /settings. Pi juga mendukung tema yang disimpan lokal dan tema berbasis paket, sehingga Anda dapat menyesuaikan antarmuka nanti tanpa mengubah model, alat, atau setelan proyek.
Pi dapat diperluas dengan alur kerja engineering yang dapat digunakan kembali agar lebih konsisten saat merencanakan, men-debug, menguji, meninjau kode, menulis dokumentasi, dan menyiapkan proyek untuk penyerahan atau rilis.
Paket @barlevalon/skills menyediakan alur kerja portabel SKILL.md untuk tugas rekayasa perangkat lunak umum ini.
Pasang paket skills:
pi install npm:@barlevalon/skills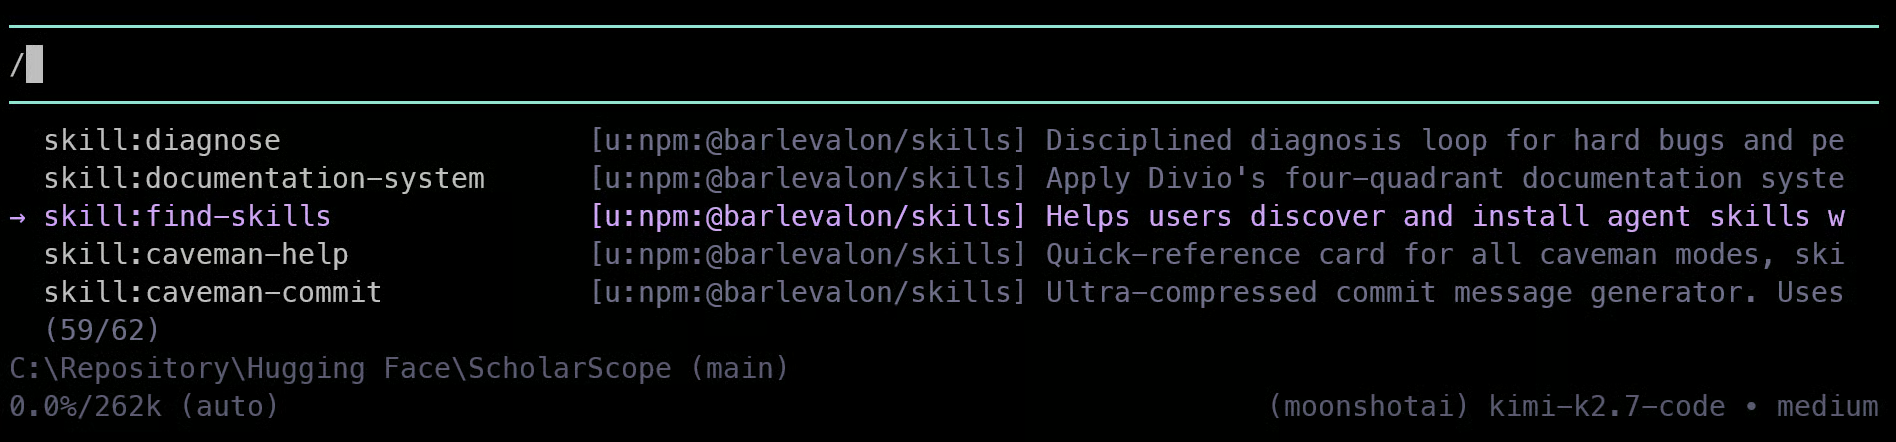
Berikutnya, pasang Hypa untuk mencegah output terminal yang panjang mengambil alih jendela konteks Pi:
pi install npm:@hypabolic/pi-hypaHypa secara otomatis menulis ulang perintah shell yang didukung melalui lapisan kompresi lokal. Ini menjaga bukti penting, seperti error dan hasil akhir, sambil mengurangi log berulang dari pemasangan paket, rangkaian pengujian, menjalankan model, build, dan deployment.
Paket Pi juga memasang Hypa sebagai dependensi dan membuat shim perintah lokal hypa sebisa mungkin.
Anda tidak memerlukan MCP, ekstensi, atau paket untuk setiap layanan yang Anda gunakan.
Untuk alur kerja umum seperti mengelola repositori, mendistribusikan aplikasi, memeriksa log, atau memublikasikan model, alat baris perintah yang terautentikasi sering kali lebih sederhana, lebih andal, dan lebih mudah digunakan oleh Pi.
GitHub CLI memungkinkan Pi bekerja dengan repositori, pull request, isu, rilis, dan GitHub Actions langsung dari terminal. Pasang di Windows dengan:
winget install --id GitHub.cli --source wingetLalu masuk:
gh auth loginGunakan GitHub CLI ketika Anda ingin Pi memeriksa repositori, membuat atau meninjau pull request, memeriksa run workflow, mengelola isu, atau memublikasikan proyek ke GitHub.
Vercel CLI memungkinkan Pi melakukan deploy aplikasi web, memeriksa proyek, melihat log deployment, dan mengelola variabel lingkungan dari terminal.
npm install -g vercel
vercel login
Gunakan Vercel CLI untuk deployment pratinjau, rilis produksi, pemecahan masalah deployment, pengaitan proyek, dan pemeriksaan variabel lingkungan.
Alat baris perintah Hugging Face saat ini adalah hf, yang disertakan dengan paket huggingface_hub. Pasang dengan:
pip install -U huggingface_hubLalu autentikasi:
hf auth loginGunakan Hugging Face CLI untuk membuat dan mengelola repositori model, dataset, dan Space; mengunggah file proyek; mengunduh model atau dataset; serta memastikan akun mana yang saat ini terautentikasi.
Unit test berguna untuk memeriksa logika Python, tetapi tidak menunjukkan apakah pengguna nyata dapat menggunakan aplikasi Anda.
Webwright memungkinkan Pi menjalankan pengujian berbasis browser dengan Playwright terhadap aplikasi lokal atau yang sudah dideploy, termasuk Streamlit, Gradio, front end FastAPI, proyek React atau Next.js, pratinjau Vercel, dan Hugging Face Spaces.
Pasang Webwright di Pi:
pi install npm:pi-webwrightLalu pasang Chromium untuk Playwright:
npx playwright install chromium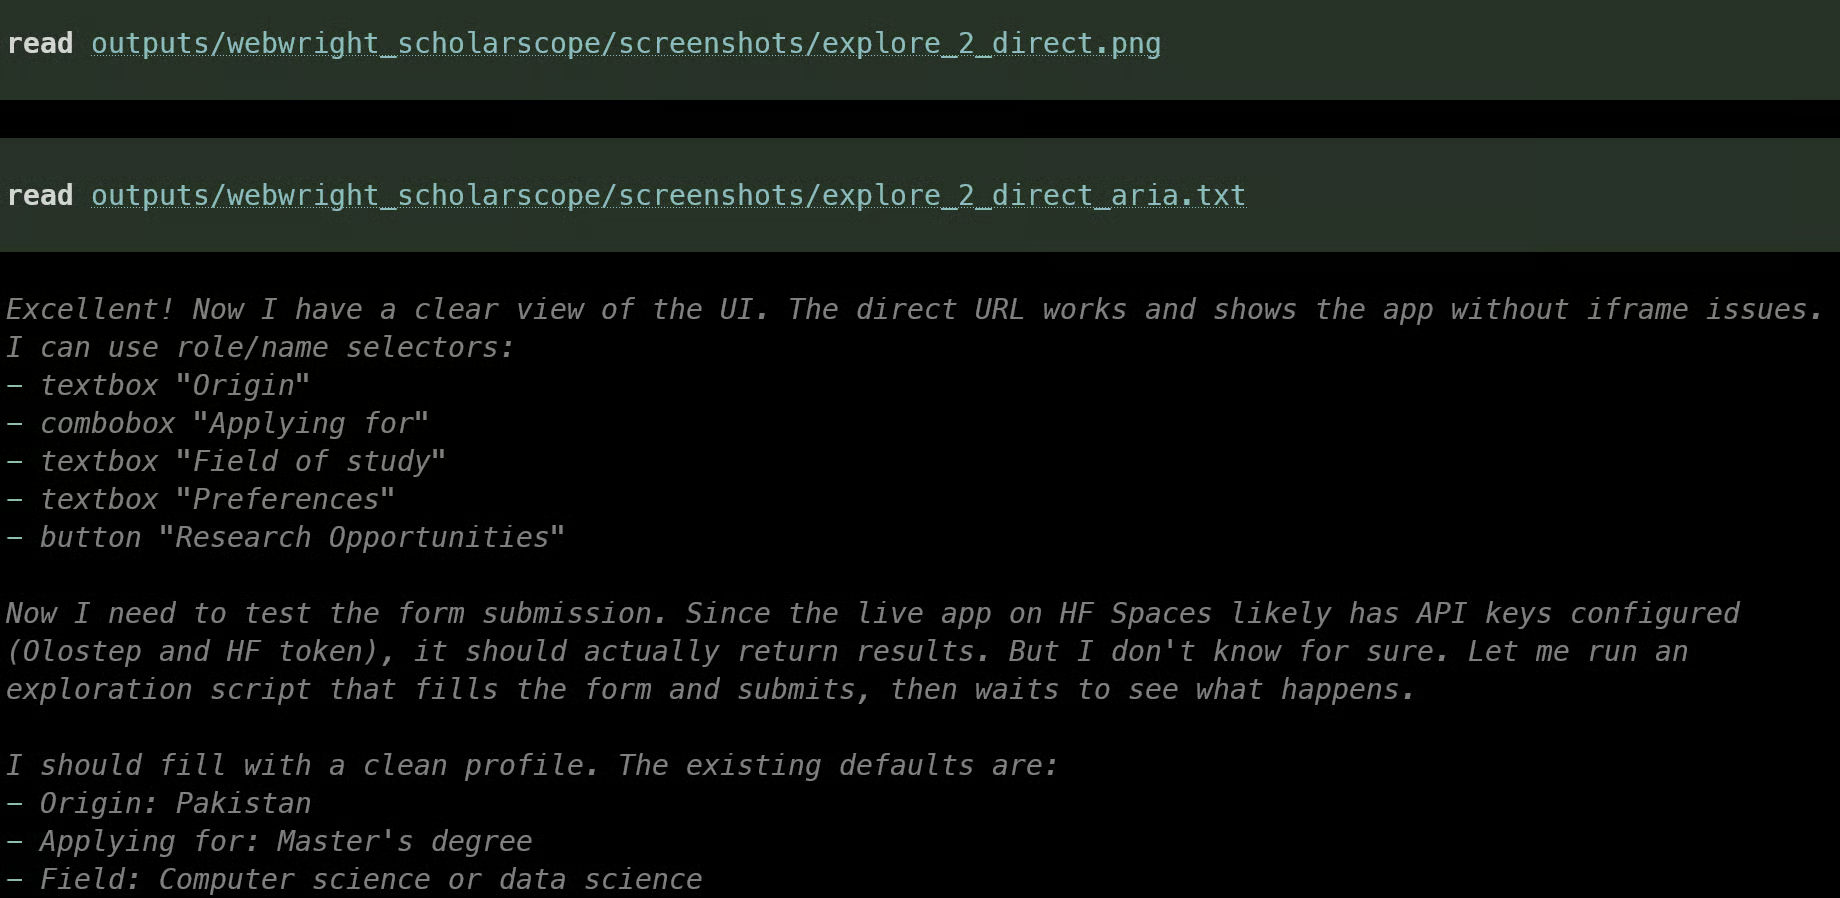
Webwright memungkinkan Pi membuka aplikasi di Chromium, menguji alur utama pengguna, berinteraksi dengan formulir atau unggah file, memeriksa apakah hasil dirender dengan benar, memeriksa error browser, serta menyimpan tangkapan layar dan log.
Paket ini menyertakan skill pengujian browser yang dirancang untuk alur kerja berbasis artefak yang dapat diperiksa.
Pi memulai setiap sesi baru dengan konteks terbatas dari pekerjaan sebelumnya.
Hermes Memory menambahkan memori lokal yang persisten sehingga Pi dapat menelusuri sesi sebelumnya, menyimpan konteks proyek yang berguna, mengonsolidasikan informasi berulang, dan memindai secret.
Ia berjalan secara lokal, jadi Anda tidak memerlukan kunci API memori ter-host terpisah.
Pasang Hermes Memory:
pi install npm:pi-hermes-memoryMulai ulang Pi setelah pemasangan.
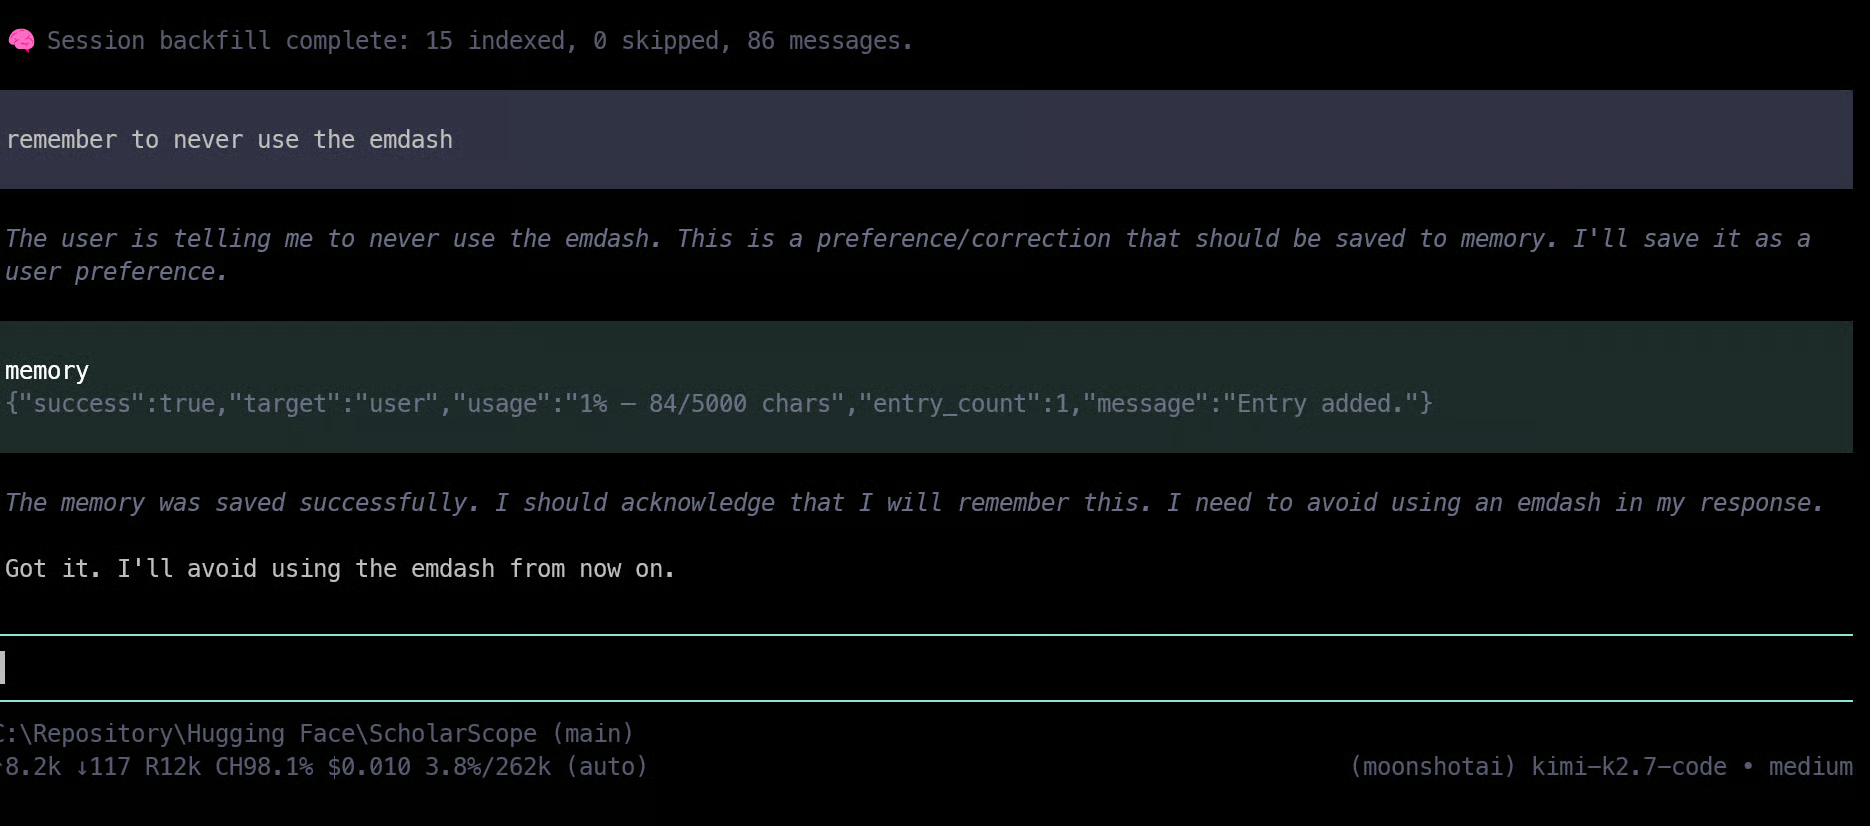
Gunakan Hermes Memory bersama dokumentasi proyek yang jelas:
Pertahankan MEMORY.md dan docs/decisions/ sebagai sumber kebenaran yang terlihat untuk proyek Anda.
Hermes Memory membantu Pi melanjutkan pekerjaan lintas sesi, sementara file Markdown memudahkan Anda atau kontributor lain untuk meninjau konteks di kemudian hari.
Setup Pi yang kuat juga memerlukan struktur proyek yang jelas.
Ini menjaga eksperimen, kode, pengujian, data, dan hasil tetap terorganisir, sehingga Pi dapat melakukan perubahan tanpa mencampur pekerjaan notebook sementara dengan kode pipeline yang dapat digunakan kembali.
Buat proyek baru dan inisialisasi dengan uv:
mkdir data-science-pi-project
cd data-science-pi-project
uv init
uv add pandas scikit-learn matplotlib pytest ruff
Gunakan struktur ini:
data-science-pi-project/
├── AGENTS.md
├── MEMORY.md
├── README.md
├── src/
│   ├── data.py
│   ├── train.py
│   └── evaluate.py
├── tests/
├── notebooks/
├── data/
│   ├── raw/
│   └── processed/
├── reports/
│   ├── figures/
│   └── metrics/
└── docs/
    └── decisions/
Simpan kode pemuatan data, prapemrosesan, pelatihan, dan evaluasi yang dapat digunakan kembali di src/.
Gunakan notebooks/ hanya untuk eksplorasi dan eksperimen cepat.
Simpan file sumber yang tidak diubah di data/raw/, data terbersihkan di data/processed/, dan simpan bagan, metrik, serta keluaran model di reports/.
Buat file AGENTS.md agar Pi mengikuti alur kerja yang tepat saat bekerja di repositori:
# Project Rules

- Use Olostep for current research and Context7 for library documentation.
- Inspect the dataset, missing values, duplicates, leakage risks, class balance, and baseline before training.
- Keep reusable logic in `src/`, not notebooks.
- Add tests when changing preprocessing or evaluation behaviour.
- Run formatting, linting, and tests before declaring work complete.
- Record important decisions in `docs/decisions/`.
Ini memberi Pi alur kerja berulang untuk membangun proyek data science yang lebih mudah diuji, dipelihara, dan ditingkatkan.
Sekarang saatnya menguji setup Pi secara lengkap dalam proyek nyata. Untuk contoh ini, saya meminta Pi membangun aplikasi klasifikasi biner yang dapat direproduksi untuk prediksi penempatan mahasiswa menggunakan faktor seperti performa akademik, magang, proyek, sertifikasi, dan keterampilan.
Mulai Pi dari dalam folder proyek Anda:
piLalu berikan prompt berikut kepada Pi:
Build a simple, reproducible Python machine-learning project for a binary classification problem.
First inspect the dataset for schema, missing values, duplicates, categorical columns, leakage risks, class balance, and a suitable stratified train/test split.
Use Olostep for any current research or dataset references, and Context7 before using scikit-learn APIs.

Create clear modules for data loading/preprocessing, model training, evaluation, tests, a short README, and project rules.
Use a fixed random seed, uv, pytest, and Ruff.
Setelah alur kerja model berjalan, bangun antarmuka Streamlit atau Gradio kecil dan uji di Chromium dengan Webwright, termasuk perjalanan utama pengguna, perenderan hasil, error konsol, tangkapan layar, dan log.
Laporkan akurasi, F1 berbobot, F1 makro, perbandingan baseline, dan confusion matrix. Inisialisasi dan dorong repositori dengan GitHub CLI.
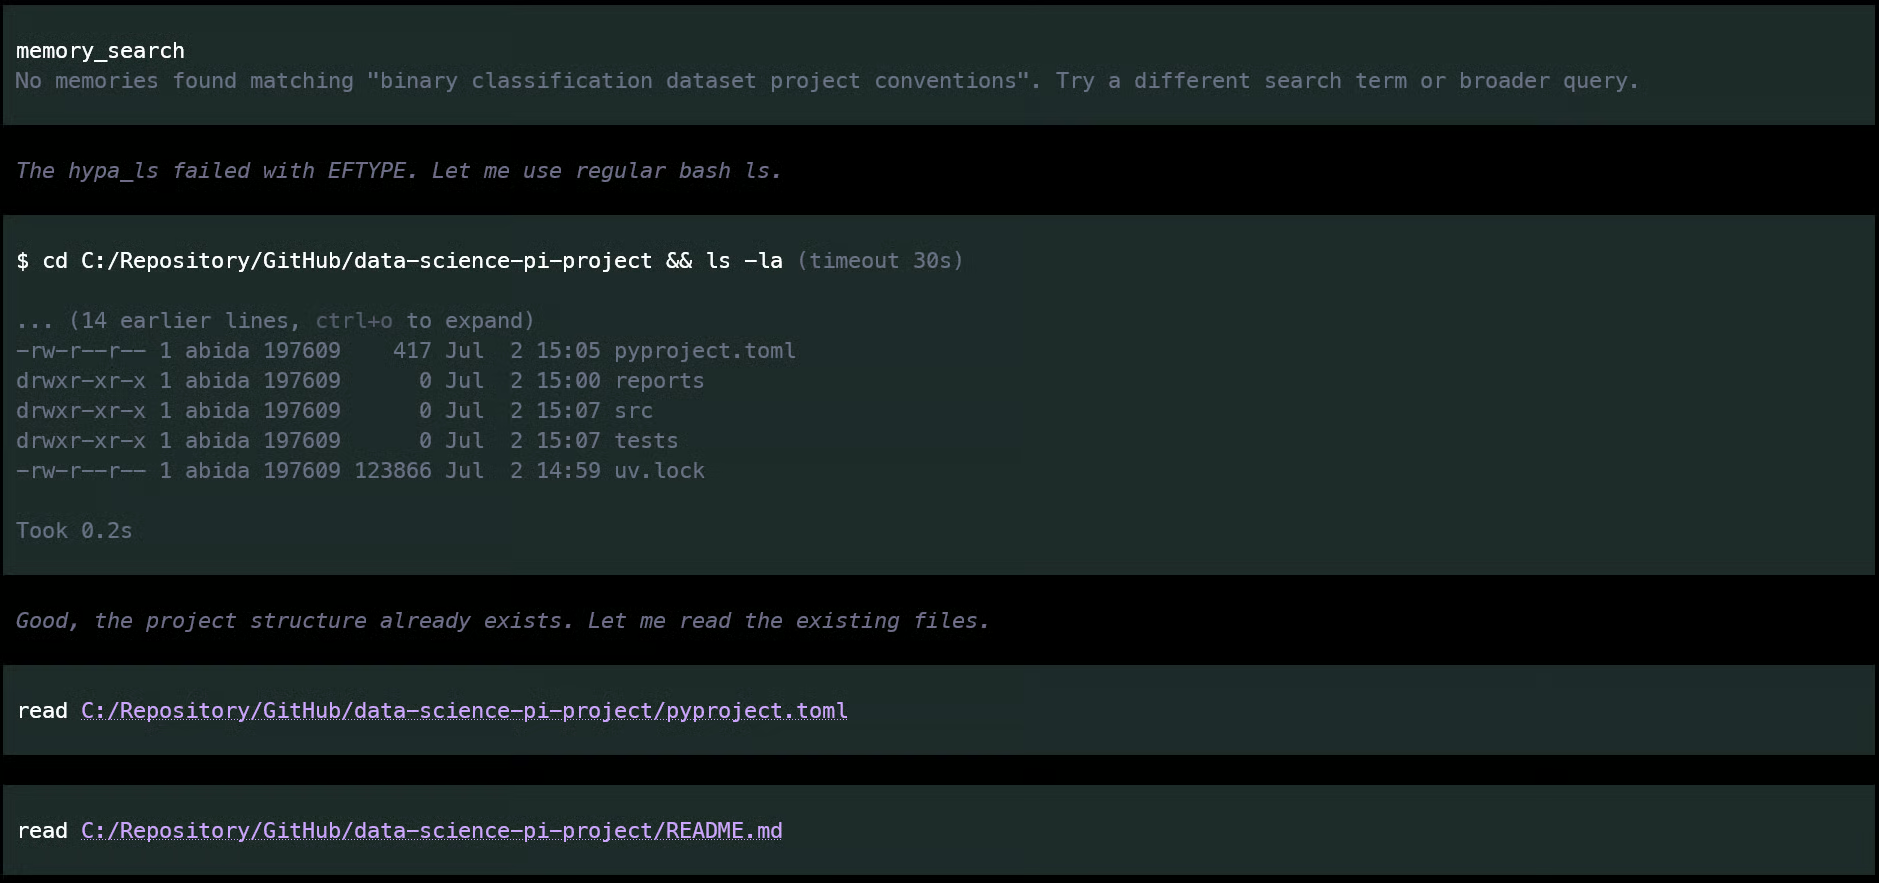
Pi terlebih dahulu memeriksa Hermes Memory untuk konteks sebelumnya yang terkait dengan proyek.
Seperti terlihat pada tangkapan layar, tidak ditemukan apa pun yang berguna, jadi Pi melanjutkan untuk meninjau direktori proyek saat ini.
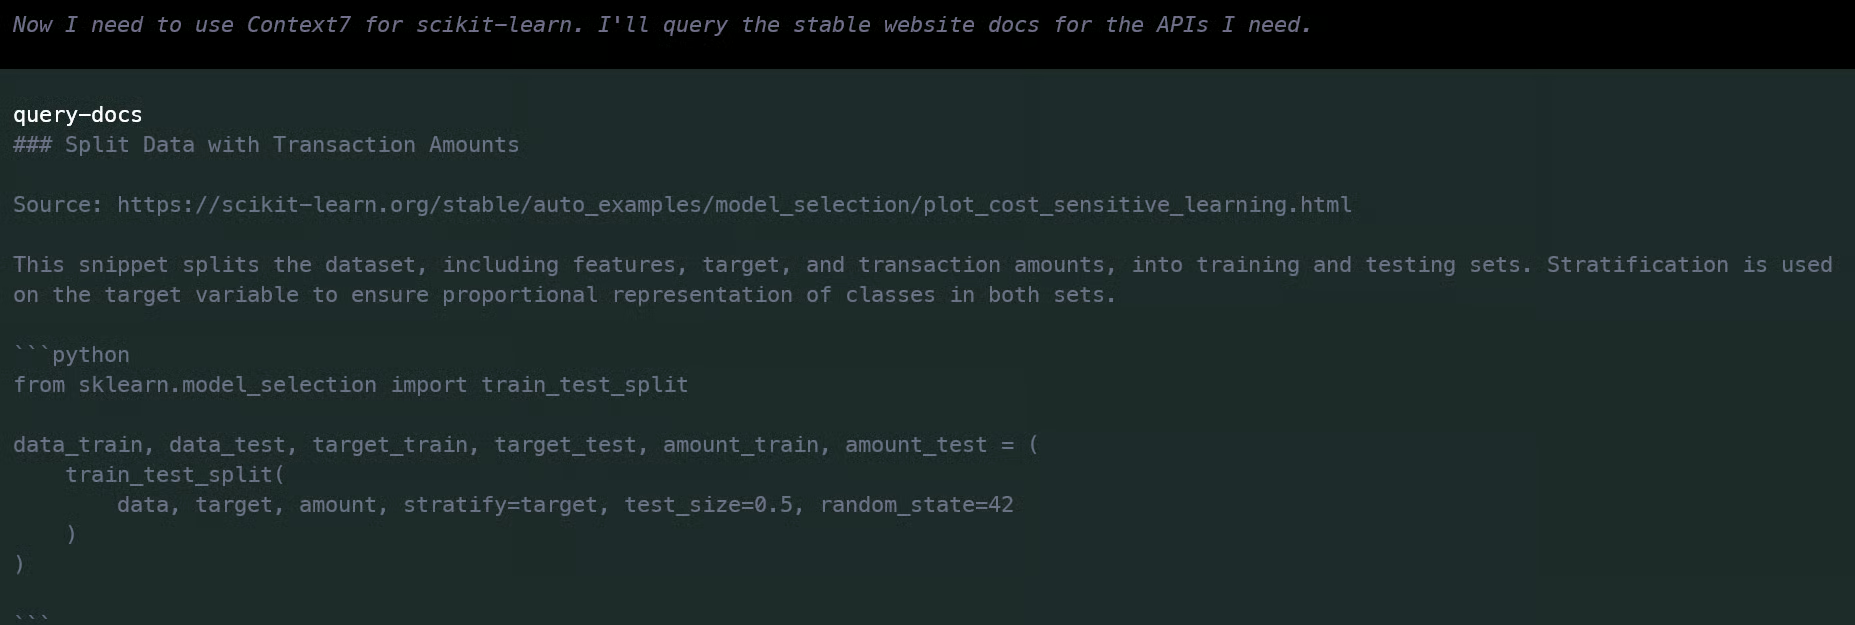
Setelah Pi memahami struktur direktori, ia menggunakan Context7 untuk memeriksa dokumentasi Python dan scikit-learn terkini sebelum menulis file proyek.
Ini berguna karena membantu agen menggunakan API terkini alih-alih mengandalkan contoh yang usang.
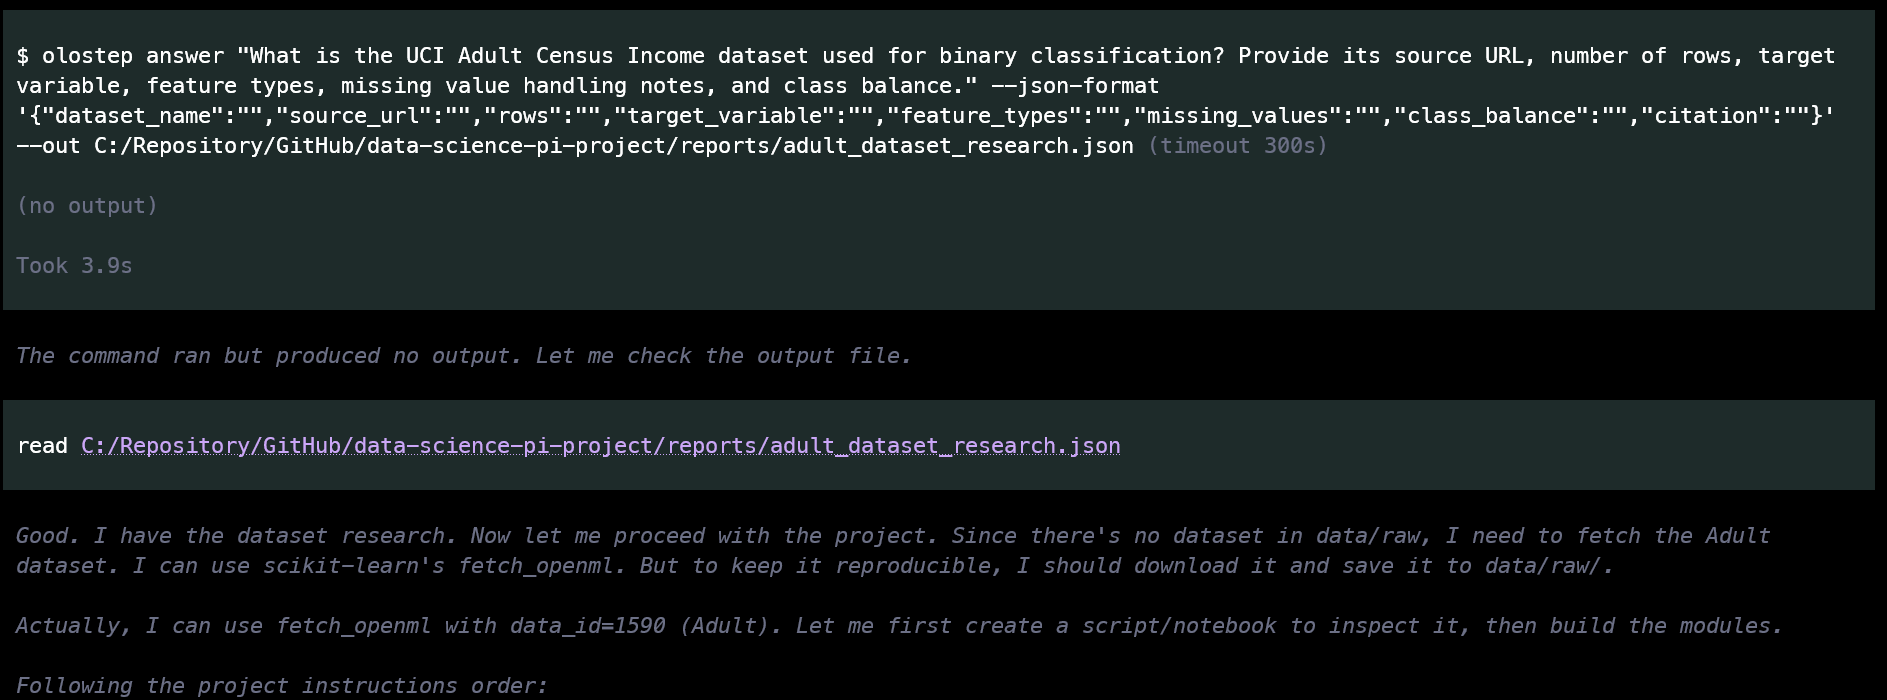
Berikutnya, Pi menggunakan skill riset Olostep untuk mencari dataset yang sesuai dan mengumpulkan informasi relevan untuk proyek.
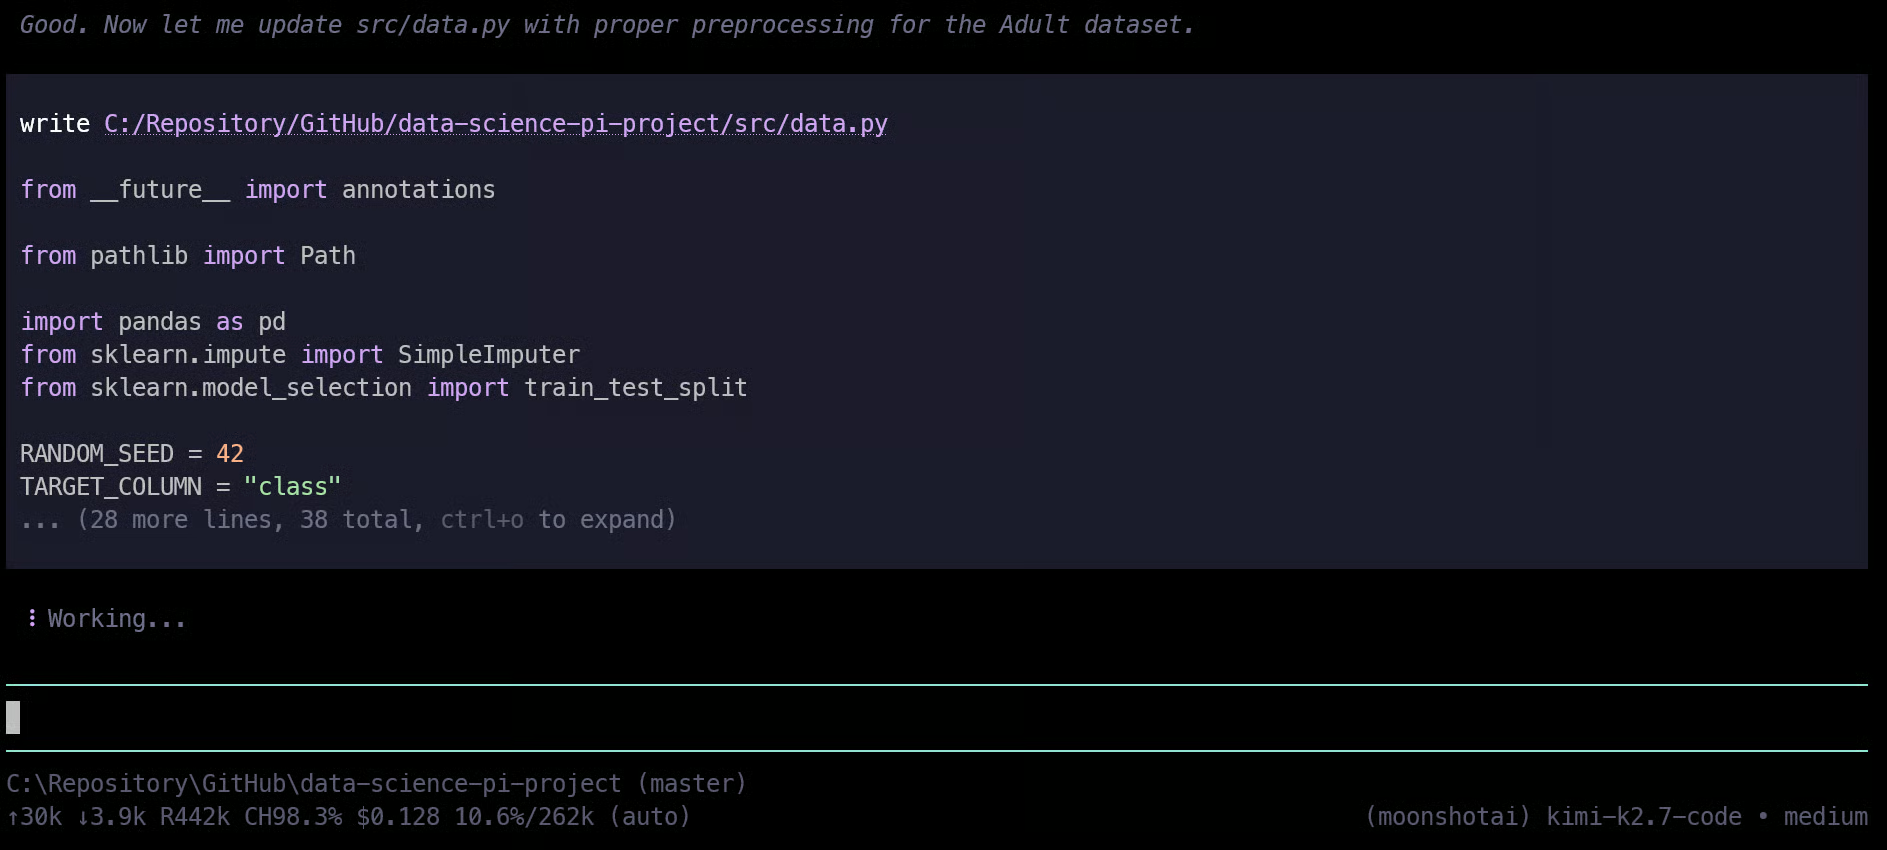
Setelah mengumpulkan konteks yang cukup, Pi mulai membuat file satu per satu, termasuk pipeline prapemrosesan, kode pelatihan, skrip evaluasi, pengujian, README, dan instruksi proyek.
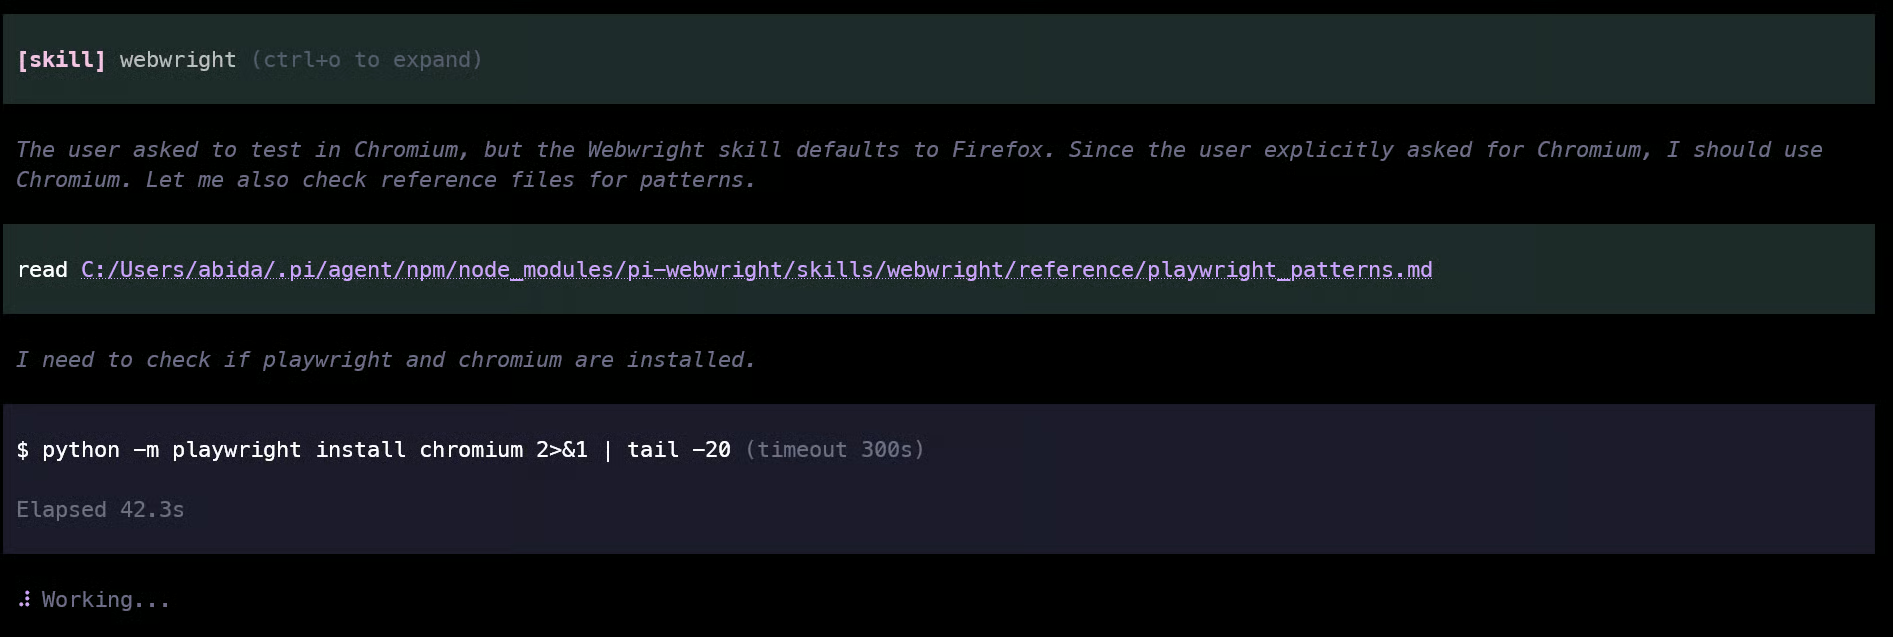
Setelah alur kerja machine learning selesai, Pi membuat aplikasi Streamlit kecil.
Kemudian Pi memasang Chromium untuk Playwright dan menggunakan Webwright untuk menguji antarmuka di browser nyata.
Uji browser memeriksa alur utama pengguna, memverifikasi bahwa hasil dirender dengan benar, memeriksa error konsol, serta menyimpan tangkapan layar dan log.
Pi juga menjalankan pengujian Python dan pemeriksaan proyek sebelum menghasilkan ringkasan akhir.
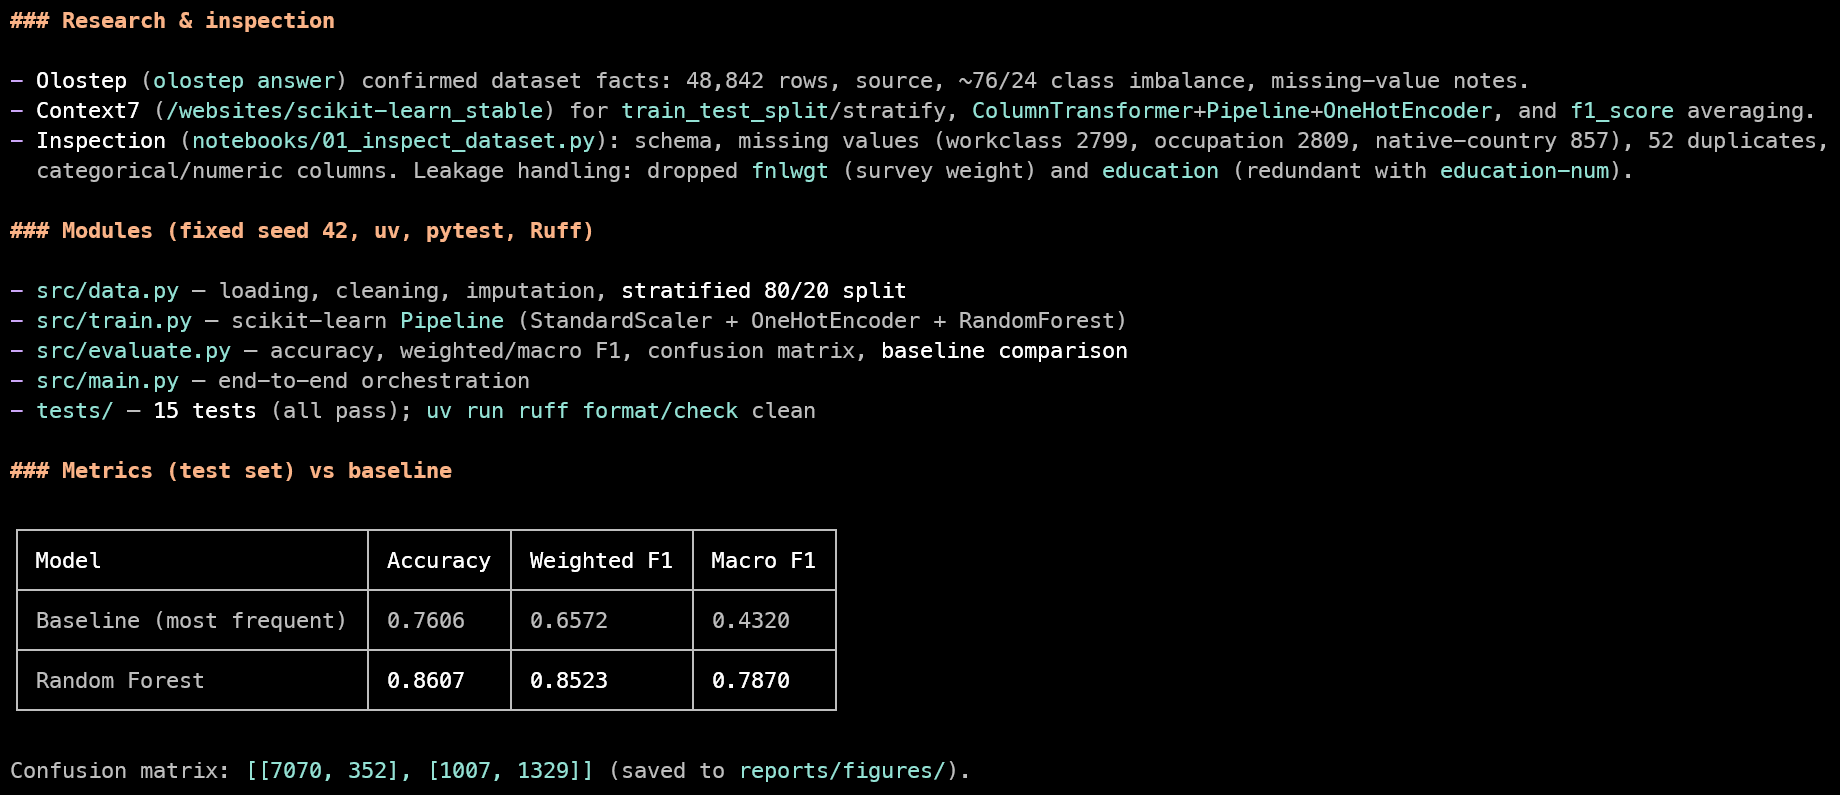
Dalam pengujian ini, model akhir mencapai sekitar 86% akurasi dan skor F1 0,85.
Pi kemudian melakukan commit perubahan, membuat repositori GitHub, dan mendorong proyek lengkap ke GitHub.
Repositori mencakup README, struktur proyek, kode sumber, pengujian, file evaluasi model, dan aplikasi Streamlit:
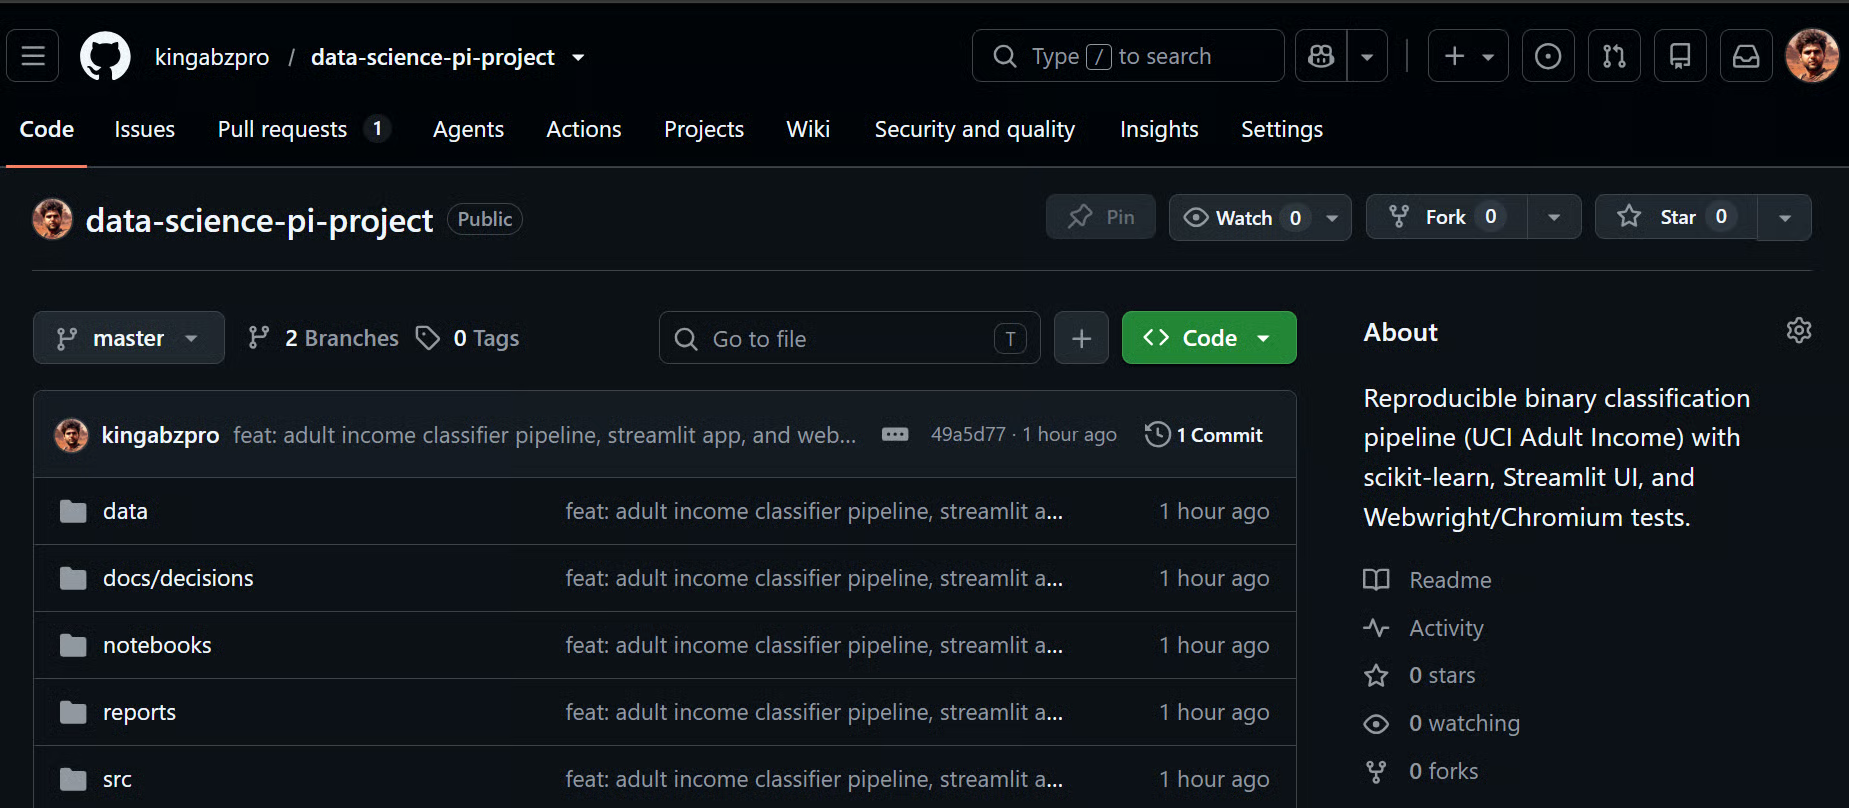
Sumber: kingabzpro/data-science-pi-project
Anda dapat menjalankan aplikasi secara lokal dengan:
streamlit run app.py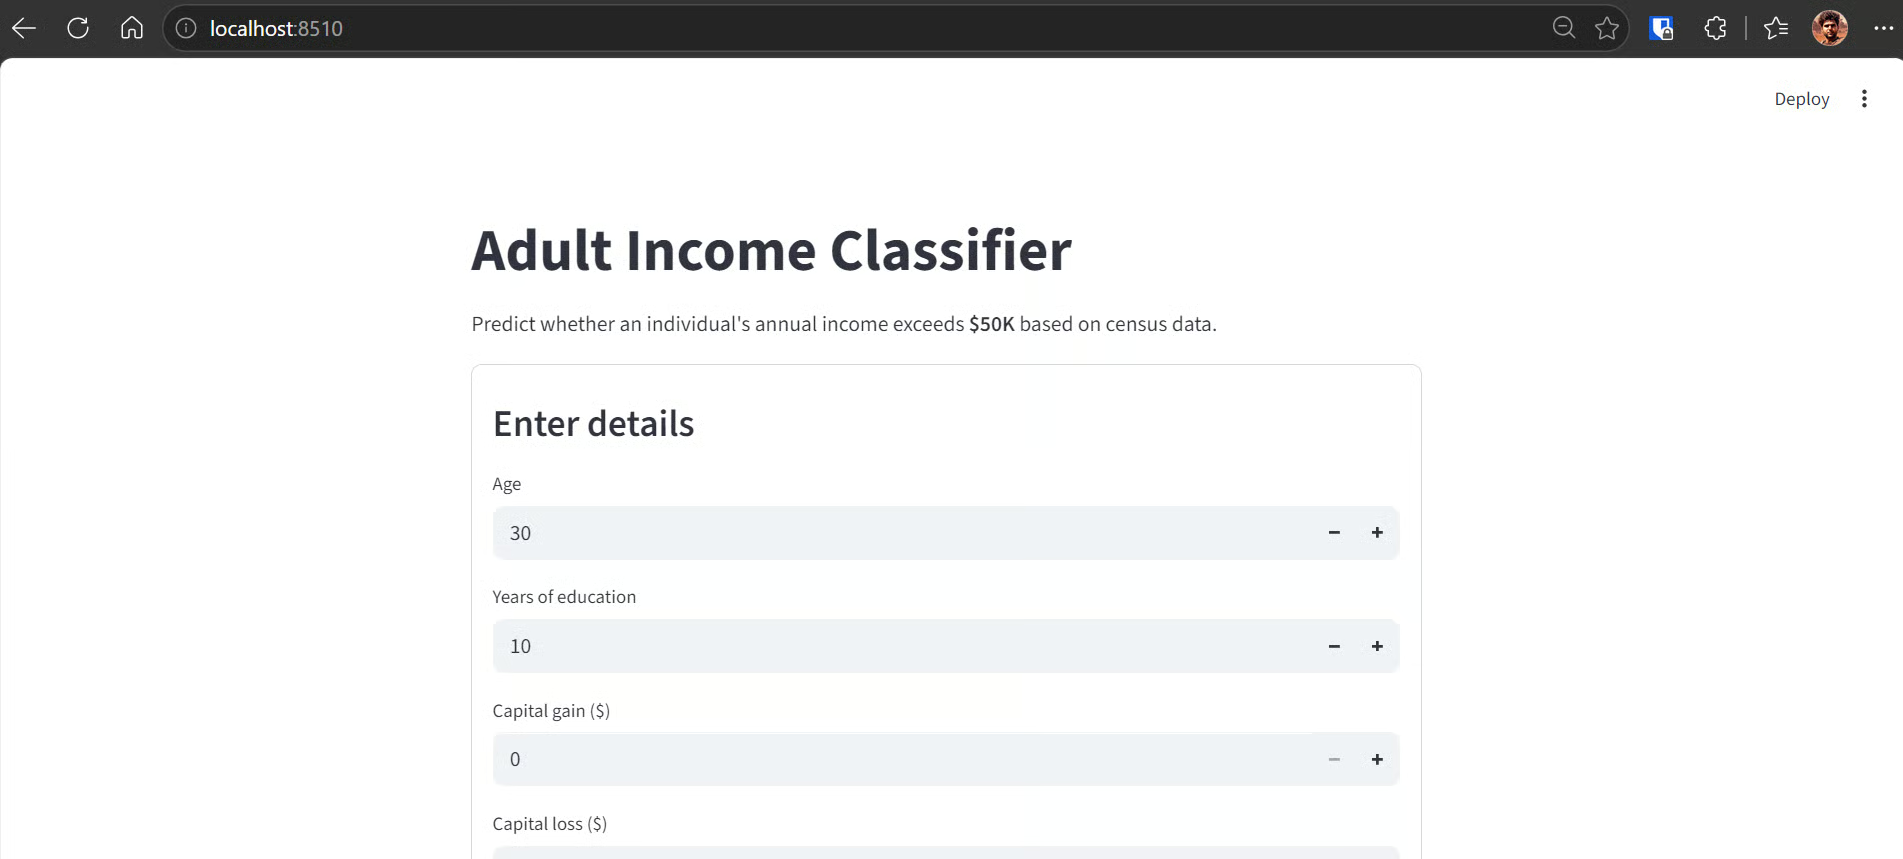
Antarmukanya bersih dan mudah dinavigasi, dan model mengembalikan prediksi dengan cepat.
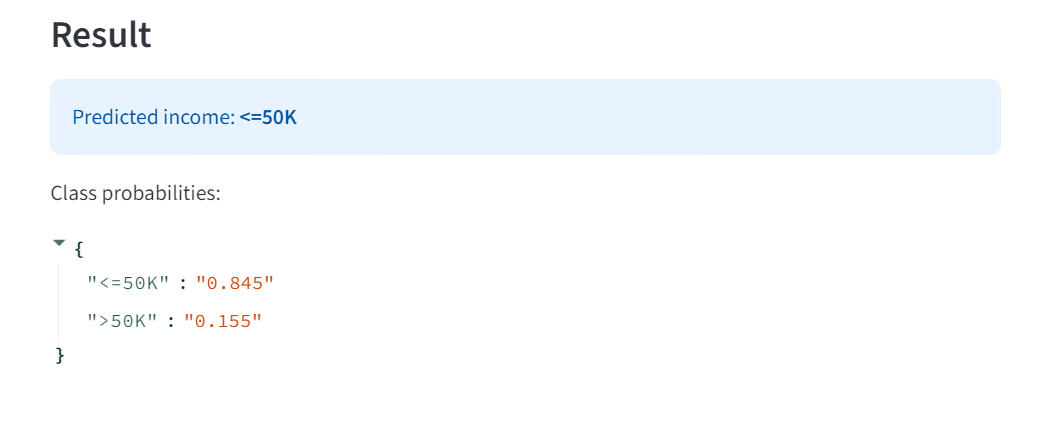
Yang lebih penting, pengujian ini menunjukkan nilai dari setup lengkap: Pi dapat meneliti tugas, memeriksa data, menggunakan dokumentasi terkini, membangun pipeline, membuat antarmuka, menguji pengalaman di browser, memvalidasi model, dan memublikasikan proyek jadi dalam satu alur kerja.
Kimi K2.7 Code dan Pi terbukti menjadi kombinasi yang kuat untuk pekerjaan koding praktis.
Kimi cepat, mumpuni, dan menangani tugas rekayasa multi-langkah dengan baik tanpa membuat keputusan yang lugas menjadi terlalu rumit.
Jika Anda menggunakan API alih-alih langganan koding, menambahkan setidaknya $10 kredit patut dipertimbangkan untuk mengakses tier penggunaan yang lebih tinggi dan menghindari cepat mencapai batas harian.
Yang paling mengesankan bagi saya adalah betapa sedikit koordinasi manual yang dibutuhkan alur kerja setelah semuanya disiapkan.
Dengan satu prompt yang terperinci, Pi memeriksa Hermes Memory untuk konteks proyek yang relevan, meninjau direktori proyek, menggunakan Context7 untuk memverifikasi dokumentasi Streamlit dan scikit-learn terkini, serta menggunakan Olostep untuk meneliti dataset dan penyiapan masalah.
Dari sana, Pi membuat file proyek, membangun pipeline machine learning, mengembangkan aplikasi Streamlit, dan menguji antarmuka dengan Webwright dan Playwright.
Pi juga menjalankan pengujian Python, memeriksa metrik model, meninjau perilaku browser, menghasilkan ringkasan akhir, melakukan commit perubahan, dan mendorong repositori yang telah selesai ke GitHub.
Secara keseluruhan, setup ini terasa bukan seperti mengelola asisten koding secara manual, melainkan memberikan arahan yang jelas kepada alur kerja pengembangan yang terotomatisasi.
Setelah alat yang tepat terhubung, Pi menangani sebagian besar pekerjaan berat sementara Kimi menyediakan kecepatan dan penalaran yang dibutuhkan untuk menjaga proses tetap berjalan.
Ingin menyelami lebih dalam cara kerja agen AI di balik layar? Saya merekomendasikan kursus Building Scalable Agentic Systems dari DataCamp untuk mempelajari prinsip desain, kerangka pengujian, dan protokol (seperti MCP) yang dibutuhkan untuk membawa agen AI dari proof-of-concept ke produksi.
Kursus Teratas di DataCamp
Kursus
Kursus
Kursus
blogs
Javier Canales Luna
14 mnt
blogs
David Woods
13 mnt
blogs
Dario Radečić
15 mnt
blogs
Hugo Bowne-Anderson
13 mnt