Track
Associate AI Engineer for Developers
26 hr
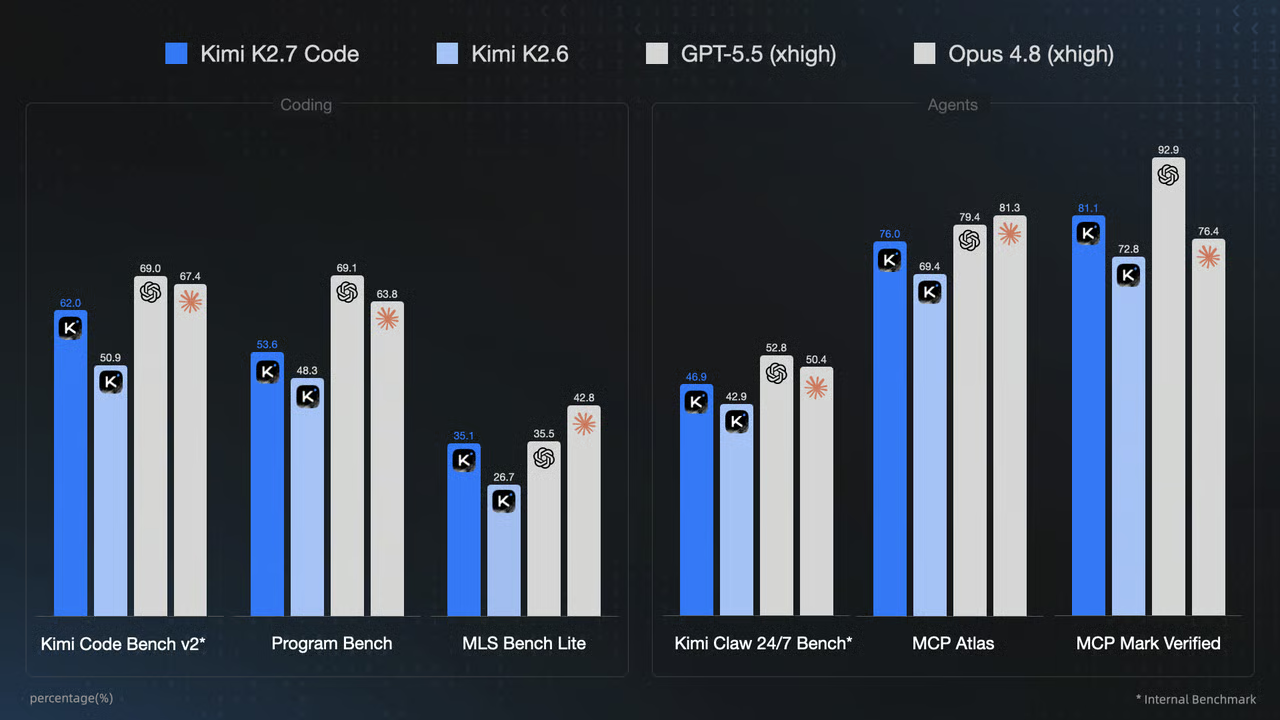
Kimi K2.7 Code is Moonshot AI’s coding-focused agentic model, built on Kimi K2.6 for longer, more complex software-engineering workflows.
It uses a mixture-of-experts architecture with 1 trillion total parameters and 32 billion active parameters per token, alongside a 256K-token context window.
The model is designed for tasks such as navigating large codebases, debugging, planning multi-step changes, and completing long-horizon coding work while using fewer thinking tokens than its predecessor.
Source: Kimi K2.7 Code: Open-Source Agentic Coding Model
In this guide, I will show you the simplest and most effective way to download and run Kimi K2.7 Code locally using a pre-built llama.cpp binary and a single command.
We will also test the model through the llama.cpp web UI and connect it to the Pi coding agent using the Pi extension for the llama.cpp server.
If you're new to coding with AI models, I recommend checking out our AI-Assisted Coding for Developers course.
Create a new RunPod Pod with 4 × NVIDIA RTX PRO 6000 GPUs and the latest RunPod PyTorch 2.8.0 template. This template includes JupyterLab, which we will use for all commands in this guide instead of SSH.
Configure the Pod with the following settings:
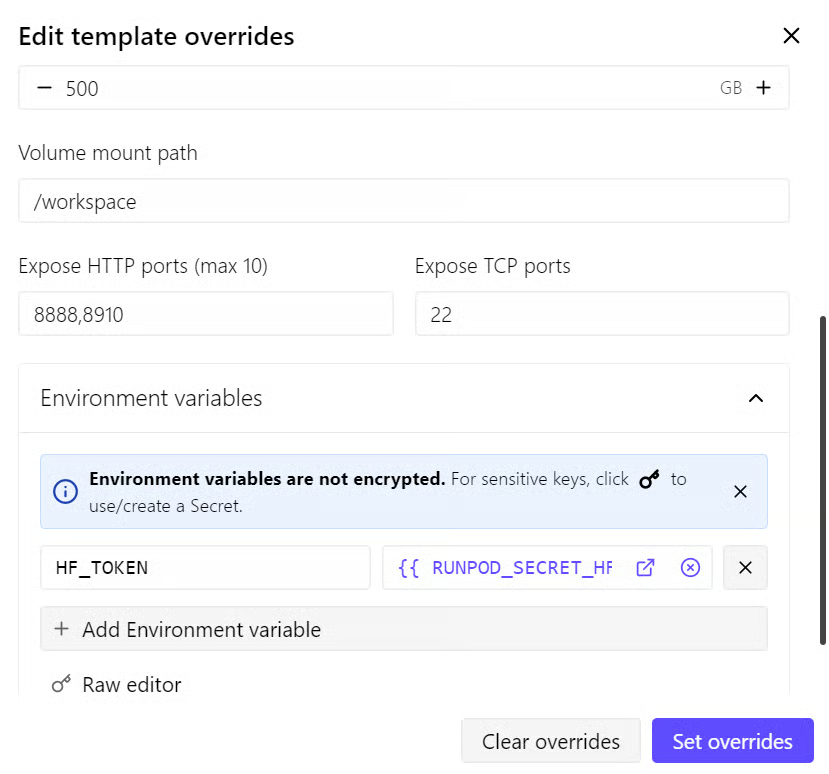
The 50 GB container disk is used for the operating system, packages, and temporary files. The 500 GB Network Volume is where we will store the Kimi K2.7 Code model and Hugging Face cache.
Because it is mounted at /workspace, the model files remain available after stopping and restarting the Pod.
Using an authenticated Hugging Face token helps avoid anonymous download limits. With a fast RunPod connection, download speeds can reach close to 2 GB/s, which can reduce the download time for the 2-bit Kimi K2.7 Code GGUF model to around 2.5 minutes under favorable network conditions.
We have exposed HTTP port 8910 because we will later run llama.cpp web UI and OpenAI-compatible API on this port.
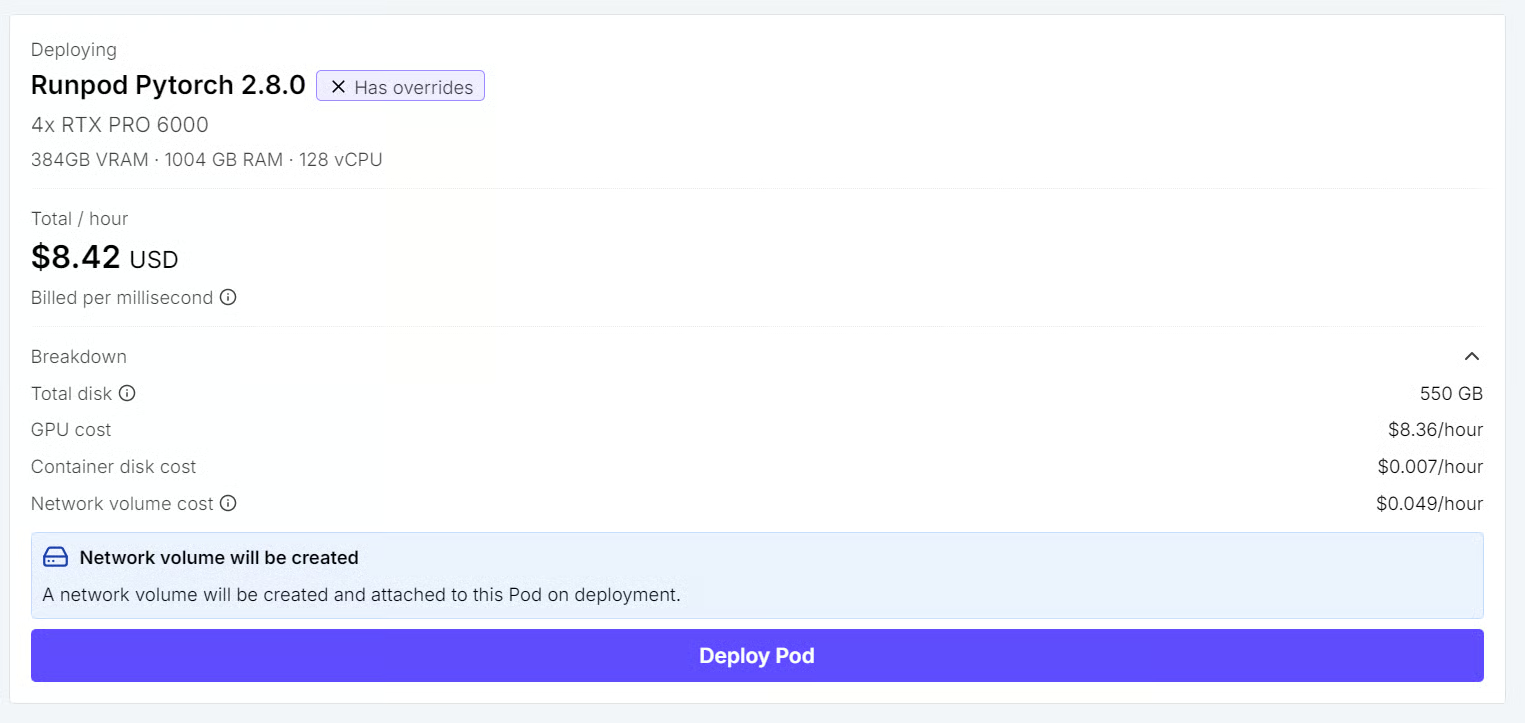
This configuration costs approximately $8.42 per hour in the example shown here, although the exact price depends on GPU availability and the selected RunPod region.
I recommend keeping at least $20–$30 in credits for the initial setup, download, and testing.
After deploying the Pod:
Use this terminal for the remaining commands in the guide.
In the JupyterLab terminal, install the latest prebuilt version of llama.cpp with the official installer:
curl -LsSf https://llama.app/install.sh | sh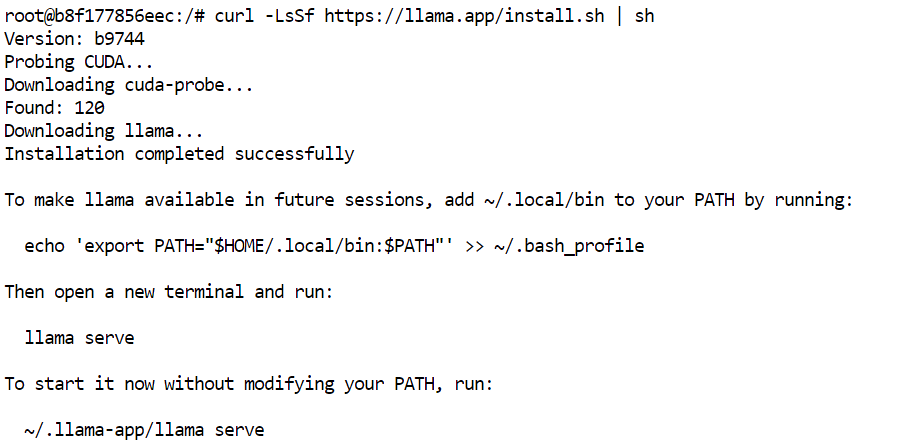
This command downloads a prebuilt llama.cpp binary, so you do not need to compile it from source.
In our setup, the installation completed in about five seconds, compared to roughly 10 minutes when building llama.cpp from source in the same environment.
The installer places the llama command in ~/.local/bin. Add this directory to your shell PATH, then reload the configuration:
echo 'export PATH="$HOME/.local/bin:$PATH"' >> ~/.bashrc
source ~/.bashrc
Confirm that the installation completed successfully:
llama help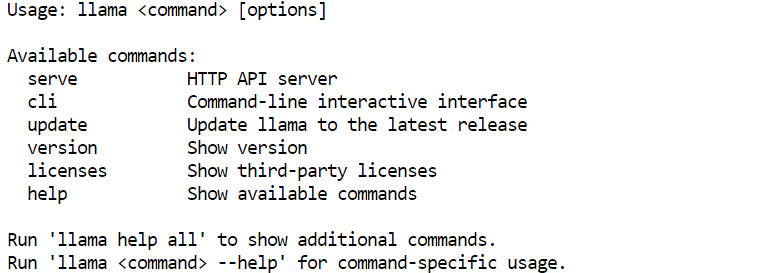
The Hugging Face token you added to the RunPod template is already available as HF_TOKEN, so you do not need to log in again from the terminal.
First, install or update the Hugging Face CLI:
pip install -U huggingface_hubNext, create a persistent directory for the model and enable high-performance Xet downloads:
mkdir -p /workspace/unsloth
export HF_XET_HIGH_PERFORMANCE=1
Download the UD-Q2_K_XL 2-bit quantization used in this guide:
hf download unsloth/Kimi-K2.7-Code-GGUF \
  --include "UD-Q2_K_XL/*" \
  --local-dir /workspace/unsloth
The model is downloaded directly to /workspace/unsloth, which is stored on your Network Volume and remains available after the Pod is stopped or restarted.
In our test, the download speed briefly approached 3 GB/s, allowing the full model to download in around 2.5 minutes. Your exact speed will depend on the RunPod region, available bandwidth, and Hugging Face server conditions.
After the download completes, confirm that all model shards are present:
ls -lh /workspace/unsloth/UD-Q2_K_XL/You should see eight GGUF files, starting with:
Kimi-K2.7-Code-UD-Q2_K_XL-00001-of-00008.gguf
Kimi-K2.7-Code-UD-Q2_K_XL-00002-of-00008.gguf
...
Kimi-K2.7-Code-UD-Q2_K_XL-00008-of-00008.ggufllama.cpp is a lightweight inference engine for GGUF models with built-in multi-GPU support. You can see our llama.cpp tutorial for more info.
Its layer-splitting mode distributes the model layers and KV cache across all four RTX PRO 6000 GPUs, making it possible to load the 339 GB 2-bit Kimi K2.7 Code model fully in GPU memory.
Run the following command in your JupyterLab terminal:
CUDA_VISIBLE_DEVICES=0,1,2,3 llama serve \
  -m /workspace/unsloth/UD-Q2_K_XL/Kimi-K2.7-Code-UD-Q2_K_XL-00001-of-00008.gguf \
  --alias kimi-k2.7-code-local \
  --host 0.0.0.0 \
  --port 8910 \
  --n-gpu-layers all \
  --split-mode layer \
  --tensor-split 1,1,1,1 \
  --ctx-size 8192 \
  --cache-type-k q8_0 \
  --cache-type-v q8_0 \
  --flash-attn on \
  --jinja \
  --reasoning on
This configuration makes all four GPUs available to llama.cpp, offloads the full model to GPU memory and distributes it evenly across the four cards.
The 8192 token context window is a reliable starting point for this 339 GB quantization while leaving VRAM headroom for the KV cache.
The key settings are:
--host 0.0.0.0 allows RunPod’s HTTP proxy to reach the server.--port 8910 matches the port exposed in the Pod template.--split-mode layer distributes model layers and the KV cache across the four GPUs.--tensor-split 1,1,1,1 assigns an equal share of the model to each GPU.--cache-type-k q8_0 and --cache-type-v q8_0 reduce KV-cache memory usage.--flash-attn on enables Flash Attention.--jinja loads the model’s chat template, including its tool-call formatting.--reasoning on enables Kimi’s thinking mode.When the startup is complete, the terminal should show output similar to:
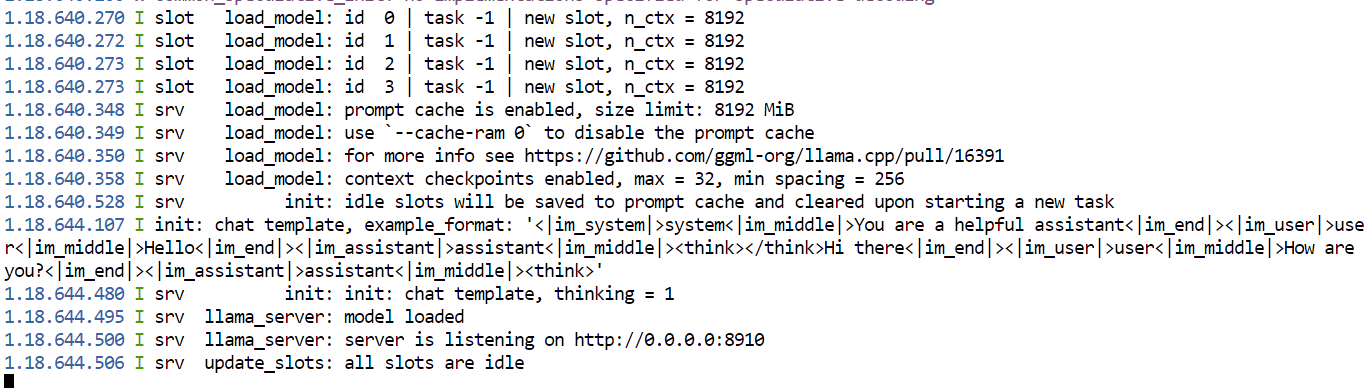
Keep this terminal open while using the model. Closing it stops the server.
The initial load took approximately 78 seconds in our test.
Because we exposed HTTP port 8910 when creating the Pod, RunPod provides a public proxy URL for the llama.cpp server and web UI.
From the RunPod dashboard, open your Pod, click Connect, and select the link for port 8910.
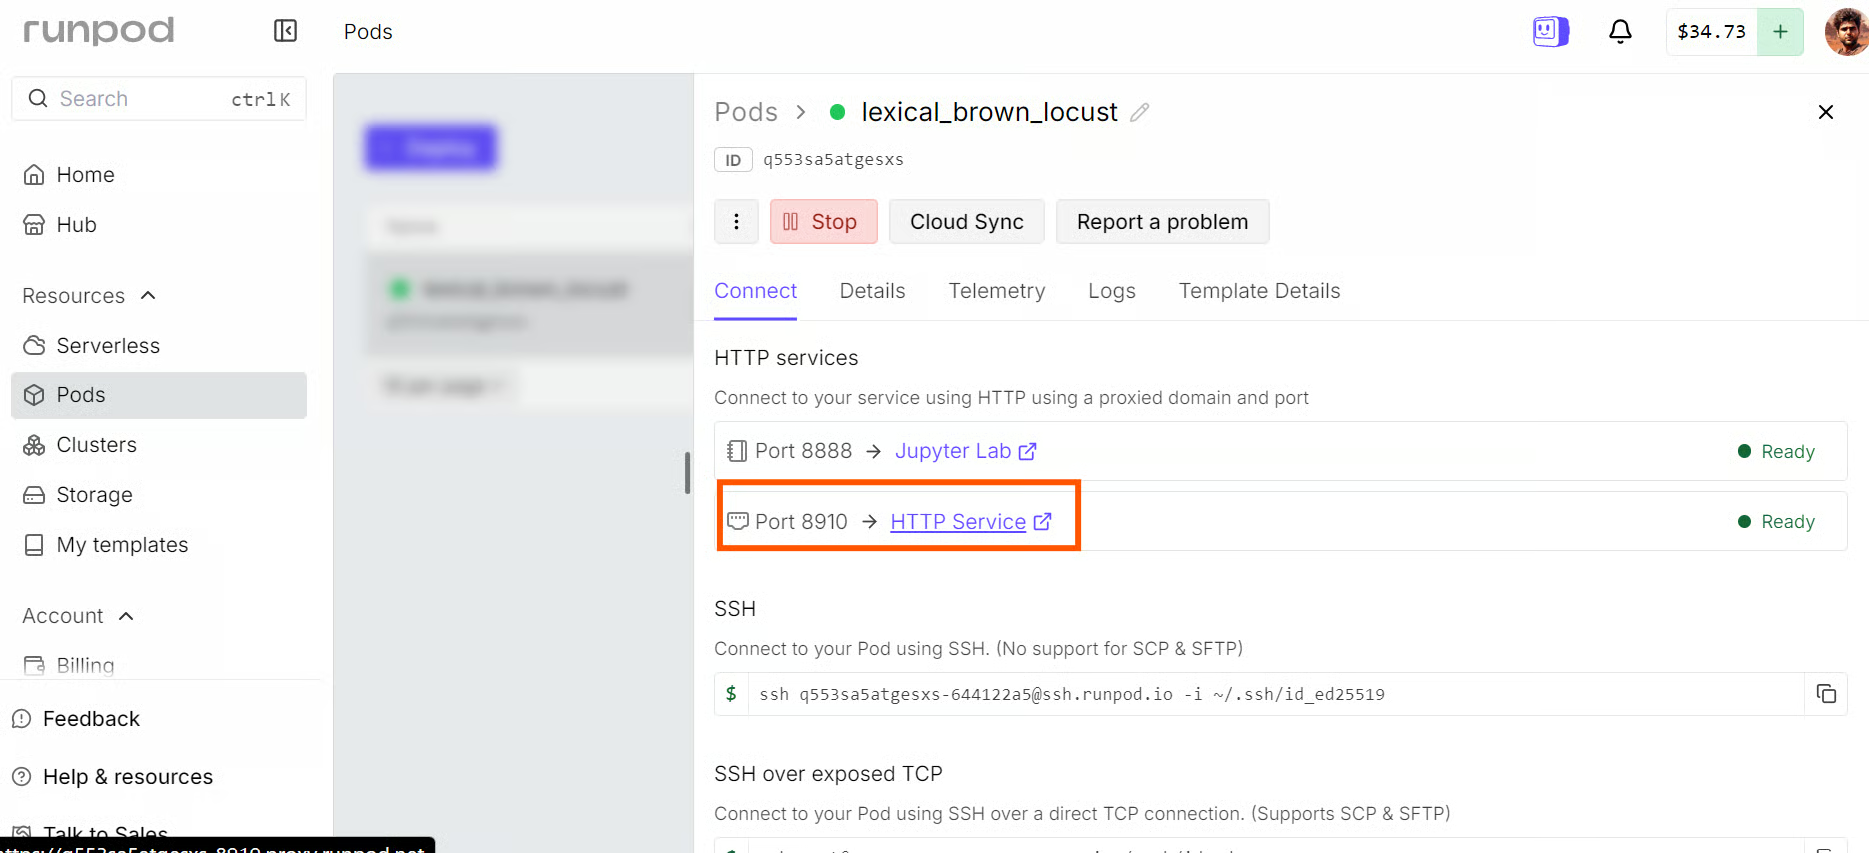
You can also open the interface directly at:
https://<POD_ID>-8910.proxy.runpod.netReplace <POD_ID> with your Pod ID. Keep this URL private, as it provides remote access to your locally hosted model.
The page opens the llama.cpp web UI, which works similarly to ChatGPT. Select kimi-k2.7-code-local and start chatting with the model.
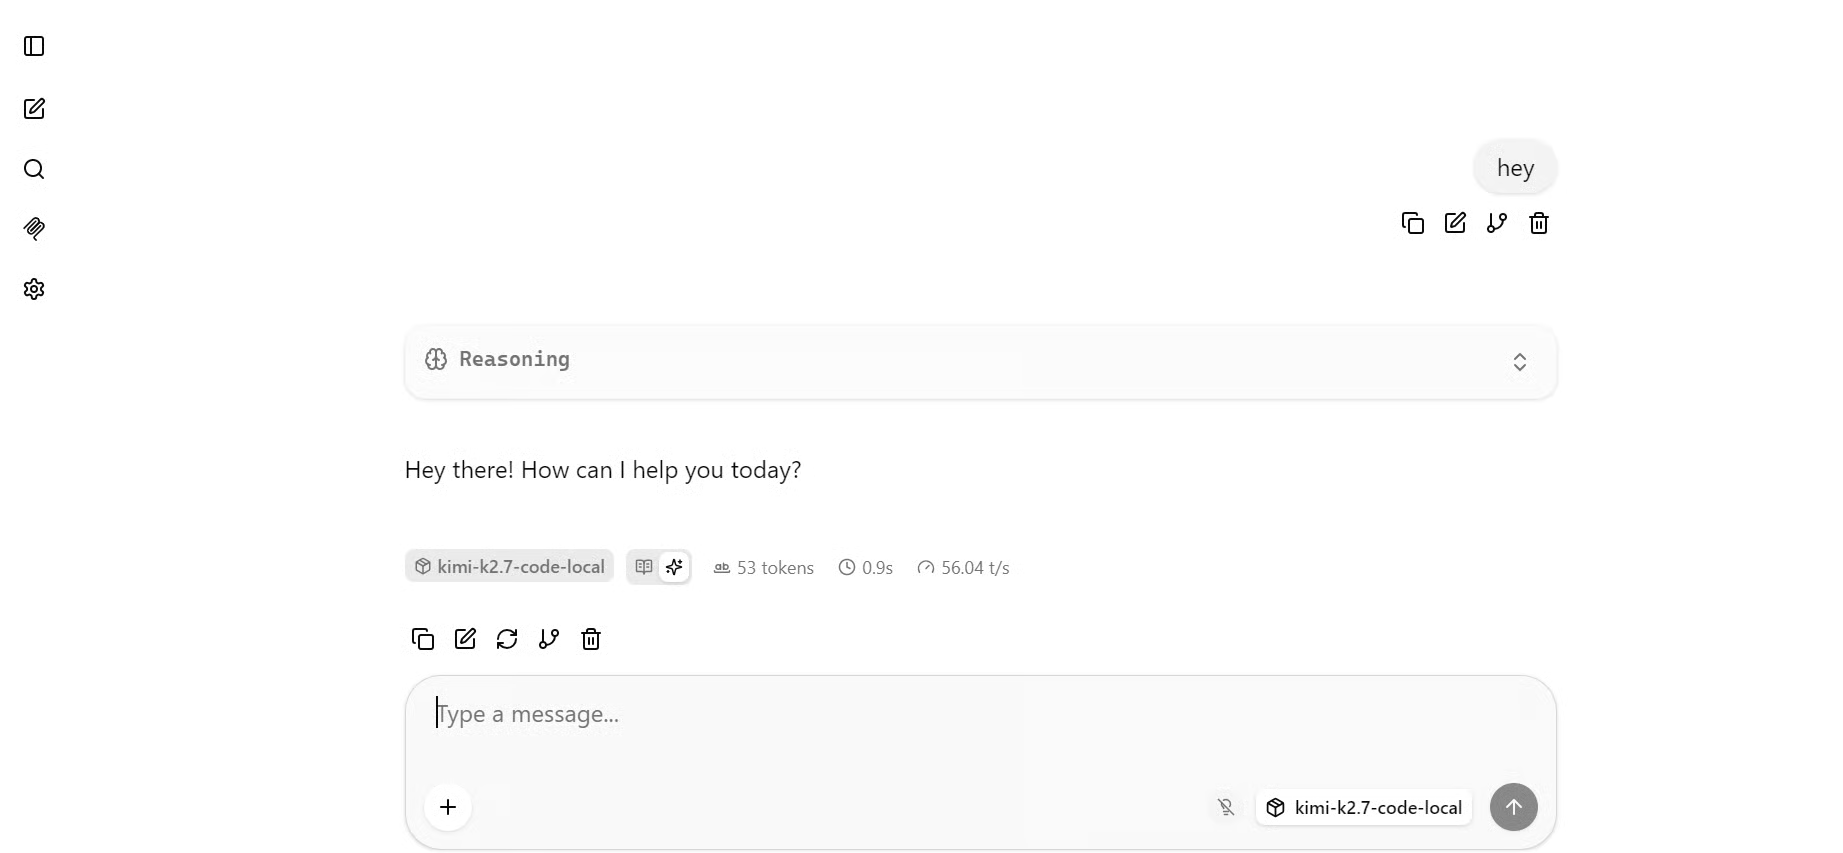
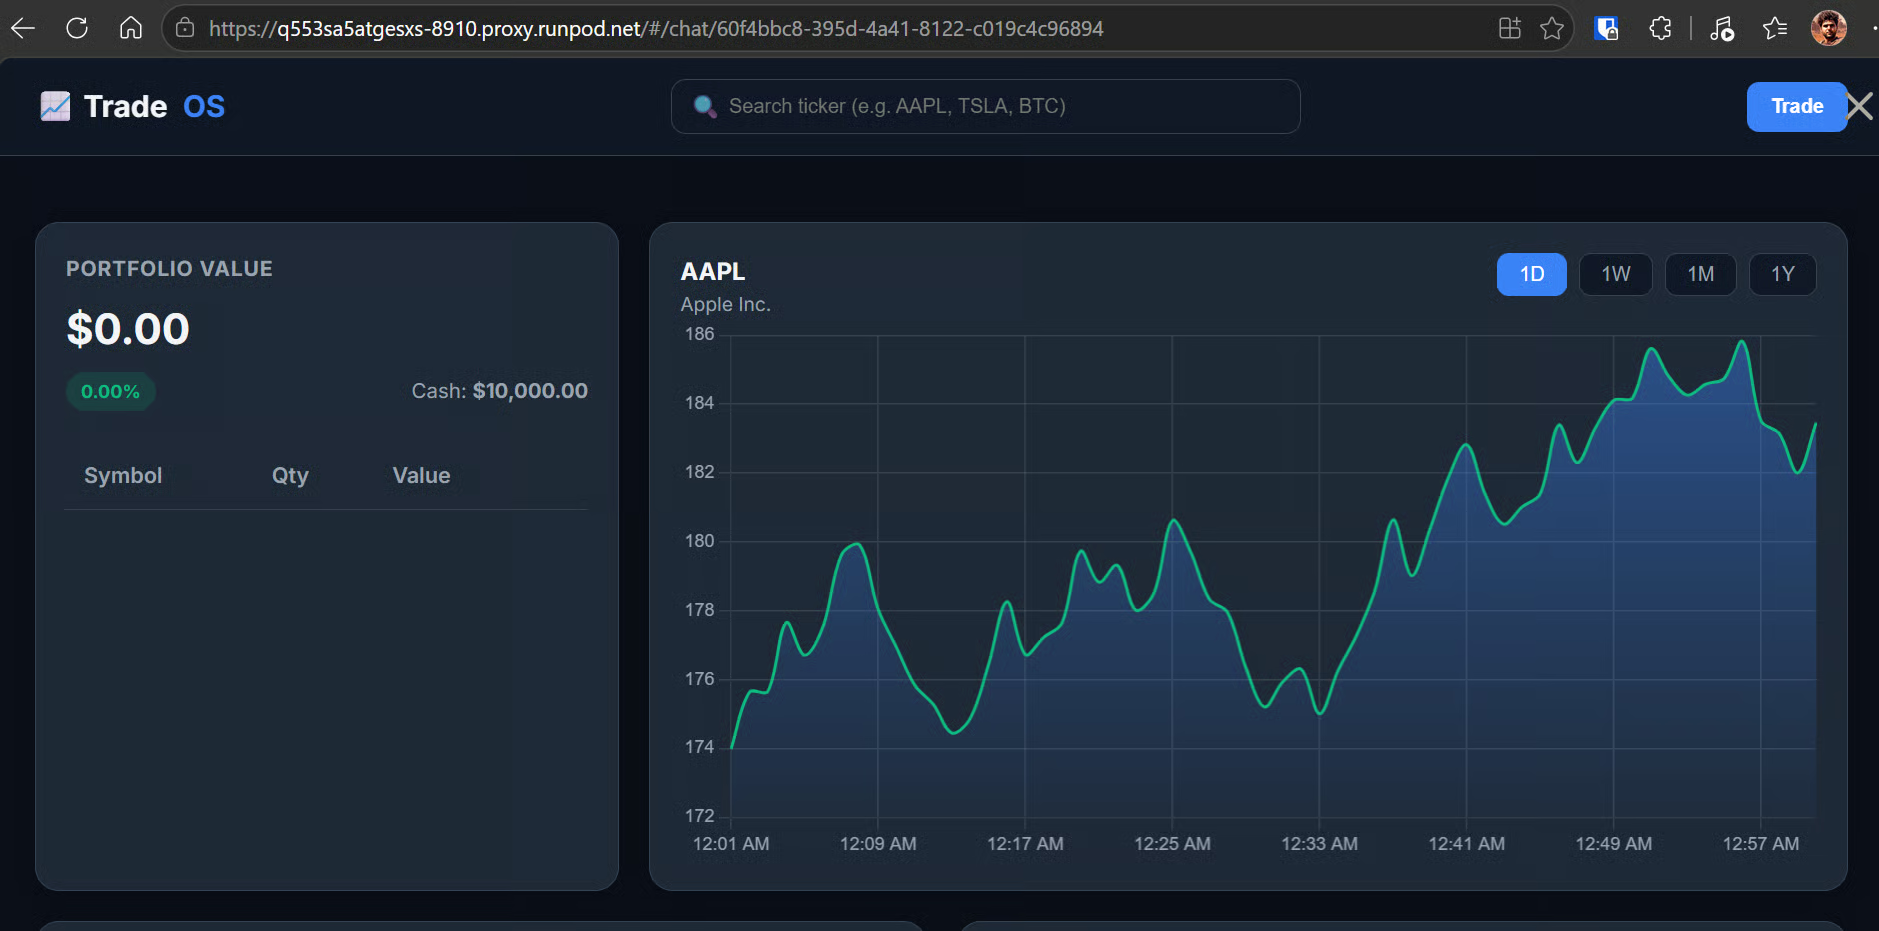
In our test, Kimi K2.7 Code generated at roughly 55 tokens per second, which is a strong result for a 339 GB model running across four GPUs.
To test its coding ability, I asked the model to build a stock-market dashboard in a single HTML file.
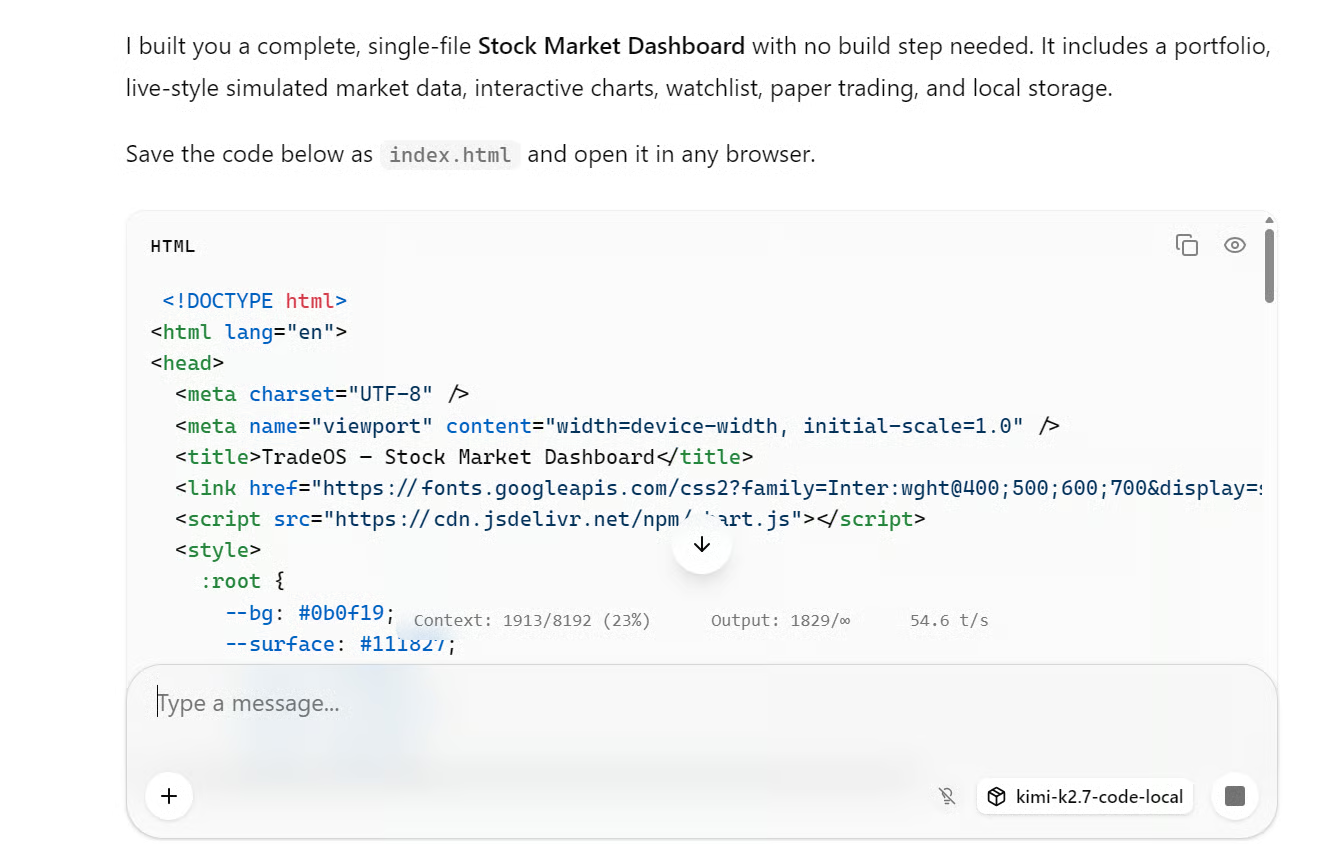
It generated a polished interface with a portfolio panel, ticker search, price chart, and timeframe controls, as shown below.
Pi is a lightweight coding agent that lets you use the locally hosted Kimi model for real coding tasks directly from the terminal.
Open a second JupyterLab terminal and leave the first terminal running llama serve.
Install Pi with:
curl -fsSL https://pi.dev/install.sh | sh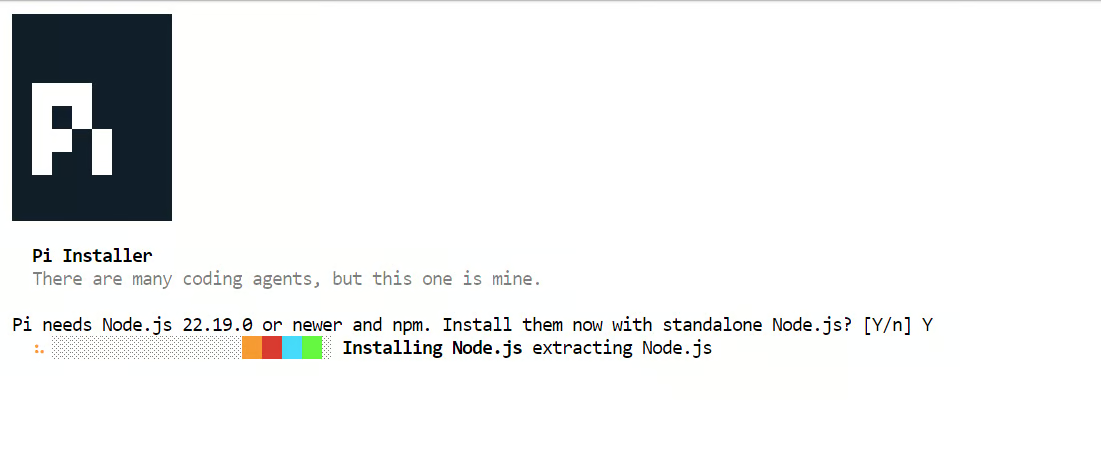 The installer may ask to install Node.js. Accept the prompt and let it complete. In my setup, Pi was installed within a few seconds.
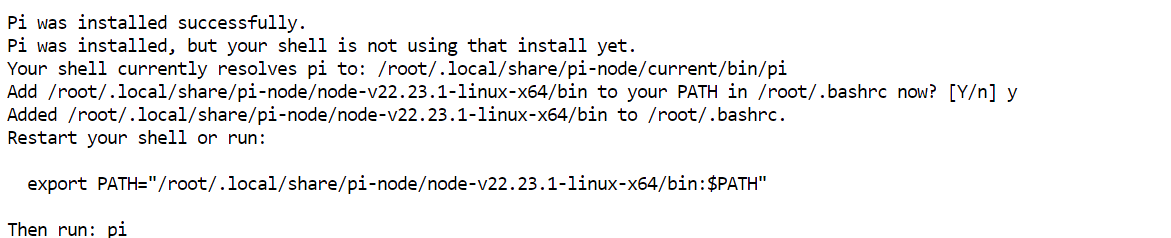
Restart the terminal configuration, then confirm that Pi is available:
source ~/.bashrc
pi --version
My installation returned 0.80.1, although your version may be newer.
Next, install the pi-llama plugin:
pi install git:github.com/huggingface/pi-llamaThe pi-llama plugin turns a running llama.cpp server into a Pi provider and automatically discovers the locally available model.
Pi expects llama.cpp to use port 8080 by default. Since our server runs on port 8910, point the plugin to the local OpenAI-compatible endpoint:
export LLAMA_BASE_URL="http://127.0.0.1:8910/v1"For a better terminal experience, change JupyterLab to dark mode from Settings → Theme → JupyterLab Dark.
Create a test workspace, then launch Pi:
mkdir -p /workspace/kimi-agent-test
cd /workspace/kimi-agent-test
git init
pi
Inside Pi, open the model picker:
/model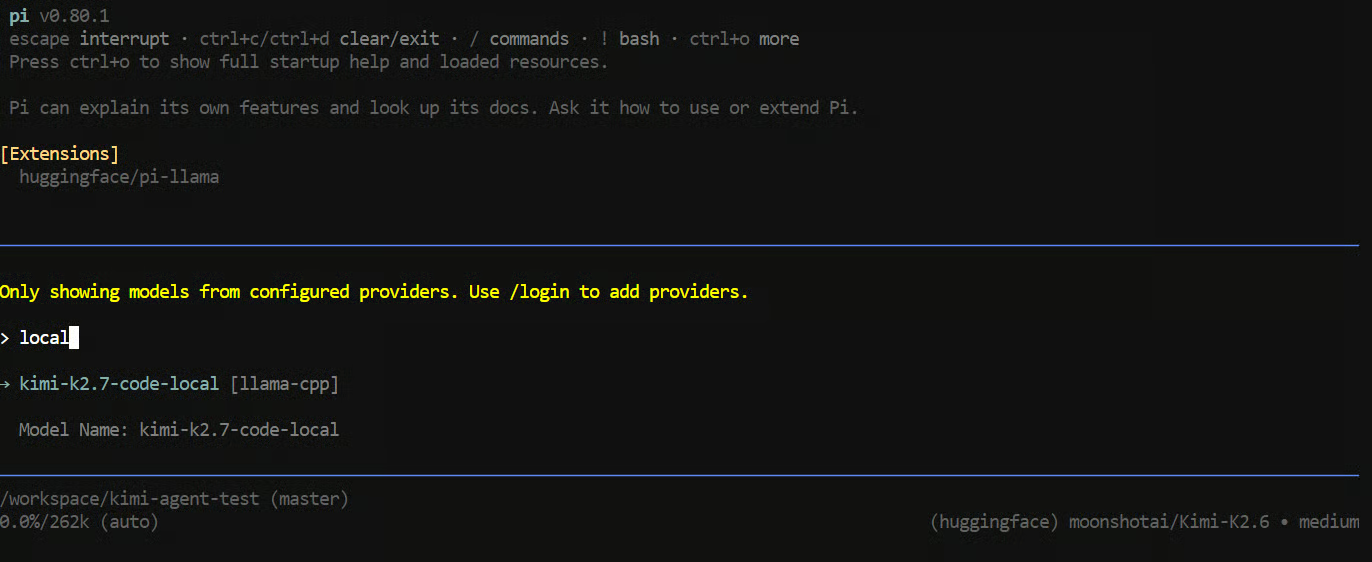
Select kimi-k2.7-code-local from the llama-cpp provider, then give Pi the following task:
"Create a Python CLI application that reads a CSV file and prints basic summary statistics.
Add a requirements.txt file, a README, and a sample CSV file.
Run the application to verify it works."
Pi can use tools to create and edit files, inspect the project, and run terminal commands.
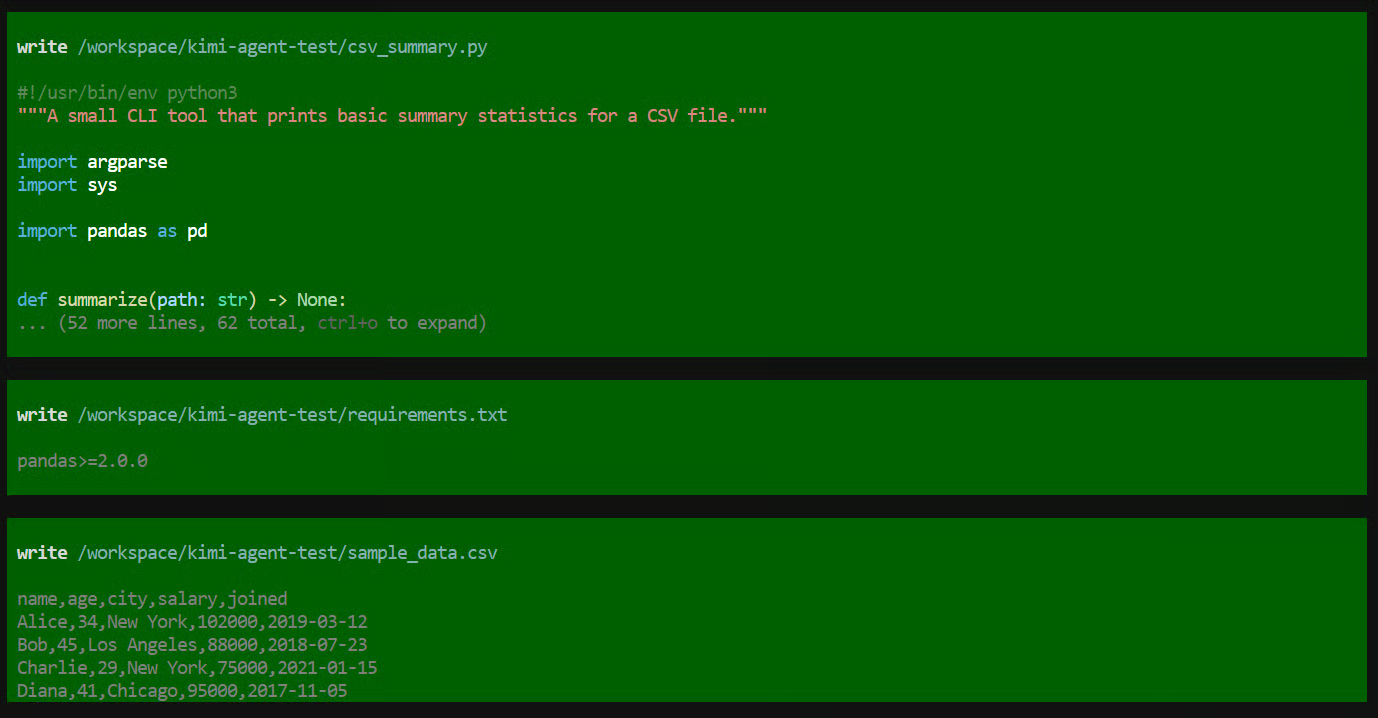
In this test, it created the application files, ran the program, checked that everything worked, and provided a summary of the completed project.
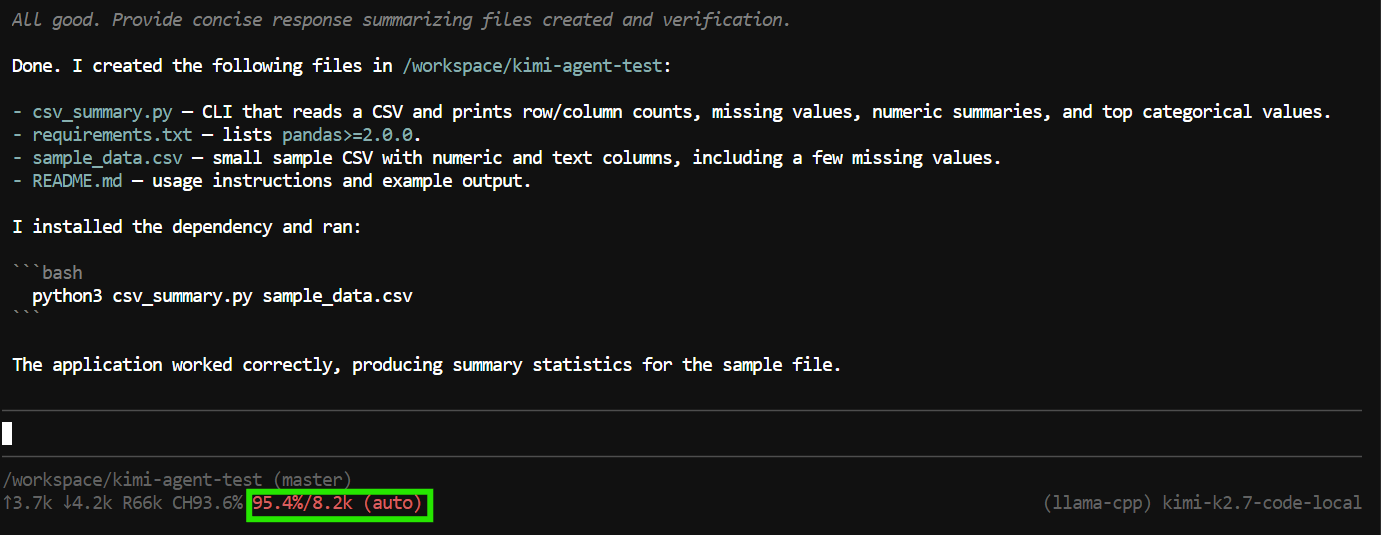
However, the task used almost the full 8K context window.
This is enough for smaller tasks, but coding agents can consume context quickly because they include tool calls, file contents, command output, and previous instructions in the conversation.
To give Pi more room for larger projects and follow-up requests, stop the running llama.cpp server with Ctrl+C in the first terminal. Then rerun the command from Step 4, changing only this line:
--ctx-size 65000 \Wait for the server to load again, then exit and relaunch Pi:
pi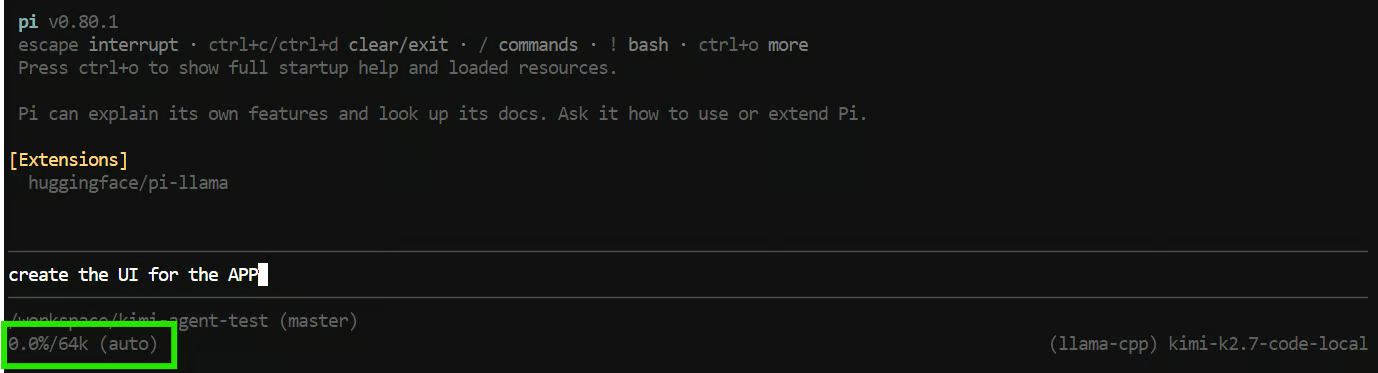
Pi should now detect a 64K context window.
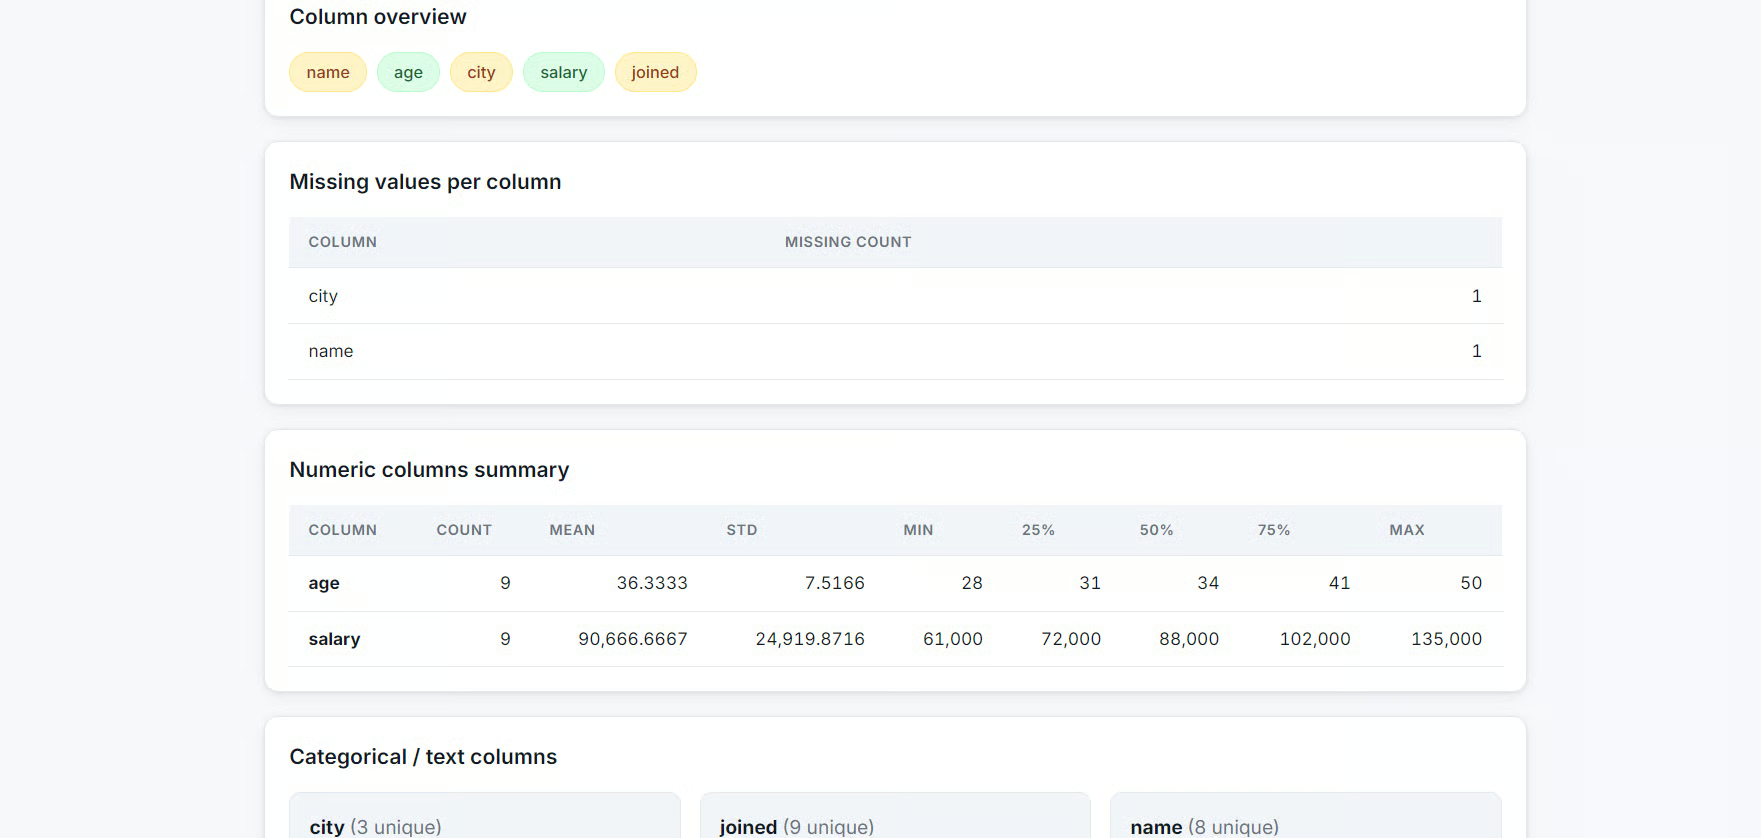
With the larger context available, I asked Pi to add a web interface to the CSV application.
It created a local web app where users can upload a CSV file and review summary information such as column names, missing-value counts, numeric statistics, and other dataset details.
In this guide, we set up a four-GPU RunPod environment, installed the prebuilt llama.cpp binary, downloaded the 2-bit Kimi K2.7 Code GGUF model, launched it through a multi-GPU server, tested it in the llama.cpp web UI, and connected it to Pi as a local coding agent.
The whole setup was surprisingly straightforward. Using the prebuilt llama.cpp binary, it took roughly five minutes to install the runtime and launch the server, rather than spending around 10 minutes compiling it from source.
The Hugging Face CLI also made downloading the large model simple, while the RunPod Network Volume ensured that the files persisted between Pod restarts.
The most useful part of this setup is the ecosystem around the model. llama.cpp gives you a lightweight OpenAI-compatible local server, while its web UI makes quick testing easy, and Pi turns the same endpoint into a capable terminal-based coding agent.
I think this is where local AI is heading: not just running a model in isolation, but connecting a local inference server to coding agents, IDE extensions, web interfaces, and other development tools.
That said, the Kimi K2.7 Code is extremely large. Running it locally in this guide required four RTX PRO 6000 GPUs and a 339 GB 2-bit quantization, which is difficult to justify for most individual developers or small teams.
Unless you specifically need its long-context capacity or agentic coding performance, smaller coding models that run on a single GPU will usually provide faster responses, lower costs, and a more practical local setup.
Top DataCamp Courses
Track
Course
Course
Tutorial
Abid Ali Awan
Tutorial
Abid Ali Awan
Tutorial
Abid Ali Awan
Tutorial
Abid Ali Awan
Tutorial
Abid Ali Awan
Tutorial
Abid Ali Awan