Kurs
Machine Learning verstehen
2 Std.
293.2K
If you experienced the frustration of waiting for ChatGPT to respond, you'd be thrilled to learn about the Groq Language Processing Unit (LPU) Inference Engine.
With Groq, you can quickly get the response to your queries, reducing wait times from 40 seconds to just 2 seconds.
In this tutorial, we’ll:
If you’re new to large language models (LLMs), we recommend taking the Developing Large Language Models skill track to learn the basics of fine-tuning LLMs and building your own model from scratch.
The LPU (language processing unit) Inference Engine by Groq is a new processing system that handles computationally extensive tasks with sequential components, particularly in generating responses for large language models. This innovative technology transforms how we process and generate text, offering unparalleled performance and precision.
Compared to the traditional central processing unit (CPU) and graphics processing unit (GPU), LPU has a greater computing capacity. This means that the time it takes to predict a word is substantially reduced, making sequences of text to be generated much faster. Moreover, LPU also deals with memory bottlenecks, a common limitation of GPUs when dealing with LLMs.
Groq has designed LPU to address challenges such as compute density, memory bandwidth, low latency, and high throughput. It offers performance gains that surpass GPU and TPU (tensor processing unit). For example, the LPU can generate over 310 tokens per second per user on Llama-3 70B.
You can learn more about the LPU architecture by reading the official research paper Groq ISCA 2022 Paper.
Currently, we can only access Groq LLMs through groq.com, Groq Cloud API, Groq Playground, and third-party platforms like Poe.
In this section, we’ll learn about the features and models offered by OpenAI and Groq Cloud. Additionally, we’ll test the speed of API calls using CURL and compare the API designs.
OpenAI API provides a wide range of features and models. It offers:
The OpenAI API is fast and getting cheaper over time.
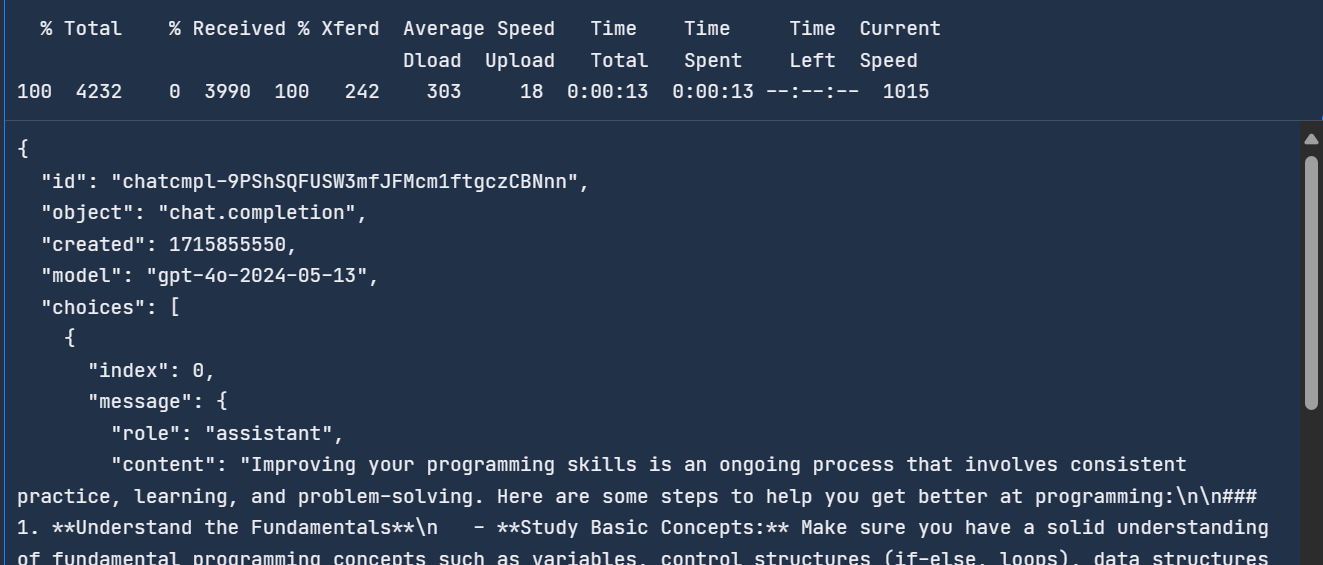
We can access the latest OpenAI model by typing the following command in the terminal. The API requires OpenAI’s API key, model name, and messages which contain the system prompt and user query.
curl -X POST https://api.openai.com/v1/chat/completions \
  -H "Content-Type: application/json" \
  -H "Authorization: Bearer $OPENAI_API_KEY" \
  -d '{
    "model": "gpt-4o",
    "messages": [
      {        "role": "system",
        "content": "You are a helpful assistant."
      },
      {
        "role": "user",
        "content": "How do I get better at programming?"
      }
    ]
  }'
It took 13 seconds to complete the request.
To learn more about OpenAI's API and features, check out this Beginner's Guide to The OpenAI API: Hands-On Tutorial and Best Practices.
Groq is new in the AI industry and currently offers limited features and models. It offers:
Groq Cloud API provides faster response time compared to OpenAI API. To test that, we'll use the CURL command in the terminal and provide the same message to the Groq API.
The Groq API is similar to the OpenAI API, with the only difference being the URL.
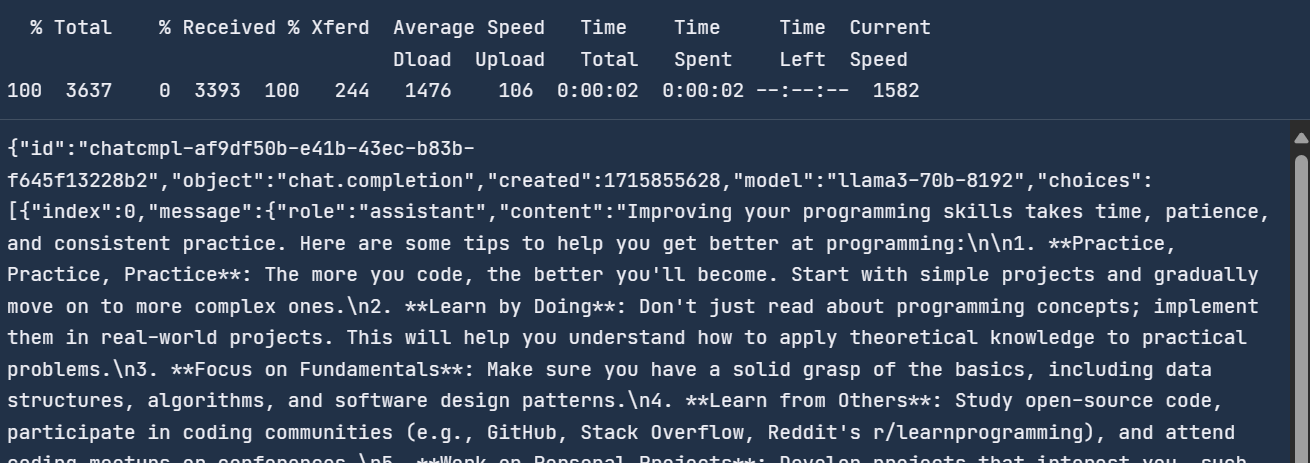
curl -X POST "https://api.groq.com/openai/v1/chat/completions" \
    -H "Authorization: Bearer $GROQ_API_KEY" \
    -H "Content-Type: application/json" \
    -d '{"messages": [
     {
       "role": "system",
       "content": "You are a helpful assistant."
     },
     {        "role": "user",
       "content": "How do I get better at programming?"
     }
   ],
   "model": "llama3-70b-8192"}'
It took two seconds to respond, compared to the OpenAI API, which is 6.5 times faster.
With Groq, you get real-time response generation which is crucial for some applications.
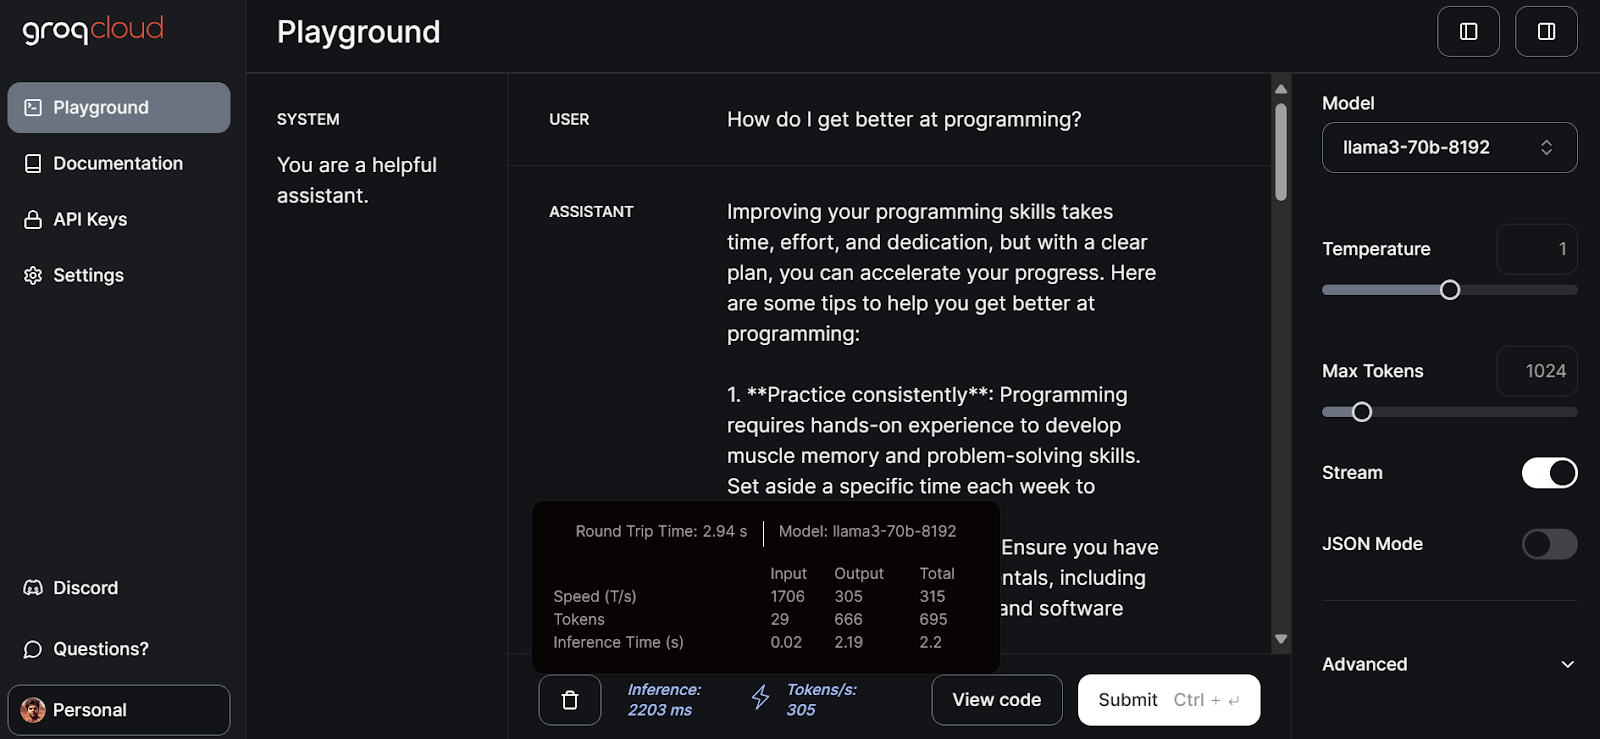
Groq Cloud comes with an AI playground where you can test out all the models and APIs that you can use to build AI products and applications.
To access Groq Cloud, you must first create an account by accessing this link.
After that, click on the playground tab on the left panel, select the llama3-70b-8192 model, and start writing prompts for the USER input.
It took 2.94 seconds to generate the full response with a speed of 305 tokens per second. This is just peak performance that we won't get from ChatGPT.
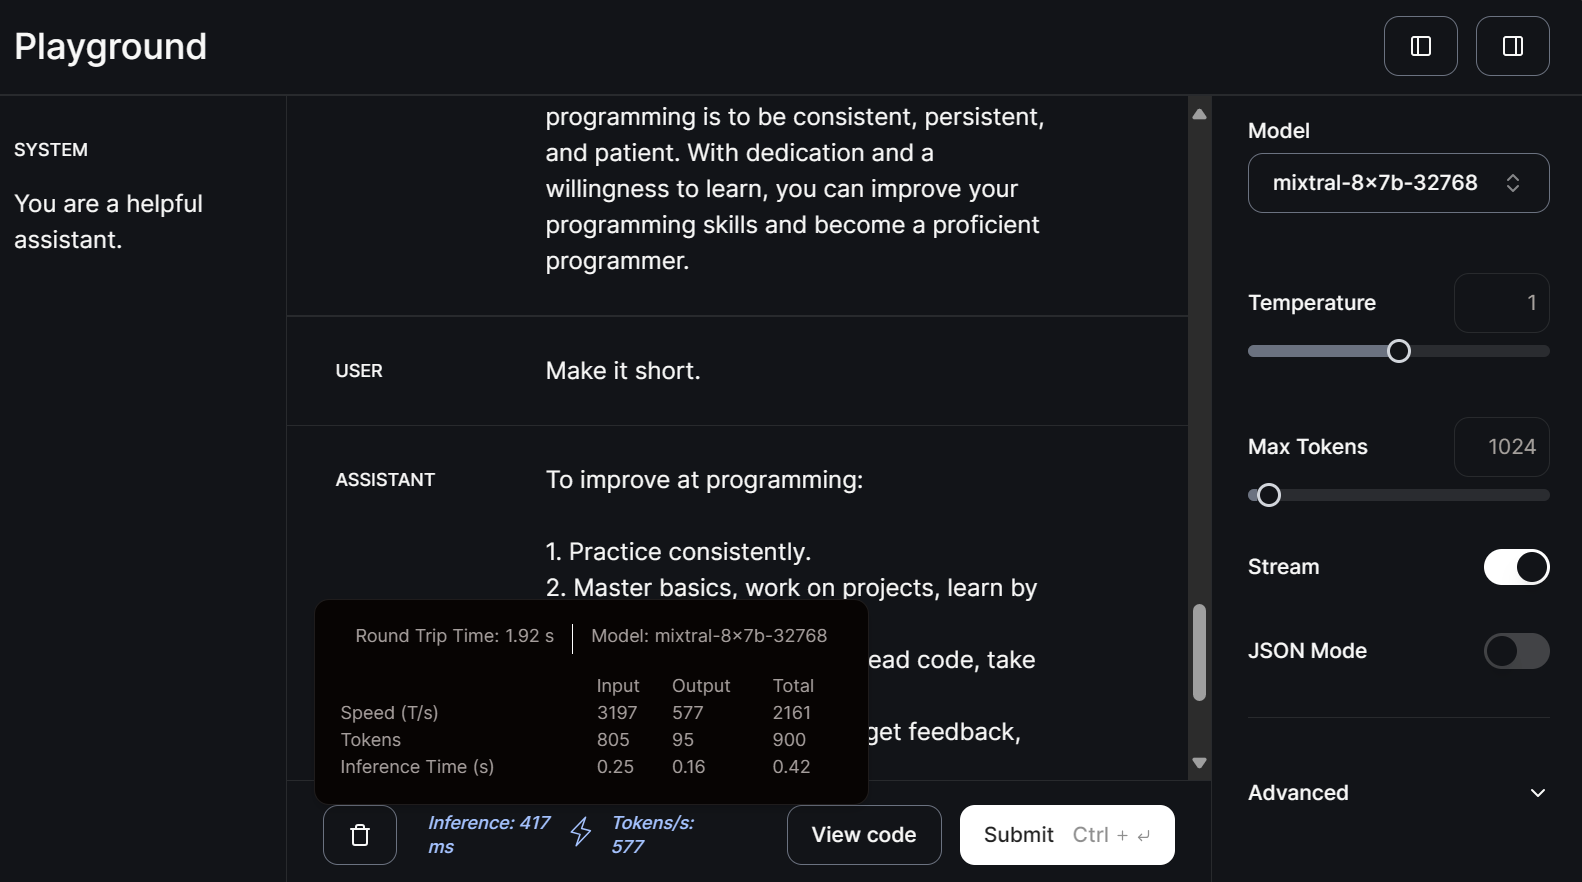
Let’s now select the small model mitral-8x7b-32768 and write the follow-up prompt.
Smaller models are even faster at generating responses with 577 tokens per second speed.
You can read this tutorial on LLM Classification: How to Select the Best LLM for Your Application to learn about the available LLM options and the factors to consider when choosing one.
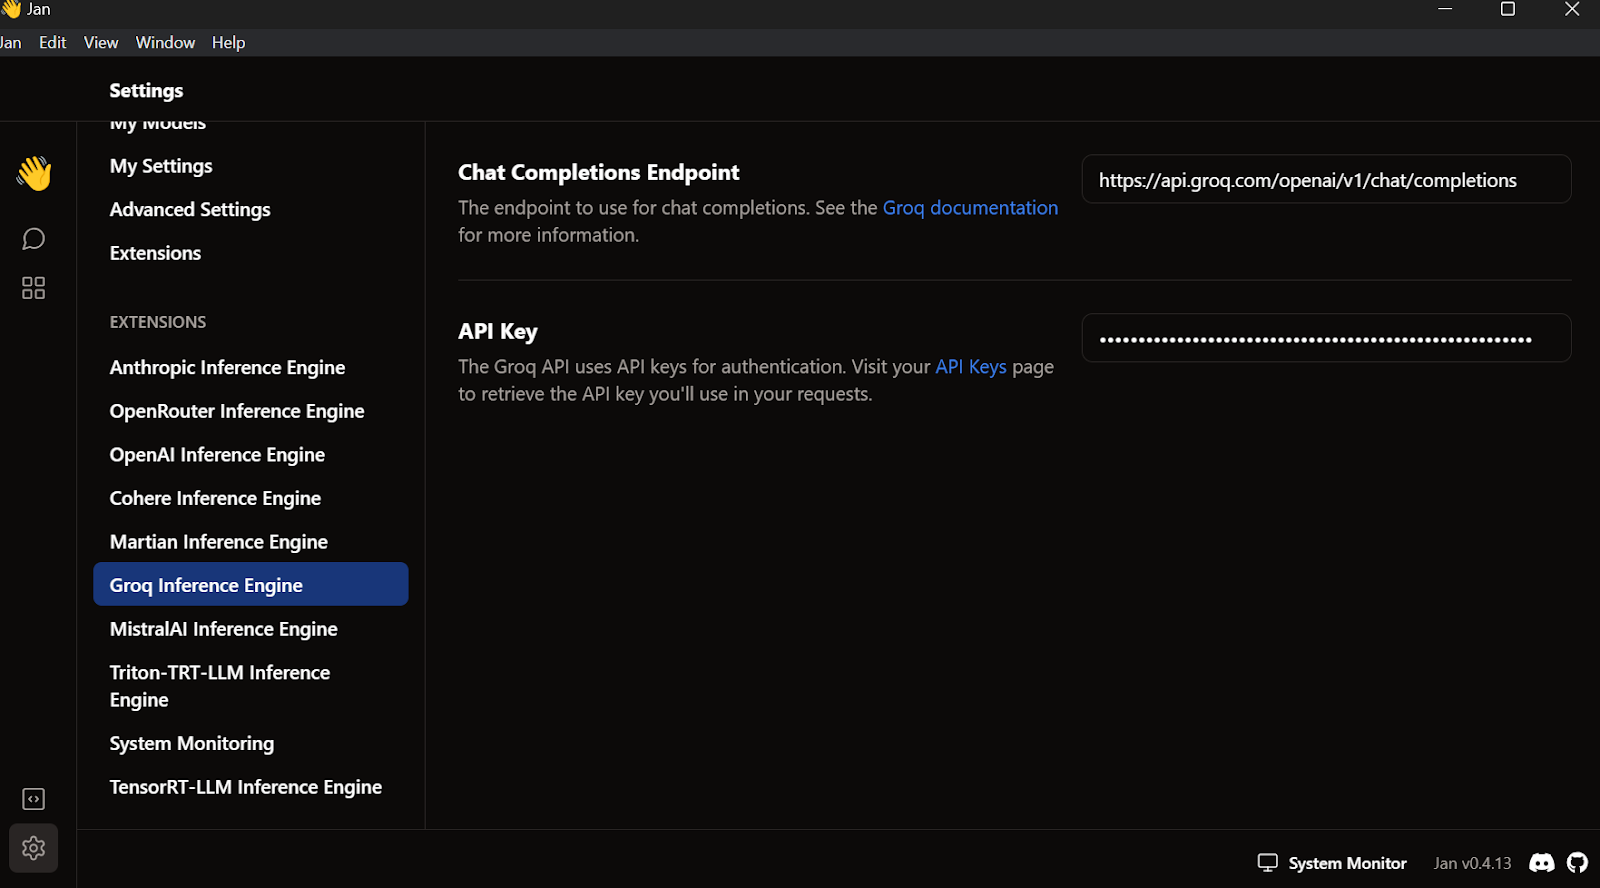
To access Groq LLMs locally, we have to generate an API key by going to the API Keys tab and clicking the Create API Key button.

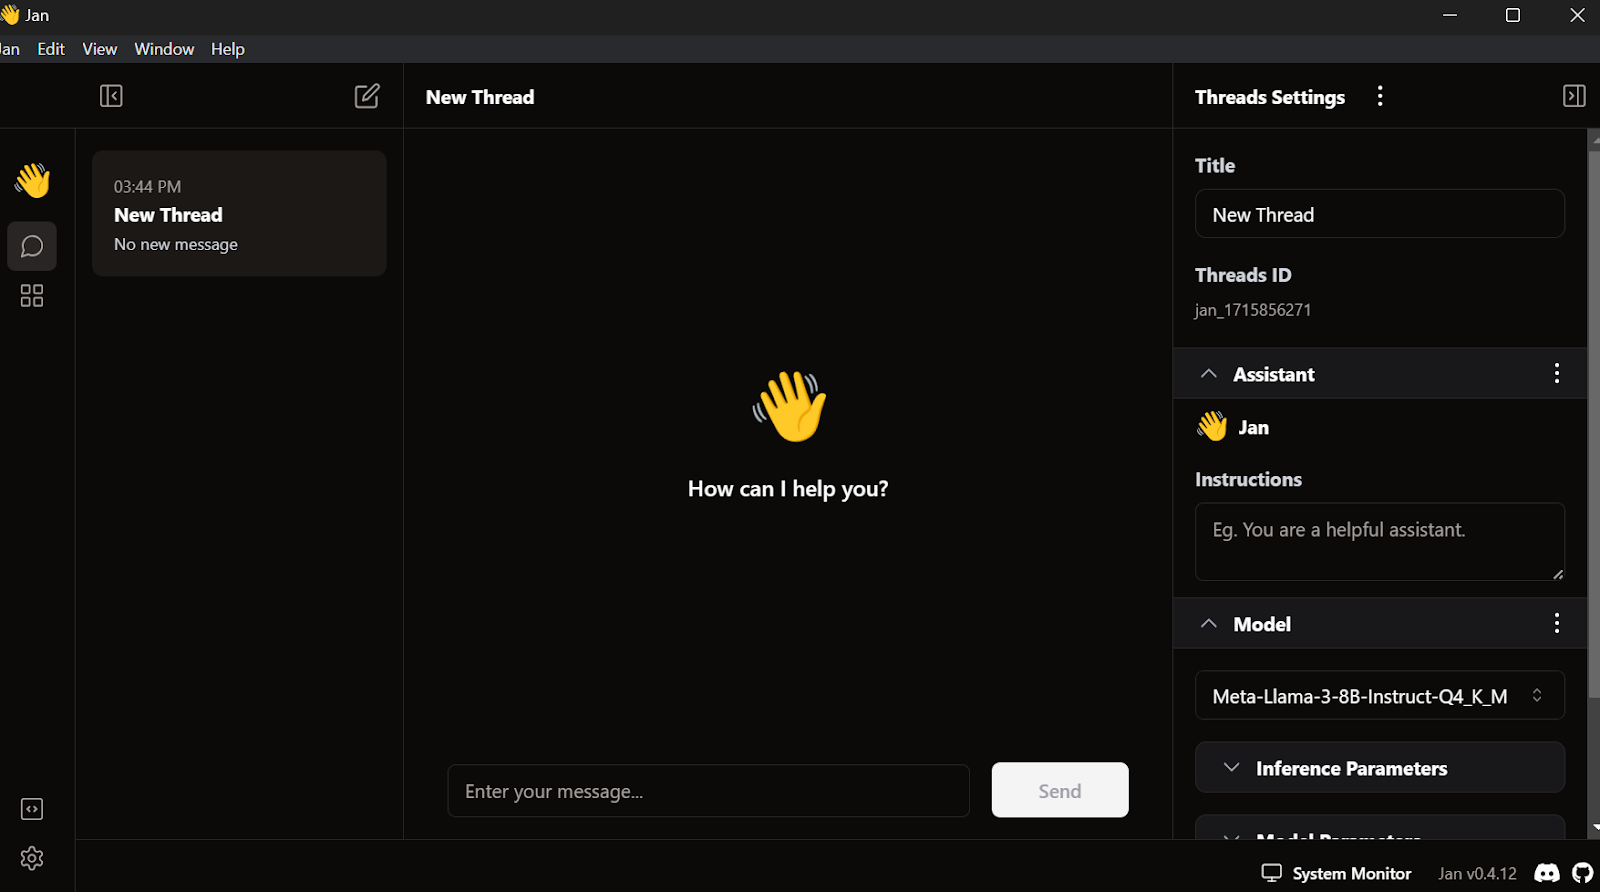
Jan AI allows us to use LLMs locally—both open-source and proprietary models. It supports model providers like OpenAI, Anthropic, Cohere, MistralAI, and Groq.
We’ll download and install Jan AI by going to the official website. Then, we can launch the application.
Go to the settings, select the Groq Inference Engine tab, and paste the API key we just created.
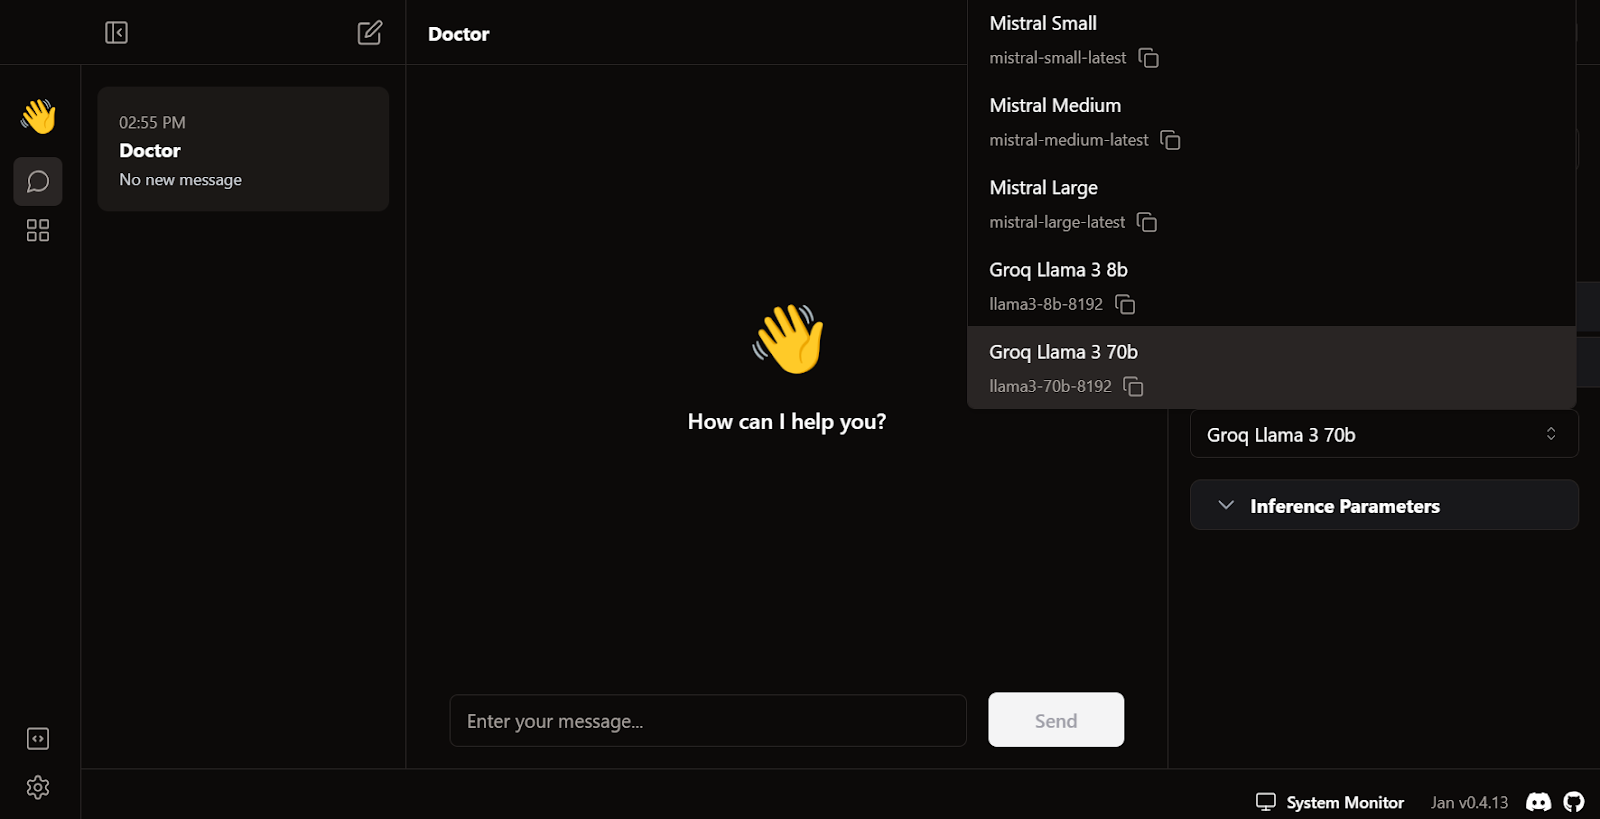
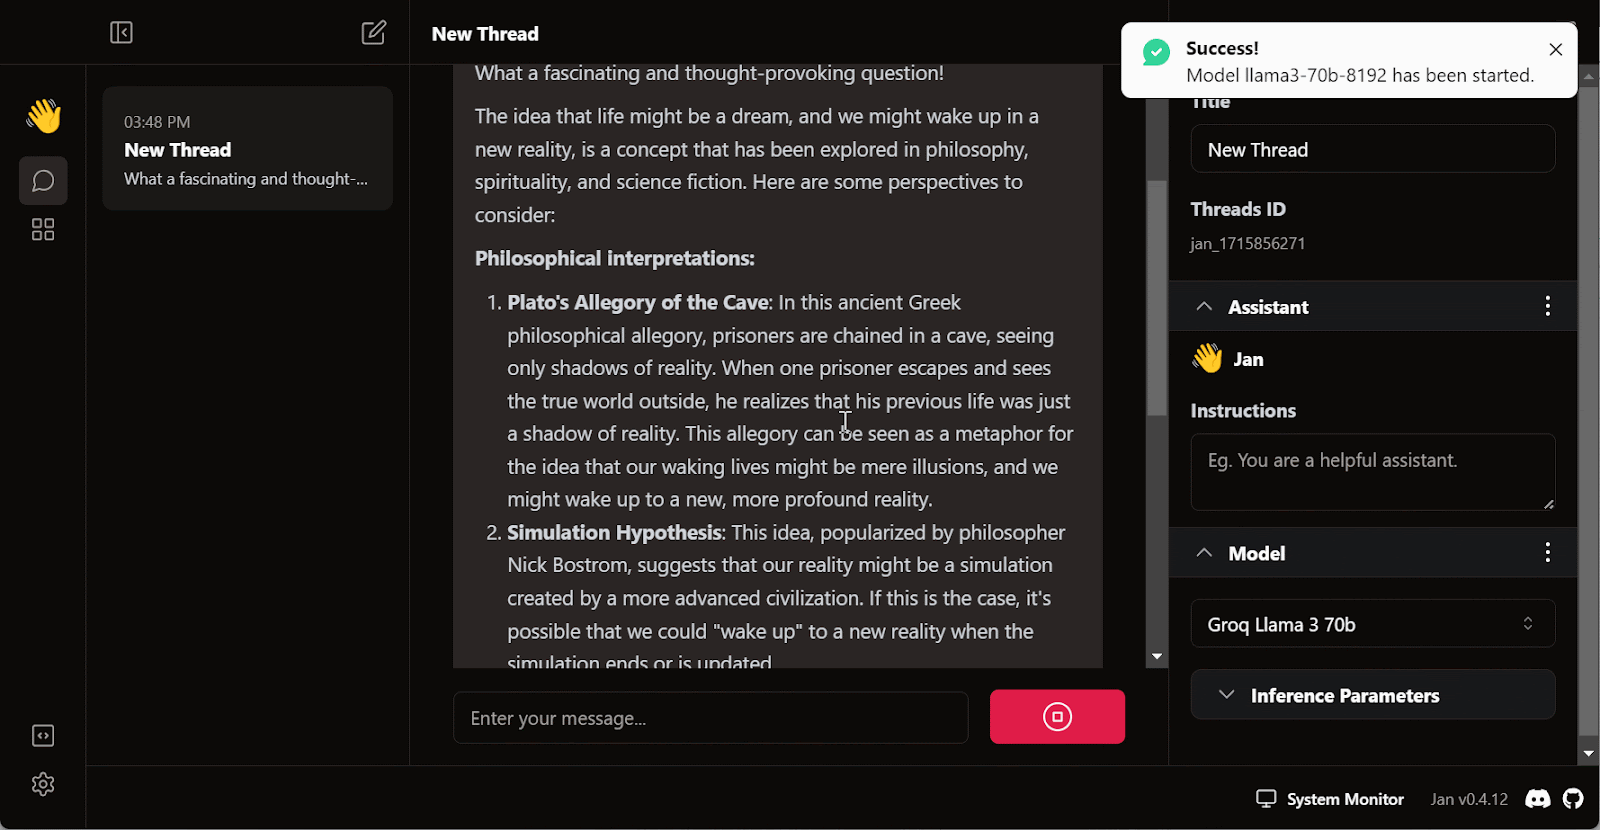
Exit the settings menu, go to Thread, and select the Groq Llama 3 70b model.
Write a question or prompt to generate the response in real time:
The free subscription for Groq Cloud comes with certain rate limitations. For example, the llama3-70b-8192 plan allows 30 requests per minute, 14,400 requests per day, and 6,000 tokens per minute. While these limitations are generous, if you intend to build a proper AI application using the Groq API, you may need to consider upgrading to the On Demand or Enterprise package.
You can read this tutorial on running LLMs locally to explore seven simple ways to run AI applications locally.
Apart from using Groq API in a chatbot application, we can also integrate it into VSCode using the CodeGPT extension. It’ll be our super fast AI coding assistant.
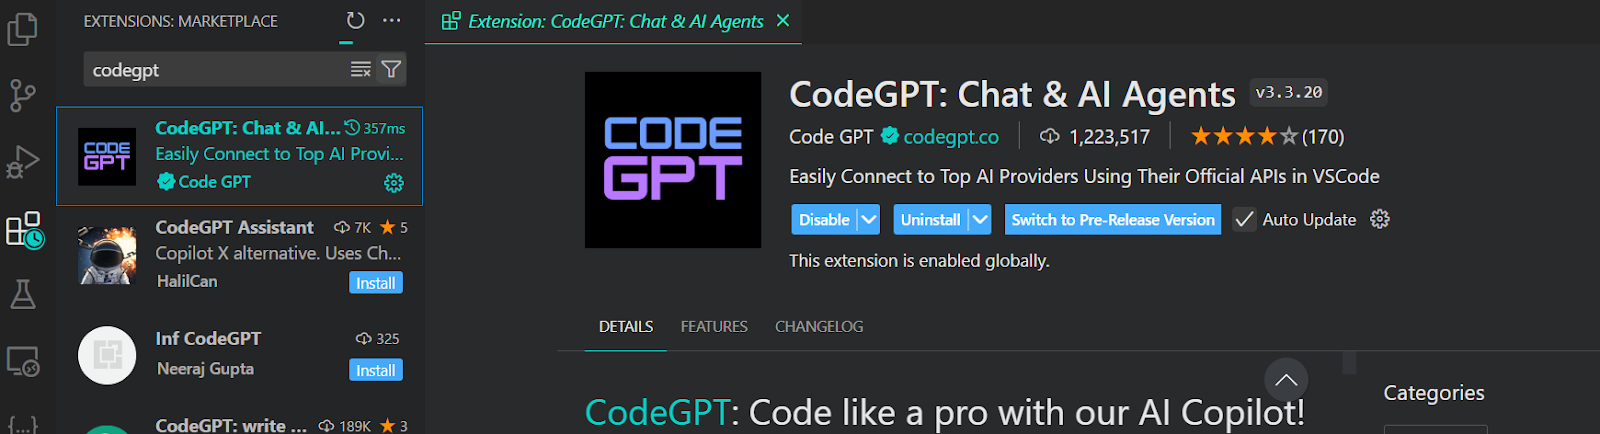
To access the Groq model in VSCode, we have to install the CodeGPT extension by going to the extension marketplace.
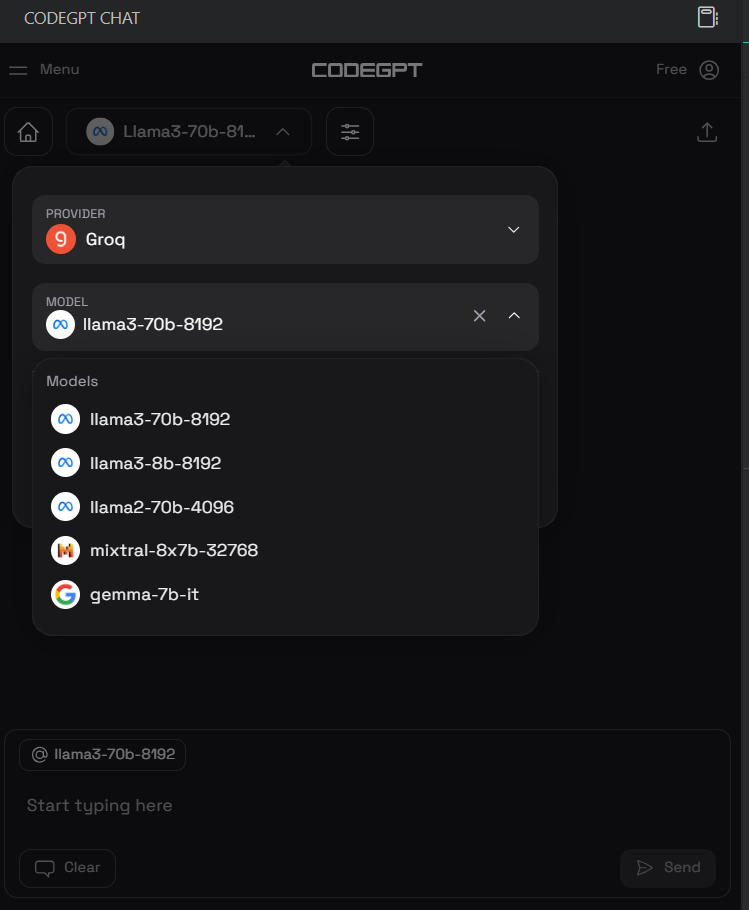
Once installed, we’ll set up the Groq API key by clicking the CodeGPT chat icon on the left panel and selecting the provider and the model. We have selected Groq as a provider and llama3-70b-8192 as a model.
After that, we can write a prompt in the chat box and generate the code. It took us a few seconds to generate the proper code and build the email system.
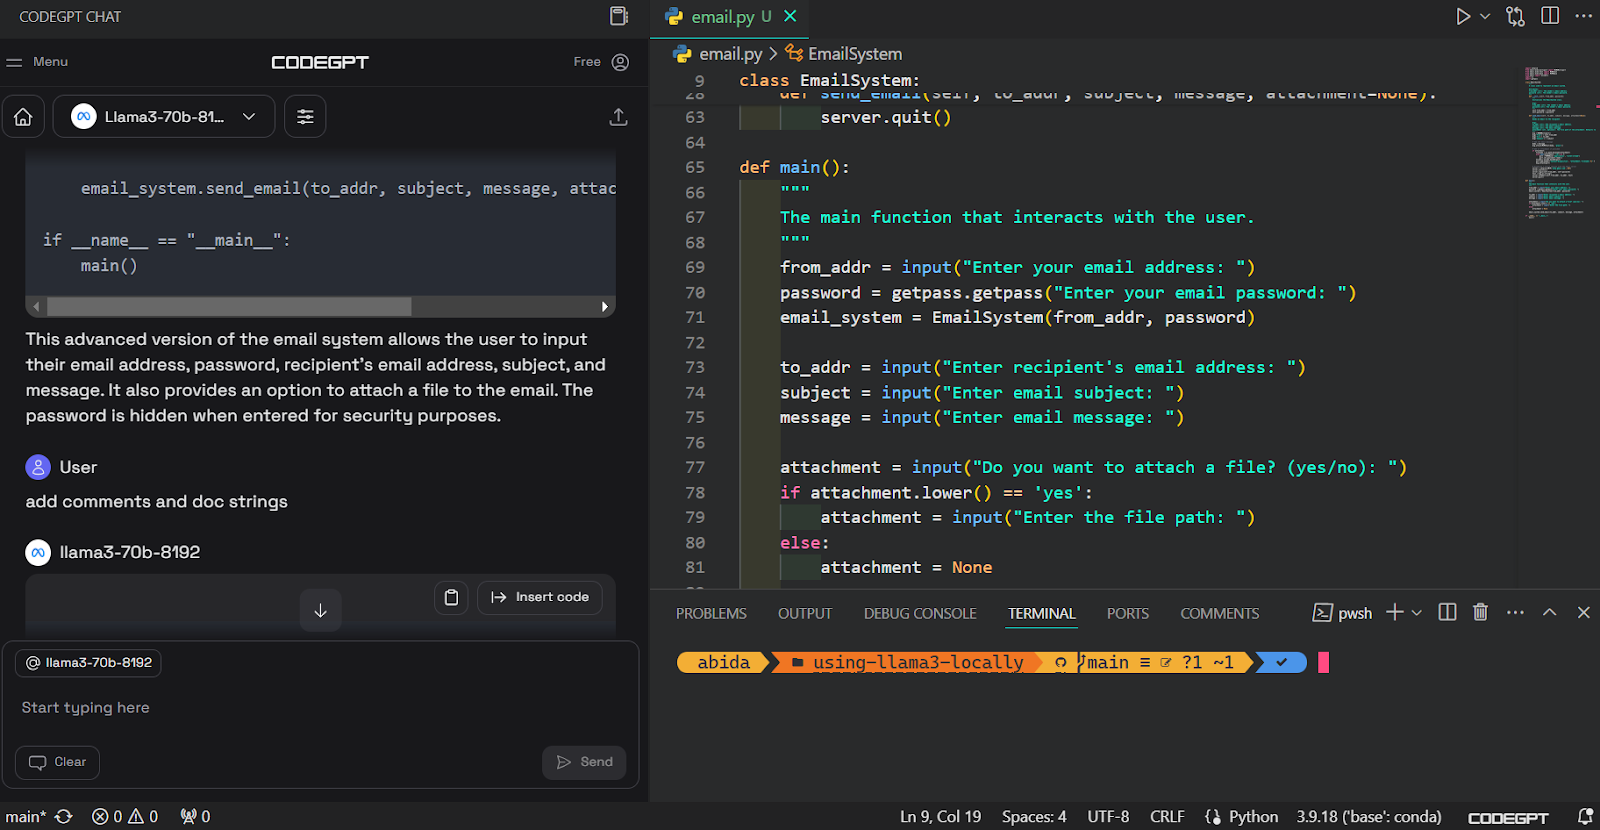
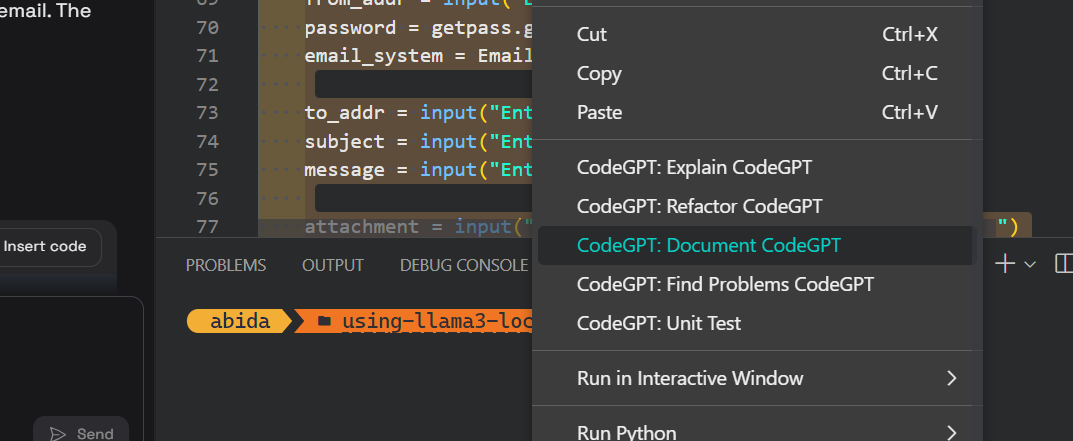
We can then document the code, refactor it, and create the unit test with built-in commands.
You can learn about VSCode by reading this tutorial on setting up VSCode for Python.
In this section, we’ll learn the basics of the Groq Python API and its key features such as streaming and async chat completion.
For this guide, we’re using DataCamp’s DataLab. The DataLab is an AI Cloud Jupyter Notebook that comes with tons of features for writing code, data analysis, and sharing insights.
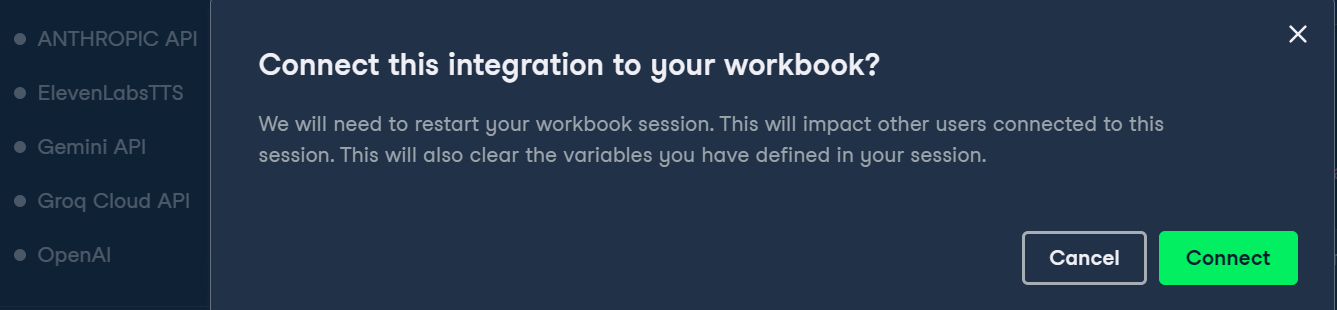
First, we have to set up the Groq API key in DataLab by clicking on the Environment button on the left panel and adding the environment variable by clicking on the plus + button.
We can write the name of the variable and paste the Groq API key as shown below.
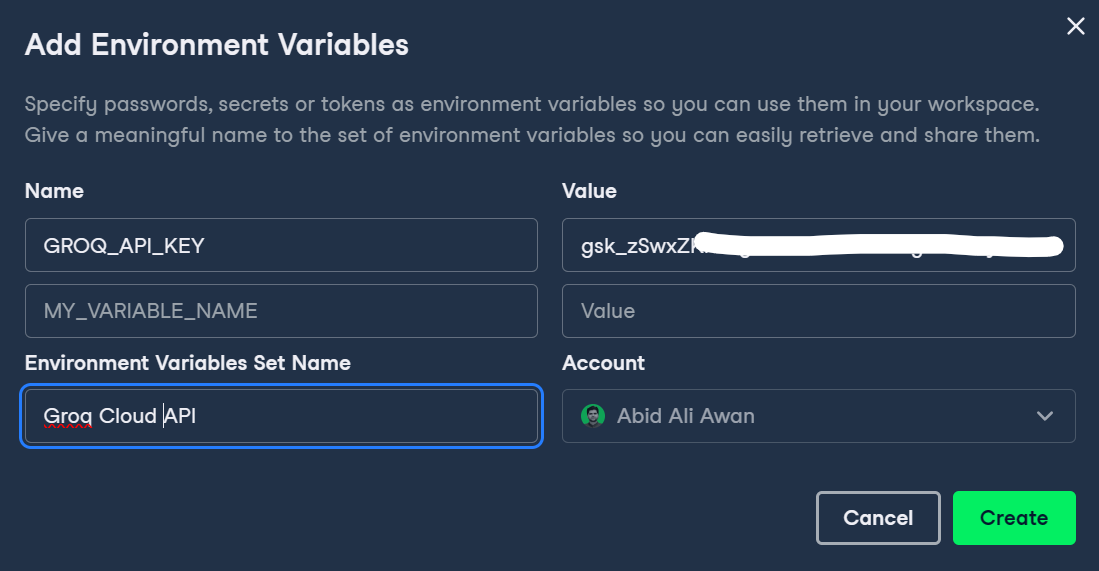
Then, we can activate the environment variable by clicking the three dots beside the Groq environment variable and clicking Connect.
In the end, we’ll install the Groq Python package using the pip command.
%pip install groq -qIf you’ve used OpenAI Python API, you might find the code structure similar. To run chat completion:
import os
from groq import Groq
from IPython.display import display, Markdown
client = Groq(
api_key=os.environ.get("GROQ_API_KEY"),
)
chat_completion = client.chat.completions.create(
messages=[
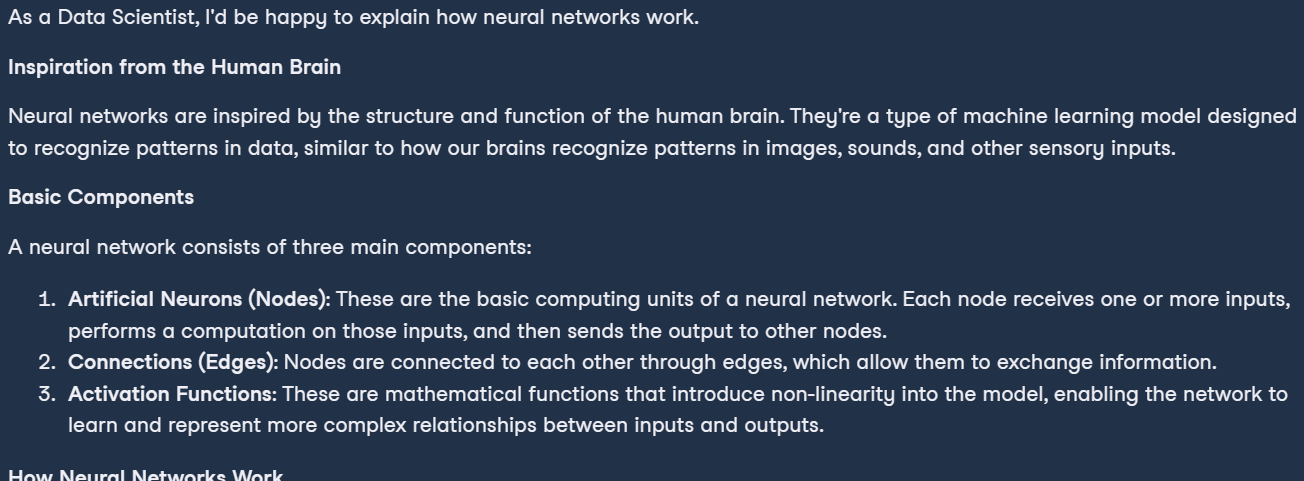
{"role": "system", "content": "You are a professional Data Scientist."},
{"role": "user", "content": "Can you explain how the neural networks work?"},
],
model="llama3-70b-8192",)
Markdown(chat_completion.choices[0].message.content)As a result, we have a perfectly formatted explanation of what neural networks are.
Streaming in LLMs refers to processing and generating text one token at a time, enabling efficient memory usage and improving the perceived speed of the AI application.
In these examples, we enabled the streaming and customized the model by changing the hyperparameters like temperature, max_tokens, and top_p.
chat_streaming = client.chat.completions.create(
messages=[
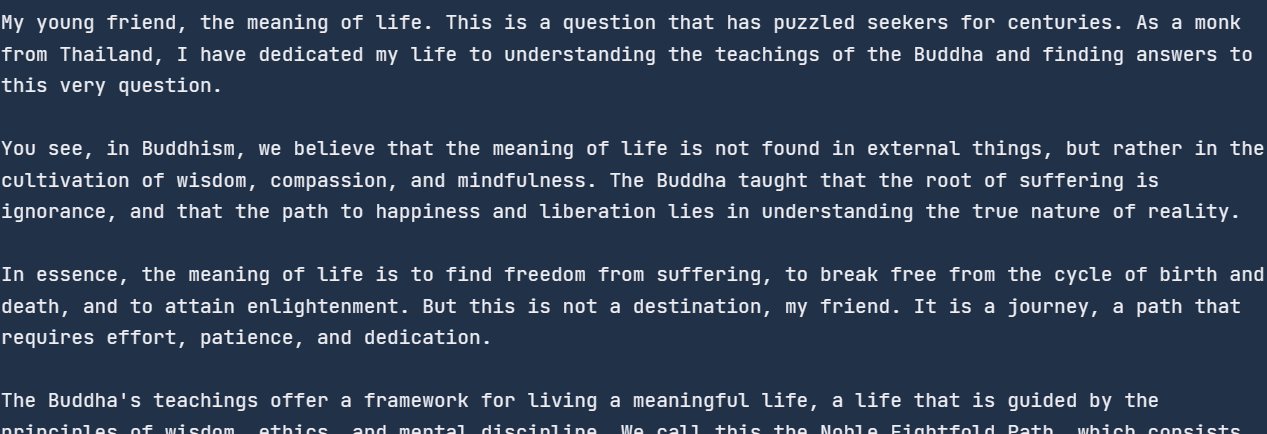
{"role": "system", "content": "You are a monk from Thailand."},
{"role": "user", "content": "Can you explain the meaning of life?"},
],
model="llama3-70b-8192",
temperature=0.3,
max_tokens=360,
top_p=1,
stop=None,
stream=True,
)
for chunk in chat_streaming:
print(chunk.choices[0].delta.content, end="")As a result, we started to receive the response as soon as we ran this code.
Asynchronous APIs enable handling multiple concurrent requests without blocking, allowing the system to process and respond to each request independently. This approach is more efficient and scalable, as it can handle a larger volume of requests and provide faster response times.
To enable async API calling, we have to change the structure of the code. We:
As a side note, the code below works on Jupyter Notebook, but if you're running this code in the Python file, you might have to change the last line with asyncio.run(main()).
import asyncio
from groq import AsyncGroq

client = AsyncGroq(

    api_key=os.environ.get("GROQ_API_KEY"),

)

async def main():

   chat_completion = await client.chat.completions.create(
       messages=[            {"role": "system", "content": "You are a psychiatrist helping young minds"},
                  {                "role": "user",                "content": "I panicked during the test, even though I knew everything on the test paper.",            },
                ],
                model="llama3-70b-8192",
                temperature=0.3,
                max_tokens=360,
                top_p=1,
                stop=None,
                stream=False,
       )

       print(chat_completion.choices[0].message.content)

await main()  # for Python file use asyncio.run(main())
We can also stream the async API by enabling the stream argument in the chat completion function and changing how we print the results. We'll print each chunk using the for loop with the async command.
import asyncio

from groq import AsyncGroq


client = AsyncGroq()

async def main():

    chat_streaming = await client.chat.completions.create(
        messages=[
           {"role": "system", "content": "You are a psychiatrist helping young minds"},
           {                "role": "user",                "content": "I panicked during the test, even though I knew everything on the test paper.",            },
        ],
        model="llama3-70b-8192",
        temperature=0.3,
        max_tokens=360,
        top_p=1,
        stop=None,
        stream=True,
     )
     async for chunk in chat_streaming:
            print(chunk.choices[0].delta.content, end="")

await main()  # for Python file use asyncio.run(main())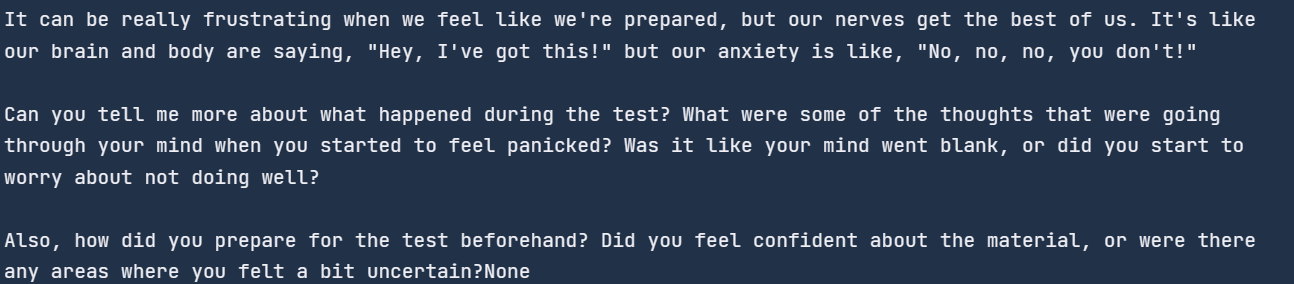
If you're having trouble running the code, please refer to this DataLab notebook: Groq Cloud API.
In this guide, we'll take one step further and learn to build an AI application using Groq API and LlamaIndex, which is an LLM framework. We'll build an application that will load the text from a PDF file, convert it into embeddings, and save it into the vector store. After that, we'll convert the vector store into the retriever that will be used to build a RAG chat engine with history.
In short, we’re building a context-aware ChatPDF application to help you understand the document much faster.
To learn how to ingest, manage, and retrieve private and domain-specific data using natural language, check out this tutorial: LlamaIndex: A Data Framework for Large Language Models (LLMs).
First, we'll install all the necessary Python Packages using pip. We use the %%capture magic function to suppress the logs.
%%capture
%pip install llama-index
%pip install llama-index-llms-groq
%pip install llama-index-embeddings-huggingfaceWe'll create the Groq LLM client using the llama_index function. The LLM client requires a model name and the API key.
from llama_index.llms.groq import Groq
import os

llm =
Groq(model="llama3-70b-8192",api_key=os.environ.get("GROQ_API_KEY"))We'll now download and load the Hugging Face embedding model using the LlamaIndex embeddings API.
In our case, we’re loading the most popular embedding model on Hugging Face called mxbai-embed-large-v1.
from llama_index.embeddings.huggingface import HuggingFaceEmbedding

embed_model =
HuggingFaceEmbedding(model_name="mixedbread-ai/mxbai-embed-large-v1")LlamaIndex allows us to set global configurations, eliminating the need to pass the LLM or embedding model objects everywhere.
from llama_index.core import Settings

Settings.llm = llm
Settings.embed_model = embed_modelFor the data, we’re using the 14 Essential Data Engineering Tools to Use in 2024 blog post and converting it into a PDF using the print command.
Using the SimpleDirectoryReader function, you can load all kinds of documents from the folder. Just provide the folder directory and the required file extensions.
from llama_index.core import SimpleDirectoryReader

de_tools_blog = SimpleDirectoryReader("./",required_exts=[".pdf", ".docx"]).load_data()VectorStoreIndex provides the fastest way to create the vector store by loading the documents and building the index. The index can be used for query engines, retrievers, and query pipelines.
In our case, we’re creating the index by providing the documents to the vector store, which will convert the text into embeddings and then store it in the vector store.
After that, we'll convert the index into the query engine to perform the basic RAG (retrieval augmented generation), which combines the retrieval and AI models to generate a context-aware answer.
from llama_index.core import VectorStoreIndex

index = VectorStoreIndex.from_documents(de_tools_blog)
query_engine = index.as_query_engine(similarity_top_k=3)

response = query_engine.query("How many tools are there?")
print(response)![]()
We'll now create the RAG chat engine with history. Adding history will allow the chat engine to remember both the user messages and generated responses and provide context-aware answers.
To build this application, we'll need to create the ChatMemoryBuffer of 3900 tokens and provide it to the chat engine along with the retriever and LLM object.
When you ask a question, the chat engine will use the PDF document and previous messages as context and respond accordingly.
from llama_index.core.memory import ChatMemoryBuffer
from llama_index.core.chat_engine import CondensePlusContextChatEngine

memory = ChatMemoryBuffer.from_defaults(token_limit=3900)

chat_engine = CondensePlusContextChatEngine.from_defaults(
   index.as_retriever(),
   memory=memory,
   llm=llm
)

response = chat_engine.chat(
   "What tools are suitable for data processing?"
)
print(str(response))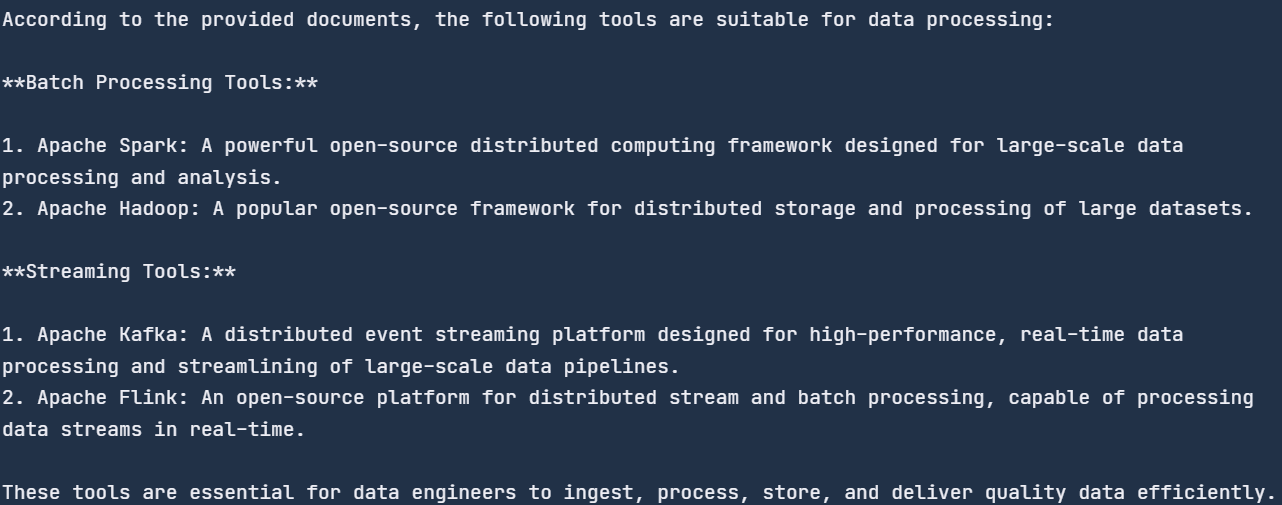
We asked generic questions, and it searched the document for the data processing tools and provided us with the list. All of the tools are mentioned in the blog.
Let’s ask a follow-up question to test the memory part of the chat engine.
response = chat_engine.chat(
    "Can you create a diagram of a data pipeline using these tools?"
)
print(str(response))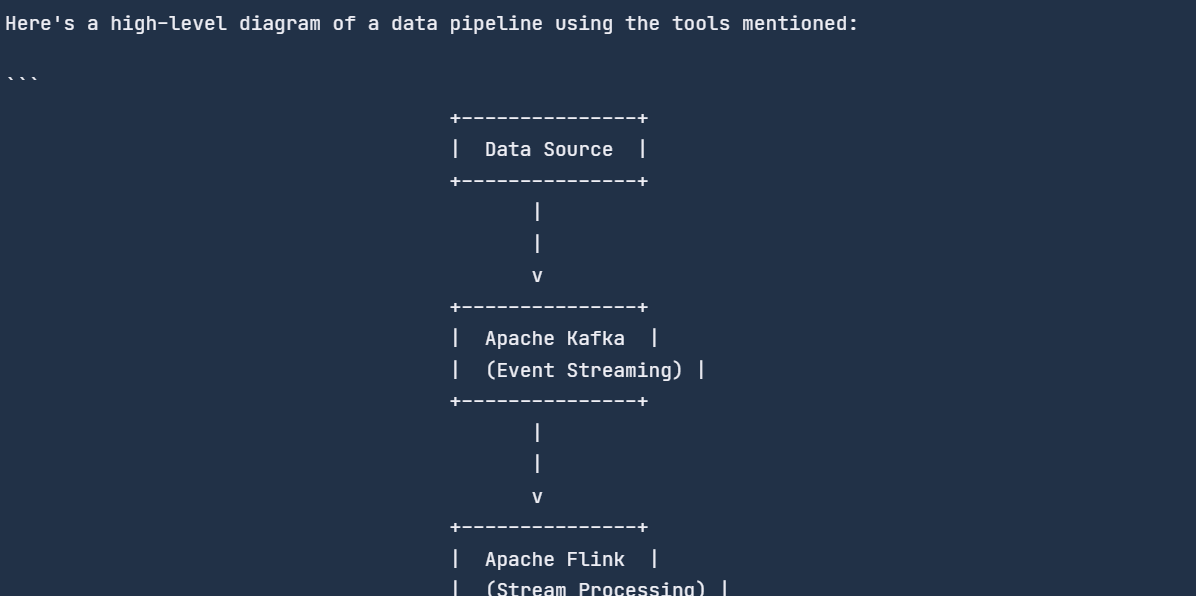
The chat engine remembered the previous chat and responded accordingly.
All the code we used is available on this DataLab notebook: Groq Cloud API — DataLab.
Groq LPU inference engine is a game-changer in AI. While major players like OpenAI and Google focus on developing high-quality LLMs, Groq makes these models faster. Despite being new to the AI scene, Groq is making significant waves in the AI community.
In this blog, we’ve learned about the Groq LPU inference engine, explored the Groq Cloud, and integrated the Groq API into VSCode and Jan AI application. Additionally, we’ve delved into the Groq Python package with code examples and learned how to build a context-aware AI application that can learn from chat history and PDF documents.
A possible next step in your learning journey is fine-tuning the LLMs on a custom dataset. You can learn how to do this by following this tutorial: Fine Tuning Google Gemma: Enhancing LLMs with Customized Instructions.
Learn with DataCamp
Kurs
Kurs
Kurs
Tutorial
Abid Ali Awan
Tutorial
Moez Ali
Tutorial
Bex Tuychiev
code-along
Dan Becker
code-along
Richie Cotton
code-along
Emmanuel Pire