Track
Associate Data Engineer in SQL
30 hr
Just like software engineers have Git for version control, data engineers have Time Travel in Snowflake databases. The Time Travel feature allows database administrators to query historical data, clone old tables, and restore objects dropped in the past.
However, given the massive sizes databases can grow into, Time Travel is not a drop-in equivalent of code version control. Every time a table is modified (deleted or updated), Snowflake takes a snapshot of the data’s state before the update. This snapshot only lives for a specified number of days, which is called the data retention period.
For Snowflake Standard accounts, the maximum retention period is only a single day. For Enterprise accounts, the retention period can be anywhere between 0 and 90 days. A retention period of 0 effectively disables Time Travel, which is enabled for all tables by default.
While reading the Snowflake docs, you might come across the term “Fail-safe” as well. From the names, it may sound like both Time Travel and Fail-safe features do the same task, but they do not.
When an object finishes its retention period, it is then moved into Snowflake Fail-safe. In Fail-safe, you cannot:
Fail-safe only keeps the data for a non-configurable 7-day period. During this period, the data can be recovered only by Snowflake itself. This feature is put into place as a data recovery service and is only intended as a last resort when all recovery methods fail. It is for use only when data has been damaged or deleted due to operational failures.
So, you cannot ask Snowflake to recover past versions of your objects once they live out their determined retention period naturally. Keep this rule in mind while following this tutorial.
Snowflake has two interfaces that interact with the platform : SnowSight (the web UI) and Snowflake CLI (the terminal client). We will go forward with SnowSight as it is easier to set up. You can read this comprehensive tutorial if you are new to Snowflake. It covers how to use Snowflake CLI as well.
First, sign up for a free account from the Snowflake homepage. You will be able to access Enterprise features for a 30-day free trial.
Once your account is ready, you will be directed to your dashboard’s Worksheets page. You can think of each worksheet as a separate environment to run SQL or even Python.
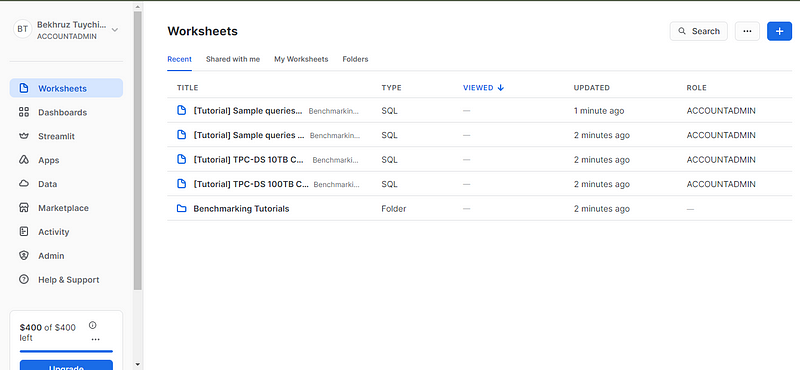
Now, create a new worksheet using the “+” button in the top right:
Next, let’s create some databases and tables and populate them with data.
First, we will create a database named ecommerce_db. Paste the following code and press "Ctrl + Enter" (Cmd + Enter) to run it ("Ctrl + Shift + Enter" runs the entire worksheet statements).
CREATE DATABASE IF NOT EXISTS ecommerce_db;
We will use this hypothetical database to sell AI-related merchandise. Run the below command to set it as default:
USE DATABASE ecommerce_db;
First, we will create a table named inventory with three columns:
CREATE OR REPLACE TABLE inventory (
 product_id INT PRIMARY KEY,
 name VARCHAR(255),
 stock_level INT,
 last_updated TIMESTAMP_TZ DEFAULT CURRENT_TIMESTAMP
);
Then, we will add some starting products:
INSERT INTO inventory (product_id, name, stock_level)
VALUES (1, Llama hoodie', 10), (2, Falcon cap', 20);
We will also create a table for orders:
CREATE OR REPLACE TABLE orders (
 order_id INT PRIMARY KEY,
 product_id INT REFERENCES inventory(product_id),
 quantity INT,
 order_date TIMESTAMP_TZ DEFAULT CURRENT_TIMESTAMP
);
-- Assume some time passes after this table was created
After we put up a website to sell our merchandise, we receive some orders. In the morning, we receive two orders for both of our products:
INSERT INTO orders (order_id, product_id, quantity)
VALUES (1, 1, 5), (1, 2, 3);
In the afternoon, we receive another:
-- Simulate a system glitch causing an extra order for product 1
INSERT INTO orders (order_id, (product_id, quantity)
VALUES  (3, 1, 100);  -- This might cause negative stock
But due to a system glitch, the order is recorded for more stock than we have. Let’s pretend that we didn’t find this out for two weeks.
Note that I made a few other updates to tables under the hood.
Our first task is setting a retention period. My free trial had ended, so I can only set it for one day:
ALTER TABLE inventory SET DATA_RETENTION_TIME_IN_DAYS=1;
ALTER TABLE orders SET DATA_RETENTION_TIME_IN_DAYS=1;
If yours hasn’t ended, try setting it to four weeks, as your trial will run out after that time.
AT and BEFORE ClausesSnowflake implements Time Travel through these SQL extensions:
AT and BEFORE clauses to use in SELECT statements to pinpoint the exact point (or period) in time you are trying to query. They support these parameters to execute this task:TIMESTAMPOFFSET - time difference in seconds from the present timeSTATEMENT - unique query IDUNDROP command to restore tables, schemas and databasesLet’s see how to use these extensions on our sample database.
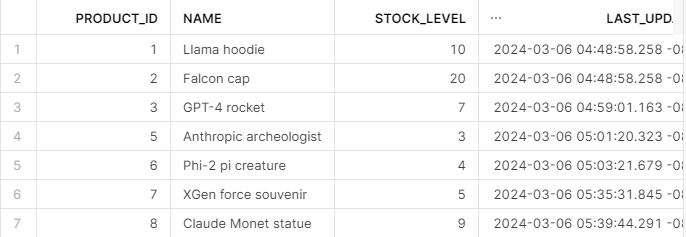
First, let’s observe what we have in inventory:
-- Check current stock level (might show negative value)
SELECT * FROM inventory;
Now, let’s combine the orders and inventory we have:
SELECT i.name, i.stock_level, o.quantity as "order_amount"
 FROM inventory as i
 JOIN orders as o
   ON i.product_id = o.product_id;
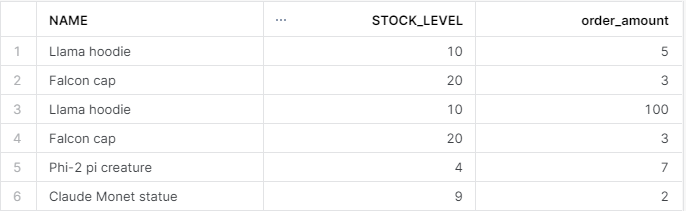
Uh-oh! Looks like there is an error — the amount of Llama hoodie orders is more than we have. Let’s try to go back 17.5 hours to pinpoint the exact time this erroneous statement was executed:
SELECT * FROM orders AT(OFFSET => -60*60*17.5); -- Go back 17.5
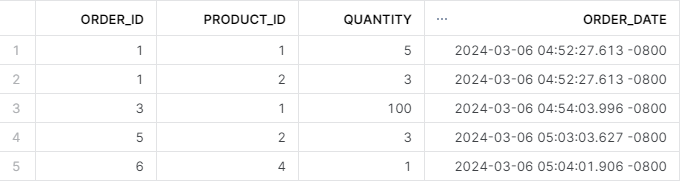
So, the incorrect order was placed at 4.54 PM on the 6th of March. This means we need the table’s state before that time. That is easy to query with the BEFORE clause:
-- Change the timezone
ALTER SESSION  SET TIMEZONE = 'UTC';

-- Select the table state before the error
SELECT * FROM orders BEFORE(TIMESTAMP => '2024-03-06 04:54:00 -0800'::timestamp_tz);
Don’t forget to add timestamp_tz as a data type for the time stamp. tz stands for time zone.

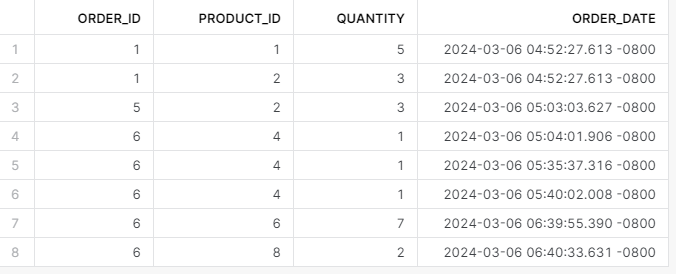
These examples demonstrate how to use AT and BEFORE clauses with timestamps and offsets. If you don't want to have to figure out the timing of queries, you can use statement IDs.
For example, the below query executes the same task as the last one - query the table state before the incorrect order was placed:
SELECT * FROM orders BEFORE(STATEMENT => '01b2ce86-0000-95e2-0000-000669127035');Here is how you can find the query ID of any statement:
By filtering the type of queries, you can find the one you are looking for much faster in SnowSight.
So, we have an incorrect order in our table — how do we get rid of it?
Well, one thing we could try is cloning the table without the incorrect row:
CREATE OR REPLACE TABLE orders_clone AS
SELECT * FROM orders WHERE quantity != 100;

SELECT * FROM orders_clone;
It worked, and we didn’t have to rely on Time Travel to fix the issue. But when you need to clone past states of a table, here is a syntax you can follow:
-- Clone an object as it existed 2 days ago
CREATE TABLE old_table_clone CLONE olt_table
   AT(OFFSET => -2 * 24 * 60 * 60);  -- Offset for 2 days
Cloning databases is similar:
CREATE DATABASE cloned_db CLONE my_db
 BEFORE(STATEMENT => '8e5d0ca9-005e-44e6-b858-a8f5b37c5726');
Let’s say we just hired an intern and gave them the problem we had with the incorrect order.
By trying to remove that record, the intern accidentally drops the orders table in production:
-- Simulate accidentally dropping the orders table
DROP TABLE orders

SELECT * FROM orders;;
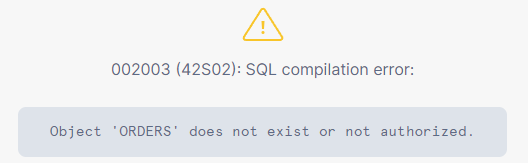
The intern approaches us, totally freaked out, and tells us what they did. So, we calmly execute the UNDROP command:
-- Recover the dropped table using UNDROP
UNDROP TABLE orders

SELECT * FROM orders;;
And get the table back. We also forgive the intern and (of course) decide not to fire them for their mistake.
In this tutorial, we’ve learned about a key feature in Snowflake — Time Travel. Using Time Travel, you can query and restore past information, which is a highly sought-after feature in database management tools.
Anything can happen in production environments, and having a backup of your database before each update gives you a sense of calm.
I think Snowflake is the best database management tool out there. It is a massive tool, and mastering it is a desirable skill in data roles. So, if you want to learn more about it, check out the Introduction to Snowflake course on DataCamp.
If you are already comfortable with it and want to test your skills, take a look at the best Snowflake certifications available in 2024.
Start Your Snowflake Journey Today!
Track
Course
Course
blog
Bex Tuychiev
14 min
blog
Bex Tuychiev
12 min
Tutorial
Tim Lu
Tutorial
Bex Tuychiev
Tutorial
Bex Tuychiev
Tutorial
Bex Tuychiev