Course
Understanding ChatGPT
1 hr
424.4K
We all know about the popularity of ChatGPT and how people are using it to boost their productivity. But if you are new, it’s worth signing up for a ChatGPT free demo and experimenting with all it can do. You should also take our Introduction to ChatGPT course to learn best practices for crafting effective prompts and to explore common business use cases for leveraging this powerful AI tool.
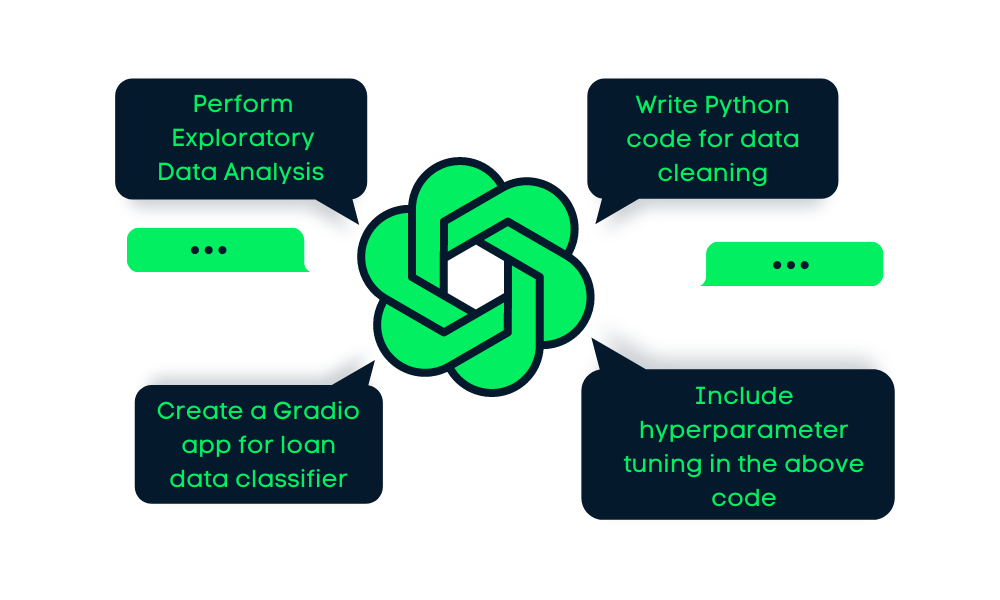
In this tutorial, we will learn how we can use ChatGPT to work on an end-to-end data science project. We will use various prompts to create a project outline, write Python code, conduct research, and debug the application. Moreover, we will learn tips on writing effective ChatGPT prompts. If you're intrigued about using AI for different purposes, check out our guide on artificial intelligence projects for all levels.
In the project, we will be using Loan Data from DataLab and plan the data science project around it.
ChatGPT does 80 percent of the work here, we just have to master prompt engineering to get everything right, and for that, we have our amazing ChatGPT Cheat Sheet for Data Science. It comes with 60+ ChatGPT prompts for data science tasks based on SQL, R, and Python.
It is the most important part of the project, where we look at the available resources and goals to come up with an optimal strategy.
You can go to chat.openai.com and initiate a new chat. After that, we will mention the available loan dataset and ask ChatGPT to come up with steps to build an end-to-end generic portfolio project.
Prompt: “I have a loan dataset consisting of 9500 rows and 14 columns: ['credit.policy', 'purpose', 'int.rate', 'installment', 'log.annual.inc','dti', 'fico', 'days.with.cr.line', 'revol.bal', 'revol.util', 'inq.last.6mths', 'delinq.2yrs', 'pub.rec', 'not.fully.paid']. Can you list the steps I have to follow to develop an end-to-end project for my portfolio.”
We did get the list, but we forgot to mention the class imbalance issue and the project goal, which is to accurately predict “loan not paid back”.
Updated Prompt: “Please include class imbalance issues and accurately predict whether a loan will not be paid back rather than if a loan is paid back.”
Again, we are not interested in model monitoring, and we want to build a Gradio app and deploy it on Huggingface Spaces.
Updated Prompt: “We will be creating a web app using Gradio and deploying it on Spaces and we won't be monitoring the model in the production.”
Gif by Author | Final list of the steps involved in a project
We got a list of 9 steps, as shown above, and a detailed explanation of how we should approach each step.
Here is the list of tasks that we are going to follow in this tutorial:
Exploratory data analysis is all about data manipulation, statistical analysis, and data visualization. We can complete it by writing a follow-up prompt about writing Python code for exploratory data analysis on our dataset.
Follow-Up Prompt: “Please write a Python code to load and perform Exploratory data analysis (EDA) on loan dataset”
The bot will understand the context and come up with Python code with comments and a detailed explanation of how it works.
Gif by Author | Python code for EDA
import pandas as pd
import matplotlib.pyplot as plt
import seaborn as sns

loan_df = pd.read_csv("loan_data.csv")

loan_df.head()
# Display the number of rows and columns in the dataset
print("Number of rows and columns:", loan_df.shape)

# Display summary statistics for numerical variables
print(loan_df.describe())
Number of rows and columns: (9578, 14)
credit.policy int.rate ... pub.rec not.fully.paid
count 9578.000000 9578.000000 ... 9578.000000 9578.000000
mean 0.804970 0.122640 ... 0.062122 0.160054
std 0.396245 0.026847 ... 0.262126 0.366676
min 0.000000 0.060000 ... 0.000000 0.000000
25% 1.000000 0.103900 ... 0.000000 0.000000
50% 1.000000 0.122100 ... 0.000000 0.000000
75% 1.000000 0.140700 ... 0.000000 0.000000
max 1.000000 0.216400 ... 5.000000 1.000000print(loan_df.isnull().sum())credit.policy 0
purpose 0
int.rate 0
installment 0
log.annual.inc 0
dti 0
fico 0
days.with.cr.line 0
revol.bal 0
revol.util 0
inq.last.6mths 0
delinq.2yrs 0
pub.rec 0
not.fully.paid 0sns.countplot(x="not.fully.paid", data=loan_df)
plt.show()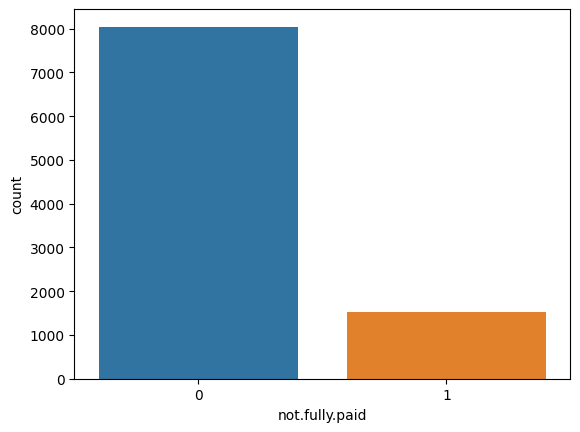
corr = loan_df.corr()
sns.heatmap(corr, annot=True, cmap="coolwarm")
plt.show()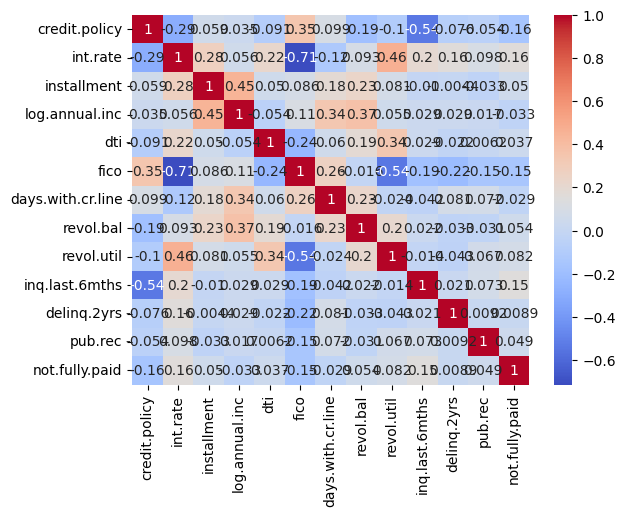
sns.countplot(x="purpose", data=loan_df)
plt.xticks(rotation=90)
plt.show()
sns.boxplot(x="purpose", y="int.rate", data=loan_df)
plt.xticks(rotation=90)
plt.show()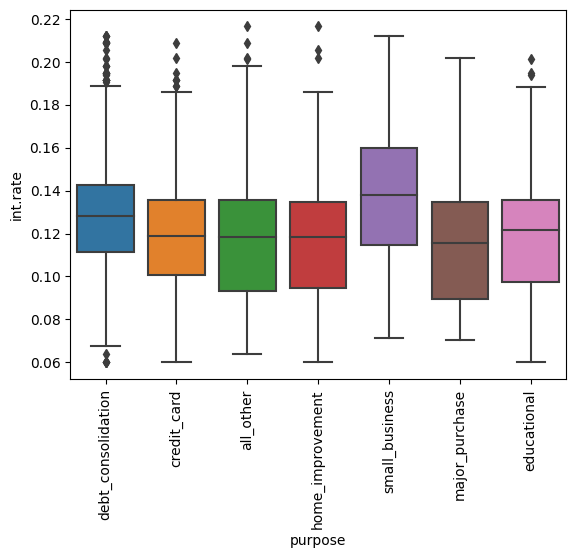
Instead of preprocessing and cleaning the data, we will perform feature engineering to simplify the preprocessing task.
Follow-up Prompt: “Write a Python code to perform feature engineering”
We did get the right solution, but it included irrelevant code, so we had to write an update prompt to modify the code.
Updated Prompt: “only add feature engineering part.”
# Perform feature engineering
loan_df["installment_to_income_ratio"] = (
    loan_df["installment"] / loan_df["log.annual.inc"]
)
loan_df["credit_history"] = (loan_df["delinq.2yrs"] + loan_df["pub.rec"]) / loan_df[
    "fico"
]
ChatGPT has suggested two new features: “installment_to_income_ratio” and “credit_history”.
Again, ChatGPT knows the context of the project. We don't have to explain everything again. So, we will simply ask it to write a Python code to clean and preprocess the data.
Follow-up Prompt: “Now write a python code to clean and preprocess the dataset”
from sklearn.preprocessing import LabelEncoder, StandardScaler

loan_df = loan_df.drop(['credit.policy', 'days.with.cr.line', 'purpose'], axis=1)

# Convert categorical variables to numerical using LabelEncoder
le = LabelEncoder()
loan_df['not.fully.paid'] = le.fit_transform(loan_df['not.fully.paid'])scaler = StandardScaler()
numerical_cols = ['int.rate', 'installment', 'log.annual.inc', 'dti', 'fico', 'revol.bal', 'revol.util', 'inq.last.6mths', 'delinq.2yrs', 'pub.rec','credit_history','installment_to_income_ratio']
loan_df[numerical_cols] = scaler.fit_transform(loan_df[numerical_cols])from imblearn.over_sampling import SMOTE
sm = SMOTE(random_state=42)
X = loan_df.drop('not.fully.paid', axis=1)
y = loan_df['not.fully.paid']
X_resampled, y_resampled = sm.fit_resample(X, y)
loan_df = pd.concat([X_resampled, y_resampled], axis=1)
loan_df['not.fully.paid'].value_counts()As we can see, we have successfully balanced the class.
0    8045
1    8045
Name: not.fully.paid, dtype: int64In this part, we have asked ChatGPT to train the data on various models for a model selection task.
Follow-up Prompt: “Write a follow-up python code for model selection. Try decision trees, random forests, logistic regression, or support vector machines (SVM). Note: only include the model selection part.”
It has generated the Python script to split the dataset into a training and test and train the dataset on specified models to display accuracy metrics.
from sklearn.model_selection import train_test_split

# Split the dataset into training and testing sets
X = loan_df.drop('not.fully.paid', axis=1)
y = loan_df['not.fully.paid']
X_train, X_test, y_train, y_test = train_test_split(X, y, test_size=0.3, random_state=42)

# Fit and evaluate decision tree classifier
dt = DecisionTreeClassifier(random_state=42)
dt.fit(X_train, y_train)
dt_score = dt.score(X_test, y_test)
print("Decision Tree Classifier Accuracy: {:.2f}%".format(dt_score*100))

# Fit and evaluate random forest classifier
rf = RandomForestClassifier(random_state=42)
rf.fit(X_train, y_train)
rf_score = rf.score(X_test, y_test)
print("Random Forest Classifier Accuracy: {:.2f}%".format(rf_score*100))

# Fit and evaluate logistic regression classifier
lr = LogisticRegression(random_state=42)
lr.fit(X_train, y_train)
lr_score = lr.score(X_test, y_test)
print("Logistic Regression Classifier Accuracy: {:.2f}%".format(lr_score*100))

# Fit and evaluate support vector machine classifier
svm = SVC(random_state=42)
svm.fit(X_train, y_train)
svm_score = svm.score(X_test, y_test)
print("Support Vector Machine Classifier Accuracy: {:.2f}%".format(svm_score*100))
The Random Forest algorithm has significantly outperformed the other models.
Decision Tree Classifier Accuracy: 81.21%
Random Forest Classifier Accuracy: 89.14%
Logistic Regression Classifier Accuracy: 61.32%
Support Vector Machine Classifier Accuracy: 66.54%We will be selecting the better-performing model and performing the model evaluation. We have specified the use of accuracy, precision, recall, and F1 score as metrics and cross-validation to ensure the model stability.
Follow-up Prompt: “Select RandomForestClassifier and write a python code for model evaluation. Use accuracy, precision, recall, and F1 score as metric and cross-validation to ensure the model is not overfitting to the training data.”
We will update the Python to add hyperparameter tuning tasks and save the best-performing model.
Updated Prompt: “also include hyperparameter tuning in the above code and save the best-performing model”
The final version of the code is using GridSearchCV for hyperparameter tuning with five cross-validation splits and uses the f1 metric for evaluation to find the best hyperparameters.
After that, ChatGPT automatically added the code to select the best model for model evaluation on the testing set and displayed the best-performing hyperparameters.
from sklearn.model_selection import GridSearchCV
from sklearn.metrics import accuracy_score, precision_score, recall_score, f1_score
# Define the parameter grid for hyperparameter tuning
param_grid = {
    'n_estimators': [100, 200, 300],
    'max_depth': [10, 20, 30, None],
    'min_samples_split': [2, 5, 10],
    'min_samples_leaf': [1, 2, 4]
}

# Perform grid search with cross-validation to find the best hyperparameters
grid_search = GridSearchCV(rf, param_grid, cv=5, scoring='f1')
grid_search.fit(X_train, y_train)

# Get the best model and its hyperparameters
best_model = grid_search.best_estimator_
best_params = grid_search.best_params_

# Evaluate the best model on the testing set
y_pred = best_model.predict(X_test)
accuracy = accuracy_score(y_test, y_pred)
precision = precision_score(y_test, y_pred)
recall = recall_score(y_test, y_pred)
f1 = f1_score(y_test, y_pred)

# Print the results
print("Random Forest Classifier Evaluation Results:")
print("Accuracy: {:.2f}%".format(accuracy * 100))
print("Precision: {:.2f}%".format(precision * 100))
print("Recall: {:.2f}%".format(recall * 100))
print("F1 Score: {:.2f}%".format(f1 * 100))
print("Best hyperparameters:", best_params)
We have a stable model with an 89.35 accuracy score. Both Precision and recall are similar.
Random Forest Classifier Evaluation Results:
Accuracy: 89.35%
Precision: 89.92%
Recall: 88.33%
F1 Score: 89.12%
Best hyperparameters: {'max_depth': None, 'min_samples_leaf': 1, 'min_samples_split': 2, 'n_estimators': 300}
In the end, we will be saving the model using joblib.
import joblib
# Save the best model to disk
joblib.dump(best_model, 'loan_classifier.joblib')
You can find the source code with the outputs on this DataLab workbook; you can easily create your own copy to edit and run the code in the browser, all without having to install anything on your computer.
Now comes the most fun part. We will only use prompts to create a fully customizable web app that will take numerical input and display the results using a machine-learning model.
ChatGPT already knows the context, so we need to just ask it to write a Gradio web app for the loan data classifier.
Follow-up Prompt: “Write the Python code to create a Gradio web app for loan data classifiers. We are not using columns ['credit.policy', 'days.with.cr.line', 'purpose'].”
Ask ChatGPT to only include the Gradio app part instead of training and then the inference script.
Updated Prompt: “just include the gradio app part.”
The code we got displays the predictive class probability, and we want to show classification labels.
Updated Prompt: “modify the code to show classification instead of class probabilities.”
After running the code, we have seen multiple warnings and errors. You can improve it by mentioning the errors to ChatGPT.
We need to understand the limitations of ChatGPT. It was trained on an old dataset, and if you are expecting it to update the code with the latest API, you will hit the wall. Instead, we must read the Gradio documentation and update the code manually.
Failed Prompt: “update the Gradio code with component from gradio.components”
In the Gradio app, we are loading the saved model and getting the inputs from users to display model predictions.
Learn how Gradio works by reading the Gradio Docs.
import gradio as gr
import joblib
# Load the trained model
model = joblib.load("loan_classifier.joblib")


def predict_loan_status(
    int_rate,
    installment,
    log_annual_inc,
    dti,
    fico,
    revol_bal,
    revol_util,
    inq_last_6mths,
    delinq_2yrs,
    pub_rec,
    installment_to_income_ratio,
    credit_history,
):
    input_dict = {
        "int.rate": int_rate,
        "installment": installment,
        "log.annual.inc": log_annual_inc,
        "dti": dti,
        "fico": fico,
        "revol.bal": revol_bal,
        "revol.util": revol_util,
        "inq.last.6mths": inq_last_6mths,
        "delinq.2yrs": delinq_2yrs,
        "pub.rec": pub_rec,
        "installment_to_income_ratio": installment_to_income_ratio,
        "credit_history": credit_history,
    }
    # Convert the dictionary to a 2D array
    input_array = [list(input_dict.values())]
    prediction = model.predict(input_array)[0]

    if prediction == 0:
        return "Loan fully paid"
    else:
        return "Loan not fully paid"


inputs = [
    gr.Slider(0.06, 0.23, step=0.01, label="Interest Rate"),
    gr.Slider(100, 950, step=10, label="Installment"),
    gr.Slider(7, 15, step=0.1, label="Log Annual Income"),
    gr.Slider(0, 40, step=1, label="DTI Ratio"),
    gr.Slider(600, 850, step=1, label="FICO Score"),
    gr.Slider(0, 120000, step=1000, label="Revolving Balance"),
    gr.Slider(0, 120, step=1, label="Revolving Utilization"),
    gr.Slider(0, 10, step=1, label="Inquiries in Last 6 Months"),
    gr.Slider(0, 20, step=1, label="Delinquencies in Last 2 Years"),
    gr.Slider(0, 10, step=1, label="Public Records"),
    gr.Slider(0, 5, step=0.1, label="Installment to Income Ratio"),
    gr.Slider(0, 1, step=0.01, label="Credit History"),
]
outputs = [gr.Label(num_top_classes=2)]

title = "Loan Approval Classifier"
description = (
    "Enter the details of the loan applicant to check if the loan is approved or not."
)
gr.Interface(
    fn=predict_loan_status,
    inputs=inputs,
    outputs=outputs,
    title=title,
    description=description,
).launch()
You can save the above code in the `app.py` file and launch the app in the browser by running the `python app.py` script in the terminal.
Gif by Author | Loan approval classifier app
Even though our app is working fine, ChatGPT has completely missed that we have scaled the numerical features. So, instead of asking to update the code, you can go back and save the standard scalar parameters.
scalar = joblib.load('std_scaler.bin')After that, load the scalar in your app using joblib.
input_array = [list(input_dict.values())]
scaled_array = scalar.transform(input_array)
prediction = model.predict(scaled_array)[0]
So, why are we doing it manually? If you ask ChatGPT to modify a single line, it might modify the entire code and even variable names.
Yes, ChatGPT is not perfect, and it will never replace a developer.
You can simply ask ChatGPT to teach you the simple way of deploying a gradio app on Hugging Face Spaces, and it will list the necessary steps.
Prompt: “how to deploy gradio app to huggingface spaces.”
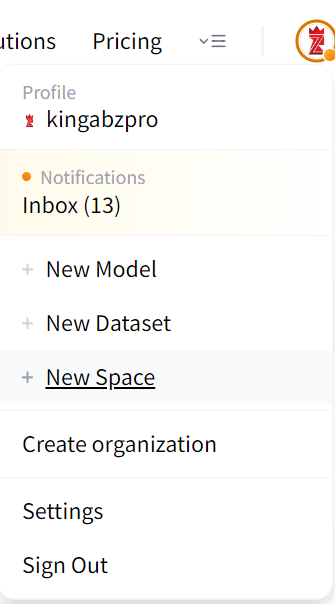
Image by Author
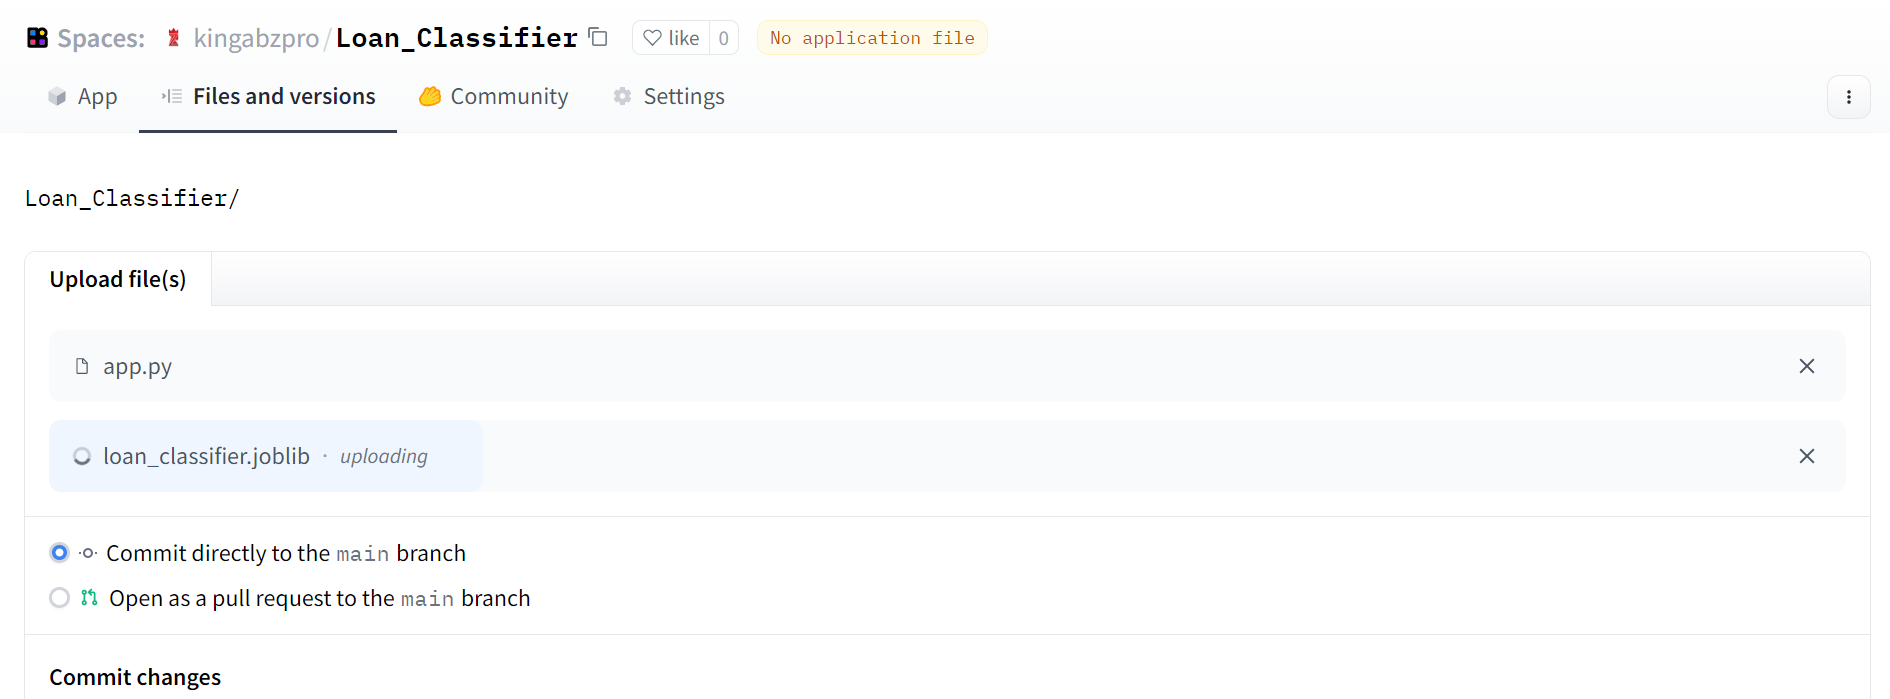
Image by Author
If you are facing a runtime error, it is because you forgot to also add requirements.txt file. Select Files and Versions tab > + Add file > Create a new file and add the file name and Python libraries with versions as shown below.
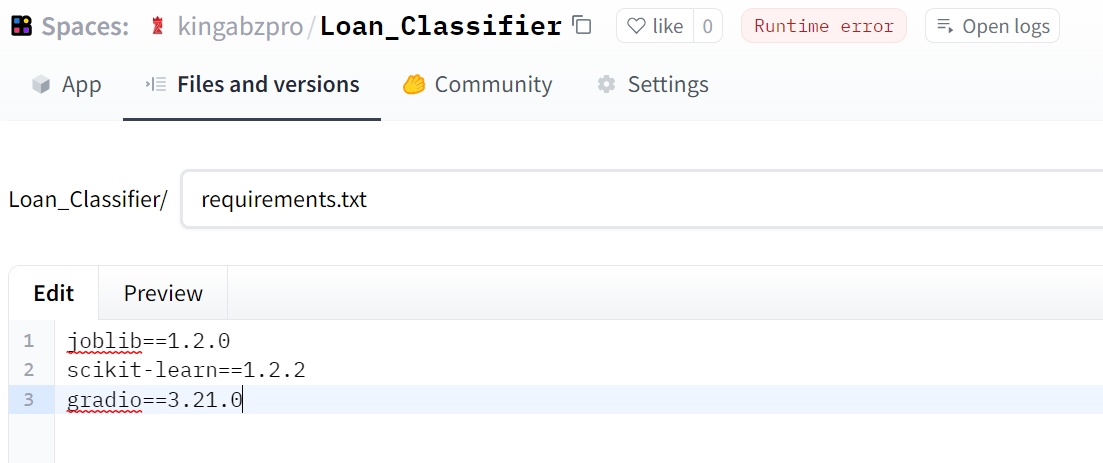
Image by Author
Your app is ready. You can change the input using sliders and predict if the customer should get a loan or not.
You can try the live demo on a Hugging Face Space by kingabzpro.
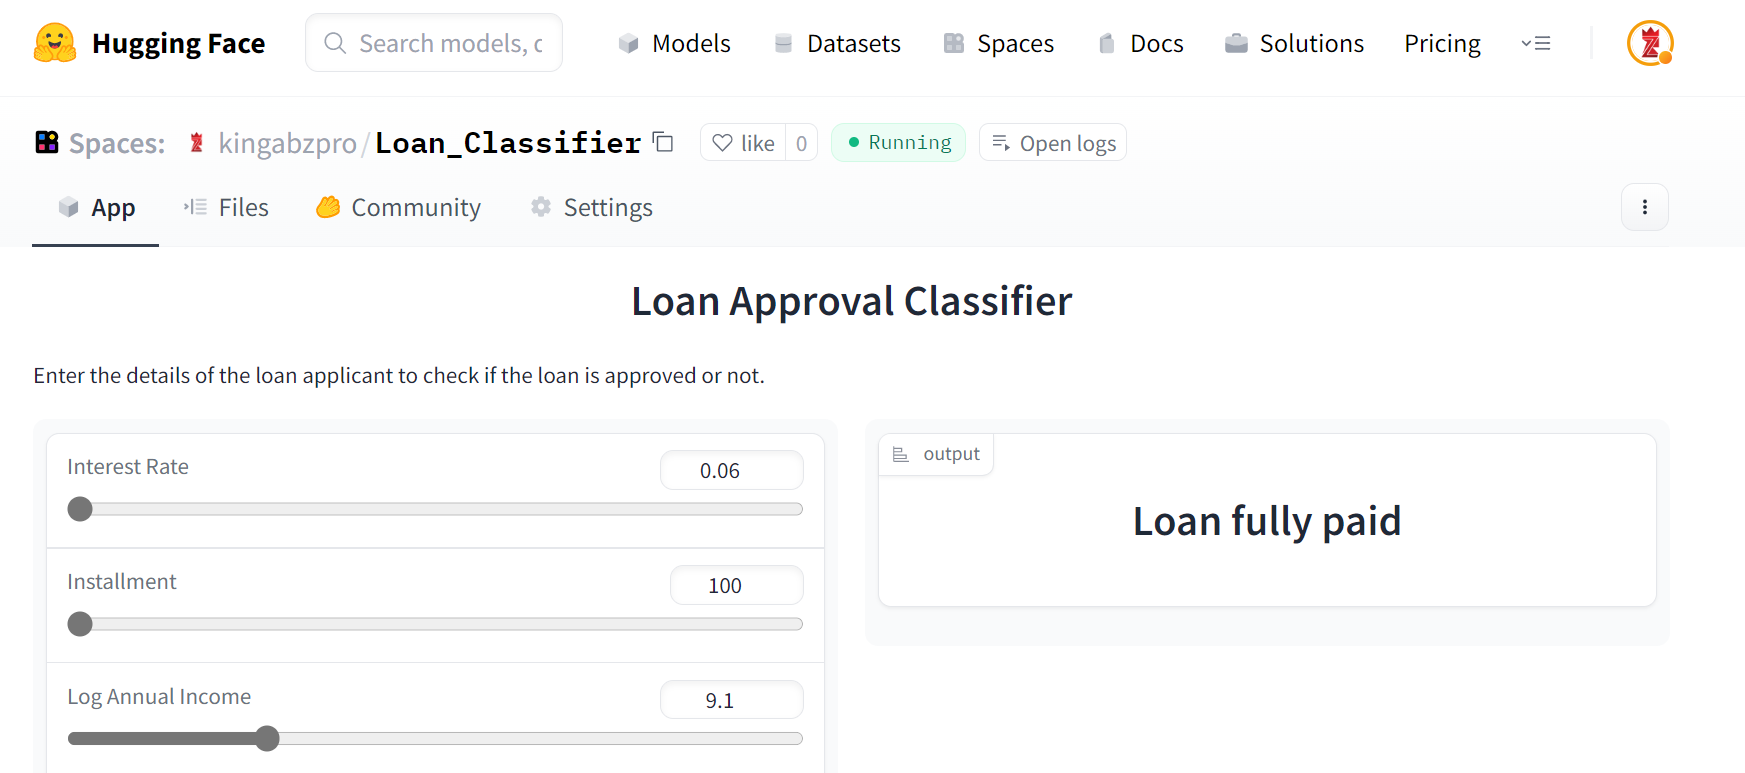
Image by Author | Loan Classifier
Prompt engineering is tricky when it comes to using it for real-life projects. We need to understand the rules about what we can do or where we have to step in to correct the ChatGPT.
Here are some tips on how you can improve your experience with ChatGPT without compromising the project.
If you are interested in ChatGPT and OpenAI API, register for the webinar: Getting Started with the OpenAI API and ChatGPT. You will learn to perform language and coding generation tasks using the OpenAI API and much more.
Developing a loan approval classifier is one of many examples of using ChatGPT for data science projects. We can use it to generate synthetic data, run SQL queries, create data analytics reports, do machine learning research, and much more. Generative AI is here to stay, and it will make our lives easier. Instead of spending weeks and months on a project, you can develop, test, and deploy data science applications in hours.
In this tutorial, we have learned to use ChatGPT for project planning, data analysis, data cleaning and preprocessing, model selection, hyperparameter optimization, and creating and deploying web applications.
There is a catch to using ChatGPT. You need to have experience with statistical analysis and Python coding to understand different tasks in the project; without it, you are walking blind. Start your data science journey by taking Data Scientist with Python career track and gain the career-building skills you need to succeed as a data scientist.
ChatGPT Course
Course
podcast
cheat-sheet
Tutorial
Moez Ali
code-along
Adel Nehme
code-along
Richie Cotton
code-along
Joe Franklin