

3. 丢掉 which()
下次您想用 which() 时,不妨试着不用!大家常常用 which() 根据布尔条件获取索引,再用这些索引去选择值。其实没有必要。
获取大于 5 的向量元素:
x <- 3:7
# Using which (not necessary)
x[which(x > 5)]
#> [1] 6 7
# No which
x[x > 5]
#> [1] 6 7
或者统计大于 5 的值的数量:
# Using which
length(which(x > 5))
#> [1] 2
# Without which
sum(x > 5)
#> [1] 2
为什么要丢掉 which()?它往往是多余的,布尔向量就足够了。
例如,R 允许您用布尔向量中标记为 TRUE 的位置来选择元素:
condition <- x > 5
condition
#> [1] FALSE FALSE FALSE TRUE TRUE
x[condition]
#> [1] 6 7
此外,将布尔向量与 sum() 或 mean() 结合,可用于得到满足条件的计数或比例:
sum(condition)
#> [1] 2
mean(condition)
#> [1] 0.4
which() 会告诉您 TRUE 值的索引:
which(condition)
#> [1] 4 5
虽然结果没错,但确实没必要。比如我经常看到有人把 which() 和 length() 结合起来测试是否有任一值或所有值为 TRUE。其实,您只需要 any() 或 all():
x <- c(1, 2, 12)
# Using `which()` and `length()` to test if any values are greater than 10
if (length(which(x > 10)) > 0)
print("At least one value is greater than 10")
#> [1] "At least one value is greater than 10"
# Wrapping a boolean vector with `any()`
if (any(x > 10))
print("At least one value is greater than 10")
#> [1] "At least one value is greater than 10"
# Using `which()` and `length()` to test if all values are positive
if (length(which(x > 0)) == length(x))
print("All values are positive")
#> [1] "All values are positive"
# Wrapping a boolean vector with `all()`
if (all(x > 0))
print("All values are positive")
#> [1] "All values are positive"
哦,而且还能帮您省点时间……
x <- runif(1e8)
system.time(x[which(x > .5)])
#> user system elapsed
#> 1.156 0.522 1.686
system.time(x[x > .5])
#> user system elapsed
#> 1.071 0.442 1.662
4. 给这个因子再来个 factor!
是否遇到过从因子中移除某些值后,仍然残留不再存在的旧水平?我见过各种创意做法来处理这个问题。最简单的解决方案,往往就是再包一层 factor()。
下面的示例创建了一个包含四个水平("a"、"b"、"c" 和 "d")的因子:
# A factor with four levels
x <- factor(c("a", "b", "c", "d"))
x
#> [1] a b c d
#> Levels: a b c d
plot(x)
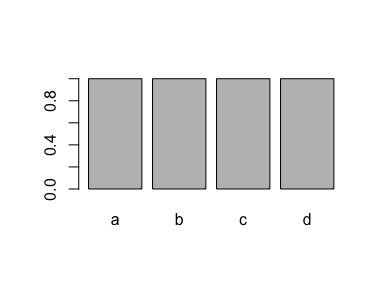
如果您删除了某个水平("d")的所有观测,这个水平仍会记录在因子中:
# Drop all values for one level
x <- x[x != "d"]
# But we still have this level!
x
#> [1] a b c
#> Levels: a b c d
plot(x)
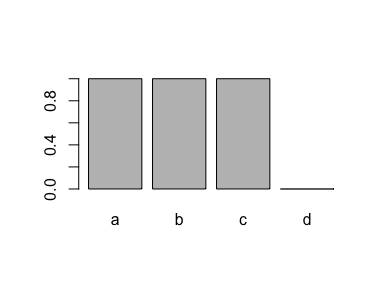
一个超简单的去除方法就是再用一次 factor():
x <- factor(x)
x
#> [1] a b c
#> Levels: a b c
plot(x)
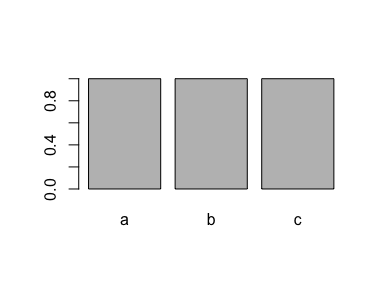
这通常是一个能解决许多人头疼问题的好办法。所以,省点心,再给那个因子来个 factor 吧!
5. 先拿到 $,再掌握效率
下次当您想从 data.frame 中抽取某列、且仅保留符合条件的行时,请先用 $ 指定列,再用 [ 指定行。
比如,您想在 mtcars 数据集中获取 4 缸(cyl)车型的马力(hp)。可以这样写:
# rows first, column second - not ideal
mtcars[mtcars$cyl == 4, ]$hp
#> [1] 93 62 95 66 52 65 97 66 91 113 109
# column first, rows second - much better
mtcars$hp[mtcars$cyl == 4]
#> [1] 93 62 95 66 52 65 97 66 91 113 109
这里的建议是使用第二种方式。
为什么呢?
第一:摆脱恼人的逗号!当您先指定行再指定列时,需要记住这个逗号:mtcars[mtcars$cyl == 4,]$hp。先指定列意味着您现在操作的是一个向量,不再需要逗号!
第二:更快!我们在一个更大的数据框上试试:
# Simulate a data frame...
n <- 1e7
d <- data.frame(
a = seq(n),
b = runif(n)
)
# rows first, column second - not ideal
system.time(d[d$b > .5, ]$a)
#> user system elapsed
#> 0.497 0.126 0.629
# column first, rows second - much better
system.time(d$a[d$b > .5])
#> user system elapsed
#> 0.089 0.017 0.107
值了吧?
不过,如果您想把 R 数据框技能练到极致,我建议学习 dplyr。您可以在 dplyr 网站上快速了解,或通过 DataCamp 的在线课程 Data Manipulation in R with dplyr 系统入门。
结语
感谢阅读,希望对您有所帮助。
如需获取最新博文更新,请在 Twitter 上关注 @drsimonj,或发送邮件至 [email protected] 与我联系。
如果您想获取生成本博文的代码,请查看 blogR GitHub 仓库。
欢迎查看我们的Tidyverse 入门教程。
@drsimonj 在这里分享我经常与 R 同行交流的五个简单技巧,帮您改进代码!
1. 从 1 开始生成序列更“有趣”
下次当您用冒号运算符从 1 生成序列(如
1:n)时,试试seq()吧。冒号运算符可能产生出乎意料的结果,让您在不知不觉中掉坑!看看当您想对一个空向量的长度生成序列会发生什么:
您还会注意到,这样可以省去使用
length()之类的函数。当seq()作用于一个具有特定长度的对象时,它会自动生成从 1 到该对象长度的序列。2. 用
vector()来创建您要c()的下次当您用
c()创建空向量时,试着改用vector("type", length)。这样做可以改善内存使用并提升速度!您往往能够事先知道向量会存放什么类型的值,以及向量会有多长。使用
c()意味着 R 需要慢慢地把这两件事都摸清楚。所以,用vector()给它加把劲吧!这个做法在 for 循环中尤为明显。大家常常先声明一个空向量,然后用
c()逐步扩展,像这样:相反,先用
vector()预定义类型和长度,再用索引按位置赋值,如下:这里有个简单的速度对比:
这应该足够有说服力了!