
Track
Artificial Intelligence (AI) Leadership
6 hr
Voice AI agents are having a moment. Users want to talk to their apps instead of typing at them, and the tech is finally good enough to make those conversations feel natural.
If you want to build one, xAI's Grok Voice Agent API is a solid place to start. It offers sub-second response times and lower costs than most alternatives, plus drop-in compatibility with existing OpenAI code.
This tutorial shows you how to build a working voice agent from scratch. You'll wire up authentication, configure personality and voice options, add tool calling, and deploy to production with LiveKit Cloud. The API runs on Grok 3, which xAI adapted for real-time voice conversation instead of the usual text-in, text-out workflow.
The Grok Voice Agent API is xAI's real-time voice conversation platform, released in December 2025. It processes audio directly without the usual conversion between speech-to-text and back again, cutting response time while keeping conversations sounding natural.
Traditional voice AI systems chain three separate steps together: transcribing speech into text, running that text through a language model, then synthesizing the response back into audio. This approach works, but each handoff between components adds delay. By the time you factor in transcription, processing, and synthesis, you're looking at 500ms to 1,000ms before the user gets a response. Those pauses add up and make conversations feel mechanical.
Grok Voice Agent skips the conversions entirely. The system takes in audio, reasons in the audio domain, and outputs audio using a single model trained on conversational speech. This architecture delivers a time-to-first-audio of 0.78 seconds on average while supporting full-duplex communication (simultaneous two-way audio where the agent can listen and speak at the same time), so the agent can respond without waiting for strict turn-taking.
Building a voice agent with Grok requires pairing it with LiveKit, an open-source WebRTC platform. Grok supplies the conversational AI model, while LiveKit manages the real-time audio infrastructure connecting users to your agent. This section covers setting up both services.
Visit console.x.ai and create an account using X, email, Google, or Apple authentication. The xAI console requires prepaid credits before you can make API calls. Purchase credits through the Billing section.
With credits in your account, navigate to API Keys and generate a new key. The console displays the key once, so copy it immediately and store it securely. If lost, you'll need to generate a replacement and update your applications. For a deeper walkthrough of xAI's API ecosystem, see the Grok 3 API tutorial.
LiveKit is WebRTC infrastructure for real-time audio and video. It handles the audio transport layer that Grok needs to connect with users. When building a voice agent, LiveKit manages rooms where conversations occur, routes audio streams between participants, and provides deployment infrastructure. The LiveKit Agents framework wraps this complexity, letting you focus on agent behavior while it handles connection management, audio encoding, and turn detection.
The framework supports multiple AI providers, including xAI. It includes a testing playground accessible through a web interface, which you'll use to validate your agent before deploying it.
Sign up at cloud.livekit.io. The free tier provides enough resources for development and testing. Create a project through the dashboard. Navigate to Settings, then API Keys. Copy three credentials: LIVEKIT_URL (your project's WebSocket endpoint), LIVEKIT_API_KEY (the public identifier), and LIVEKIT_API_SECRET (the private authentication key). These credentials authenticate your agent code with your LiveKit Cloud project.
Install the required packages:
uv add "livekit-agents[xai,openai]>=1.3.10" python-dotenvThis installs the LiveKit agents framework with both the xAI plugin and OpenAI dependencies (the xAI plugin builds on OpenAI's Realtime API compatibility), plus python-dotenv for environment variable management.
Create a .env file in your project root:
XAI_API_KEY=xai-YourActualKeyHere
 LIVEKIT_URL=wss://your-project.livekit.cloud
 LIVEKIT_API_KEY=APIYourKeyHere
 LIVEKIT_API_SECRET=YourSecretHere
Replace the placeholder values with your actual credentials. Load these credentials in your Python code:
from dotenv import load_dotenv
 load_dotenv()
This makes the credentials available to both the xAI and LiveKit libraries. Add .env to your .gitignore to prevent credential leaks in version control.
With your environment configured, you can build a working voice agent. Start with the imports and agent class in a new file called agent.py:
from livekit.agents import Agent, AgentSession, AgentServer, JobContext, cli
from livekit.plugins.xai import realtime
from dotenv import load_dotenv

load_dotenv()

class ResearchAssistant(Agent):
	def __init__(self):
    	super().__init__(
        	instructions="You are a research assistant who helps users find information.",
 	)
Your Agent subclass holds only the instructions that shape how the agent responds. These work like a system prompt, telling the agent what role to play. The actual model configuration goes elsewhere.
Next, set up the server and connection handler:
server = AgentServer()


@server.rtc_session()
async def entrypoint(ctx: JobContext):
	await ctx.connect()

 	session = AgentSession(
         llm=realtime.RealtimeModel(voice="ara"),
 	)

 	await session.start(
     	room=ctx.room,
     	agent=ResearchAssistant(),
 	)
The @server.rtc_session() decorator tells LiveKit to run your entrypoint function whenever someone connects. Inside, AgentSession takes the model configuration, including which of Grok's seven voices to use (Ara, Eve, Leo, Sal, Rex, Mika, or Valentin). When session.start() runs, it connects your agent to the LiveKit room where the conversation happens.
Voice conversations involve waiting for audio input and output without freezing the program, so the function uses async def and await to handle these operations concurrently.
Finally, add the entry point:
if __name__ == "__main__":
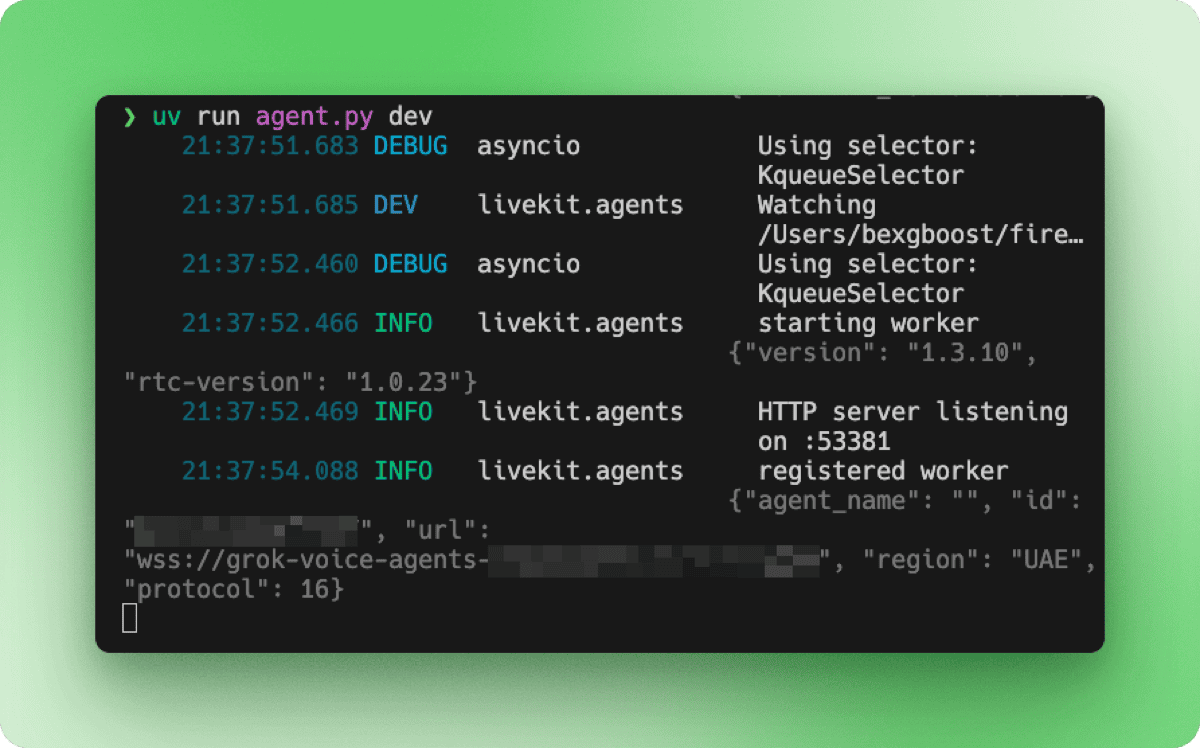
cli.run_app(server)Run your agent in development mode:
uv run agent.py devThe terminal shows the startup sequence: worker initialization, HTTP server listening on a local port, and registration with your LiveKit Cloud project.
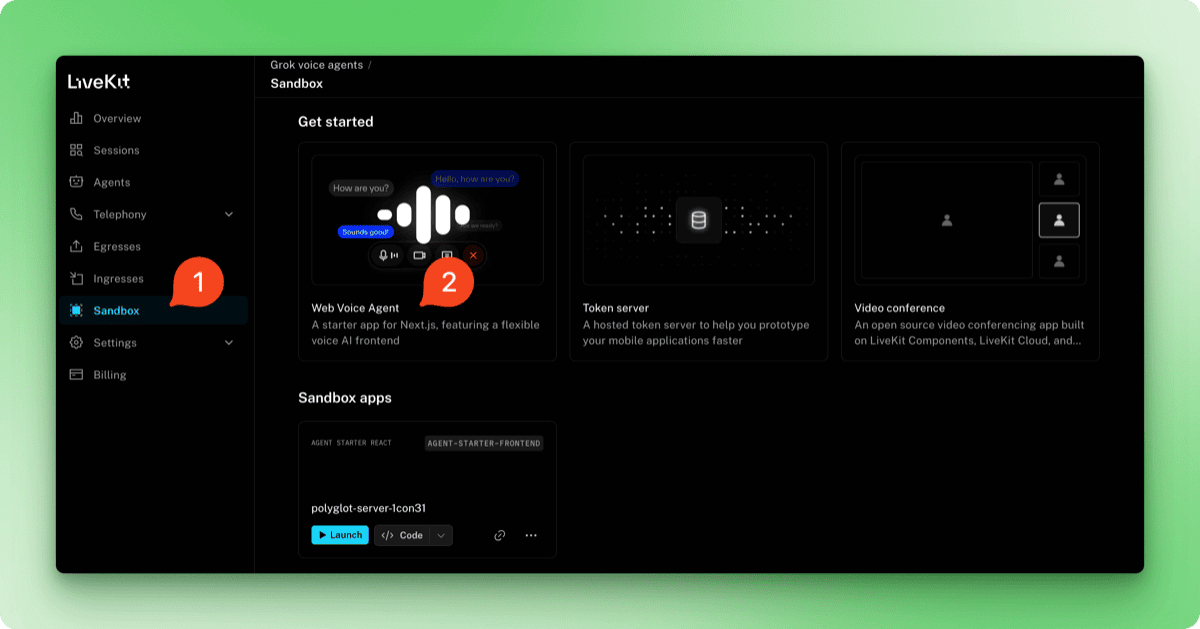
To test the agent, go to your LiveKit Cloud dashboard at cloud.livekit.io. Select your project, then click the Sandbox tab in the sidebar. Choose Web Voice Agent from the templates.
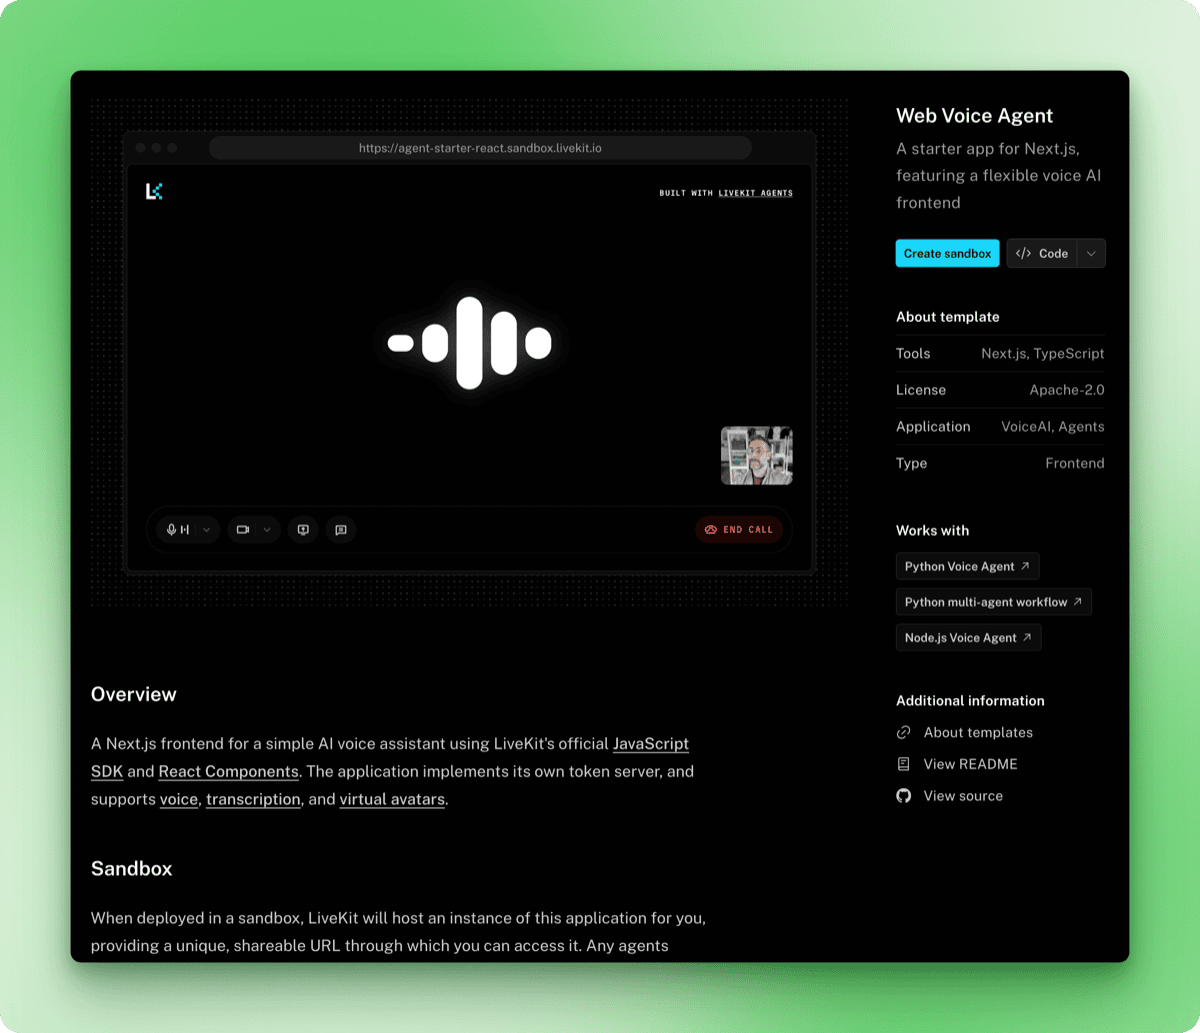
The template page shows a preview of the voice interface along with details about what it includes. Click the Create sandbox button.
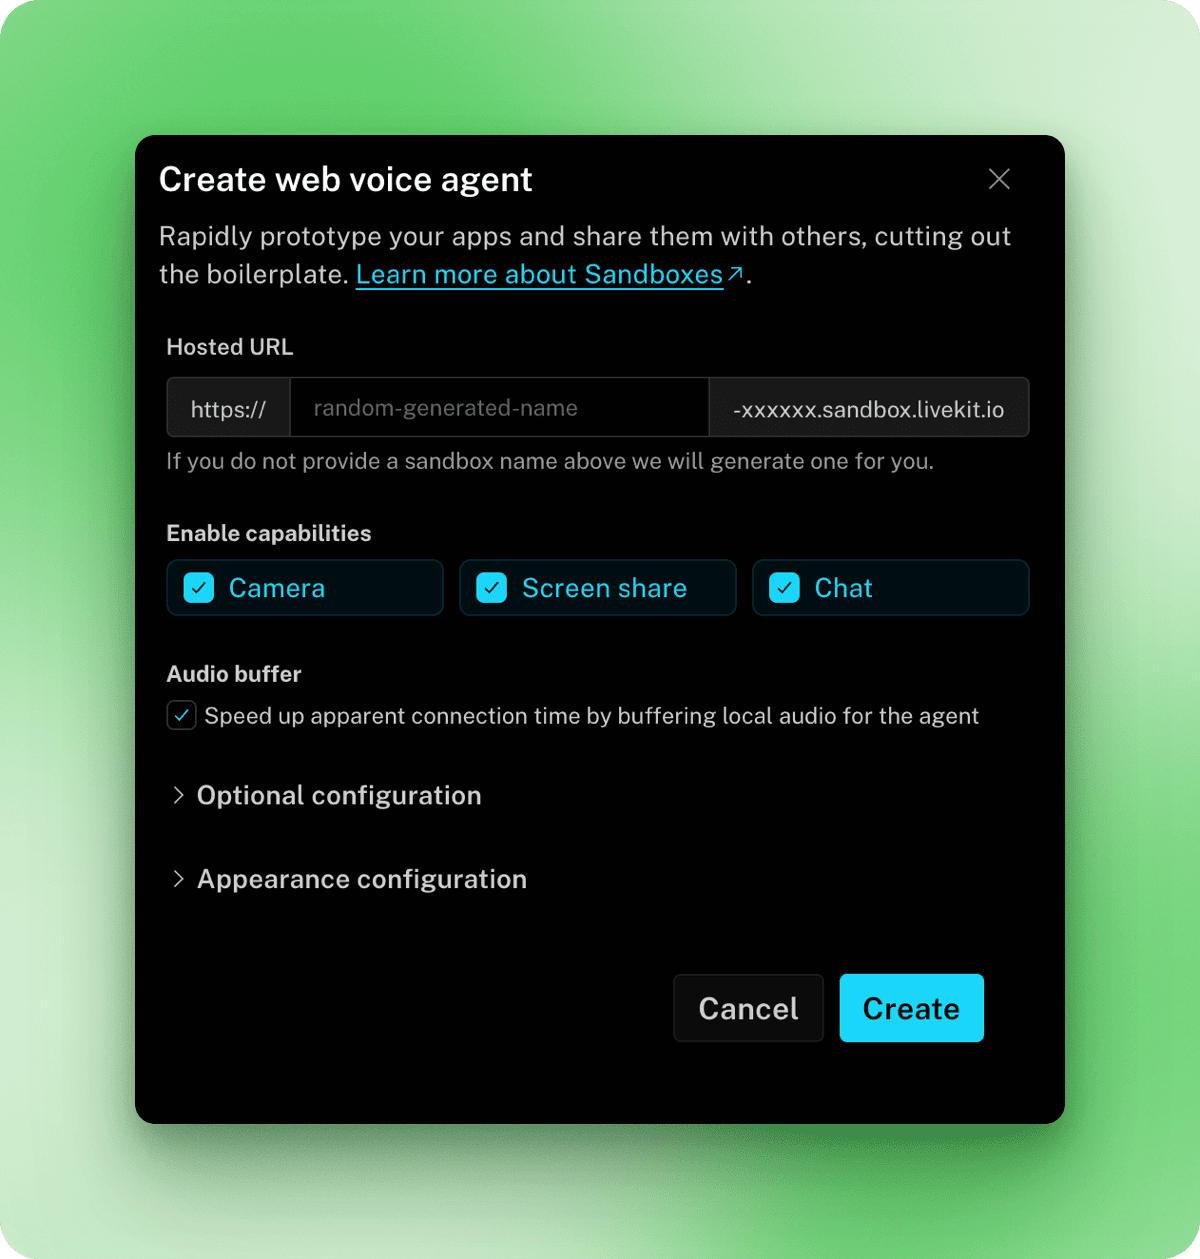
In the modal that appears, you can configure a custom URL, enable capabilities like camera and screen sharing, and adjust appearance settings. The defaults work fine for testing, so click Create, then Done.
Back on the Sandbox page, your new sandbox appears under Sandbox apps. Click Launch to open it.
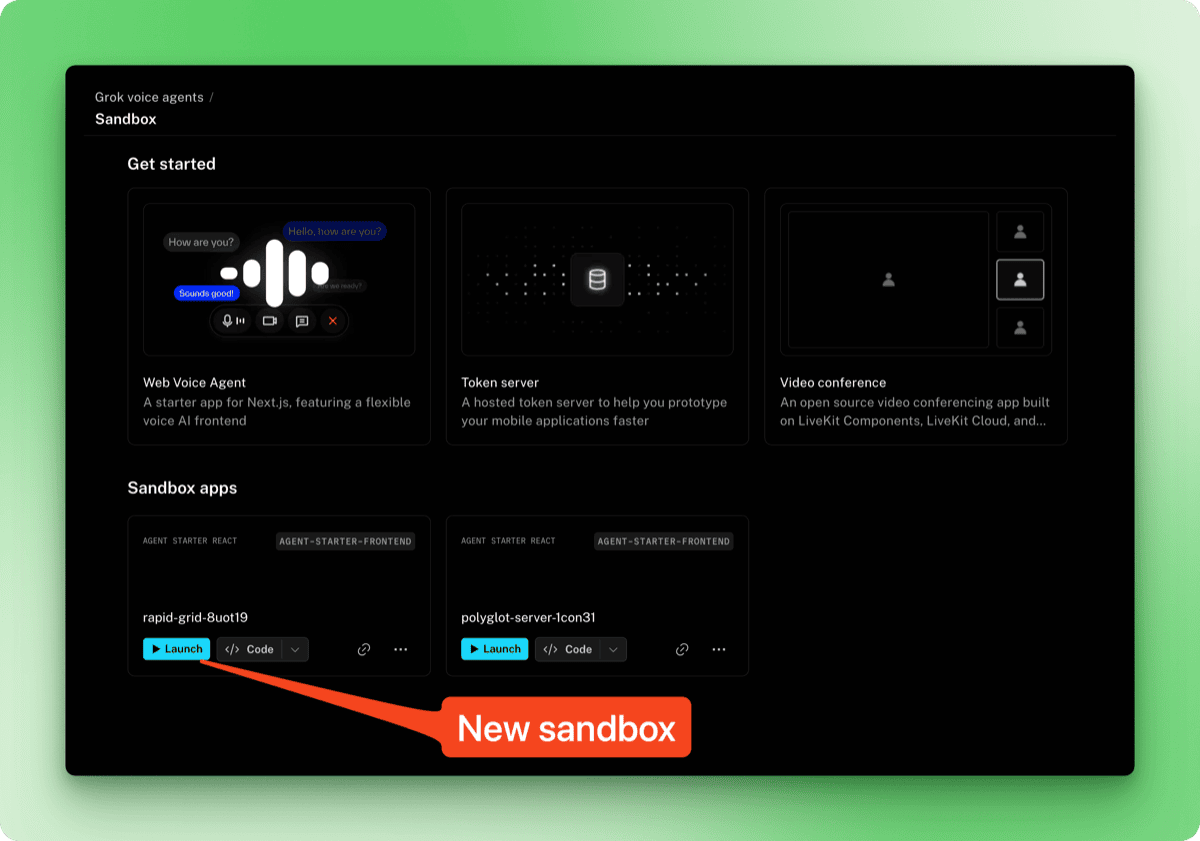
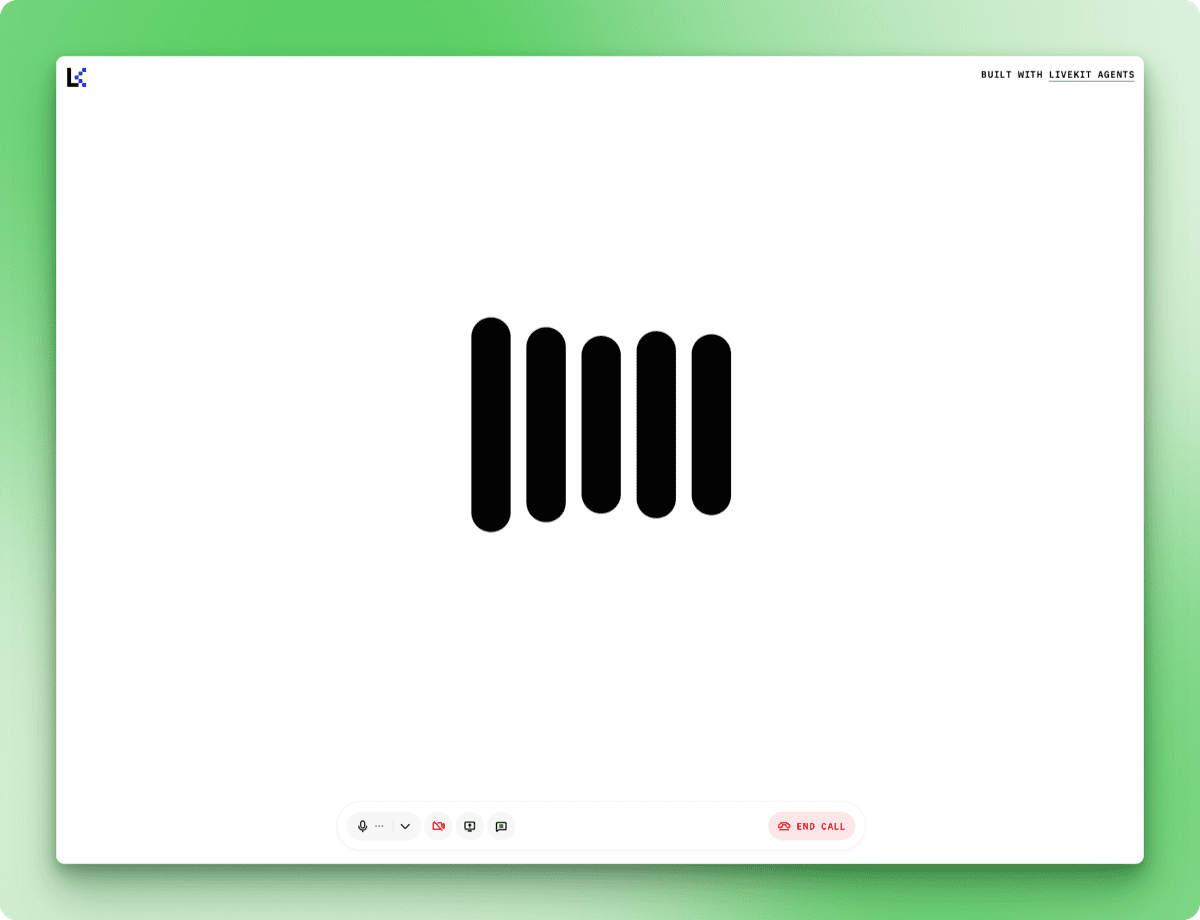
Click Start Call and grant microphone permissions when prompted. Watch the terminal for this log message, which indicates the agent is ready to receive audio:
DEBUG livekit.agents start reading stream {"participant": "...", "source": "SOURCE_MICROPHONE", ...}After this message appears, responses come quickly.
When you ask about something the agent cannot access (like current weather in a specific city), it explains its limitations rather than making things up.
The basic agent can hold a conversation but has no way to look things up. Tool calling lets Grok run functions mid-conversation and speak about the results. You can use xAI's built-in tools or define your own.
The xAI plugin includes WebSearch for general web queries and XSearch for searching posts on X. Import them and pass them to AgentSession:
from livekit.agents import Agent, AgentSession, AgentServer, JobContext, cli
from livekit.plugins.xai import realtime
from livekit.plugins.xai.realtime import WebSearch, XSearch
from dotenv import load_dotenv

load_dotenv()


class ResearchAssistant(Agent):
 	def __init__(self):
     	super().__init__(
             instructions="""You are a research assistant with access to web search and X search.

- Use web search for general queries and current information
- Use X search when users ask about posts or what people are saying on X/Twitter

Always mention your sources when providing information.""",
     	)


server = AgentServer()


@server.rtc_session()
async def entrypoint(ctx: JobContext):
	await ctx.connect()

	session = AgentSession(
         llm=realtime.RealtimeModel(voice="ara"),
     	tools=[
         	WebSearch(),
         	XSearch(),
     	],
 	)

 	await session.start(
     	room=ctx.room,
     	agent=ResearchAssistant(),
 	)


if __name__ == "__main__":
 	cli.run_app(server)
The tools parameter accepts a list of tool objects. Run the agent and test with questions like "What's the latest news about AI?" or "What are people saying about Grok on X?" The terminal logs may show warnings about unknown AI functions like web_search_with_snippets or x_semantic_search, but the tools return current information regardless.
Grok's full-duplex audio also becomes apparent when using tools. You can interrupt the agent while it's speaking, and it stops, listens, and adjusts its response. This makes conversations feel less robotic than systems that require waiting for the agent to finish before speaking.
Built-in tools cover common use cases, but defining your own tools gives you control over parameters, error handling, and which APIs to call. This section demonstrates custom tool creation using Firecrawl's search endpoint, which offers filtering options like limit, lang, and country that the built-in web search does not expose.
Sign up at firecrawl.dev. The free tier includes 500 credits and requires no credit card. Install the SDK and add your key to .env:
uv add firecrawl-pyFIRECRAWL_API_KEY=fc-your-key-hereCustom tools are methods decorated with @function_tool(). Update the imports in search_agent.py:
from livekit.agents import (
 	Agent,
 	AgentSession,
 	AgentServer,
 	JobContext,
 	cli,
 	function_tool,
 	RunContext,
 )

from livekit.plugins.xai import realtime
from livekit.plugins.xai.realtime import XSearch
from firecrawl import FirecrawlApp
from dotenv import load_dotenv

import os
load_dotenv()
The additions are function_tool for the decorator, RunContext which gets passed to tool functions, and FirecrawlApp for the Firecrawl client. WebSearch is removed since the custom tool replaces it.
Define the tool as a method on your agent class:
class ResearchAssistant(Agent):
 	def __init__(self):
     	super().__init__(
             instructions="""You are a research assistant with access to web search and X search.

 - Use Firecrawl search for general queries and current information
 - Use X search when users ask about posts or what people are saying on X/Twitter

 Always mention your sources when providing information.""",
     	)
     	self.firecrawl = FirecrawlApp(api_key=os.getenv("FIRECRAWL_API_KEY"))

 	@function_tool()
     async def search_web(
     	self,
     	context: RunContext,
     	query: str,
 	) -> dict:
     	"""Search the web for current information using Firecrawl.

     	Args:
         	query: The search query
     	"""
     	result = self.firecrawl.search(query, limit=3)
     	return {
         	"results": [
             	{
                 	"title": item.title,
                 	"url": item.url,
                     "description": item.description,
             	}
             	for item in result.web
         	]
     	}
Grok reads the docstring to understand what the tool does. When you ask "What's the current USD to EURO exchange rate?", Grok extracts the query, calls your function, and incorporates the results into its response.
Methods decorated with @function_tool() register automatically, so remove WebSearch() from the tools list:
session = AgentSession(
     llm=realtime.RealtimeModel(voice="ara"),
 	tools=[
     	XSearch(),
 	],
 )
Run the updated agent:
uv run search_agent.py devThe terminal shows tool execution:
DEBUG livekit.agents executing tool {
 	"function": "search_web",
 	"arguments": "{\"query\":\"current USD to EURO exchange rate\"}",
 	...
 }
DEBUG livekit.agents tools execution completed {...}
In my tests, Firecrawl returned results in about two seconds. You can combine multiple custom tools with built-in tools in the same agent. A customer support agent, for example, might use XSearch alongside custom lookup_order() and check_inventory() tools that connect to internal databases.
The default turn detection settings handle typical conversations well. Adjustments become necessary when the environment or user behavior differs from the norm. A noisy room might cause the agent to respond to background sounds, while a user who pauses to collect their thoughts might get interrupted before finishing.
from livekit.plugins.xai import realtime
from openai.types.beta.realtime.session import TurnDetection

session = AgentSession(
 	llm=realtime.RealtimeModel(
     	voice="ara",
     	turn_detection=TurnDetection(
         	type="server_vad",
         	threshold=0.5,
         	prefix_padding_ms=300,
         	silence_duration_ms=200,
     	),
 	),
 )
The threshold parameter sets how loud audio needs to be before it counts as speech, ranging from 0.0 to 1.0. Raising this value to 0.7 or higher helps in noisy environments where background sounds might otherwise trigger responses.
The prefix_padding_ms parameter determines how much audio to capture before the detected start of speech. The default 300ms prevents the first syllable from getting clipped. Increase this if users report their opening words being cut off.
The silence_duration_ms parameter controls how long the agent waits after you stop speaking before it responds. At 200ms, conversations feel responsive. Raising this to 400 or 500ms accommodates users who pause mid-sentence or speak at a slower pace.
For push-to-talk interfaces or telephony systems where you need explicit control over conversation flow, disable automatic turn detection:
session = AgentSession(
 	llm=realtime.RealtimeModel(
     	voice="ara",
     	turn_detection=None,
 	),
 )
The agent then waits for a programmatic signal before responding rather than listening for silence.
Development mode ties the agent to your local machine. For a production deployment that runs 24/7 and scales with demand, LiveKit Cloud hosts your agent on their infrastructure.
The LiveKit CLI detects your project type through dependency files. Create a requirements.txt in your agent directory:
livekit-agents[xai,openai]>=1.3.10
python-dotenv>=1.2.1
firecrawl-py>=4.12.0
Create a separate file for production secrets. LiveKit Cloud automatically provides LIVEKIT_URL, LIVEKIT_API_KEY, and LIVEKIT_API_SECRET, so you only need to include your other API keys:
XAI_API_KEY=xai-your-key-here
FIRECRAWL_API_KEY=fc-your-key-here
Save this as .env.production and add it to .gitignore.
Authenticate the CLI with your LiveKit Cloud account:
lk cloud authThis opens a browser to link your CLI to your project. Once authenticated, deploy the agent:
lk agent create --secrets-file .env.productionThe CLI registers your agent, generates a Dockerfile, builds the container image, and deploys it to LiveKit Cloud. The logs stream to your terminal as the agent starts:
{"message": "registered worker", "level": "INFO", "name": "livekit.agents", "url": "https://your-project.livekit.cloud", "region": "Germany 2", ...}Check the deployment status:
lk agent status┌─────────────────┬─────────────────┬────────────┬─────────┬────────┬─────────┬───────────┐
│ ID │ Version │ Region │ Status │ CPU │ Mem │ Replicas │
├─────────────────┼─────────────────┼────────────┼─────────┼────────┼─────────┼───────────┤
│ CA_AAVy5WbUYpmA │ v20260109102531 │ eu-central │ Running │ 0m / 2 │ 0 / 4GB │ 0 / 1 / 1 │
└─────────────────┴─────────────────┴────────────┴─────────┴────────┴─────────┴───────────┘The URL in the deployment logs (https://your-project.livekit.cloud) is the WebSocket backend, not a user interface. Users interact with your agent through a frontend that connects to this backend.
The sandbox you created earlier serves this purpose. Navigate to your LiveKit dashboard, open the Sandbox section, and copy your sandbox URL. This URL is publicly accessible and works without any authentication. Share it with users and they can start talking to your agent immediately.
For a branded experience, customize the sandbox appearance in the dashboard (logo, colors, button text) or build your own frontend using LiveKit's JavaScript SDK.
View real-time logs from your deployed agent:
lk agent logsDeploy updates after modifying your code:
lk agent deploy --secrets-file .env.productionLiveKit uses rolling deployments. New instances handle fresh sessions while existing instances complete their active conversations, so updates cause no downtime.
Revert to a previous version if something breaks:
lk agent rollbackThe deployed agent runs independently of your local machine. Close your terminal, shut down your computer, and the agent keeps responding to users. LiveKit Cloud handles scaling, so traffic spikes spin up additional instances automatically.
Running a Grok voice agent in production involves two costs: xAI's API and LiveKit's hosting.
xAI charges $0.05 per minute of voice conversation. LiveKit Cloud charges $0.01 per minute of agent session time. Combined, expect roughly $0.06 per minute when your agent is actively serving users.
LiveKit's free tier (Build plan) includes 1,000 agent session minutes per month with no credit card required. This covers about 16 hours of conversation, enough for testing and low-traffic applications. Paid plans start at $50/month with 5,000 included minutes and higher concurrency limits.
The agent costs nothing when idle. Charges only apply during active conversations, so a deployment sitting unused overnight incurs no LiveKit fees. xAI billing follows the same pattern, metering only actual API usage. Throughout my experiments while writing this article, I spent a grand total of 78 cents on xAI, with LiveKit covered by its free tier.
You now have a voice agent that listens, thinks, and talks back. The agent connects to live data through tools, adjusts its listening behavior for different environments, and runs on infrastructure that scales without manual intervention.
The code patterns covered here extend to other use cases. Swap the research assistant instructions for customer support guidelines and add tools that query your order database. Build a language tutor that searches for example sentences. Create a voice interface for your existing API.
xAI plans to release standalone text-to-speech and speech-to-text endpoints, which will open up hybrid architectures where you mix Grok's voice capabilities with other language models. For now, the voice agent API handles the full pipeline.
The LiveKit Agents documentation covers additional features like multi-agent handoffs and session persistence. The xAI docs go deeper on audio formats and enterprise features.
Learn with DataCamp
Track
Course
Course