Course
Introduction to Python
4 hr
6.9M
If you're tired of fumbling with confusing slice indices or wondering why your sliced lists aren't behaving as expected, you’re in the right place. In this guide, we’ll break down Python slicing into digestible chunks (pun intended). We’ll cover everything from the basics of slicing syntax to advanced techniques with multi-dimensional arrays. Plus, I'll share examples with real applications you can make use of immediately.
If you are eager to build a strong Python foundation, also check out our Python Fundamentals course, which is designed to help you master essential skills like slicing, data structures, and more.
Let’s take a quick moment to talk about what slicing means in Python and why it’s useful.
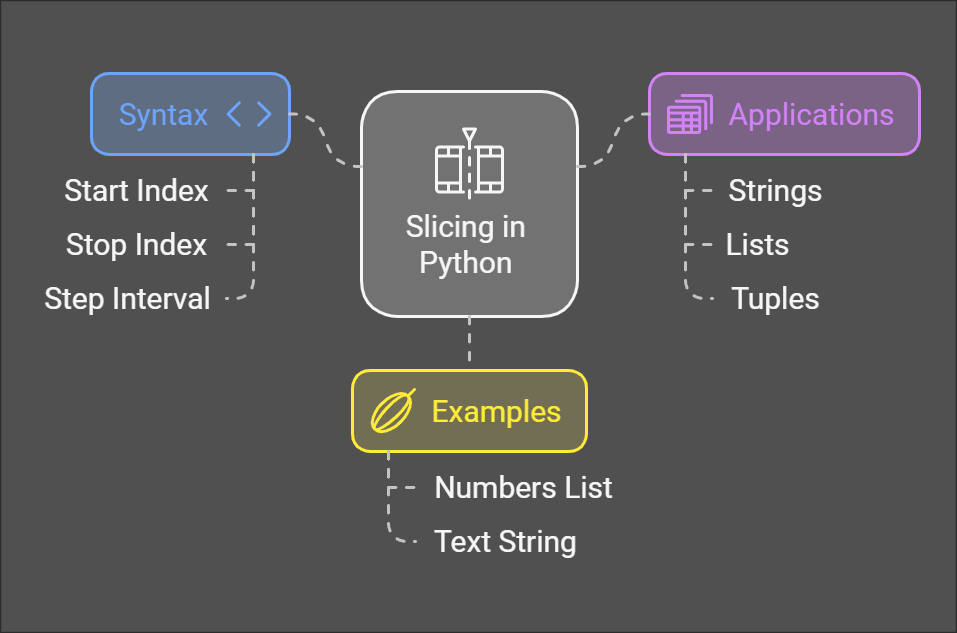
Slicing in Python is a method for extracting specific portions of sequences like strings, lists, tuples, and ranges. Slicing can refer to using the built-in slice() function or the even more common bracket notation that looks like this: [start:end:step]. The functionality is a core part of the Python language, so you can perform slicing with or without importing any additional packages. Slicing as it happens in external libraries like NumPy or pandas provide some interesting differences, which I will cover in detail, below.
Python slicing is one of the most efficient and intuitive tools for data manipulation. Whether you're analyzing datasets, processing strings, or manipulating arrays, slicing allows you to access and handle subsets of data.
Here’s why every developer should master it:
As I said, slicing is a core feature in Python, allowing developers to extract portions of sequences like lists, strings, and tuples. Python offers two primary ways to slice sequences without importing anything: the slicing : syntax and the slice() function. Understanding both methods is useful since you are very likely to see both methods used.
The slicing syntax sequence[start:stop:step] is the most common way to access parts of a sequence. Each parameter—start, stop, and step—controls how the slicing is performed:
start: Index where the slice begins (inclusive). Defaults to 0 if omitted.
stop: Index where the slice ends (exclusive). Defaults to the sequence's length if omitted.
step: Determines the interval between elements. Defaults to 1 if omitted.
Let's try an example:
numbers = [10, 20, 30, 40, 50, 60]

print(numbers[1:4])
# Output: [20, 30, 40]

print(numbers[:3])
# Output: [10, 20, 30]

print(numbers[::2])
# Output: [10, 30, 50]
You can also apply this method of slicing to strings:
text = "Python Slicing"

print(text[7:])
# Output: "Slicing"

print(text[::-1])
# Output: "gnicilS nohtyP" (reverses the string)
You can even extract alternate elements from a list with slicing:
data = [100, 200, 300, 400, 500]

alternate = data[::2]

print(alternate)
# Output: [100, 300, 500]
In a real-world scenario, slicing is particularly useful when working with large datasets. Let’s say you’re handling a log file with millions of records and need to extract the last 1,000 entries for analysis:
logs = load_large_dataset()
recent_logs = logs[-1000:]
This approach avoids loading the entire dataset into memory, ensuring your application runs efficiently.
Python’s slice() function provides an alternative definition of slicing parameters as reusable slice objects. These objects encapsulate slicing logic and can be applied across multiple sequences.
The slice() function follows the format:
slice(start, stop, step) Here is an example:
# Create a slice object
slice_obj = slice(1, 4)

# Apply to a list
numbers = [10, 20, 30, 40, 50]
print(numbers[slice_obj])  # Output: [20, 30, 40]

# Apply to a string
text = "Python"
print(text[slice_obj]) # Output: "yth" Personally, I like using the slice() function because it allows me to reuse the same slice object across different sequences, avoiding repetitive slicing logic. It also makes the code easier to read and maintain.
As you can see in the following example, we define a slice object once and reuse it across multiple sequences. This eliminates the need to repeatedly specify the same start, end, and step values. It also improves reusability because changing the slice boundaries in a single place automatically updates all uses of that slice
# Define a reusable slice
my_slice = slice(2, 5)

# Apply to multiple sequences
data_list = [100, 200, 300, 400, 500]
data_string = "SlicingExample"

print(data_list[my_slice])  # Output: [300, 400, 500]
print(data_string[my_slice]) # Output: "ici" Both slicing methods have their place in Python. The syntax is perfect for concise operations, while slice() is invaluable for reusable and dynamic slicing logic.
| Feature | Syntax slice() |
Function |
|---|---|---|
| Ease of Use | Simple for quick slicing tasks | Better for reusable logic |
| Readability | Ideal for straightforward slices | Adds clarity for complex slicing |
| Versatility | Limited to single-use in code | Reusable across multiple sequences |
Slicing isn’t limited to Python’s built-in data structures—it extends into powerful libraries like NumPy and pandas, which are indispensable for data manipulation. While the basic principles remain consistent, these libraries introduce additional slicing capabilities tailored to their data structures.
NumPy arrays take slicing to the next level, offering powerful tools for manipulating large, multi-dimensional datasets. One critical difference in NumPy slicing is views vs. copies: slicing a NumPy array typically returns a view (a reference to the original data), not a new copy. This behavior ensures efficiency when working with large datasets but requires careful handling to avoid unintentional changes.
import numpy as np

# Create a 1D array
array = np.array([10, 20, 30, 40, 50])

# Slice elements from index 1 to 3
print(array[1:4])
# Output: [20 30 40]

# Apply step
print(array[::2])
# Output: [10 30 50] With multi-dimensional arrays, slicing applies to each axis independently.
# Create a 2D array
array_2d = np.array([[1, 2, 3], [4, 5, 6], [7, 8, 9]])

# Slice the first two rows and first two columns
print(array_2d[:2, :2])
# Output:
# [[1 2]
#  [4 5]]

# Slice the last column
print(array_2d[:, -1])
# Output: [3 6 9] Check out our Introduction to Data Science with Python course for a deeper dive into NumPy.
pandas expands slicing to work seamlessly with DataFrames and Series, introducing more intuitive ways to access and manipulate structured data. While it builds on Python’s basic slicing, pandas slicing has unique behaviors tailored to tabular data.
import pandas as pd

# Create a sample DataFrame
student_data = {'Name': ['Alice', 'Bob', 'Charlie'],
                'Age': [25, 30, 35],
                'Score': [85, 90, 95]}

students = pd.DataFrame(student_data

# Slice the first two rows
print(students[:2])
# Output:
#      Name  Age  Score
# 0   Alice   25     85
# 1     Bob   30     90

# Slice specific columns by name
print(students[['Name', 'Score']])
# Output:
#       Name  Score
# 0    Alice     85
# 1      Bob     90
# 2 Charlie 95 pandas introduce .loc[] (label-based) and .iloc[] (index-based) for more precise control.
# Slice using .iloc (index-based)
print(df.iloc[1:, 1:])
# Output:
#    Age  Score
# 1   30     90
# 2   35     95
# Slice using .loc (label-based)
print(df.loc[:1, ['Name', 'Age']])
# Output:
# Name Age
# 0 Alice 25
# 1 Bob 30 Inclusive range: Unlike Python slicing, .loc[] includes the stop index for rows and columns.
Mixed indexing: pandas allows slicing with both labels and positions, offering greater flexibility.
For advanced techniques, explore our Manipulating DataFrames with pandas course.
Let’s now look at Python slice examples with different data types to see how slicing works across different data structures like strings, lists, tuples, or more complex data types.
Strings in Python are sequences of characters, which means you can slice them just like lists or tuples. This makes slicing useful for extracting substrings, reversing text, or formatting data. Here I am using :.
Basic string slicing# Extract a substring
text = "Python Slicing"
print(text[7:14])  # Output: Slicing

# Reverse a string
print(text[::-1])  # Output: gnicilS nohtyP
The slice() function allows you to create reusable slice objects for consistent slicing operations.
# Create a slice object
slicer = slice(7, 14)

# Apply the slice object
print(text[slicer]) # Output: Slicing Lists and tuples are foundational Python data structures, and slicing them can simplify your work.
Basic list slicing
# Extract elements from a list
numbers = [10, 20, 30, 40, 50]

print(numbers[1:4])
# Output: [20, 30, 40]

# Skip elements using steps
print(numbers[::2])
# Output: [10, 30, 50] Tuples are immutable, but slicing still works to extract parts of them.
# Slice a tuple
colors = ("red", "green", "blue", "yellow")

print(colors[:2])
# Output: ('red', 'green')
Filtering and reordering
Slicing is a handy way to filter or reorder elements.
# Filter odd-indexed elements
data = [5, 10, 15, 20, 25]

filtered = data[1::2]
# Output: [10, 20] In data analysis, slicing plays a role in extracting and reorganizing subsets of data for further examination. Use cases in data analysis include subset selection, where you extract relevant rows or columns for focused analysis, and data transformation, where you can reorganize datasets for better visualization or reporting.
import numpy as np

# Create a 2D array
data = np.array([[1, 2, 3], [4, 5, 6], [7, 8, 9]])

# Extract the first two rows
print(data[:2, :])
# Output:
# [[1 2 3]
#  [4 5 6]]
There would be a lot more to say about working with Numpy, but you can explore NumPy slicing in depth with our Data Structures and Algorithms in Python course.
An option is pandas, which provides slicing capabilities that allow you to access and manipulate rows and columns. Here’s a quick demonstration of how to slice both rows and columns in a DataFrame:
import pandas as pd

# Create a DataFrame
df = pd.DataFrame({
    'Name': ['Alice', 'Bob', 'Charlie'],
    'Age': [25, 30, 35],
    'Score': [85, 90, 95]
})

# Slice rows and columns
print(df.loc[:1, ['Name', 'Score']])
# Output:
#      Name  Score
# 0   Alice     85
# 1 Bob 90 Once you understand more advanced techniques, you can manipulate data structures with impressive precision and efficiency. The following techniques will help you write cleaner and faster Python code.
One of the lesser-known powers of slicing is its ability to modify lists directly. You can replace, insert, or delete multiple elements in a single line of code.
Replace elements:
numbers = [1, 2, 3, 4, 5]
numbers[1:4] = [20, 30, 40]

print(numbers)
# Output: [1, 20, 30, 40, 5]
Insert elements:
numbers = [1, 2, 5]
numbers[2:2] = [3, 4]

print(numbers)
# Output: [1, 2, 3, 4, 5]
Delete elements:
numbers = [1, 2, 3, 4, 5]
numbers[1:4] = []

print(numbers)
# Output: [1, 5]Understanding whether Python creates a copy or a view is essential for memory management when slicing data structures, especially with large datasets. Know that with built-in lists and strings, Slicing always creates a copy of the original sequence, but with NumPy arrays, slicing creates a view, meaning both the original array and the slice point to the same data in memory.
In the following code, our slicing operation creates a view of the original NumPy array rather than a copy. This means that both arr and sliced reference the same underlying data in memory. As a result, modifying sliced directly affects arr.
import numpy as np

arr = np.array([1, 2, 3, 4, 5])
sliced = arr[1:4]
sliced[0] = 99

print(arr)
# Output: [1, 99, 3, 4, 5]
Always be cautious when modifying slices in external libraries to avoid unintentional side effects.
Slicing is powerful, but it’s not foolproof. Here are common pitfalls:
numbers = [1, 2, 3]

print(numbers[5:10])
# Output: []
Slicing out of bounds doesn’t raise an error—it simply returns an empty list.
numbers = [1, 2, 3]

print(numbers[1:1])
# Output: []
When start and stop indices are the same, the result is an empty slice.
numbers = [1, 2, 3, 4, 5]

print(numbers[::-2])
# Output: [5, 3, 1]
The -2 step slices the list in reverse, skipping every second element.
Negative indexing allows you to slice sequences starting from the end rather than the beginning.
numbers = [1, 2, 3, 4, 5]

print(numbers[-1])  # Last element
# Output: 5numbers = [1, 2, 3, 4, 5]
print(numbers[::-1]) # Reverse the list
# Output: [5, 4, 3, 2, 1]Negative indexing is particularly useful when working with unknown sequence lengths or when processing data backward.
Slicing isn’t limited to one-dimensional structures. In libraries like NumPy, you can slice multi-dimensional arrays with precision.
import numpy as np

matrix = np.array([[1, 2, 3], [4, 5, 6], [7, 8, 9]])

# Extract a sub-matrix
sub_matrix = matrix[:2, 1:]

print(sub_matrix)
# Output:
# [[2, 3],
#  [5, 6]]
Tips for multi-dimensional slicing:
Use commas to separate slicing for each dimension.
Avoid mixing negative indices and default slicing : in ways that create ambiguity.
Debugging Tip: Always print intermediate slices when debugging multi-dimensional slicing to ensure you’re targeting the correct subset.
Python slicing is powerful, but it’s not immune to mistakes. Some common pitfalls can trip up even experienced developers. Understanding these issues and their solutions is essential for clean, accurate code.
An off-by-one error occurs when the start or stop indices in your slicing operations include or exclude unintended elements. This is one of the most common issues in slicing and can lead to inaccurate results or bugs in your code.
numbers = [1, 2, 3, 4, 5]

# Intending to extract [2, 3, 4]
slice_result = numbers[1:3]

print(slice_result)
# Output: [2, 3]
Here, the stop index excludes the element at index 3, causing an unintended omission. How to avoid this error:
Here is a corrected example:
numbers = [1, 2, 3, 4, 5]
slice_result = numbers[1:4]

print(slice_result)
# Output: [2, 3, 4]Step values determine how many elements to skip between indices when slicing. Misunderstanding how step values work can lead to unexpected results, especially with negative steps.
numbers = [1, 2, 3, 4, 5]
# Expecting every second element

step_result = numbers[::3]

print(step_result)
# Output: [1, 4]
Here, a step of 3 skips too many elements, resulting in fewer values than expected. The following code is an example of confusing negative steps.
numbers = [1, 2, 3, 4, 5]
step_result = numbers[::-2]

print(step_result)
# Output: [5, 3, 1]
Negative steps reverse the list while skipping elements, but misunderstanding their behavior can make it hard to predict the outcome. Here is what I consider when thinking about how to use step values correctly:
Plan your intervals: Ensure the step value aligns with the interval you need. For every second element, use a step of 2.
Test negative steps in isolation: Experiment with small examples to confirm you understand how reversed slices behave.
Combine step values with start/stop indices: Use start and stop indices to limit the range of the slice while applying step values.
Here is a corrected example of better step usage:
Every second element:
numbers = [1, 2, 3, 4, 5]

print(numbers[::2])
# Output: [1, 3, 5]

Reverse with a step:
numbers = [1, 2, 3, 4, 5]

print(numbers[4::-2])
# Output: [5, 3, 1]Here are some good ideas so you don't make mistakes:
Visualize your slices: Use comments or print statements to verify your slicing logic.
Practice with examples: Start with small, simple lists to test your understanding of start, stop, and step parameters.
Use built-in functions for clarity: When in doubt, create slices with the slice() function for more explicit slicing logic.
Throughout this guide, we’ve explored concepts such as:
The basics of slicing syntax and parameters, including start, stop, and step.
Interesting techniques like modifying lists with slicing, with consideration to memory-efficient practices and handling multi-dimensional data.
Mistakes people make, such as off-by-one errors and misunderstandings of step values, and how to avoid them.
The best way to solidify your understanding is through hands-on practice. Experiment with real-world datasets, test edge cases, and challenge yourself by going beyond the basics.
DataCamp is here to help. Try our course on Data Manipulation with Python and other courses like Developing Python Packages for an interactive learning experience. Whether you're a beginner or looking to refine your techniques, these resources can help you master slicing and other skills.
Learn Python with DataCamp
Course
Course
Course
blog
Moez Ali
15 min
Tutorial
Allan Ouko
Tutorial
Sejal Jaiswal
Tutorial
DataCamp Team
Tutorial
Oluseye Jeremiah
Tutorial
Matthew Przybyla