Course
Introduction to Python
BasicSkill Level
4.8+8,882 reviews
4 hr
or
Recommended for Python beginners
Build your Python skills with interactive courses for data science, data analysis and machine learning, curated by real-world experts
Course
Track
Not sure where to start?
Take an AssessmentCourse
Course
Course
Course
Course
Course
Course
Course
Course
Course
Course
Course
Course
Course
Course
Course
Course
Course
Course
Course
Course
Course
Course
Course
Course
Course
Course
Course
Course
Course
blog
Abid Ali Awan
15 min
blog
Matt Crabtree
15 min
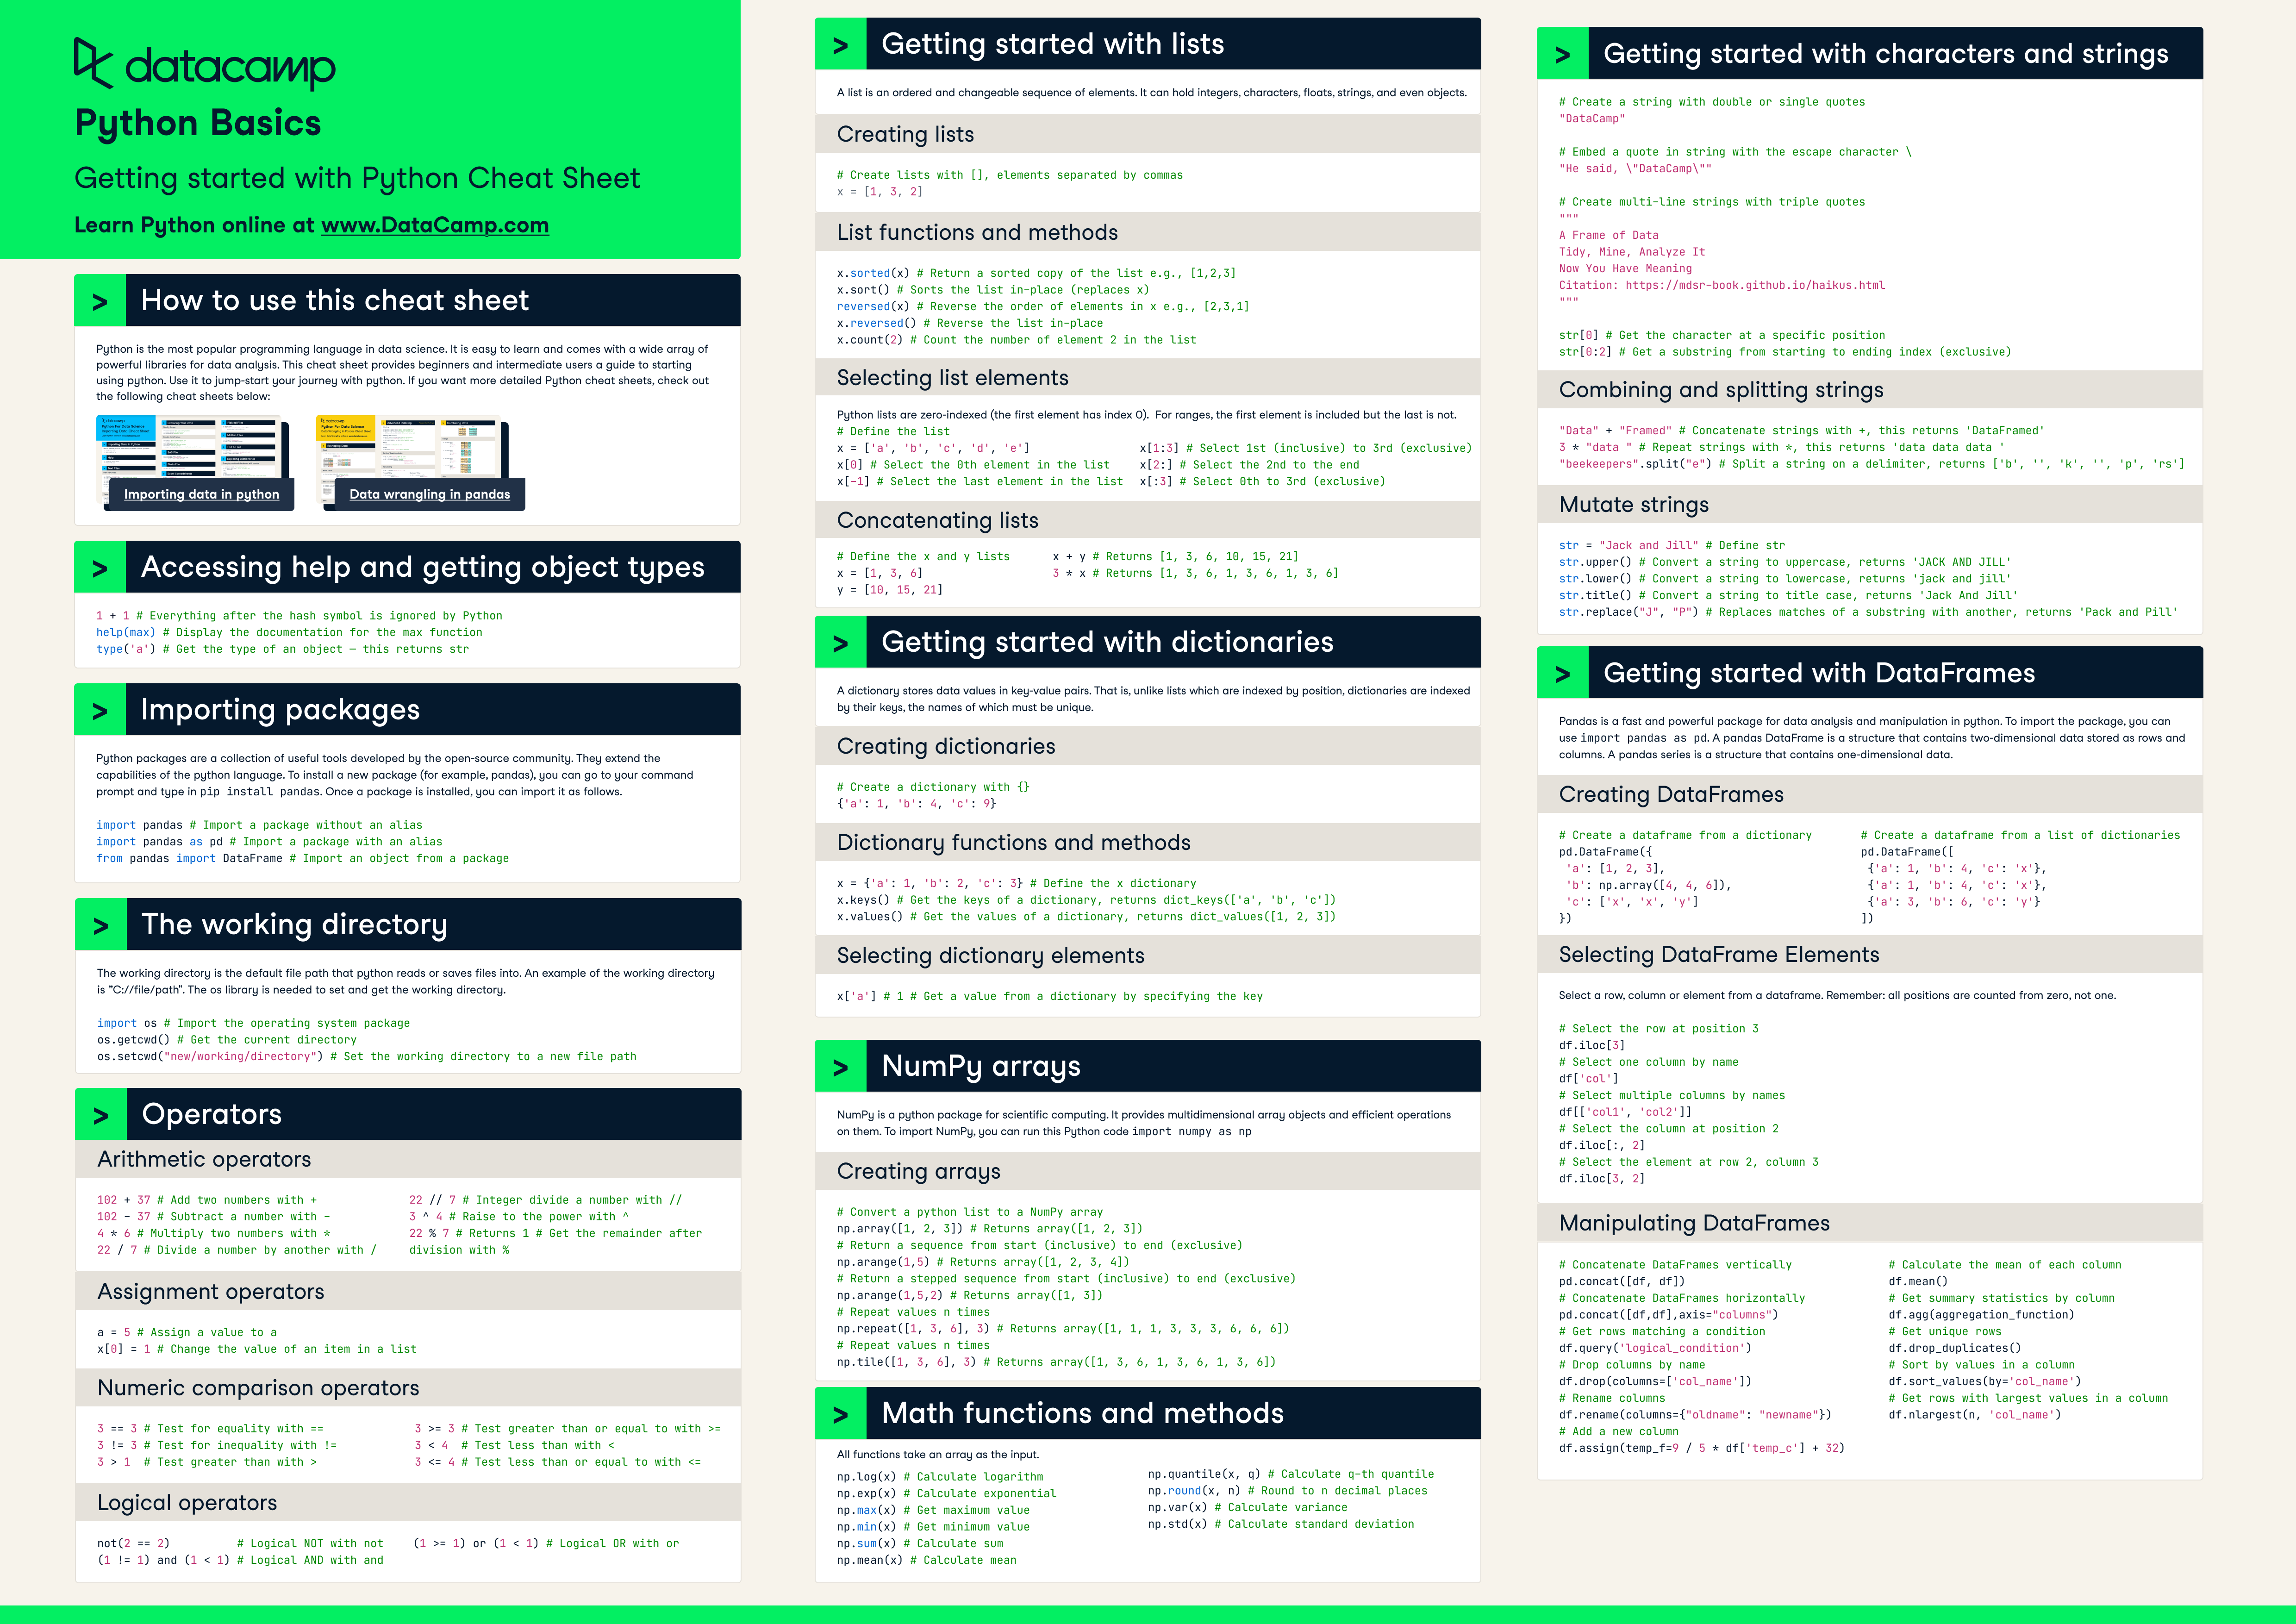
cheat sheet
Richie Cotton
8 min
Make progress on the go with our mobile courses and daily 5-minute coding challenges.