
Track
Developing AI Applications
21 hr
Important note: OpenAI has retired Sora. The Sora web and mobile apps were shut down on April 26, 2026, and the developer API is scheduled to be discontinued on September 24, 2026. The guide below documents how Sora worked while it was available and is preserved for reference. If you're looking for a tool you can use today, the leading alternatives as of 2026 include Google Veo 3, Runway, and Kling 3.0.
The following article shows Sora’s functionalities with step-by-step examples. You’ll see how to navigate the platform, use presets, and apply advanced tools like storyboarding, blending, and looping. By the end, you’ll have a solid grasp of Sora’s features.
Having released Sora initially in 2024, OpenAI published Sora 2 as a major update in October 2025, which included an improved video generation model with audio support, the Sora mobile app, and cameo features.
In early 2026, Sora on the web was now available in many countries, including the EU and UK, and also in countries in the Americas and East Asia.
However, Sora is no longer available. OpenAI discontinued the Sora web and mobile apps on April 26, 2026. Only the developer API remains, and it is scheduled to shut down on September 24, 2026. The walkthrough that follows describes how Sora worked while it was live. But you can also check out our guide to using the Sora 2 API, which is still up and working.
To get started, we can access Sora from its dedicated website, https://sora.com/. You can create a video by simply describing it in the text prompt at the bottom of the screen.

Here’s the result:
While it was available, Sora was included in the ChatGPT Plus ($20/month) and Pro ($200/month) subscriptions. Following the product's discontinuation in April 2026, these plans no longer include Sora.
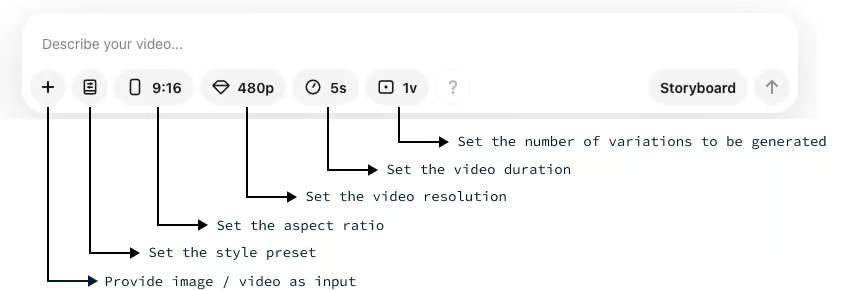
Apart from the prompt, the base options available when generating a video are:
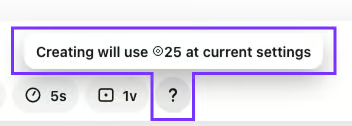
The last button, marked with a question mark (?), indicates how many credits will be used with the current settings when we hover it:
Additionally, Sora 2 now generates an audio track along with the video, providing background sound or music to match your scene automatically. The videos below were created using the initial Sora version, which is why they are silent.
To see the audio functionality in action, you can check out our article on Sora 2. It also provides an overview of further improvements in the video generation model, such as increased physical accuracy, better continuity, and the capability of simulating failure.
Here’s an overview of Sora’s menu that you can find on the left side of the home page:
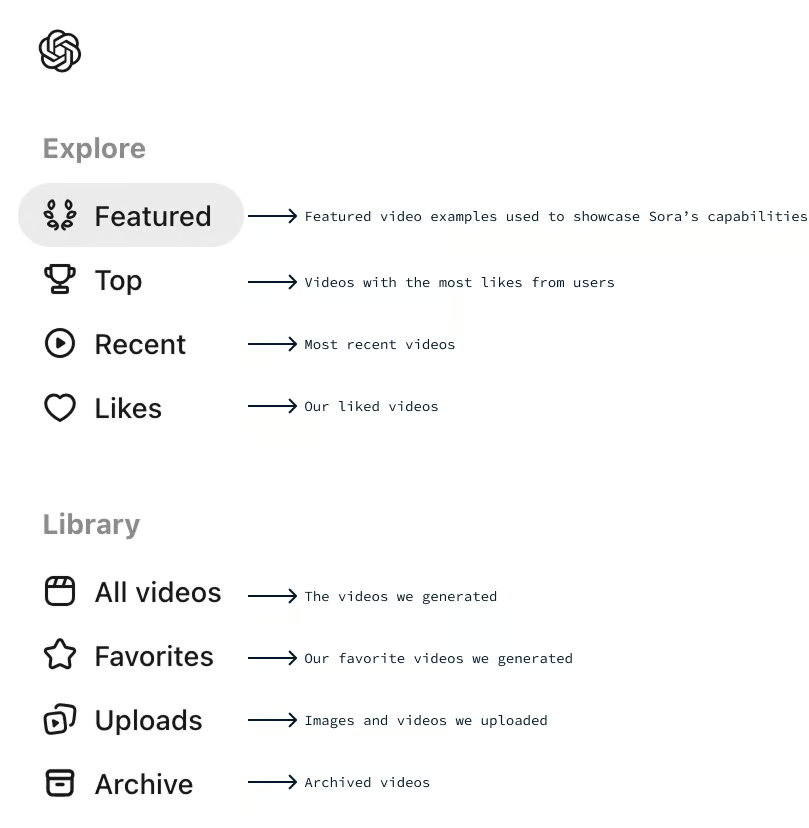
If you click on the Featured section, you’ll be able to see what other people created. These can be a great inspiration for your videos. To see how a video was generated, we can click on it and then hover or click on the prompt shown at the bottom of the video:
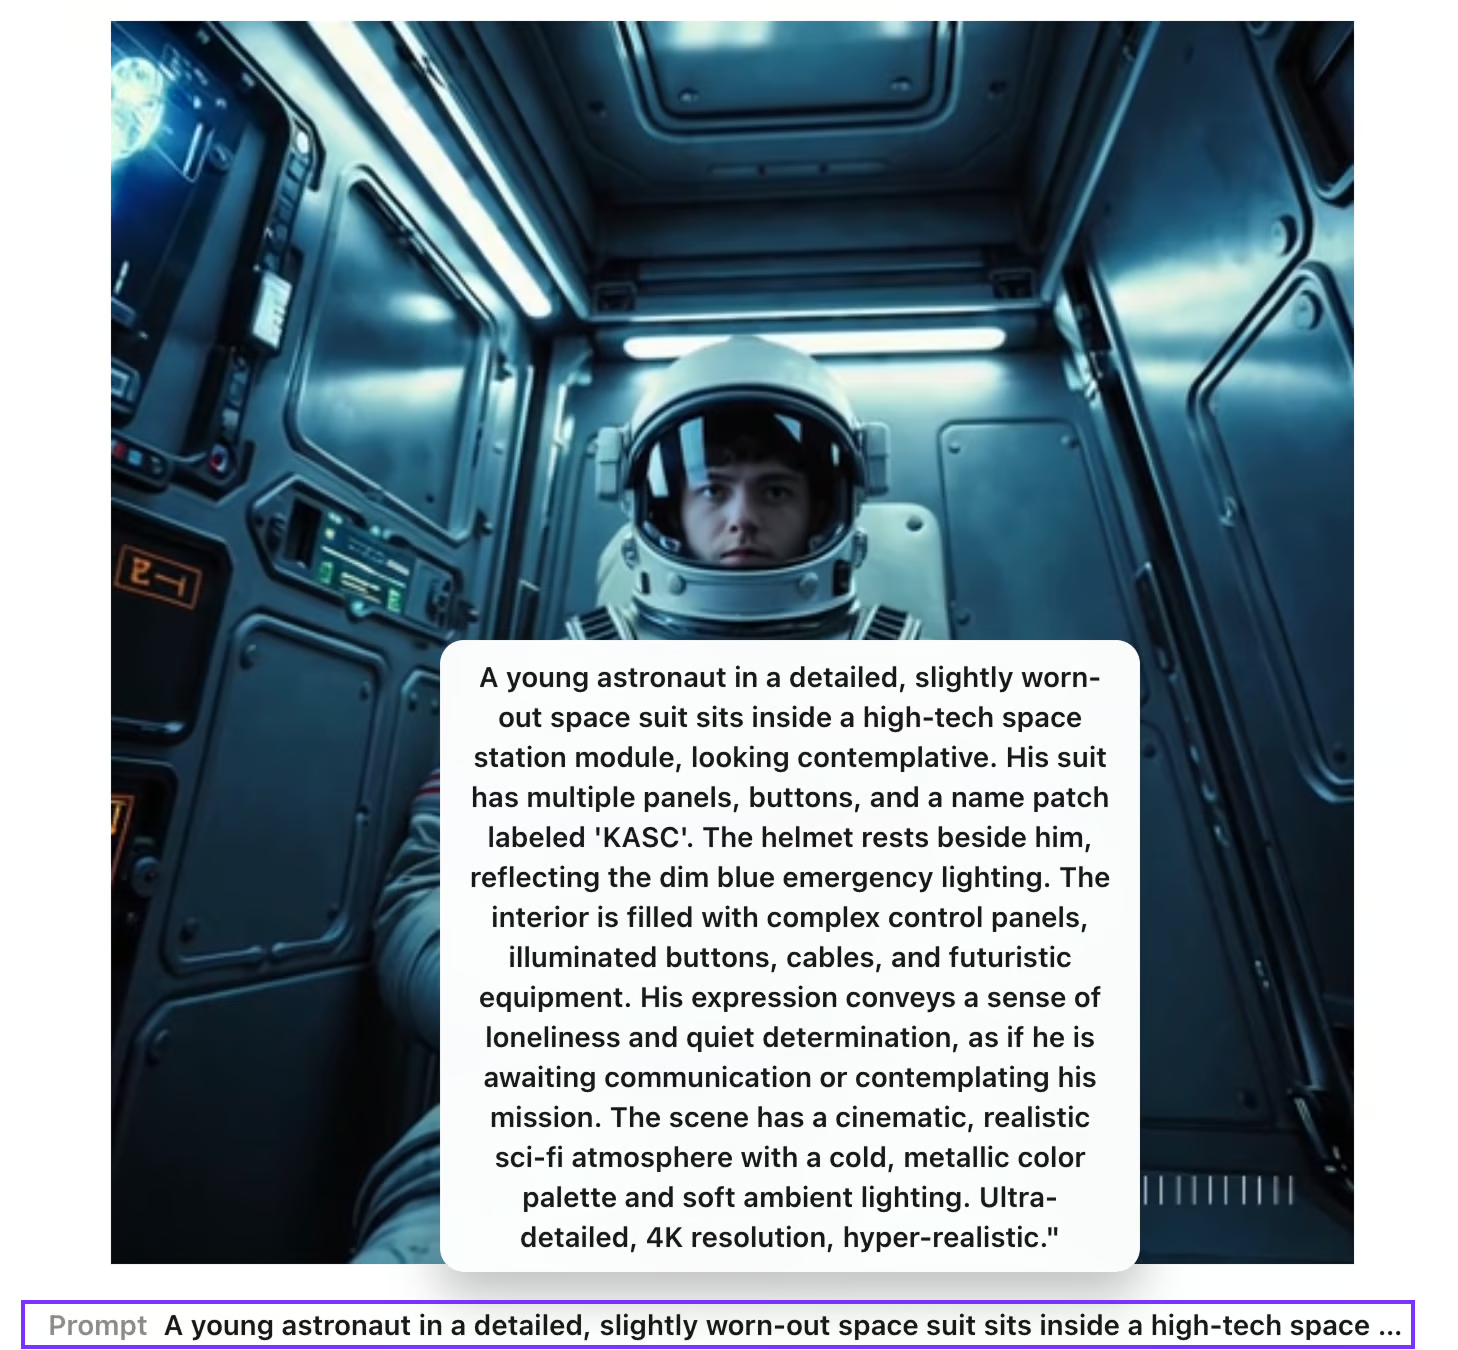
Since prompts are public, a great way to get started with Sora is by finding videos you like, checking the prompts used, and using them as a starting point for your own videos.
Once we generated a video, Sora offers us four useful tools to better control the output: re-cut, remix, blend, and loop.

Let’s start by exploring the remix feature.
The remix feature in Sora allows us to modify a video by describing what we want to be altered.
We can adjust the strength of the remix in three levels: “subtle”, “mild”, “strong”, or “custom”, depending on how significant the change is.
In the next example, we show a remix of a video created using the prompt:
“Far away aerial shot of a car driving along the countryside during golden hour with a picturesque village in the far background of the scene.”
After generating the initial video, I modified it using a mild remix asking to replace the car with a horse carriage and a strong remix asking to replace the village with a forest. Here’s a side-by-side edit of the three videos:
We can also remix videos created by others by clicking the remix button at the bottom of the video:

Let’s try to turn the cat into an elephant using a strong remix.
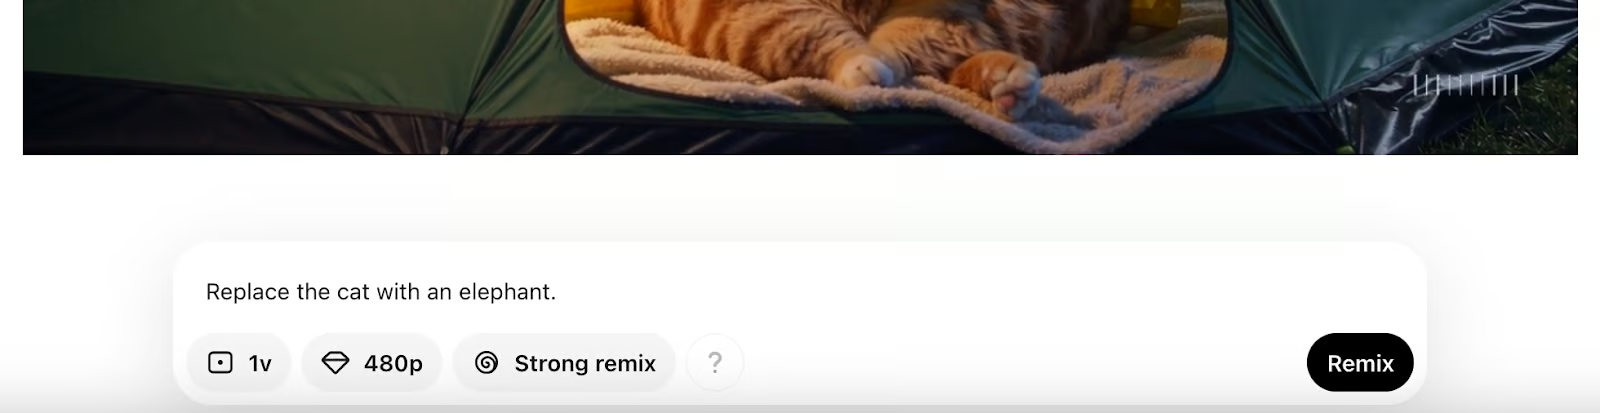
Here’s the result:
Depending on the remix level, the video might change more than we want. By changing the custom remix level, we can experiment with several levels to find the right amount.
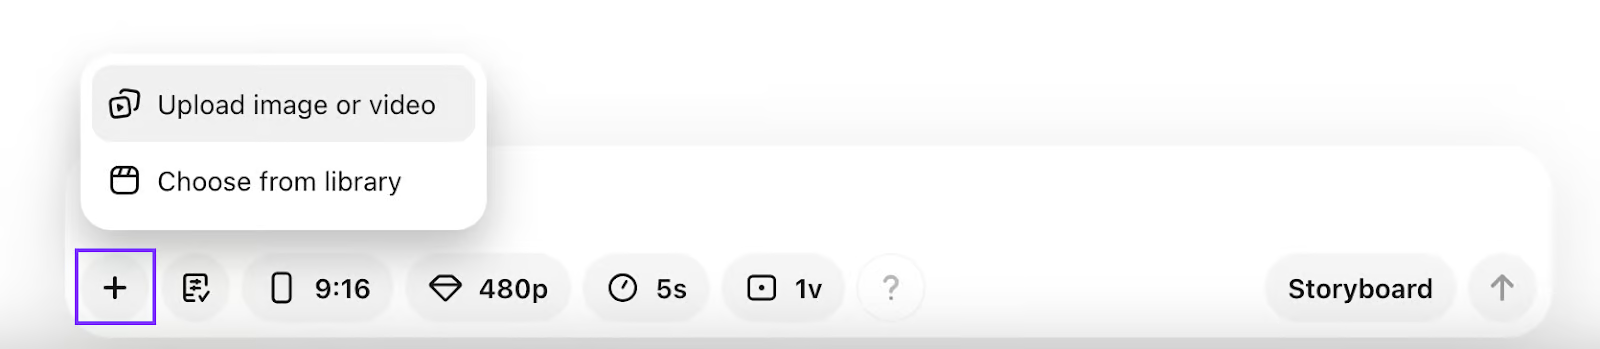
Finally, since Sora allows us to upload our videos, we can also use the remix feature to make changes to existing videos. To upload a video, use the + button at the bottom of the text prompt:
I’ve seen some creators using the remix feature as an upscaler, that is, to increase the resolution or level of detail of an existing video.
To do this, we can upload the low-resolution video, ask Sora to remix it without prompting, and set the highest resolution available to our plan. Sora will output a similar video but with a higher resolution.
This is particularly useful when combined with other AI video generation tools.
The loop feature in Sora lets us create a smooth repetition of a specific segment within a video. Here's how it works:
1. Define the video section: First, we choose the part of the video we want to loop.
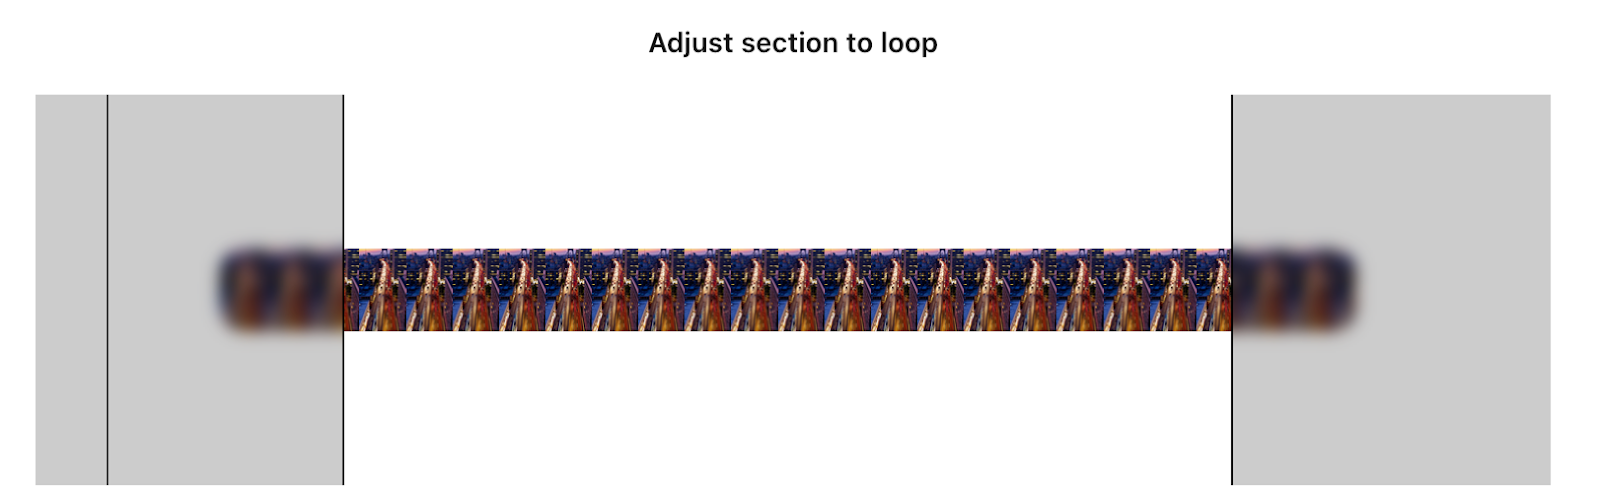
2. Adjusting loop handles: In the editor, we see two handles on the timeline: one to set the start of the loop and another for the end. These handles help us fine-tune exactly which frames of the video will form the loop.
3. Choose loop length: Depending on how similar the beginning and end frames of the looped section are, we might adjust the loop type to “short”, “normal”, or “long”. A “short” loop works well if the frames blend naturally, while “normal” or “long” options give Sora more time to connect the frames if they differ significantly.
4. Creating the loop: After setting the handles and choosing the loop length, Sora generates a looping segment, ensuring the transition between the end and start is smooth and appears continuous.
The loop feature is great for creating endless visual cycles, like waves crashing on a shore, that can enhance the aesthetic appeal and storytelling of our video projects.
The video below shows the result of trying to loop a video created using the prompt:
“A drone hyperlapse above a city at rush hour. ”
The end of the video is a bit strange when the giraffe turns around. We can use the re-cut feature to select the ending and ask Sora to generate just that part.
The thing we need to do is to cut the video and isolate the parts we don’t want. To cut a clip in half we can use the “S” key. By making several cuts, we can isolate the part of the video we don’t want:
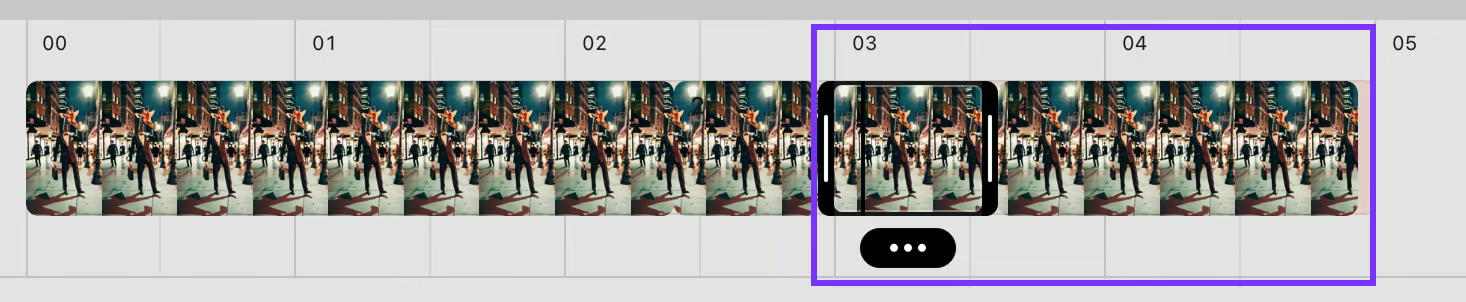
In this case, we want to delete the last two cuts of the video when the giraffe starts turning away. Then we can add instructions on what to generate or leave it blank. In this case, we just want Sora to complete the video based on the first part so we can leave it blank and hit the “Create” button:

Here’s the side-by-side comparison between the original video and the re-cut:
Notice that the end now looks more natural. We can of course also cut from the middle, not just from the start or the end of a video.
The re-cut feature is quite useful because Sora often generates a video with parts that are good as well as some that are bad and unnatural. Using re-cut we can keep the good and regenerate the bad until we get something we like overall.
The blend feature in Sora allows us to combine two separate videos into one cohesive clip. This technique can result in creative and unexpected visual outcomes. Here’s a step-by-step guide on how it works.
1. Select videos to blend: First, we choose a video from our library that we want to use.
2. Access the blend editor: Once we've selected a video, we open the blend editor by clicking the “Blend” button below the video.

3. Choose the second video: Next, we choose whether we want to merge with a video we upload or a video from the Sora library.
4. Adjust influence curve: The curve lets us adjust which video has more influence at different points in the timeline. If the curve is higher, the top clip has more influence, and if it's lower, the bottom clip dominates.
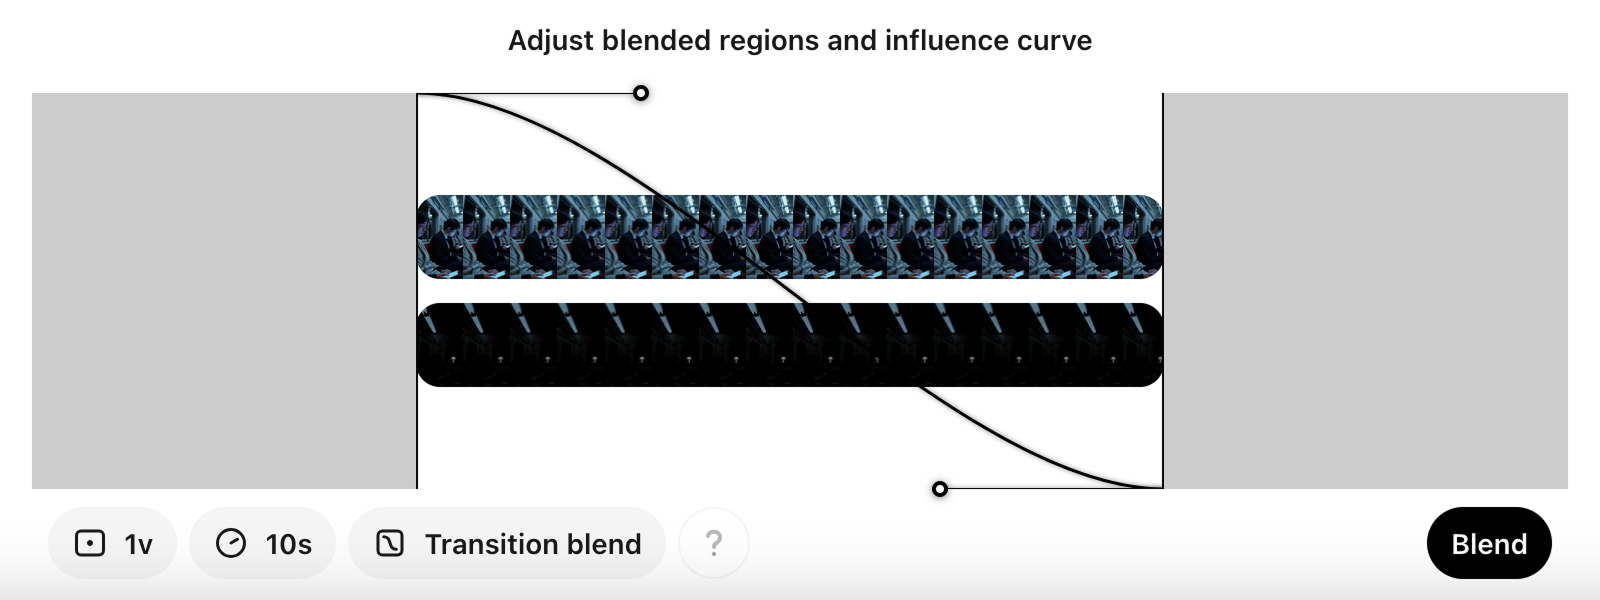
5. Trim and set up: We can trim either video to focus on the sections we want to emphasize in the blend. This allows us to carefully select the portions that contribute to the desired outcome.
6. Generate the blend: After setting up the curve and trimming the videos, we let Sora work its magic and blend the videos together. The result is a unique combination of elements from both videos, seamlessly integrated.
Here’s a side-by-side example where we blend two videos together into a scene:
The blend feature is particularly exciting because it opens up new creative possibilities by merging different visuals into something fresh and innovative.
The style presets in Sora allow us to apply predefined artistic styles to our videos, giving them a unique look and feel based on our creative vision.
It includes the following styles:
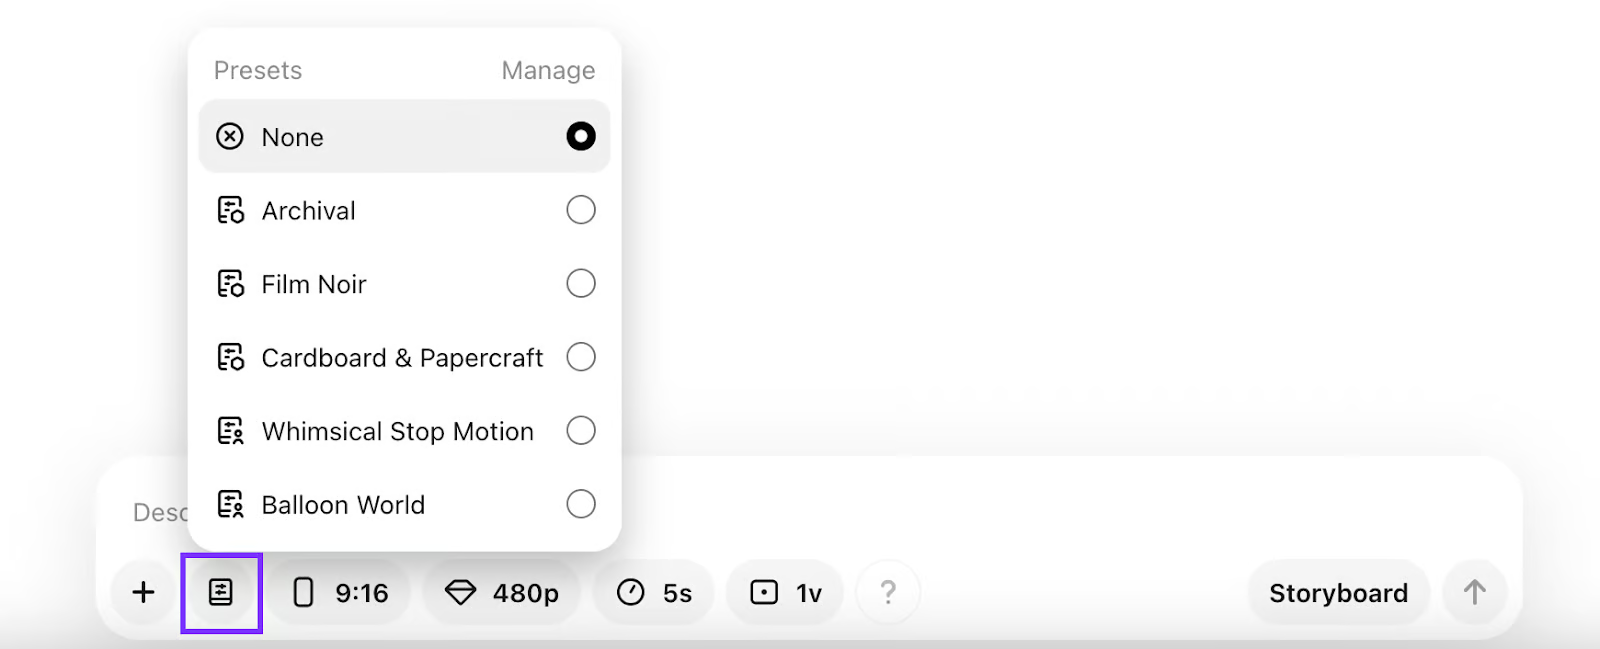
To apply a preset to a prompt, we select it by pressing the preset button at the bottom of the prompt input:
To better visualize these, here’s a montage of five videos generated with each of the styles using the prompt:
“A cinematic, full shot of a bustling New York City street scene, but instead of humans, the pedestrians and workers are stylishly dressed anthropomorphic animals going about their daily routines. The perspective is wide and slightly lower, evoking an immersive sense of everyday life in this imaginative, animal-inhabited metropolis.”
While the predefined styles provide a quick and easy way to stylize videos, Sora also allows us to create custom styles. By managing our presets, we can describe specific attributes like lighting, colors, and even upload reference images or videos. This flexibility helps tailor the style to our preferences and the specific mood we aim to achieve.
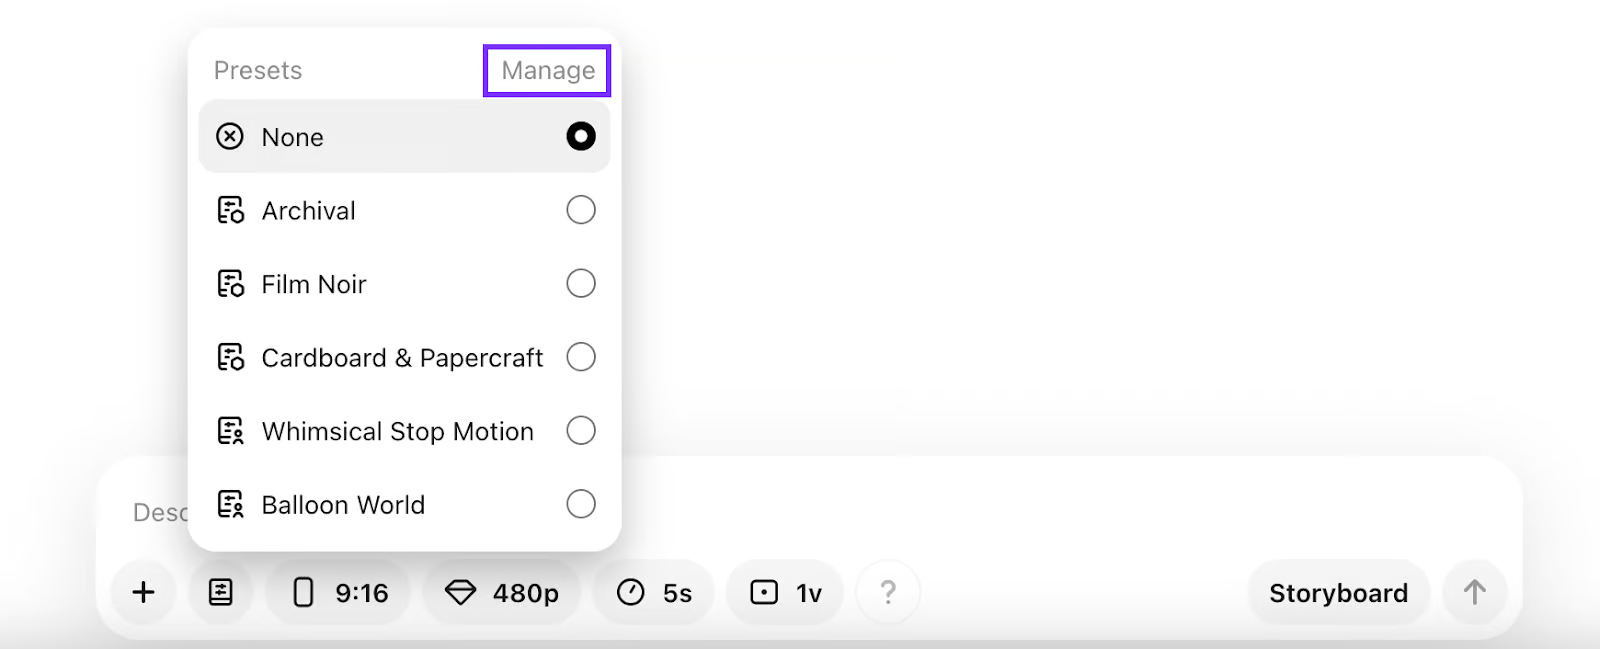
To create a custom preset, we click the “Manage” option in the preset selection panel:
Then, we click the + button:
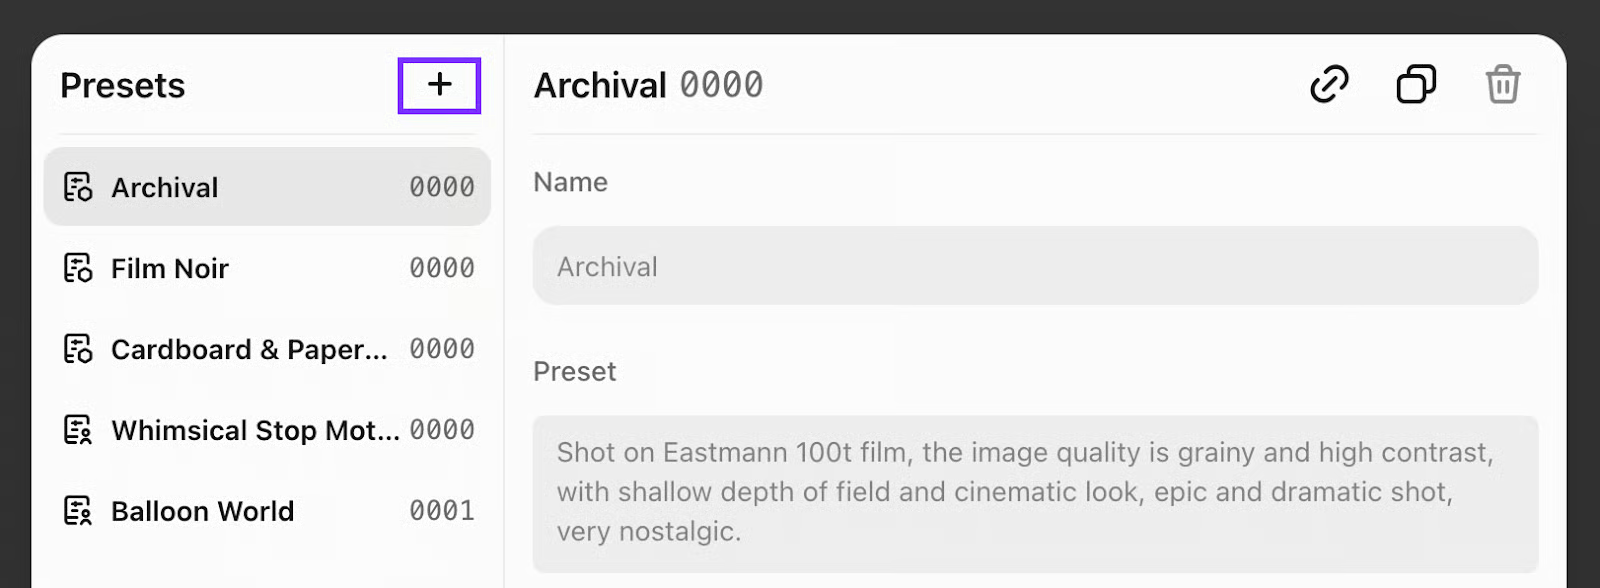
A preset consists of a name and a prompt. The prompt should describe the style, type of camera, image quality, and other features we want videos generated with the preset to have.
The preset creator also supports uploading an image with the style we want instead of a text prompt.
Presets make it possible to avoid having to repeat ourselves and save time when we want to create multiple videos with the same style.
Sora storyboards are intended to help us create more complex scenes by describing what happens and when. In this example, we use a storyboard to create a video of a bird in the water and make sure that it drinks water at a specific moment:
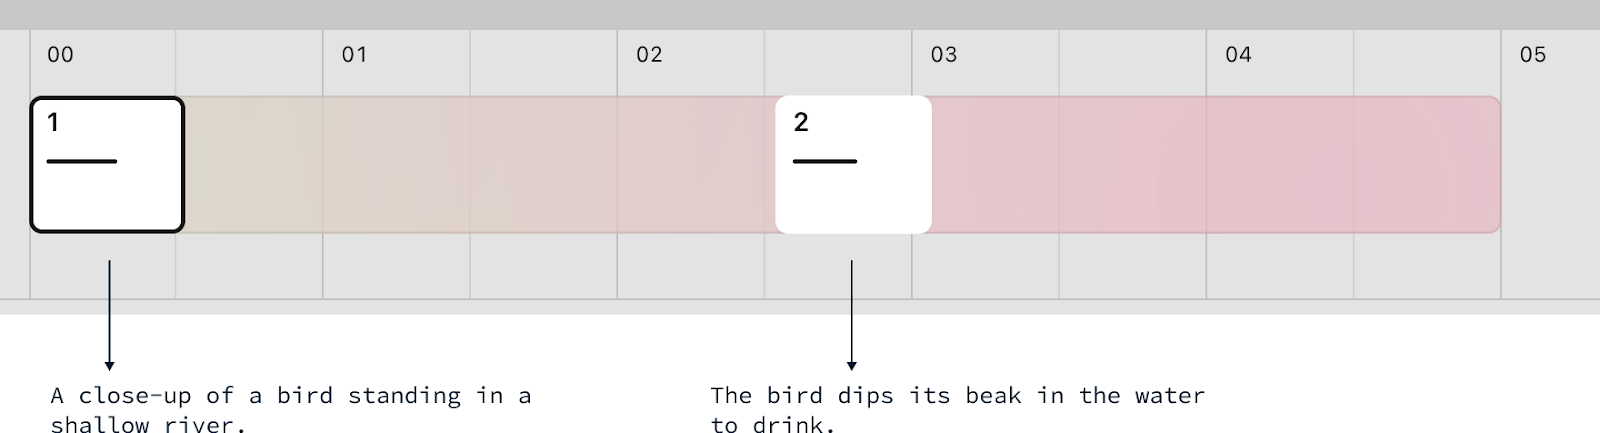
We can think of the prompts in a storyboard as keyframes.
The above storyboard uses two prompts to guide the video generation. The first sets the scene while, the second one, sets an action we want to happen. Sora will then try to generate a video by adhering to these prompts at the timestamps they occur.
In my experience, the storyboard feature in Sora falls short of my expectations. While it has the potential to be a powerful tool for creating complex videos, it often fails to deliver, especially in more intricate scenarios.
To get better results, I recommend keeping it simple and avoiding adding too many constraints to the video.
The storyboard feature also works using keyframe images instead of textual prompts. In this case, Sora generates a video linking these still images.
Let’s animate a bird flying to a tree and then flying away by creating a storyboard with three keyframes:
Here are the images that I used:
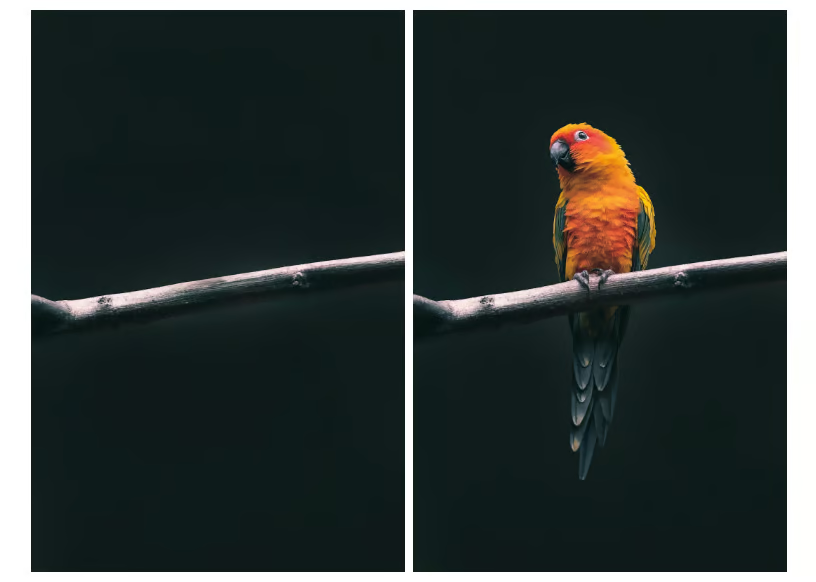
The bird image was taken from Unsplash, while the image without the bird was generated by removing the bird using AI.
This is the resulting video Sora generated:
Learn AI with these courses!
Track
Track
Course
blog
Richie Cotton
8 min
blog
Alex Olteanu
8 min
blog
Alex Olteanu
8 min
Tutorial
François Aubry
Tutorial
François Aubry
Tutorial
François Aubry