
Corso
Progettare sistemi agentici con LangChain
3 h
12.3K
Unsloth Studio is helping make LLM fine-tuning more accessible to everyone through a local, browser-based interface that removes most of the setup and coding overhead. It is designed as a no-code web UI that handles model loading, dataset formatting, hyperparameter setup, and live training monitoring.
In this tutorial, we will walk through the full workflow for fine-tuning an LLM with Unsloth Studio. We will start by preparing our model and data, running the fine-tuning job, testing the fine-tuned model locally in the chat interface, and finally exporting it for later use.
Unsloth Studio supports local installation across Linux, Windows, macOS, and WSL, and its export tools support formats such as GGUF, Safetensors, and LoRA for downstream use in tools like llama.cpp, Ollama, and vLLM.
For many small-to-medium fine-tuning workflows, this process can be completed surprisingly quickly once the environment is ready, making Unsloth Studio a practical option for beginners who want a simpler path from data to a working fine-tuned model.
I also recommend checking out my other guide on How to Run Unsloth Studio Locally to learn more.
In the steps below, I’ll outline how you can get started using Unsloth Studio for LLM fine-tuning:
Before installing Unsloth Studio, make sure your machine supports training. Unsloth Studio can run on Windows, Linux, WSL, and macOS, but training support depends on your hardware.
At the moment, full training is supported on NVIDIA GPUs and Intel GPUs. On Mac and CPU-only systems, you can still use Chat and Data Recipes, while MLX training support is expected later.
Prerequisites for Linux training:
Before installing Unsloth Studio, it is worth reading the tutorial How to Run Unsloth Studio Locally: Step-by-Step Guide. It gives a more detailed walkthrough of setting up Runpod, installing Unsloth Studio, and opening it in the browser.
For this tutorial, we made one small change. Instead of using an A10 pod, we used an RTX A6000 GPU pod. The main reason is that the A10 setup can take longer when installing dependencies and preparing the environment for Unsloth Studio.
To install Unsloth Studio, use the official one-line installer:
curl -fsSL https://unsloth.ai/install.sh | shThe installer first sets up the required Python dependencies using uv.
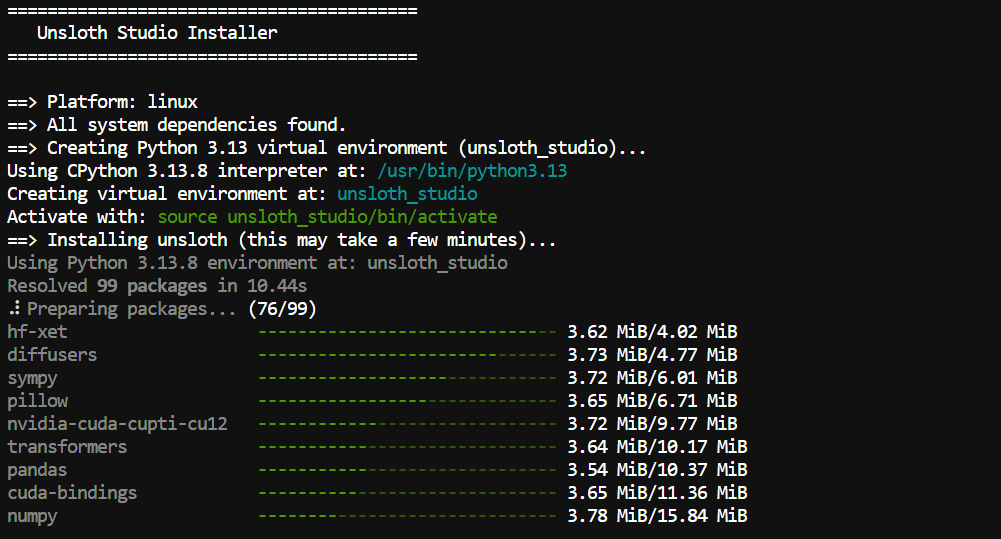
After that, it runs the Unsloth Studio setup script, which installs the files needed for local web inference.
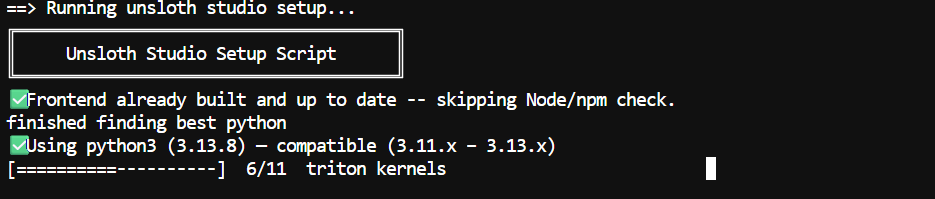
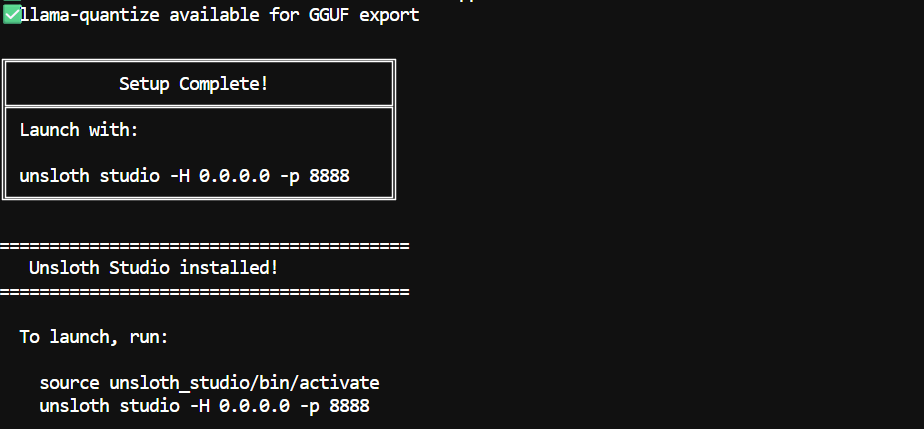
Once everything is downloaded and configured, including the frontend files and model components, Unsloth Studio will show you the next steps to start the server and open the interface in your browser.
Note: The first installation can take 5 to 10 minutes because some llama.cpp binaries may need to be compiled.
Once the installation is complete, you can start Unsloth Studio with the following commands:
source unsloth_studio/bin/activateunsloth studio -H 0.0.0.0 -p 8910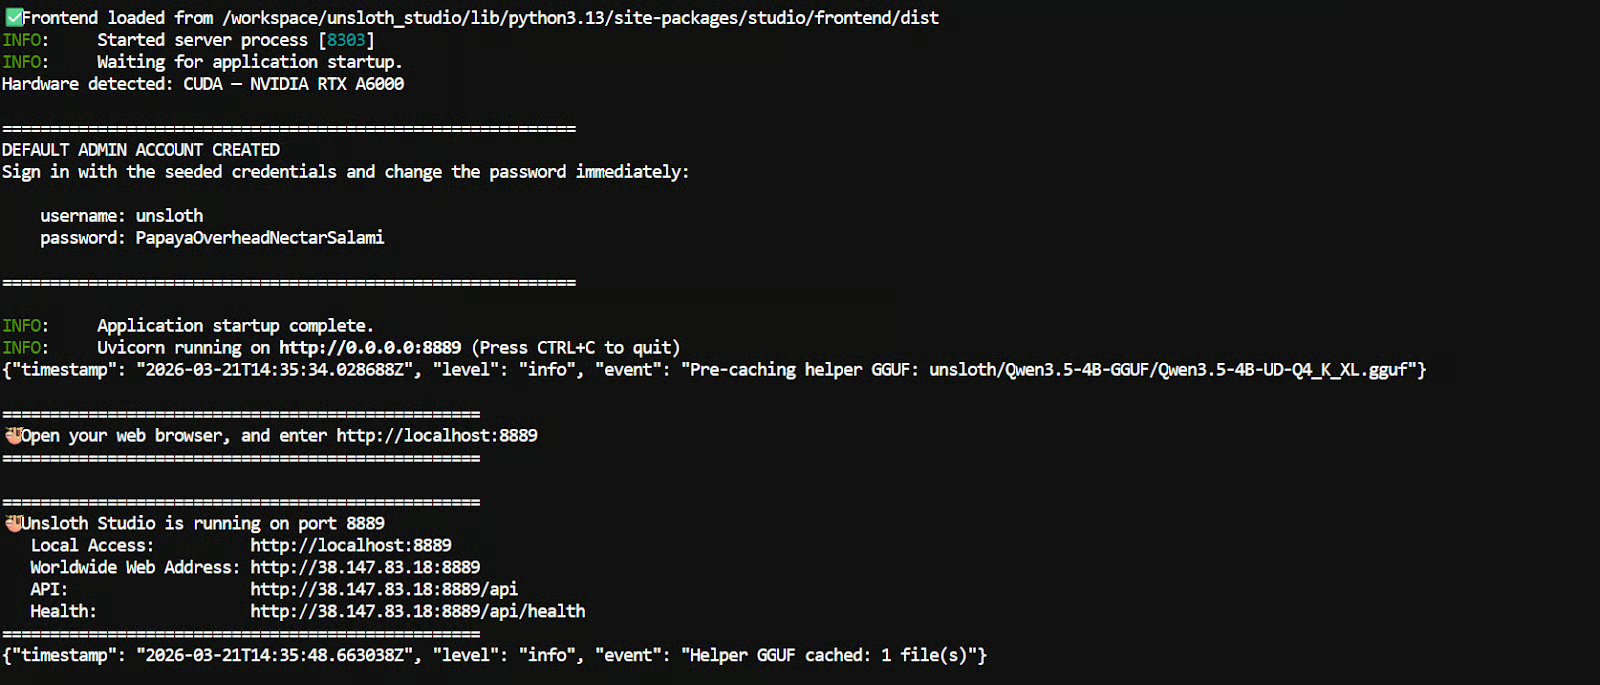
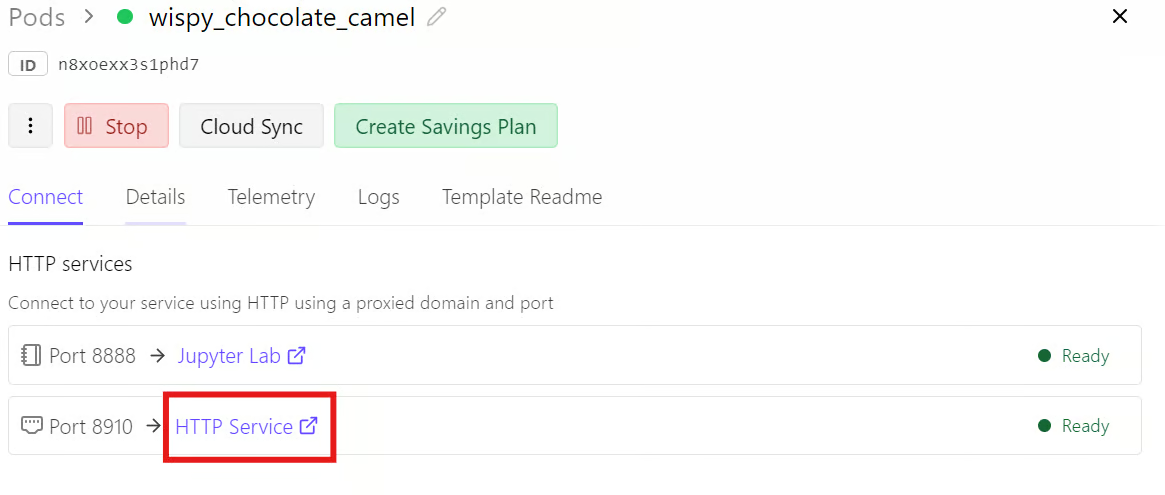
If you are running it on your local machine, open this link in your browser:
http://localhost:8910If you are using Runpod, go to your Runpod dashboard, open the Connect tab, and click the link for port 8910.
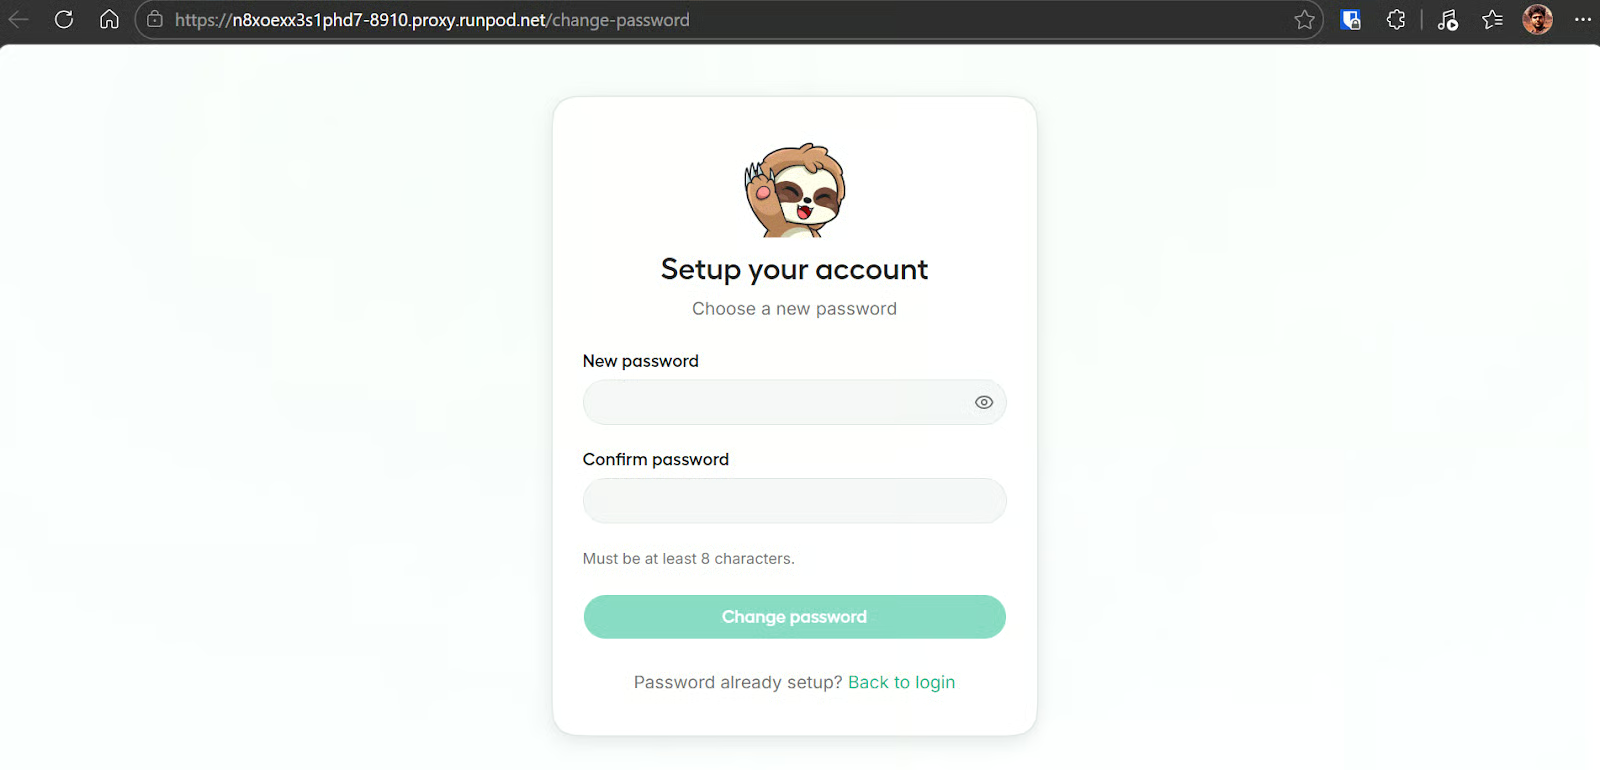
When you open Unsloth Studio for the first time, it will ask you to create a password for your instance. This helps protect access, especially when you are using a public or externally accessible link.
Once Unsloth Studio opens, the main screen is divided into four core sections: Model, Dataset, Parameters, and Training/Config. Together, these sections cover the full fine-tuning workflow, from choosing a base model to launching training and monitoring progress.
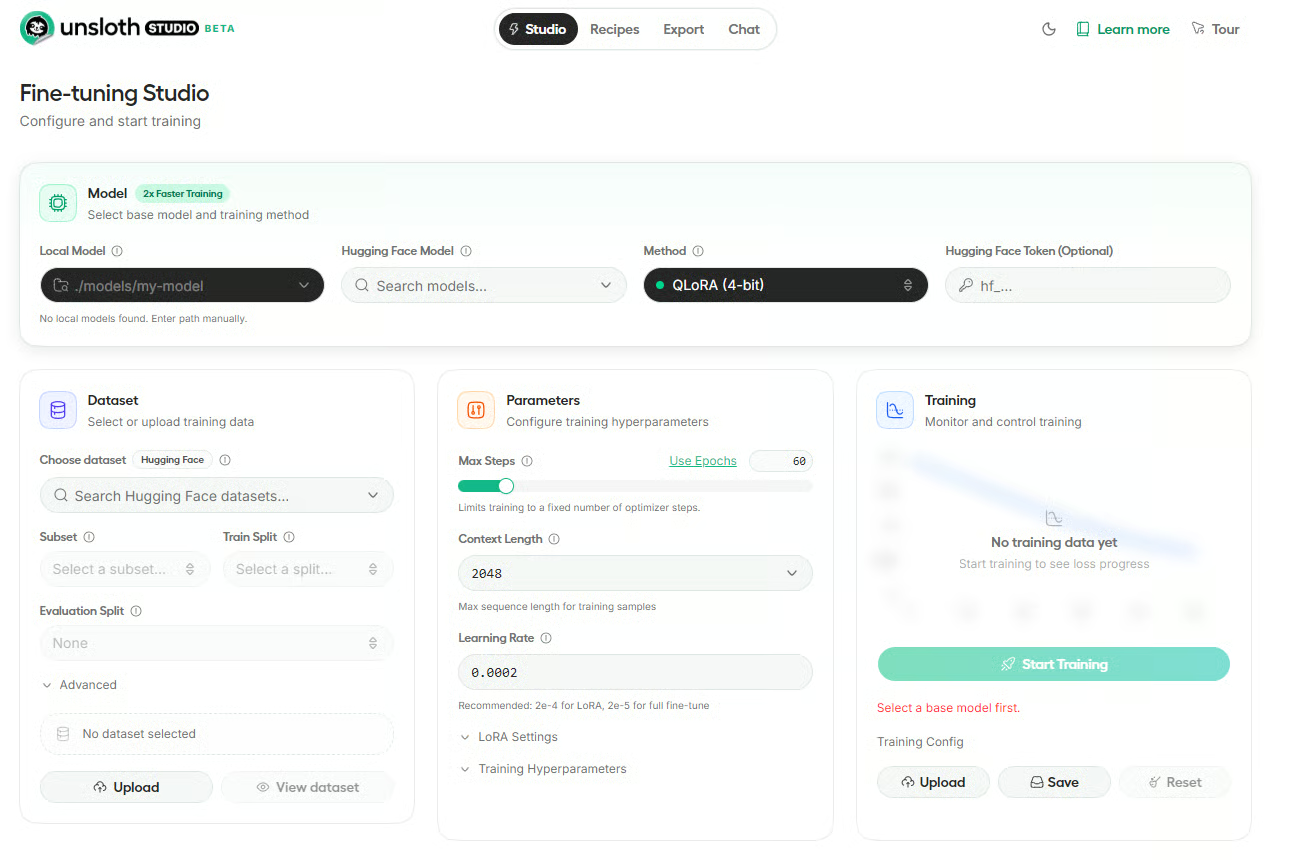
This is where you choose the base model and training method. In this screen, you can enter a local model path, search for a Hugging Face model, choose the fine-tuning method such as QLoRA (4-bit), and optionally add your Hugging Face token.
This section is used to select or upload your training data. You can choose a dataset from Hugging Face, define the subset and split, and upload your own files if needed.
Here you configure the main training settings, such as max steps, context length, and learning rate. There are also expandable settings for LoRA and other training hyperparameters.
This section is where you start and monitor training. Once the model and dataset are ready, you can launch the run, track progress, and upload or save the training config.
In the Model section, you can either search for a model from Hugging Face or select a local model already available on your machine. Unsloth Studio supports direct Hub search, and local models stored in ~/.unsloth/studio/models or your Hugging Face cache can also appear in the list.
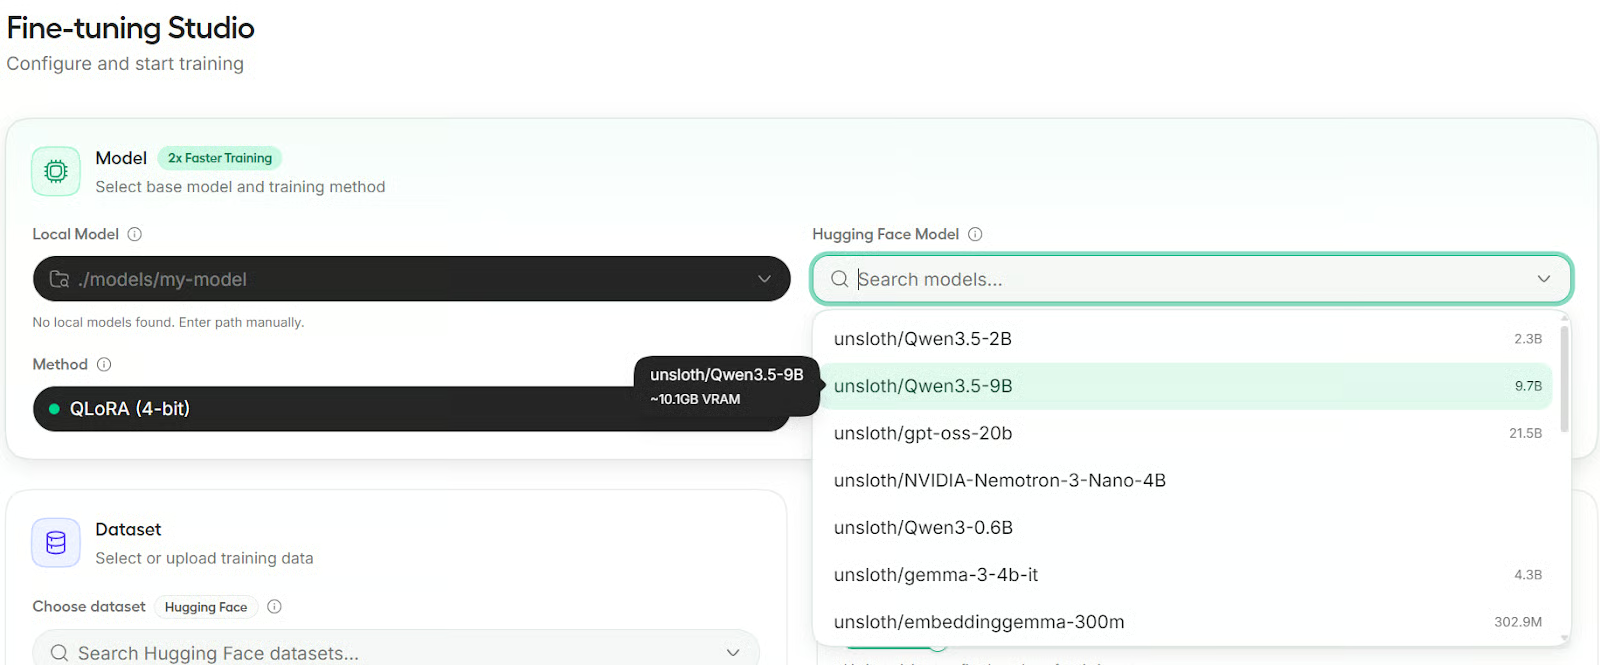
For this tutorial, we will use Qwen3.5-9B as our base model. It is a compact but capable model that works well for small-scale fine-tuning and local experimentation.
Unsloth Studio offers three training methods: QLoRA, LoRA, and Full Fine-tuning. QLoRA uses a 4-bit quantized base model with a LoRA adapter and needs the least VRAM.
LoRA keeps the base model in full precision and adds a LoRA adapter, so it uses more memory. Full Fine-tuning updates all model weights and requires the most VRAM.
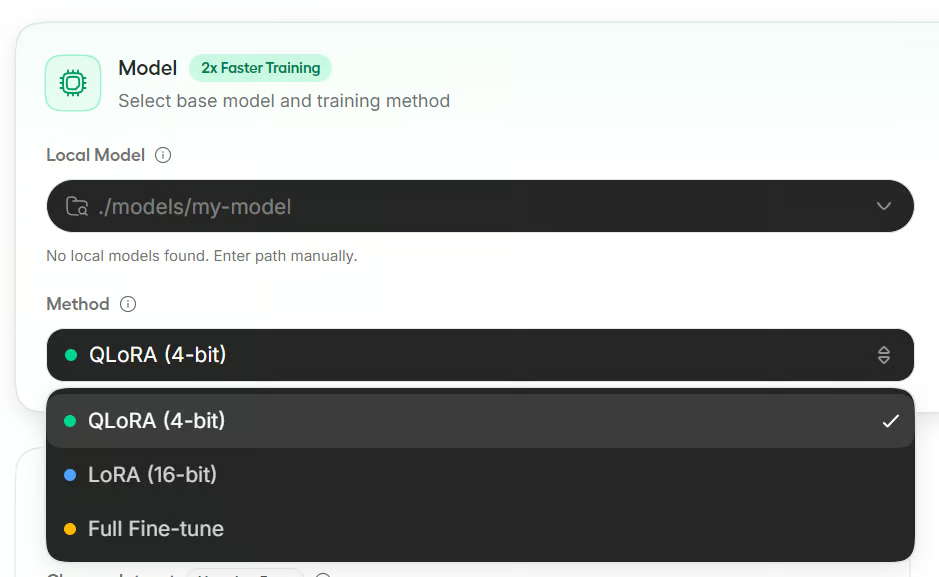
For this tutorial, we will use QLoRA because it is the most memory-efficient option and is usually the easiest choice for smaller GPU setups.
In the Dataset section, you can load data from Hugging Face or upload local files. Unsloth Studio supports automatic dataset formatting and works with common layouts such as Alpaca, ChatML, and ShareGPT. It also includes tools for split selection, column mapping, and dataset preview.
Here, choose the Unsloth Latex OCR dataset, select the train split, and leave the evaluation split empty to keep training faster. We will also keep the format on Auto so Studio can detect the dataset structure for us.
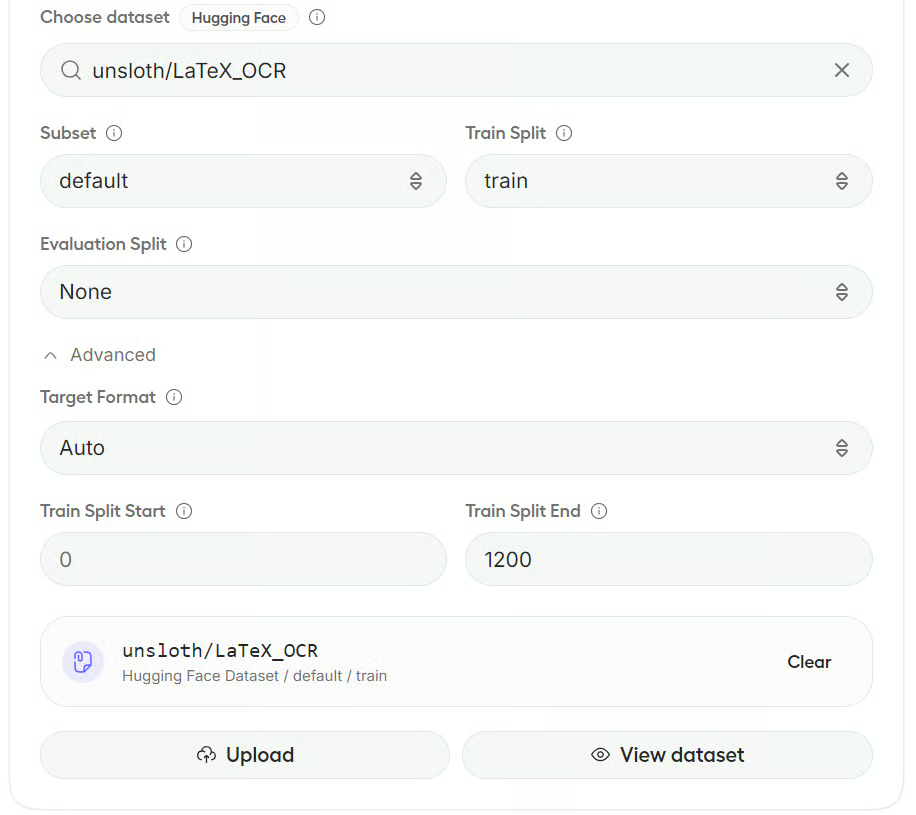
Note: If Studio cannot fully detect the dataset fields, it opens a preview window where you can map columns such as instruction, input, output, or image. Suggested mappings are often filled in automatically.
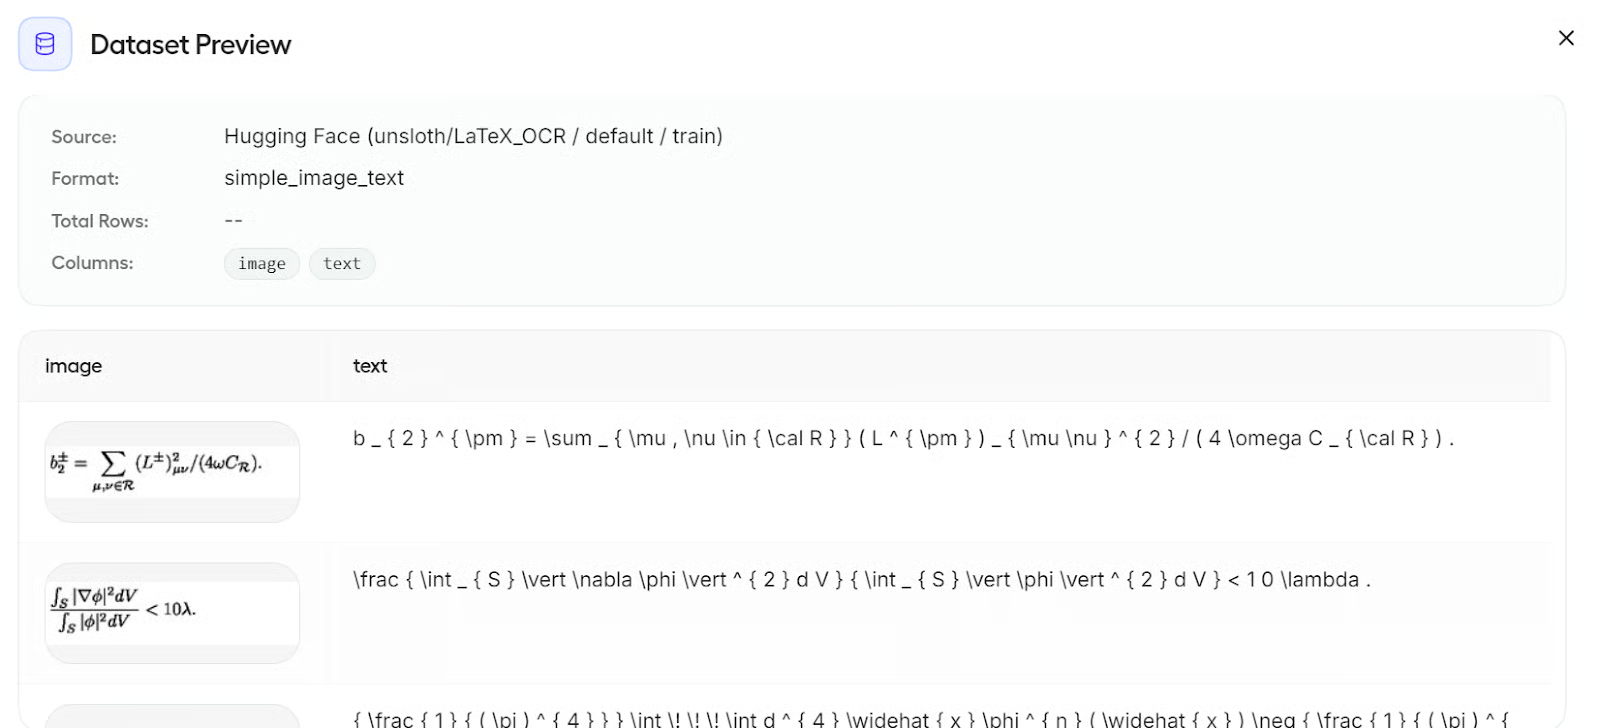
You can also click View dataset to inspect your data before training. In this case, the dataset includes image and text columns, which makes it ready for multimodal fine-tuning.
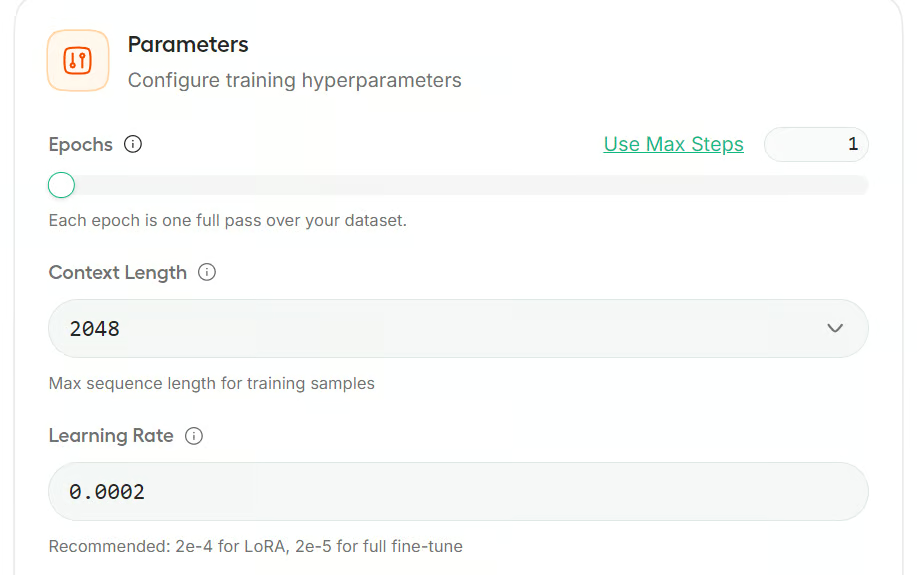
In the Parameters section, Unsloth Studio groups the settings into collapsible panels. For this tutorial, we will keep things simple and only make a few small changes.
First, switch the training limit from steps to epochs and set it to 1 epoch. Since this is a short example run, training for one full pass over the dataset is enough. We will leave the rest of the main settings at their default values:
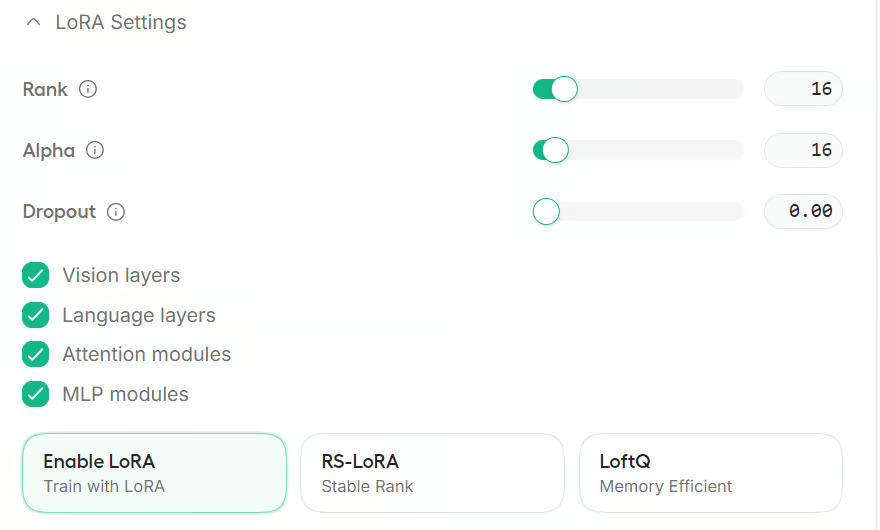
Next, open the LoRA Settings section. For this guide, we will keep the default values here as well:
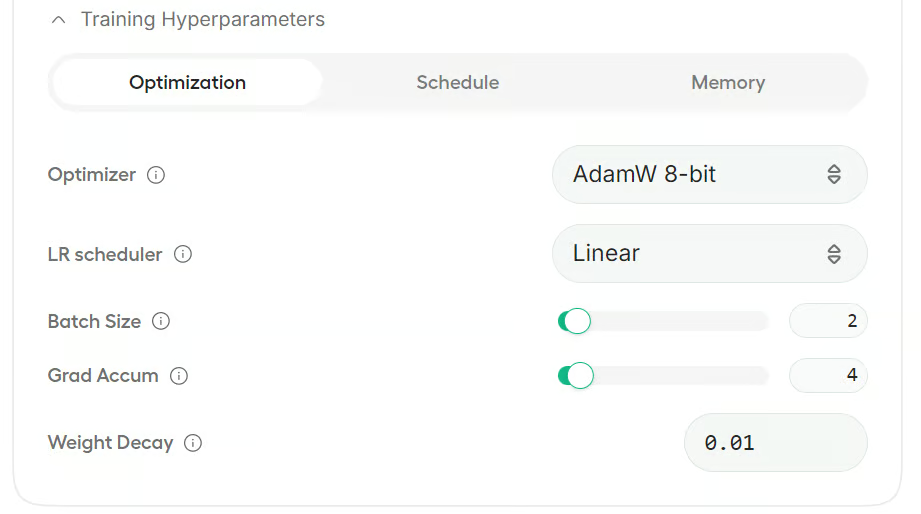
You can also expand the Training Hyperparameters section to adjust options such as the optimizer, scheduler, and memory-related settings.
For this example, we will leave everything else unchanged and use the default configuration.
Before starting training, it is a good idea to save your settings. This makes it easier to reload the same setup later or share it with your team so they can reproduce the same results.
Once everything is ready, click Start Training.
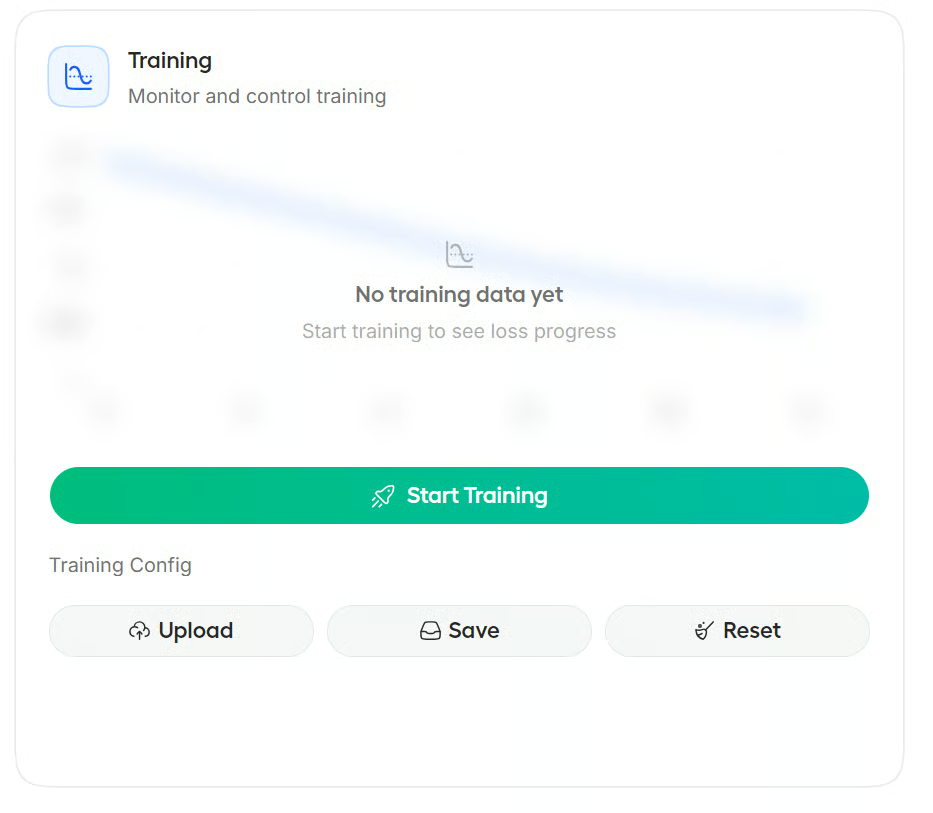
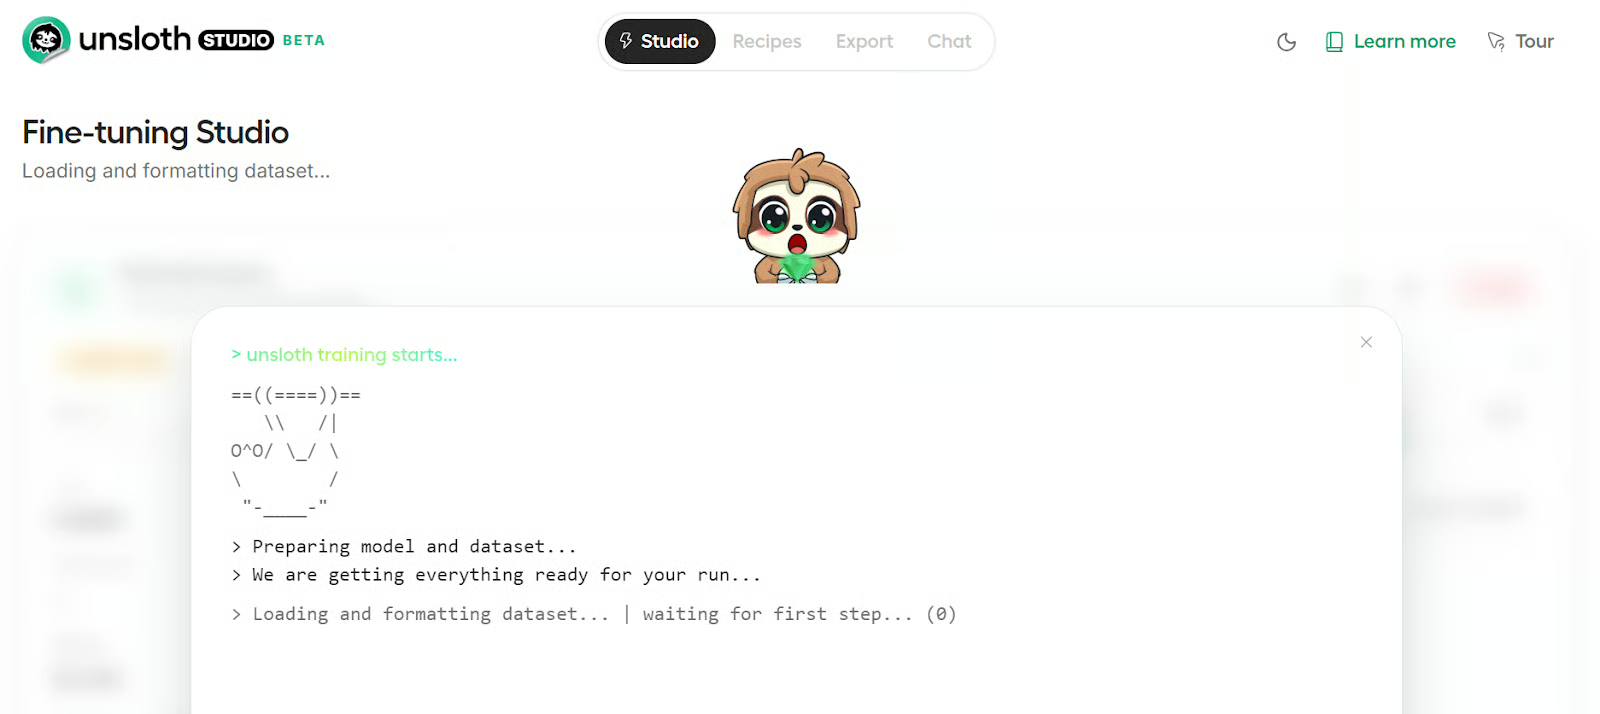
Studio will open the training view, where you can follow the logs as the run begins. At first, you will see the usual setup steps such as loading Python libraries, preparing the dataset, and initializing the fine-tuning pipeline.
When training starts, the screen updates to show the live progress, including the loss, steps, and other training details.
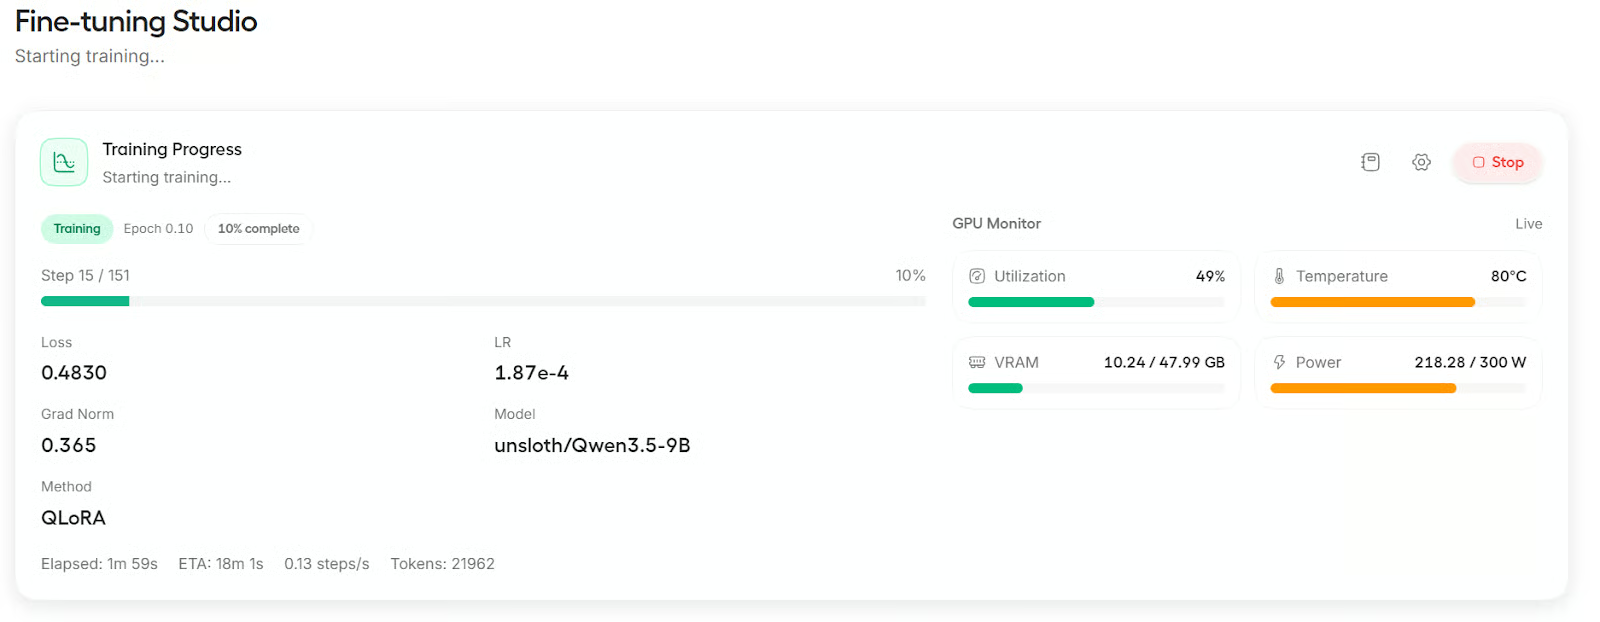
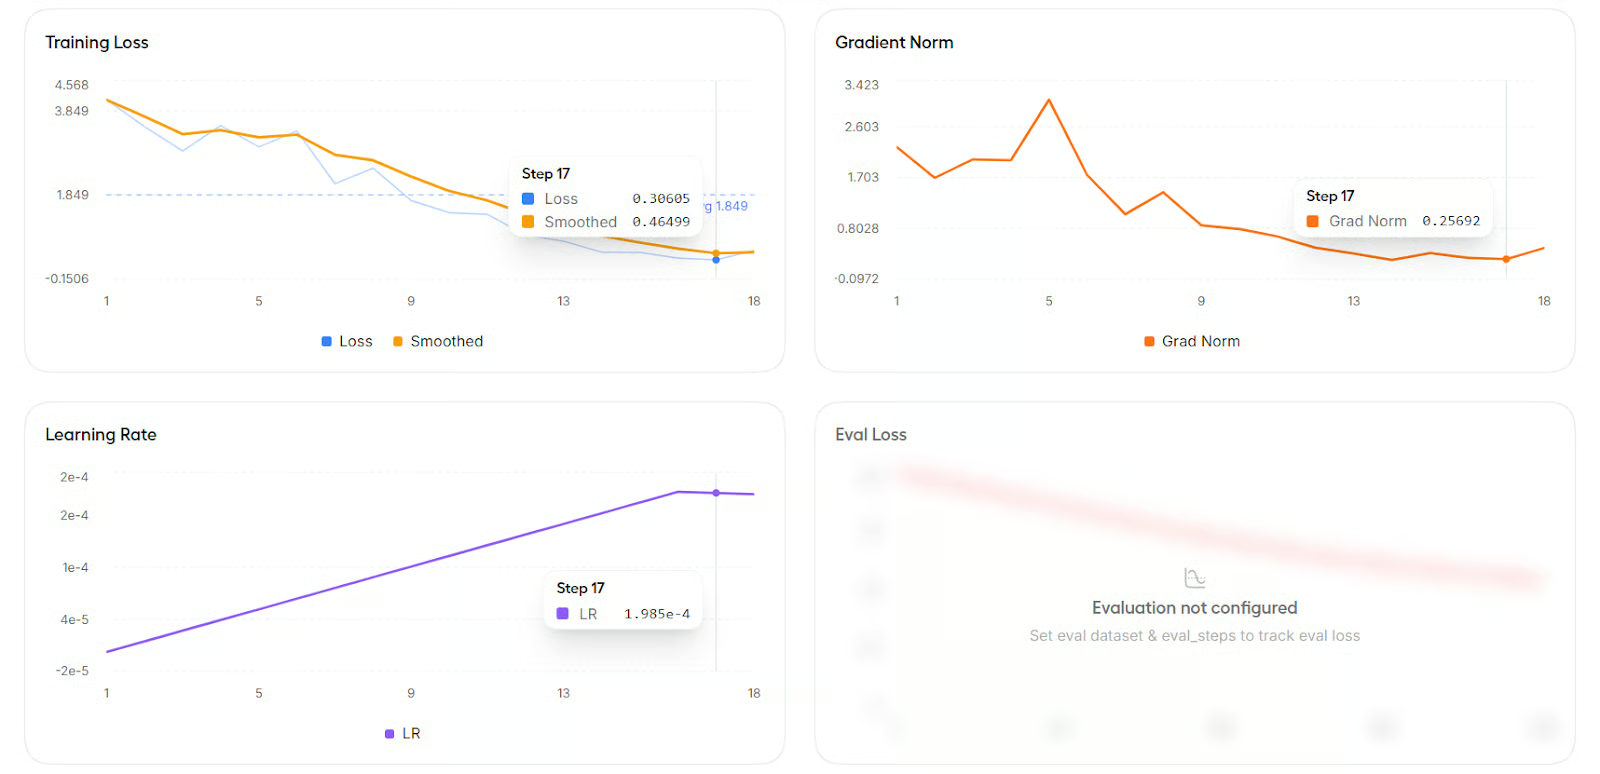
You can also scroll down to view graphs for metrics such as training loss, learning rate, and gradient norm.
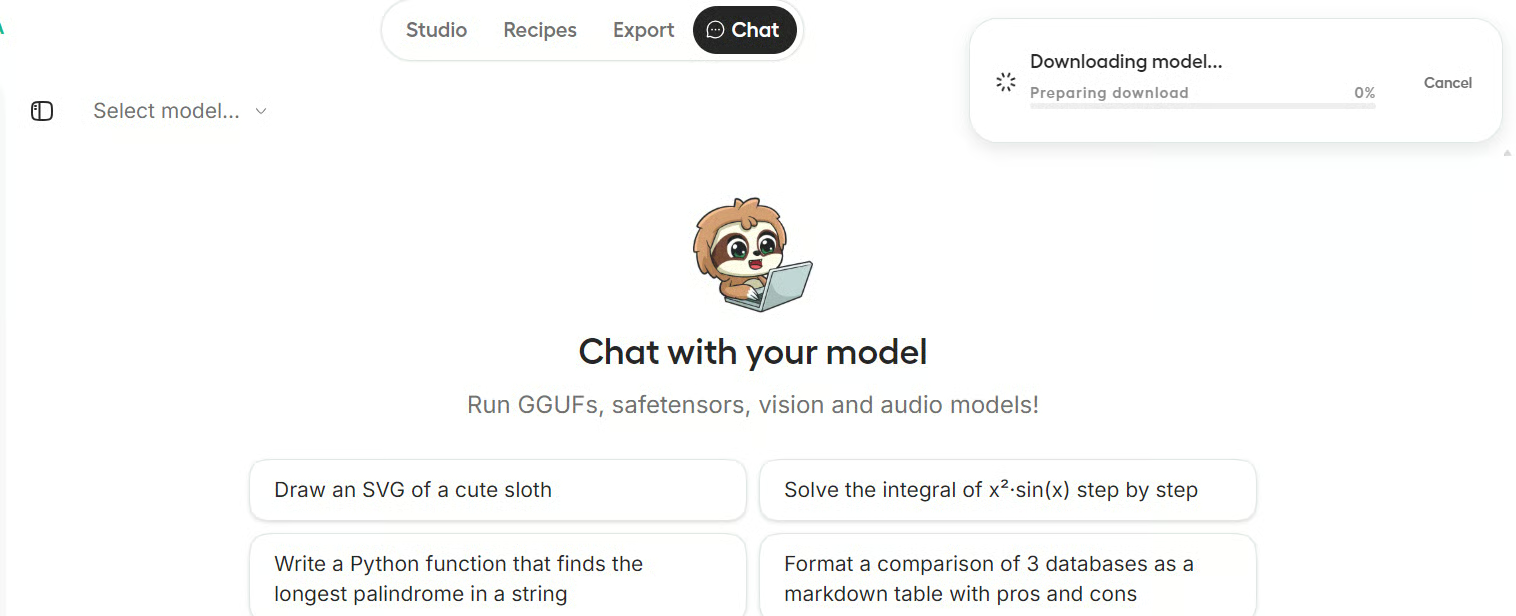
After training finishes, Studio gives you the option to export the model or compare it in Chat. For this tutorial, click Compare in Chat to test the fine-tuned model.
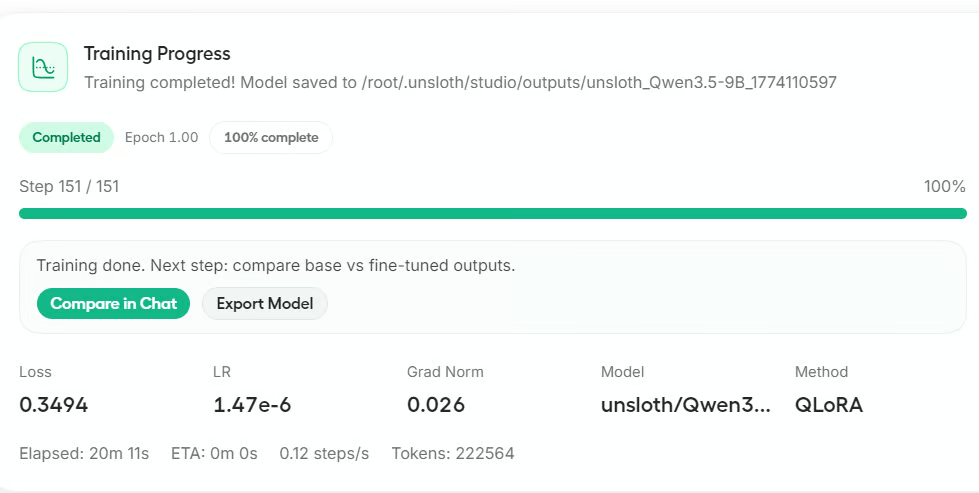
It may take a few seconds for the fine-tuned model to load in the chat interface.
Once it is ready, you will see the new model name appear in the Select Model section.
For testing, we gave the model a LaTeX equation image, and it was able to transcribe it correctly into text.
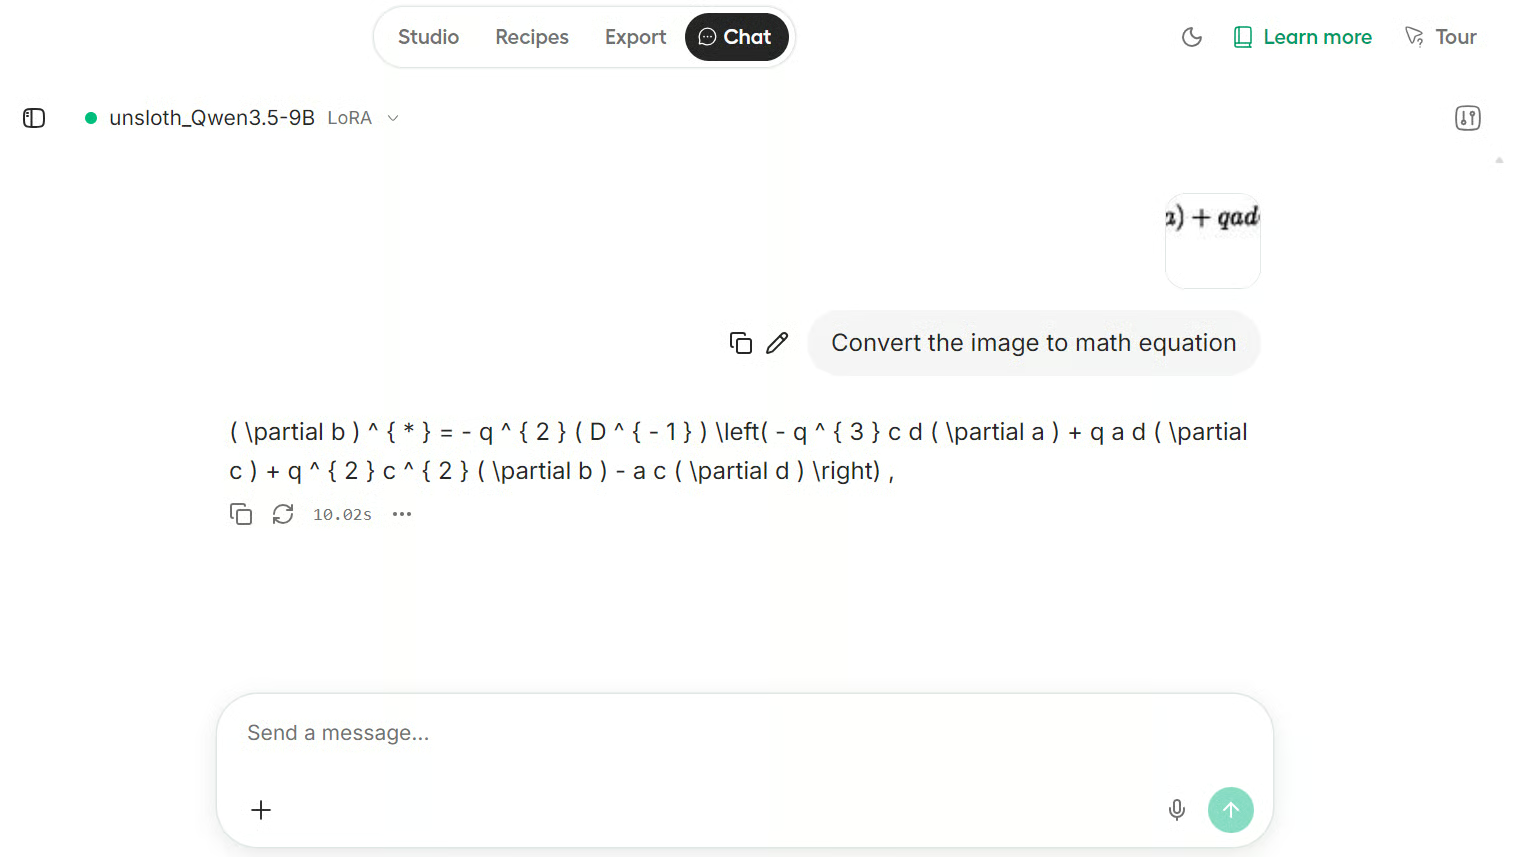
The result is impressive. Even though this is only a small example dataset, the fine-tuned model handled the equation well and showed strong performance on this LaTeX OCR task.
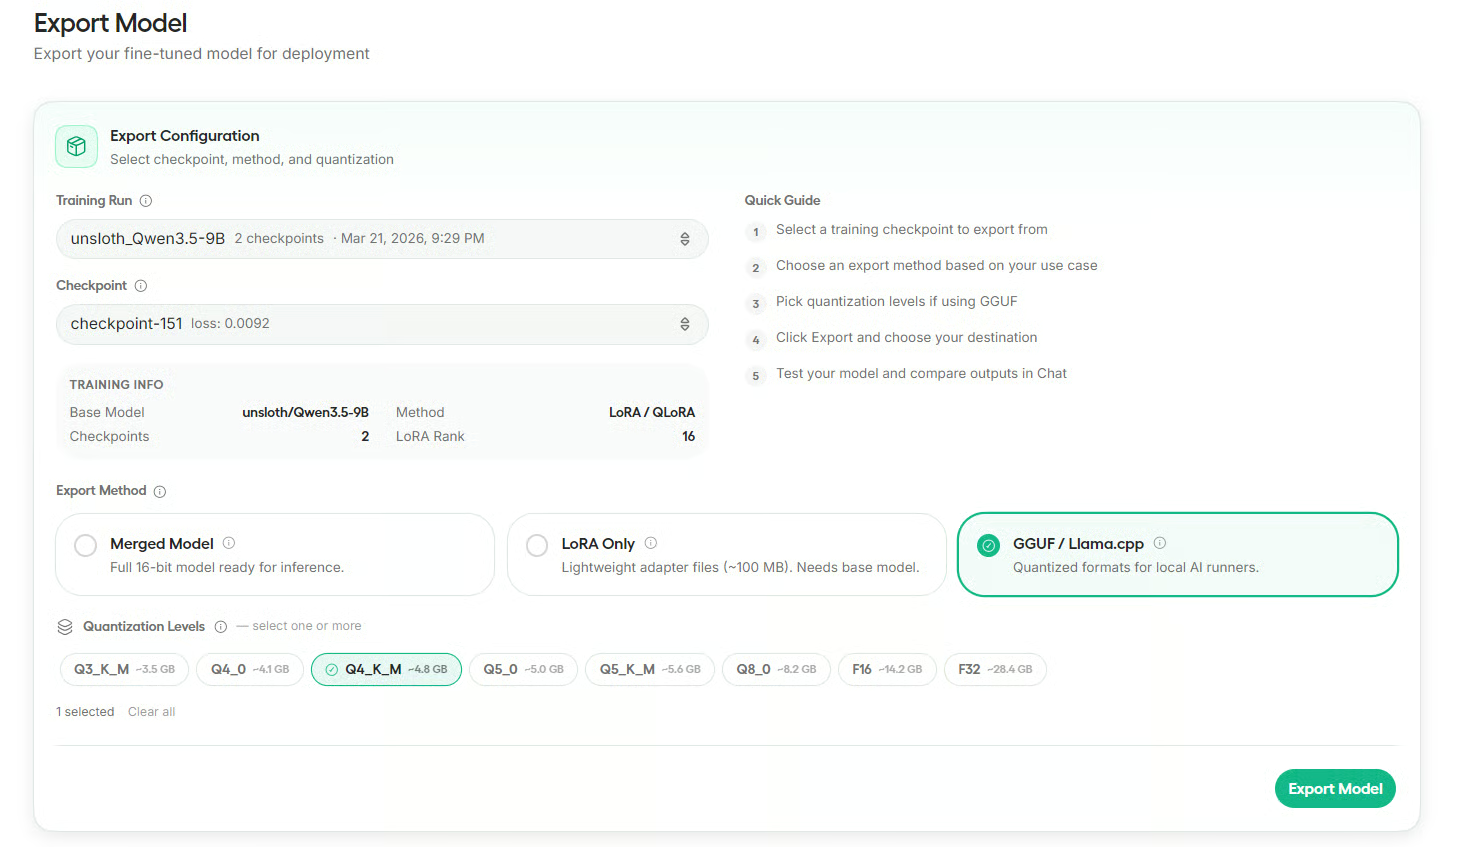
After testing the fine-tuned model, go to the Export section. Here, select your training run, choose the checkpoint, and then pick the export format you want.
Unsloth supports exporting as a merged model, LoRA only, or GGUF for local inference tools.
For this tutorial, export the model in GGUF format and choose Q4_K_M quantization.
This is a good option for local use because it keeps the model smaller while still working well in tools like Ollama, llama.cpp, LM Studio, and Jan AI.
Before exporting, Studio will ask whether you want to save the model locally or push it to Hugging Face. In this guide, we will save it locally.
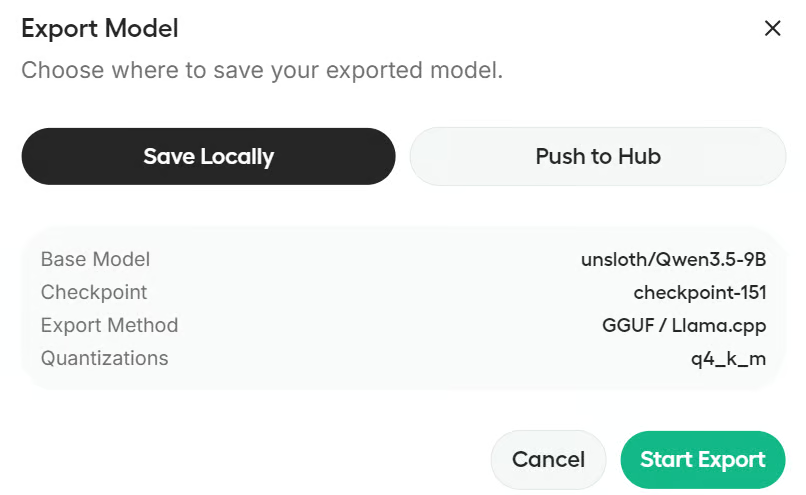
If you want to push to Hugging Face, you will need the right authentication setup, such as a write-enabled Hugging Face login or token.
Unsloth Studio makes fine-tuning much easier to approach, especially for people who want to work with open models without spending hours setting up a complex training pipeline.
From installation to training, chat testing, and export, the whole workflow is organized in a way that feels practical and beginner-friendly.
In this tutorial, I walked you through the complete fine-tuning workflow in Unsloth Studio. We installed the studio on a GPU machine, launched the web interface, selected Qwen3.5-9B as the base model, loaded the Latex OCR dataset, configured the main training settings, ran fine-tuning with QLoRA, tested the fine-tuned model in chat, and finally exported it for local use.
If you are new to LLM fine-tuning, Unsloth Studio is a strong place to start. It lowers the barrier to entry, keeps the workflow clear, and gives you a simple path to train and run models locally. I also recommend checking out the Fine-Tuning With Llama 3 course, which gives hands-on examples of the fine-tuning process.
Top DataCamp Courses
Corso
Corso
Corso
Tutorial
Abid Ali Awan
Tutorial
Abid Ali Awan
Tutorial
Abid Ali Awan
Tutorial
Abid Ali Awan
Tutorial
Abid Ali Awan
Tutorial
Bex Tuychiev