Track
Developing AI Applications
21 hr
I know you’re probably tired of constantly copying and pasting your code into ChatGPT. Thankfully, there’s a solution: the ChatGPT desktop app. It integrates with popular tools like VS Code, Xcode, and the terminal.
In this tutorial, I will guide you through the setup and use of the ChatGPT desktop app for VS Code and terminal, with examples.
To get started, download and install the ChatGPT desktop app from the official OpenAI website.
The app is available for macOS and Windows, functioning like the web version but with the added ability to integrate with other applications.
The ChatGPT desktop app operates just like its web counterpart, with an added feature: integration with other tools. It can be triggered from anywhere using Option+Space on macOS or Alt+Space on Windows.
Upon opening the app, we’re greeted with a familiar interface that’s almost identical to the web version but includes several key enhancements.
When we open the app, we get the following prompt window:
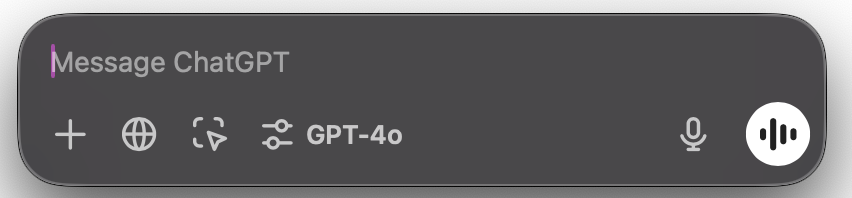
The interface is very similar to the web version, but some differences are worth pointing out.
The leftmost button allows us to attach files or data to provide context for ChatGPT. However, with the desktop app, we have different options:
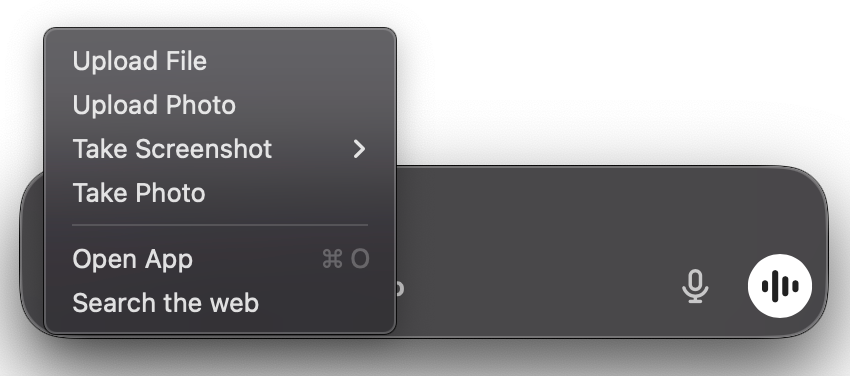
In particular, it is worth noting the ability to take a screenshot. This is very practical to share the current context we’re viewing. It makes it possible to easily ask questions about what we’re seeing on our screen.
Unique to the desktop app is the ability to take screenshots, enabling quick sharing of our current screen view. This is particularly useful when seeking assistance about what we’re seeing on our screen.
The app also features an “Open App” button, which toggles between a compact prompt input and the full ChatGPT desktop interface.
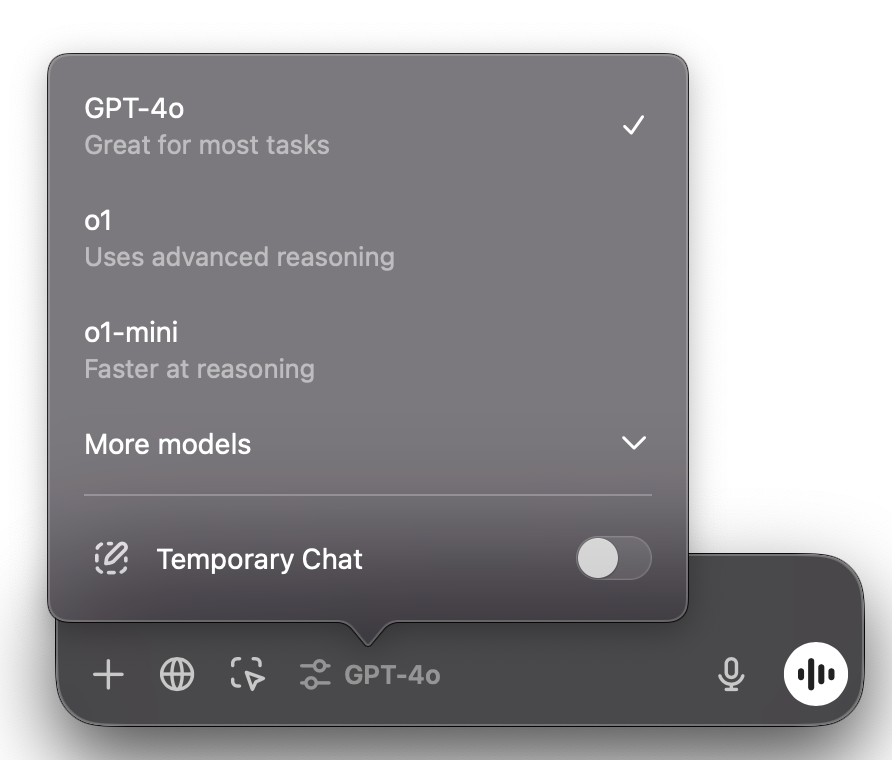
Clicking on the model name opens a model selector where we can choose which model we want to use:
The most significant advantage of the ChatGPT desktop app is its ability to connect with other applications like VS Code and the terminal. This integration can improve our workflows by providing ChatGPT with direct context from these tools.
We can connect to another application using the third button:
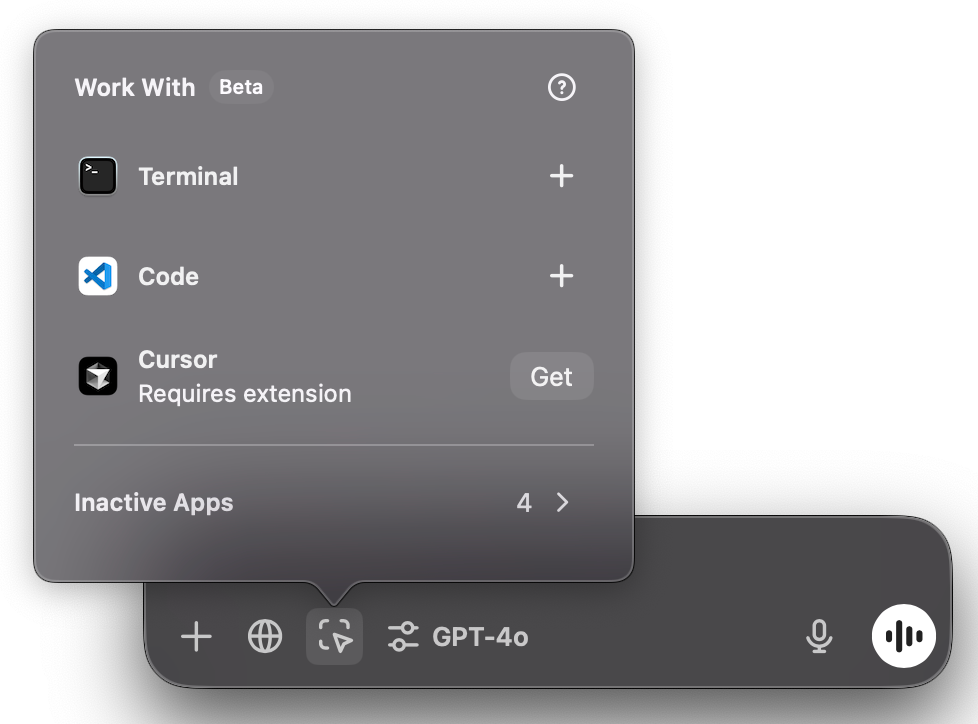
In my case, I have already installed the VS Code extension which is what makes it possible for me to connect to it (as indicated by the + icon). We can see in this example that to use Cursor I would need to first install the extension. Let’s see next how we can install extensions.
As mentioned above, to integrate ChatGPT with VS Code, we need to install the ChatGPT VS Code extension. To do so, we need to:
vsix on the input and select “Extensions: Install from VSIX…”.Note: Ensure that VS Code is up-to-date to avoid installation errors.
Once installed, we can open ChatGPT using Option+Shift+1 (on macOS) or Alt+Shift+1 (on Windows). This is equivalent to opening the ChatGPT desktop app selecting VS Code in the “Work With” menu.
When using ChatGPT with VS Code, the context of the currently open window is automatically taken into account when we submit a prompt.
For example, I’m working on a web application, and I want to see if my database security rules are secure. For this I:
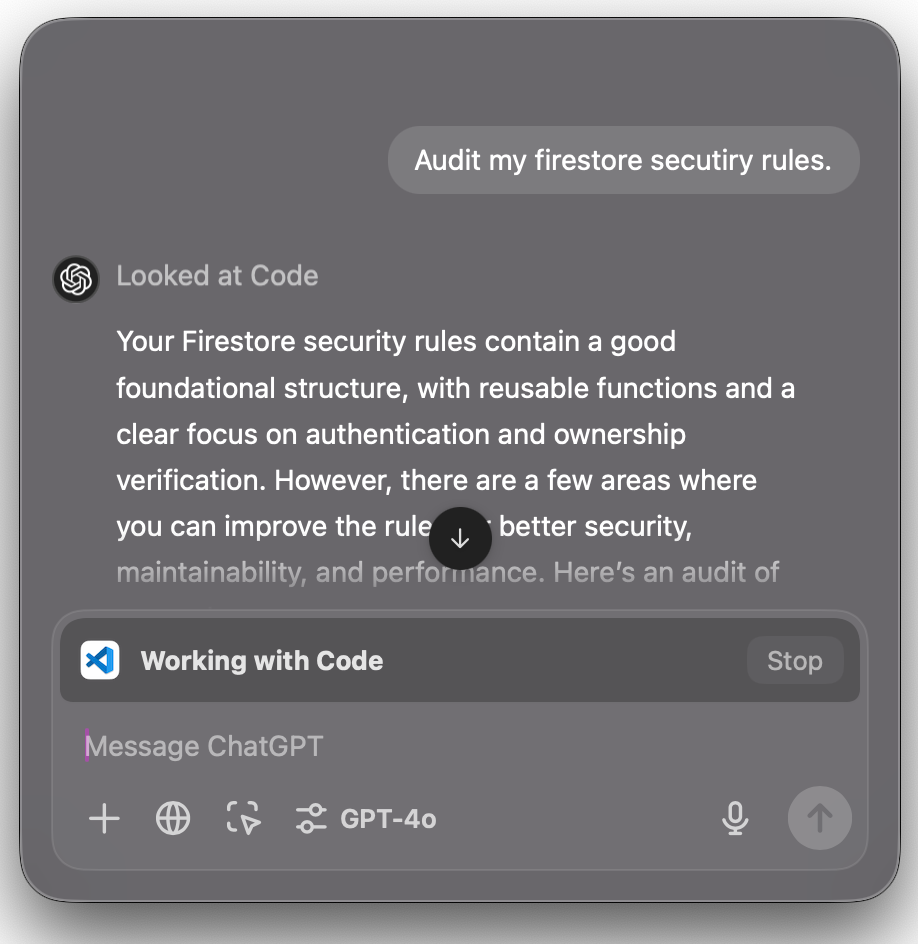
ChatGPT won’t automatically apply any changes to the code. We still need to manually copy and paste the code suggestions it provides.
The main advantage of the extension is that we don’t need to keep manually providing our code. As long as it is the open tab in our editor, ChatGPT will have access to it.
To connect ChatGPT with the terminal, we need to select the terminal from the “Work With” menu:
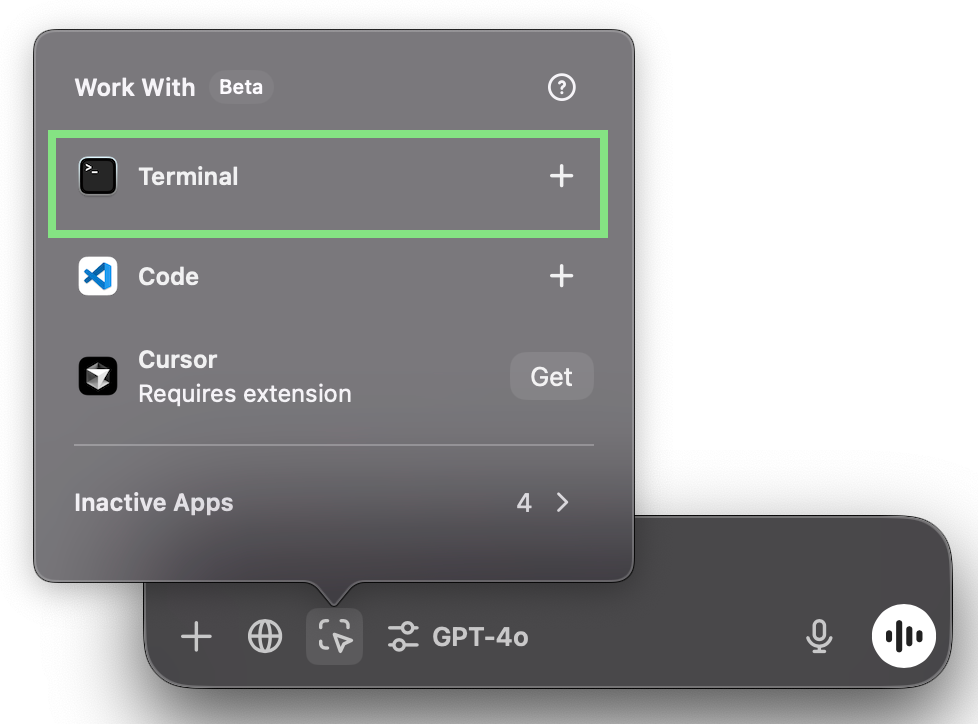
Note that this is the stand-alone terminal, not the integrated terminal in VS Code.
Once the terminal is connected, its content will be taken into account when prompting ChatGPT.
In my opinion, one of the most useful aspects of this integration is the ability to easily ask questions about an error. Let’s say I’m working on some code and run into an error. I ask ChatGPT to explain the error I see in the terminal and how to fix the code: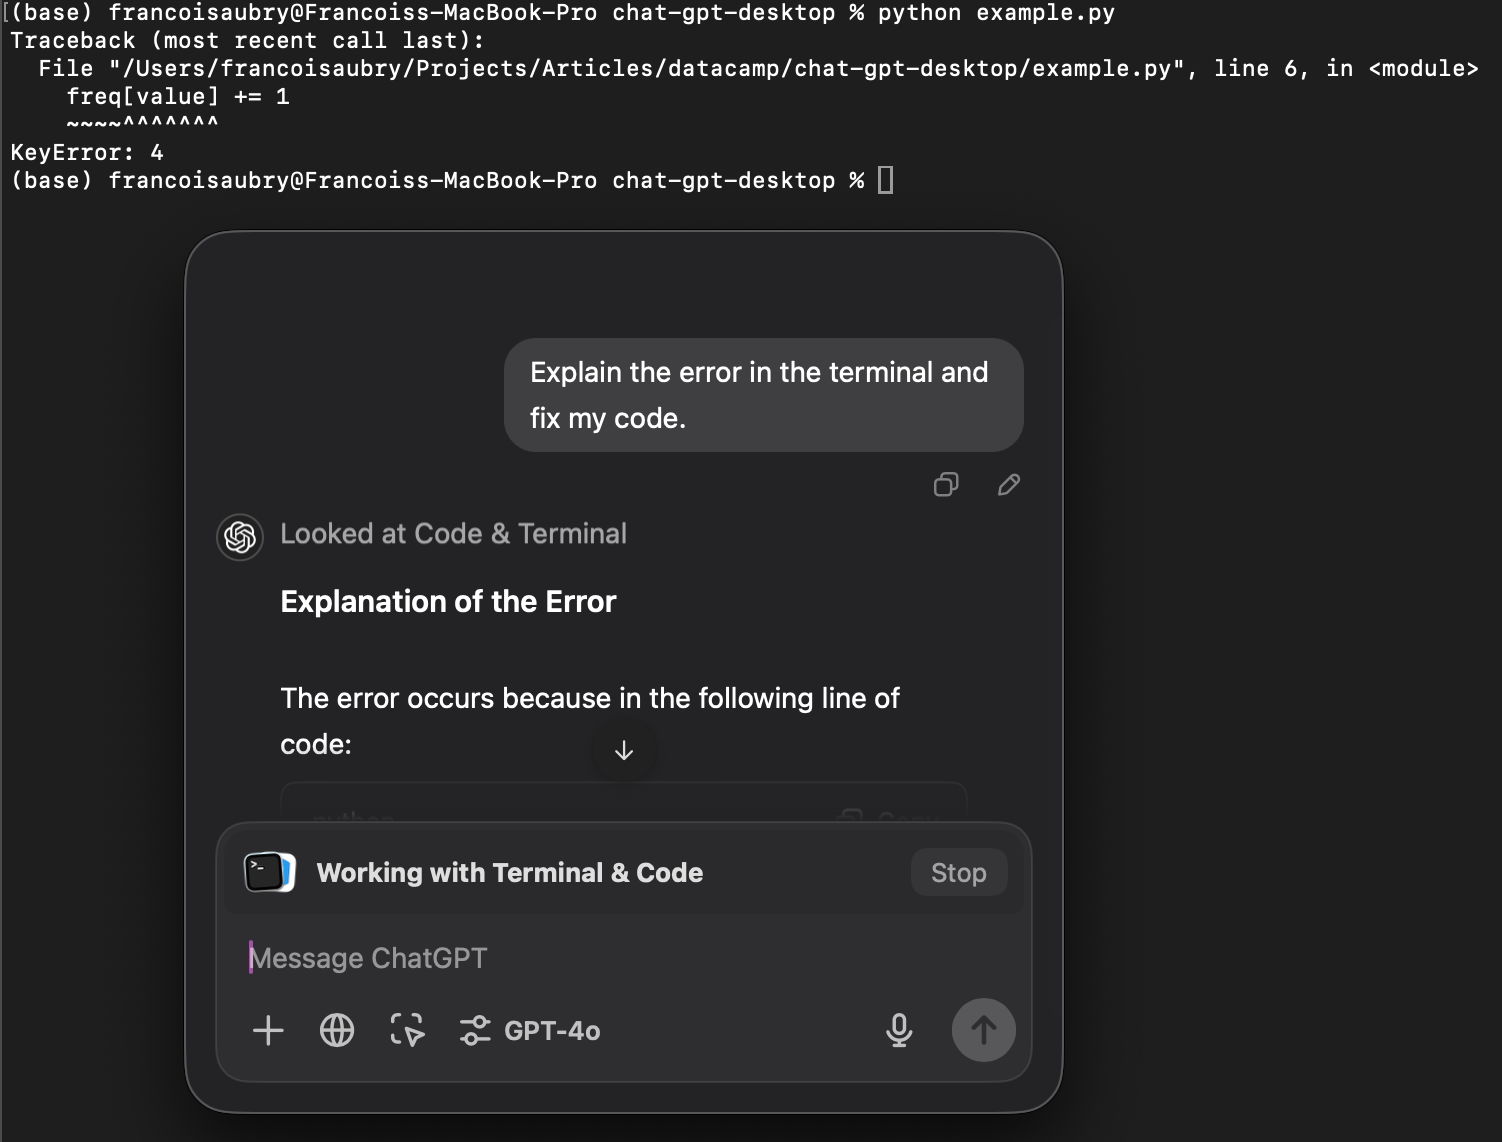
This is a much better experience than having to copy both the error from the terminal and the source code into ChatGPT to debug.
While the ChatGPT desktop app greatly simplifies providing context, it’s not without limitations:
The ChatGPT desktop app is a significant improvement for developers who rely on ChatGPT for coding assistance, offering a more streamlined and efficient workflow. However, it’s still not as seamless as fully integrated solutions like Cursor.
If you rely on copy-pasting your code into ChatGPT, this app will save you time and effort. While the integration has room for improvement, OpenAI’s roadmap hints at promising updates in the near future. For now, manual adjustments remain necessary, but the convenience of this tool could make it a valuable addition to your development toolkit.
Learn AI with these courses!
Track
Course
Course
blog
François Aubry
6 min
blog
François Aubry
8 min
blog
Dr Ana Rojo-Echeburúa
8 min
cheat-sheet
Tutorial
Abid Ali Awan
Tutorial
François Aubry