Track
Developing AI Applications
21 hr
It’s important not to confuse this with the Voice Library.
Once you create a voice in VoiceLab, you can optionally publish it to the Voice Library for others to use. But by default, it stays private in your account.
Getting started is straightforward.
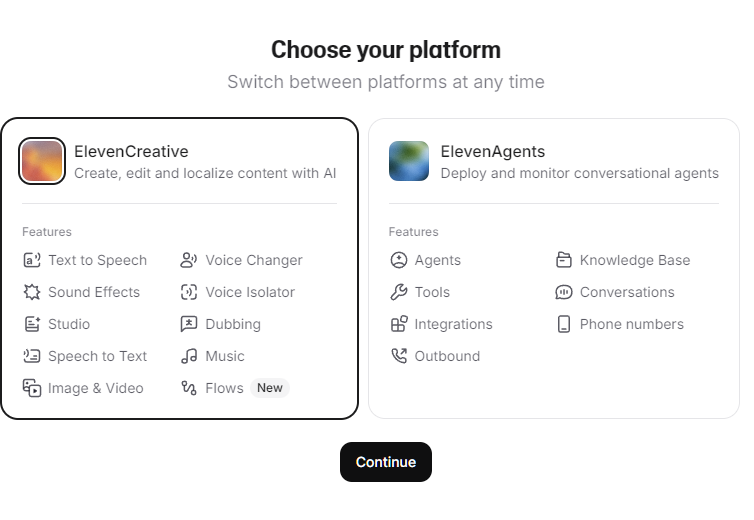
Once you’re in, navigate to the VoiceLab area:

You’ll see four options:

Note that not all these features are available for all tiers. Check the table below to know what is available at each tier:
|
Plan |
Voice Design |
IVC |
PVC |
Commercial License |
|
Free |
Yes |
No |
No |
No |
|
Starter |
Yes |
Yes |
No |
Yes |
|
Creator |
Yes |
Yes |
Yes |
Yes |
Voice Design is the easiest place to start. You don’t need any recordings. It generates a voice from scratch. It’s also the only option available on the free plan, which makes it perfect for beginners.
The workflow is simple:
One tip from experience: generate at least 5 to 10 variations before picking one. Even with the same settings, results vary quite a bit. To get started, let’s click on the Voice Design button in the Create Voice menu. This will open a menu that allows you to write a prompt for your voice.
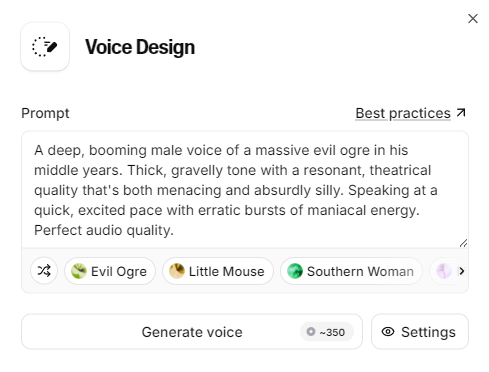
You can tap Settings to adjust two details:
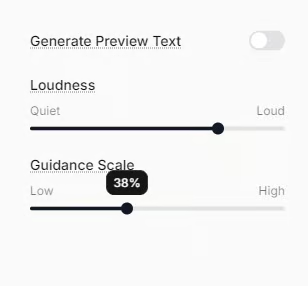
You can choose to let the AI agent have its own preview text, or you can provide it with your own script by turning off the setting and putting your own text in the preview text box.
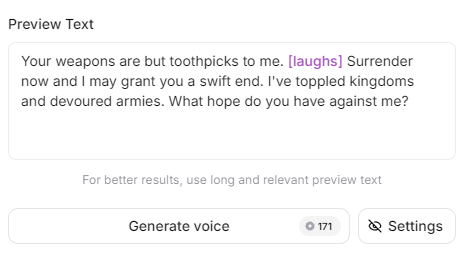
You’ll want to use the prompt area to generate your configurations. Try using the following prompt template to key in on some specific parameters you want:
Native <Language>.  <Accent>, <Gender>, <Age range>, <Quality level>.
Persona: <2–5 words>. Emotion: <2–3 adjectives>.
<1–2 sentences about timbre, pacing, delivery>
Each parameter influences the output:
The interesting part is how these combine. Sometimes unexpected combinations produce the best results, so it’s worth experimenting.
Click Generate voice, and ElevenLabs produces a short sample.
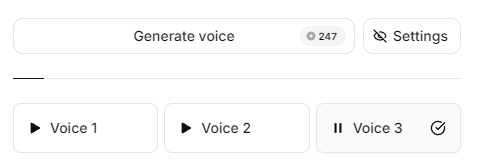
You can regenerate as many times as you want. Each version will be slightly different.
Once you find one you like:
Click Save
Use a descriptive name like narrator_us_male_30s
After saving, the voice will appear under My Voices and in the Speech Synthesis dropdown.
Instant Voice Cloning lets you replicate a voice using just a small audio sample. It’s fast and surprisingly effective, though not perfect. Remember, you’ll need the Starter ($6/mo) plan or higher for this.
Important note: only clone voices you have permission to use. The platform requires you to confirm this, and you should take it seriously. The full pipeline is pretty straightforward:
So you want your audio to be of the right length, the right format, and of decent quality. The minimum length is about a minute, but I’ve found that 3 to 5 minutes gives much better results.
You should upload either MP3 or WAV files under 50MB, and you can always upload multiple files at once.
To ensure the best cloning experience and good audio quality, I recommend the following when recording:
Make sure to avoid the following:
Navigate back to your Voices dashboard and do the following:
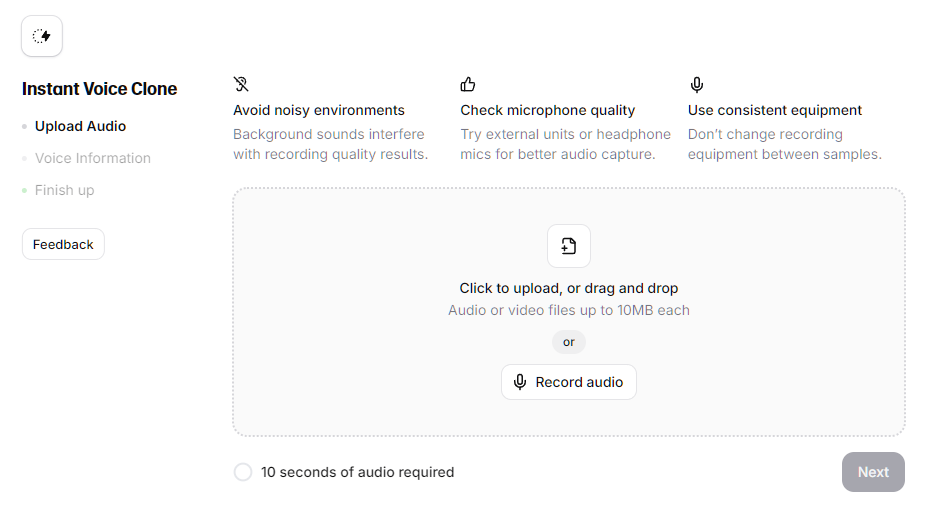
The following labels can be chosen from a dropdown menu:
The voice is ready immediately, and you can test it right away in the text-to-speech generator. Try a few different sentences and pay attention to where it sounds natural and where it struggles.
To do this, click on Text to Speech on the left sidebar. (Note that some versions have referred to this as Speech Synthesis.)
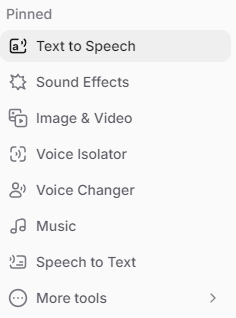
This opens a window with a similar text prompt window.
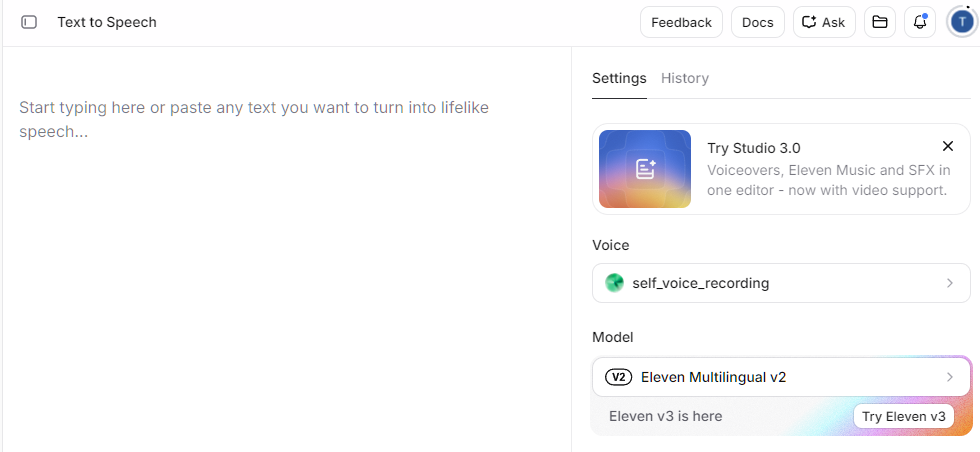
On the right side, click on the Voice dropdown and select your voice from the My Voices window.

Write a test sentence and click on Generate speech.

This will generate an audio sample with your chosen voice. Feel free to adjust the settings on the right side to suit your preferences. You can adjust settings such as:
Choosing different models can also provide different options!
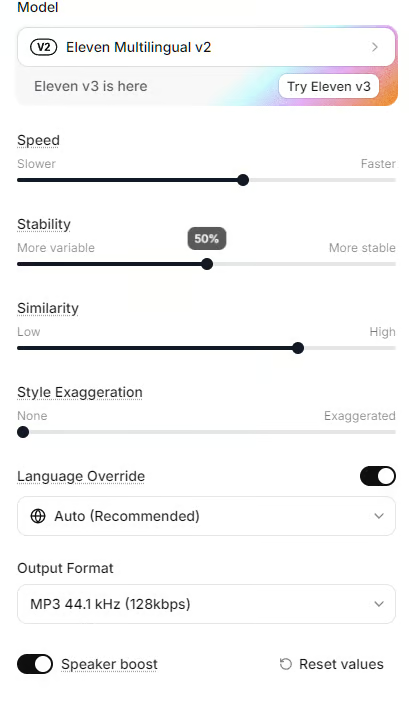
To save your file, click the download button on the right to save the generated audio.

If IVC gives you a rough approximation, PVC gives you something much closer to the real thing. This is where you capture nuances like pacing, breath, and emotion.
It requires the Creator plan ($22/mo). According to ElevenLabs, processing typically takes 2 to 6 hours, though the total training time can be up to 24 hours depending on server load.
It’s the most relevant option if we’re trying to build production-grade voice assets. Think things like narration, audiobooks, and branded voice agents. Things that might see commercial or widespread use.
Since we’re trying to create the best possible model, the requirements have gone up. For instance, the minimum recording time is 30 minutes of clean audio, but for best results, aim for 3+ hours. The best way to submit this much audio is to break it up into 30-minute samples.
Here are some tips to make the most of your recording:
For example, you might want to mix up your narration style:
As always, avoid bad quality audio like the following:
Once you get done with preparing the audio, the steps are pretty easy:
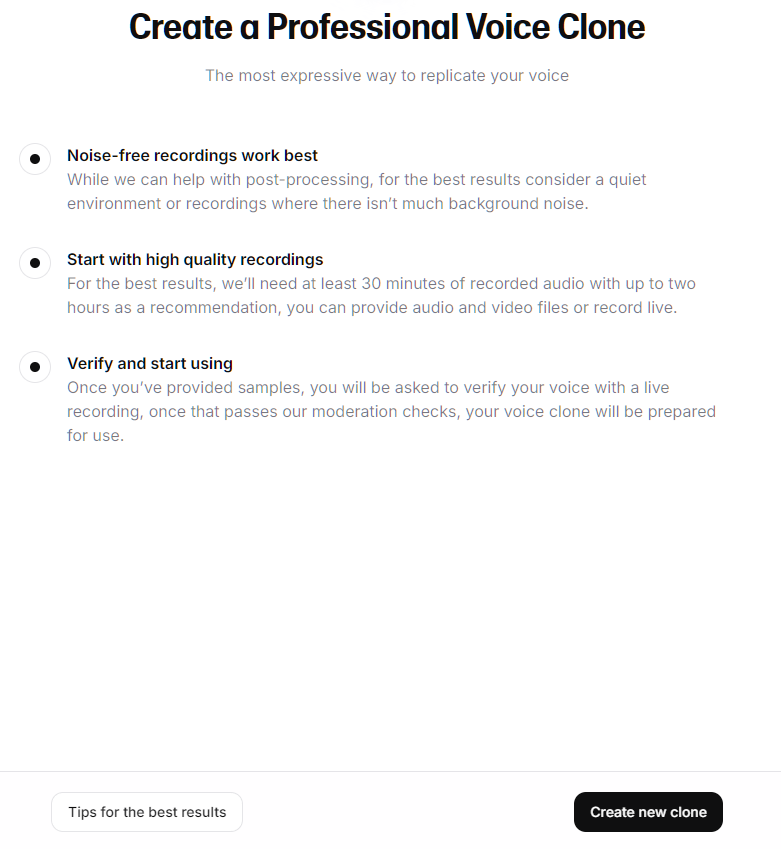
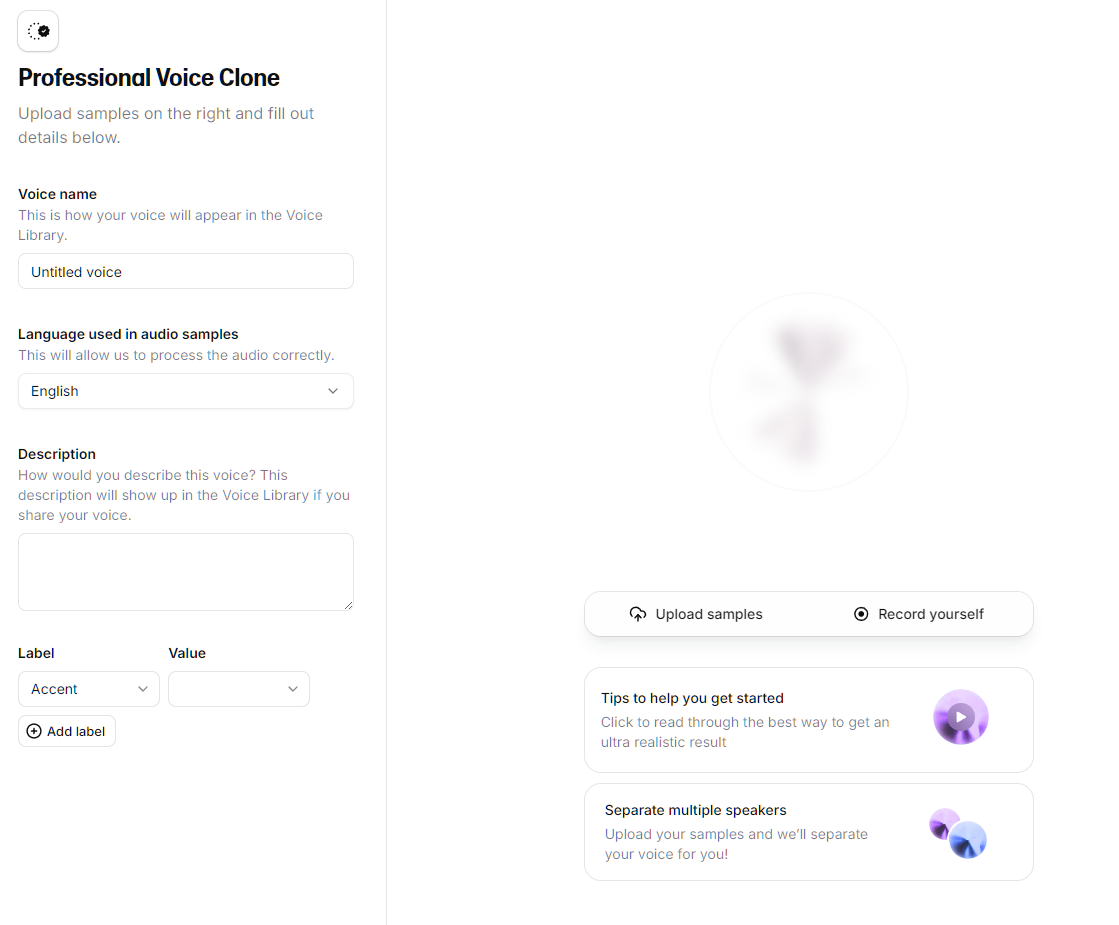
Before ElevenLabs trains your clone, they make you prove the voice is actually yours.
This is the big difference from IVC: professional cloning only lets you clone your own voice, so you can't clone someone else's, even with their consent. If a colleague wants to lend theirs, they have to create and verify the PVC on their own account, then share it with you through a private sharing link.
Verification is a short live recording. You'll read a few on-screen lines into your mic. Two things make or break it:
If it fails, you can wait 24 hours and retry, or reach out to support. One heads-up: once you reach the verification stage, the clone is locked in. You can't delete an unverified PVC yourself, so make sure your samples are right before you get here.
You’ll get notified when your voice clone is ready! Once that is the case, a useful trick is to compare your IVC and PVC outputs using the same sentence. The difference is usually very clear.
Once your voice is saved, it becomes available across the platform everywhere ElevenLabs generates audio.
You can use it in:
I’ll go over how we can use your voice for each of these tools. The Beginner’s Guide to the ElevenLabs API is the best way to get started with the Python API.
In Text to Speech you just need to select your voice from the Voices -> My Voices dropdown, as we mentioned above.
Some tuning tips for the Text to Speech tool:
It might take a few tries to get the exact voice and recording you want, but the more you experiment, the better you’ll understand the speech generation process.
In Studio, it’s somewhat similar. You start by navigating to Studio on the left sidebar, then select + New Blank Project. Next, you can choose the kind of project:
An audio project is just that; it allows you to create long-form conversational content with multiple voices. A video project requires you to upload a video first, where you can then add voices to voice-over a video.
The Studio audio project allows you to create a multi-speaker audio file. This can be great for generating podcasts or conversational content. Even audiobook content where you want different voices or different characters.
The Studio’s audio dashboard is a blank canvas for you to work on. We’ll focus on the key voice component here, but feel free to play around with it.

On the left, you will see a voice section selected for you. As you type in the prompt area, it will highlight the character’s speech for you.
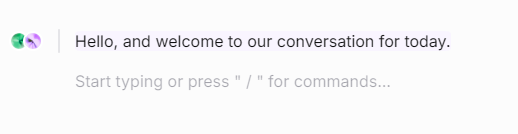
When you go to the next line, you can then select a different voice and have a different character. Each of these lines is a “paragraph”:
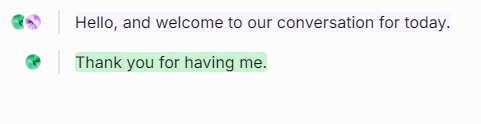
The limits are quite high for the Studio. Each project can have up to 500 chapters, each with up to 400 paragraphs. Each paragraph can have up to 5000 characters.
The number of projects you can have will depend on your tier:
Let’s follow the same steps, but this time choose a video project. You are taken to a blank canvas and asked to upload a video: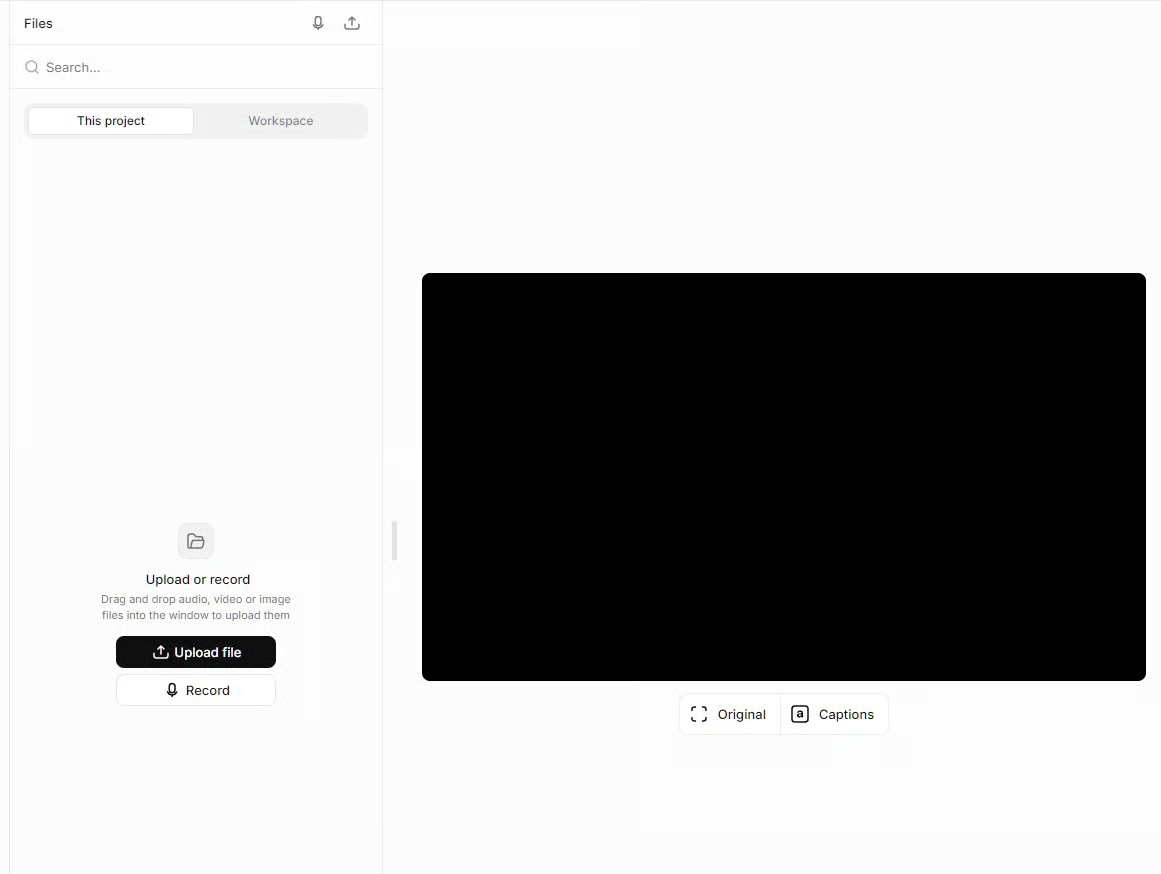
Once you’ve uploaded a video clip, you can see it on the left and hit play to preview. You can add multiple videos if needed.
Then go to the left and choose Speech.

Similar to an audio project, you can choose multiple voices and type the sentences of interest. As you type, you can hit Enter to get to a new line. It’s possible to choose different voices for each line to get a conversation going.

At the bottom, you can easily adjust the timeframes for each line by dragging and dropping them on the timeline.

If you do not have photos or video, you can generate them using the Video tab on the left. You simply write a prompt, which then generates the image or video of choice.
Please note that you must first accept the Image and Video beta terms of service. Also, free members are only allowed to generate images; you must have at least a Starter membership ($5/mo) to generate video.

To use the Python SDK, you must first have Python installed. Then you want to create a Python environment where you can then install the ElevenLabs SDK using the following: pip install "elevenlabs[pyaudio]"
Next, go to your ElevenLabs developers dashboard by clicking on the bottom of the left sidebar and selecting API Keys -> Create Key.

You will then select what tools you want to give access to the API and click Create Key.

This will pop up an API Key where you must copy or else you will lose it forever.

Next, save the API key to a .env file in a safe place or a project folder.
After that, go to your Voices dashboard and select My Voices. You’ll want to copy the Voice ID of your voice. I would save it somewhere easy for you to access later.

Now you can create a script to run your ElevenLabs voice! Here’s a simple example:
import os
from dotenv import load_dotenv
from elevenlabs.client import ElevenLabs

# Loads the .env file from the folder
load_dotenv()

# uses the API key to get access to the ElevenLabs Client
client = ElevenLabs(api_key=os.getenv("ELEVENLABS_API_KEY"))
# Sets the voice ID for your voice
custom_narrator_voice_id = "your_voice_id_here"

# Calls the text to speech API using your custom voice ID
# Creates an audio file with the specific text
# Uses the model and output format defined for the voice
audio = client.text_to_speech.convert(
    voice_id=custom_narrator_voice_id,
    text="Thanks for getting through this DataCamp article!.",
    model_id="eleven_v3",
    output_format="mp3_44100_128",
)

# Takes the output audio and joins it into a byte object
audio_bytes = b"".join(audio)

# Saves the audio bytes to a file
with open("output.mp3", "wb") as f:
f.write(audio_bytes)VoiceLab offers three paths to choose from, depending on your needs. Voice Design is perfect for experimenting, Instant Voice Cloning is great for quick prototypes, and Professional Voice Cloning is where you go for production-level quality.
If you’re just getting started, I recommend sticking with Voice Design first. Upgrade only when you have a clear use case.
If you want to go deeper into building AI-powered applications, check out our Developing AI Applications skill track, which teaches you to use the latest AI developer tools, including the OpenAI API, Hugging Face, and LangChain.
Learn AI with DataCamp!
Track
Course
Course
blog
Khalid Abdelaty
9 min
Tutorial
Stanislav Karzhev
9 min
Tutorial
François Aubry
12 min
Tutorial
Khalid Abdelaty
11 min
Tutorial
Abid Ali Awan
8 min
code-along
Rhys Phillips