Course
Introduction to Python
4 hr
6.9M
If you are just getting started in Python and would like to learn more, take DataCamp's Introduction to Data Science in Python course.
Threading allows you to have different parts of your process run concurrently (Source: RealPython). These different parts are usually individual and have a separate unit of execution belonging to the same process. The process is nothing but a running program that has individual units that can be run concurrently. For example, A web-browser could be a process, an application running multiple cameras simultaneously could be a process; a video game is another example of a process.
Inside a process comes the concept of multiple threading or commonly known as multi-threading, where multiple threads work together to achieve a common goal. The most crucial benefit of using threads is that it allows you to run the program in parallel.
Let's understand the concept of threading with the help of an example. Imagine you have an application which counts the number of cars entering and exiting the mall's parking. Your apparatus has various cameras that monitor the entry and exit connecting to a central device. Each camera will have an algorithm to monitor the flow of cars, which will belong to the same process or program. However, each camera, along with the algorithm it is being run on, could be part of a separate thread. Not only that, but even the frames being read from the camera and the algorithm predicting on the frames could also be two separate threads.
Another example could be a video game in which the process has to run the tasks in parallel like the graphics, user interaction, and networking (while playing multiplayer games) because it has to be responsive at all times. And to accomplish this, it has to make use of the concept of multi-threading, where each thread would be responsible for running each independent and individual task.
A thread has its flow of execution, which means that the process will have multiple things happening at one time.
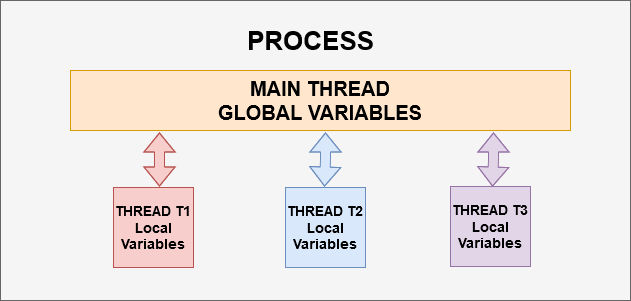
It is important to note that each process has at least one thread, and that is called the main thread. If your program doesn't have any defined thread, then it will at least have the main thread, i.e., the process itself.
If you look at the above diagram, there is a process that consists of the main thread consisting of global variables and three different threads t1, t2, and t3. Each thread has its local variables and flow of execution of code. The threads generally share the resources of the process, like the resources available to the main thread will also be shared among the three threads t1, t2, and t3. All the threads will have access to the global variables while having their own local variables.
There are different types of threads:
Multi-threading allows the program to speed up the execution provided that it has multiple CPUs.
It also lets you perform other tasks while the I/O operations are being performed with the help of multiple threads or even main thread along with a single thread. For example, the speed at which the frames from the camera are read and inferred by the algorithm will be handled by different threads. Hence, the algorithm will not have to wait for the frame to be inputted, and the frame reading part will not have to wait for the algorithm execution to complete to be able to read the next frame.
Remember that Python works based on the CPython implementation, which limits only one thread to be run at a time, hence; threading may not speed up all tasks. And the essential reason behind this is Global Interpreter Lock (GIL).
If you would like to learn about GIL, then feel free to check out this tutorial.
If you are looking for speeding up the CPU intensive task, then threading may not be the best solution for you. In such cases, multi-processing is considered to be useful.
To execute a program comprising of various threads, it needs to switch quickly across threads; hence, scheduling needs to be taken care of in programs where you have a lot of threads.
Resource sharing can also be a problem since all the threads share the same resources and memory of the global variables. Hence, operations performed in one thread could cause a memory error for another thread, or the other thread might not get the memory to perform its task.
In Python, the threading module is a built-in module which is known as threading and can be directly imported.
Since almost everything in Python is represented as an object, threading also is an object in Python. A thread is capable of
A thread can also be executed as a process.
A thread in Python can have various states like:
Let's now learn how you can implement threading in Python.
Note that Python3 is backward compatible with the thread module, which exists in Python2.7. In Python3, it can be imported as _thread module. So, let's take an example and understand the _thread module.
import _thread #thread module imported
import time #time module
Let's define a function called thread_delay, which will take two parameters as an input, i.e., name of the thread and the delay. Inside this function, you will:
time.sleep() to add delay, this delay will be useful to understand the execution of the thread. This delay will be in seconds,def thread_delay(thread_name, delay):
count = 0
while count < 3:
time.sleep(delay)
count += 1
print(thread_name, '-------->', time.time())
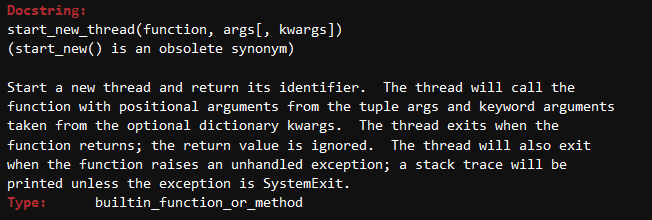
Now to add the thread functionality on the above function or to run the above function in the thread, you would use the start_new_thread method, which is inside the _thread module.
Let's see the docstring of the start_new_thread method.
?_thread.start_new_thread
Let's pass in the function thread_delay without parenthesis and the two arguments, i.e., thread name and the delay (to visualize the thread execution since it is very fast).
_thread.start_new_thread(thread_delay, ('t1', 1))
_thread.start_new_thread(thread_delay, ('t2', 3))
10916
t1 --------> 1588077856.4221454
t1 --------> 1588077857.4418247
t2 --------> 1588077858.422453
t1 --------> 1588077858.4431
t2 --------> 1588077861.4371448
t2 --------> 1588077864.438915
From the above output, you can see that the thread t1 starts executing first. Meanwhile, thread t2 waits since there is a 3-second delay, and as soon as that delay is finished, thread t2 is executed, and also, the delay for thread t1 is just 1 second.
Let's now change the delay of t2 to 5 seconds, which would start t2 after t1 would have finished executing since t1 will take only 3 seconds to complete its execution.
_thread.start_new_thread(thread_delay, ('t1', 1))
_thread.start_new_thread(thread_delay, ('t2', 5))
14632
t1 --------> 1588078001.4087512
t1 --------> 1588078002.4272866
t1 --------> 1588078003.432218
t2 --------> 1588078005.4082909
t2 --------> 1588078010.4268317
t2 --------> 1588078015.4283602
Let's use the same example as you used above, but this time you will use the threading module instead of the _thread module.
import threading
import time
def thread_delay(thread_name, delay):
    count = 0
    while count < 3:
        time.sleep(delay)
        count += 1
        print(thread_name, '-------->', time.time())
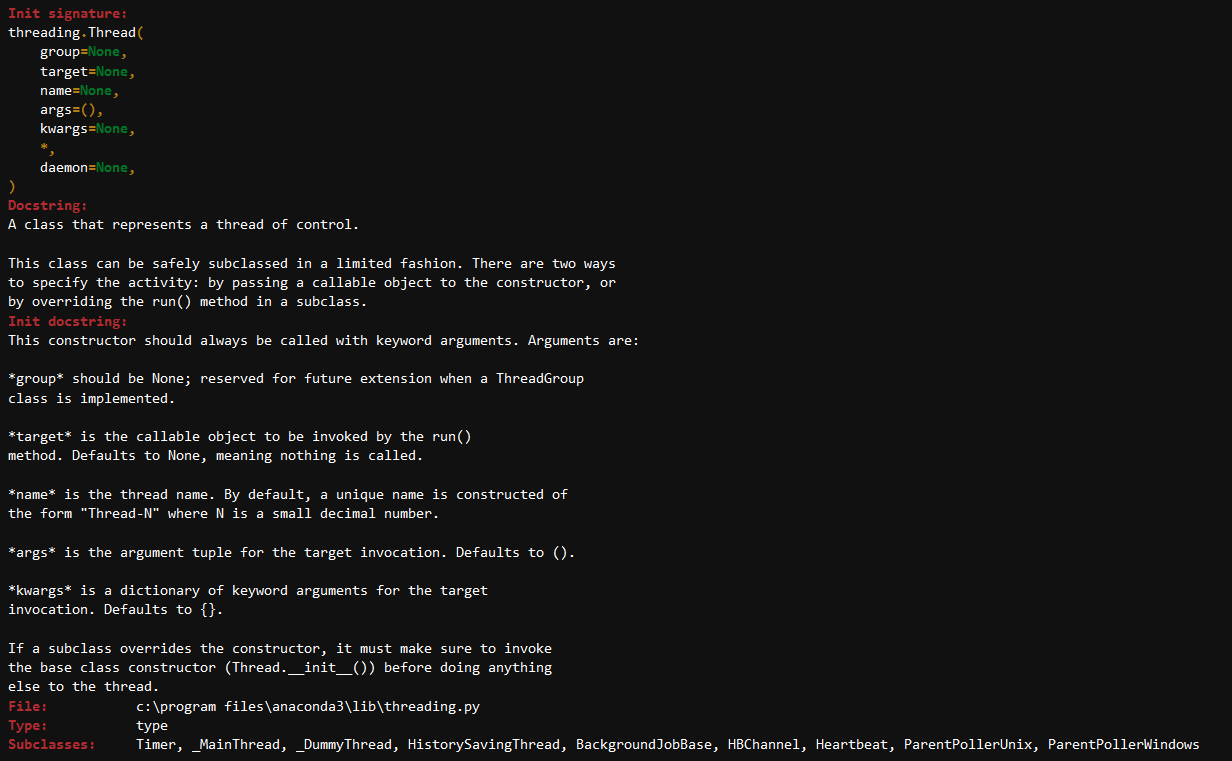
Inside the threading module is a Thread class, which is a similar spirit to the start_new_thread function of the _thread module.
Let's look at the docstring of Thread class, which takes in several parameters like group, target (like a function), args, etc.
?threading.Thread
In the Thread class constructor, you will pass in the target function thread_delay and the arguments of that function.
t1 = threading.Thread(target=thread_delay, args=('t1', 1))
t2 = threading.Thread(target=thread_delay, args=('t2', 3))
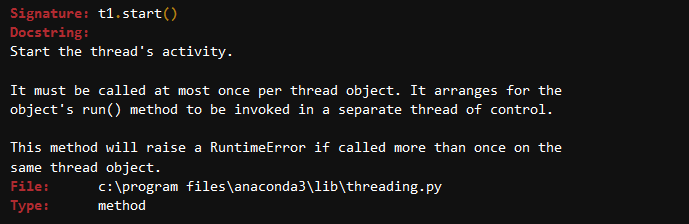
In the threading module, in order to run or execute the thread, you make use of the start() method, which simply responsible for running the thread.
?t1.start
t1.start()
t2.start()
t1 --------> 1588081121.7790291
t1 --------> 1588081122.7962046
t2 --------> 1588081123.7789369
t1 --------> 1588081123.7980876
t2 --------> 1588081126.7961557
t2 --------> 1588081129.7995002
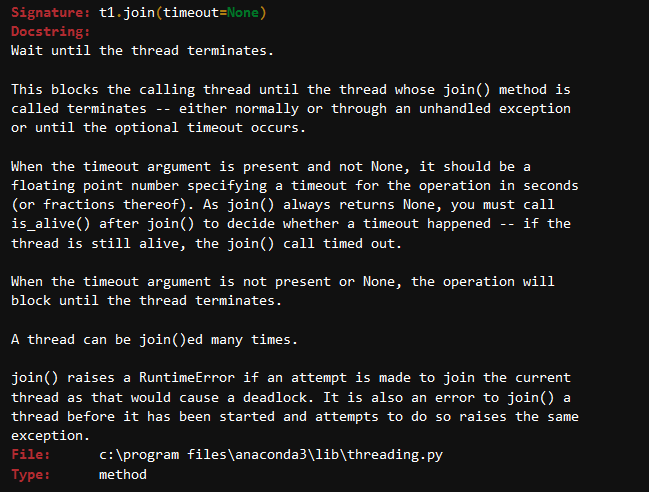
You will also use the join method, which means that wait until all the thread execution is complete. So whatever code you have written after the join method will only be executed once these threads have terminated.
?t1.join
t1.start()
t2.start()

t1.join()
t2.join()

print("Thread execution is complete!")
t1 --------> 1588081798.7118263
t1 --------> 1588081799.7231226
t2 --------> 1588081800.7129223
t1 --------> 1588081800.730732
t2 --------> 1588081803.7298765
t2 --------> 1588081806.7309563
Thread execution is complete!
Now let's calculate the volume of cube and square using the threading concept, which is pretty straight forward.
def volume_cube(a):
    print ("Volume of Cube:", a*a*a)
def volume_square(a):
    print ("Volume of Square:", a*a)
t1 = threading.Thread(target=volume_cube, args=(2))
t2 = threading.Thread(target=volume_square, args=(3))
t1.start()
t2.start()

t1.join()
t2.join()

print("Thread execution is complete!")
Thread execution is complete!


Exception in thread Thread-9:
Traceback (most recent call last):
  File "C:\Program Files\Anaconda3\lib\threading.py", line 926, in _bootstrap_inner
    self.run()
  File "C:\Program Files\Anaconda3\lib\threading.py", line 870, in run
    self._target(*self._args, **self._kwargs)
TypeError: volume_square() argument after * must be an iterable, not int
Exception in thread Thread-8:
Traceback (most recent call last):
  File "C:\Program Files\Anaconda3\lib\threading.py", line 926, in _bootstrap_inner
    self.run()
  File "C:\Program Files\Anaconda3\lib\threading.py", line 870, in run
    self._target(*self._args, **self._kwargs)
TypeError: volume_cube() argument after * must be an iterable, not int
Wait; what? As soon as you executed the start method, it resulted in an error. That is because the args parameter expects a tuple, and since the volume_cube and volume_square expects only one parameter, hence, you need to put a comma in the args parameter after specifying the first argument of the functions.
t1 = threading.Thread(target=volume_cube, args=(2,))
t2 = threading.Thread(target=volume_square, args=(3,))
t1.start()
t2.start()

t1.join()
t2.join()

print("Thread execution is complete!")
Volume of Cube: 8
Volume of Square: 9
Thread execution is complete!
Let's now learn to use threading as a subclass.
In this section, you would learn how to create sub-class from the thread class, which is available inside the threading module, and then create thread instances t1 and t2 out of that class.
You would use the same thread_delay function here as well.
class DataCampThread(threading.Thread):
    def __init__(self, name, delay):
        threading.Thread.__init__(self)
        self.name = name
        self.delay = delay


    def run(self):
        print('Starting Thread:', self.name)
        thread_delay(self.name,self.delay)
        print('Execution of Thread:', self.name, 'is complete!')


t1 = DataCampThread('t1', 1)
t2 = DataCampThread('t2', 3)

t1.start()
t2.start()

t1.join()
t2.join()

print("Thread execution is complete!")
Starting Thread: t1
Starting Thread: t2
t1 --------> 1588089083.4879806
t1 --------> 1588089084.489222
t1 --------> 1588089085.4909666
Execution of Thread: t1 is complete!
t2 --------> 1588089085.4979634
t2 --------> 1588089088.499365
t2 --------> 1588089091.5012596
Execution of Thread: t2 is complete!
Thread execution is complete!
Now let's understand the above code step by step:
You defined a class as DataCampThread, and in the class argument, you passed in the threading.Thread class. The reason you do that is that you want to create a sub-class from the threading module. Doing this allows you to use all the methods that are available in the threading.Thread class similar to the concept of inheritance.
Next, you defined the init method of the DataCampThread class and passed in the function along with the delay. The init is a constructor similar to the parameters you passed to the threading.Thread class, here you would be passing to the DataCampThread class.
Then you initialize the init method of the main threading.Thread class and then equate name and delay.
Next, you define the run method, recall here you defined the start method, which basically underneath the hood calls the run method. Since you have inherited the main class, you are allowed to make changes to the run method. Hence, when you call the start method, whatever modifications you will make in the run method will be reflected now.
Congratulations on finishing the tutorial.
This tutorial was a basic introduction to threading in python. However, threading is a very vast and vital topic, and some concepts might have been left unexplored. Feel free to look at more threading methods like active count, current thread, etc.
If you would like to learn more, then also check out Python's Thread-based Parallelism.
If you are just getting started in Python and would like to learn more, take DataCamp's Introduction to Data Science in Python course.
Python Courses
Course
Course
Course
Tutorial
Kurtis Pykes
Tutorial
Abid Ali Awan
Tutorial
Aditya Sharma