As a data scientist relying on Python, you might be wondering about the potential upsides of using an integrated development environment (IDE) like PyCharm. Due to Python's readability and simplicity of code, you can easily make changes to your code using a simple text editor, and then instruct a Python interpreter to execute your code. So why would you use a heavy and complex IDE to achieve the same result?
In the following sections, we will walk you through this question by unpacking what specific problems PyCharm can solve for you and how you can reap the benefits of using it.
Why do you need PyCharm?
Having a good development environment is a crucial step in boosting your productivity. There are more aspects to Python other than writing code, such as testing, debugging, the management of environments and packages, version control, and many other boiler-plate-heavy operations that might not be quite explicit. A Python IDE like PyCharm helps you focus on the development process by simplifying the rest for you as it comes with multiple features, including syntax highlighting, automatic indentation, and debugging tools, etc.
Installing and Configuring PyCharm
Before proceeding with installing your PyCharm IDE, you need to make sure that your hardware satisfies the specified technical requirements to install and run the software. The list of requirements is made available on the JetBrains website, but to mention a few, your computer must:
- Have at least 4 GB of RAM (8 GB recommended)
- Have at least 2.5 GB of disk space and 1 GB for caches
- Have Python 2.7 or Python 3.6 (or newer) already installed Installing PyCharm is similar to installing other software, and it can be done as follows:
- First, go to JetBrains' website, where you can download the IDE. The display will be as follows:
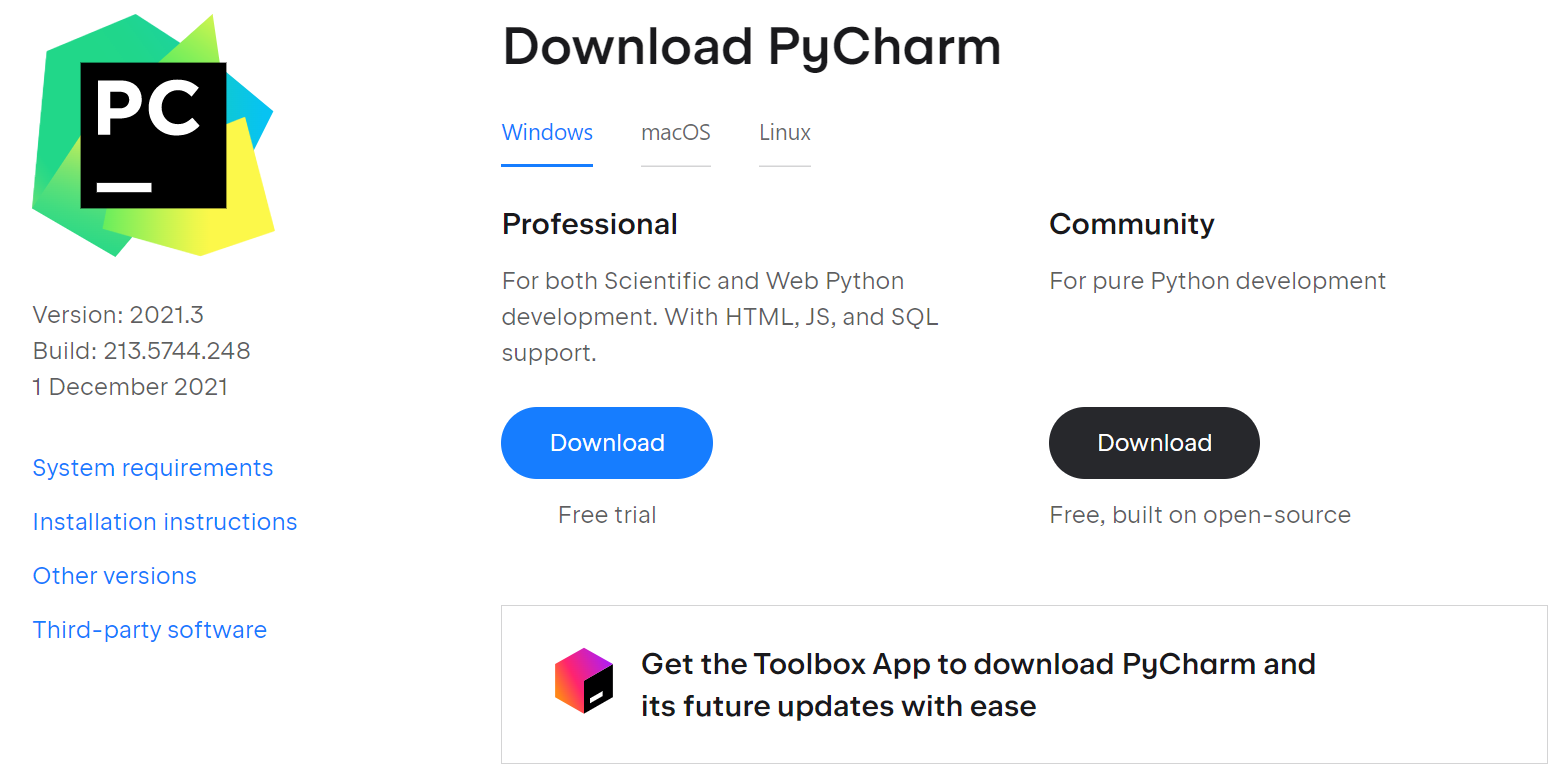
- There are various options depending on your operating system. The default option corresponds to the operating system you're using as it gets detected once you open the website (the default option for computers using Windows will be Windows).
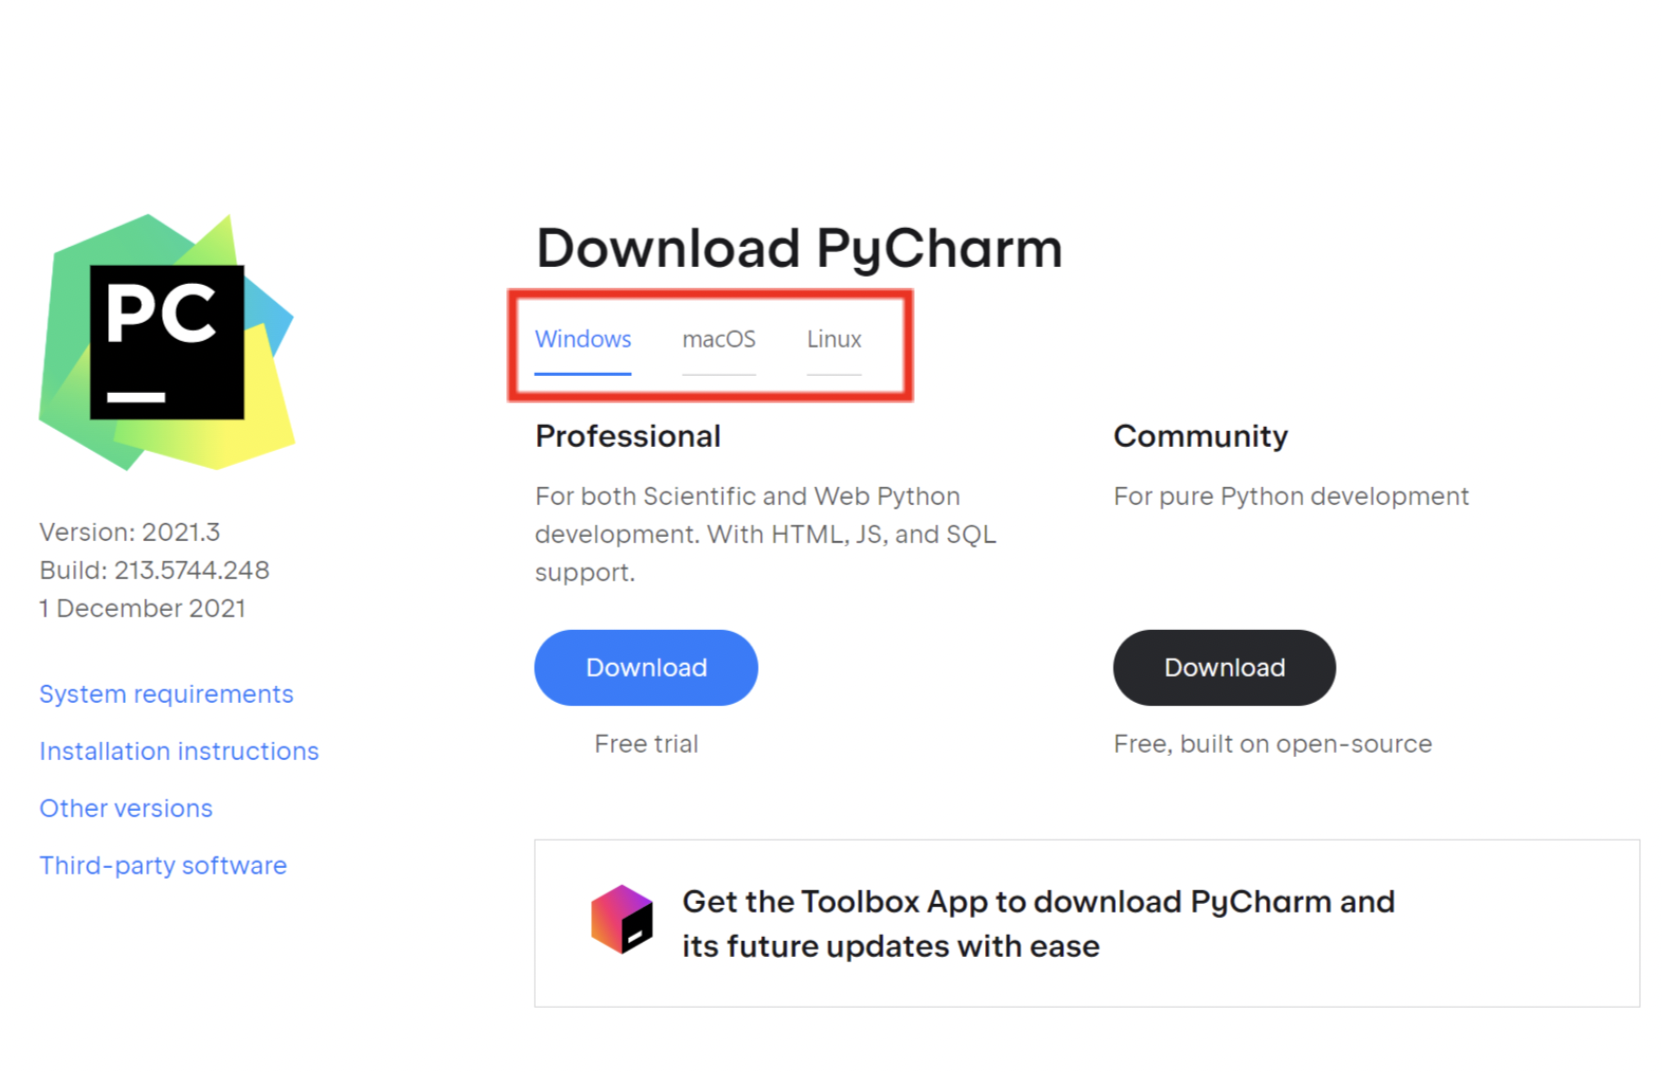
- Click on the Download button of your corresponding OS. It might take a moment for the download to complete.
If you download the Professional edition, you can take advantage of the exclusive included features during the 30-day free trial period. Afterward you will need to buy a license to continue using the edition, but if you downloaded the Community edition you will be able to use PyCharm for free right after installation.
Once the download has finished, open your file explorer in the folder that the file was downloaded to. Now, you can begin the installation process:
- Run the pycharm-2021.3.exe file and follow the wizard steps. Your screen will look as follows:
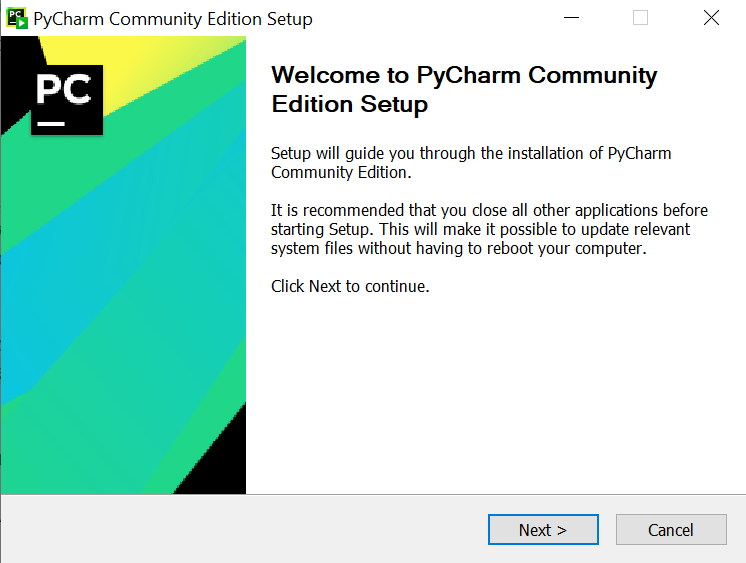
Choose next, and follow the installation wizard steps :

- Keep the following options in mind during the installation:
- 64-bit launcher: Creates a launching icon to your desktop.
- Open Folder as Project: Adds an option to the folder context menu that will allow opening the selected directory as a PyCharm project.
- .py: Sets an association with Python files to open them in PyCharm.
- Add launchers dir to the PATH: Enables running this PyCharm instance from the console without specifying the path to it.
To run your newly installed IDE, you can find it in the Windows Start menu, or you can use the shortcut created on your desktop.
Overview of the user interface
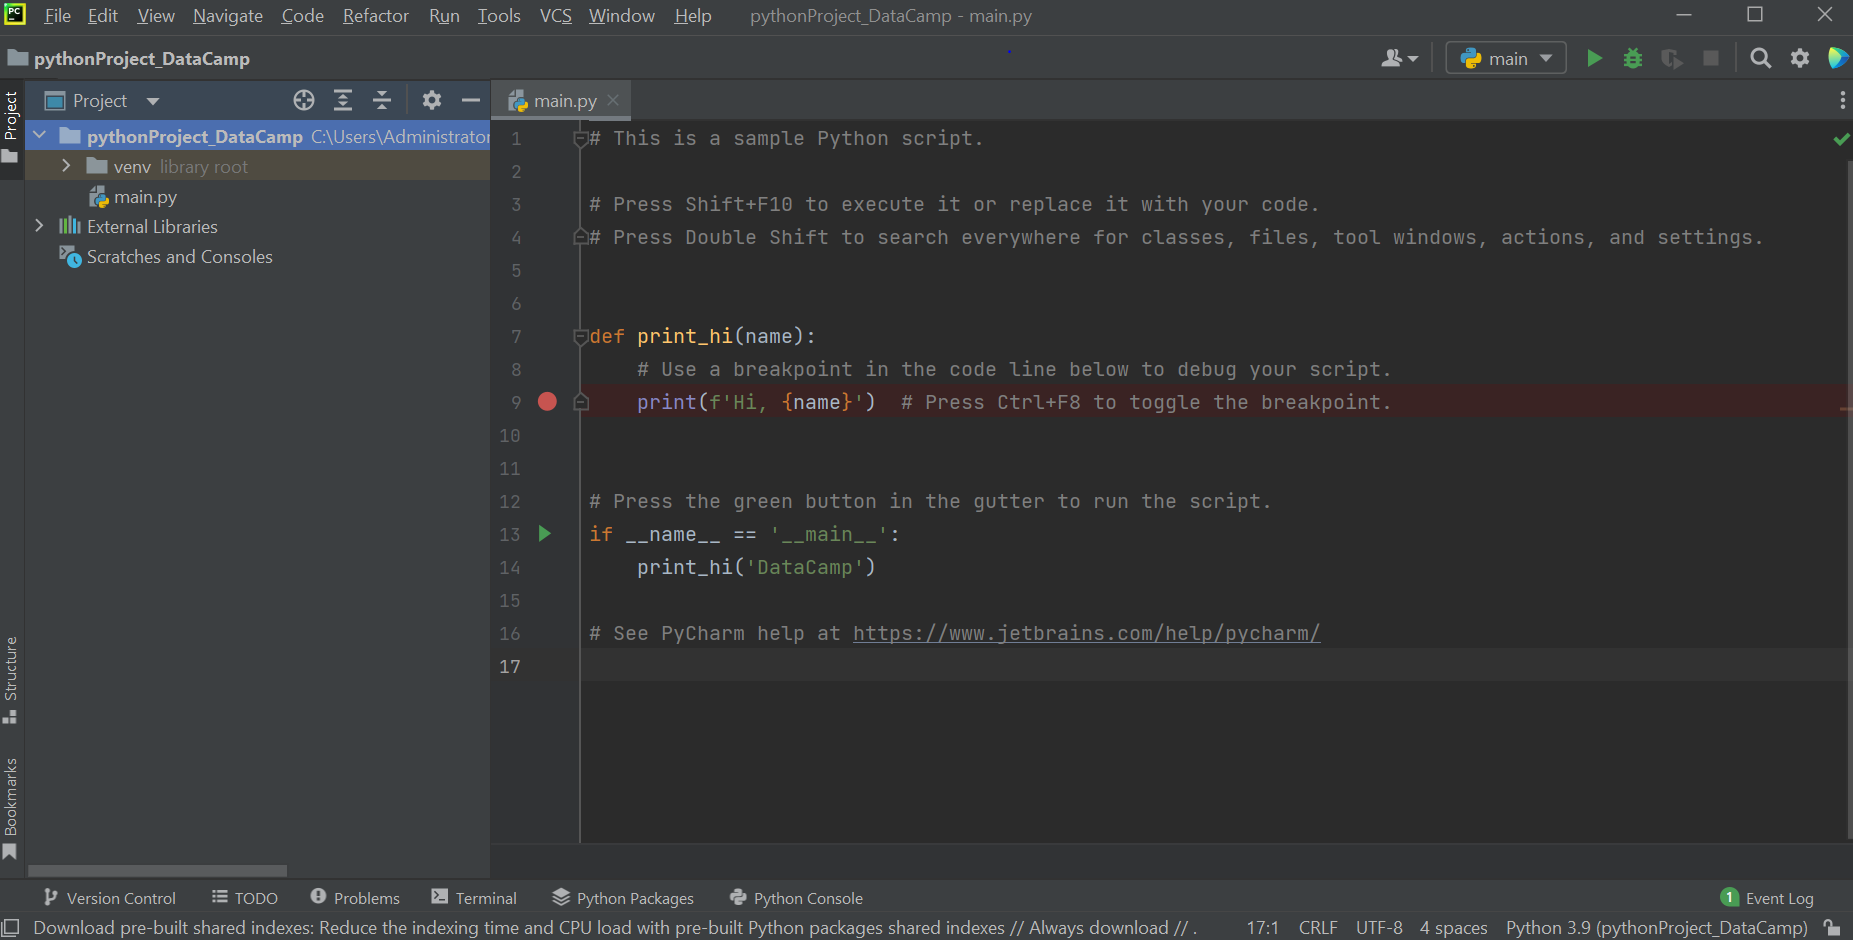
When your launch your IDE, your view should be similar to this:
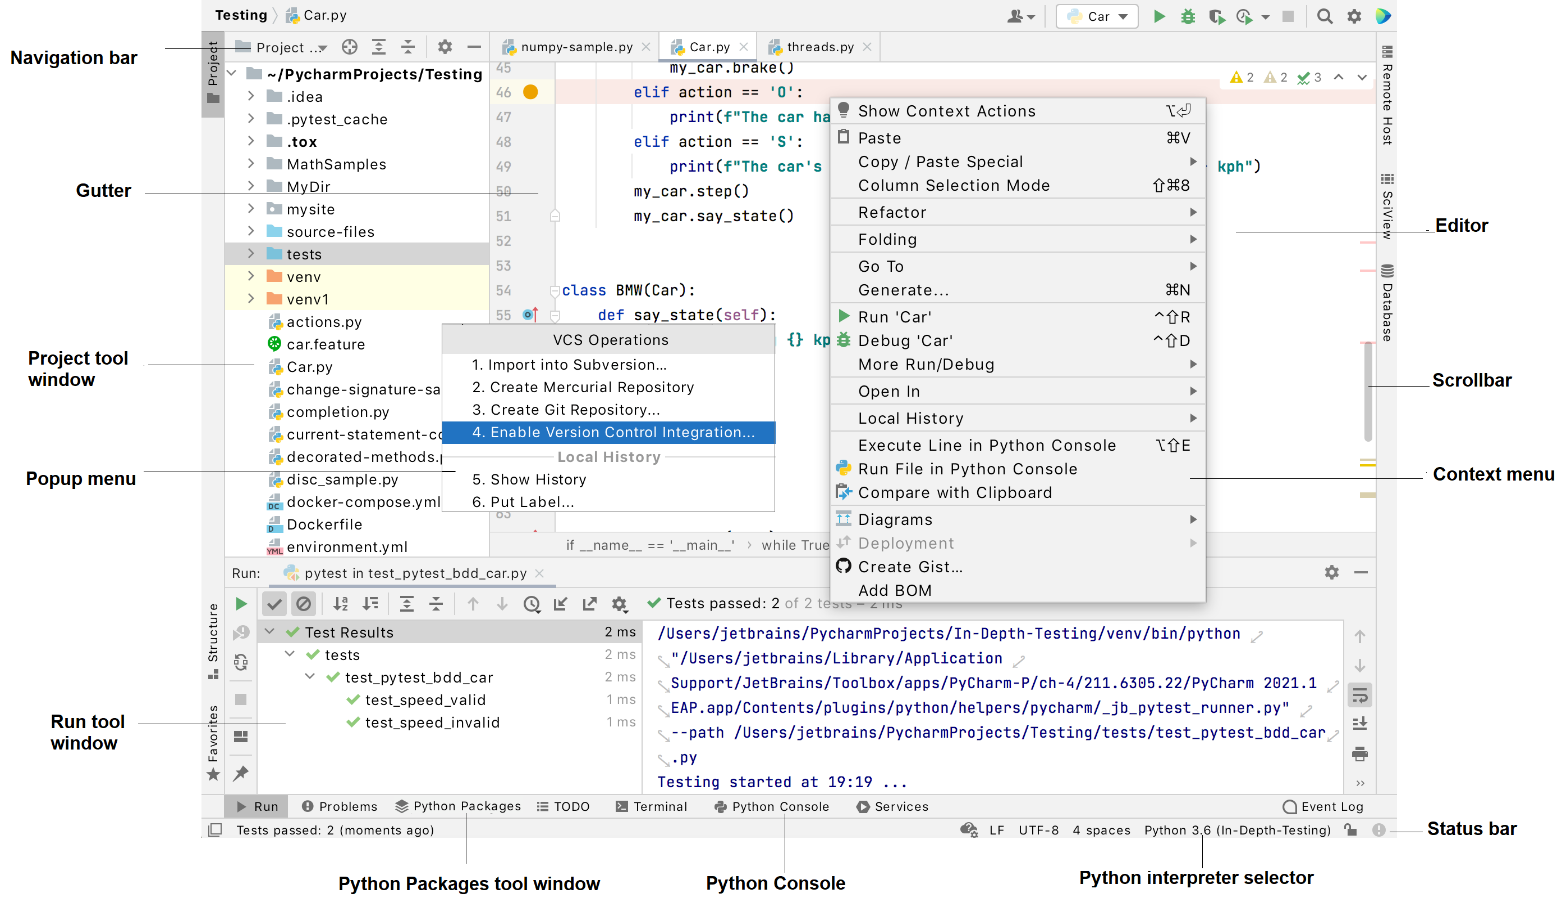
Your PyCharm IDE might look different than the screenshot above, depending on your plugins, the edition you chose, and your settings. Below we explain the role of some components:
-
Editor You can use it to manipulate (read/write/explore) your code.
-
Action indicators and action list The icons in the left editor are to assist you in finding quick fixes and other actions.
-
Navigation bar This simplifies navigating the structure of your project and opening files for editing.
-
Status bar Displays the recent event alerts and descriptions of actions when you hover your mouse over them.
-
Main window The main window includes all the information for a single project.
Change your Shortcuts
PyCharm enables you to quickly adapt your development environment to your preferences. You can easily preserve your favorite shortcuts by finding, editing, and customizing your IDE's shortcuts. Thus, it enhances your productivity and ability to access functionalities faster.
Open the Settings/Preferences dialog Ctrl+Alt+S to view the keymap configuration and select Keymap.
This list contains available actions and tasks that you can add or customize your shortcuts for; they are ordered so that you can find specific actions.
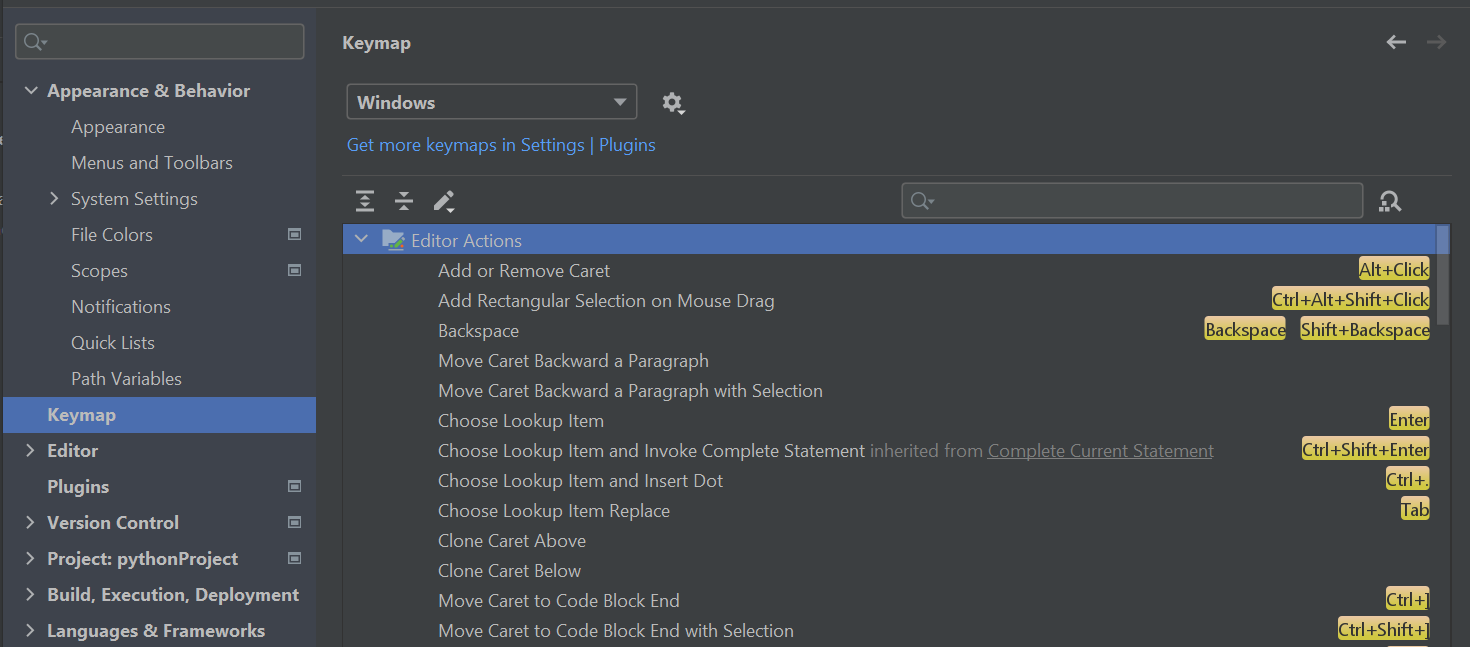
Let's consider some examples. For the Join Lines action, we can see that it is associated with the shortcut (Control + Shift + J) in Windows. Additionally, some available items are in our list of actions; some are not yet associated with any shortcut (for example, Move Caret Backward a Paragraph). However, you can attribute different key combinations to them by right-clicking on the actions and creating a Keyboard Shortcut or a Mouse Shortcut combination.
Customize your editor theme
The more you use IDEs, the more efficient it will be to customize the editor's theme independently from the environment's general theme. Most developers like customizing their code's features, such as its font. For example, the scheme shown below (Editor theme) is Darcula (known by many editors as the dark theme).
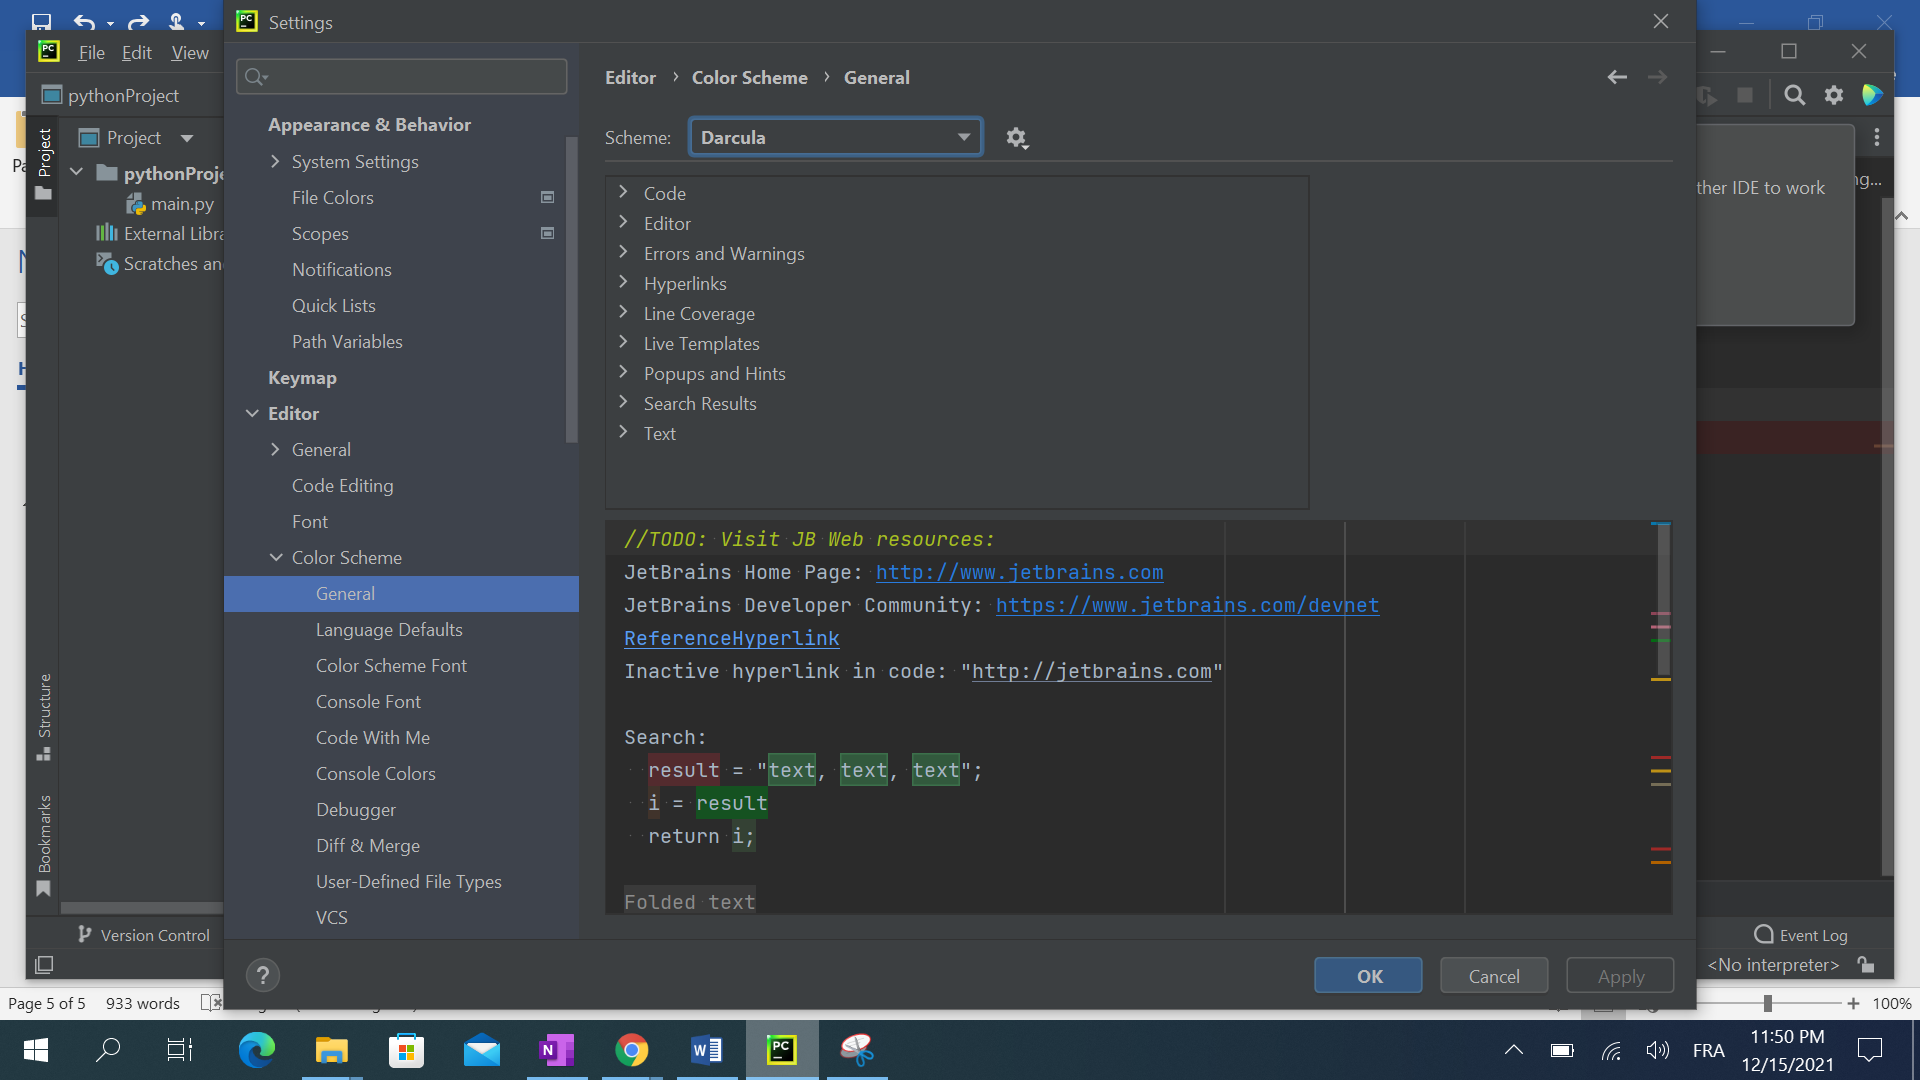
Additionally, you can customize your line wrapping, which defines how long a line of code in your editor should be. Following the current style guide for Python code, PEP 8, the maximum length of a line in a Python file should be 79 characters, so it is recommended to set the entry in this setting to 79. By specifying this, your IDE will then display a vertical line at the 79th column, indicating a point where the programmer should break their code into multiple lines.
Explore core editor features
According to the developer, JetBrains, PyCharm functions on the following two key principles:
- Enhancing productivity: PyCharm makes it easier for data scientists to focus on building their models by taking away the repetitive, uncreative aspects of Python programming.
- Real-time assistance: PyCharm offers data scientists various intelligent features to address inconsistencies by real-time checking logic for errors, PEP 8 code styles, and suggesting quick fixes, among other vital functionalities. PyCharm also offers various higher-level features that help foster these principles:
- Scientific computing support: Pycharm includes many functionalities that streamline the job of data scientists by facilitating scientific computing via IPython note and interactive console features.
- Intelligent coding assistance: PyCharm offers code-completion options, syntax and error analyses, as well as automated ways to refactor your code.
- Streamlined programmer tools: PyCharm enables data scientists to efficiently debug, test and manage their code.
- Web development options: PyCharm supports web development projects, such as Python web development frameworks, and other major elements such as JavaScript.
Create a new project
Now that we have seen how PyCharm is streamlining your development process, it is time to create our first project.
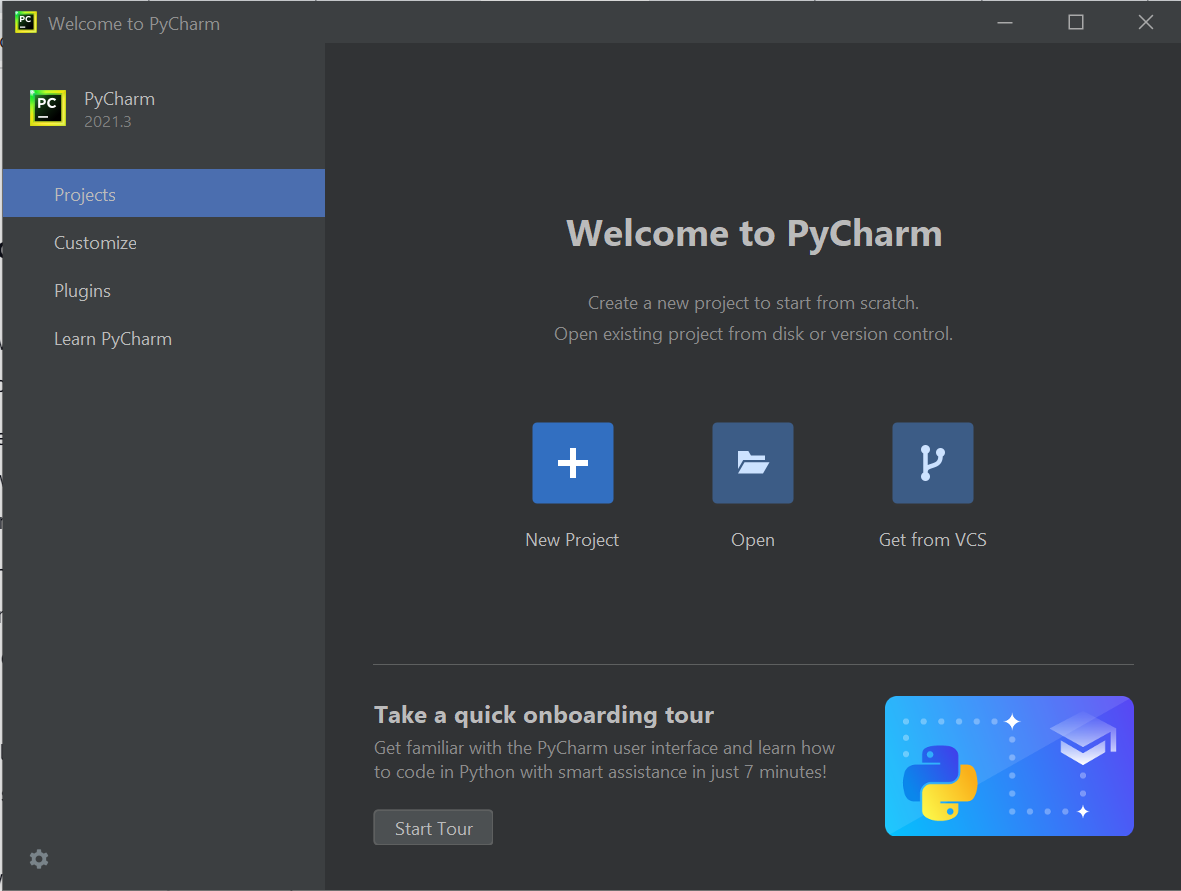
- If the installation process goes successfully, you will now be able to launch your IDE without errors. Your welcome screen should be similar to the following:
- Click the New Project button to finalize the process. PyCharm will take you to another window to enter your new project details. By default, it suggests the parameters in the screenshot below:
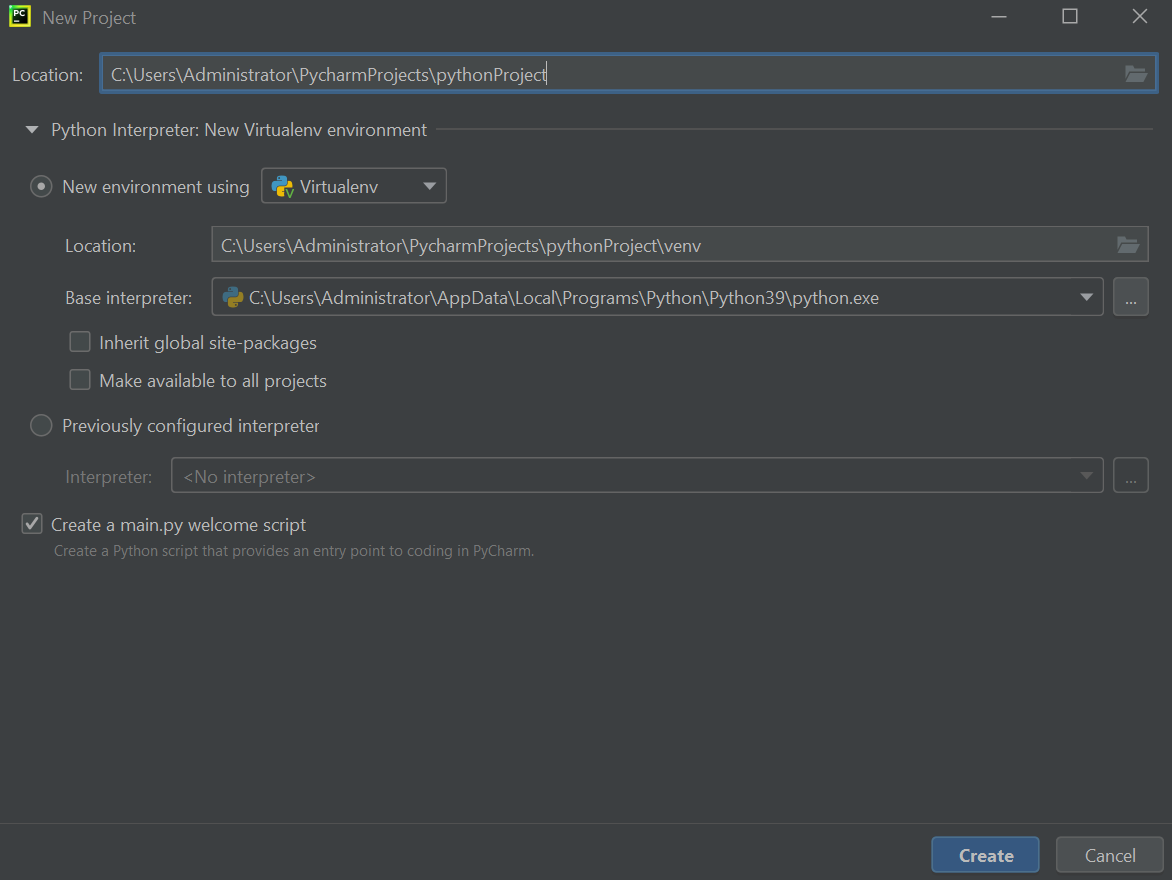
Adjust the project settings to your needs, and click create.
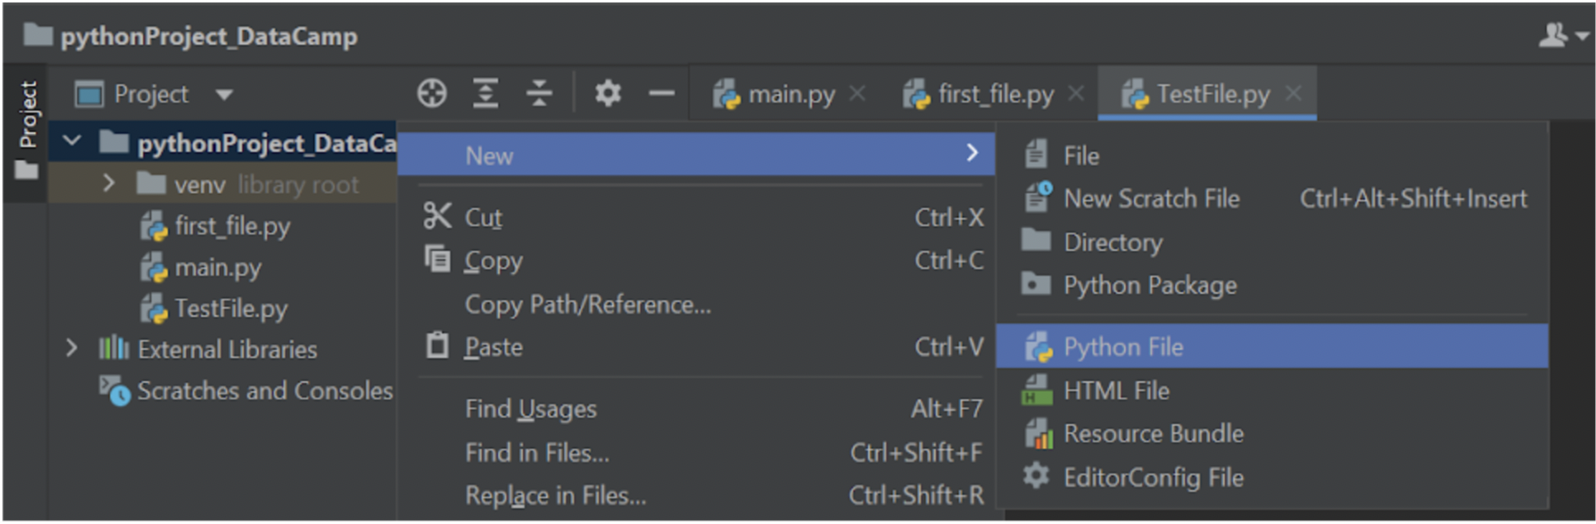
If you'd like to add a new file to your project, you can right-click on the project in the left panel and choose New | Python File. You can create multiple types of files, but we can select Python for now.
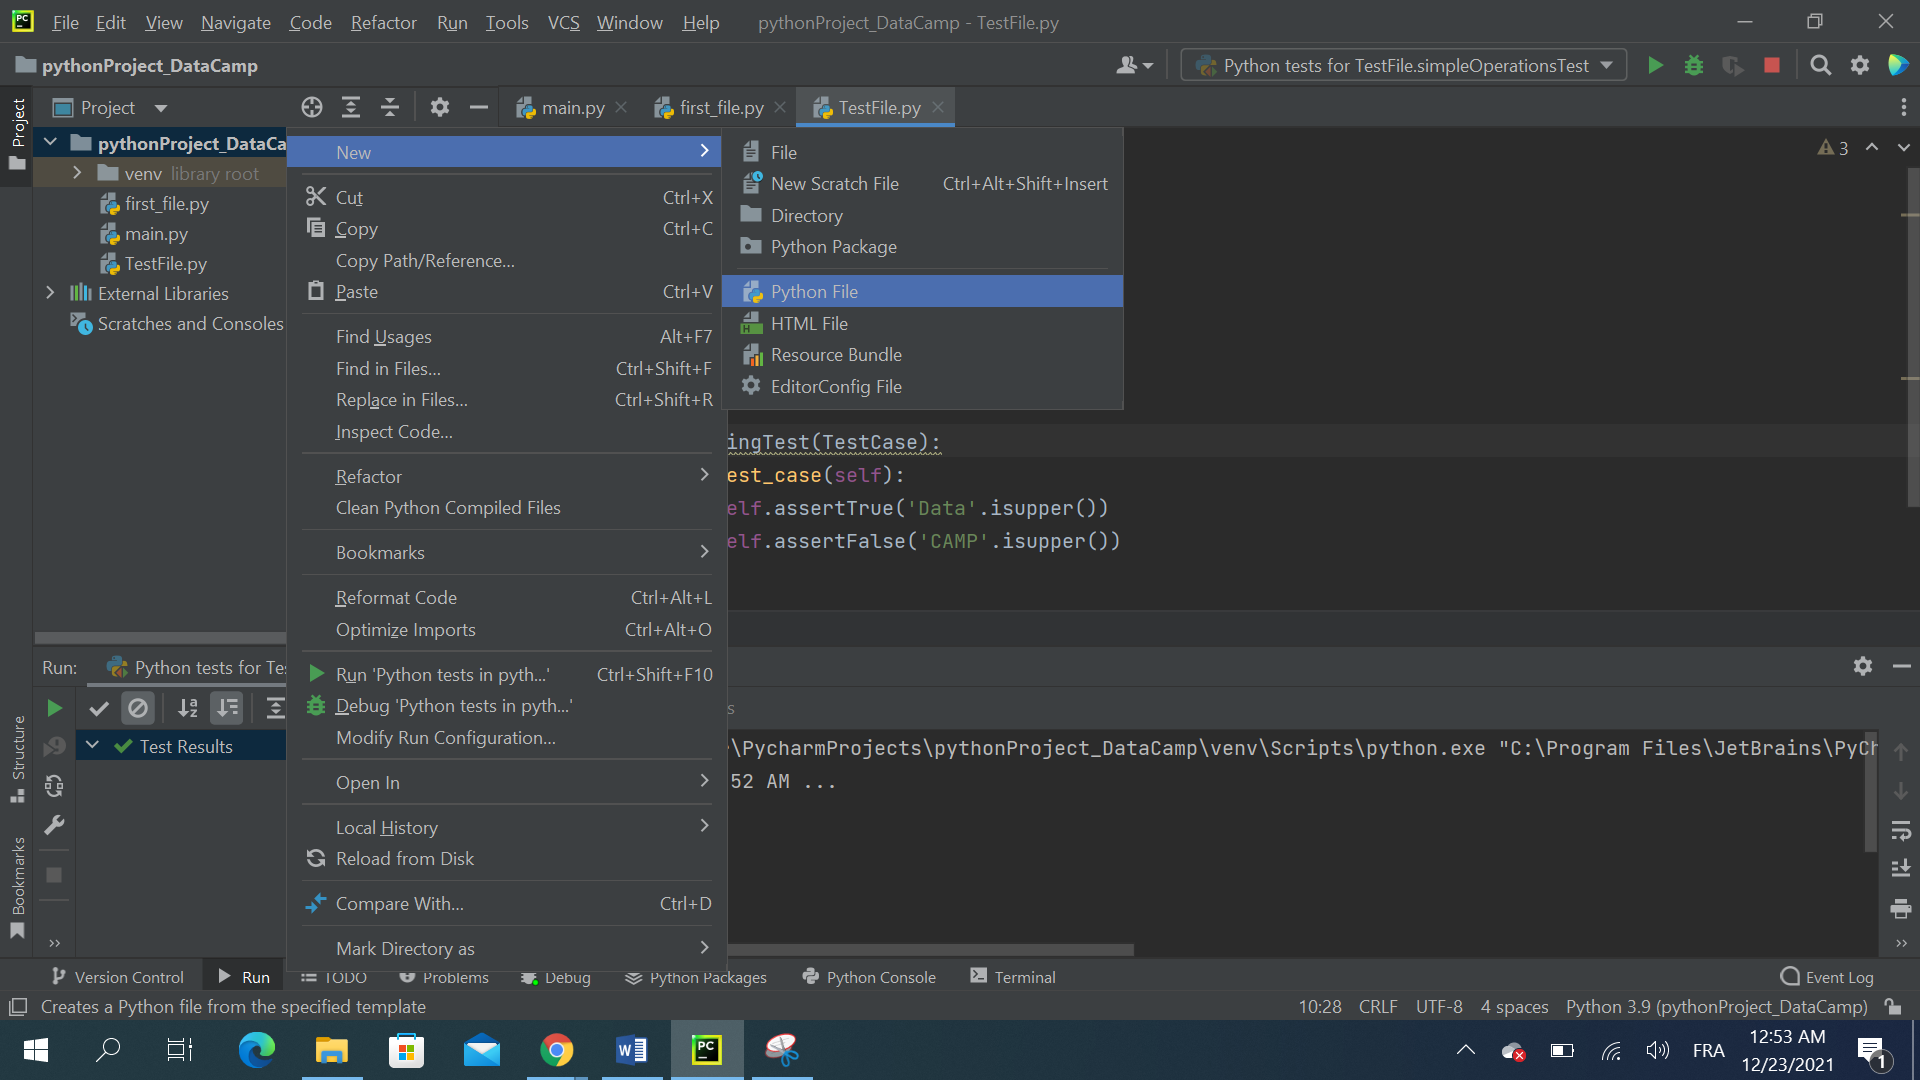
A window will pop up to rename the file and choose the file type you'd like to create as shown below:
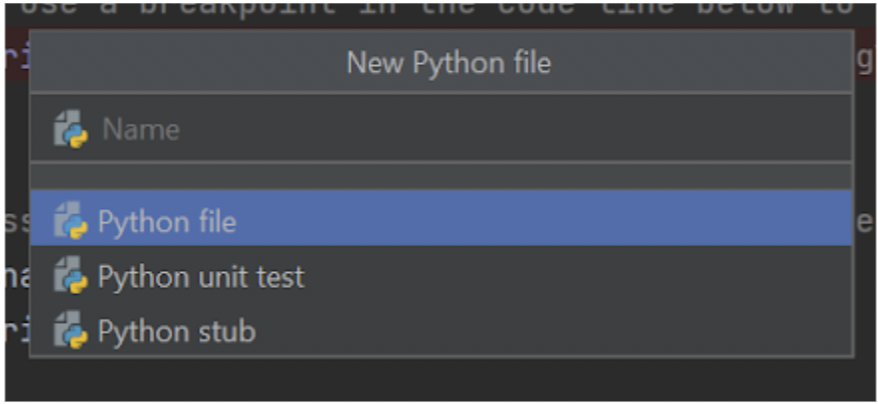
You can use whatever name you want for your file. The '.py' is not needed in the name of the file since you have already specified that you are creating a Python file. Click OK to proceed.
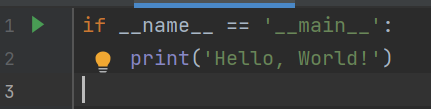
The file is successfully created now, and it opens by default. Let's try to create some code and run it. We will take a simple example of printing "Hello, World!":
To run this in PyCharm, you can go to the Run tab and choose 'Run' as shown below:
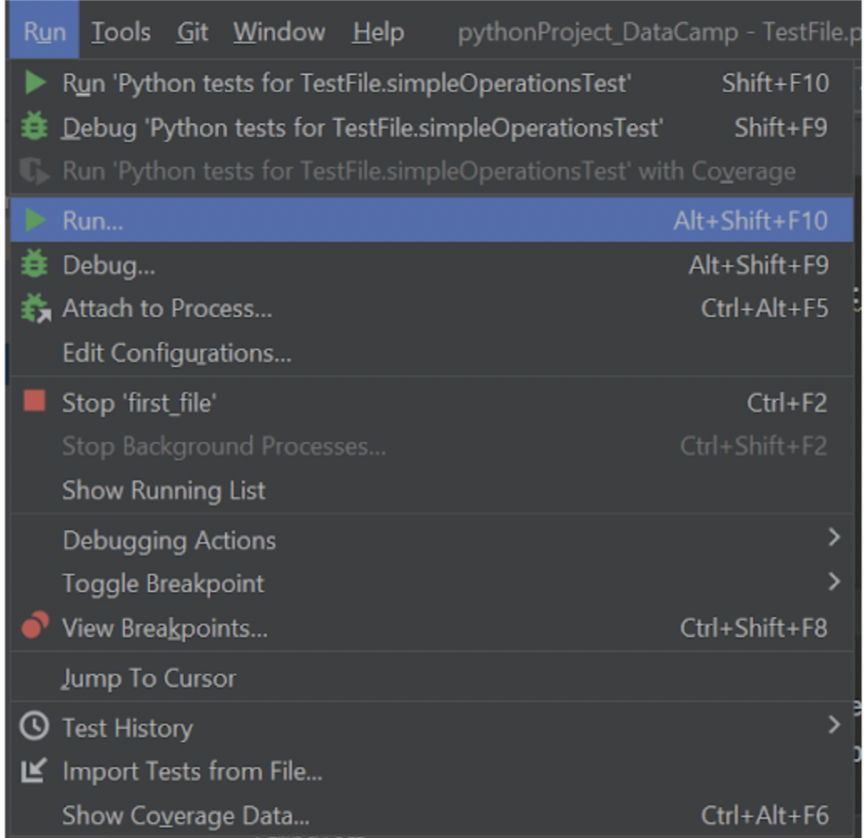
A window will appear after this; select first_file (or the name you use for your file) to run your code. The Run panel of PyCharm will then appear, which shows various information such as location, status, and output, regarding the Python program we just ran There are other ways to run your program; you can select the green button to the left of the Run panel to execute the file again. This action has the default shortcut of Ctrl + Shift + R for macOS and Ctrl + Shift + F10 for Windows. You can customize your shortcuts using the Keymap settings that we discussed previously. This option reruns the last file executed, so you can use it to run a file multiple times in a row. However, this is not possible when you execute multiple files. PyCharm streamlines lots of parts that are included in the development process, and what we have seen so far is merely scratching the surface of what this powerful IDE can do for you as a data scientist or a Python developer. In the next section, we will detail how you can become more productive by using it.
Productive coding
There are lots of aspects that are involved in software development or in implementing a data science project that is beyond coding; these activities can involve testing, debugging, and profiling. However, given their complexity and the depth of knowledge required to do such tasks, many developers get intimidated and thus tend to skip them in their projects.
Fortunately, this is where PyCharm steps in to offer a practical way of following best programming practices in real-time as you build your projects. Furthermore, the dull management tasks of organizing packages, interpreters, and virtual environments, are also taken care of in a straightforward manner. PyCharm does not only provide intuitive and graphical methods for performing this, but it also provides intelligent coding assistance, syntax highlighting, and suggestions in parallel.
Debugging
The goal behind debugging is to point out the causes of the bugs found in your program during the testing process, and thus adjust your code to output your accurate and desired result.
A data scientist or a Python developer monitors the interactions between and changes in the program's variables in a debugging process. You can investigate the potential causes for the errors in your program by seeing how each different function, method, or even line of code alters the value and functionality of the variables.
There are several debugging approaches that programmers or data scientists utilize in Python:
- Print debugging: you can add print statements between commands in your programs to show the values of the variables that you think are causing the bugs. By going through these values and how they change over time, you can see the outcomes of each different line of code on the variables under review.
- Logging: by keeping a record of the events that occur during the execution of your program. This approach is commonly used by server administrators, who frequently handle server crashes and other site-reliability problems.
- Tracing: you can track low-level machine language details regarding the execution of your program. This is valuable in terms of delving into the cause for a particular bug or error that is embedded in a programming language.
- Using a debugger: This is the least common method, and it consists of using a separate program called a debugger to debug your code. However, this is generally the most robust method as debuggers are multipurpose and come with various approaches to oversee the changes in your programs.
Usually, print debugging might be fine in small to medium programs. However, in a large program, using a debugger might be helpful to save time and enhance your productivity.
Now let's take an example in PyCharm. Here we've created a Python file which contains the following code:
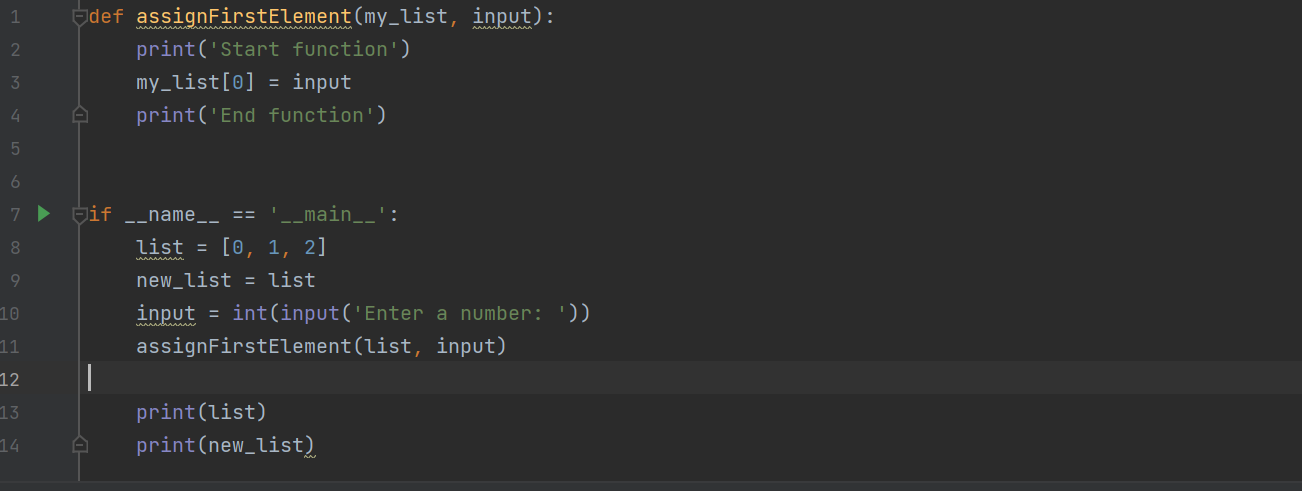
In this file, we have a function called assignFirstElement(), which takes in two parameters: a list and a number, and finally assigns that numerical value to the first element in the input list.
In our program, we initialize a list of three numbers (0, 1, and 2) and assign it to the variable. Next, the list variable is assigned to the new_list variable so that the two have the same value. After this, we ask the user to give an input number, and then we call assignFirstElement() on list to change the first element in the list from the console. Finally, we print out the values of both list and new_list.
If you're familiar with other programming languages like C, you will expect that after calling assignFirstElement() on list, you will have [x,1,2], and new_list will remain [0,1,2]. However, if you run the program, you will obtain the following:
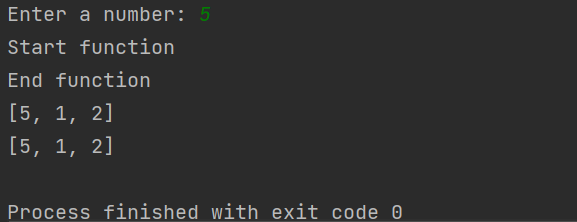
This shows that both list and new_list are equally modified, which doesn't align with our initial hypothesis. To understand this issue, PyCharm streamlines your debugging process, making it easier for you to quickly investigate your errors and fix them. That being said, you can simply place some breakpoints through your file as follows:
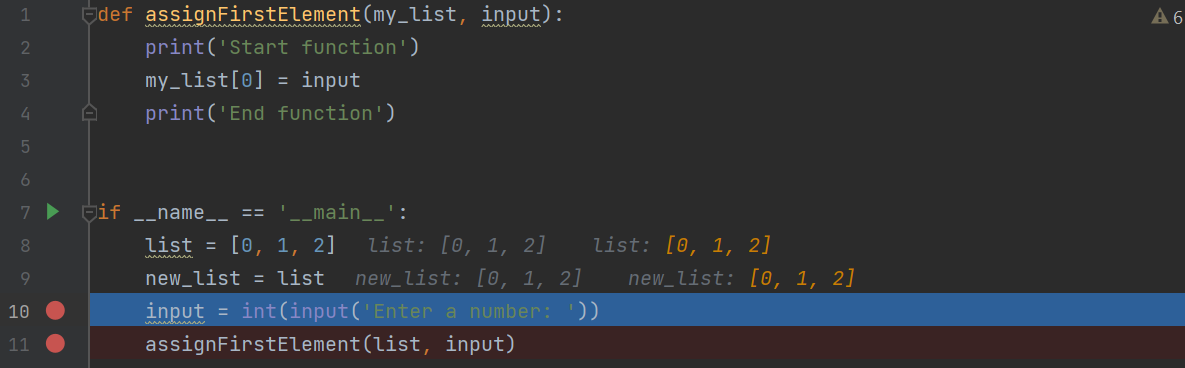
Then run your code under the debug mode to follow through its execution step by step, as you determined by your breakpoints.

After you click on the debug mode, your debugging console will open and it will look similar to the screenshot below:
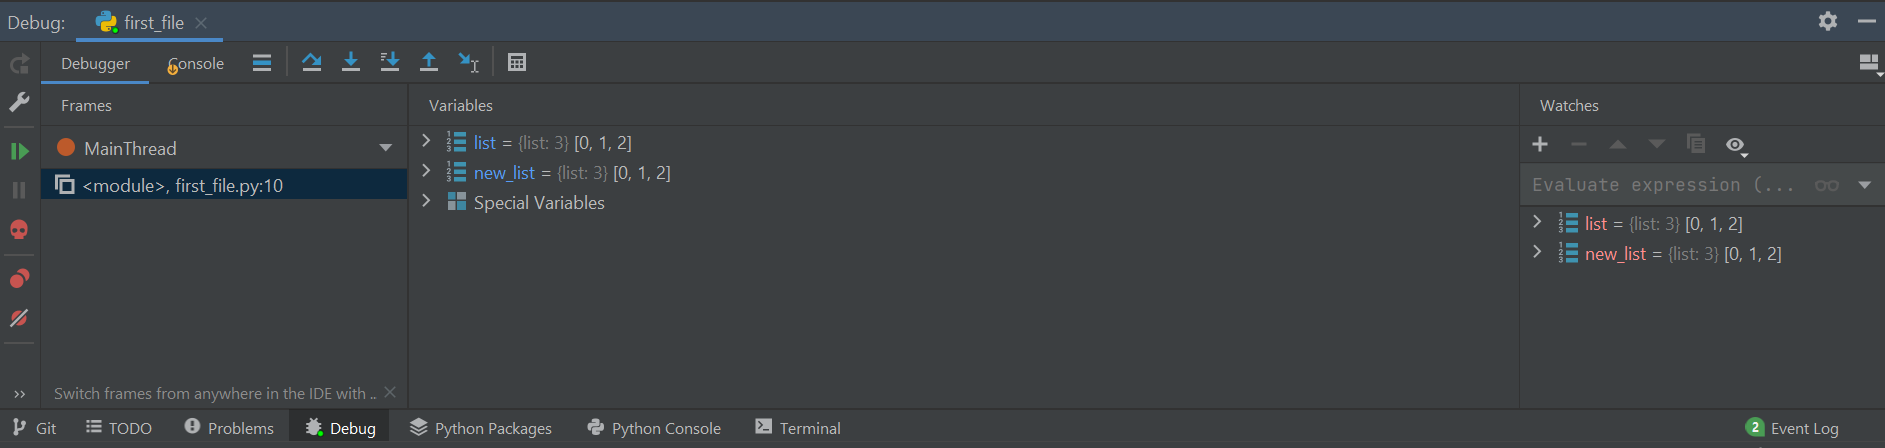
The console makes it easier to investigate what went wrong and watch the values of your variables and the output of each line of code as you run your code.
Testing
Testing is one of the most critical parts of any software development process. A well-tested code makes it easier to reach a production-level quality of deliverables. Testing is not only for software developers, but as data scientists this plays a vital role in developing robust, performant, and accurate models for your next projects.
Many tests can be performed on a code, starting with the first stage, Unit testing. You've probably heard about it a lot, or even done it before. Unit testing in Python is supported by the unit test module, which offers identical functionalities to common unit testing frameworks in other programming languages.
Let's consider an example to grasp the concept of unit testing quickly:
First, let's create a unit test file. Right-click on your project and select New Python file.
A pop up similar to this will appear :
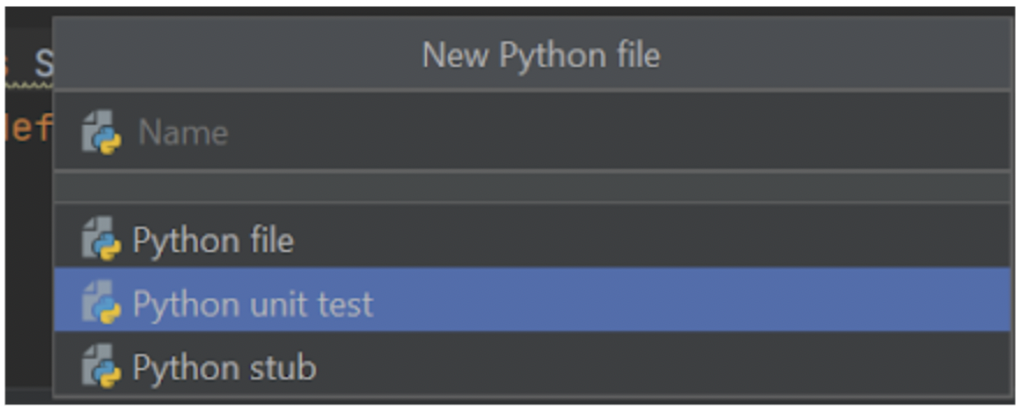
Enter the name of your file and choose Python unit test.
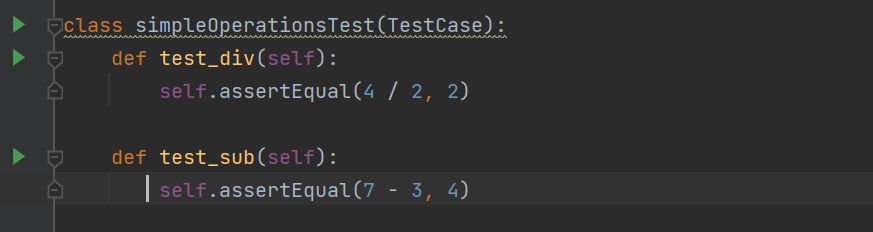
Next, copy and paste the code below into your new file :
from unittest import TestCase
class simpleOperationsTest(TestCase):
def test_div(self):
self.assertEqual(4 / 2, 2)
def test_sub(self):
self.assertEqual(7 - 3, 4)
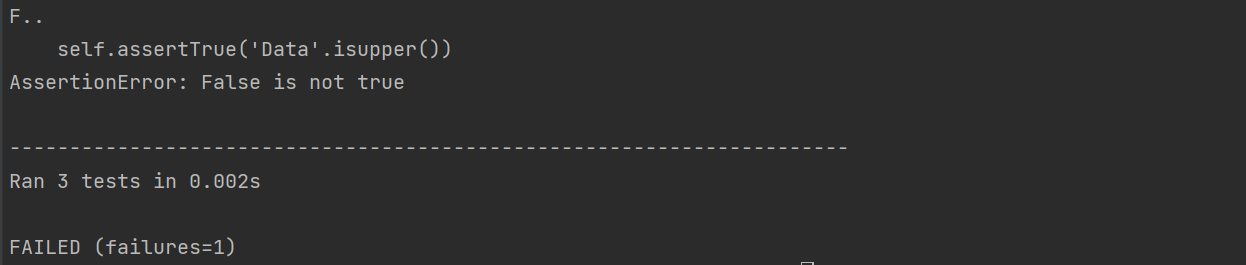
class StringTest(TestCase):
def test_case(self):
self.assertTrue('Data'.isupper())
self.assertFalse('CAMP'.isupper())
The simpleOperationsTest and StringTest classes, where our unit tests are created, both inherit from the TestCase class of the unittest module. We simply put testing methods in the related classes to implement different unit tests.
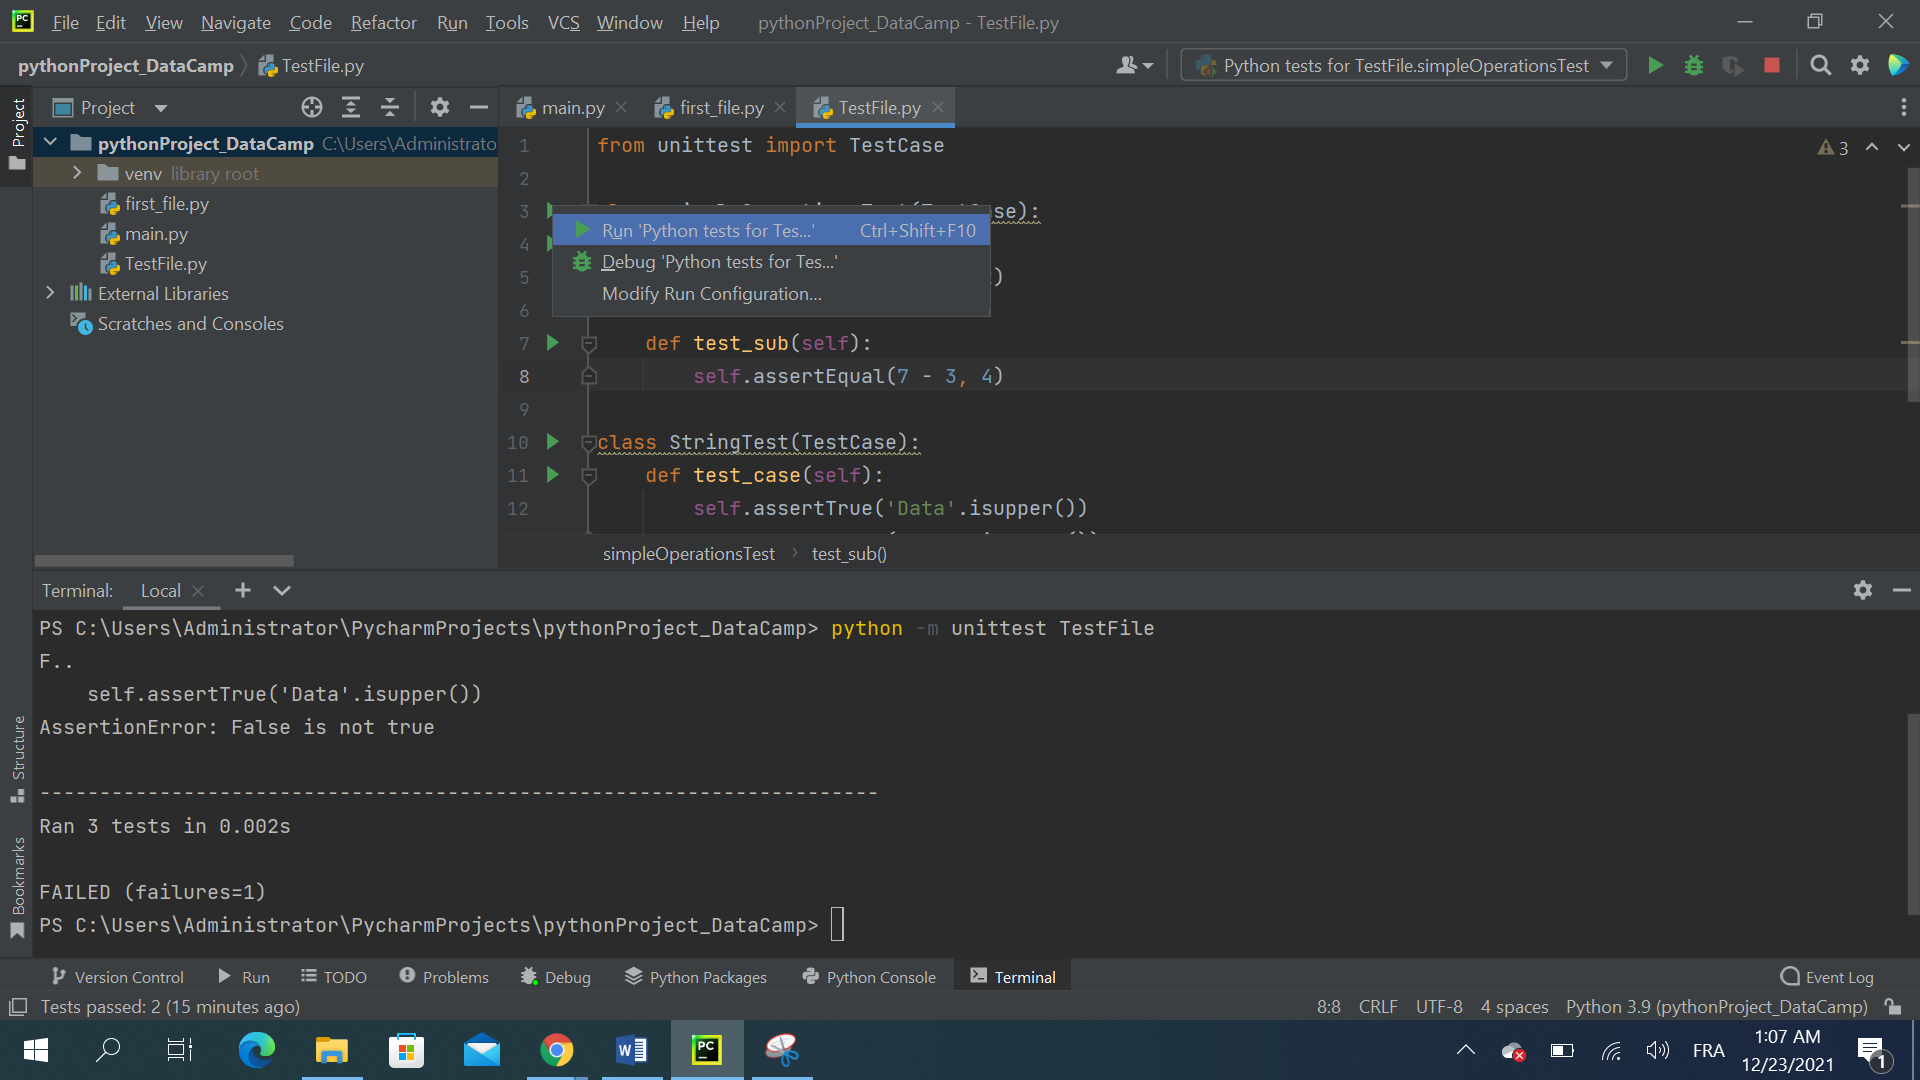
The most common way to run these Python unit tests is via the command line. The module can be included in a Python command to run tests from files, classes, and individual test methods.
You can either use the Terminal panel of your PyCharm, or open the actual command line of your system and navigate to the folder you are working with.
To run our tests, use the following command:
Python -m unittest TestFile
Or you can leverage the power of PyCharm by using its run arrows as follows:
Pycharm version control integrations
To integrate version control with PyCharm, you need to click on VCS, then choose Enable Version control. A window similar to the one below will appear:
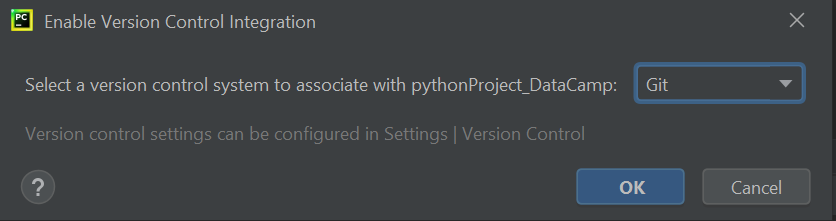
There are many versions of control tools that PyCharm integrates with, but for the moment we will choose Git from the drop down list, and click OK. Now you'll see that you have VCS enabled for your project.
After creating the Git repository, the Version Control panel will appear in your project window:

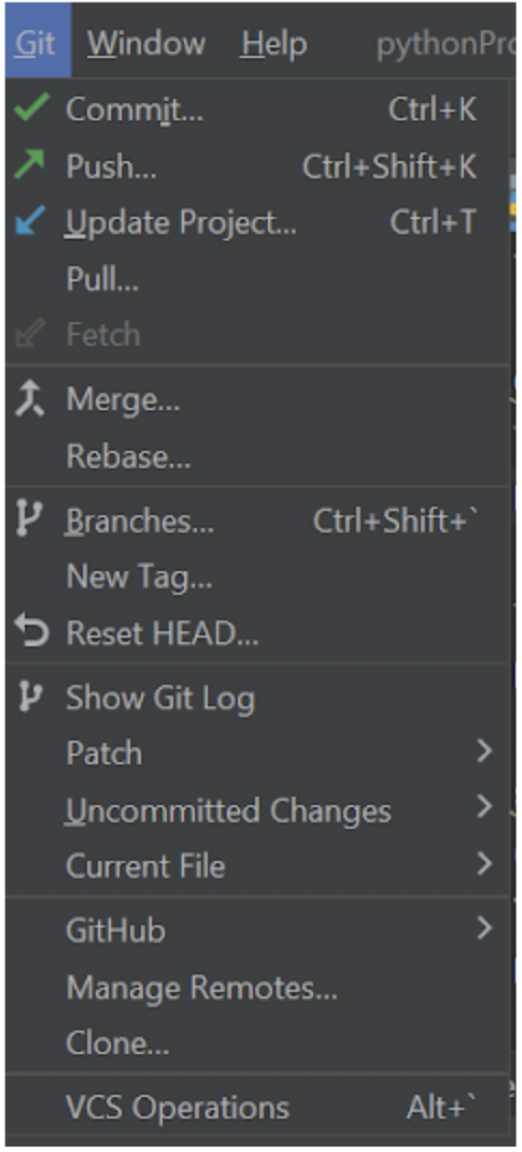
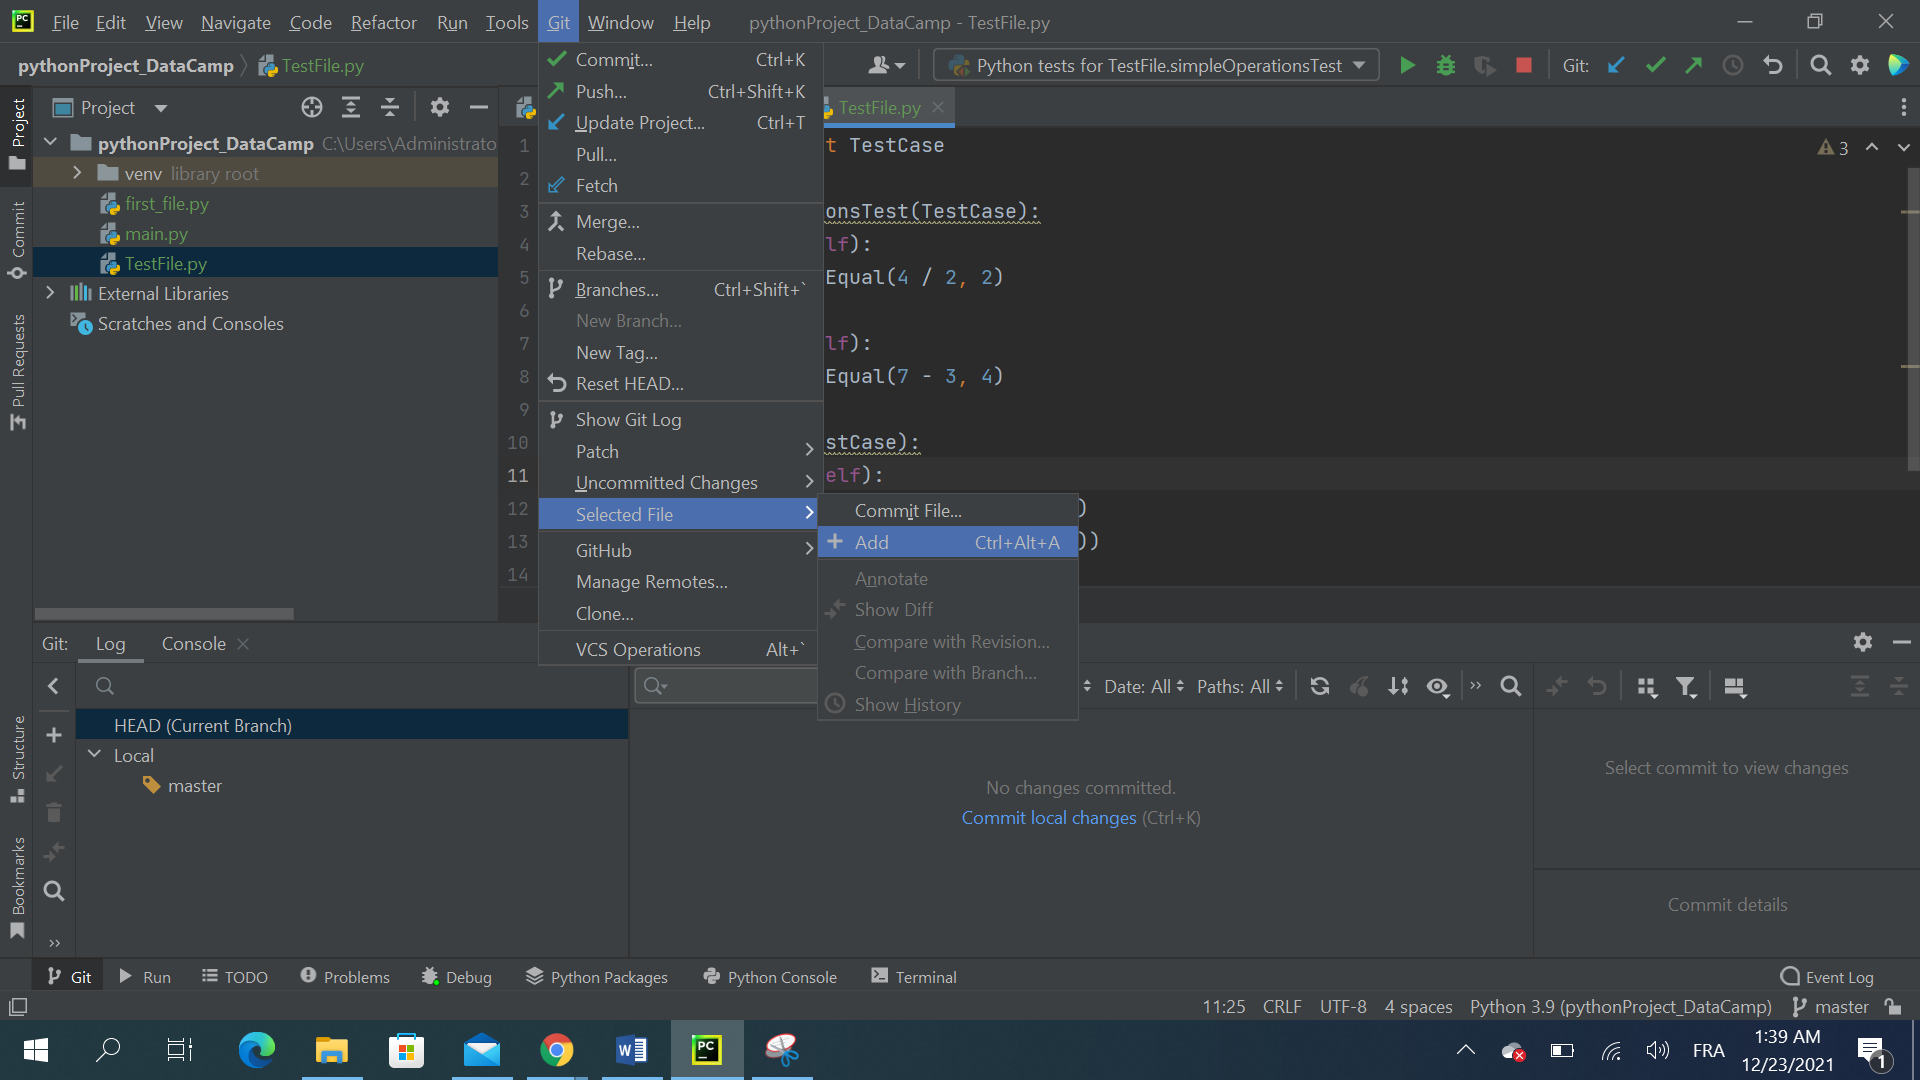
Now, if you go to the menu on top, you'll see different options under Git that you can use: git add, git stash, git branch, git commit, git push and more.
To add a specific file to Git, you can go to VCS | Git | Add in the menu bar, or use the corresponding keyboard shortcut.
You can also select multiple files simultaneously in the Version Control panel and add them to Git. To add all the unversioned files to Git, you can also select the unversioned files section itself and evoke the add action.
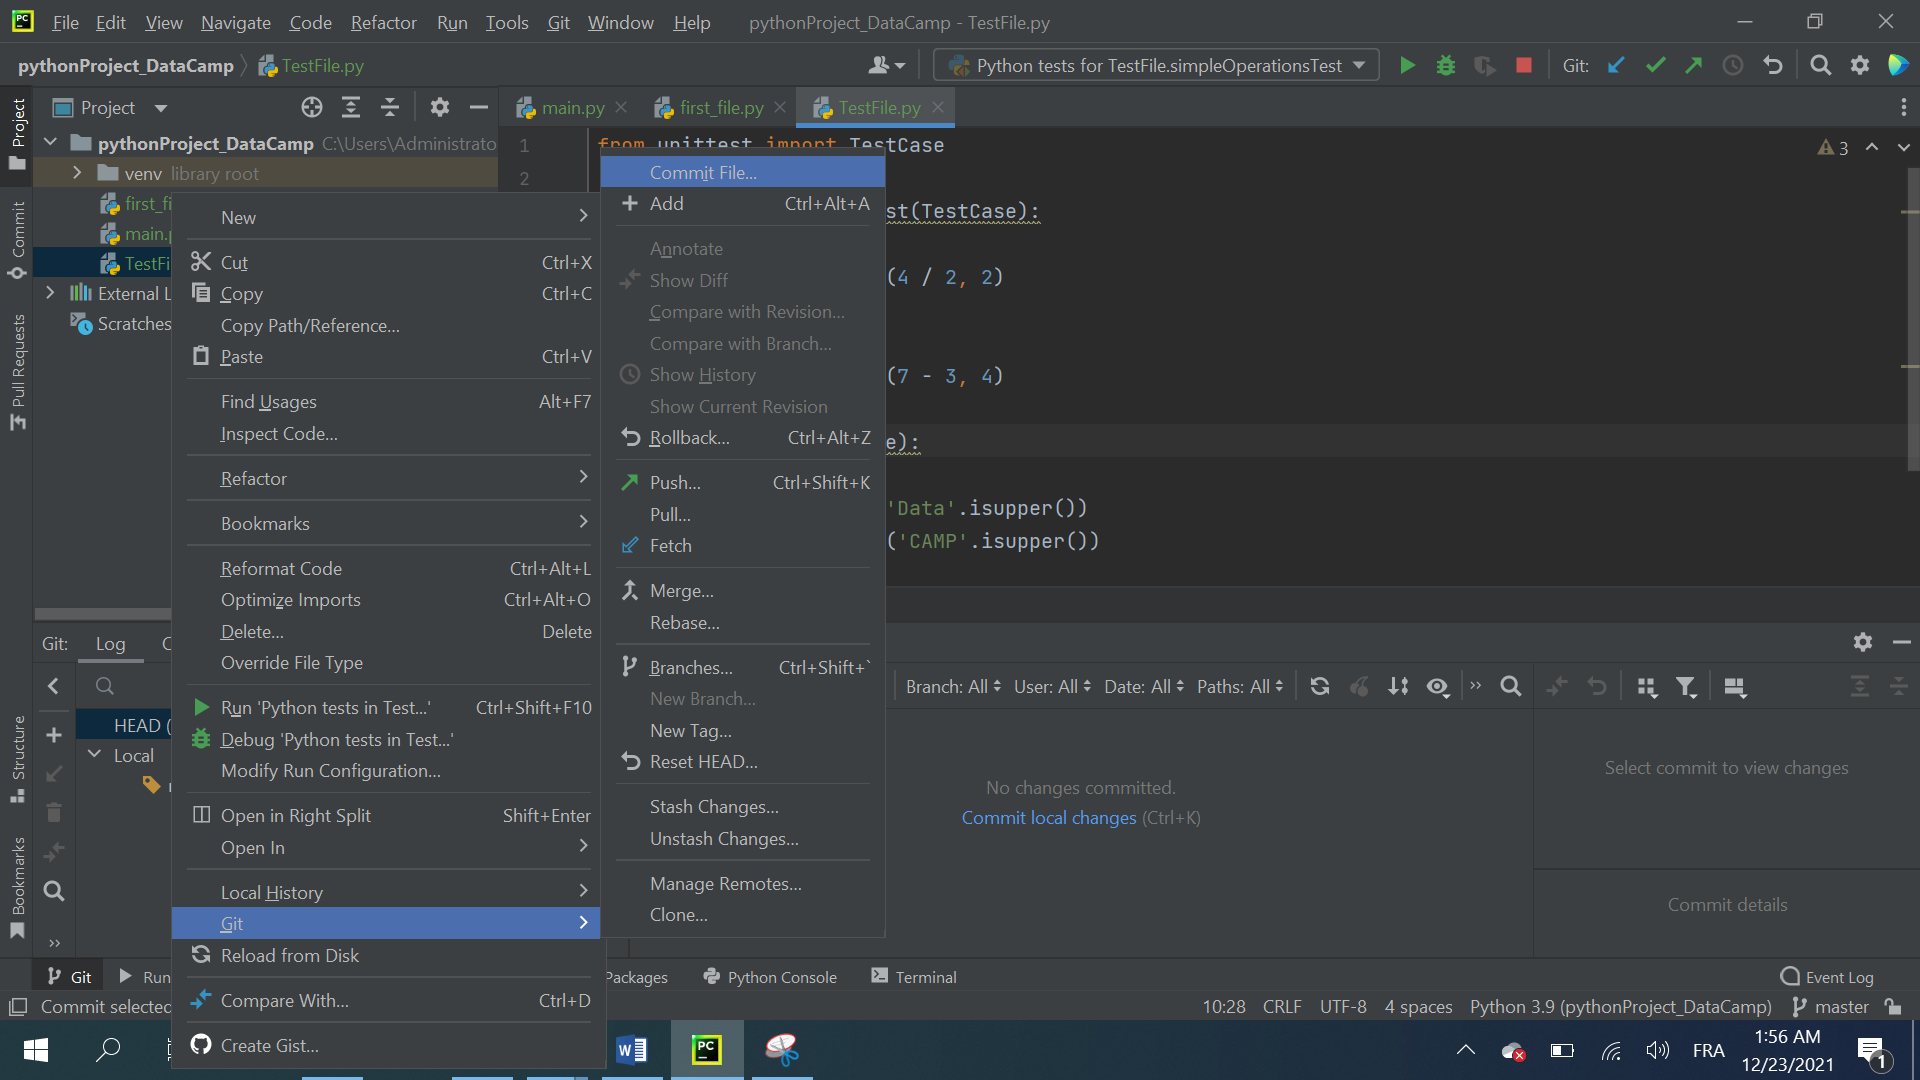
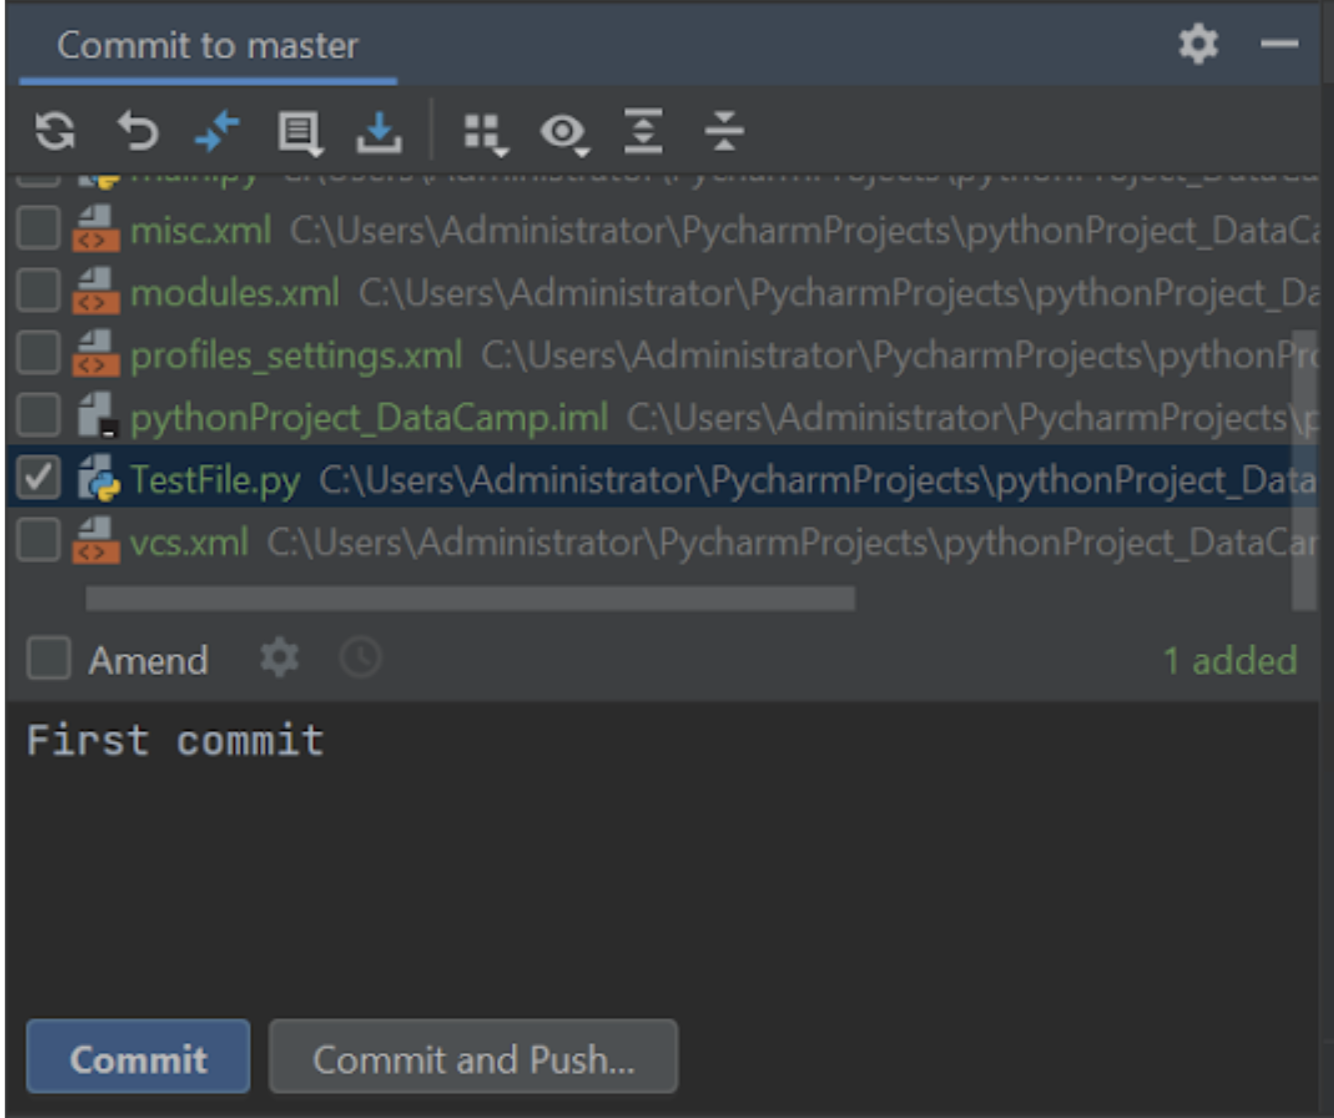
Next, you'll notice that committing a file to your repository is also quite straightforward and fairly similar to what we just saw with adding. To commit the files highlighted in green in the Default Change list section, right-click on them and select Commit, or use the corresponding keyboard shortcut.
You can also type a commit comment about the purpose of the commit, which will be displayed on GitHub.
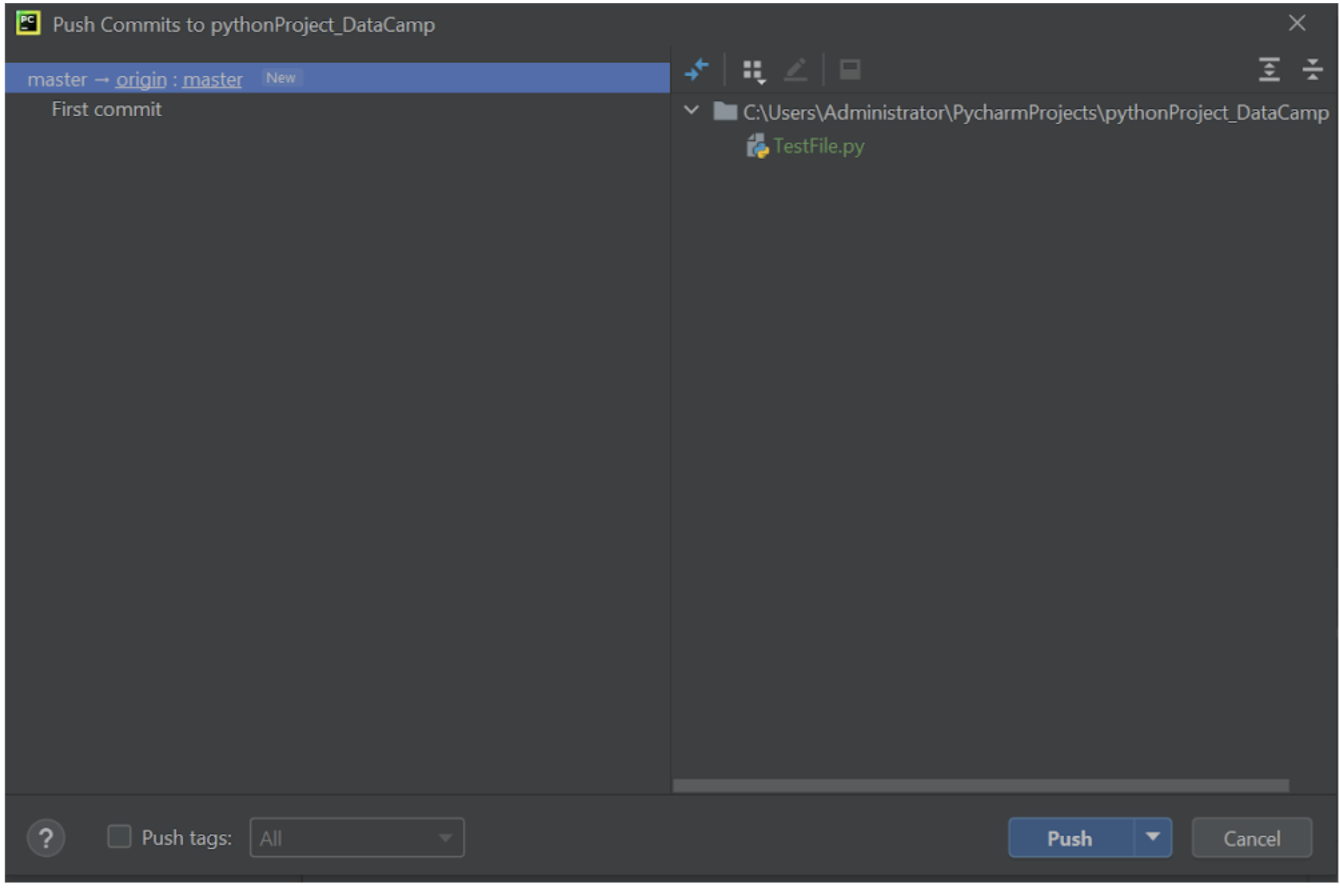
Now the final milestone will be to push the committed code in the previous step to our GitHub. To do so, you need to go to VCS | Git | Push. Another pop-up window will appear, like the one below. Select Push to complete the operation.
Frequently Asked Questions
Is PyCharm the best IDE for Python development?
PyCharm is a widely used IDE for Python. According to Jetbrains, the combined share of PyCharm's Community and Professional editions is 33%, in line with last year's results. VS Code continues to grow, gaining 5% over last year. In contrast, most text editors such as Vim or Sublime Text have seen their usage rates drop. The share of web developers using PyCharm is nearly double that of users working with data, and the difference is particularly pronounced for the PyCharm Professional Edition.
Is PyCharm free?
It's important to know which edition you are using on your computer. PyCharm Community edition is free and does not require any license. However, the Professional edition offers only a 30-day trial and afterwards you'll need to buy a license to use it.
Does PyCharm integrate with any plugins?
PyCharm offers a large number of plugins for multiple purposes and applications. One of the most famous plugins is the AWS toolkit for PyCharm, which is an open source plug-in for the PyCharm IDE that makes it easier to create, debug, and deploy Python applications on Amazon Web Services.
Conclusion
PyCharm is one of the most powerful IDEs when it comes to data science, making it easier for data scientists to focus on tasks with higher priorities, such as building their models and tuning them. It streamlines some tasks that are often seen by developers or data scientists as complex or time-consuming, such as testing, debugging, and profiling. The tool grants access to many integrations and customizations for a better user experience.