
Track
AWS Cloud Practitioner (CLF-C02)
10 hr
When I first explored AWS Lightsail, I was impressed by how simple and cost-effective it is for hosting applications, websites, and databases.
It is a great option for anyone new to cloud computing because it allows users to establish virtual private servers (VPS) easily, manage networking, and integrate AWS Lightsail with other AWS services.
Whether you are looking to deploy a personal website, an e-commerce store, or a lightweight database, Lightsail provides the tools necessary to get started.
By the end of this tutorial, you will have a working Lightsail instance, understand best practices for security and performance, and know how to scale your project as needed.
If you are new to AWS and want a broader understanding before diving into Lightsail, I recommend starting with an Introduction to AWS course to build foundational knowledge.
AWS Lightsail is a cloud service from Amazon that offers networking, databases, storage, and VPS hosting at a fixed monthly price.
It is perfect for developers, startups, and companies that want to launch apps at a low cost without the complexity of managing EC2 instances.
One of the standout features of AWS Lightsail is how it simplifies cloud hosting without compromising on power.
Here are a few features of Lightsail:
AWS Lightsail simplifies cloud hosting by offering a managed VPS service, whereas AWS EC2 provides more granular control over virtual machines, networking, and storage.
EC2 is ideal for complex architectures and large-scale applications, whereas Lightsail is best suited for smaller projects that require quick deployment and predictable pricing.
If you are looking for more advanced cloud solutions beyond Lightsail, the AWS Cloud Technology and Services course covers a wider range of AWS capabilities, including EC2, networking, and database management.
Before getting started with AWS Lightsail, you’ll need to go through a few essential setup steps.
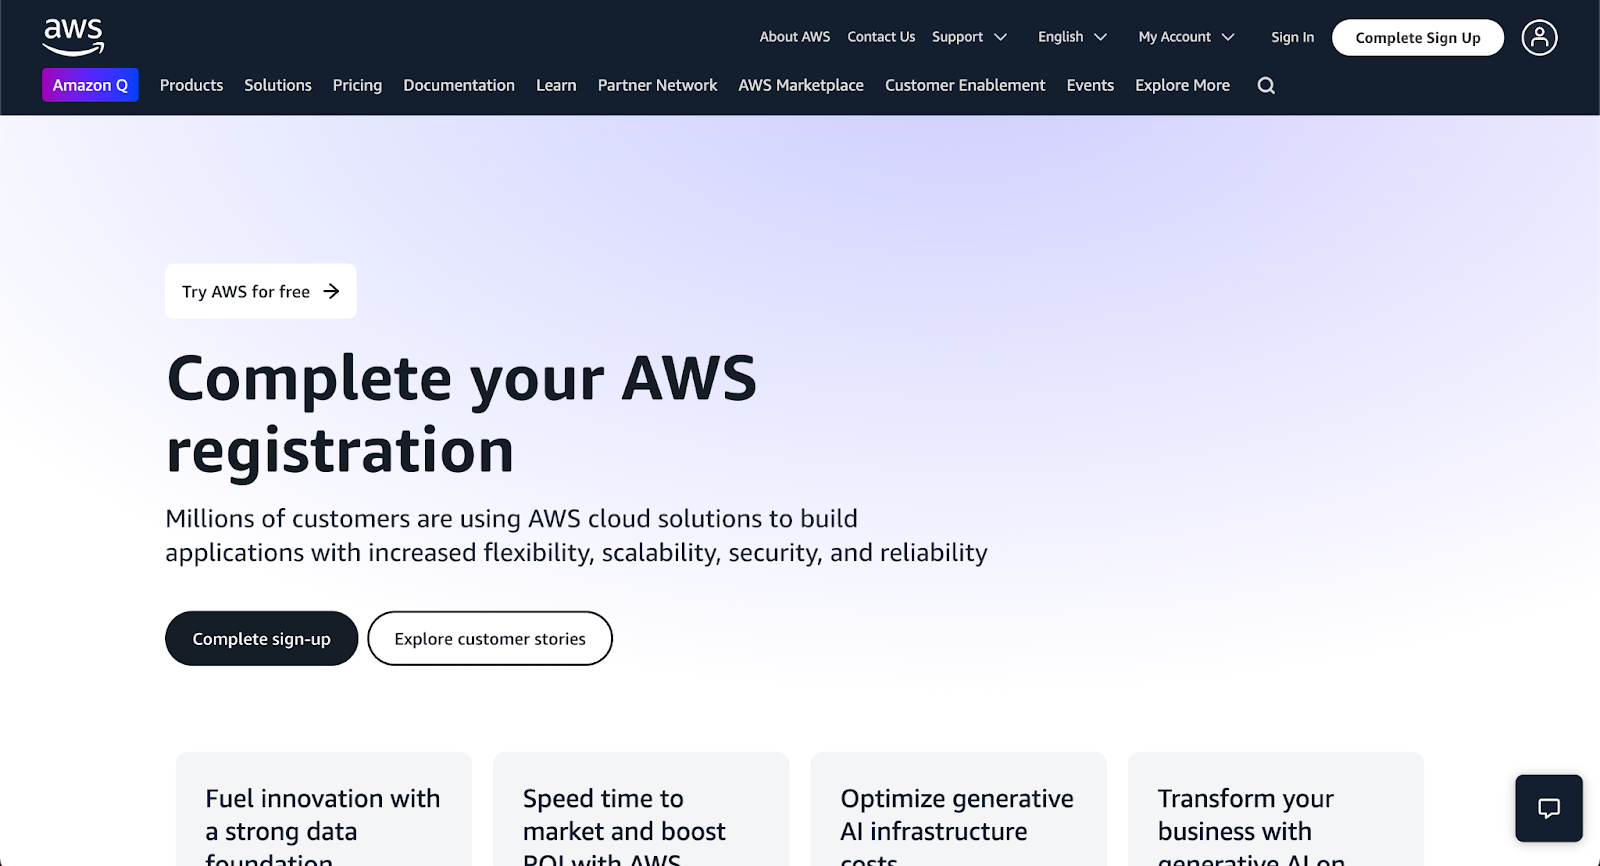
If you don’t have an AWS account, navigate to the AWS website and sign up.
The image below contains a screenshot of this page.
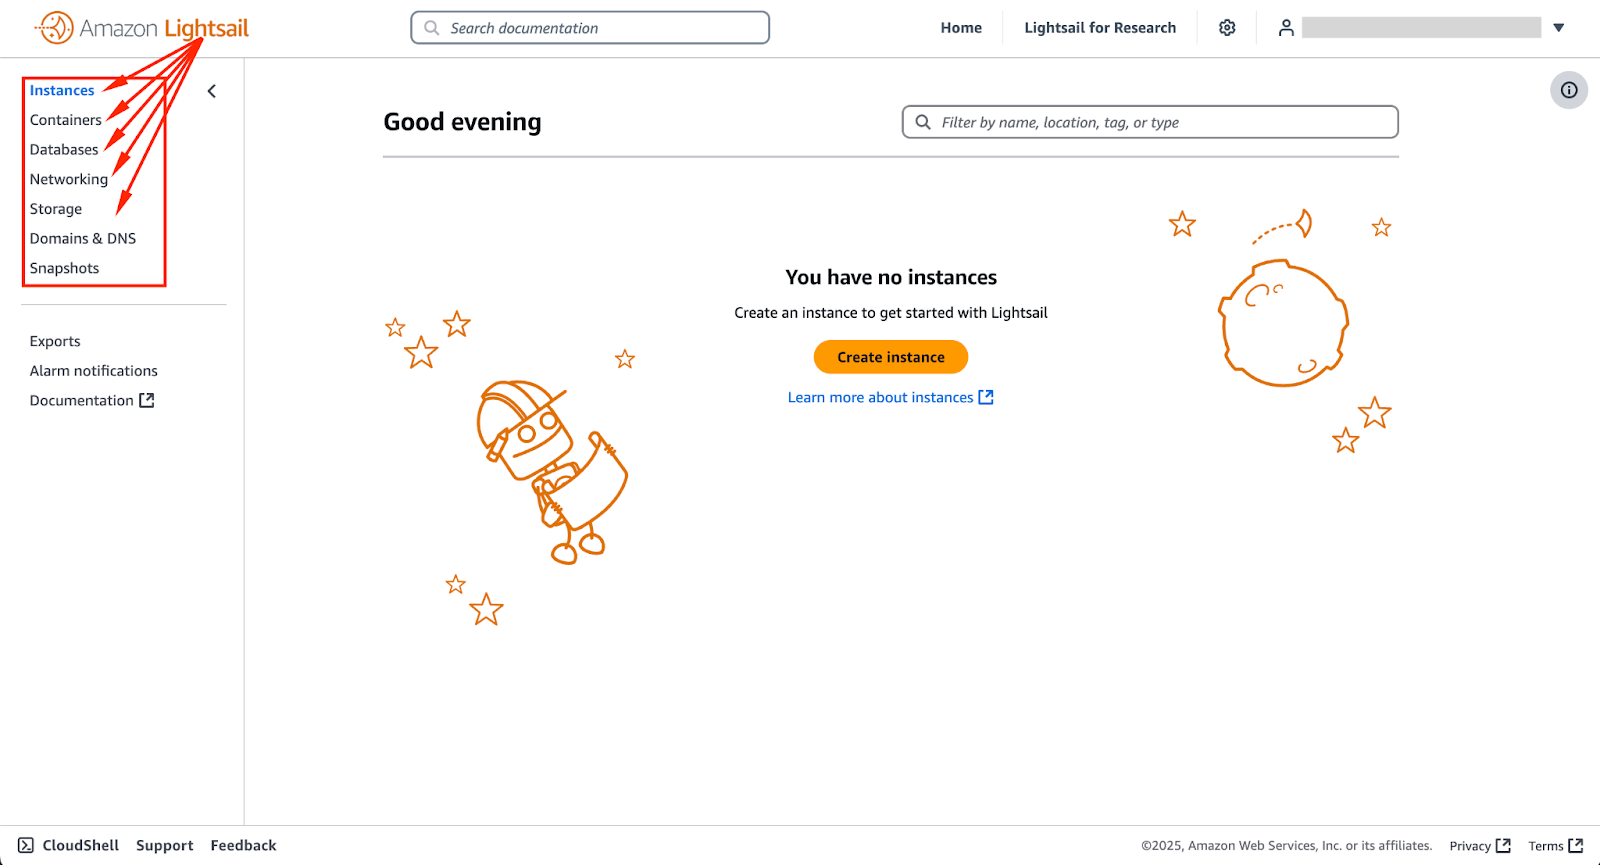
Once your AWS account is ready, the next step is accessing the AWS Lightsail console. You can do this in two ways:
Once in the Lightsail console, you’ll see the dashboard, which is divided into key sections: Instances, Networking, Storage, and Snapshots. These tabs contain all the tools needed to manage your Lightsail resources.
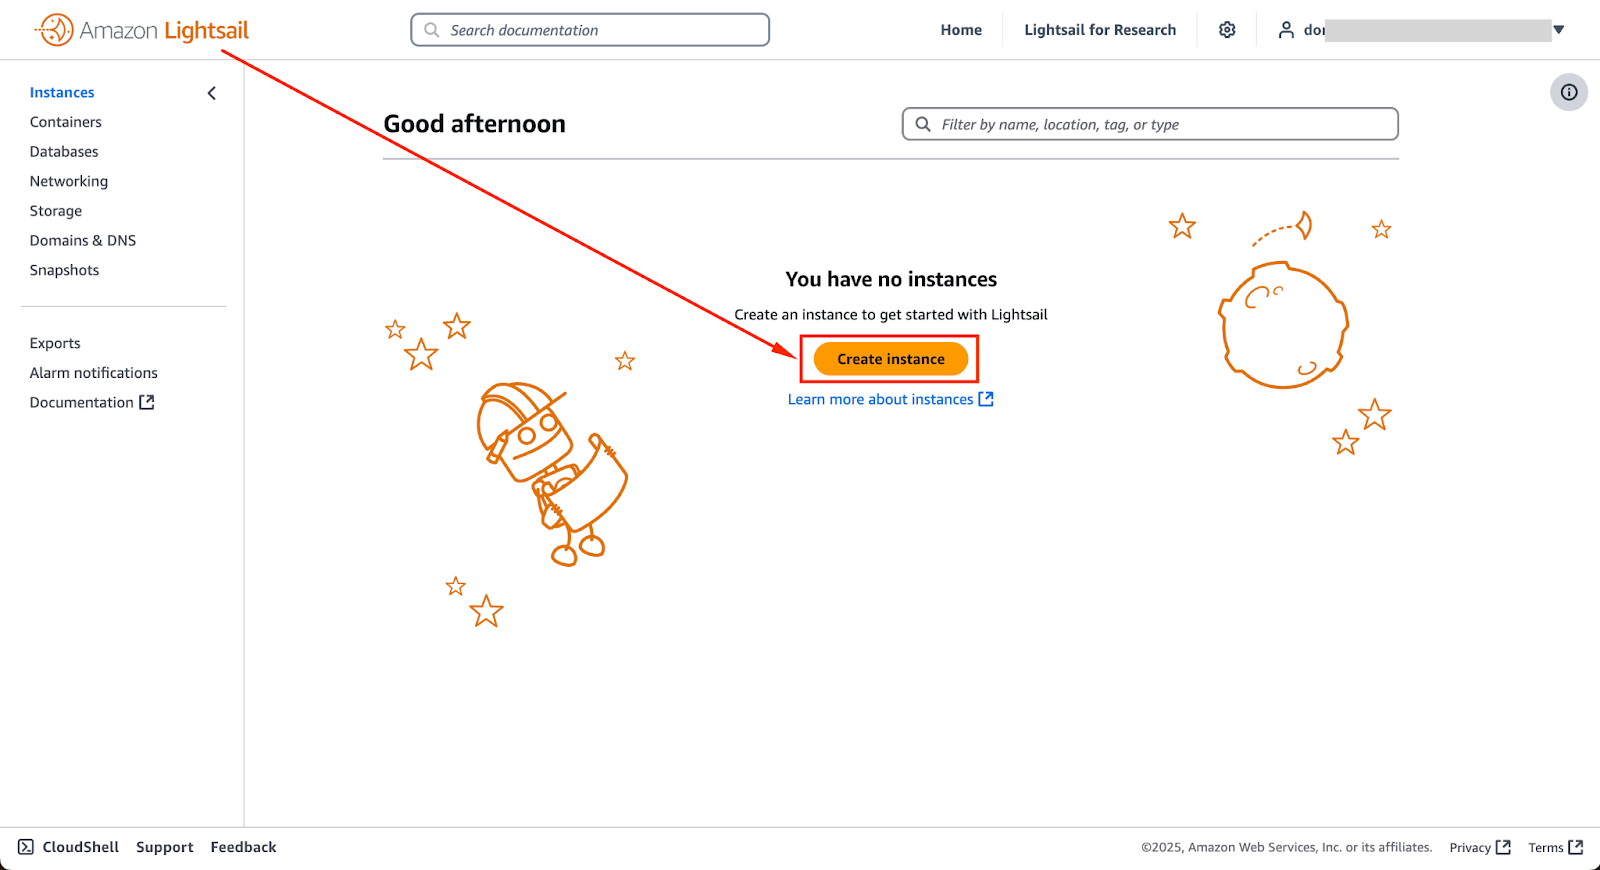
Now that you're in the AWS Lightsail console, you’re ready to launch your first instance.
To start, click Create Instance - as shown in the image below. This will take you to the instance creation page.
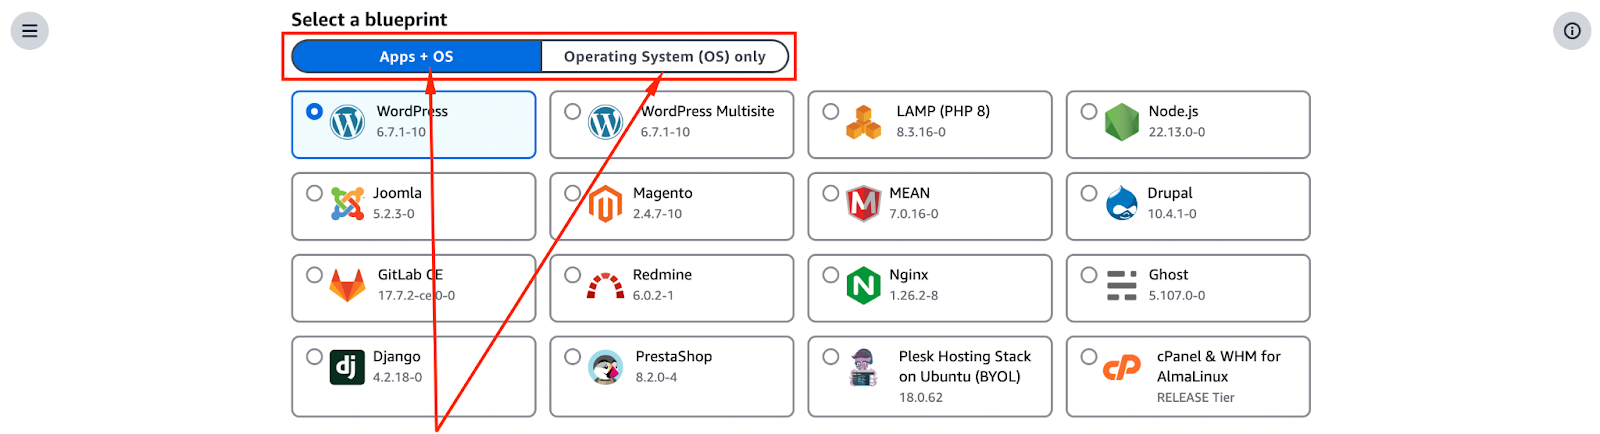
The image below provides an example of the screen you will see when creating an instance. The exact appearance may vary based on your AWS Region, Availability Zone, and console version.
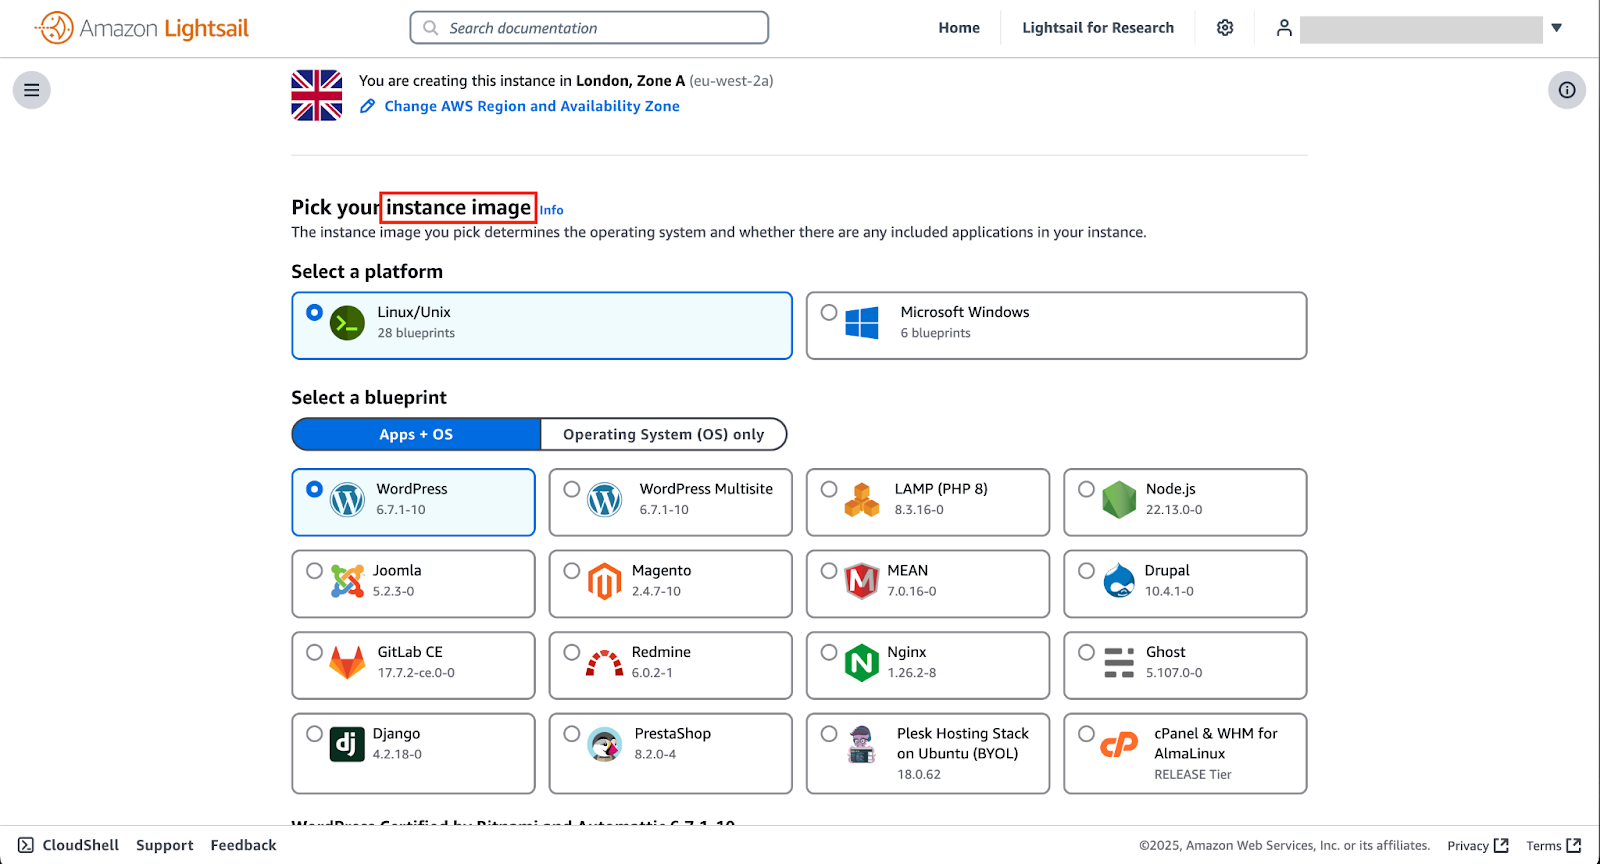
The first choice you have to make is to determine what operating system or pre-configured software stack your instance will use.
Lightsail gives you two options:
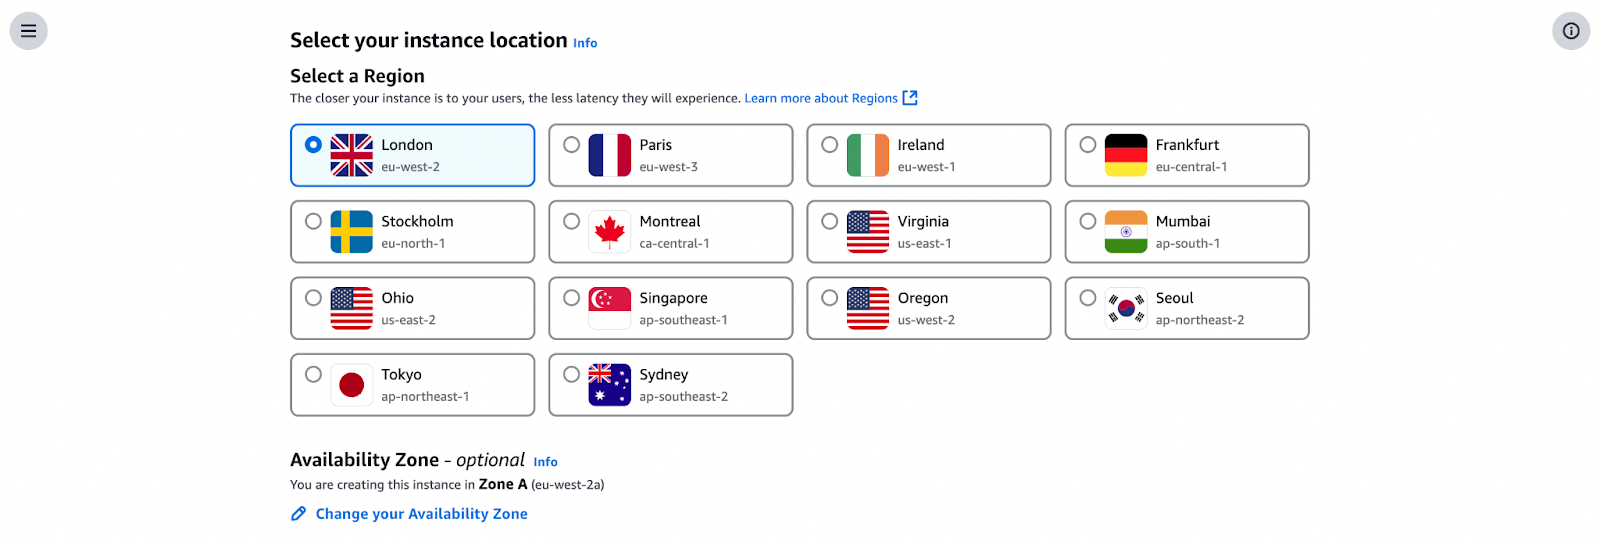
Another decision you have to make is choosing a region for your instance. AWS Lightsail operates from multiple data centers worldwide, and the region you pick will affect the latency and performance of your instance.
If your audience is primarily in North America, an instance in a US-based region will provide faster response times. If you serve users in Europe or Asia, select a region closer to them to minimize delays.
The image below highlights some of the available AWS Regions and Availability Zones. AWS periodically expands its infrastructure by adding new Regions and Availability Zones, so check for updates to find the best option for your needs.
Your next step will be to decide on a pricing plan based on your computing needs.
At the time of writing, AWS Lightsail offers fixed-cost plans starting at $5 per month. These prices increase as you add CPU power, RAM, and storage.
The image below displays a selection of available plans, which may be updated periodically.
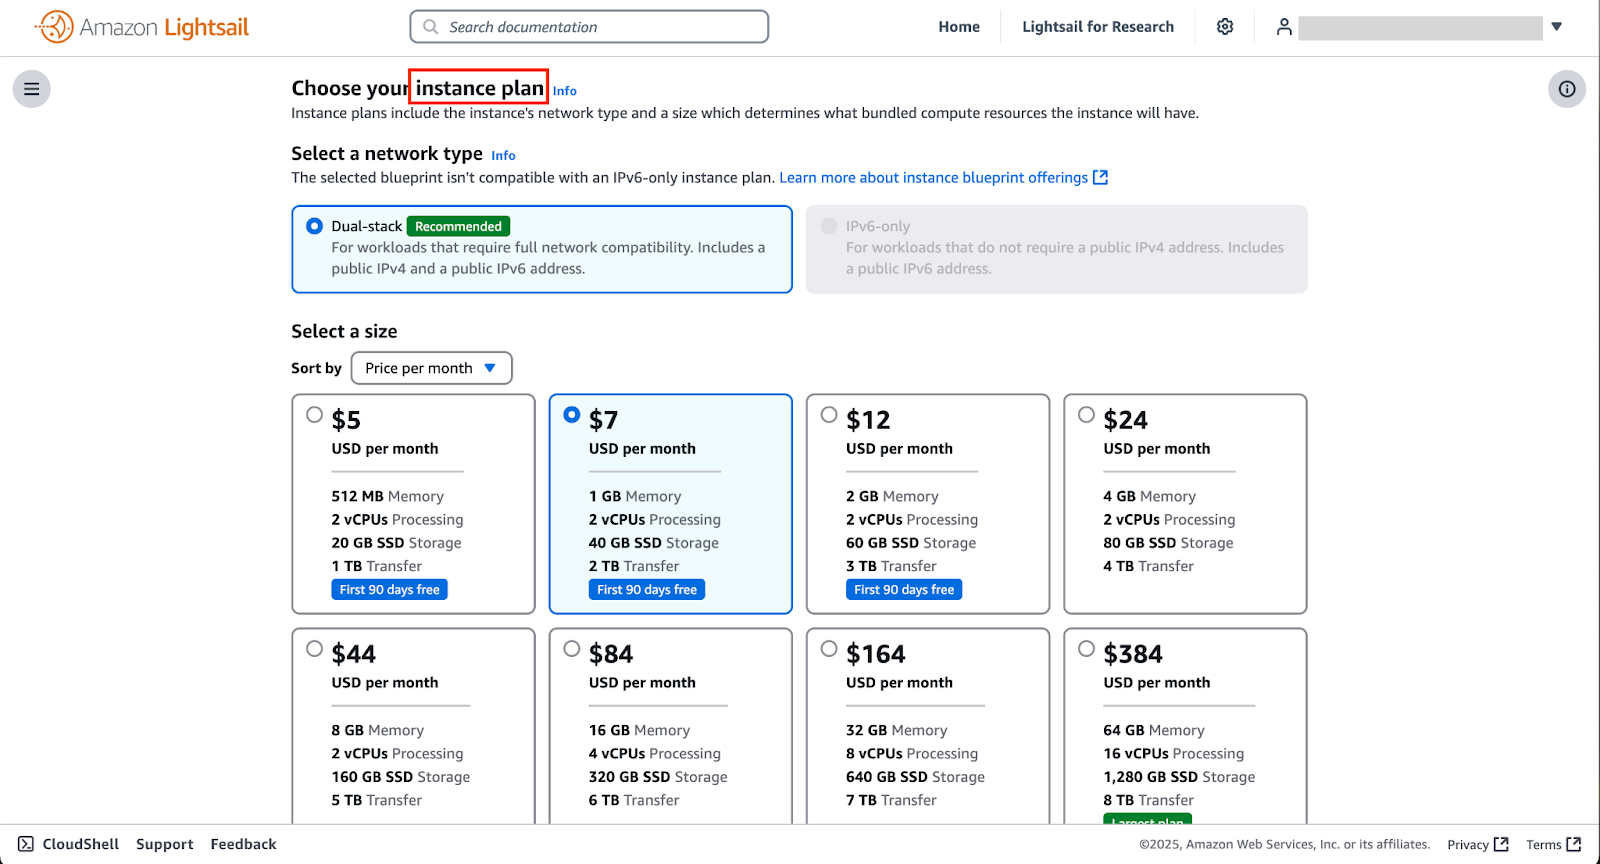
One of Lightsail's benefits is its predictable pricing; there are no unforeseen fees, which makes it an excellent option for those who are new to cloud hosting.
To customize your instance, you should adjust a few settings before launching it:
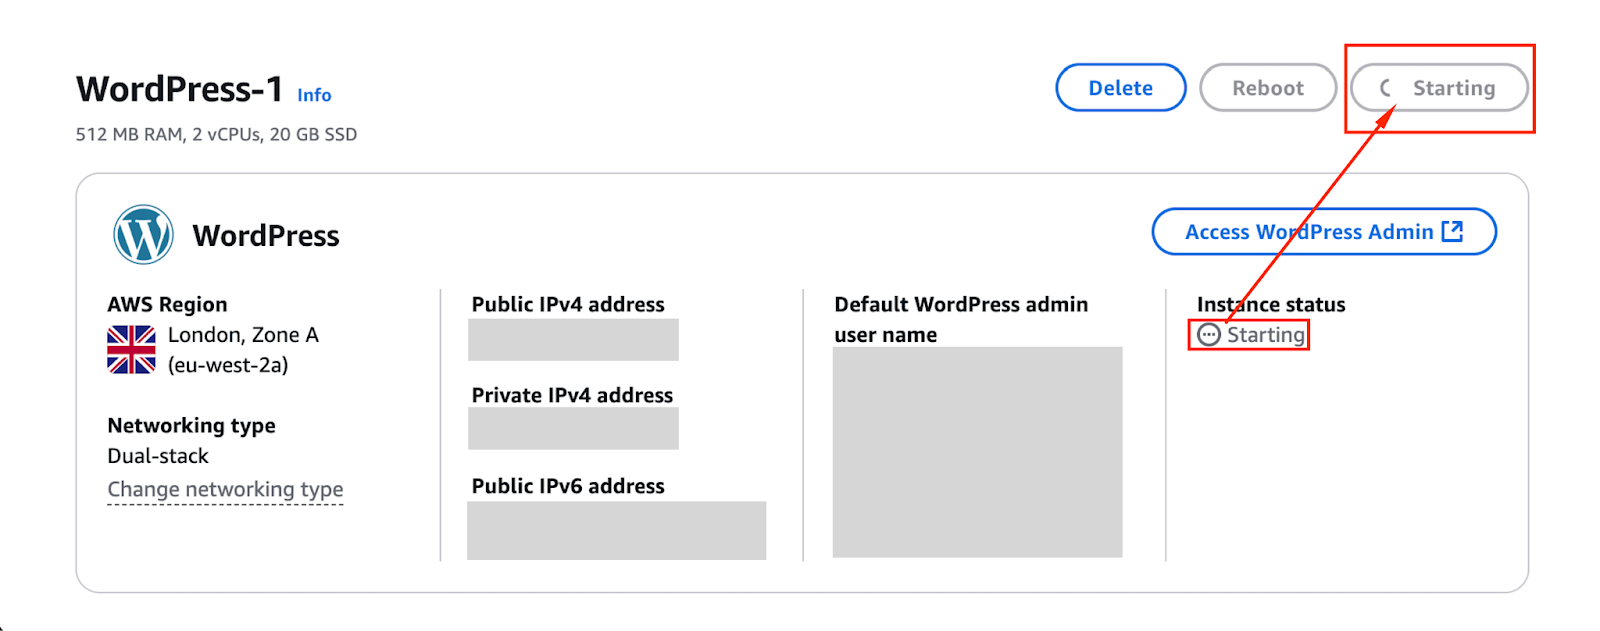
Once everything looks good, click the Create Instance button. It usually takes a few minutes for Lightsail to begin the background setup process.
The image below shows an instance being set up in the background.
The image below shows a ready instance.
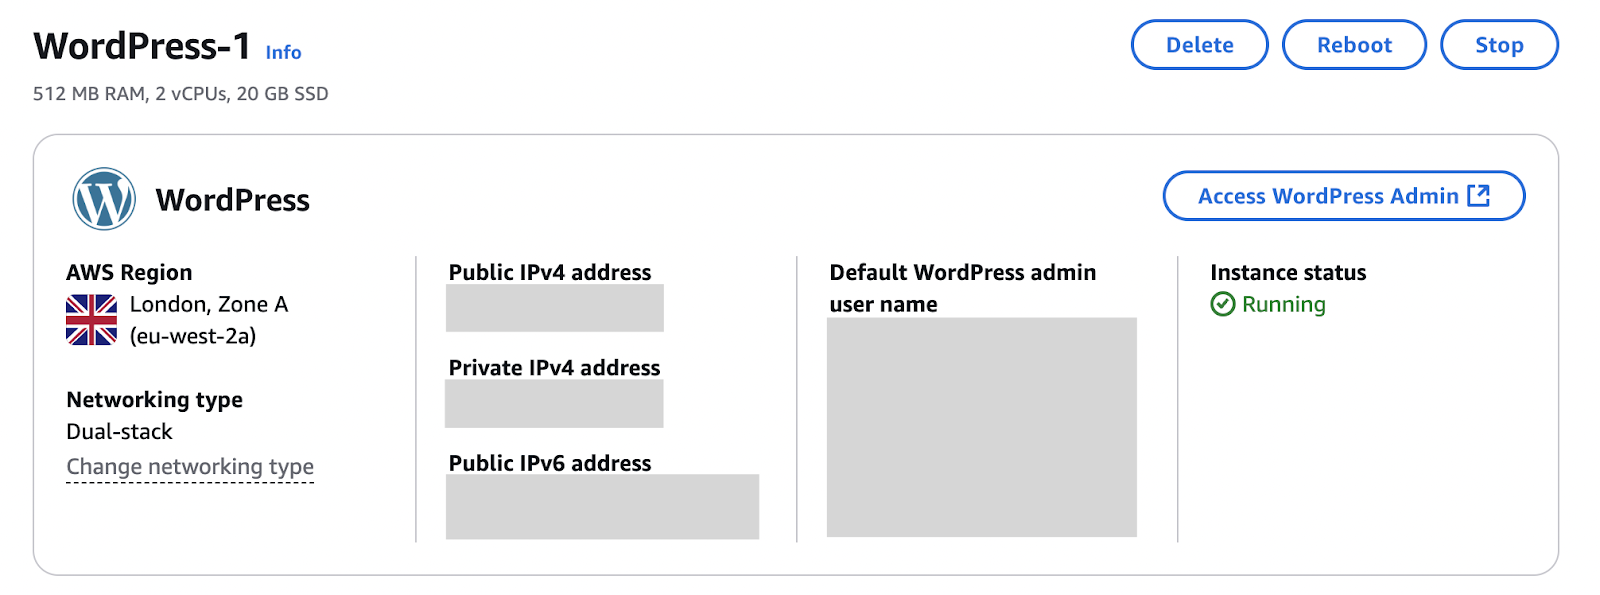
You now have a cloud-based server ready to host your application, website, or development environment!
Once your instance is up and running, the next step is managing it effectively. This includes connecting to your instance, taking backup snapshots, and configuring networking for stable and secure access. Let’s go through each of these tasks.
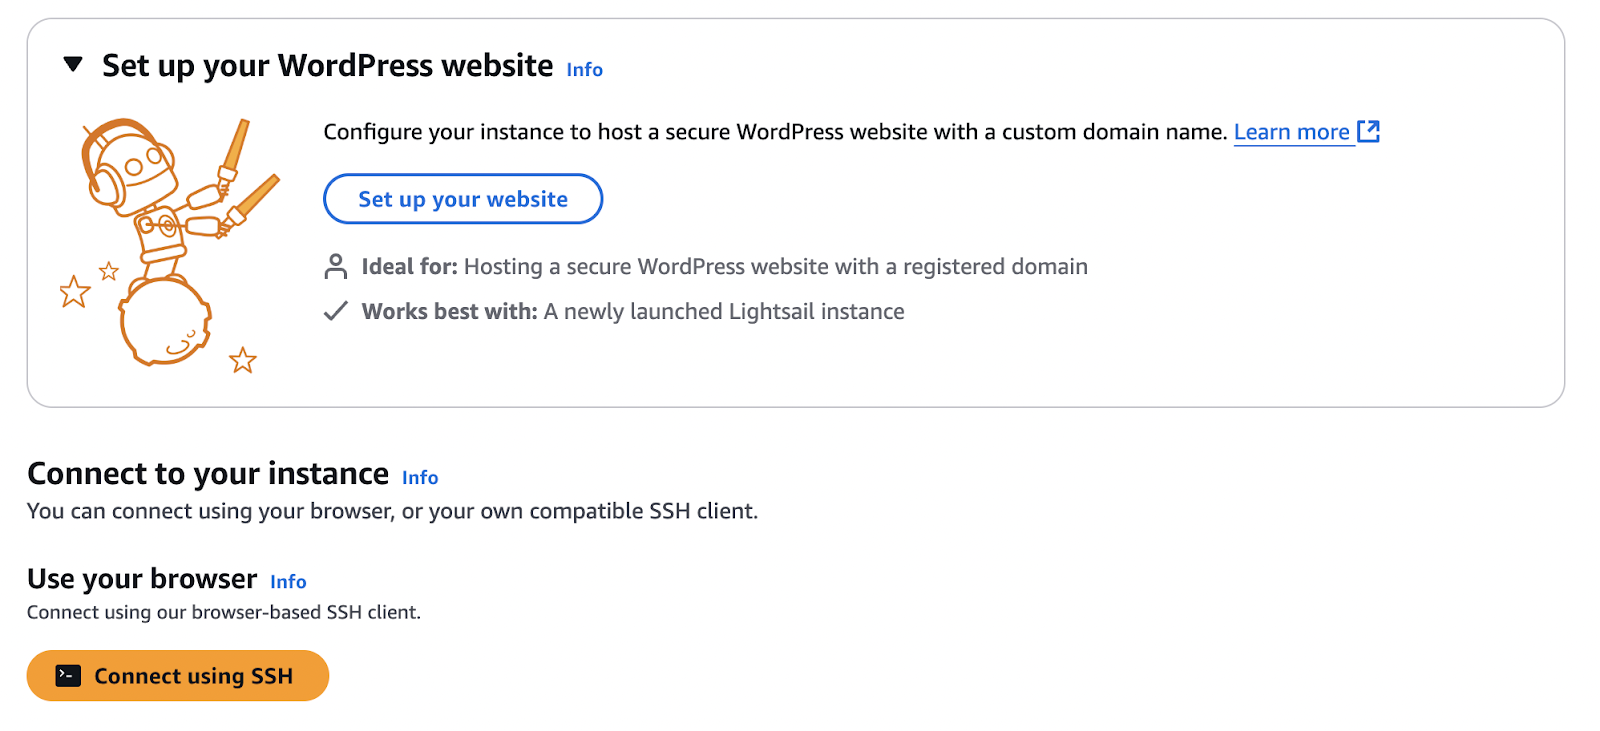
You can connect to your instance using SSH directly from the Lightsail console using the built-in terminal.
The images below show where you can connect using SSH and the built-in terminal you will be presented with.

If you prefer using an SSH client like PuTTY, you need the private key from the SSH key pair you set up earlier.
Lastly, check the instance status in the console to make sure your instance is operating as it should.
Snapshots are essentially backups of your instance and come in handy for disaster recovery or migration.
To create one, go to the Snapshots tab in your instance’s management page and click Create Snapshot.
The image below shows the Snapshots tab in the Lightsail console.

If anything ever goes wrong with your server, you can restore a snapshot to bring it back to a previous state.
To ensure stable and reliable access to your instance, you’ll need to configure its networking settings. This includes assigning a Static IP, setting up DNS configurations, and managing firewall rules.
With your Lightsail instance set up and networking configured, you’re ready to deploy applications.
The next step is installing the software you need. To do this, you will need to connect to your instance via SSH.
Remember, if you are using the Lightsail console, you can click the Connect button to open a browser-based terminal. Alternatively, you can use an SSH client like PuTTY or your command line if your SSH key is set up.
You might need software like Apache, MySQL, and PHP for a basic web server setup. You can install them with a single command:
sudo apt update && sudo apt install apache2 -yThe command above updates your package list and installs Apache, which serves web pages to visitors.
Depending on your application, you may also need to install other components, such as PHP for dynamic content or MySQL for database management.
If you are deploying a WordPress website, AWS Lightsail makes it even easier. Instead of installing everything manually, you can select the pre-configured WordPress blueprint when creating your instance. This automatically sets up WordPress, MySQL, and all the necessary components.
Once the instance is running, open a web browser and navigate to your Lightsail instance’s public IP address.
You should see the WordPress setup screen, where you’ll configure your site name, admin account, and other settings.
To improve performance, consider enabling caching and setting up a Content Delivery Network (CDN). Lightsail has built-in CDN support, which helps speed up your site by serving content from edge locations closer to your visitors.
If you are working with a custom web application instead of WordPress, you will need to upload your code manually.
The easiest ways to transfer files to your instance are:
git clone https:// github. com/name-of-your-repoAfter uploading your files, you will need to install dependencies.
For example, if you are running a Node.js application, you might install dependencies with:
npm installNext, configure your web server. If you are using Nginx, you must set up a configuration file to serve your application properly.
Finally, store sensitive information securely using environment variables instead of hardcoding them in your application. You can do this by exporting variables in your shell or using a .env file that your application reads.
Once everything is set up, restart your web server and check that your application is running correctly.
At this point, your custom app is live on AWS Lightsail!
If you are specifically interested in learning how to deploy and manage AWS EC2 instances, have a look at AWS EC2 Tutorial for Beginners, which covers key concepts and configurations.
As your application grows, you may need to improve performance, handle more traffic, or increase storage capacity. AWS Lightsail provides several ways to scale and optimize your setup, whether by upgrading your instance, distributing the load, or expanding storage.
You have two primary choices if your Lightsail instance is having trouble keeping up:
If you are running out of space, you can do the following:
1. Navigate to the Storage section and attach a new block storage volume.
2. Use the following command to mount it to your instance:
sudo mount /dev/xvdf /mnt/new_storage3. If you want this to persist after a reboot, update /etc/fstab.
If traffic spikes, you can use a load balancer. A load balancer distributes incoming requests across multiple instances, keeping performance steady.
Lightsail’s built-in load balancer makes this easy.
You can also automate instance deployment with snapshots and scripts for better scaling.
If you want a structured path to becoming an AWS-certified professional, consider the AWS Cloud Practitioner (CLF-C02) certification track. It will help you better understand AWS services and best practices.
Keeping your Lightsail instance running smoothly and securely requires proactive monitoring and proper security measures. By tracking performance metrics and following security best practices, you can prevent issues before they impact your application.
The Metrics tab allows you to monitor your instance’s health. You can check CPU usage, network traffic, and storage.
If something looks wrong, set up alerts to catch issues before they become serious problems.
You can secure your Lightsail instance with these simple steps:
I’ve found AWS Lightsail to be a great option for developers and small businesses who need a simple, scalable, and cost-effective cloud hosting solution. It takes the complexity out of AWS while still giving you the flexibility to deploy and manage applications with ease.
If you’re looking to deepen your AWS skills, I highly recommend checking out these courses:
Learn more about AWS with these courses!
Track
Course
Course
blog
Thalia Barrera
15 min
blog
Joleen Bothma
12 min
Tutorial
Kenny Ang
Tutorial
Tim Lu
Tutorial
DataCamp Team
Tutorial
Moez Ali