
Course
Introduction to Docker
4 hr
48.6K
In this article, I’ll walk you through installing Bitwarden with Docker on a fresh Ubuntu server, configuring HTTPS with Let's Encrypt, and handling common setup issues.
If you’re just starting out with Docker, you’re better of enrolling in our Introduction to Docker or Intermediate Docker courses - learn the fundamentals before managing multiple container setups.
Bitwarden has an official Docker-based installation that allows you to run a password manager on your own terms.
All you need to do is to run a single install script. There’s no need to manually install databases, web servers, or write any code. Docker pulls pre-configured containers, sets up networking between them, and gets everything running. Updates work the same way - just run the update script and Docker handles the rest.
Bitwarden's Docker setup runs as multiple containers working together. You get a web vault container for the user interface, an API container for handling requests, a database container for storing encrypted vault data, and supporting services for attachments and icons. Docker Compose orchestrates these containers so they can communicate with each other.
Everything is preconfigured for you.
This multi-container approach means each component runs in isolation. If you need to modify the database, you can restart just that container without touching the web interface. If you want to check logs, each service has its own log stream.
The official deployment uses Docker Compose to manage everything through a single configuration file, which makes the whole system easier to understand and maintain than a traditional server install.
You need a few things in place before you can run Bitwarden, but none of them require enterprise hardware or complex setups.
A Linux server or VM is your starting point. Ubuntu Server is really all you need. You can use a cloud instance from AWS, DigitalOcean, or Linode. A basic instance with 2GB RAM and 20GB storage is enough to run Bitwarden for personal use or small teams.
Docker and Docker Compose handle the actual installation. You'll install Docker Engine (not Docker Desktop) and Docker Compose as separate packages. Most Linux distributions include both in their package managers.
A domain name is required because Bitwarden needs HTTPS to work. You can't run it on an IP address. You’ll have to point your domain to your server's IP address before starting the installation.
Ports 80 and 443 need to be open on your server. Port 80 handles HTTP traffic and certificate validation, while port 443 serves the actual HTTPS traffic. Configure your firewall and cloud provider's security groups to allow incoming connections on both ports.
You also need basic command-line skills. You'll be SSH-ing into your server, running installation scripts, and editing configuration files. If you know how to navigate directories and run commands with sudo, you're ready.
And that’s it! There are things you need to know, sure, but almost anyone a bit tech-savvy can do it. Let me show you how next.
This walkthrough uses a DigitalOcean Ubuntu droplet Cloudflare for domain and DNS management. You’re free to use other providers and services - but if you want to follow along without stress, I recommend choosing the same.
First, Create a DigitalOcean droplet with Ubuntu 24.04 LTS. The $12/month Basic droplet (2GB RAM, 1 CPU, 50GB SSD) runs Bitwarden fine for personal use or small teams. Choose a datacenter region close to you for better response times. Don’t forget to add an existing SSH key or create a new one.
After the droplet boots, note its public IP address from the DigitalOcean dashboard.
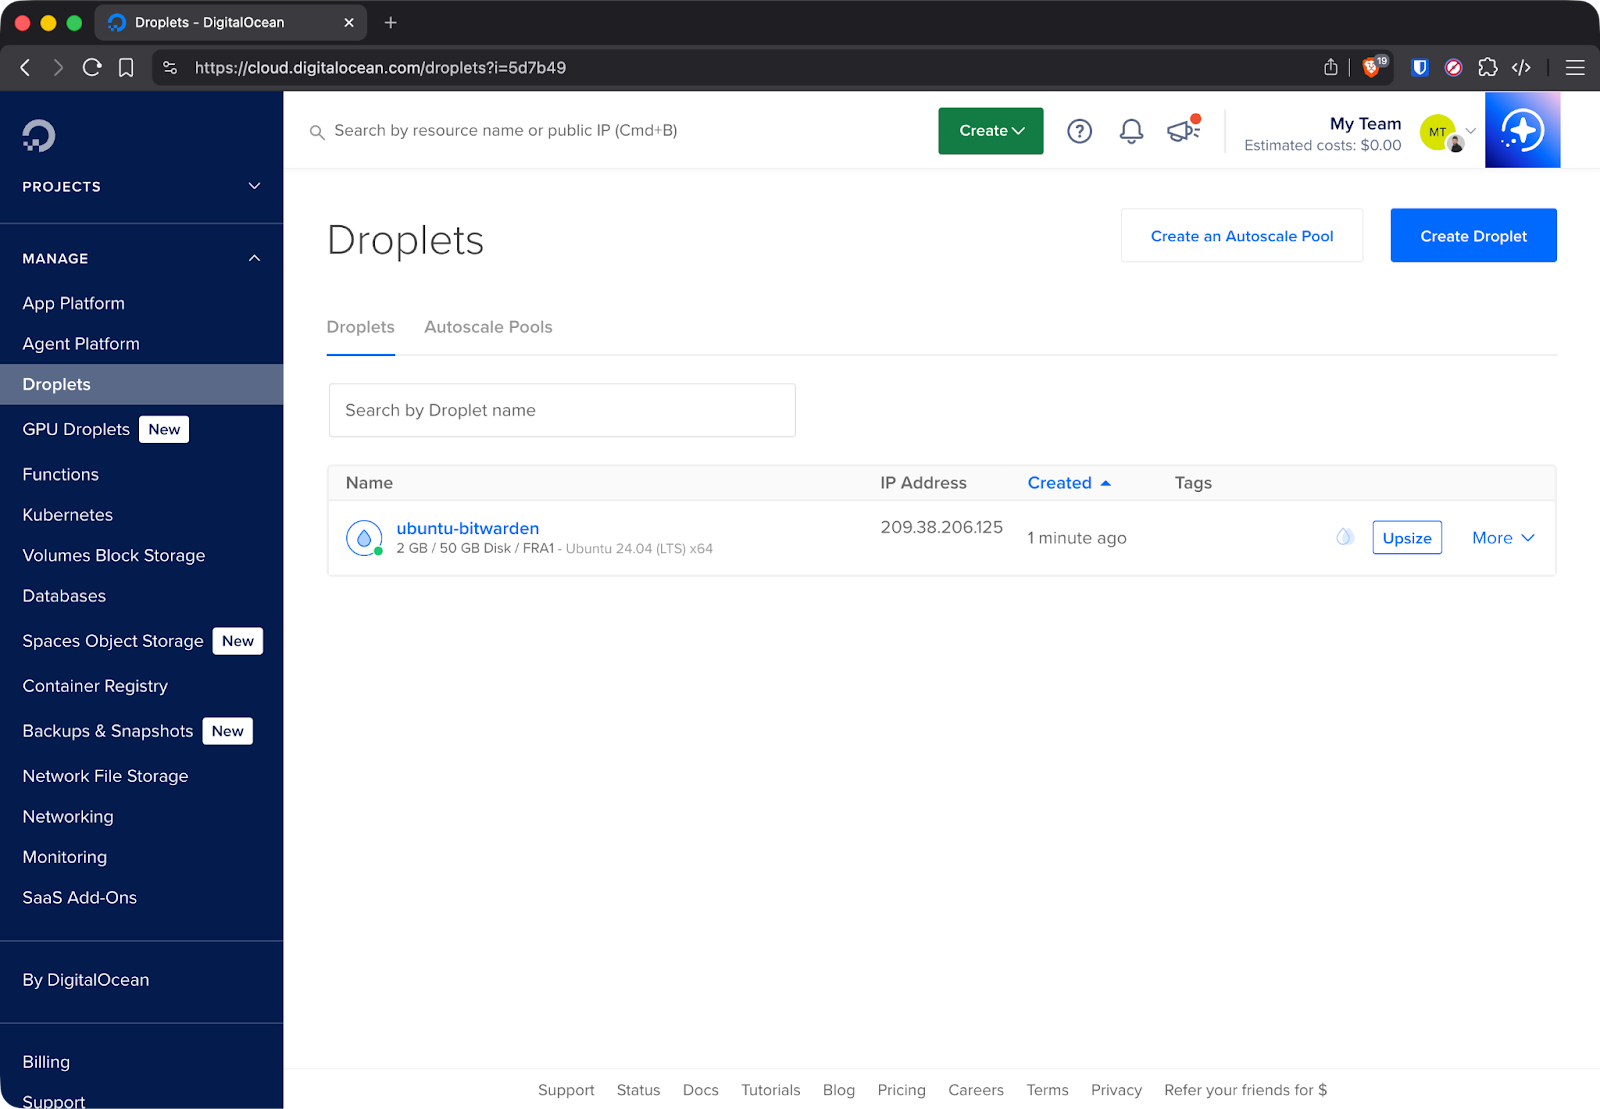
DigitalOcean droplet details
Next, configure DNS in Cloudflare. Log into your Cloudflare account and add an A record pointing your domain to the droplet's IP address:
Type: A
Name: vault (or your preferred subdomain)
IPv4 address: Your droplet's IP
Proxy status: Off (gray cloud)
Turn off Cloudflare's proxy for initial setup. Let's Encrypt needs direct access to your server to verify domain ownership. You can enable the proxy after Bitwarden is running and certificates are generated.
I’ve used one of mine active domains for the purposes of this article:
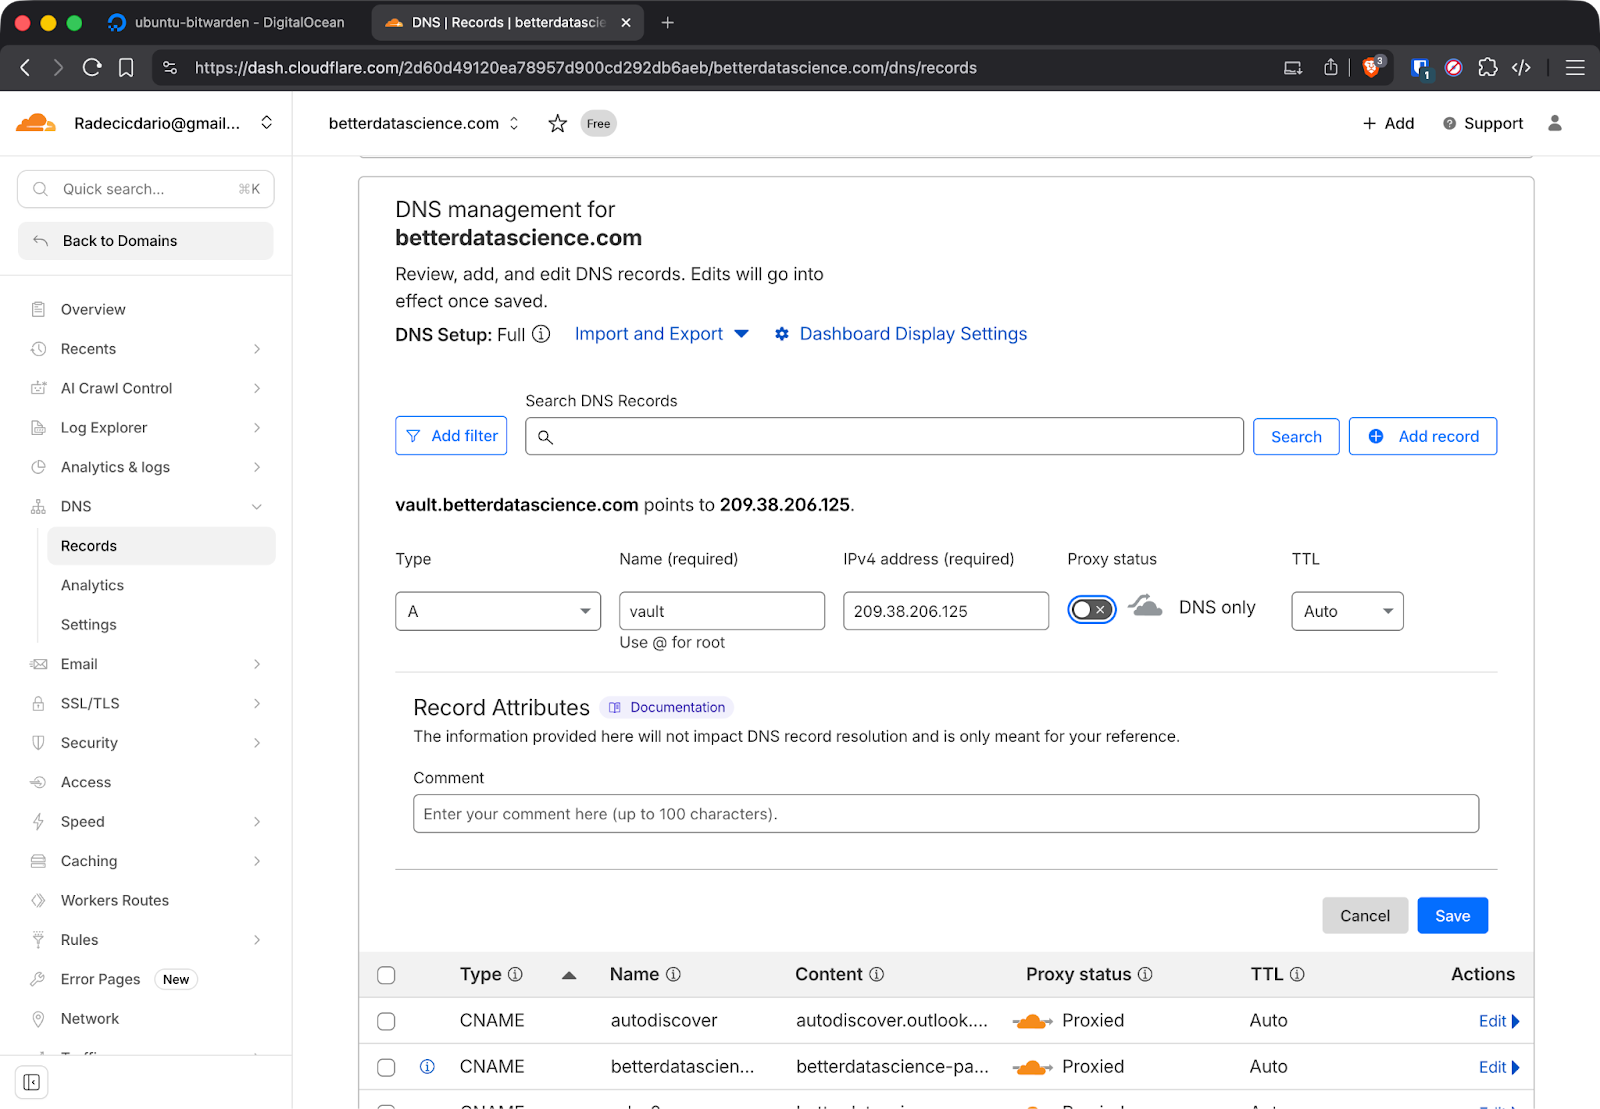
Cloudflare DNS setup
DNS propagation takes a few minutes. Run this shell command to verify the changes are visible:
nslookup vault.yourdomain.comYou should see your droplet's IP address in the response.
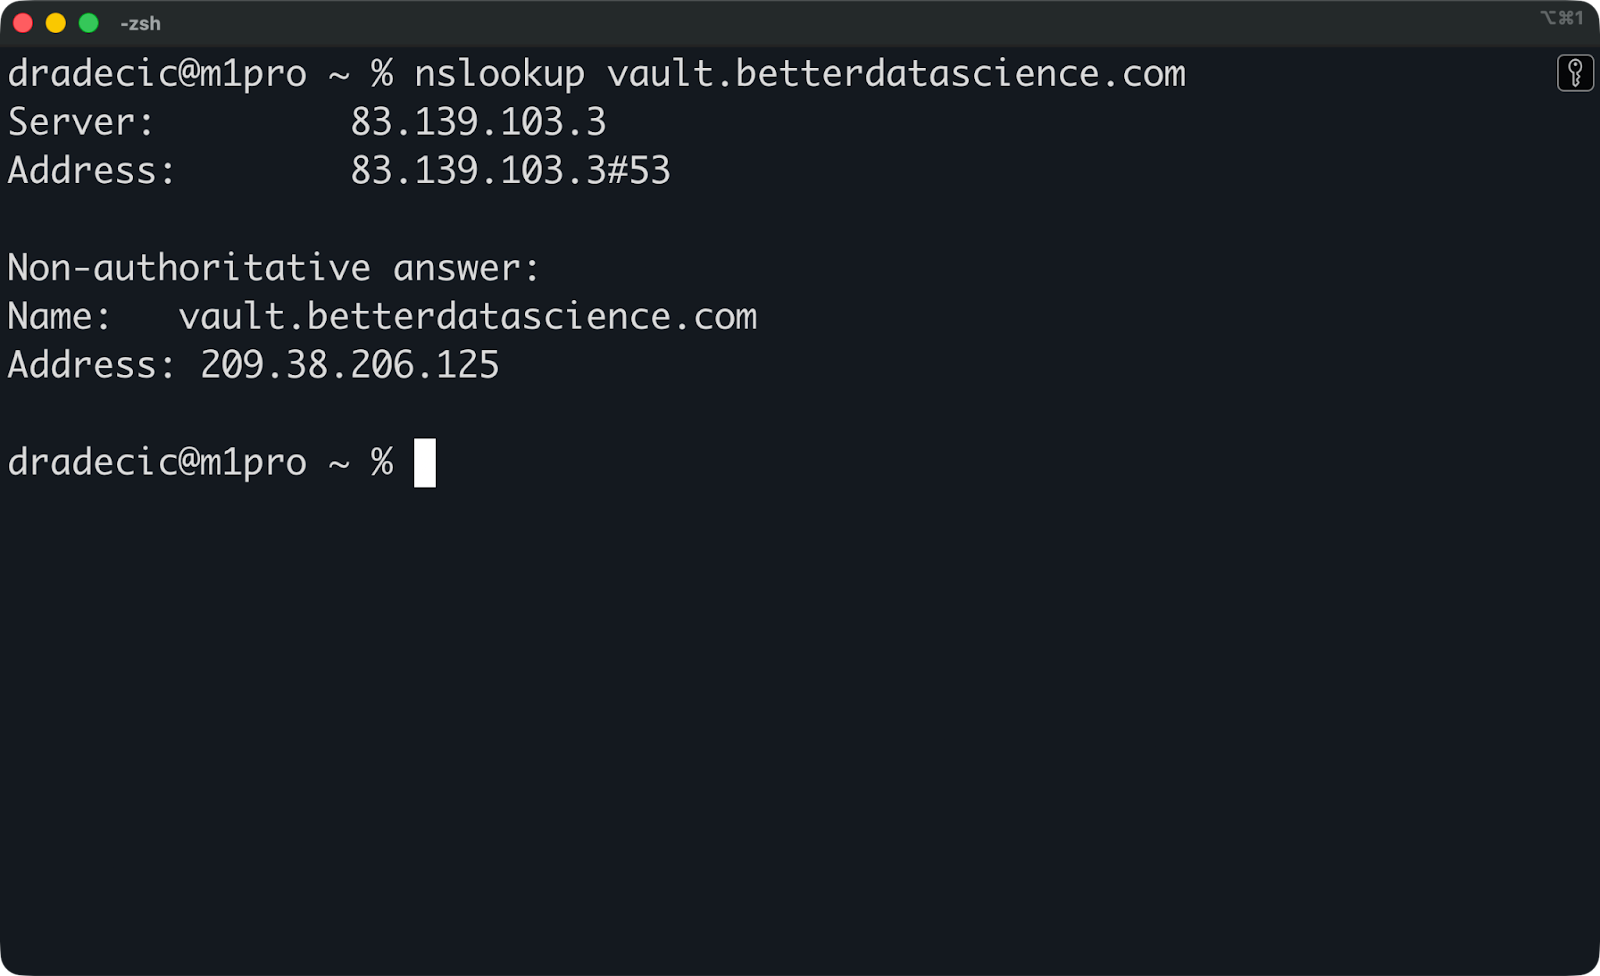
Nslookup results
You can now connect to your droplet via SSH:
ssh root@your-droplet-ipAnd you’re in:
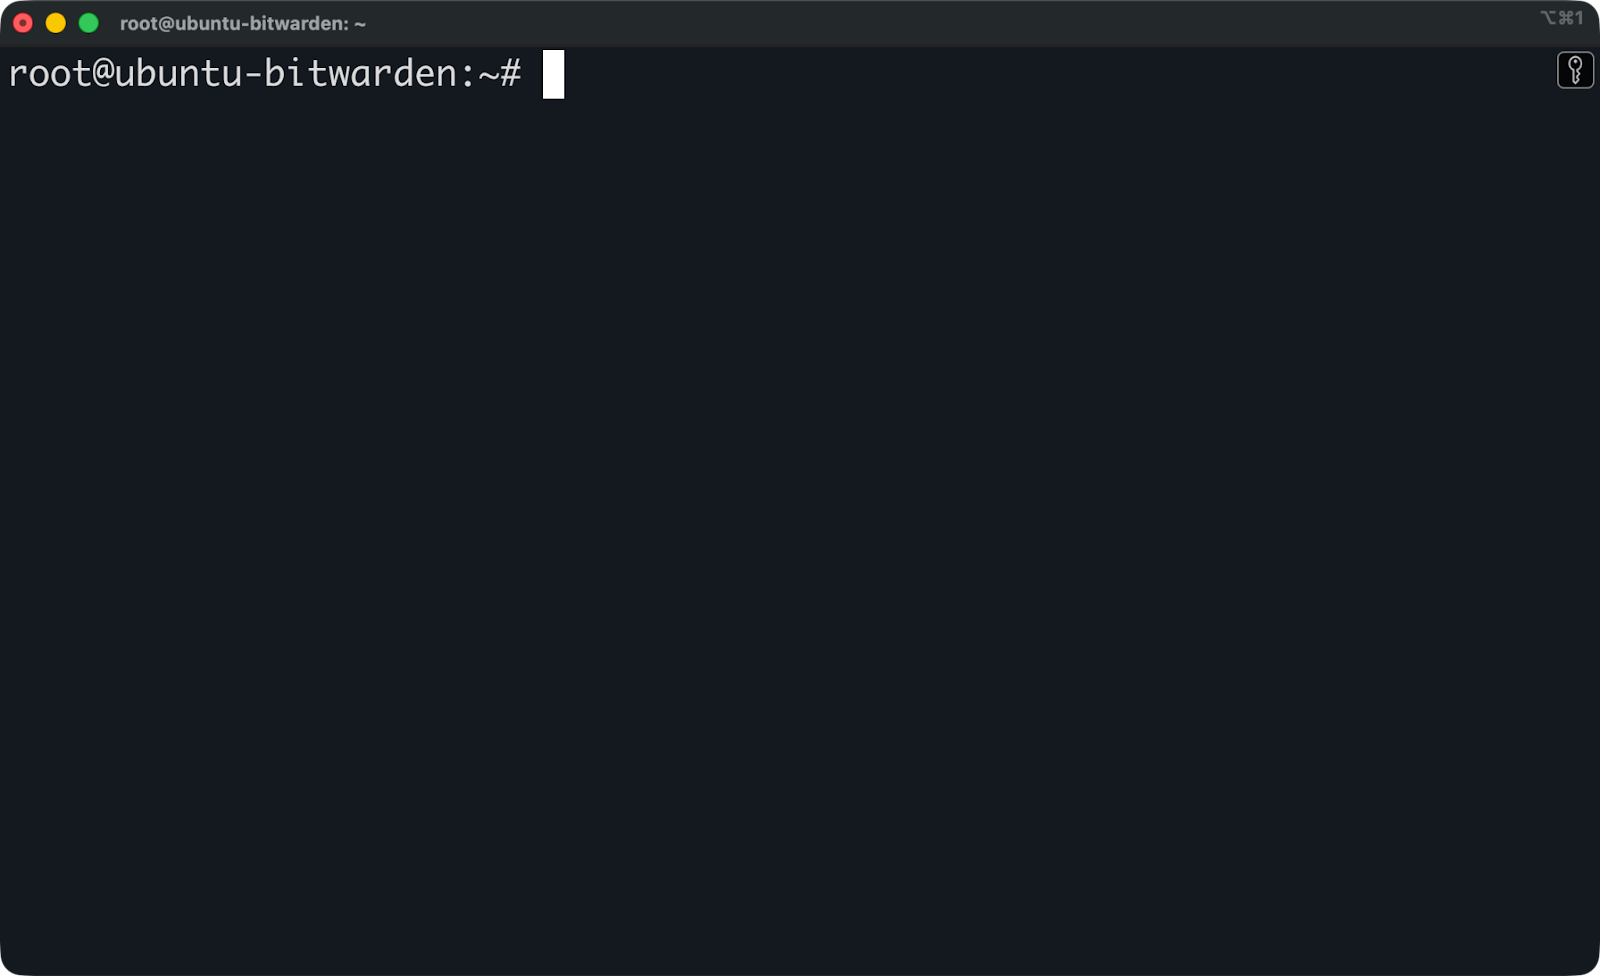
Connecting to the Ubuntu instance
Okay, so the first order of business here is to update the system packages. Run the following command:
apt update && apt upgrade -yNow you're ready to install Docker and Bitwarden.
As mentioned earlier, you’ll need both Docker and Docker Compose. Run these commands to install them:
sudo apt install docker.io docker-compose-v2 -y
sudo systemctl enable docker
sudo systemctl start docker
And now verify the installation:
docker --version
docker compose version
You should see version numbers for both commands.
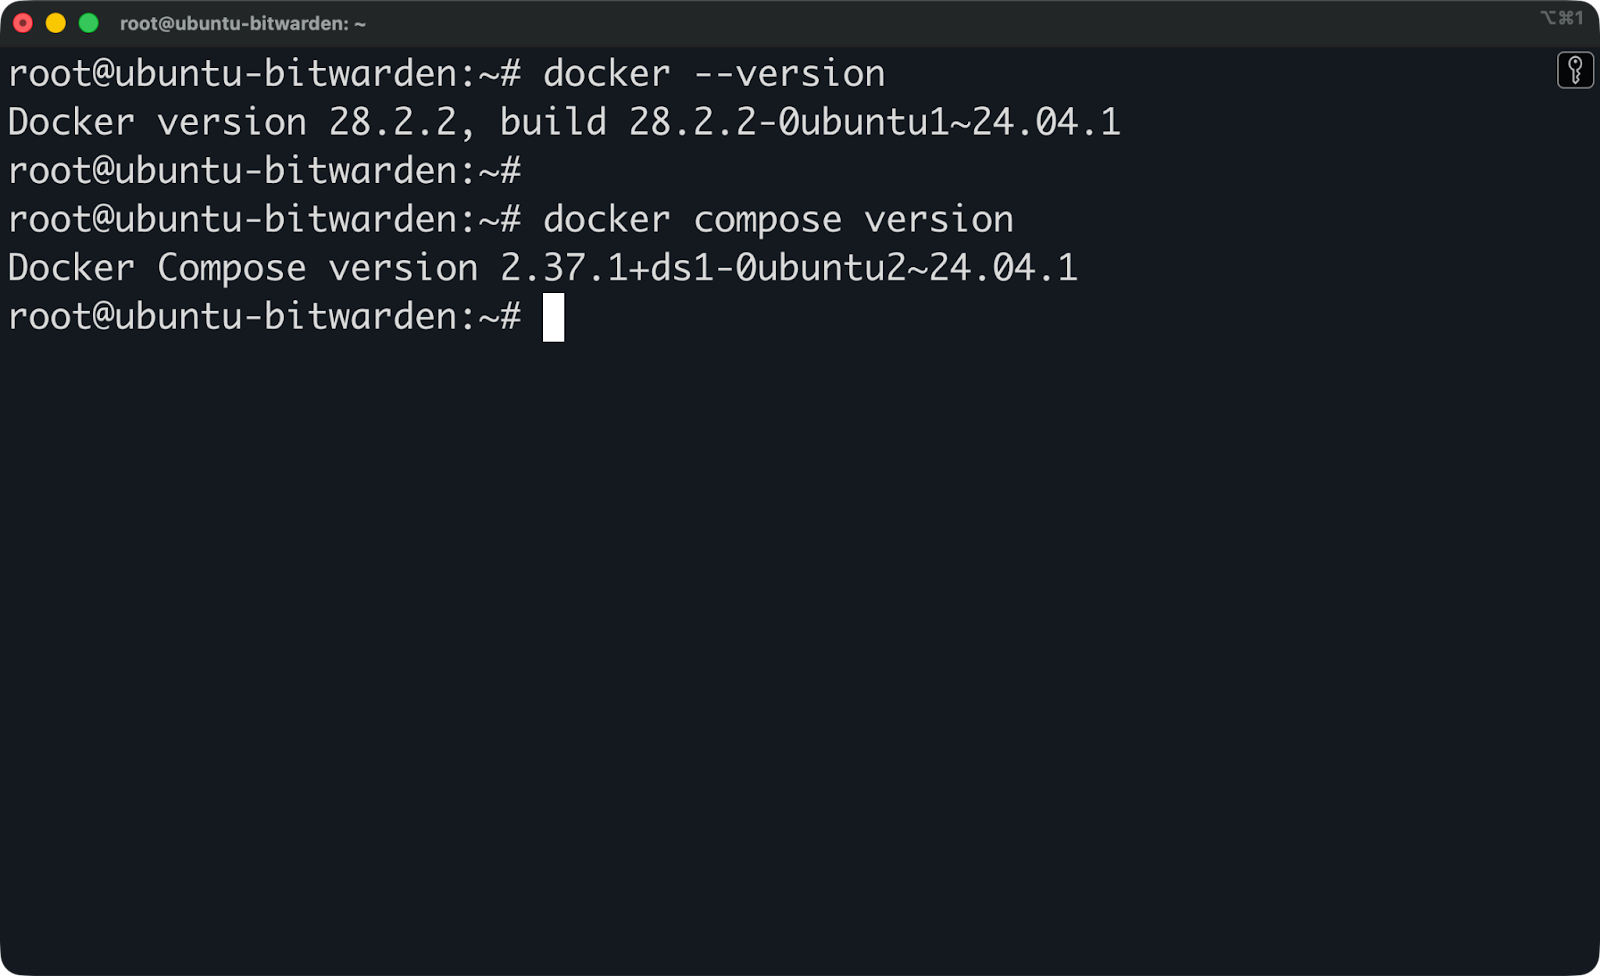
Docker and Docker Compose versions
Up next, I’ll show you how to install Bitwarden.
Bitwarden's official installer is stored in their GitHub repository. You can download it directly to your server:
curl -Lso bitwarden.sh "https://func.bitwarden.com/api/dl/?app=self-host&platform=linux" && chmod +x bitwarden.shThis downloads the installation script and makes it executable. The script handles everything from downloading Docker images, creating configuration files, to setting up the directory structure.
The next step is to create a directory where Bitwarden will store its data:
sudo mkdir /opt/bitwardenYou can now move the installation script there:
sudo mv bitwarden.sh /opt/bitwarden/
cd /opt/bitwarden
And finally, run the installer:
sudo ./bitwarden.sh installThe script creates a bwdata directory that contains all of Bitwarden's configuration files, certificates, logs, and database files. This is where everything lives, so back this directory up regularly.
The installer asks you several questions. Answer them carefully because getting these wrong means starting over.
Enter your domain name exactly as it appears in your DNS records. If you set up vault.yourdomain.com in Cloudflare, enter that exact string. Don't include https:// or trailing slashes.
Choose Let's Encrypt for SSL certificates. The installer will handle certificate generation and renewal automatically. If you're using Cloudflare's proxy (the orange cloud), you might need to disable it temporarily during initial setup so Let's Encrypt can verify your domain.
Enter your email address. This is where you’ll get your certification expiration reminders.
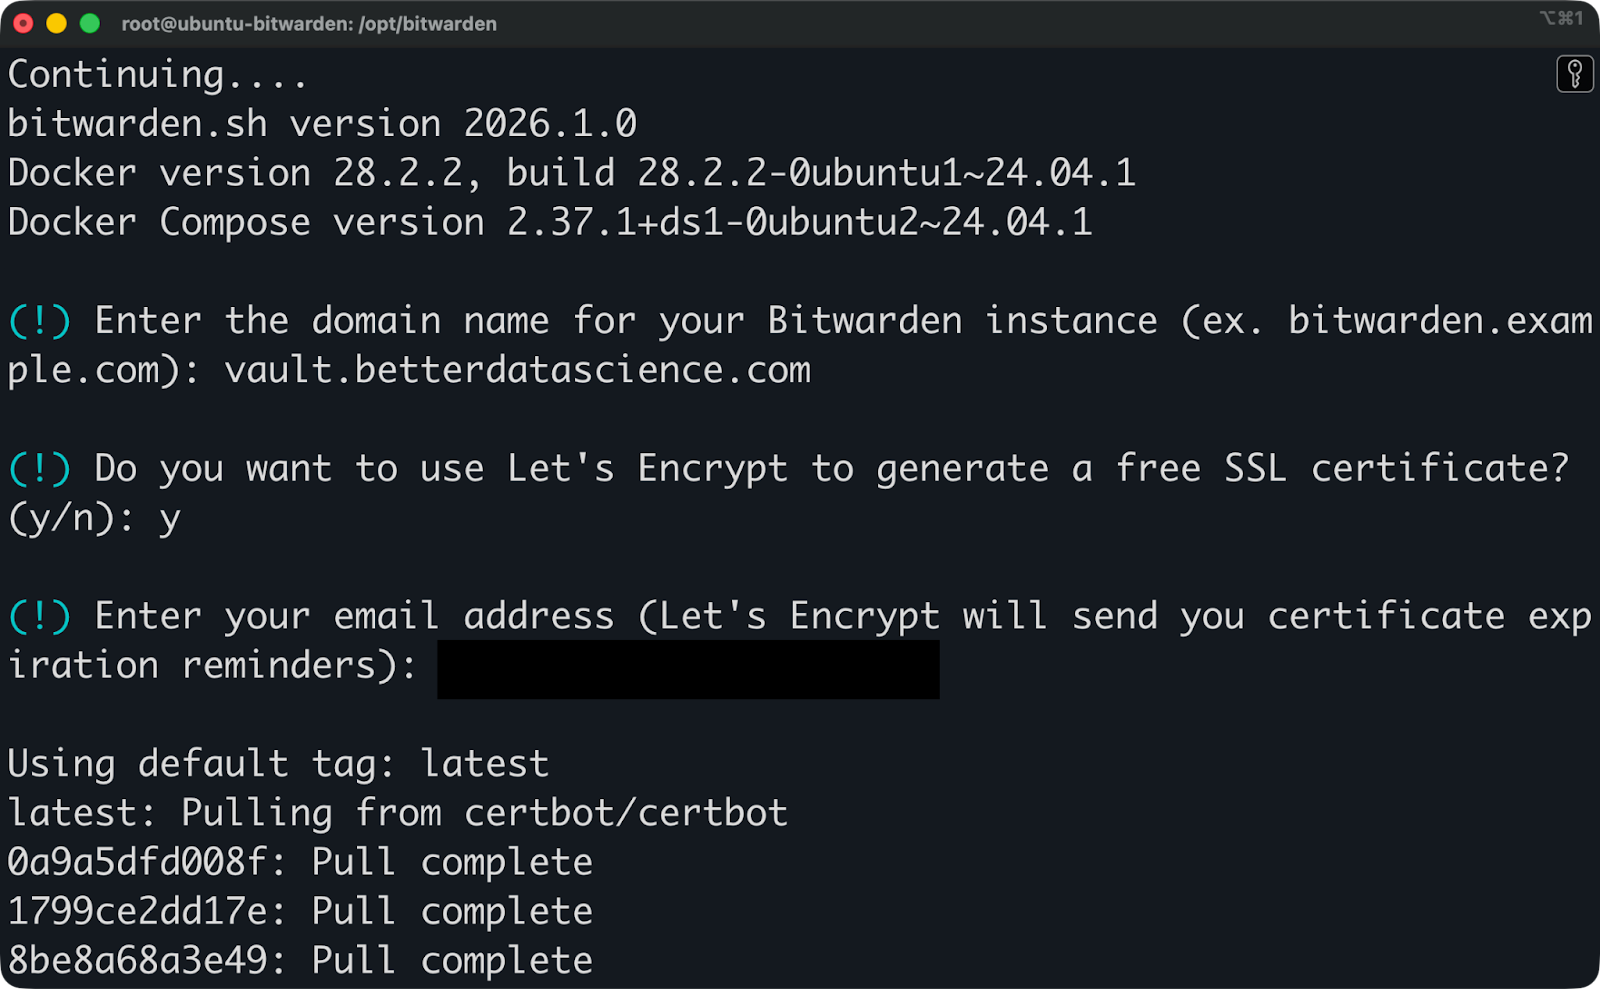
Bitwarden installation (1)
Bitwarden will then pull the required Docker images. It will take a minute or so, and then you’re in for another round of prompts.
Choose a name for the database. No need to get creative here, vault works perfectly fine.
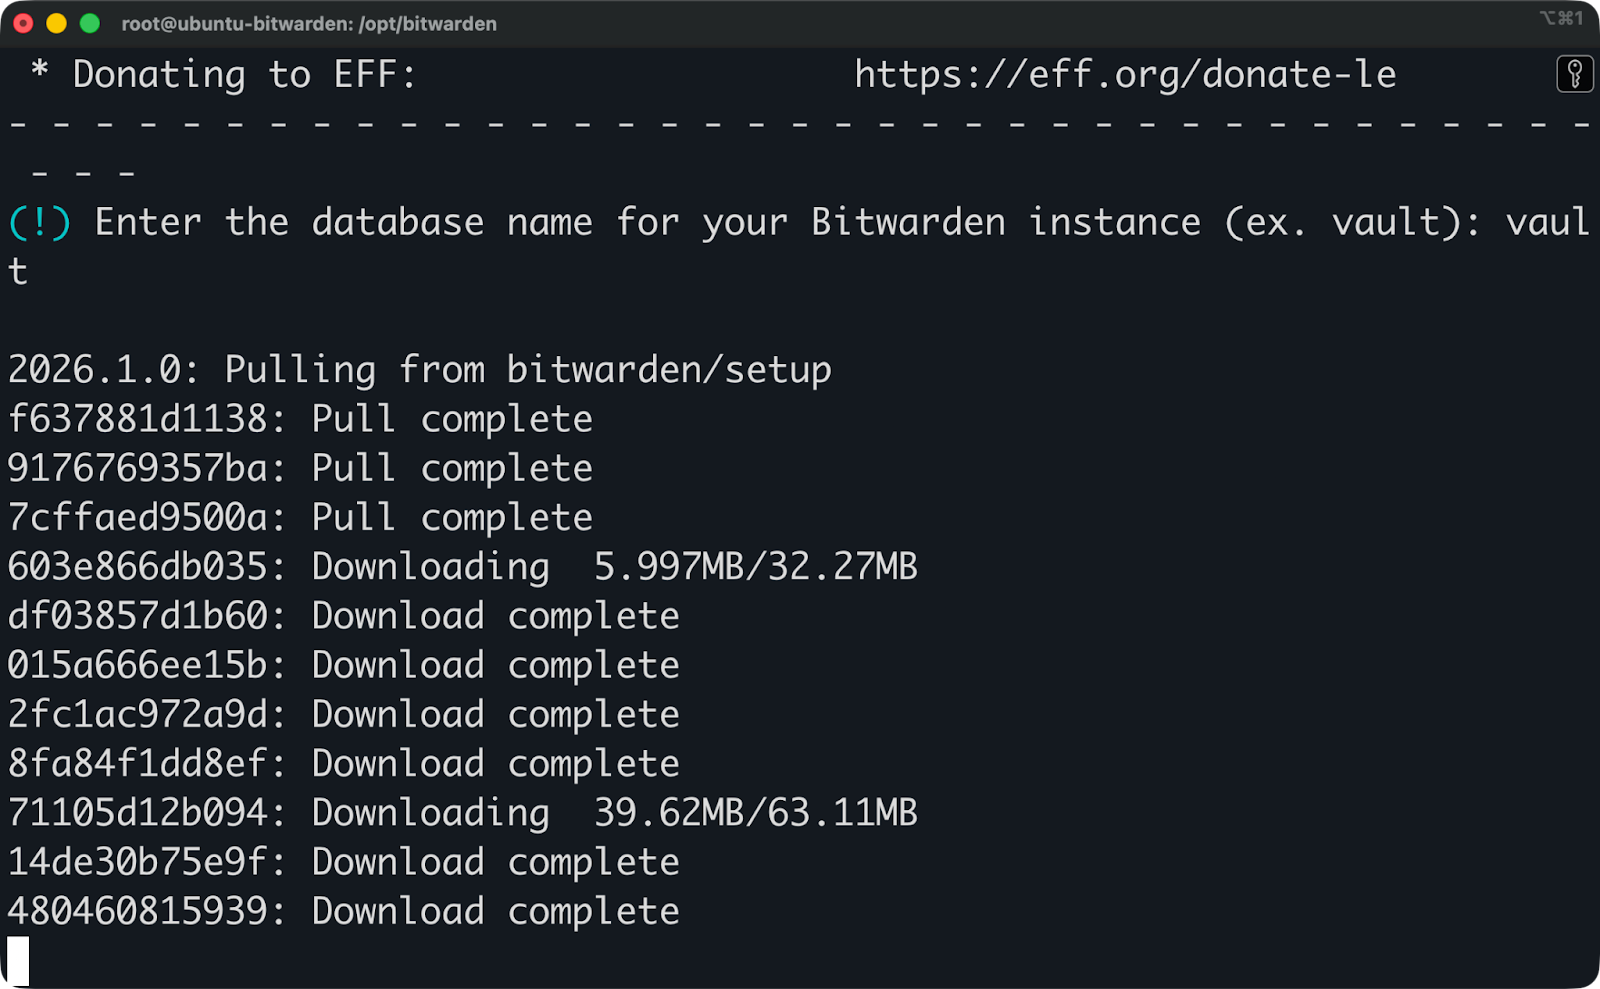
Bitwarden installation (2)
Then the installation will proceed to download additional Docker images.
Get the installation ID and key. Open the Bitwarden Host page and enter your admin email and region. You’ll then get both values - copy/paste them when prompted during installation.
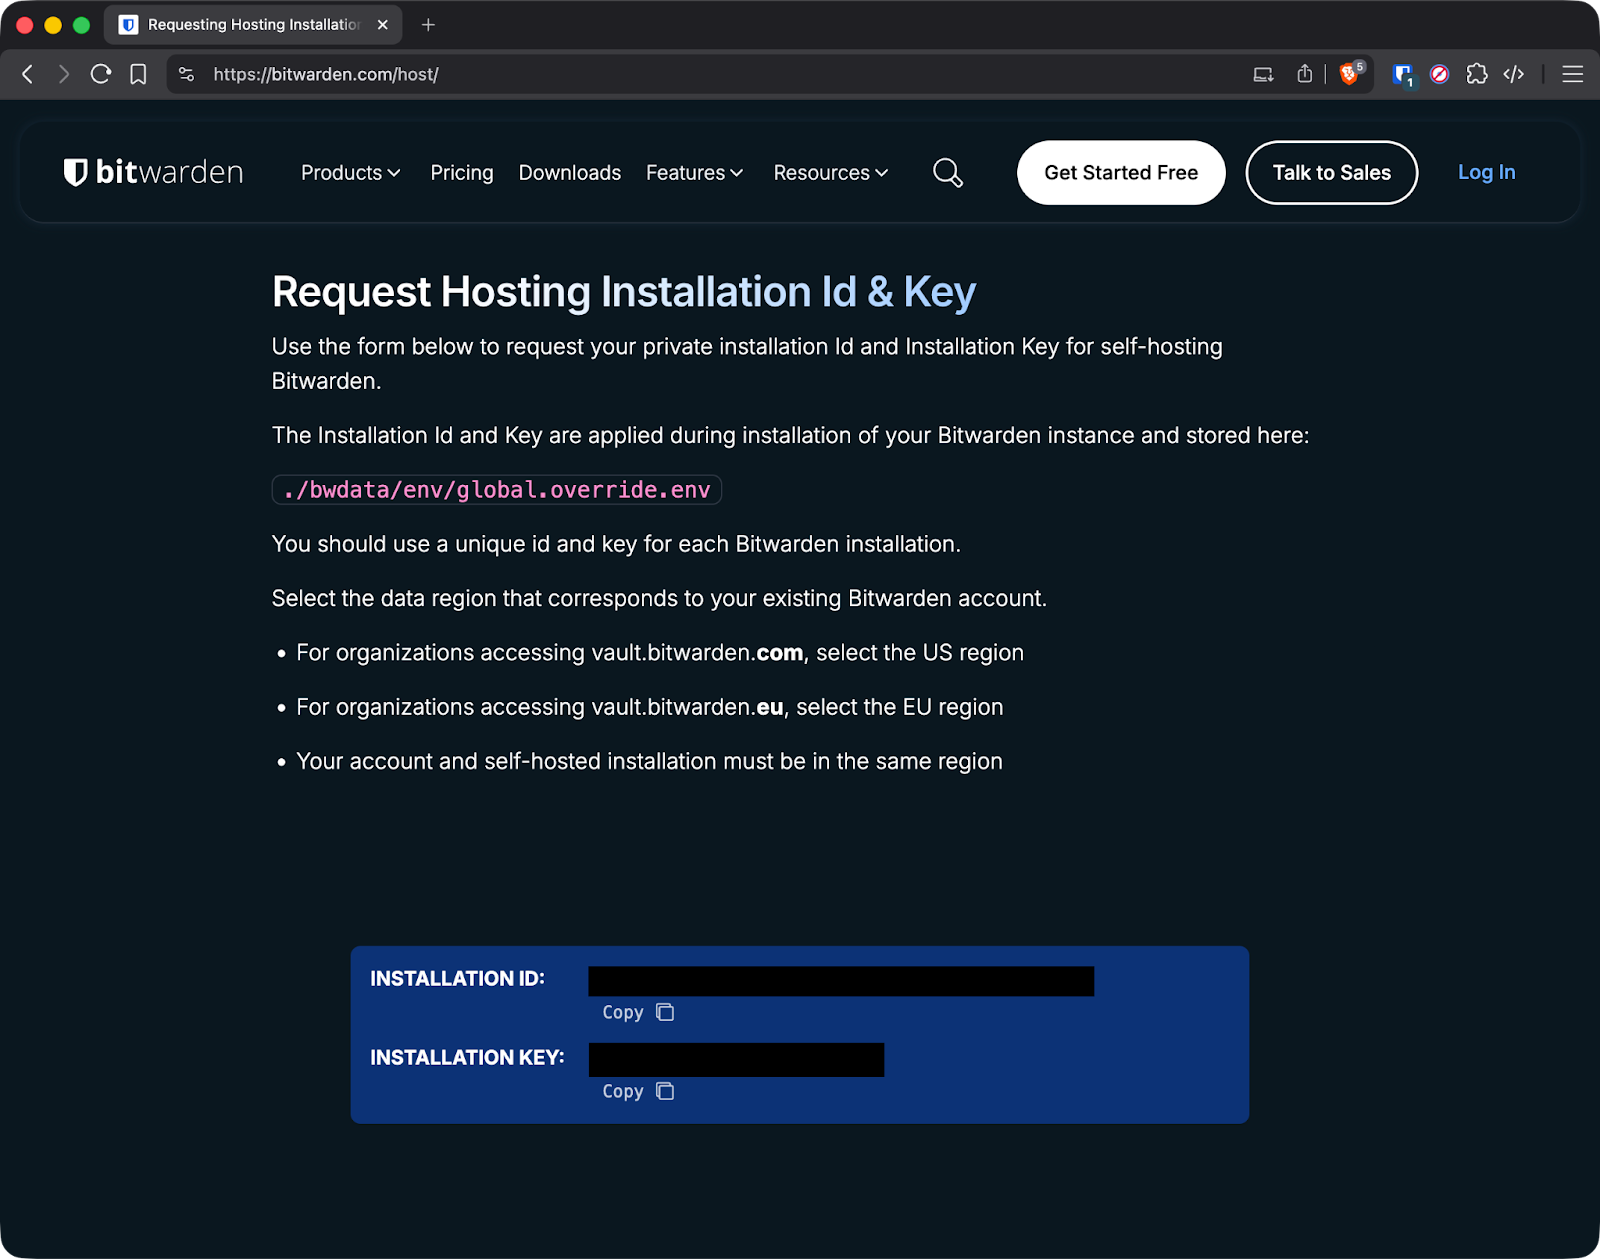
Bitwarden installation ID and key
And that’s it - installation is complete:
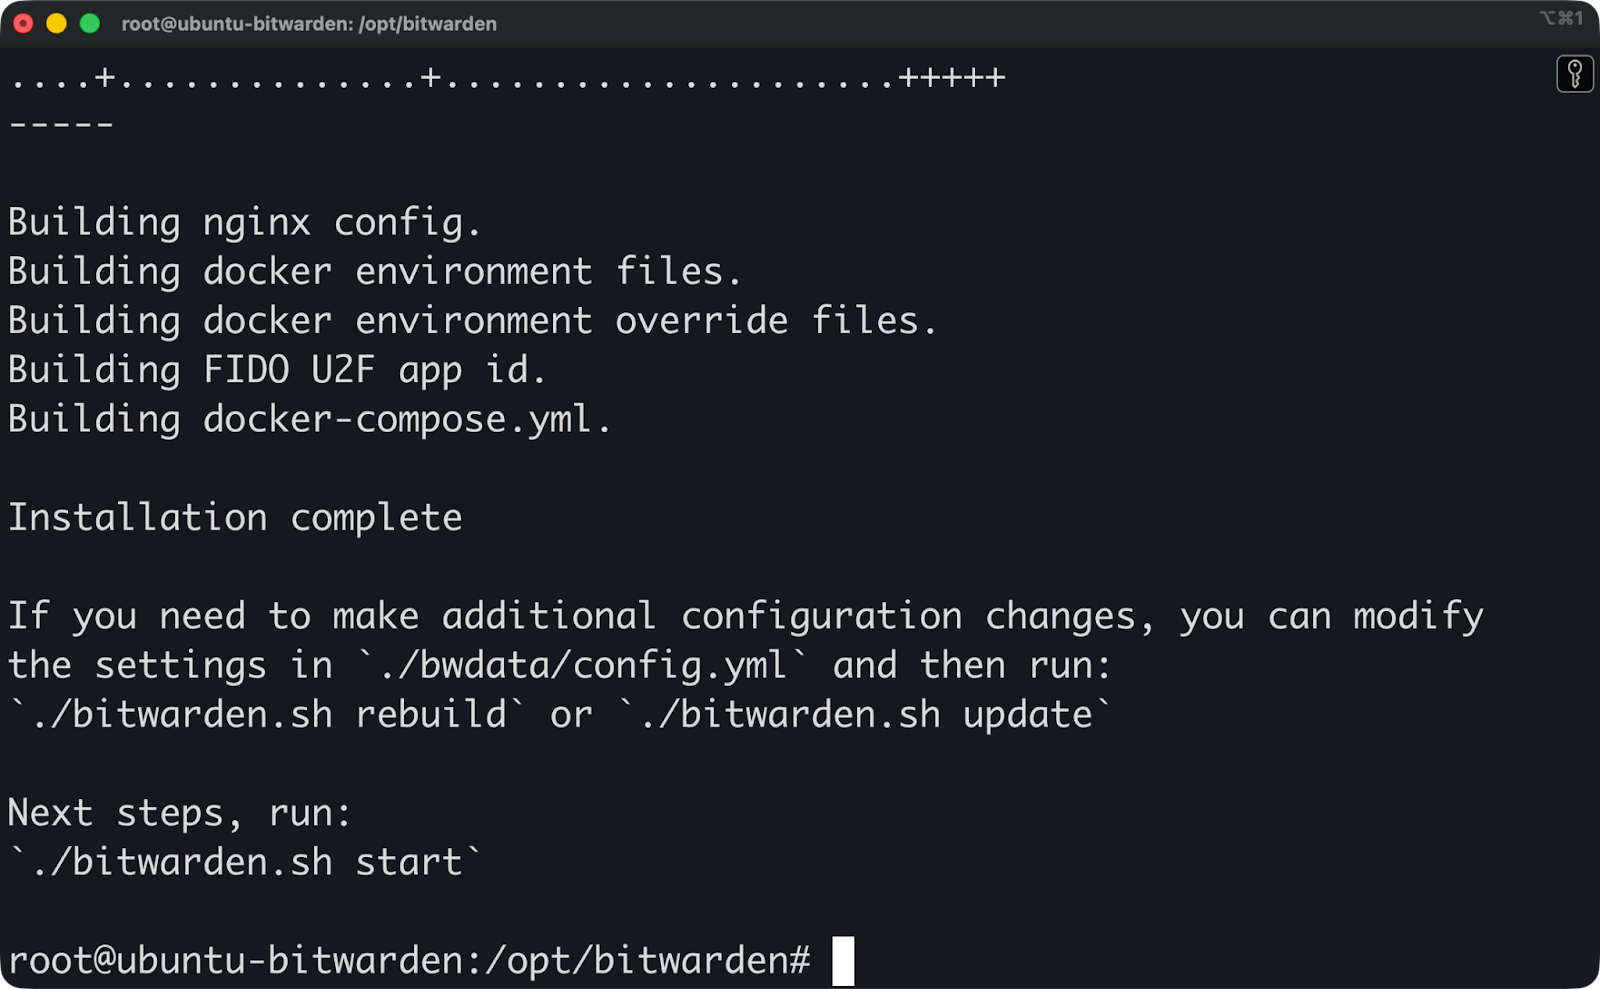
Bitwarden installation (3)
The script generates configuration files in ./bwdata/config.yml and ./bwdata/env/global.override.env. You can edit these files directly if you need to change settings later.
The only thing left to do now is to start Bitwarden:
sudo ./bitwarden.sh startDocker pulls all the required images and starts the containers. This takes a few minutes on the first run. The script shows progress as each container starts.
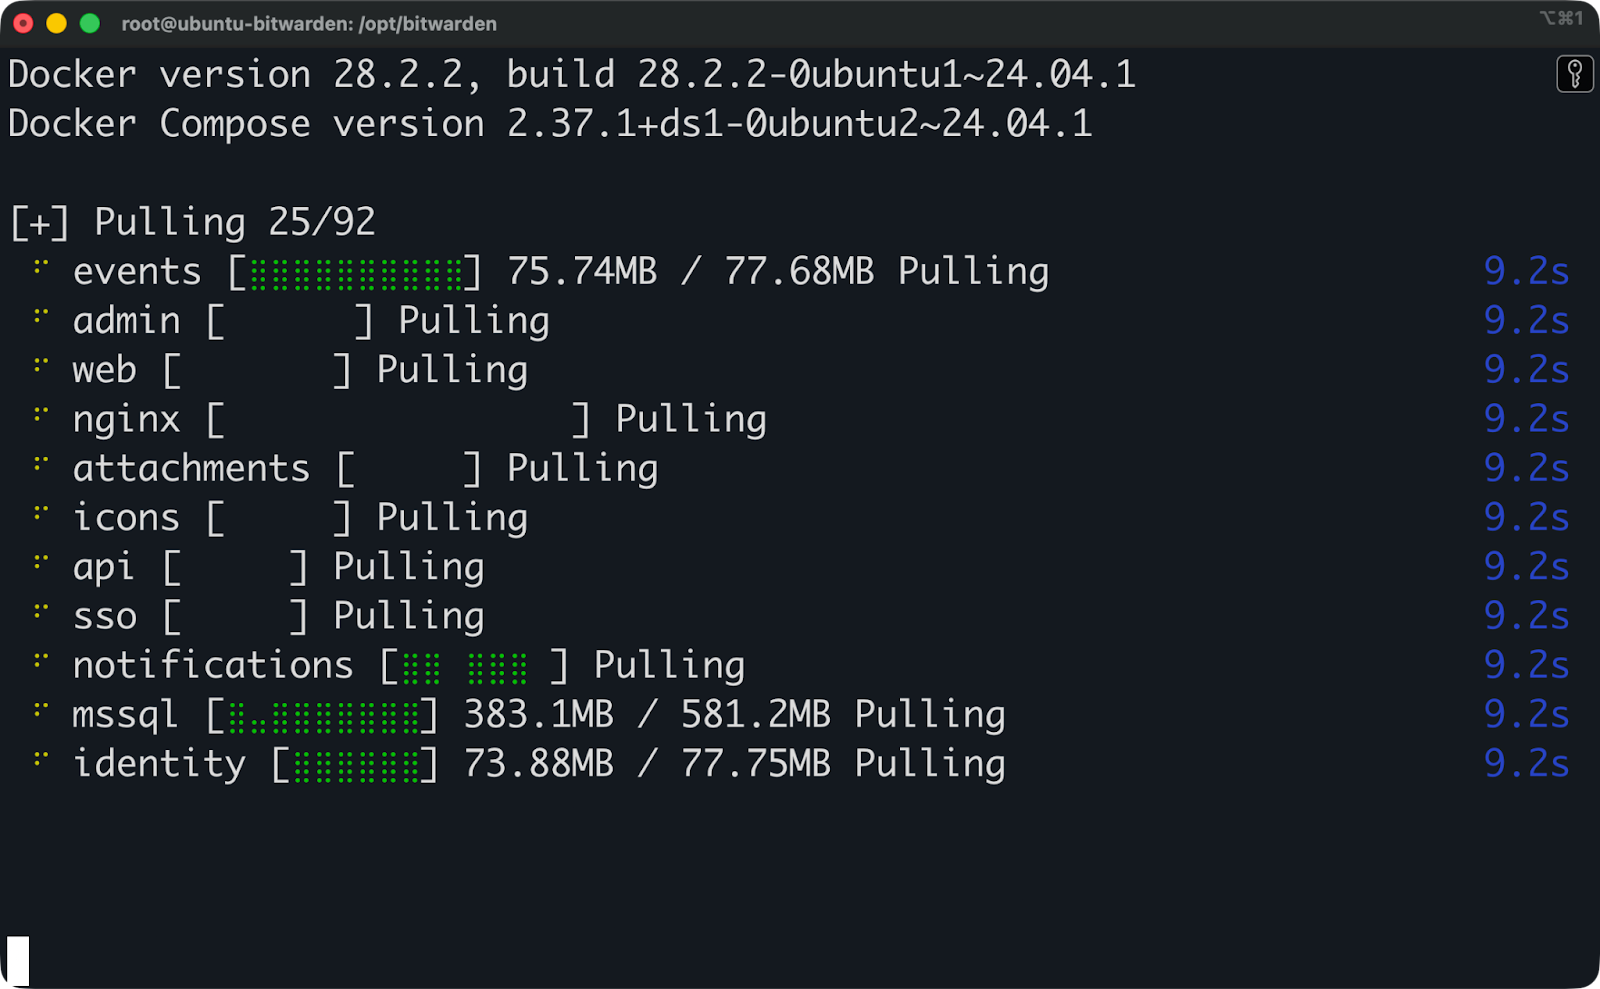
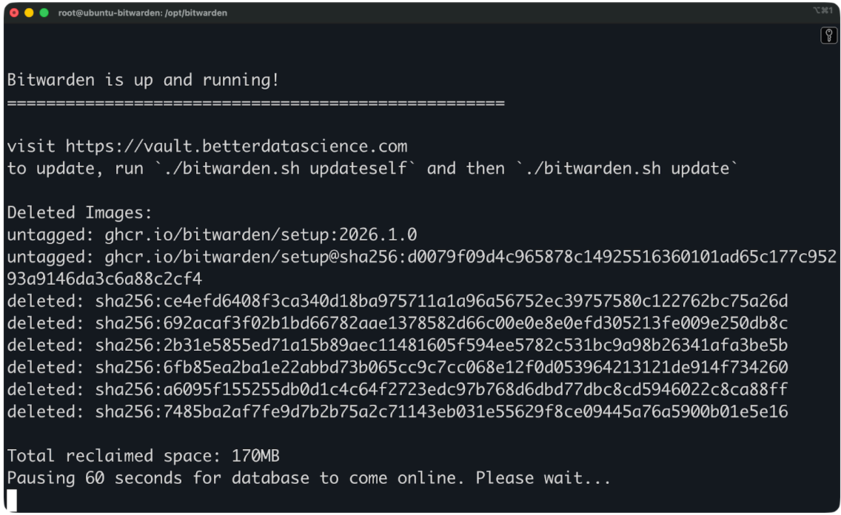
Bitwarden installation (4)
After a couple of minutes, you should see a message Bitwarden is up and running! printed in the terminal. This means the installation was successful, and you’re ready to proceed to the next section.
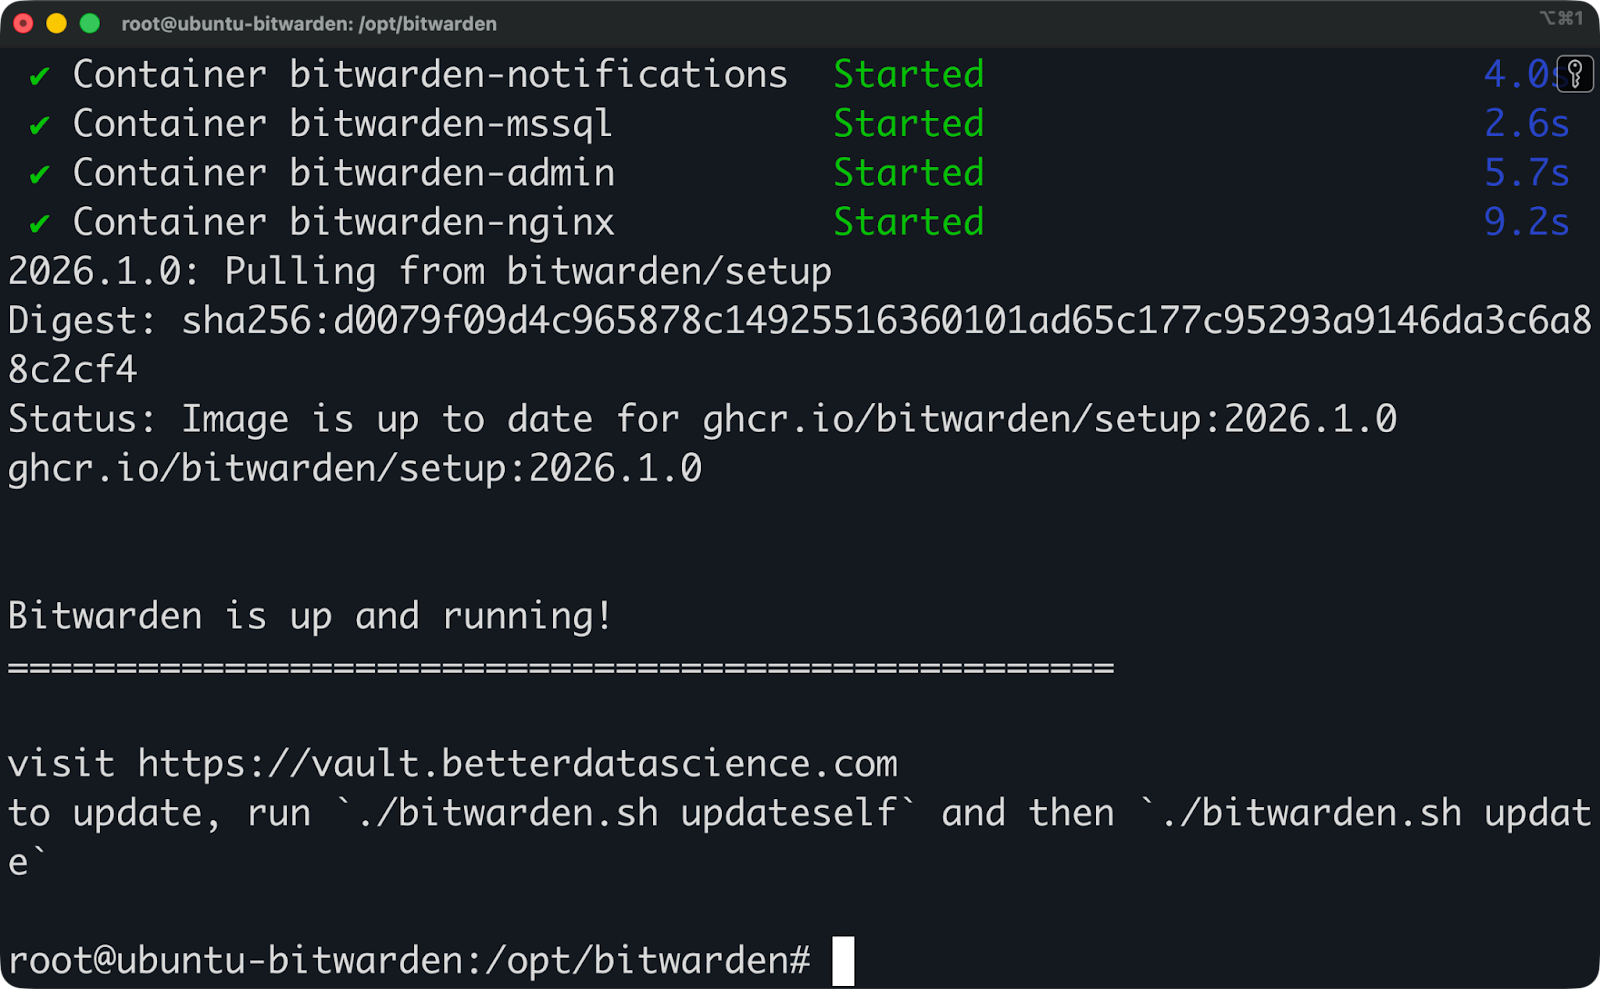
Bitwarden installation (5)
Open your domain in a browser. You should see the Bitwarden login page with a valid HTTPS certificate.
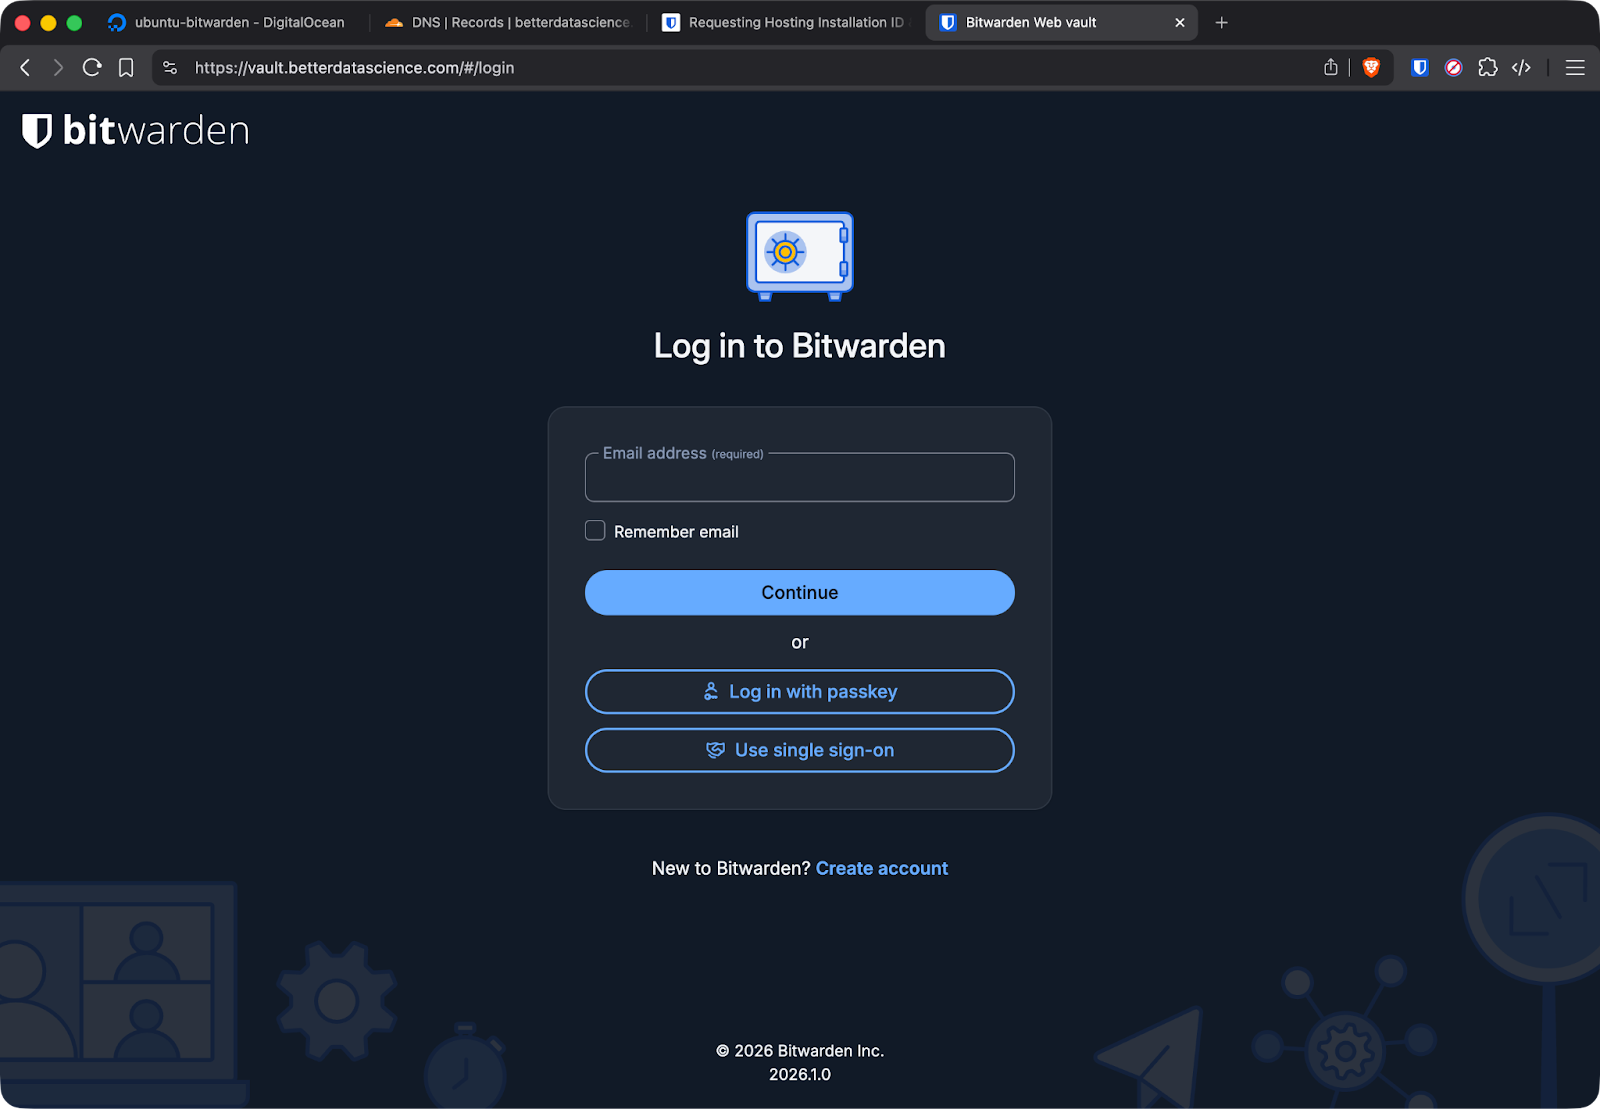
Bitwarden login page
If you see a certificate warning, Let's Encrypt probably couldn't verify your domain. Check that:
Click "Create Account" to set up your first user. This account becomes your vault's owner, so use a strong master password you won't forget. Bitwarden can't recover this password - if you lose it, your vault data is gone.
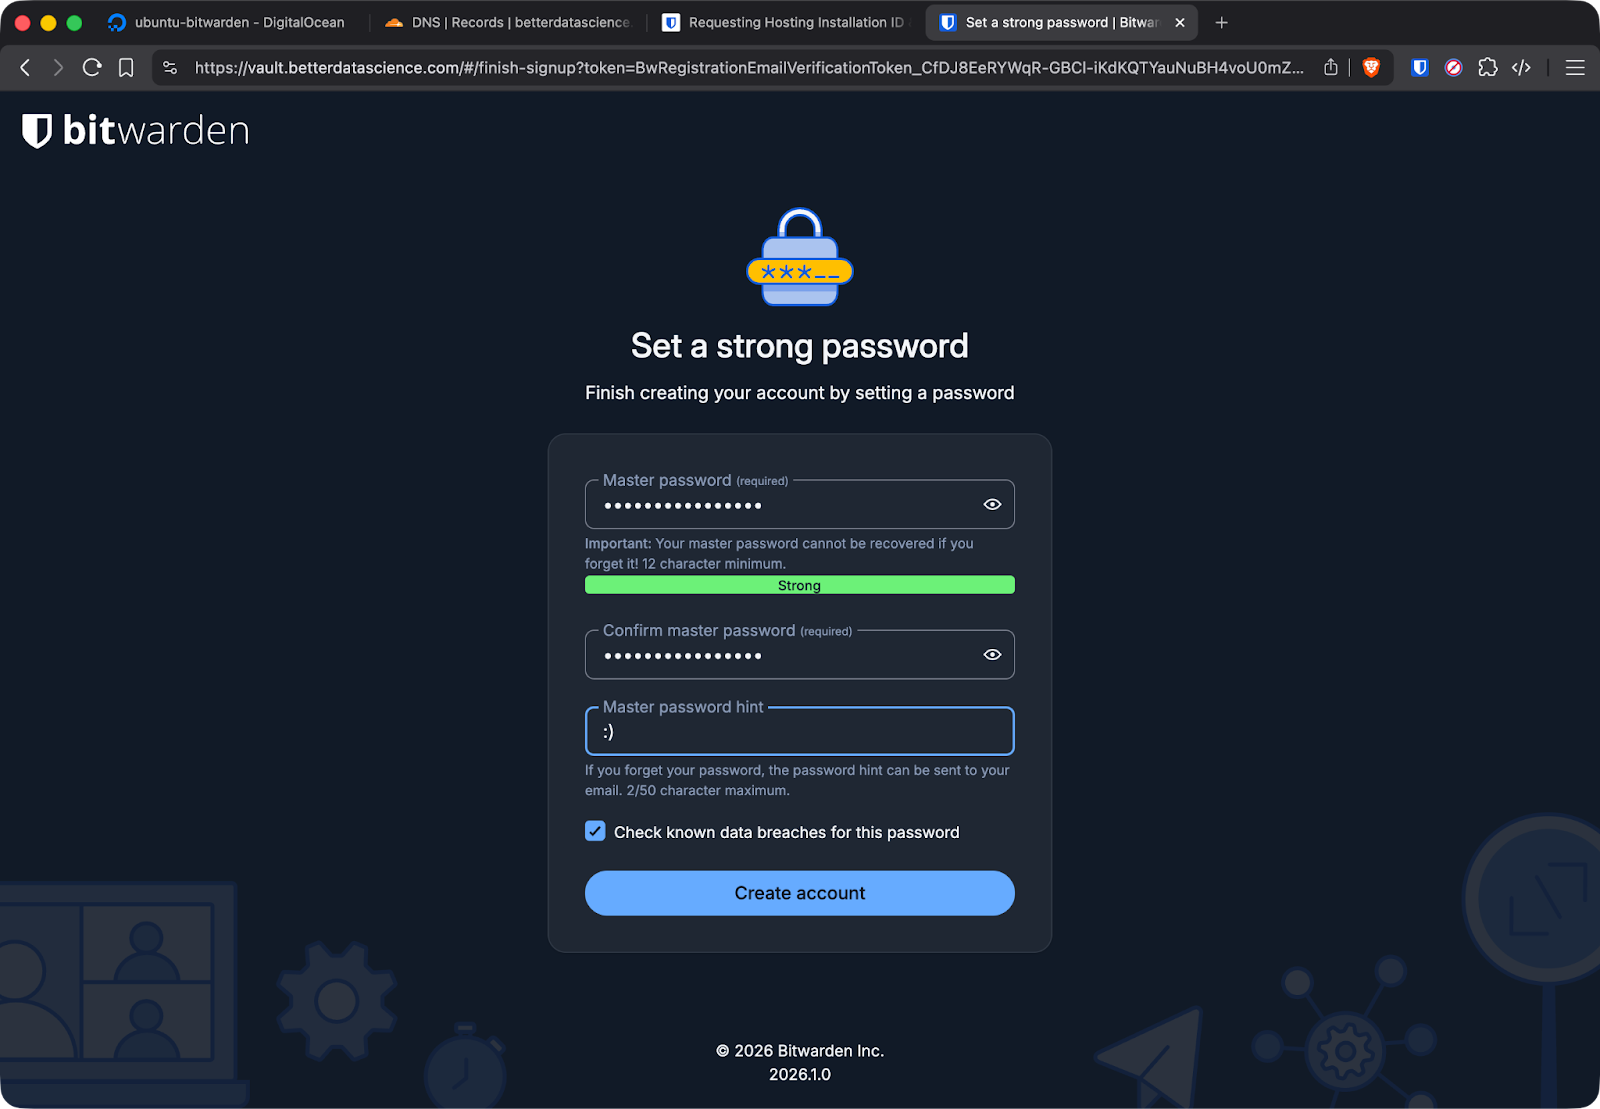
Bitwarden user creation
After creating your account, log in to verify everything works. You can create a test login item and make sure it saves correctly.
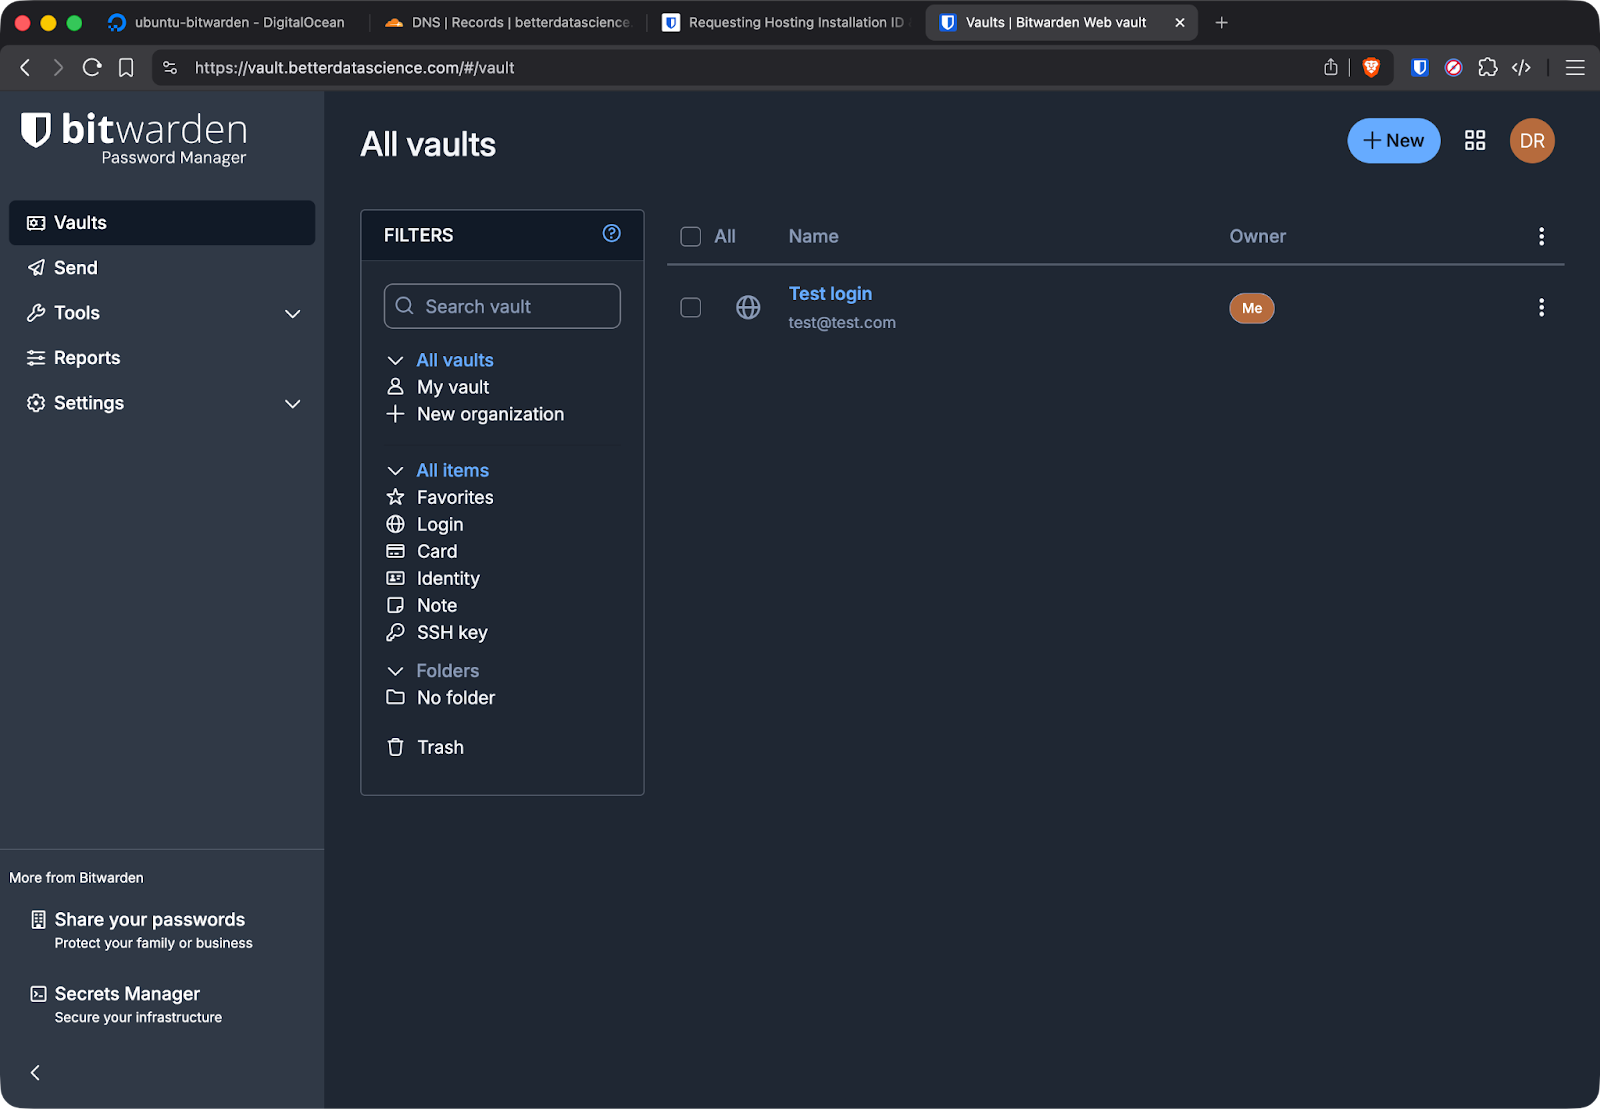
Adding a login item to Bitwarden
This works as expected, so next, I’ll go back to the terminal to verify everything works well there too.
Run this command to check that all containers are running:
sudo docker psYou should see multiple containers with names like bitwarden-web, bitwarden-api, bitwarden-db, and others.
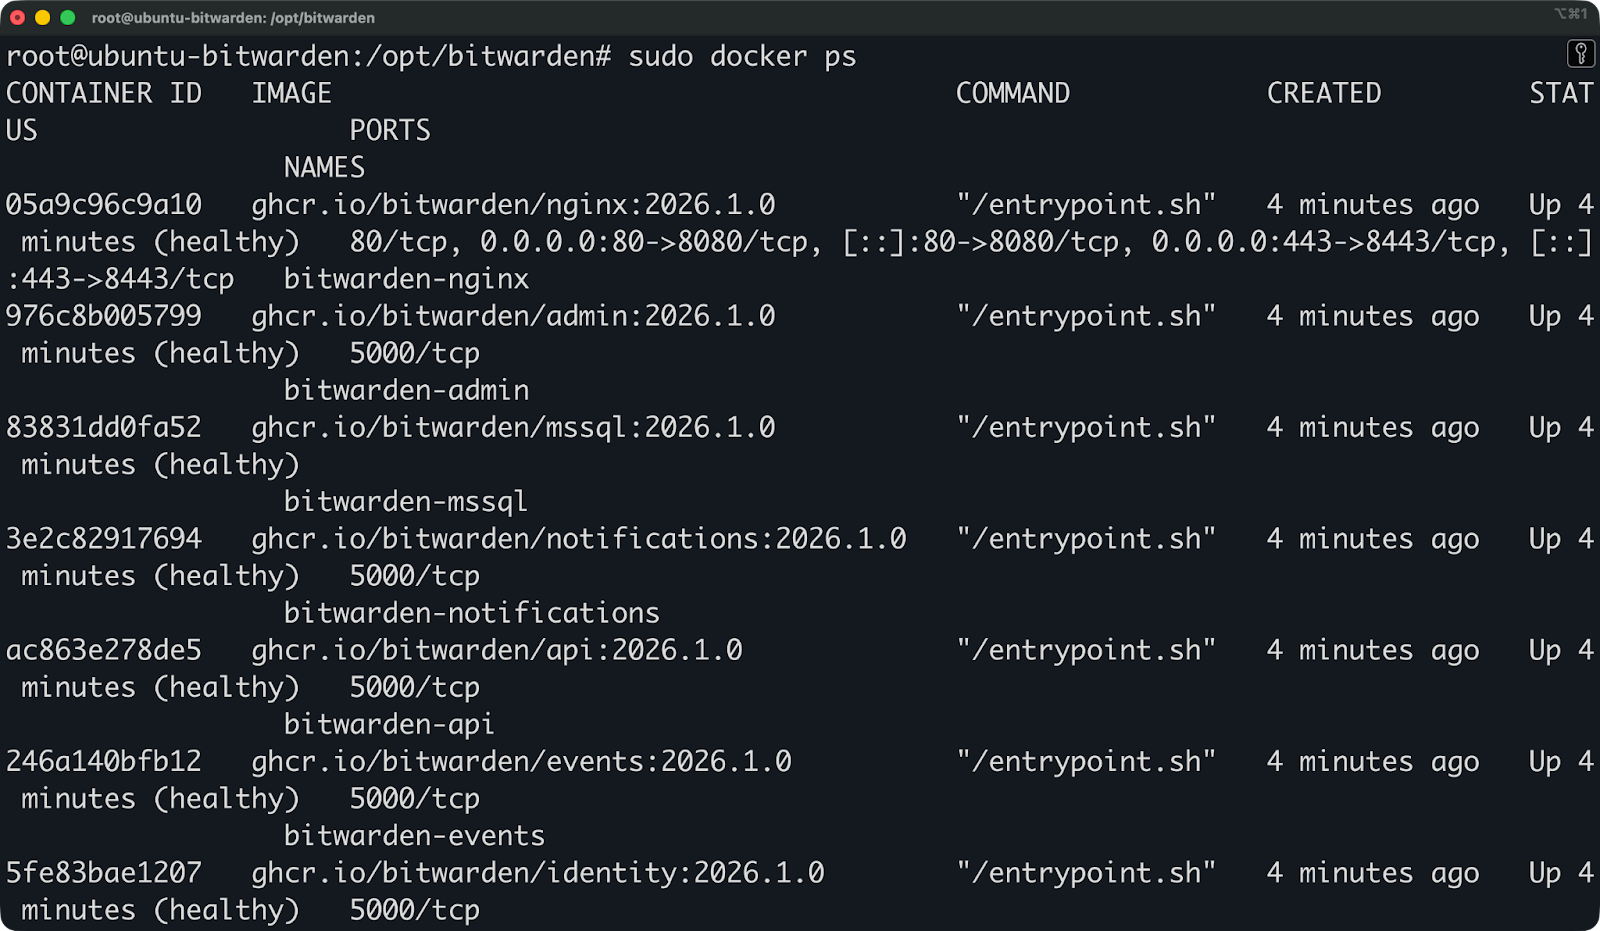
Running containers
If any containers show as "Restarting" or aren't listed, check the logs with these commands:
sudo docker logs bitwarden-api
sudo docker logs bitwarden-web
If you have any startup issues, these are typically due to port conflicts or permission issues.
Port conflicts happen if something else is using ports 80 or 443. Stop the conflicting service or change Bitwarden's ports in ./bwdata/config.yml.
Database initialization failures usually mean permissions issues. Check that the Docker user can write to the bwdata directory:
sudo chown -R root:root /opt/bitwarden/bwdata
sudo chmod -R 755 /opt/bitwarden/bwdata
Certificate generation failures mean Let's Encrypt couldn't reach your server. Verify your domain points to the right IP and that your firewall allows incoming traffic on ports 80 and 443.
If containers keep restarting, check available disk space and memory. Bitwarden needs at least 2GB of RAM to run all its services.
Bitwarden requires HTTPS for all connections. There's no way to run it over plain HTTP.
Bitwarden's browser extensions and mobile apps refuse to connect to HTTP endpoints. The protocol itself requires encrypted connections to protect your vault data in transit.
The installation script sets up Let's Encrypt certificates. Let's Encrypt is a free certificate authority that issues SSL/TLS certificates and handles renewals. When you entered your domain during installation, the script configured automatic certificate generation through Let's Encrypt's ACME protocol.
Certificates expire after 90 days, but Bitwarden's Docker setup includes automatic renewal. A cron job checks for expiring certificates and renews them before they expire. You don't need to do anything manually.
Custom certificates make sense in a few situations. If you're running Bitwarden behind a reverse proxy that already handles SSL termination, you can disable Let's Encrypt and let the proxy manage certificates. If your organization has an internal certificate authority, you can configure Bitwarden to use those certificates instead.
To use custom certificates, edit ./bwdata/config.yml and set ssl_certificate_path and ssl_key_path to your certificate files.
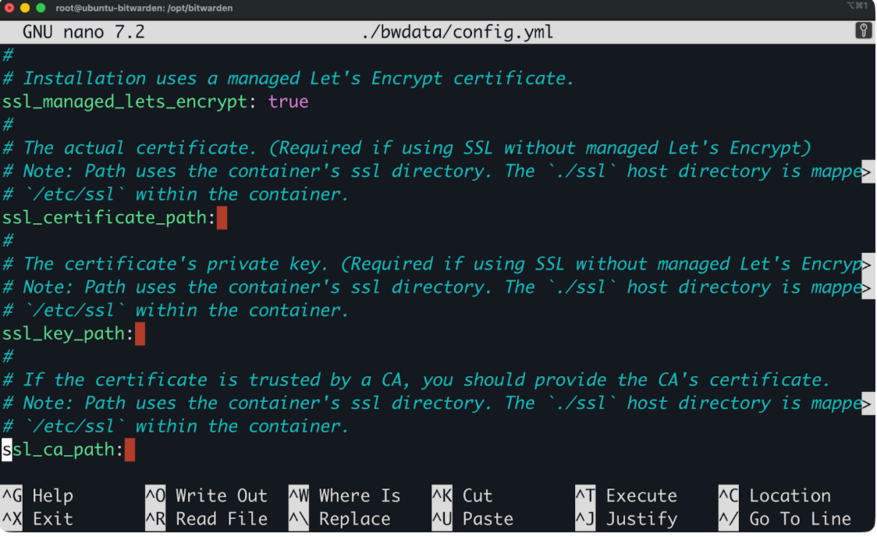
Using custom certificates
Then restart Bitwarden:
sudo ./bitwarden.sh restartWhen certificate renewal fails, you should first check the logs:
sudo docker logs bitwarden-nginxCommon renewal failures happen when:
Fix the underlying issue, then manually trigger renewal:
sudo docker exec bitwarden-nginx certbot renewIf that succeeds, the automatic renewal cron job should work on future attempts.
Bitwarden needs email to send user invitations, password reset links, and two-factor authentication codes.
Without SMTP configured, users can't reset their passwords. You can't invite team members to your organization. Emergency access requests won't work. The system works, but you lose critical account recovery and user management features.
SMTP settings live in ./bwdata/env/global.override.env.
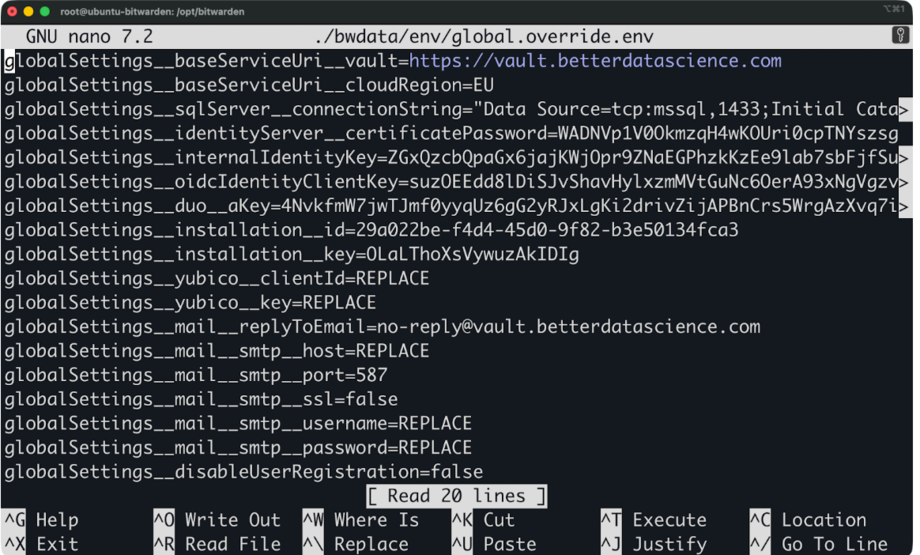
SMTP settings file
Open this file and add your email provider's configuration:
globalSettings__mail__replyToEmail=no-reply@yourdomain.com
globalSettings__mail__smtp__host=smtp.gmail.com
globalSettings__mail__smtp__port=587
globalSettings__mail__smtp__ssl=false
globalSettings__mail__smtp__username=your-email@gmail.com
globalSettings__mail__smtp__password=your-app-password
The format uses double underscores to represent nested configuration. Each __ separates a level in the settings hierarchy.
After editing the file, don’t forget to restart Bitwarden:
sudo ./bitwarden.sh restartTest email delivery by requesting a password reset or sending a test email through the admin panel.
Here are some common SMTP mistakes you’ll want to avoid:
Using your regular email password instead of an app-specific password. Most providers require you to generate a dedicated password for SMTP access. Gmail calls these "App Passwords," and you create them in your Google account security settings.
Wrong port numbers. Port 587 handles STARTTLS connections, port 465 handles SSL/TLS, and port 25 is usually blocked by cloud providers. If one port doesn't work, try another.
SSL/TLS confusion. Set ssl=false for STARTTLS on port 587, or ssl=true for direct SSL on port 465. Mixing these settings causes connection failures.
Firewall blocking outbound SMTP. Some cloud providers block outbound port 25 by default. Use ports 587 or 465 instead, which are rarely blocked.
If emails aren't sending, check the API container logs:
sudo docker logs bitwarden-apiLook for SMTP connection errors or authentication failures. The logs show exactly what went wrong with the email delivery.
With self-hosted installation comes the pain of manual backups and updates. Luckily, these are easy to do.
Before updating, stop Bitwarden and back up your data. Updates can fail or introduce issues, and you need a way to roll back if something goes wrong.
cd /opt/bitwarden
sudo ./bitwarden.sh stop
Back up the entire bwdata directory:
sudo tar -czf bitwarden-backup-$(date +%Y%m%d).tar.gz bwdata/Move this backup somewhere safe, like an external drive or different server.
Now update Bitwarden with this command:
sudo ./bitwarden.sh updateThe update script pulls the latest Docker images, updates configuration files if needed, and restarts all containers. This usually takes a few minutes.
Updating Bitwarden
After the update completes, verify everything works by logging into your web vault and checking that your data is intact.
If the update breaks something, simply restore your backup:
sudo ./bitwarden.sh stop
sudo rm -rf bwdata/
sudo tar -xzf bitwarden-backup-YYYYMMDD.tar.gz
sudo ./bitwarden.sh startThe bwdata directory contains everything Bitwarden needs to run. You should back it up regularly.
This directory includes:
Stop Bitwarden before backing up to ensure data consistency:
sudo ./bitwarden.sh stop
sudo tar -czf bitwarden-backup-$(date +%Y%m%d).tar.gz bwdata/
sudo ./bitwarden.sh start
Store backups in multiple locations. Keep one on the server, one on a different machine, and one in cloud storage if possible.
To restore from backup, stop Bitwarden, delete the current bwdata directory, extract your backup, and restart. The process is the same as rolling back from a failed update.
You can even automate backups with a cron job that runs daily or weekly, depending on how often your vault data changes.
Even with a clean installation, you can run into issues. Here's how to diagnose the most common ones.
Port conflicts happen when another service is already using ports 80 or 443. Check what's using these ports:
sudo netstat -tlnp | grep ':80\\|:443'If you see Apache, Nginx, or another web server running, you need to either stop that service or change Bitwarden's ports. To change ports, edit ./bwdata/config.yml and set http_port and https_port to different values like 8080 and 8443. Then restart:
sudo ./bitwarden.sh restartCertificate failures show up as browser warnings or Bitwarden refusing to start. Check the nginx container logs with this command:
sudo docker logs bitwarden-nginxLook for ACME challenge failures or certificate validation errors. Here are the most common causes:
Fix the DNS or firewall issue, then manually request certificates:
sudo docker exec bitwarden-nginx certbot renew --force-renewalContainers not starting usually means database problems or missing files. Check which containers are running by running this:
sudo docker ps -aContainers in "Exited" or "Restarting" status have problems. Check their logs:
sudo docker logs bitwarden-db
sudo docker logs bitwarden-api
Database initialization errors mean the bwdata directory has permission issues. Fix permissions:
sudo chown -R root:root /opt/bitwarden/bwdata
sudo chmod -R 755 /opt/bitwarden/bwdata
If containers still won't start, check disk space:
df -hRemember that Bitwarden needs at least a few GB of free space to run properly.
SMTP not working prevents password resets and user invitations. Test your SMTP settings first by checking the API logs when you try to send an email:
sudo docker logs -f bitwarden-apiTrigger a password reset attempt and watch for SMTP errors in the logs. Here are the most common issues:
You can verify your SMTP settings in ./bwdata/env/global.override.env match your provider's documentation exactly. Even small typos in the hostname or port break email delivery.
After fixing SMTP settings, restart Bitwarden and test again.
Vaultwarden is an unofficial, community-maintained implementation of the Bitwarden server written in Rust.
It's not affiliated with Bitwarden Inc., but it's compatible with all official Bitwarden clients. You use the same browser extensions, mobile apps, and desktop applications. The difference is entirely on the server side.
Use official Bitwarden if you want enterprise support, guaranteed compatibility with all features, and backing from the company that builds the clients. The resource requirements matter less if you're on a properly sized VPS.
Go with Vaultwarden if you're running on constrained hardware, want a simpler setup, or need premium features without paying. Just understand you're trading official support for resource efficiency.
Both work well for self-hosting, and both protect your passwords with the same encryption the clients expect.
Stating the obvious, but Bitwarden stores your passwords, so you’ll want protection beyond just encryption. Here are some best practices to follow.
Keep your server updated. Security patches matter, so run updates regularly. Here’s a command for doing so:
sudo apt update && sudo apt upgrade -yYou can set up automatic security updates so critical patches are installed without manual intervention. On Ubuntu, install unattended-upgrades:
sudo apt install unattended-upgrades -y
sudo dpkg-reconfigure --priority=low unattended-upgrades
Restrict access to the admin panel. Bitwarden's admin interface lives at /admin and uses a separate admin token for authentication. Generate a strong token during installation and store it somewhere safe. Don't expose the admin panel to the public internet if you can avoid it.
If you need remote admin access, use SSH tunneling or a VPN instead of leaving /admin publicly accessible.
Use HTTPS everywhere. Never disable HTTPS or bypass certificate warnings. If your certificates aren't working, fix them rather than working around the problem. Bitwarden clients refuse to connect over HTTP for good reason.
Monitor Bitwarden releases. Subscribe to Bitwarden's GitHub releases or check their blog for security updates. When a new version drops, read the release notes before updating to understand what changed.
Enable two-factor authentication on your vault account. Even if someone steals your master password, 2FA blocks unauthorized access. Use an authenticator app or hardware key.
Use a firewall. For reference, here’s how you can configure UFW to only allow necessary ports:
sudo ufw allow 22/tcp
sudo ufw allow 80/tcp
sudo ufw allow 443/tcp
sudo ufw enable
Block everything else by default.
Check logs occasionally for unusual activity. Look for failed login attempts or unexpected API calls:
sudo docker logs bitwarden-api | grep -i "failed\\|error"As you can see, self-hosted Bitwarden means you’ll have to do some work every now and then. That’s the price of full control.
Docker makes self-hosting Bitwarden easy and you don’t need enterprise infrastructure.
The official installation script does everything for you. You get automatic updates, certificate management, and a working vault in under an hour - it took me roughly 15 minutes to set up, including compute instance provisioning and DNS setup. Most users never need anything more than what I covered in this article.
Start with the basic setup on a single server. Get comfortable with backups, updates, and basic troubleshooting before adding reverse proxies, external databases, or high availability setups. Those advanced configurations solve problems you probably don't have yet.
If you don’t want to trust third parties with your passwords, this is the way to go. But it’s also important not to overcomplicate the setup and break something. Run the official Docker deployment, back it up regularly, and you've got a solid password manager under your control.
Are you ready to learn more about Docker? Start with our Containerization and Virtualization Concepts course and then see it in action with Docker and Kubernetes.
Learn Docker with DataCamp
Course
Course
Course
Tutorial
Dario Radečić
Tutorial
Nic Raboy
Tutorial
Dario Radečić
Tutorial
Dario Radečić
Tutorial
Benito Martin
Tutorial
Dario Radečić