
Track
Git Fundamentals
7 hr
If you've got half-finished work that isn't ready to commit, but you need to change contexts right now, don’t make a "WIP" commit. Also, don’t copy-paste you changes into a text file like it's 2005. git stash is all you need.
This command is a go-to way for preserving uncommitted work while you switch contexts. It lets you store changes temporarily, handle urgent tasks on other branches, and restore everything exactly where you left off.
In this article, I’ll walk you through how git stash pop works, when to use it over git stash apply, and how to recover when conflicts inevitably show up.
If you’re new to Git and find the concept of stashing confusing, make sure to master the fundamentals first. Our Introduction to Git and Introduction to GitHub courses will get you up and running in no time.
Git stash is your temporary storage for uncommitted changes.
Think of it as a clipboard for your work. You've got changes in your working directory that aren't ready to commit, but you need to switch branches or pull updates from remote. So instead of losing your work or making a WIP commit, you stash it.
The command saves your modifications and reverts your working directory to match the HEAD commit.
Stashing solves a simple problem: Git won't let you switch branches with uncommitted changes.
Let’s say you're working on a feature when a bug report comes in. You need to switch to another branch right now, but you've got half-written code and modified files. A commit doesn’t make sense because your work is incomplete. A forced checkout would lose your changes.
That's when you stash.
Here are the most common scenarios where stashing can help you:
Stashing is quick and reversible - no need to think about commit messages or branch names.
Git maintains stashes in a last-in, first-out (LIFO) stack.
Every time you stash, Git creates a new entry at the top of the stack. The most recent stash becomes stash@{0}, and older stashes shift down: stash@{1}, stash@{2}, and so on.
Under the hood, each stash is actually a commit - or more precisely, a set of commits. Git creates a multi-parent commit structure that stores:
This structure means stashes aren't just snapshots. They're full commits that Git can merge back into your working directory later.
You can reference stashes in two ways - by index using stash@{0} syntax, or by using git stash list to find the message you gave it and referencing that specific stash. The index is faster for recent stashes, but messages are better when you've got multiple stashes saved.
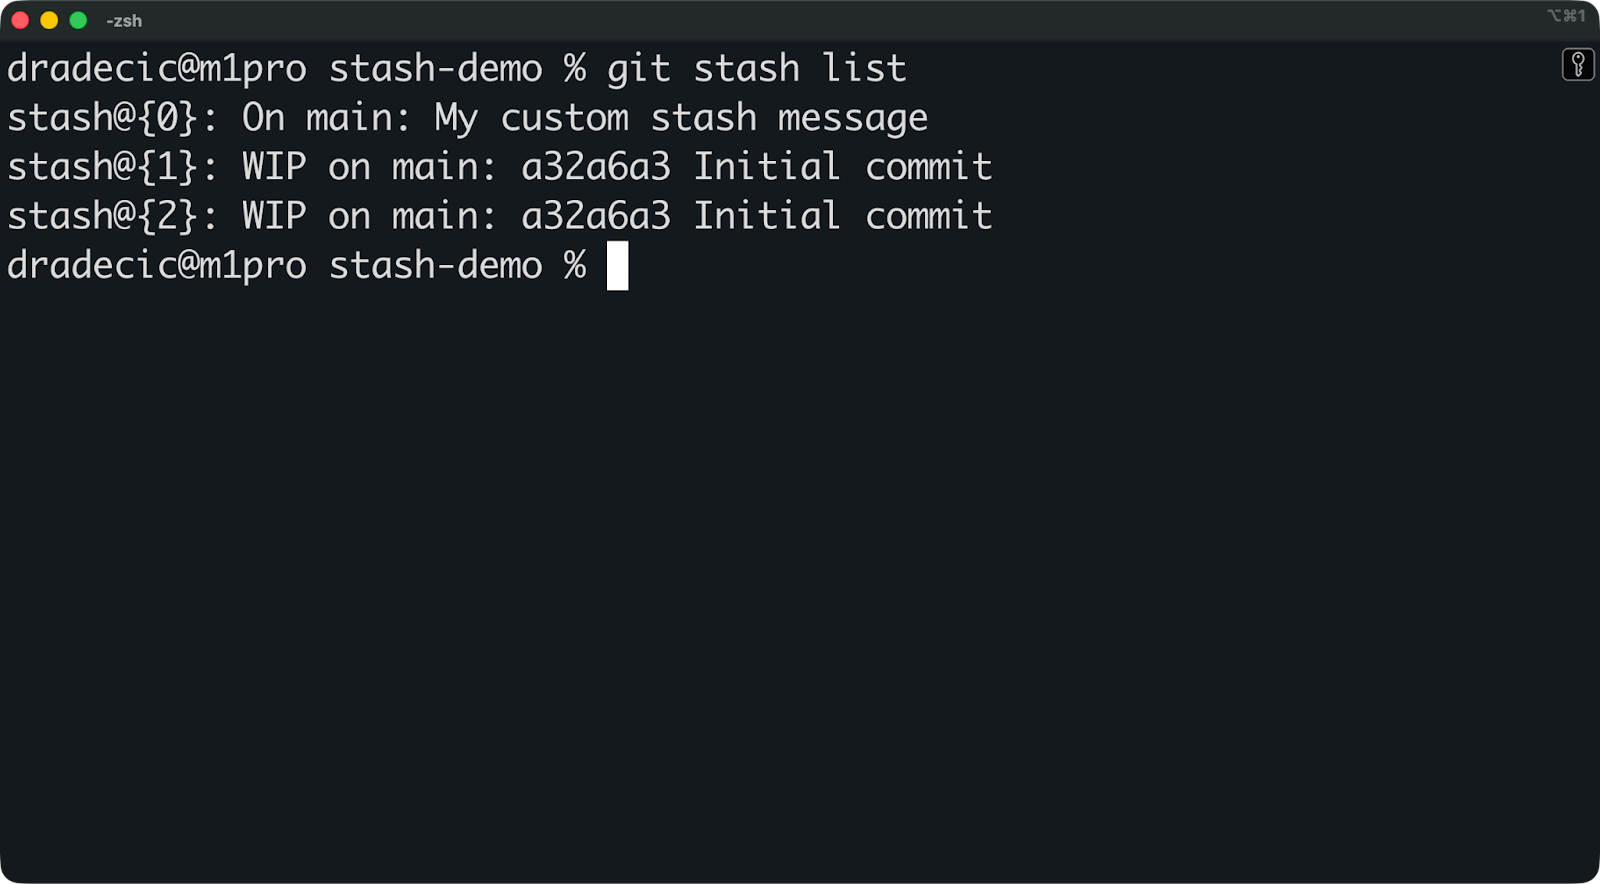
Here's what a typical stash stack looks like:
The WIP on prefix means you used git stash without a message. The On prefix means you provided a custom message with git stash push -m.
Stashes live in your local repository only - they don't get pushed to remote. This keeps your temporary work exactly where it belongs: on your machine, ready to restore when you need it.
The basic git stash command is enough to get you started, but it's lazy. You'll end up with a stack of "WIP on branch-name" entries that tell you nothing about what's inside. Six weeks later, you won't remember which stash contains the bug fix and which one has your half-finished refactor.
I’ll now show you how to do it right from the start.
The simplest way to stash is just typing git stash:
git stashThis saves your changes, but the "WIP on main" message isn’t too informative. You can't tell what's in there without inspecting it.
Instead, run git stash push -m with a descriptive message instead:
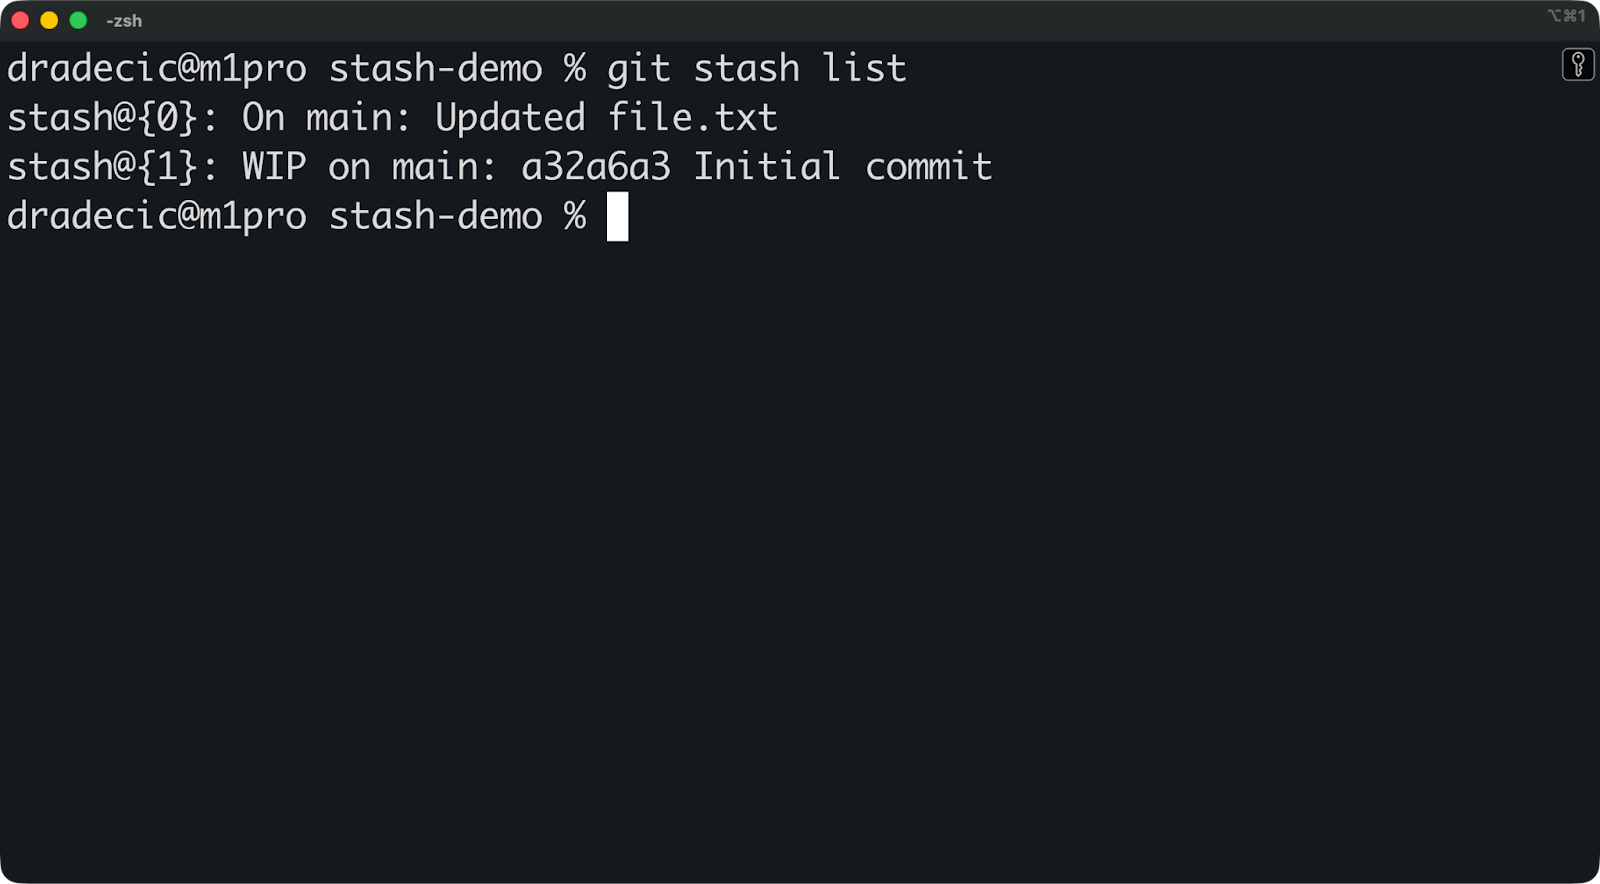
git stash push -m "Updated file.txt"Now your stash list is actually informative:
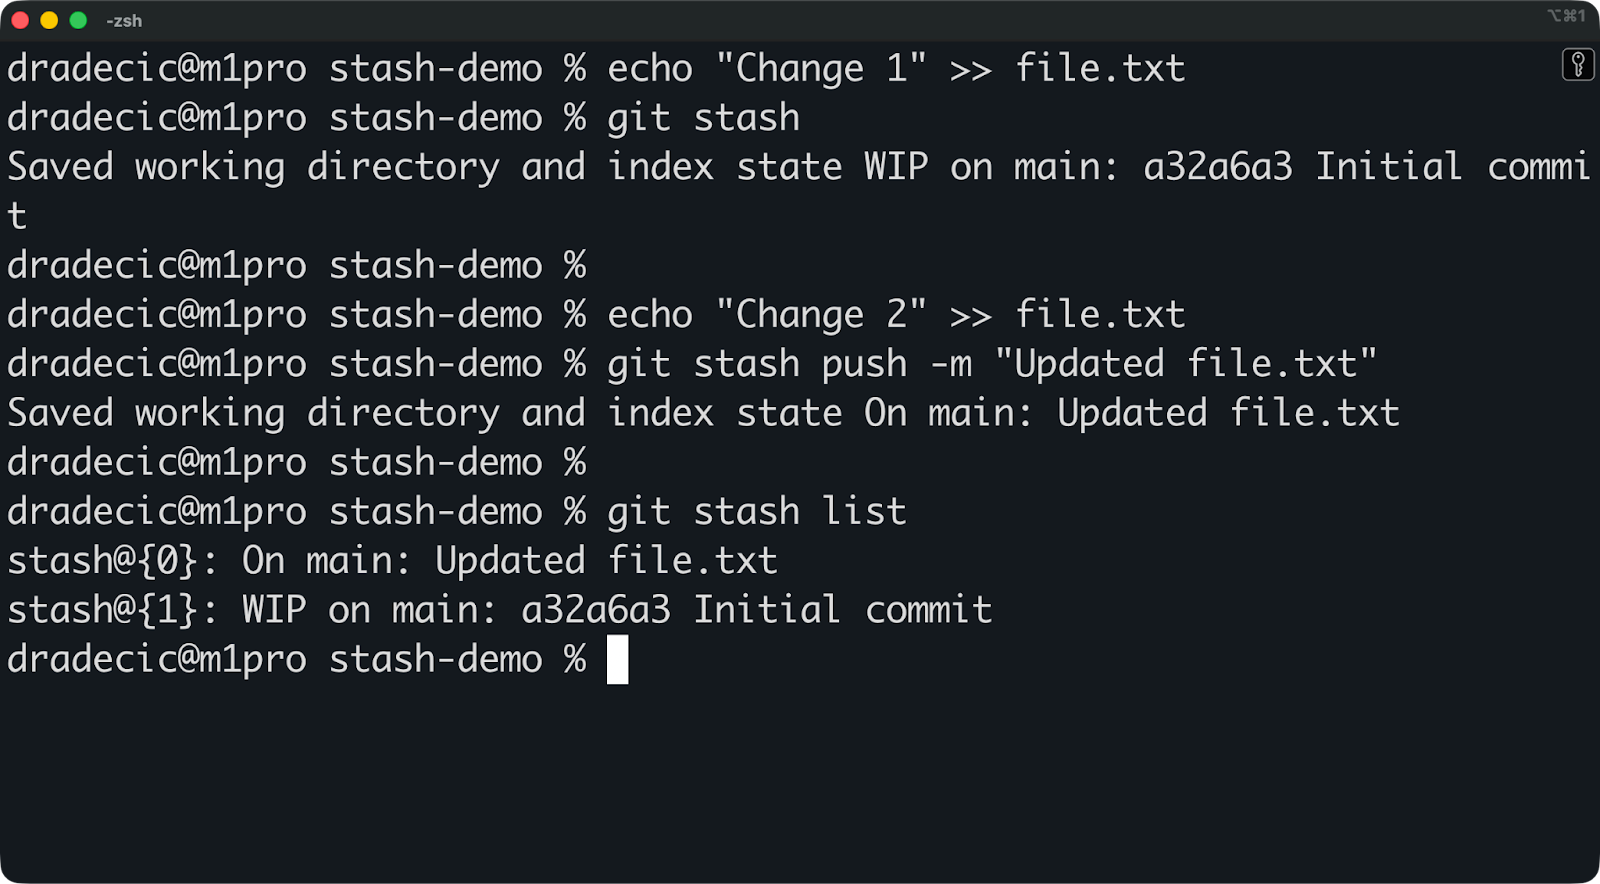
The difference is obvious. One entry tells you exactly what you did, while the other makes you guess.
Write messages like you're leaving notes for your future self. "Add auth logic," "Fix navbar bug," or "Experiment with new API design" beat generic WIP messages every time.
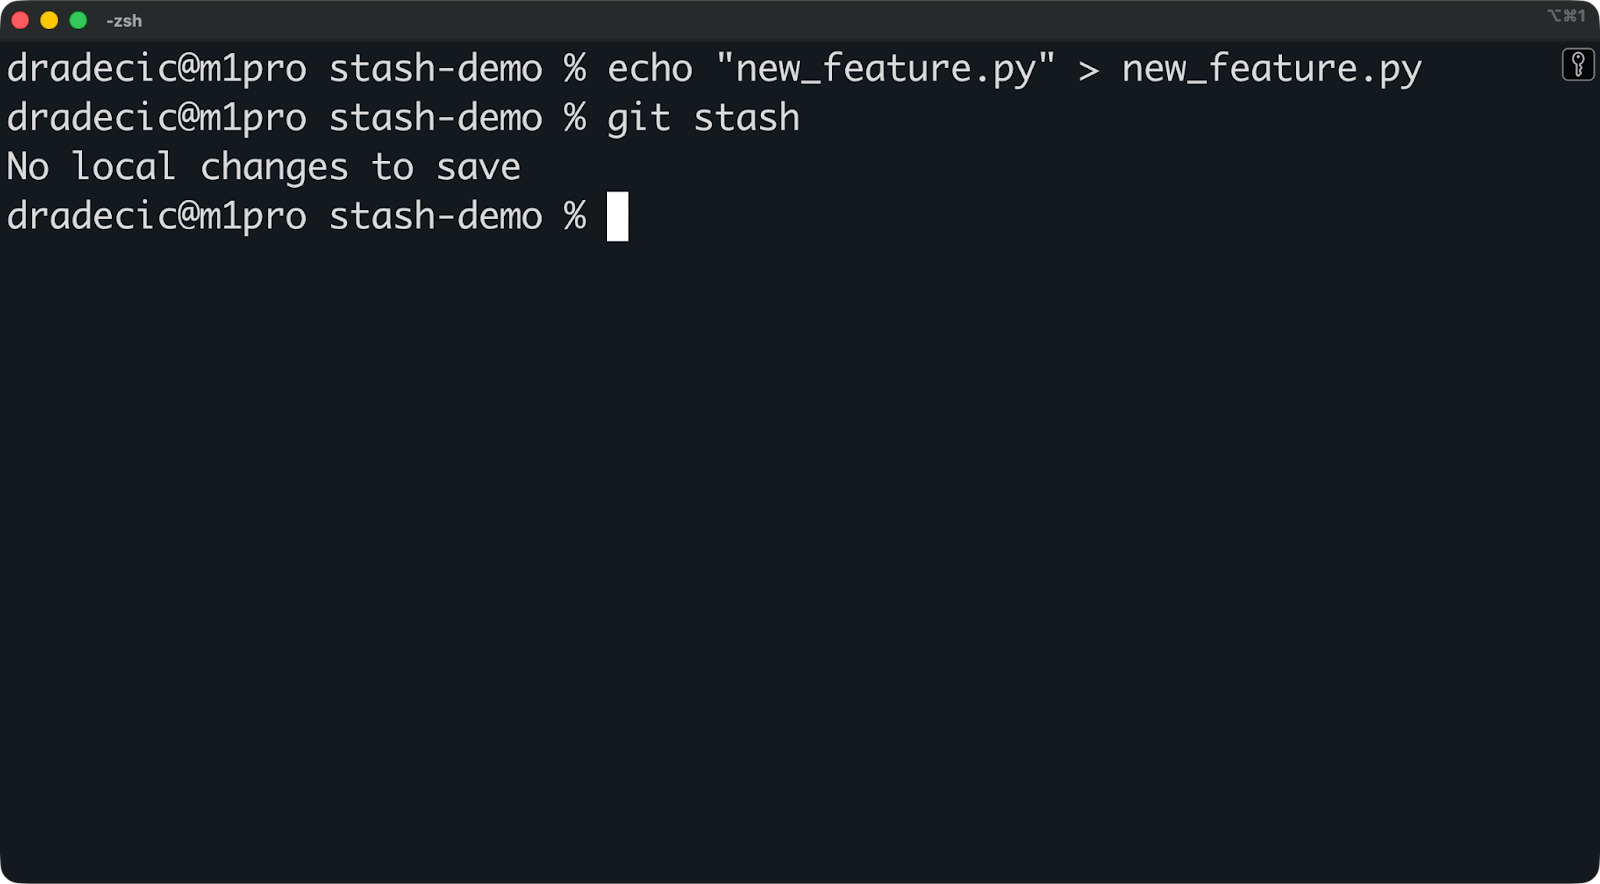
By default, git stash only saves tracked files - files Git already knows about.
Untracked files stay in your working directory. This catches people off guard when they stash, switch branches, and see their new files still sitting there.
Here's what happens:
echo "new_feature.py" > new_feature.py
git stash
The file didn't get stashed because Git isn't tracking it yet:
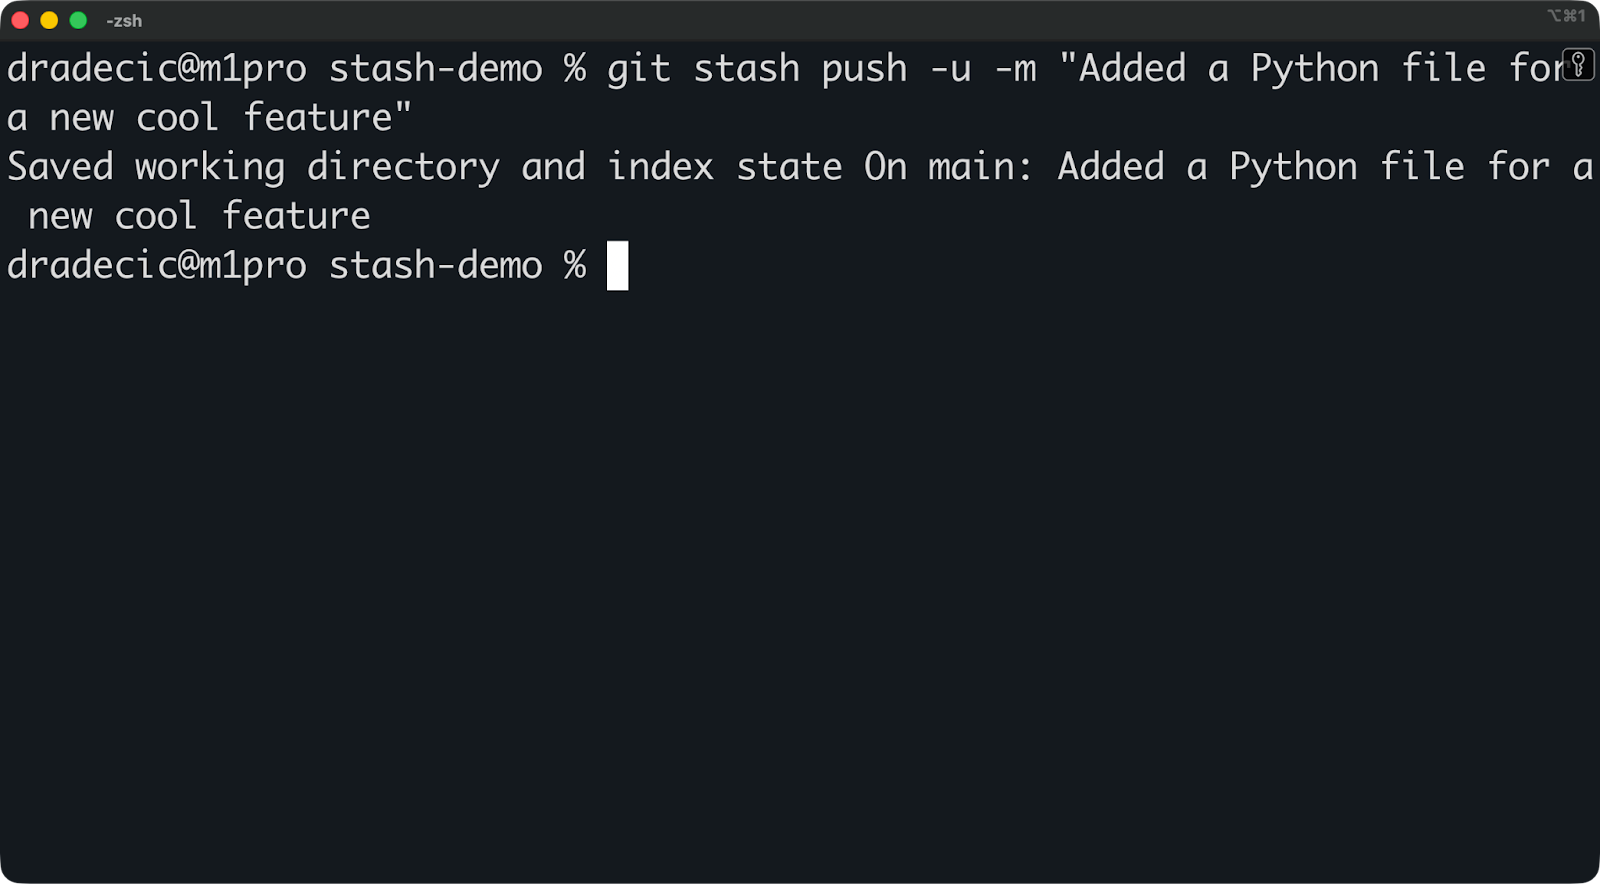
To get around this, use the -u flag to stash untracked files:
git stash push -u -m "Added a Python file for a new cool feature"This stashes both tracked and untracked files. Your working directory ends up completely clean.
Tip: You can add the -a flag to include ignored files too. It stashes tracked files, untracked files, and files in your .gitignore. You rarely need this unless you're debugging build issues or want to save a completely clean snapshot of everything.
Here’s a cheat sheet so you know when to use each flag:
No flag: You only changed existing files
u flag: You added new files that aren't tracked yet
a flag: You need to save everything, including build outputs or temp files
Most of the time, you'll use -u. It's the safest bet when you've created new files during development.
You don't have to stash everything in your working directory.
Say you've fixed two bugs, but you only want to stash one of them. Or you've got changes across five files, but only three are related to the feature you want to save.
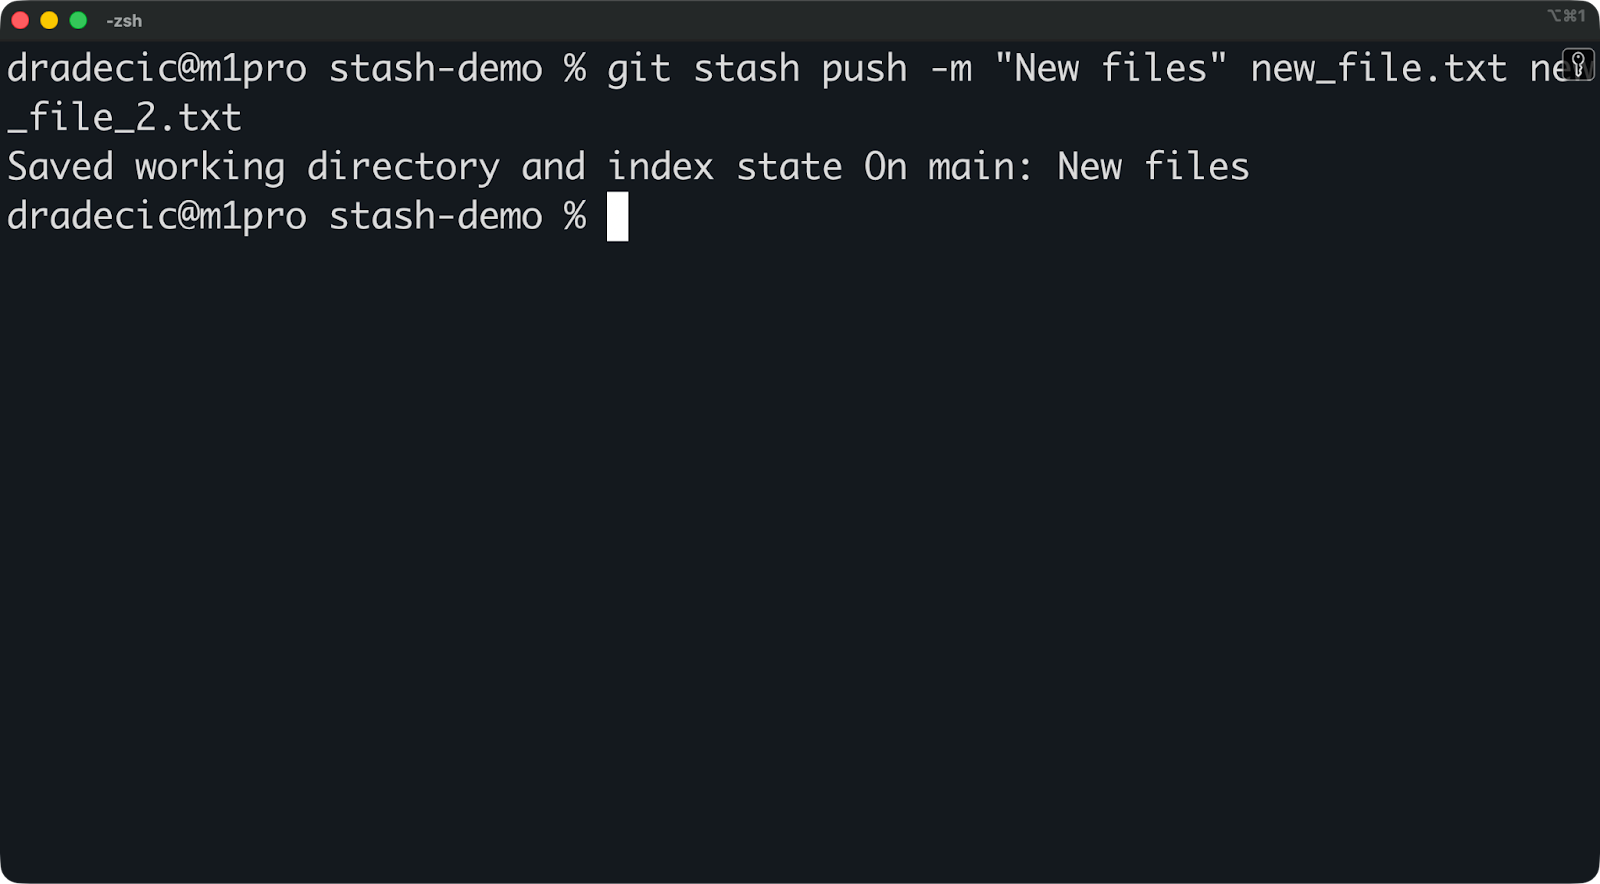
You can stash specific files with pathspec:
git stash push -m "New files" new_file.txt new_file_2.txtThis stashes only new_file.txt and new_file_2.txt. Everything else stays in your working directory.
You can also use wildcards:
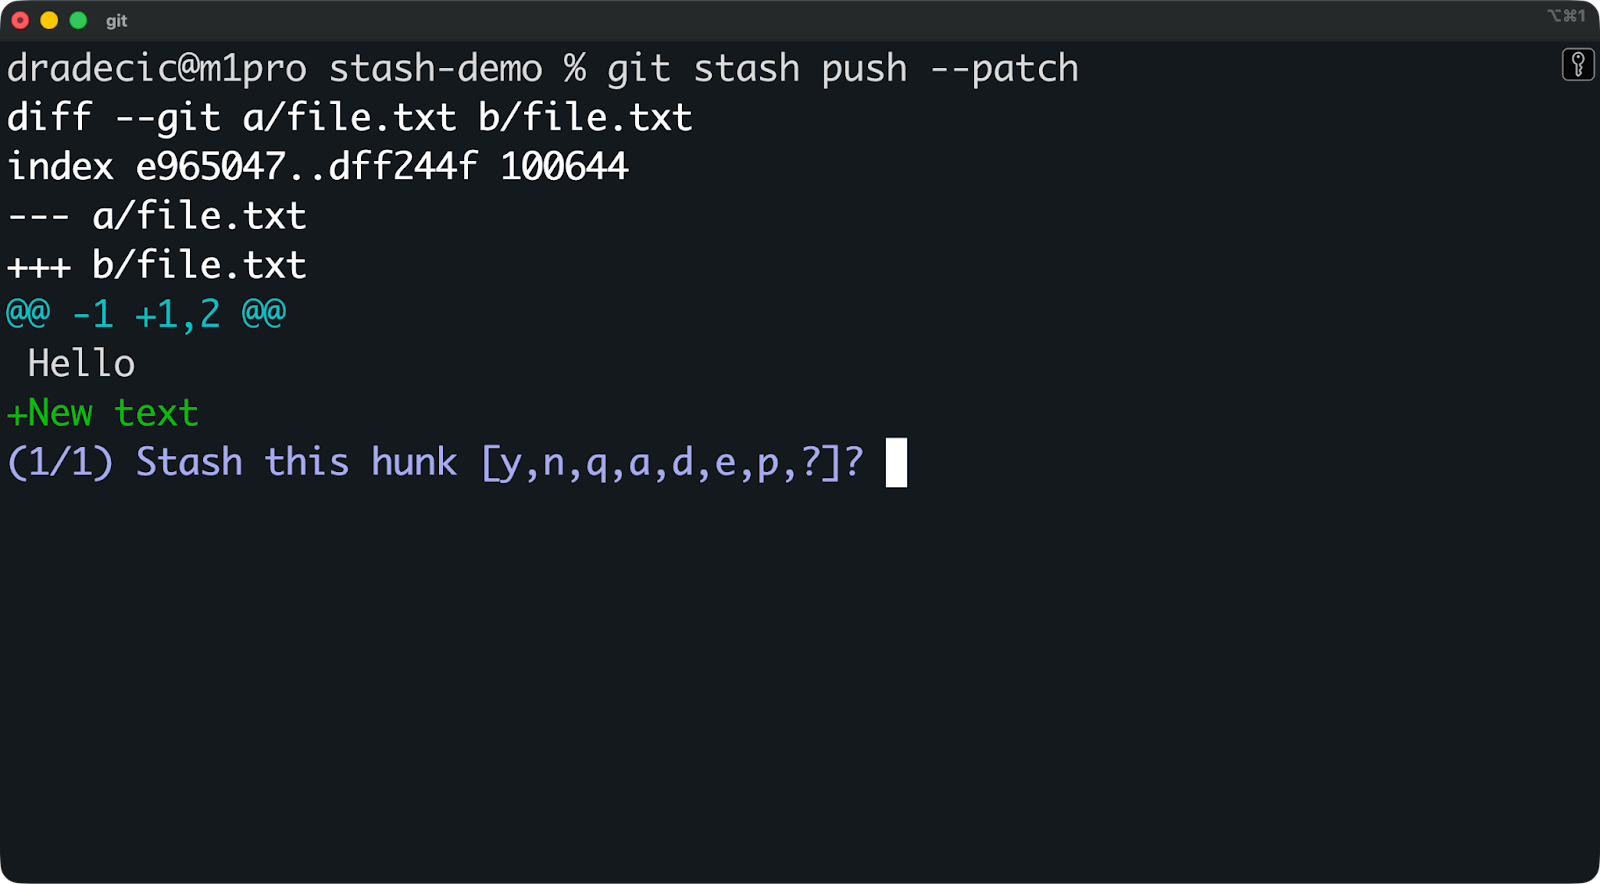
git stash push -m "Stash all txt files" *.txtOr, you can use --patch for interactive stashing:
git stash push --patchGit walks through each change and asks if you want to stash it. You answer y (yes), n (no), or s (split this hunk into smaller pieces).
This is handy when you've got related and unrelated changes mixed in the same file. You stash the feature work and leave the debug code behind.
Here's what the interactive prompt looks like:
As you’ve already seen, you can run git stash list to see everything you've stashed:
The most recent stash is always stash@{0}. Older stashes shift down the index.
If you wrote good messages, you can scan this list and know exactly what's in each stash. If you didn't, you'll need to inspect them one by one.
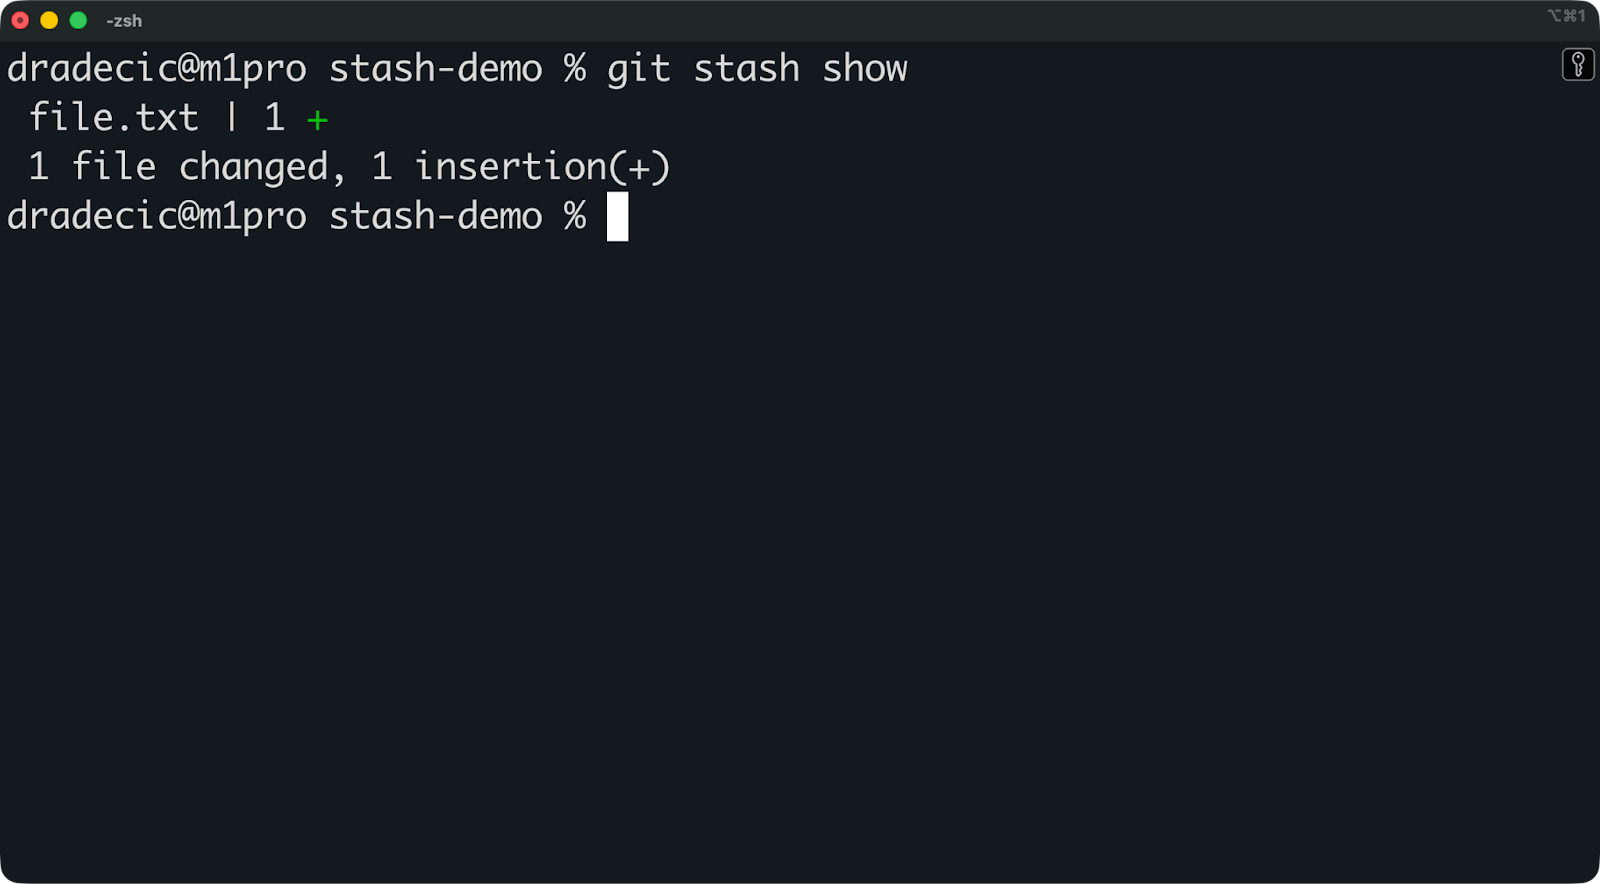
Use git stash show to see a summary:
This shows which files changed and how many lines were added or removed.
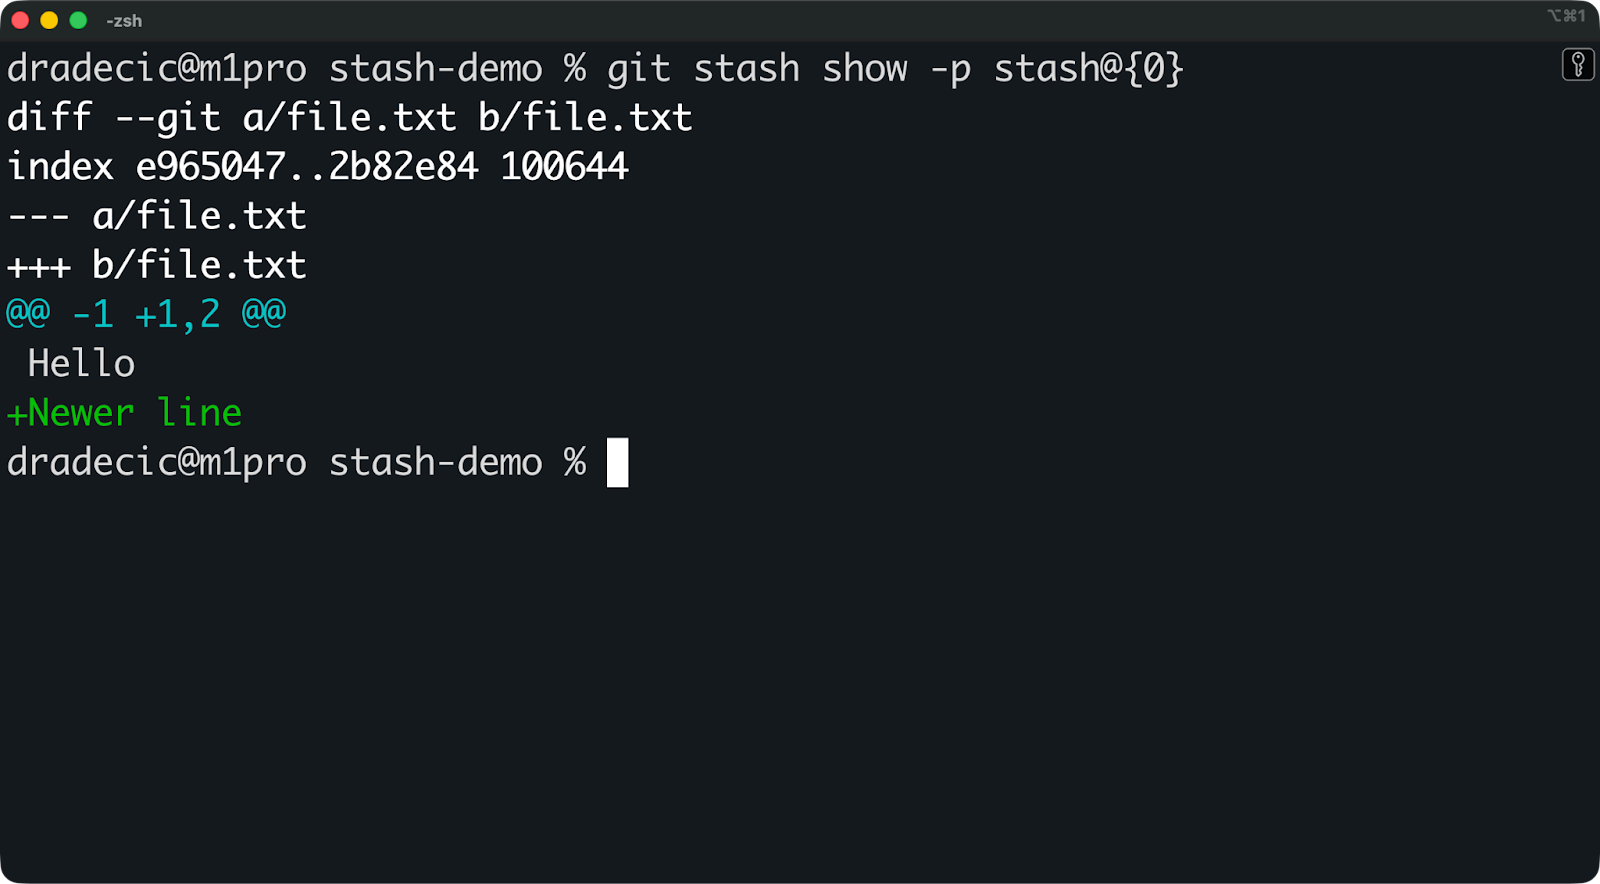
Alternatively, use git stash show -p to see the full difference:
The -p flag shows you the actual code changes, just like git diff. This is how you confirm you're popping the right stash before you run git stash pop.
Now let's talk about what git stash pop actually does and why you'd use it.
The git stash pop command does two things: it applies your stashed changes and then deletes that stash from the stack.
Here's the basic syntax:
git stash popThis pops the most recent stash (stash@{0}) and removes it from your stash list.
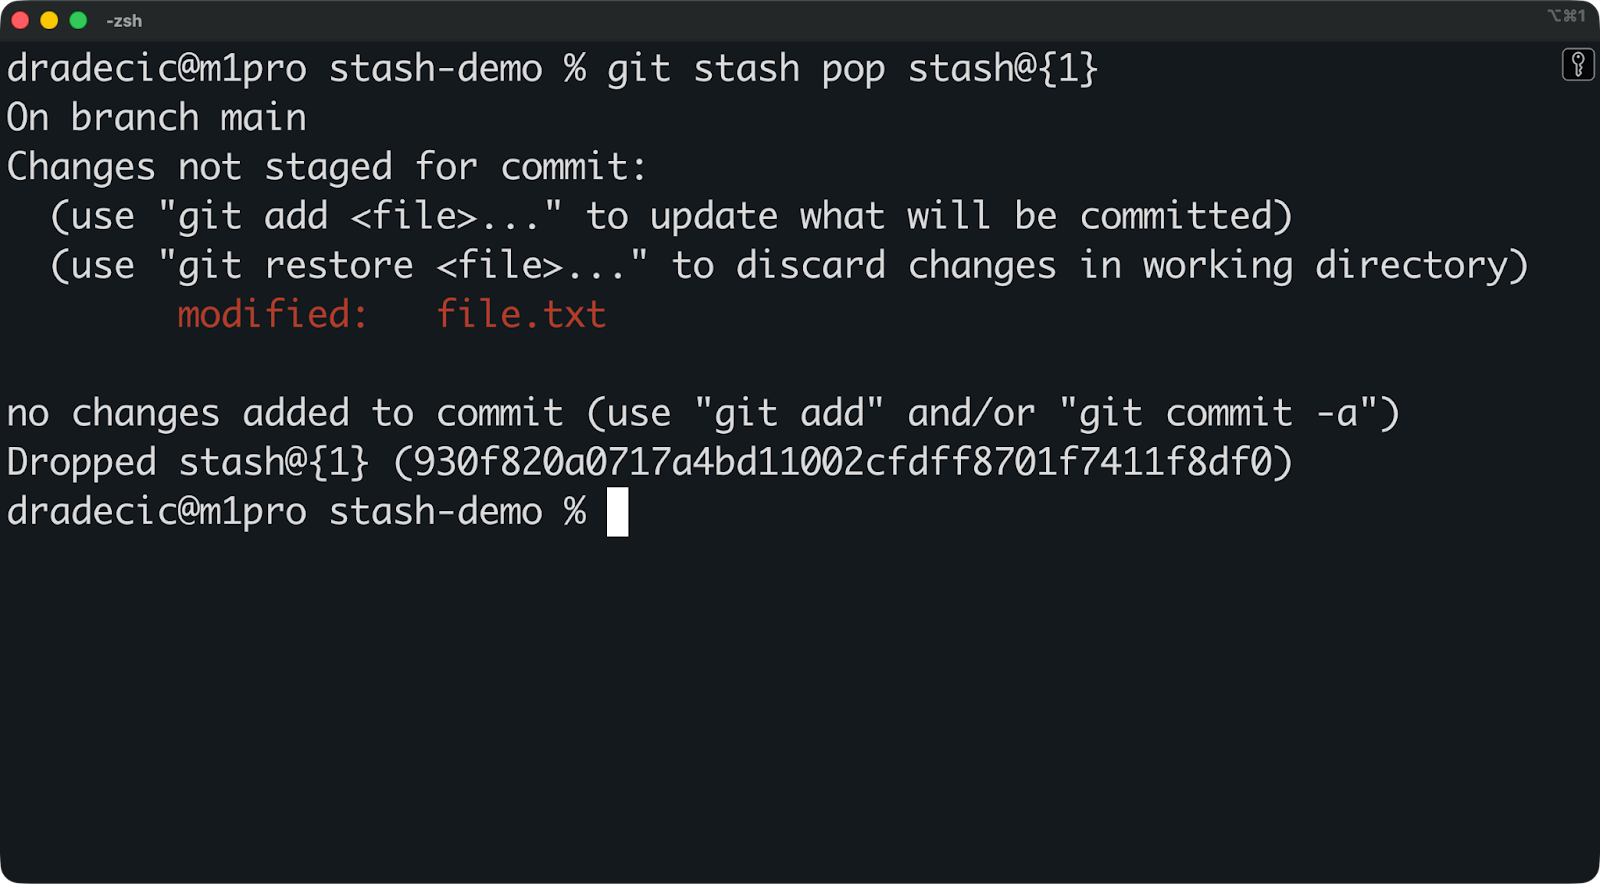
You can also pop a specific stash by referencing its index:
git stash pop stash@{1}This applies stash@{1} and removes it, but here's the catch - the remaining stashes shift up. What was stash@{2} becomes stash@{1}, and so on.
When you run git stash pop, Git performs a three-way merge behind the scenes.
It compares three states:
If the merge succeeds without conflicts, Git applies your changes and removes the stash. Your working directory looks exactly like it did before you stashed.
Here's a simple workflow example:
# You're working on a feature
echo "new feature code" >> feature.py
git stash push -m "Half-finished feature work"

# Switch to new branch and make unrelated changes
git checkout bugfix
echo "bug fix" >> bugfix.py
git add bugfix.py
git commit -m "Fix critical bug"

# Go back to your other branch
git checkout main

# Pop your stashed work
git stash pop
If Git can't merge cleanly, you get a conflict. The stash stays in your stack because the pop didn't complete successfully. You'll see conflict markers in your files, just like during a regular merge conflict.
When conflicts happen, you need to resolve them manually, stage the fixed files, and commit. The stash doesn't automatically disappear, so you'll need to run git stash drop after you've resolved everything.
Stashes aren't tied to any specific branch.
You can create a stash on bugfix, switch to main, and pop that stash there. Git doesn't care where the stash came from - it just tries to apply the changes to whatever branch you're currently on.
This opens up some handy workflows:
Moving work between branches: Say you started coding on the wrong branch. Instead of resetting and losing work, you stash it, switch to the correct branch, and pop it there.
Reorganizing tasks: You stashed some experimental code a week ago. Now you want to try it on a different branch to see if it works better there.
Testing changes in different contexts: You've got a bug fix stashed, and you want to test it on multiple branches before committing. Use git stash apply instead of pop to keep the stash around, test it on different branches, then pop it on the branch where you want to commit. More about apply in a bit.
As long as the changes don't conflict with your current branch, the stash applies cleanly - that’s the main idea you have to remember.
Developers often wonder whether to use git stash pop or git stash apply.
The main difference is simple: pop removes the stash after applying it, while apply keeps it in your stack.
With pop, you're saying "I'm done with this stash - apply it and throw it away." With apply, you're saying "I might need this again later."
This affects your workflow in two ways:
Safety: If something goes wrong during a pop and you need to recover, the stash is gone. With apply, the stash stays in your stack as a backup.
Cleanup: Using pop keeps your stash list clean automatically. Using apply means you need to manually run git stash drop later to remove stashes you're done with.
Most developers default to pop because it's cleaner. But apply is better when you're not sure if the stash will work on your current branch, or when you want to test the same changes on multiple branches.
Here's where pop gets tricky - stash indices shift when you pop from the middle of your stack.
Say you've got three stashes:
stash@{0}: Feature work
stash@{1}: Bug fix
stash@{2}: Experimental code
If you pop stash@{1}, the remaining stashes shift up:
stash@{0}: Feature work
stash@{1}: Experimental code
This can cause problems if you're scripting Git operations or running multiple pop commands in sequence. You pop stash@{1}, then try to pop stash@{2}, but that index doesn't exist anymore.
The apply command doesn’t have this problem. Indices only shift when you explicitly run git stash drop. You can apply stashes in any order without worrying about the stack changing underneath you.
Both commands handle conflicts the exact same way.
If Git can't merge your stashed changes cleanly, you'll get conflict markers in your files. The difference is what happens to the stash:
With pop: The stash stays in your stack because the pop didn't complete successfully
With apply: The stash stays in your stack (which it would do anyway)
In both cases, you need to fix the conflicts manually, stage the resolved files with git add, and remove the stash with git stash drop (if using apply).
The conflict resolution workflow is identical - the only difference is whether the stash would've been removed automatically on success.
Use git stash pop when:
Use git stash apply when:
Conflicts happen when Git can't cleanly merge your stashed changes. In this section, I’ll show you how to deal with them.
A conflict happens during the three-way merge Git performs when you pop a stash.
Git compares three versions of your code:
If the same lines changed in both your current branch and the stash, Git doesn't know which version to keep. That's a conflict.
Common causes of stash pop conflicts:
The general gist is that the longer a stash sits around, the more likely you'll hit conflicts when you finally pop it.
When a conflict occurs, Git pauses the pop and marks the conflicts in your files:

Your file now contains conflict markers:

Everything between <<<<<<< Updated upstream and ======= is your current code. Everything between ======= and >>>>>>> Stashed changes is from the stash.
Here's what you can do to fix it:
Open the conflicted file and decide which version to keep (or combine both)
Remove the conflict markers (<<<<<<<, =======, >>>>>>>)
Stage the resolved file with git add
Drop the stash manually with git stash drop - remember that it won’t disappear automatically.
If you don't want to deal with conflicts in your current branch, use git stash branch instead.
This command creates a new branch from the commit where you made the stash, then applies the stash there:
git stash branch temp-featureGit creates a branch called temp-feature, checks it out, and pops your stash onto it. Since the branch starts from the exact commit where you stashed, there won't be any conflicts. I’ll discuss this in a separate section in more depth.
You can also abort a failed pop with git reset --merge:
git stash pop

# Conflicts appear

git reset --merge
This undoes the pop attempt and reverts your working directory to its state before the pop. The stash stays in your stack.
If you started a pop or apply and want to back out completely, you've got options.
For conflicts you haven't started fixing yet, run the following:
git reset --mergeThis cancels the merge and cleans up your working directory. Everything goes back to how it was before you ran the stash command.
For conflicts you've partially fixed, run this command:
git reset --hard HEADThis throws away all changes in your working directory, including any fixes you've made. Use this when you've made a mess and just want to start over.
Remember that this command destroys uncommitted work. Make sure you actually want to throw everything away before running it.
After aborting, your stash is still in the stack (unless you used pop and it succeeded before hitting conflicts). You can try again later, or use git stash branch for a cleaner approach.
Stashes pile up fast in long-lived projects. You stash work to fix a bug, then forget about it. You create experimental stashes that you never pop. Six months later, you've got 20 stashes and no idea what half of them contain.
This makes it harder to find the stash you actually need. You end up running git stash show -p on each one just to figure out what's inside.
It’s a huge time waste, so remember to clean up your stashes regularly.
Use git stash drop to remove a specific stash:
git stash drop stash@{2}This deletes stash@{2} from your stack. The remaining stashes shift up - what was stash@{3} becomes stash@{2}.
You can also drop the most recent stash without specifying an index:
git stash dropThis removes stash@{0} by default.
Through years of working with Git, my top reasons for dropping stashes are when:
If you're not sure whether to drop a stash, use git stash show -p to inspect it first. Better safe than sorry.
You can use git stash clear to delete all stashes at once:
git stash clearJust remember that this is permanent. You can't undo it or recover the stashes afterward.
Only use git stash clear when you're absolutely certain you don't need any of your stashed work.
Most of the time, you're better off dropping stashes individually so you don't accidentally delete something you need.
Sometimes the cleanest solution is turning a stash into its own branch. This avoids merge conflicts and gives your stashed work a proper home.
The git stash branch command creates a new branch and applies your stash to it:
Here's what happens:
Git creates a new branch called feature-experiment from the commit where you made the stash
Git checks out that new branch
Git pops the stash onto the branch
Git removes the stash from your stack (just like pop)
Since the branch starts from the exact same commit as the stash, there won't be any conflicts. The changes apply cleanly every time.
You can also use a specific stash instead of the most recent one:
git stash branch new-feature stash@{2}Creating a branch from a stash is perfect for experimental features. Let’s say you’ve stashed some experimental code a week ago, and now you want to develop it properly without messing up your current work.
You get a clean branch to work on the experiment. If it works out, you merge it back. If it doesn't, you delete the branch and move on.
It’s also great for long rebases. Instead of dealing with potential conflicts during the rebase, you can just stash everything and create a branch from it.
git stash push -m "WIP before rebase"
git rebase main
git stash branch temp-work
Now you can review the stashed changes separately and decide how to integrate them after the rebase.
Creating a branch also comes in handy for isolating large or messy changes. Imagine you got a massive stash with changes across 15 files, half of which conflict with your current branch. Just create a new branch - no need to fight your way through.
You get a dedicated branch where you can review everything calmly, commit it properly, and then merge it back with a clear history.
By now you’re familiar with the basics of git stash, so let me show you some more advanced concepts.
You can pop or apply any stash in your stack, not just the most recent one.
Just reference stashes by their index to grab exactly what you need:
git stash pop stash@{3}
git stash apply stash@{1}
This lets you grab older stashes without touching the newer ones. When you pop an intermediate stash, all the indices below it shift up. What was stash@{4} becomes stash@{3}, and so on. If you're scripting Git operations or popping multiple stashes in sequence, this index shifting will break your commands.
The solution is to use apply instead of pop when you need predictable indices:
git stash apply stash@{2}

# Drop it manually when you're done
git stash drop stash@{2}
This gives you complete control over when the stack changes. You apply the stash, verify it worked correctly, then drop it yourself. The indices only shift when you explicitly tell them to.
By default, git stash pop and git stash apply restore your changes but don't preserve what was staged.
Say you had three files modified, and you staged two of them for commit before you stashed. When you pop that stash, all three files come back as unstaged changes. Git loses track of which files you wanted to commit.
The solution is to use the --index flag to restore the staging state exactly as it was:
git stash pop --indexThis recreates your exact working tree and index from before the stash. Files that were staged stay staged. Files that were unstaged stay unstaged. Everything goes back to exactly where it was.
You'll need this flag when:
You're in the middle of preparing a carefully staged commit and you can't afford to lose that staging information
You're working with complex staging scenarios, like when you've used git add -p to stage only specific hunks from files
You want your working directory to look exactly like it did before you stashed, with no exceptions
Most of the time, you won't need this flag. You'll pop your stash, see what came back, and stage what you need.
You will eventually drop a stash you needed or clear your entire stack by accident.
If that happens, git's reflog could save your day.
The reflog tracks every reference change in your repository, including stashes. When you create or drop a stash, Git records it in the reflog. Even after you drop a stash, the commits still exist for a while as unreachable objects.
You can find your lost stash by searching for unreachable commits:
git fsck --unreachable | grep commit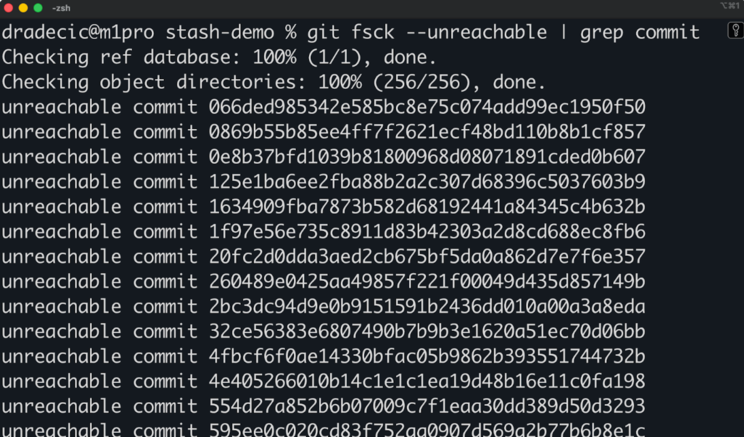
You can now check each commit to find your stash:
git show 066ded985342e585bc8e75c074add99ec1950f50Look at the diff and commit message to identify which one is your lost stash. Once you find the right commit, recover it:
git stash apply 066ded985342e585bc8e75c074add99ec1950f50This applies the lost stash to your working directory like it was never dropped.
Better yet, prevent mistakes in the first place by following these best practices:
Write descriptive stash messages so you know exactly what you're dropping. "Fix login bug" beats "WIP" when you're looking at a list of five stashes.
Use git stash show -p before dropping to confirm it's the right stash. Take five seconds to verify rather than spending five minutes recovering.
Clean up your stash stack regularly so it doesn't get messy. A stack with three relevant stashes is easier to navigate than one with 15 old entries.
Use apply instead of pop when you're not 100% sure you want to delete the stash. You can always drop it later after you've verified everything works.
Reflog recovery works, but it's tedious. Just look at the image above to see how many commits would I have to check manually - and this is a small project created only for the purpose of this article.
Using stashes well means following patterns that prevent mistakes and keep your workflow clean. Let me show you my go-to approach.
The safest stash workflow follows a simple pattern: stash with a message, switch context, then pop when you're ready to continue.
# Work on feature-branch
git stash push -m "Feature work in progress"

git checkout main
# Do urgent work on main

# Go back
git checkout feature-branch
git stash pop
This works for most situations. You preserve your work, handle the interruption, and restore everything cleanly.
Another common pattern is the "inspect before pop" workflow. You list your stashes, examine what's inside, then pop the right one.
git stash list
git stash show -p stash@{1}
git stash pop stash@{1}
This extra verification step prevents you from popping the wrong stash or applying outdated work.
Some developers prefer the "reluctant commit" alternative to stashing. Instead of stashing, they make a temporary commit with a message like "WIP - not ready" and then amend or reset it later. This works if you're uncomfortable with stashes or if you want the work tracked in your branch history. The downside is you end up with messy commit logs if you forget to clean them up.
Most Git GUIs show your stashes visually and let you pop or apply them with a click.
Tools like GitKraken, Sourcetree, and GitHub Desktop list your stashes in a sidebar. You can see the message, inspect the diff, and apply or drop stashes without typing commands. This is handy when you've got multiple stashes and you want to compare them side by side.
VS Code's Git extension shows stashes in the source control panel. You can right-click to pop, apply, or drop without leaving your editor.
Shell aliases make stashing faster if you prefer the command line. Add these to your .bashrc or .zshrc:
alias gst='git stash'
alias gstp='git stash pop'
alias gstl='git stash list'
alias gsts='git stash show -p'
Now gst stashes your work, gstp pops it, gstl lists your stashes, and gsts shows the diff. You save a few keystrokes every time.
Stashes are local to your machine - they never get pushed to remote repositories.
This means your teammates can't see your stashes, and you can't access them from another computer. If you need to share work in progress, don't stash it. Use patches or temporary branches instead.
To share work via patches, run the following:
git stash show -p > my-work.patch
# Send the patch file to your teammate
# They apply it with: git apply my-work.patch
Now send the patch file to your teammate, and they’ll apply it by running git apply my-work.patch.
To share work via temporary branches, run this:
git checkout -b temp/work-in-progress
git add .
git commit -m "WIP - authentication feature"
git push origin temp/work-in-progress
Your teammate can pull the branch, review the work, and continue from there.
Whatever you choose as a go-to approach, always maintain a good stash hygiene. This will prevent any confusion and keep your local stack manageable. These are some good practices to follow:
Use descriptive names for every stash. "Add user auth logic" tells you what's inside. "WIP on feature-branch" tells you nothing.
Clean up your stashes weekly. Run git stash list and drop anything older than a week. If you haven't needed it in seven days, you probably won't need it at all.
Don't let your stash count go above five. More than five stashes means you're using them as long-term storage instead of temporary holds. Either pop them, commit the work, or drop them.
If you're working with a team and someone asks, "Where's that code you were working on?", never answer, "It's in my stash." Stashes are private and temporary - they're not for sharing or archiving work that matters.
You now know how git stash pop works and when to use it.
At its core, stashing is simple: save your uncommitted work, switch contexts, and restore it later. But the details matter. Knowing when to use pop versus apply, how to handle conflicts, and when to create branches from stashes will save you hours of frustration.
The most important takeaway is that stashes are temporary storage, not permanent backups. Use descriptive messages, clean up regularly, and don't let your stack grow beyond five entries. If you need to share work or keep it long-term, commit it to a branch instead.
If you’ve enjoyed this article and are looking to get better at Git, your next best stops are our Intermediate Git and Intermediate GitHub Concepts courses.
Learn with DataCamp
Track
Course
Course
Tutorial
Bex Tuychiev
Tutorial
François Aubry
Tutorial
Allan Ouko
Tutorial
François Aubry
Tutorial
Oluseye Jeremiah
Tutorial
Mark Pedigo