Track
Data Engineer in Python
40 hr
In this article, I will catch you up to speed with everything you need to know about GitHub Codespaces, which is well worth learning because it is changing the way developers work by offering an instant, cloud-based development environment. In this article, we will look at the GitHub Codespaces lifecycle, so you can understand the different stages in the process. Plus, we will look at how to customize your own codespace so it fits your own working style and needs.
Don’t worry if you are not yet familiar with Git and GitHub. You can take our GitHub Concepts course to learn how to create a repository, a README, and many other foundational things. Also, don’t overlook our Foundations of Git course to get started on the basics of version control.
A GitHub Codespace is a cloud-based development environment that allows developers to write, test, and debug code directly in the cloud, obviating the need for complex local setups. When a codespace is created, it launches a Docker container running on a virtual machine, which is pre-configured with the necessary tools, libraries, and dependencies for the project. A notable feature, also, of GitHub Codespaces is that it integrates with IDEs like Visual Studio Code, as we will explore later in this article.
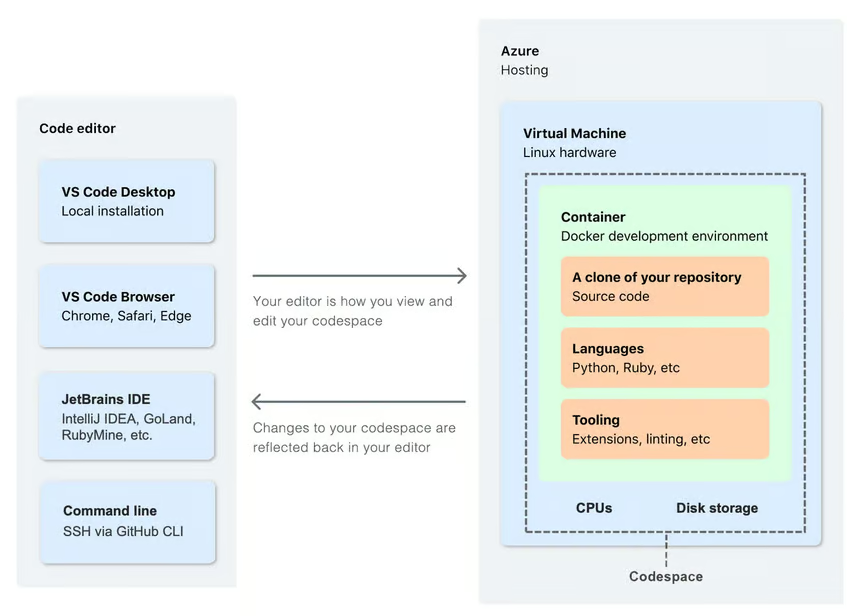
Codespace workflow. Source: GitHub
Understanding GitHub Codespaces requires understanding the lifecycle of a codespace. Each phase involves specific actions that impact your experience or how you use resources.
You have two primary options when creating a codespace: starting from an existing project or starting a new project. If you are working on an existing project, you are likely to create a codespace from an existing repository branch, and the codespace will be tied to the specific branch you select. If you're launching a new project, you can use a template instead. A template is useful because it provides a pre-configured environment to help you kickstart a project.
As a note, although templates are primarily used when starting new projects, if you are working on an existing project and want to use specific settings from a template, you could apply a template’s configuration to enhance your environment. That’s an option, also.
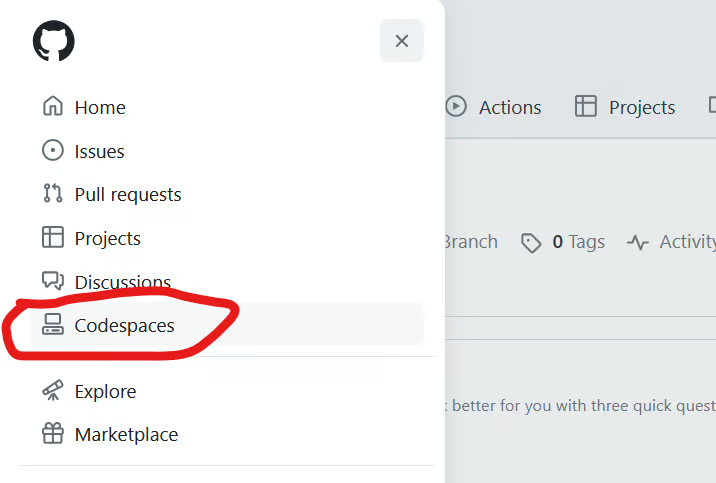 Finding Codespaces in the GitHub menu. Image by Author
By design, the whole workflow and the interaction with Git and branches is similar to the workflow you would have if you were working on your local machine. In both cases, you would publish your project to a GitHub repository and you would have to make sure to push your changes to GitHub.
Creating a new codespace is an alternative to rebuilding a codespace. In certain situations, however, rebuilding a codespace offers some advantages, so it's worth understanding the difference. For one thing, rebuilding allows you to apply updates to the container configuration without losing any of the work inside your /workspaces directory. Additionally, when you rebuild, GitHub Codespaces reuses cached images from earlier builds, which speeds up the process by avoiding the need to reinstall libraries.
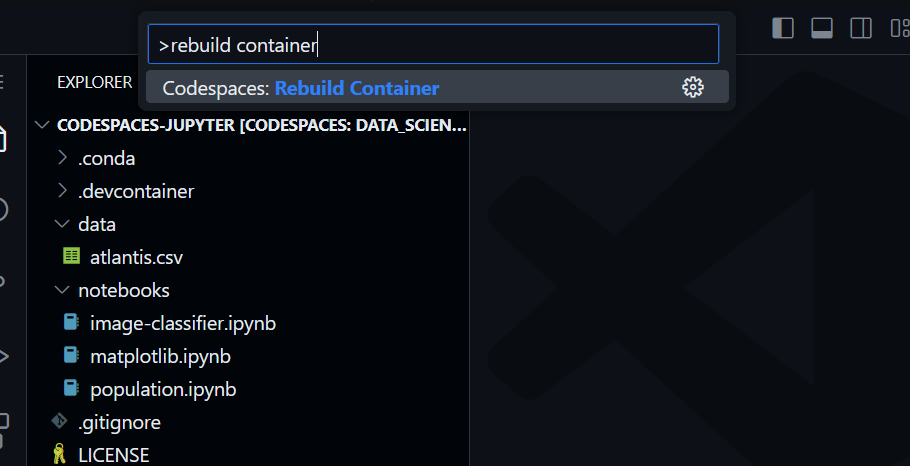 Rebuilding the container. Image by Author
The reason we stop a codespace is because, when the environment is paused, no resources are consumed, and this helps to manage costs. We keep in mind that running a codespace incurs CPU charges, while a stopped codespace incurs only storage charges.
It's important to know that if you do not explicitly stop a codespace, it will continue running until it times out due to inactivity. The timeout period is a customization that we can choose, which I will cover in the next section. It’s also important to know that simply closing a browser tab does not stop the codespace itself. This is a common mistake that people make.
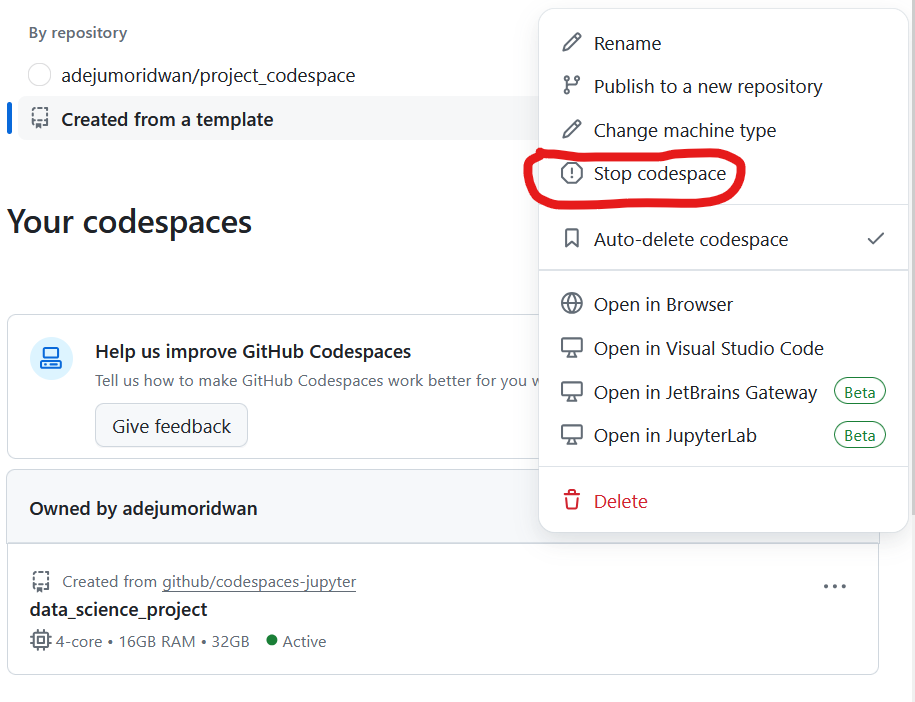
Stopping a codespace. Image by Author
Once you’ve finished working on a project, delete the codespace so you don’t incur unnecessary storage charges. It’s also always a good practice to keep your workspace organized.
You can either push your changes to a remote branch before deleting them or you can discard any uncommitted changes entirely. Additionally, codespaces that remain inactive for a set period will be deleted automatically. This is designed to help developers manage their storage and also their costs. Choosing the period before automatic deletion is another customization that we will cover below.
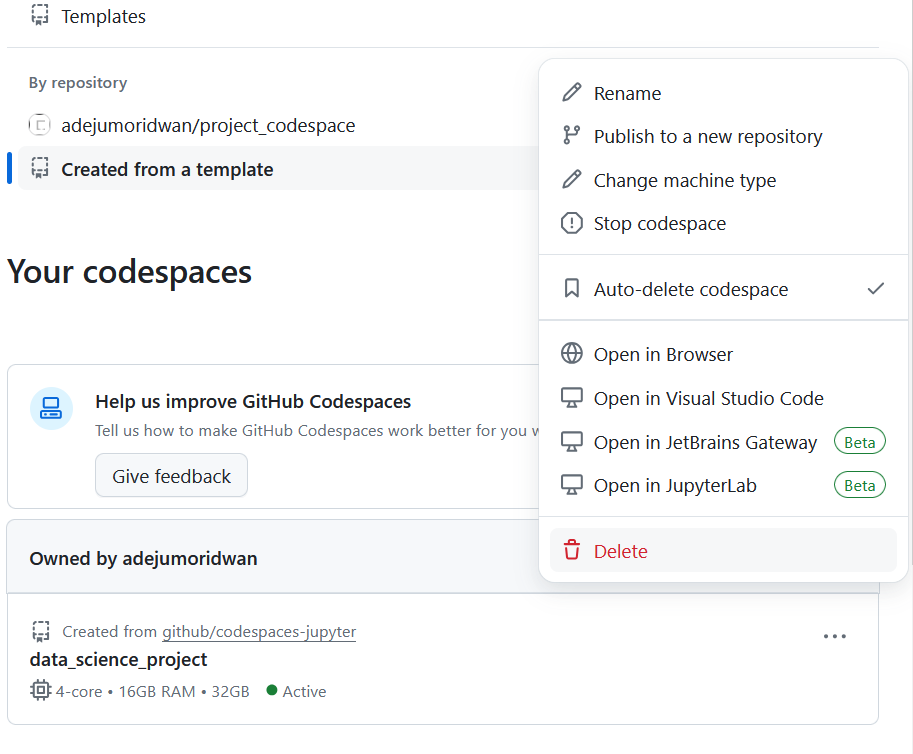
Deleting a codepace. Image by Author
One great thing about GitHub Codespaces is that they are highly customizable. You can choose a configuration or select specific tools. Broadly speaking, we can divide the customizations into two categories: the customizations that are designed to personalize your workspace to fit your own working style, and those customizations that are designed to help you manage your resources and keep costs down.
The first thing we can consider is how to personalize our environment. Developers are likely to appreciate customizations that fit their specific kind of workflow. Most of these customizations will be accessed when you click on your profile picture to open the settings menu, as you can see in the picture below.
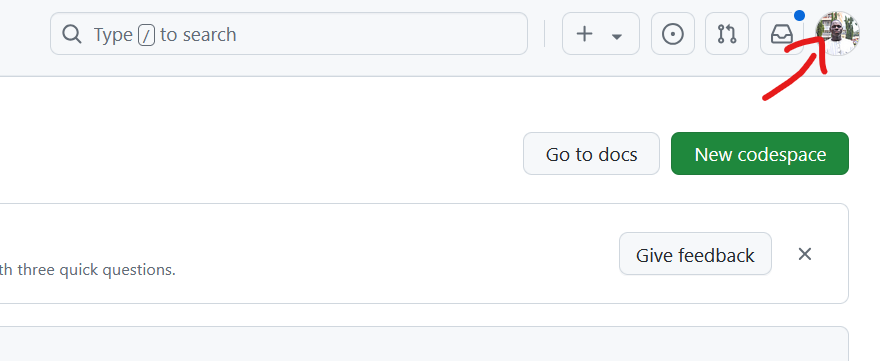 Opening the settings menu. Image by Author
The first thing you might want to do is make sure that your settings are consistent across both the desktop version of VS Code and the web-based client. You can do this by enabling Settings Sync so any changes or customizations you make in one place are applied to the other. This is a very convenient feature for developers who may have to switch back and forth between environments.
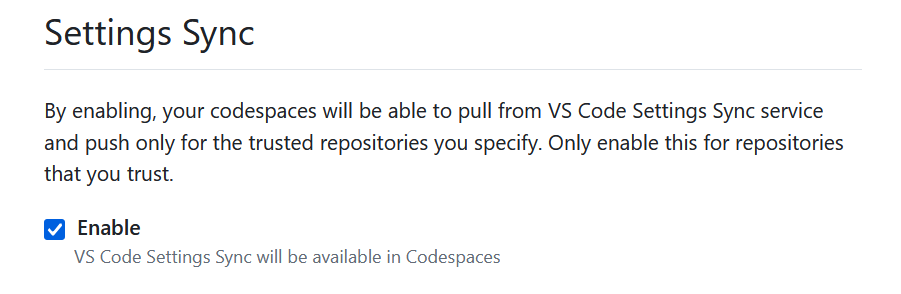
Enabling Settings Sync. Image by Author
Conflicts can occur if there are differences between the cloud settings and your local settings or if one of your machines was offline for a while. In the event of conflicts, you will have the option to overwrite using either the local or cloud settings, or you can choose more specifically which settings to keep.
GitHub assigns a display name to each new codespace. Probably, you don’t want to keep the autogenerated name, especially if you have multiple codespaces going. I try to come up with a name that shows the purpose of the project and helps me navigate around easily.
 Renaming a codespace. Image by Author
You should know that, besides the display name, every codespace also has a permanent name that you can’t change. This permanent name is really the display name with a set of randomly generated characters at the end. The purpose of having this permanent name is to make sure the codespace has a unique identifier. Pay attention to the permanent name if you are planning to use the GitHub command line interface. It’s also handy to know in case you need to connect with the GitHub support team for whatever reason. You can find the permanent name by opening the codespace in the browser, where you can see that the subdomain in the browser is the permanent name.
If you open a new codespace in the VS Code desktop application, the shell that opens depends on your local settings. If you use the VS Code web client, you will see bash open by default. You can always change your shell if you prefer, for example, zsh or fish and you can apply this change in your settings so that is opens your preferred shell each time.
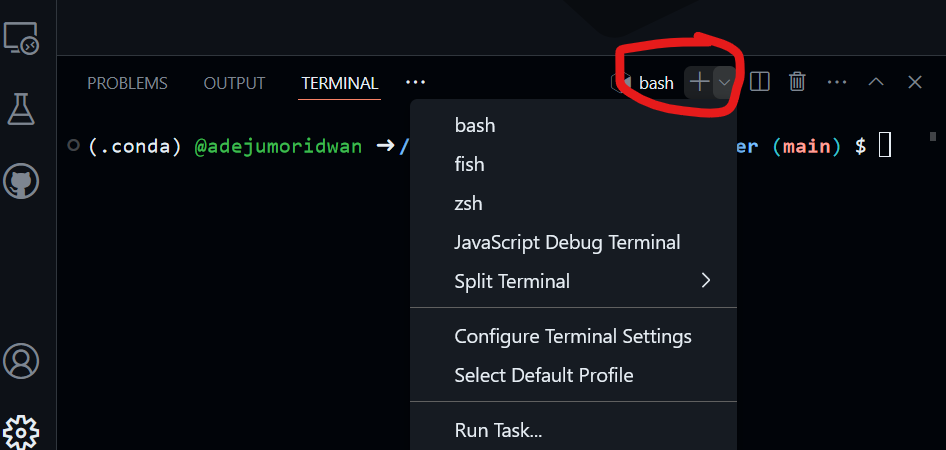 Changing the shell. Image by Author
You can also choose your favorite code editor. For example, if you really like Visual Studio Code like I do, you can configure your settings to launch VS Code every time you create or open a codespace. You can choose between VS Code, JetBrains, and JupyterLab.
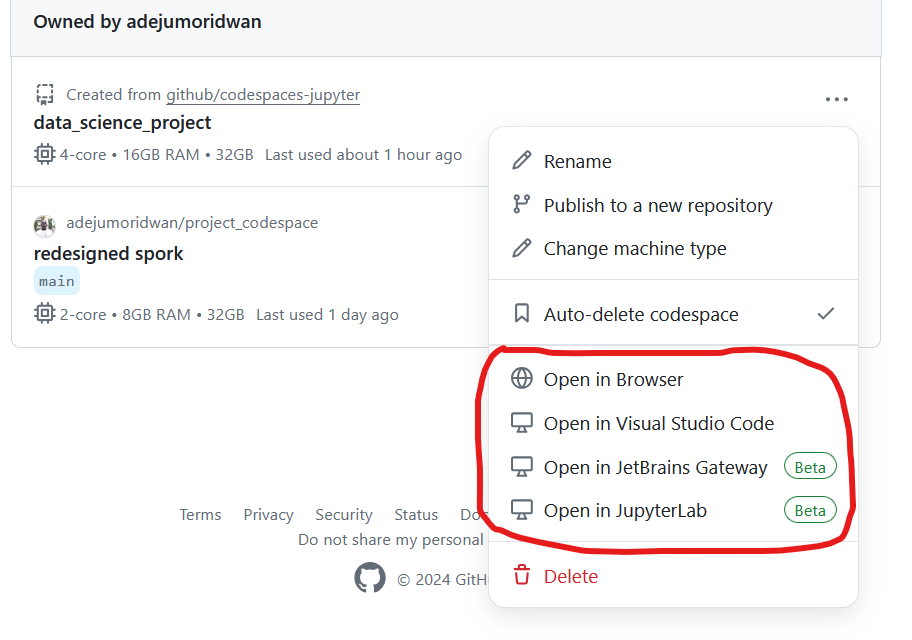 Choosing a default editor. Image by Author
Now, let’s look at some settings related to resource allocation and performance.
You can select or modify the underlying hardware that powers your environment. For example, you can switch to a machine with more CPU, RAM, or storage. This way, you can make sure your codespace has enough resources to handle whatever task you are working on, but at the same time you can make sure you don’t go overboard. It’s important to pay attention to which remote machine type you are using because the types belong to different billing tiers.
 Selecting a preferred machine type. Image by Author
Do know that you can only change the machine type of codespaces that are published, so if you create a codespace from a template that isn’t linked to a GitHub repository, you won’t have the option to change the machine type. Also, if you are part of an organization, you might not have the option to change the machine type, depending on the rules of the policy you’re under.
By default, GitHub Codespaces automatically stops running after 30 minutes, but you can adjust this in your personal settings. The maximum timeout period is four hours. It’s important to be mindful of resource usage and prevent idle codespaces from running when they don’t need to be running.
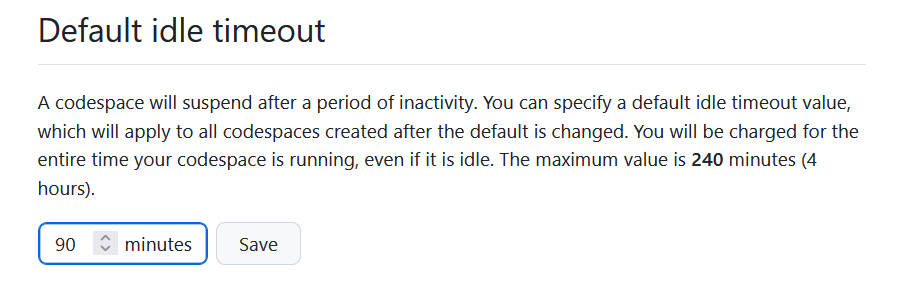 Changing the timeout period. Image by Author
Inactive codespaces will be deleted after a certain period of time. This is designed as a convenience to free up resources. You can configure how long your stopped codespaces are retained before they are deleted, but keep in mind there is a maximum retention period of 30 days.
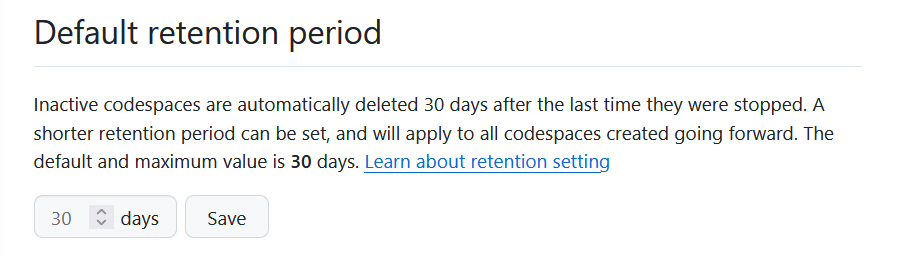 Setting the retention period. Image by Author
You can set a default geographic region where your GitHub Codespaces are hosted by visiting your profile settings. Selecting a region closer to your location can improve performance, such as faster load times and reduced latency, and also allows you to personalize where your data is stored to comply with data residency requirements.
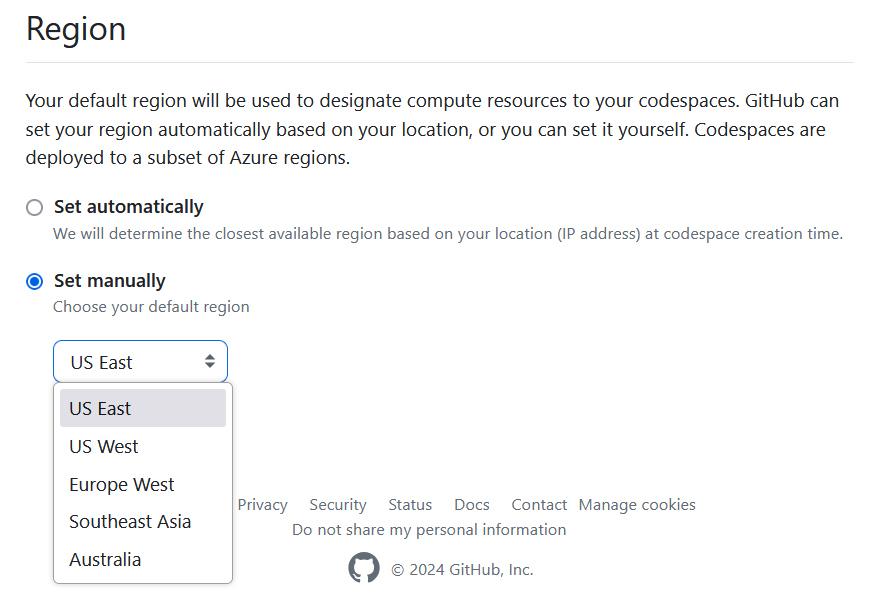 Changing the region. Image by Author
If you are familiar with GitHub, you might also be familiar with GitHub.dev, and you might be wondering what the difference is between GitHub.dev and GitHub Codespaces.
For one thing, GitHub.dev is a lightweight, browser-based code editor, while GitHub Codespaces provides a full development environment that allows you to run and test your code. In other words, because GitHub.dev is limited in scope, it is really only designed for code edits.
GitHub Codespaces also integrates with IDEs like VS Code, and the changes to the settings in the cloud and local environments can be synced through the Settings Sync feature, as we have seen. Developers will also notice that GitHub.dev environments are not persistent, meaning that your work isn't saved between sessions unless you manually commit changes to the repository. On the other hand, with GitHub Codespaces, the changes are saved even if you close or stop your codespace.
Added together, we should consider GitHub Codespaces as the choice for larger projects and more complex workflows because it offers the power of a development environment without the need for configuration or resource management on your personal machine.
| Feature | GitHub.dev | GitHub Codespaces |
|---|---|---|
| Purpose | Browser-based code editor for quick edits to code hosted in GitHub repositories | Full-featured, cloud-based development environment |
| Environment | No setup needed; quick access via browser | Docker-based container with pre-configured tools, libraries, and dependencies |
| IDE Integration | Limited editing experience with built-in editor | Supports Visual Studio Code, JetBrains, and JupyterLab |
| Customization | Minimal customization | Highly customizable |
| Resource Management | No resource management required | Users manage CPU charges, storage charges, and set timeouts |
| Deployment | Not designed for deployment | Full support for deployment workflows |
| Availability | Available for any GitHub repository | Requires subscription and more resources |
As we move towards a distributed and flexible work environment, tools like GitHub Codespaces will play a big role in shaping the future of software development. Specifically, GitHub Codepspaces solves a few major issues: It allows you to start coding immediately, regardless of your local machine’s specifications; it gives you access to a development environment from any device; and it allows you to collaborate with team members in identical environments.
For further learning, read the following DataCamp articles:
Lastly, have a listen to the DataCamp podcast episode, The Future of Programming with Kyle Daigle, COO at GitHub. In it, he discusses the state of AI-assisted coding and how he sees the industry progressing.
Learn with DataCamp
Track
Course
Course
blog
Samuel Shaibu
8 min
blog
Samuel Shaibu
9 min
blog
Adejumo Ridwan Suleiman
13 min
Tutorial
DataCamp Team
Tutorial
Abid Ali Awan
Tutorial
Abid Ali Awan