Course
Intermediate SQL Server
4 hr
65.6K
If you would like to learn about SQL from basic to an advanced level, take DataCamp's SQL Fundamentals skill track.
SQL stands for Structured Query Language. As per Wikipedia, SQL is a domain-specific language used in programming and designed for managing data held in a relational database management system (RDBMS), or for stream processing in a relational data stream management system (RDSMS). It is particularly useful in handling structured data, i.e., data incorporating relations among entities and variables (Source).
Data can be inserted, searched, updated, or deleted from the database records using SQL. SQL can be beneficial in maintaining and even optimizing the databases.
As the name suggests, SQL is capable of handling only the structured type of data, which means data that can be represented in rows and columns format like dates, numbers, and strings. On the other hand, unstructured data can be represented in the form of images, videos, speech, or text.
But what kind of information do these Databases hold?
They can hold a variety of information or maybe anything that you could think of—ranging from catalogs of product, customer information, images metadata, text data, etc.
Let's say you want to automate the process of Resume screening, and you would like to store the name, education, job experience, and application date of the candidate who has applied for an open job position. You would need a database to be designed which would store the above information related to the candidate, and to achieve this; you will need an SQL server.
In order for the information to be easily accessible and understandable, you need database management systems or relational database management system. DBMS can be helpful in a variety of ways, like sorting information or linking databases to each other, provide reports about any updates in the database, and even manage administrative access to the database.
Some of the most popular SQL databases are:
MySQL: It is the most popular open-source relational database management system. Just to name a few, MySQL is currently being used by Facebook, Youtube, and Twitter. Since it's open-source, it comes without any cost associated with it.
Oracle Database: It is a multi-model DBMS developed by Oracle and is written in the C++ language. It is widely used for running online transaction processing like bank payment server websites. Though being costly, it is very reliable. To handle unstructured data, Oracle has also released an Oracle NoSQL database.
MS SQL: An RDBMS developed by Microsoft. It supports both structured (SQL) and unstructured (NoSQL) data. Its primary function is to store and retrieve data based on the requests it receives from other software-like applications. It is fast and stable and works well with other Microsoft based products.
Microsoft Azure: It is a cloud computing service created by Microsoft. Its primary functionalities are building, testing, deploying, and managing applications and services which are managed by Microsoft owned data centers. It provides software as a service (SaaS), platform as a service (PaaS) and infrastructure as a service (IaaS)(Source). It has support for various programming languages. It is considered to give a tough competition to Amazon Web Services (AWS) and Google Cloud Platform (GCP).
Few other popular SQL databases are IBM DB2, MariaDB, Sybase, and PostgreSQL.
In today's tutorial, you will learn to install Microsoft SQL (MS SQL). So without any further ado, let's get started!
Microsoft SQL server download and click on the very first link that it shows as shown below. Make sure it is a Microsoft website and not any other third-party site.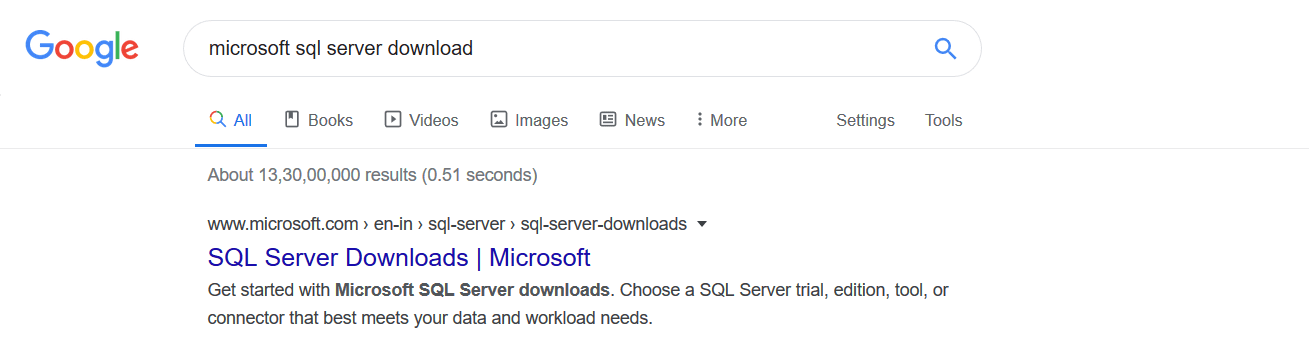
Developer edition, click Download Now, and save the file. The developer edition is a full version and comes packaged with a fully featured free edition specially designed for developers.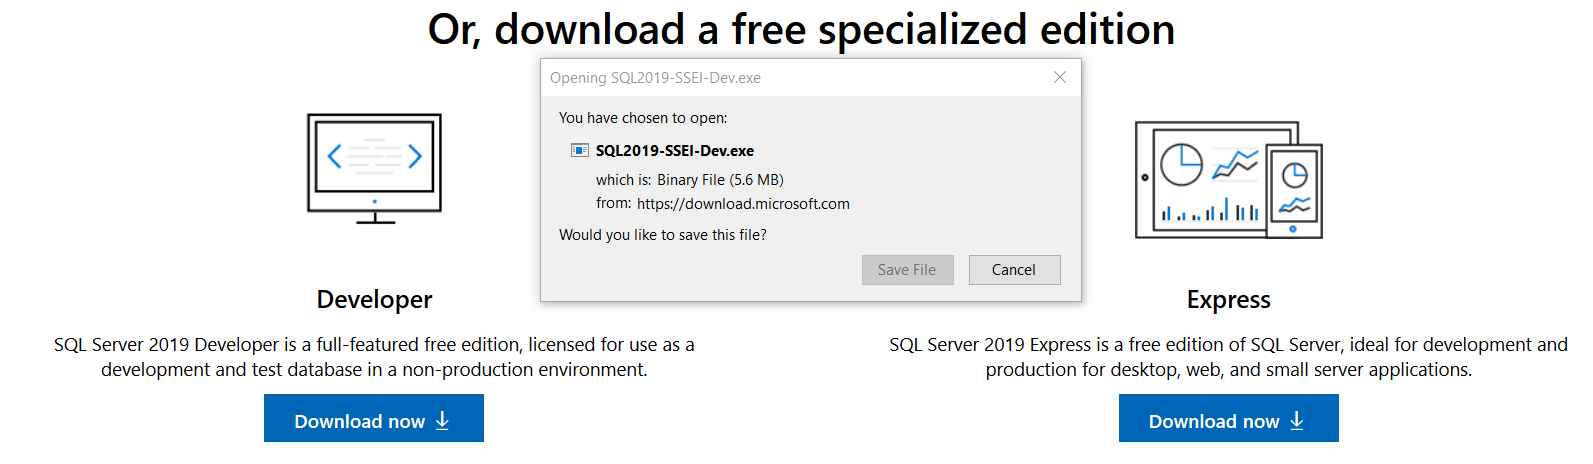
SQLServer2017-SSEI-Dev.exe file. Double click on that file, and you should see Getting things ready, which means everything is going smoothly.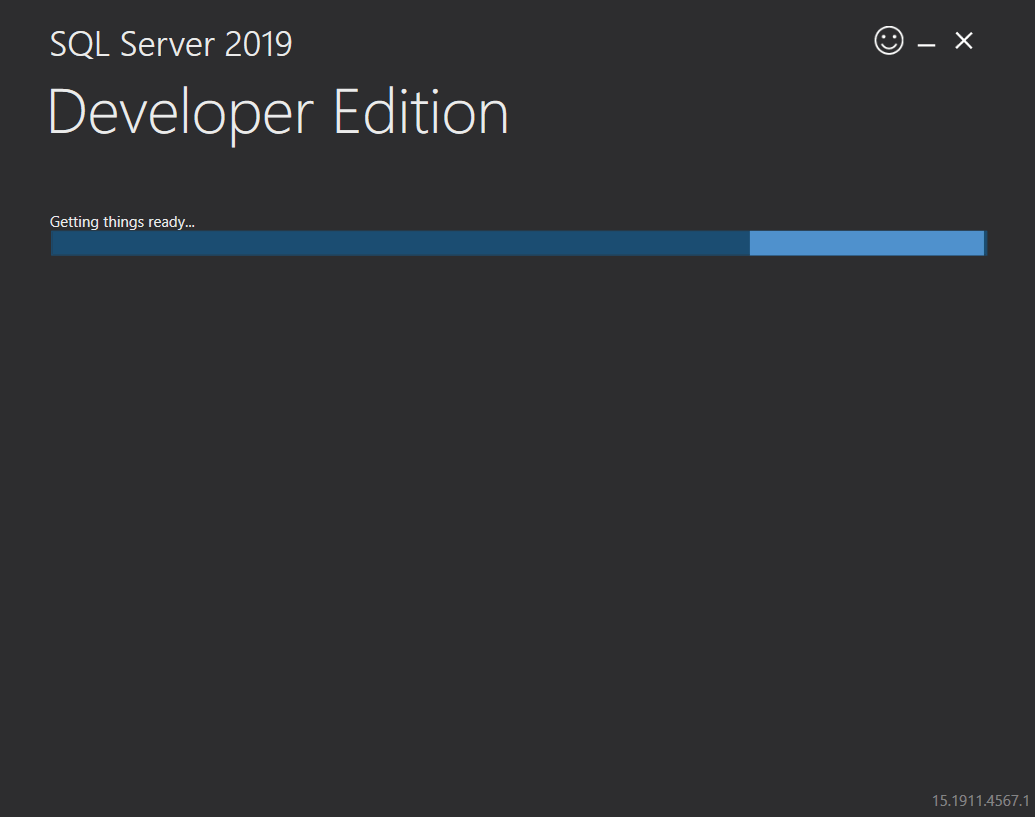
Basic, Custom, and Download Media. You need to select the second option, which is Custom.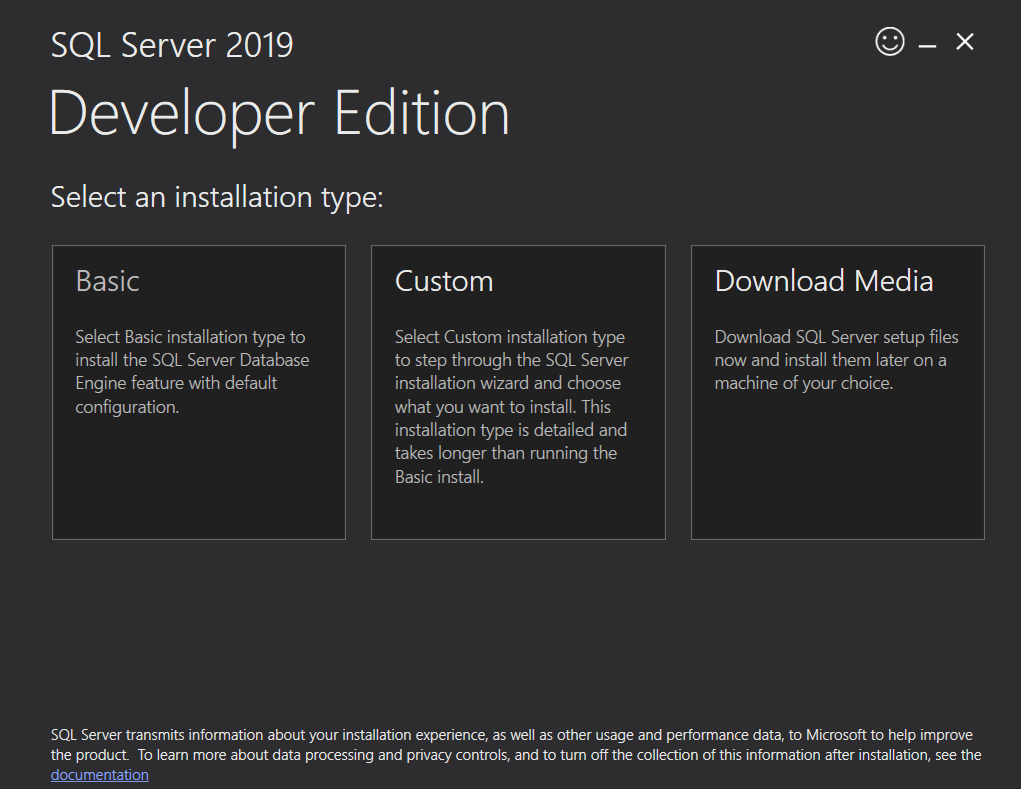
Install. Make sure you have good internet connectivity. In the meantime, feel free to take a short nap since it will take some time to install.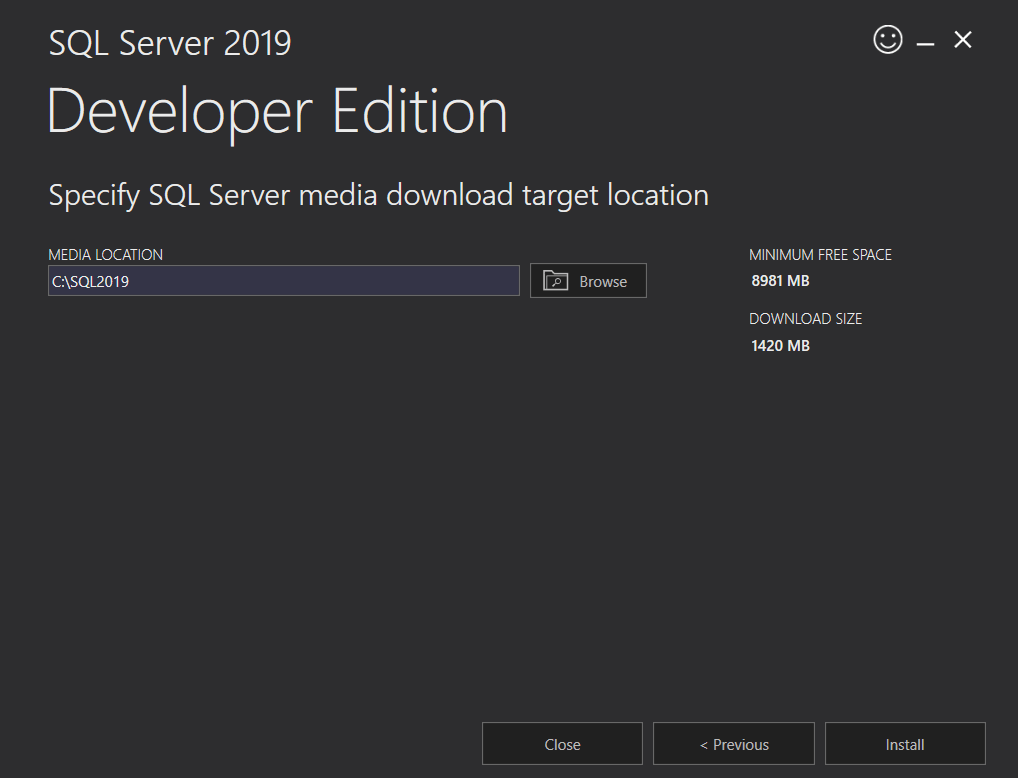
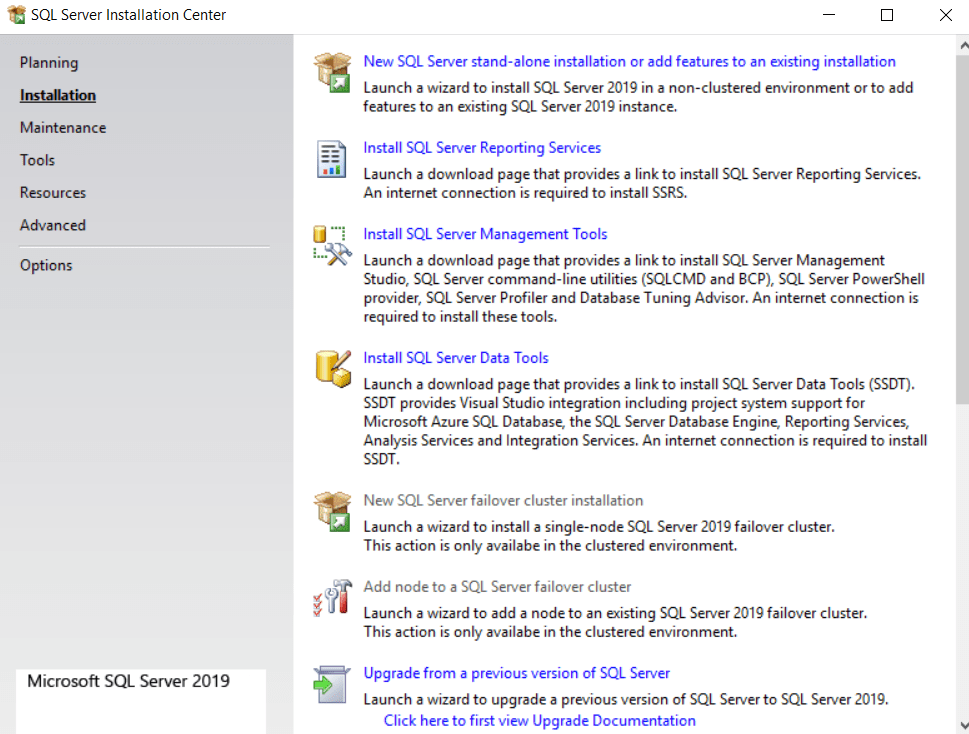
SQL Server Installation Center will open, which will have planning, installation, maintenance, etc. You need to click on installation and then on the right side of the panel you will find multiple options, you need to select New SQL Server stand-alone installation or add features to existing installation.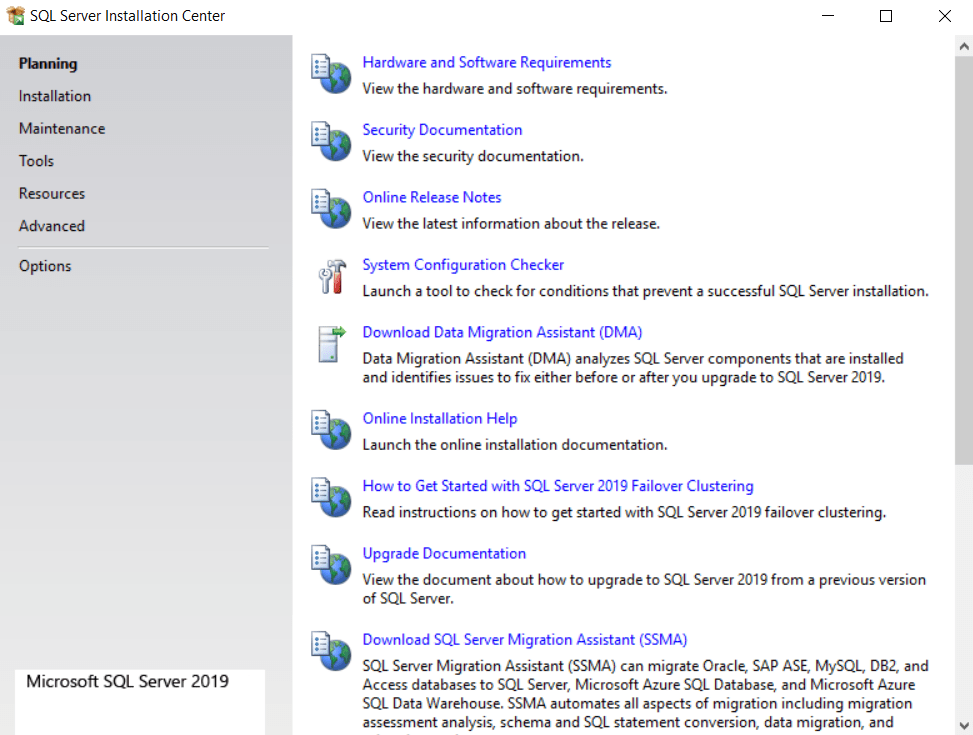
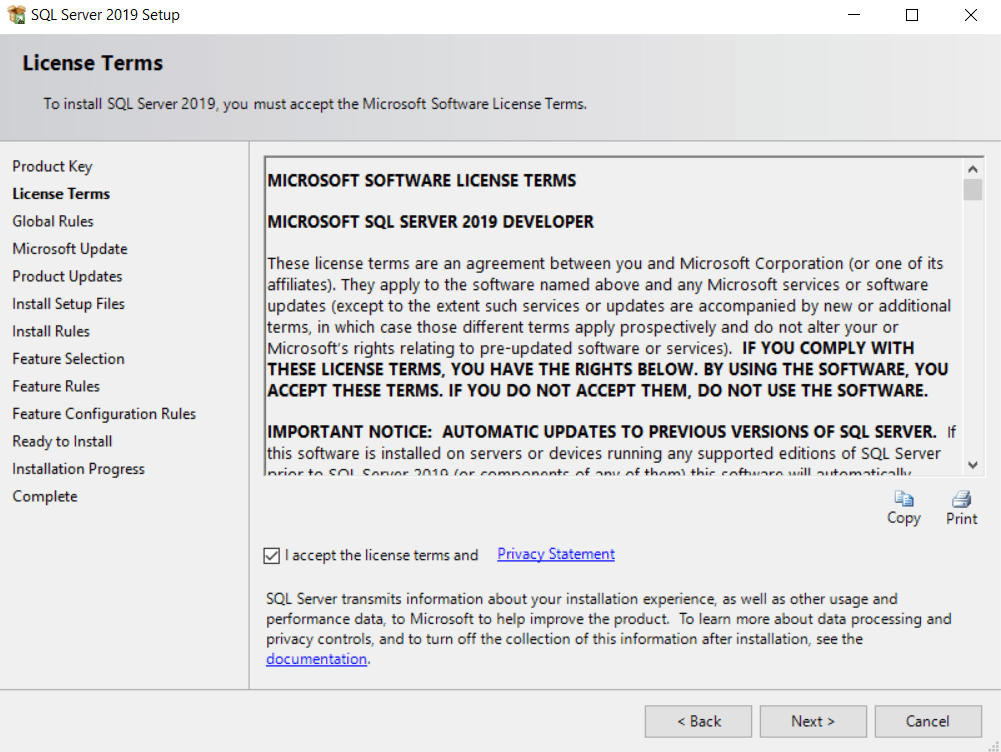
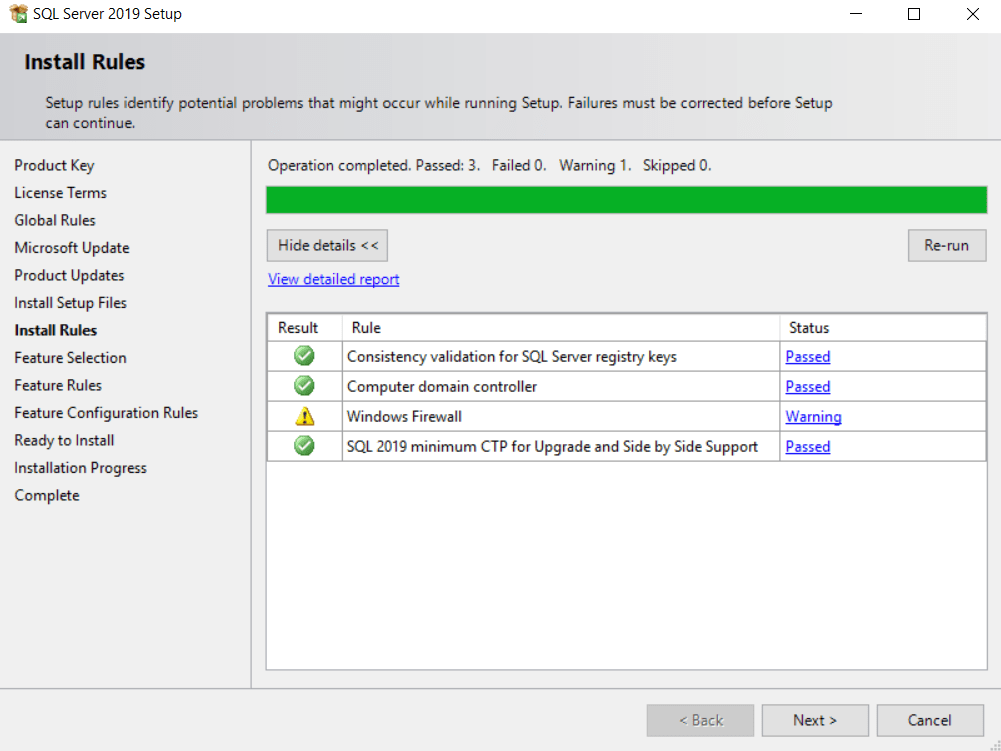
SQL Server 2017 setup window in which, by default, the checkbox with specify a free edition to Developer would be selected. All you need to do is click next and accept the license terms and again click on next. It will install the setup files and move to the next step, which is install rules. You might get a warning of windows firewall, which you can safely ignore.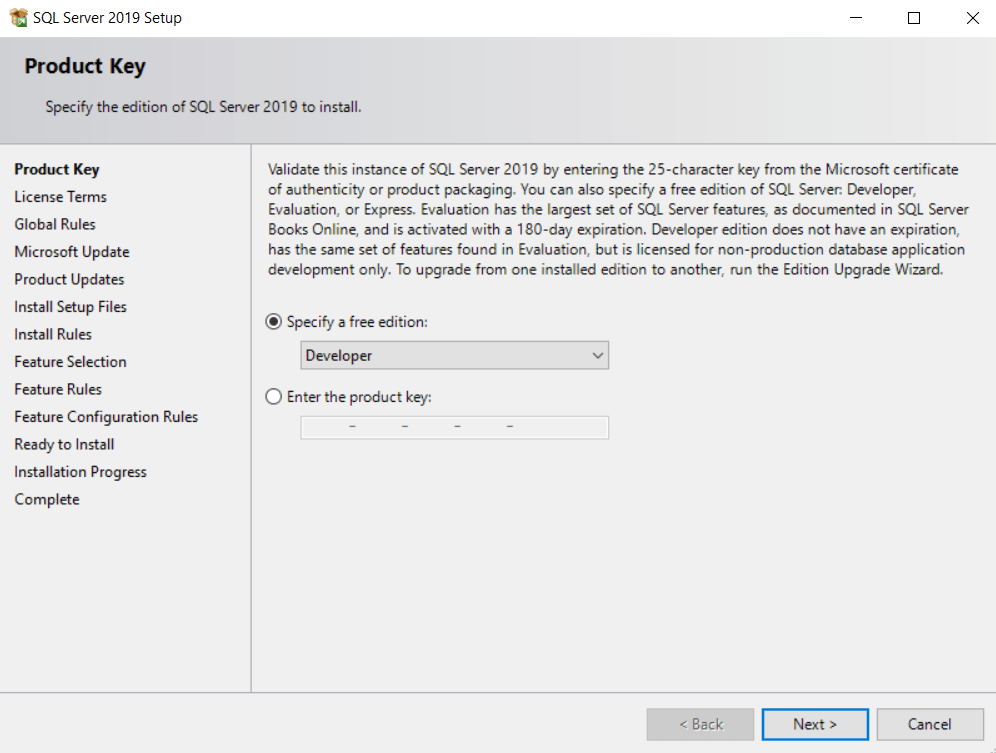
Feature Selection setup in which you will find a lot of options to select from, like instance features, database engine services, machine learning services, etc. You need to select the Database engine services and click next.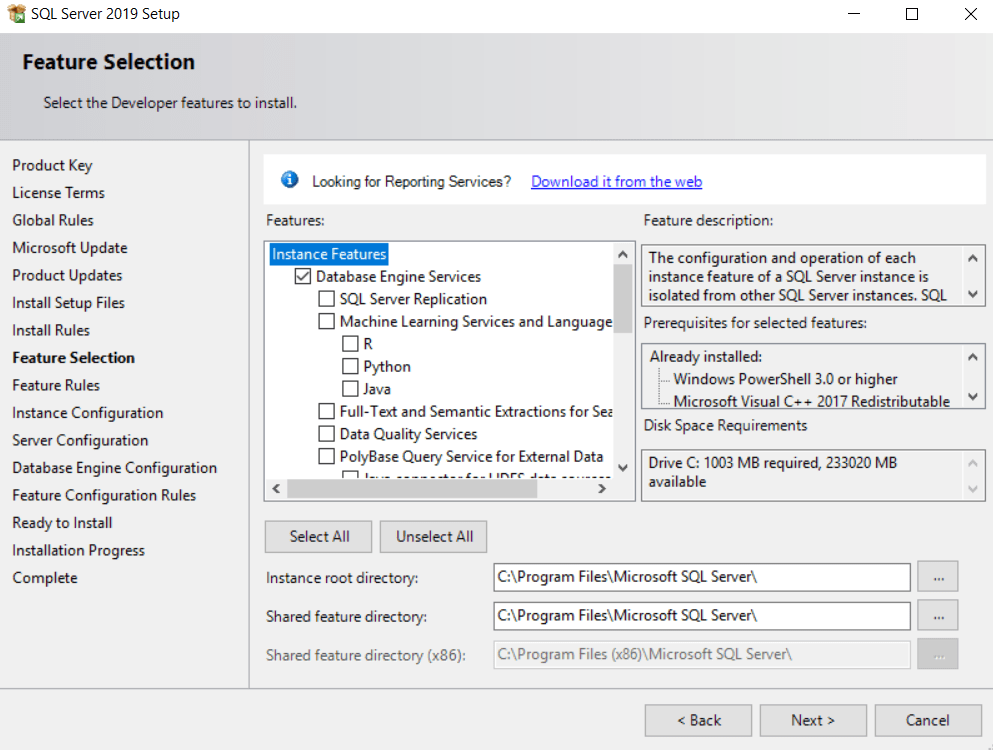
instance configuration, specify an instance name that will be later used to connect to the SQL server. Let's name it Datacamp_Sql and click next. You can skip the Server configuration and directly move on to the database engine configuration.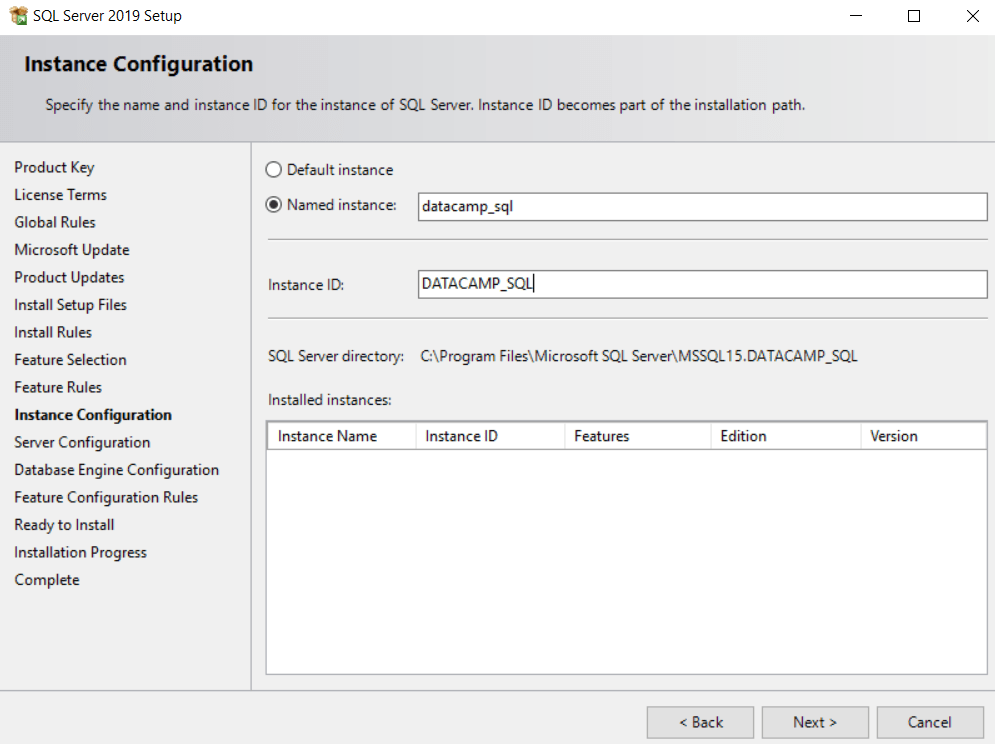
mix mode as the authentication mode, specify the password, i.e., datacamp@1234 and click on add current user. Remember that this password will be used with the instance name that you had created in the previous step. Finally, click on install.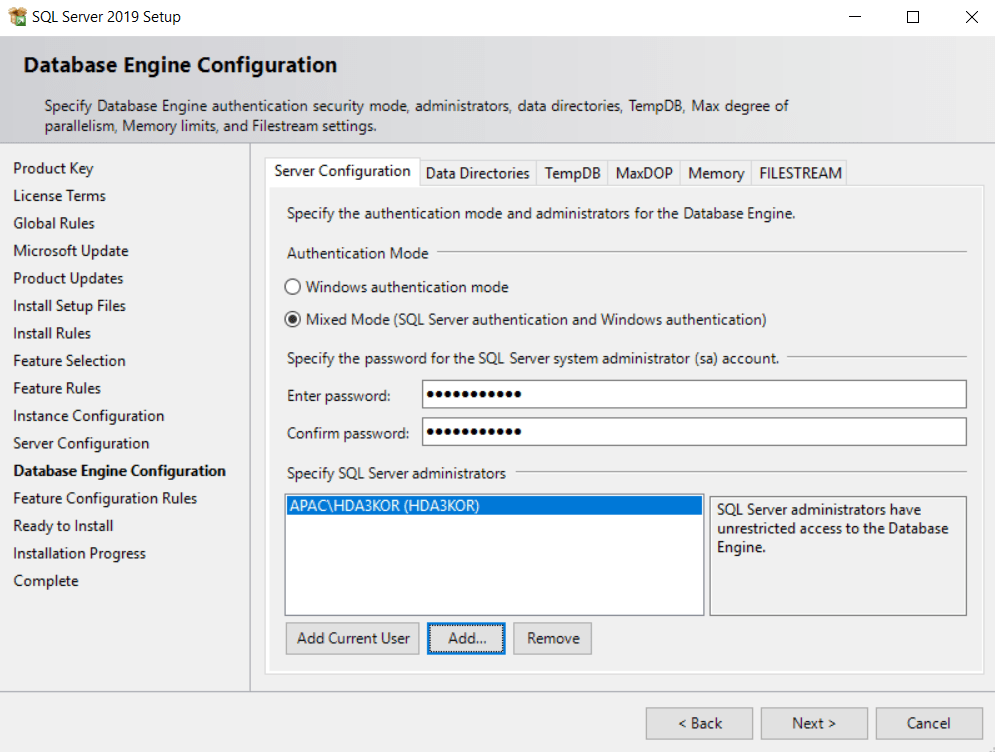
Installation successful in the detail box. Feel free to close the SQL server setup window.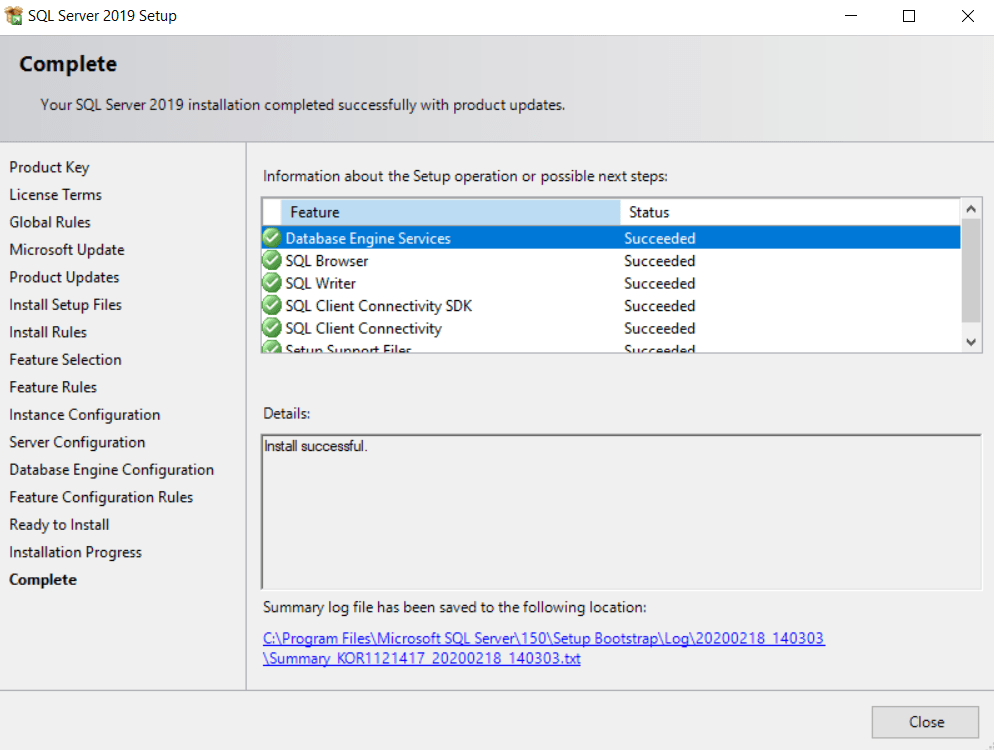
SQL server management studio, which provides you a graphical user interface (GUI) for connecting to the database, creating a database, tables, and a lot more. To install the studio, you need to click the SQL server management tools, which is the third option.SQL server management tools, you will be redirected to the Microsoft website from where you can download the SQL server management studio. It can also be downloaded from the same website from where you initially downloaded the SQL server 2019 developer edition.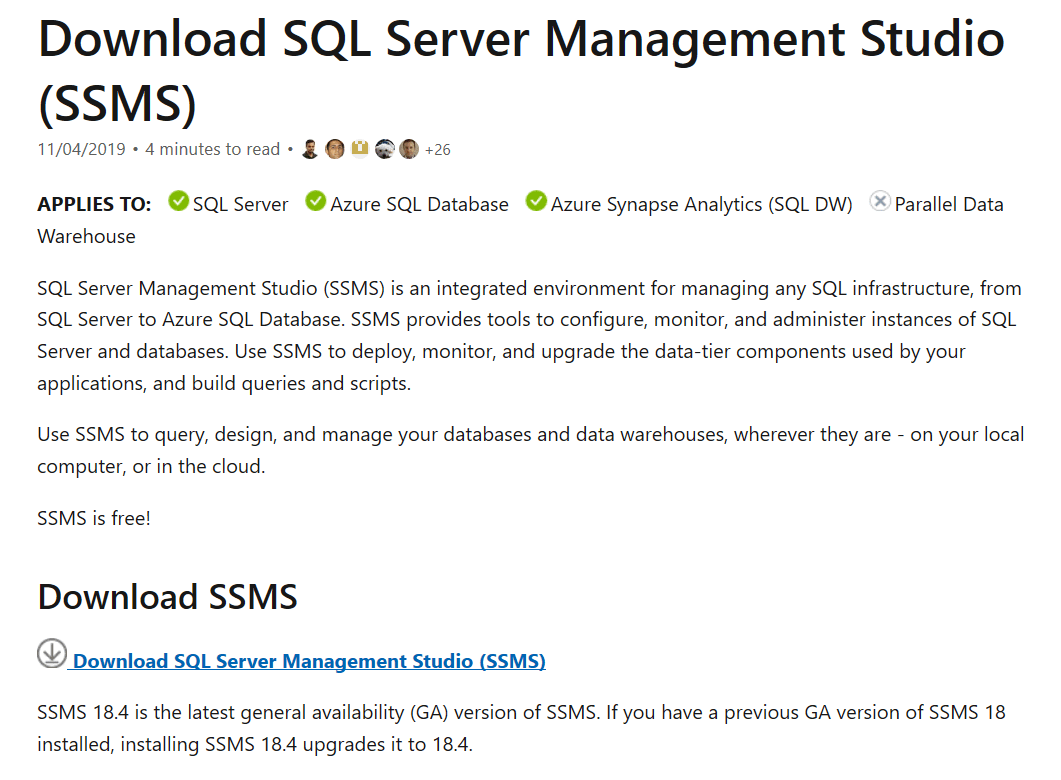
SSMS-Setup-ENU in your downloaded folder. Double click on that file and select Yes. Then click on Install, it will take some time for it to complete again depending upon your internet connection. You might be asked to restart your system for the installation to complete. Once the setup is complete, click on close.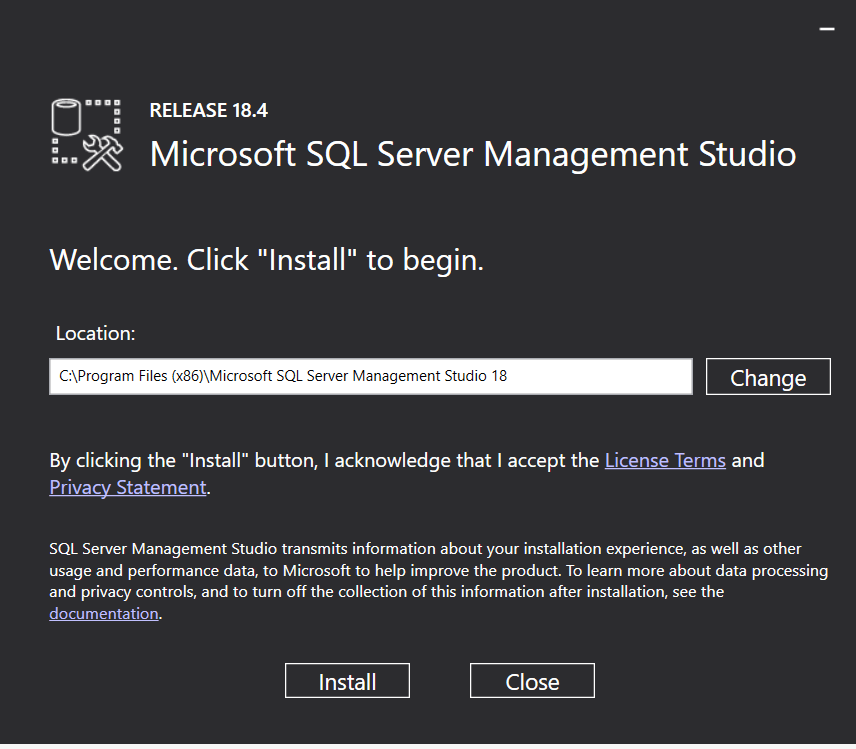
SQL server installation center. Go to windows start and search for Microsoft SQL Server Management Studio, and you should be able to find it, once you open it the UI should look similar to one shown below: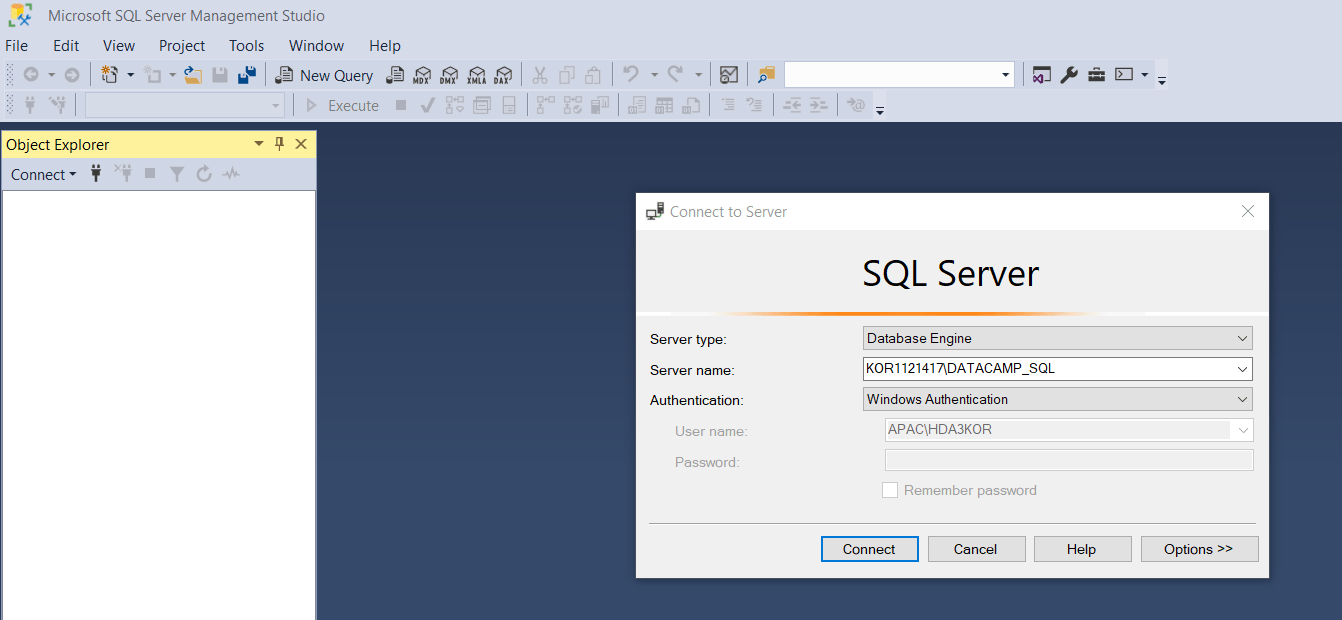
connect to server option with multiple parameters like Server Type, Server Name, Authentication, etc. Click on server name and select browse for more in that select Database engine. Once you select Database Engine it would show you the instance name you had created in instance configuration, click ok.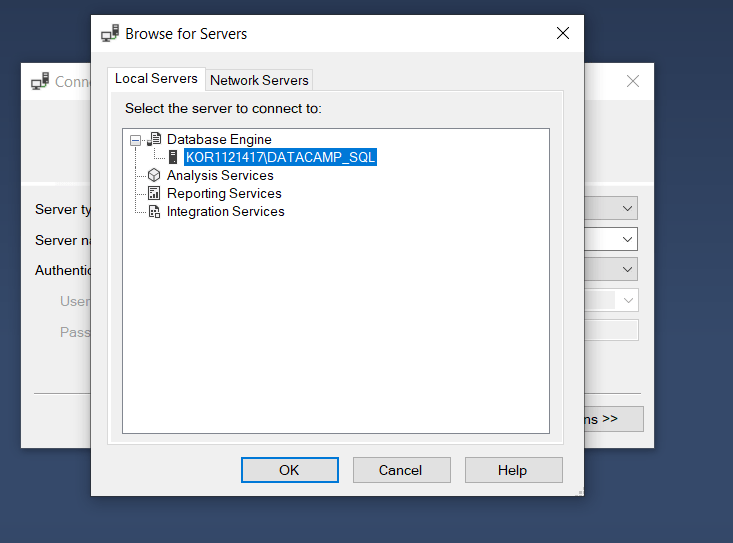
Authentication, select SQL Server authentication. It's important to note that the login will be default name i.e., sa, and the password will be the same as you had created in the earlier steps.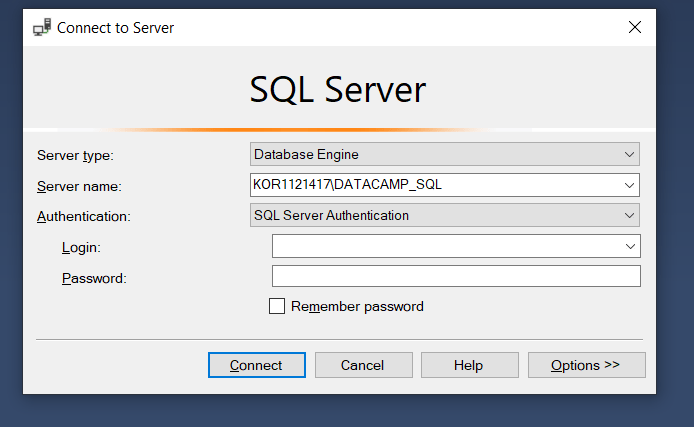
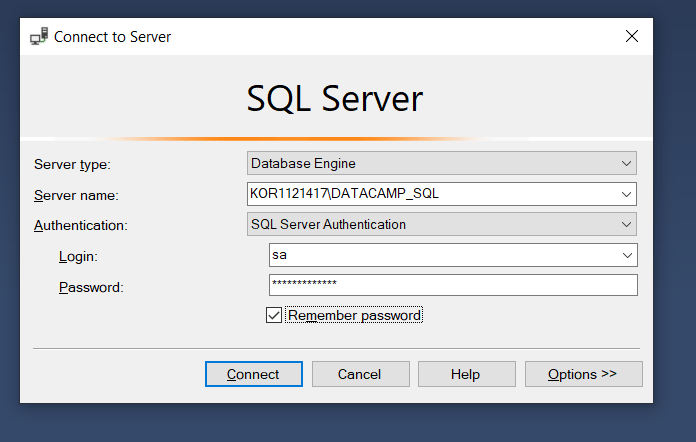
Connect. Once connected, you should see the Datacamp_SQL server that you had created listed on the object explorer panel, which means that you have successfully established a connection with your local SQL server. And you are all set to create a database, add, delete and insert in it.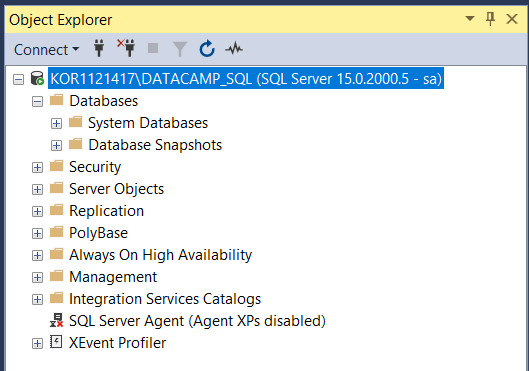
Awesome, so you were successful in installing SQL Server. Enjoy learning SQL!
Congratulations on finishing the tutorial.
This tutorial should take you one step closer to learning SQL in a more practical sense since your environment is set up now.
Please feel free to ask any questions related to this tutorial in the comments section below.
If you would like to learn about SQL from basic to an advanced level, take DataCamp's SQL Fundamentals skill track.
SQL courses
Course
Course
Course
Tutorial
Sayak Paul
Tutorial
DataCamp Team
Tutorial
Parul Pandey
Tutorial
Sayak Paul
Tutorial
Sayak Paul
Tutorial
Sayak Paul