Course
Introduction to Functions in Python
3 hr
466.5K
In data science, you will often need to create reports of your work to show to decision makers or other non-technical personnel. Converting your Jupyter Notebook into a stable PDF or HTML document is more transferable to colleagues who do not have Python or Jupyter installed. Python uses a library called nbconvert and a templating language called Jinja2 for converting documents. Templates define how a document will be displayed on a webpage or another output format. Understanding how to customize templates is beneficial to making beautified reports of your Notebooks.
Jupyter notebooks are a way to run Python code in your browser. If you'd like to learn more about Python, be sure tot take a look at our free Intro to Python for Data Science course.
In this tutorial, you'll cover the following topics:
Jinja2 template designer.nbconvert for exporting your Notebooks.From the Python wiki: "Templating, and in particular web templating, is a way to represent data in different forms... Frequently, templating solutions involve a document (the template) and data. Templates usually look much like the final output, with placeholders instead of actual data"
The Jupyter Notebook can be exported easily by using File -> Download As (In Jupyter Lab, you will see Export Notebook As). This option uses the default templates held in the main Jupyter environment. Jinja2 is a powerful templating language for Python to define blocking and typesetting. Templates have sections, defined by tags, which tell the template how to render the input data. The data replaces the variables, or expressions, when the template is rendered.
The delimiters for the different sections of a template are:
{% ... %} for Statements{{ ... }} for Expressions to print to the template output{# ... #} for Comments not included in the template outputTake a look at this short example of a Jinja template (courtesy of Jinja2 documentation):
<!DOCTYPE html>
<html lang="en">
<head>
{% block head %}
<link rel="stylesheet" href="style.css" />
<title>{% block title %}{% endblock %} - My Webpage </title>
{% endblock %}
</head>
<body>
<div id="content">{% block content %}{% endblock %}</div>
<div id="footer">
{% block footer %}
© Copyright 2008 by <a href="http://domain.invalid">you </a>.
{% endblock %}
</div>
</body>
</html>
You can see above that much of the template resembles a normal HTML document. Jinja needs a few extra lines to interpret the code as a template. The {% block head %} defines the head section of the HTML document and how this template will extend its formatting. The {% block title %} section describes where the input title will be displayed. And the {% endblock %} appears in multiple places because that ends any corresponding template block.
Now you are ready to learn how to use Jinja to create custom templates of your own!
Jinja is a templating engine that allows you to define how your documents will be displayed. Specifically, for this tutorial, you will focus on how to export your Jupyter Notebook with the help of Jinja templates.
First, from Jinja2 import Template:
from jinja2 import Template
Rendering data in Jinja templates is pretty straightforward. Using brackets and variable names, you can display your data in the template:
myTemplate = Template("My template is {{ something }}!")
myTemplate.render(something="awesome")
'My template is awesome!'
Calling .render(input) allows you to display the template in your Notebook with your input replacing the generic {{ something }} from the template. This is an example of expression usage in Jinja.
You can use a template more dynamically by defining a Python statement, which Jinja will interpret.
myFancyTemplate = Template("Let's count to 10: {% for i in range(11) %}{{i}} " "{% endfor %}")
myFancyTemplate.render()
"Let's count to 10: 0 1 2 3 4 5 6 7 8 9 10 "
Notice you defined a for loop and the template rendered the numbers from 0 to 10 with spaces between. The statement syntax of {% expression %} provides a lot of flexibility for making a custom template.
In order to make templates that extend the default Jupyter exports, you can use template inheritance. Inheritance is the concept in programming that you can implement something in a child object that can utilize the parent's defined functionality. A simple example is if you have a Dog object that can bark, eat, and walk, you can use inheritance to create a Dalmatian object that can inherit all those attributes and add others, like has spots. You will see in this tutorial how inheritance is very useful for templating, because typically only small changes are needed to customize the output. Like other inheritance languages, Jinja uses keywords like extends and super to access parent definitions.
Take a look at the example parent template from above, called base.html:
<!DOCTYPE html>
<html lang="en">
<head>
{% block head %}
<link rel="stylesheet" href="style.css" />
<title>{% block title %}{% endblock %} - My Webpage </title>
{% endblock %}
</head>
<body>
<div id="content">{% block content %}{% endblock %}</div>
<div id="footer">
{% block footer %}
© Copyright 2008 by <a href="http://domain.invalid">you </a>.
{% endblock %}
</div>
</body>
</html>
A child template might look like this (courtesy of Jinja2 documentation):
{% extends "base.html" %}

{% block title %}Index{% endblock %}

{% block head %}
    {{ super() }}
    <style type="text/css">
        .important { color: #336699; }
    </style>
{% endblock %}

{% block content %}
    <h1>Index</h1>
    <p class="important">
      Welcome to my awesome homepage.
    </p>
{% endblock %}
Notice how the child template begin with {% extends "base.html" %}. This declaration tells the Jinja templating engine how to treat this document (as an HTML with inheritance from base.html). Using this child template allows for specifying different attributes for the homepage (like a specific CSS color). Also, you can see in the head block that the child template inherits the parent's style with the call to super().
Now that you understand the basic syntax and inheritance of templates, you can learn how to export your Jupter Notebook with nbconvert and define templates to customize the output.
First import nbconvert:
import nbconvert
nbconvert can create output to a variety of formats. This tutorial will focus on HTML and LaTeX/PDF output. To view the output in the notebook, use the IPython display function and the --stdout in your call to nbconvert.
example = !jupyter nbconvert --to html 'Example.ipynb' --stdout
from IPython.display import HTML, display
display(HTML('\n'.join(example)))
[NbConvertApp] Converting notebook Example.ipynb to html
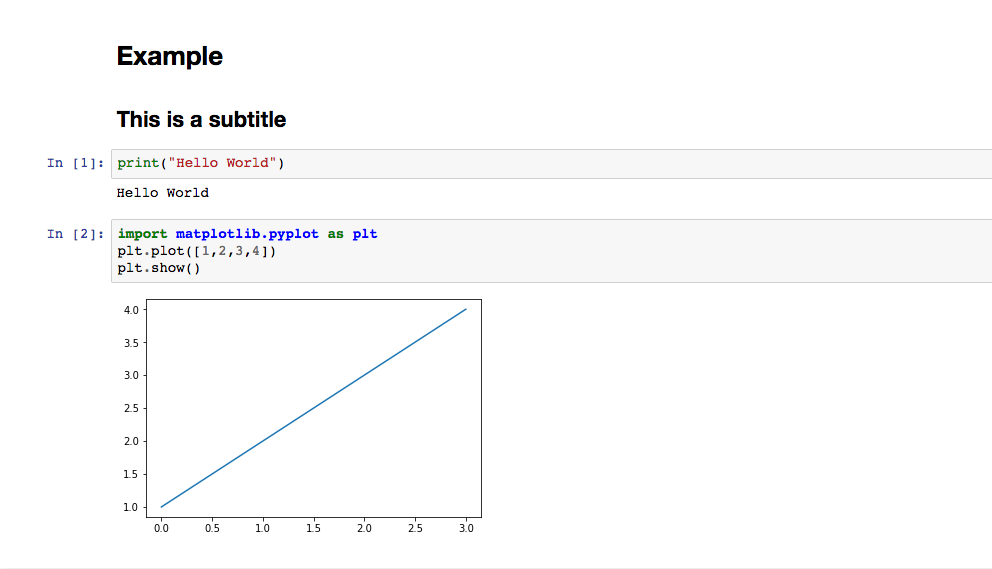
This snippet of a Notebook looks very similar to the original .ipynb file. The output displays as a standalone document with headings and text the way it typically displays in a Notebook. The code cell blocks are displayed as gray boxes (known as "Notebook style"). The main difference you can see is that the Jupyter default HTML template does not display "Out:" prompts, like active Notebooks do.
Typically, you'll want to extend the Jupyter Notebook's default export templates and make small design changes to your output.
For example, look at this simple template that removes Markdown cells from the output (called rmMkdwn.tpl):
{% extends 'basic.tpl'%}

{% block markdowncell -%}
{% endblock markdowncell %}
Applying a template to nbconvert is done with the --template= option:
example = !jupyter nbconvert --to html 'Example.ipynb' --template='rmMkdwn.tpl' --stdout
display(HTML('\n'.join(example)))
[NbConvertApp] Converting notebook Example.ipynb to html 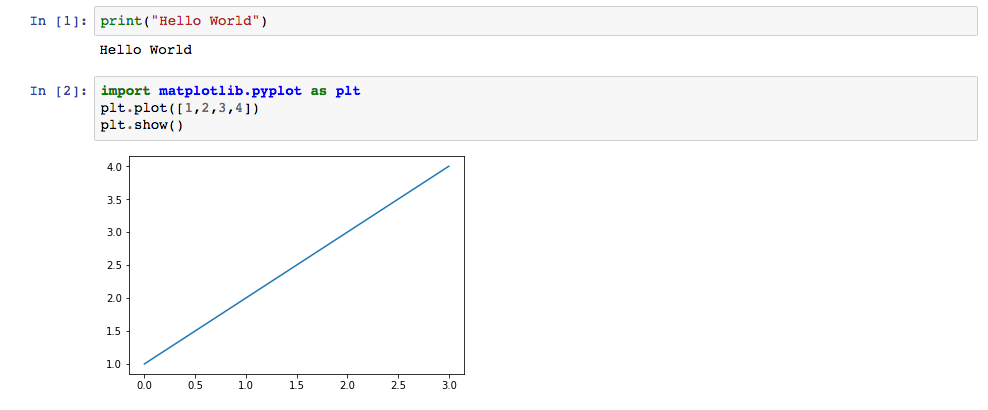 Even a very simple template, like rmMkdwn.tpl , can help you customize your output tremendously.
Look at this more complicated template, which boxes cells in red (called boxRed.tpl):
{% extends 'full.tpl'%}

{% block any_cell %}
    <div style="border:thin solid red">
        {{ super() }}
    </div>
{% endblock any_cell %}
example = !jupyter nbconvert --to html 'Example.ipynb' --template='boxRed.tpl' --stdout
display(HTML('\n'.join(example)))
[NbConvertApp] Converting notebook Example.ipynb to html 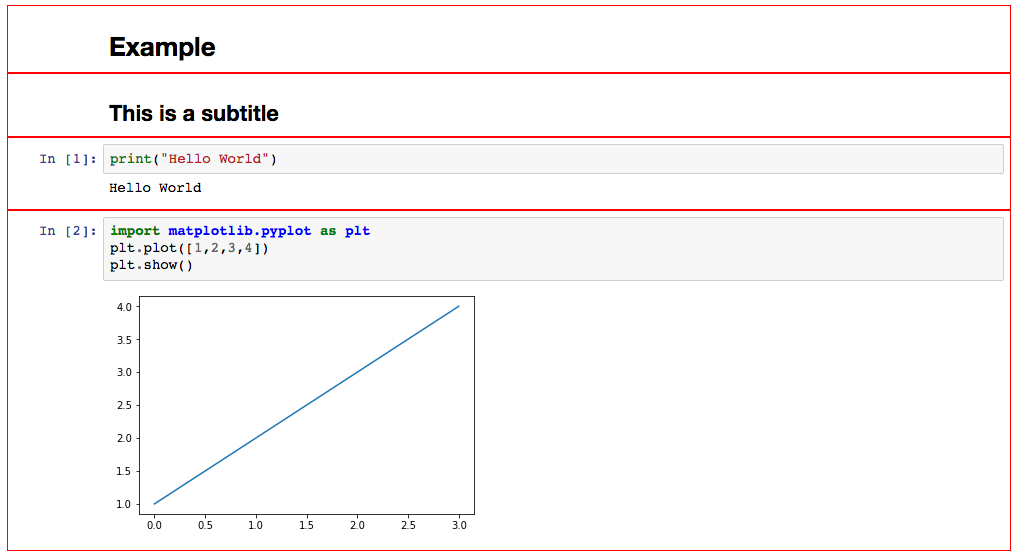
Above, you can see that the only style change is the red boxes around each cell. super() is used to make sure that each cell maintains its individual styling from the parent template full.tpl.
Since { } and % are special characters in LaTeX, you have to use (( )) and *. Also the default LaTeX templates are base.tplx, article.tplx, and report.tplx, which correspond to LaTeX document classes.
Look at removing Markdown cells with a LaTeX child template:
((* extends 'article.tplx' *))

((* block markdowncell -*))
((* endblock markdowncell *))
nbconvert can make LaTeX or PDF output - the PDF output is compiled from the LaTeX templates. For ease of viewing in this tutorial, look at what happens when you export to PDF using rmMkdwn.tplx.
!jupyter nbconvert --to pdf 'Example.ipynb' --template='rmMkdwn.tplx'
from IPython.display import IFrame
IFrame('Example.pdf', width=800, height=500)
[NbConvertApp] Converting notebook Example.ipynb to pdf
[NbConvertApp] Support files will be in Example_files/
[NbConvertApp] Making directory Example_files
[NbConvertApp] Writing 16047 bytes to notebook.tex
[NbConvertApp] Building PDF
[NbConvertApp] Running xelatex 3 times: ['xelatex', 'notebook.tex']
[NbConvertApp] Running bibtex 1 time: ['bibtex', 'notebook']
[NbConvertApp] WARNING | bibtex had problems, most likely because there were no citations
[NbConvertApp] PDF successfully created
[NbConvertApp] Writing 16102 bytes to Example.pdf
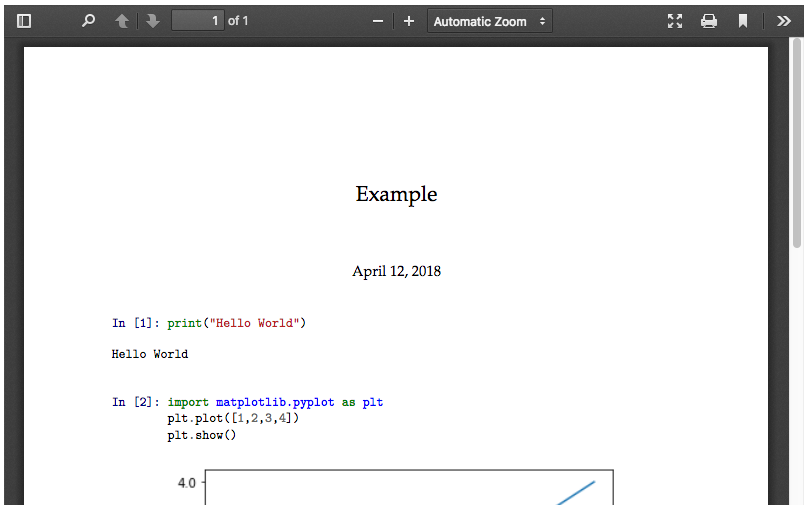
Notice, this output turned out very differently than the HTML version. LaTeX feeds the first Markdown cell into the article title, so it still displays in the output. The template did correctly remove the subtitle (so it regarded that Markdown cell as true Markdown). The article document class updates with today's date - which is not something in the original Notebook. The font and spacing is different than the HTML version. Lastly, by default the output uses the classic IPython display, not the "Notebook style" display.
If you choose to extend a LaTeX document class that lives in Jupyter, make sure you understand what formatting it will use.
There are some key things to remember about templates, Jinja2 and nbconvert.
Templates define how a document will be displayed on a webpage or another output format. Jupyter Notebooks implement Jinja templates to display different export formats. Templates have inheritance rules that allow you to define parent and child templates for similar pages, with slightly different formatting.
Jinja templates have statements, expressions, and (optionally) comments. Statements, defined by {% statement %}, define the template structure. Expressions, defined by {{ expression }}, fill the template with your data. And comments, defined by {# comment #}, do not get displayed in the output - they are internal to the template only.
nbconvert is a Python library that allows you to convert your Jupyter Notebook into other formats, like HTML, LaTeX and PDF. nbconvert uses Jinja templates to define how Jupyter Notebooks will be displayed in these formats. You can define custom templates or extend the default Jupyter templates using inheritance.
Now you are ready to start making your own templates and exporting beautiful Jupyter Notebook documents!
References:
Learn more about Python
Course
Course
Course
cheat-sheet
Karlijn Willems
Tutorial
Olivia Smith
Tutorial
Çağlar Uslu
Tutorial
Adam Shafi
Tutorial
Javier Canales Luna
code-along
Filip Schouwenaars