Course
Introduction to Python
4 hr
6.9M

It’s impossible to understand software development without programming languages. True, a software developer with no programming language is like a taxi driver with no car. However, things are more complex. Just as GPS makes taxi drivers’ life easier, so does Integrated Development Environments (also known as IDEs) for programmers.
IDEs are designed to enable programmers to write code and develop software applications more efficiently. IDEs increase programmer productivity by putting together multiple utilities into a single interface. Writing, testing, and debugging code, as well as editing functionalities, such as syntax highlighting, bracket-matching, and code autocompletion, are among the most common features of modern IDEs.
There are many IDEs particularly well-suited for data science, including DataCamp’s DataLab. In this article, we will introduce you to JupyterLab, the next generation of Jupyter Notebook, probably the most popular IDE for data science. Released in 2018, JupyterLab offers a flexible user interface and more features than the classic Jupyter Notebook, and it’s certainly the present and the future of Project Jupyter. Willing to get started with JupyterLab? Keep reading!
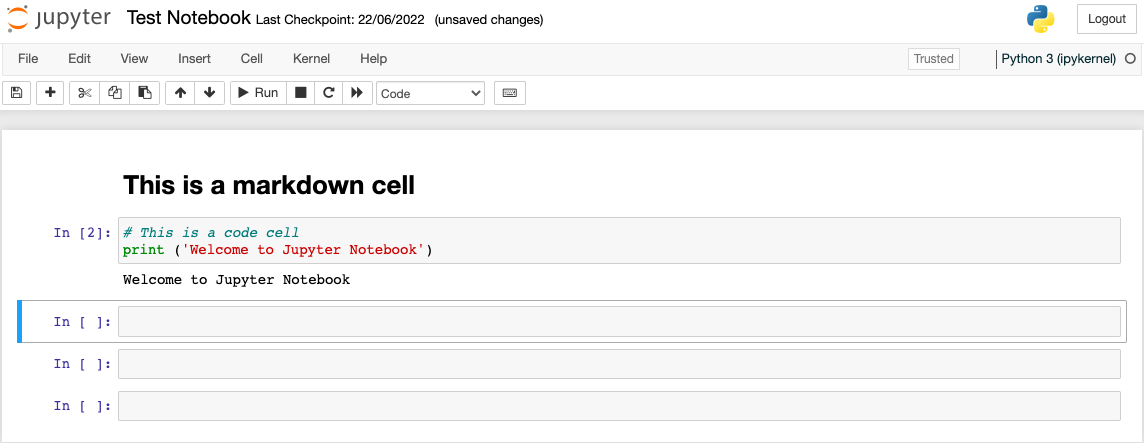
When Jupyter Notebook was launched for the first time in 2014, it rapidly revolutionized the IDE landscape. Recently considered one of the most important computing projects, which has changed the process of scientific publishing forever, Jupyter has become the de facto standard in data science.
Jupyter Notebook works as a server-client application, allowing coders to edit and run notebooks via a web browser. The application can be executed on a computer without Internet access, or it can be installed on a remote server, where you can access it through the Internet.
Initially designed to support Julia, Python, and R –three of the most popular programming languages for data science–today, Jupyter supports over 40 programming languages.
Jupyter is made of two main components.
As an improved version of Jupyter Notebook, JupyterLab adds new features and capabilities, although the core components remain intact.
In order to use JupyterLab, you first will need to install it on your computer, as with any other program. This can be done in different ways, depending on your preferences: using pip, Anaconda, or Docker.
Pip is the standard package manager in Python. To install JupyterLab with pip, you just have to run on the command line:
>>pip install jupyterlabAfter running this instruction, pip will install the JupyterLab packages as well as all the dependencies required for JupyterLab to function. If you want to know more about how to manage packages in Python, check out our Pip Python Tutorial for Package Management.
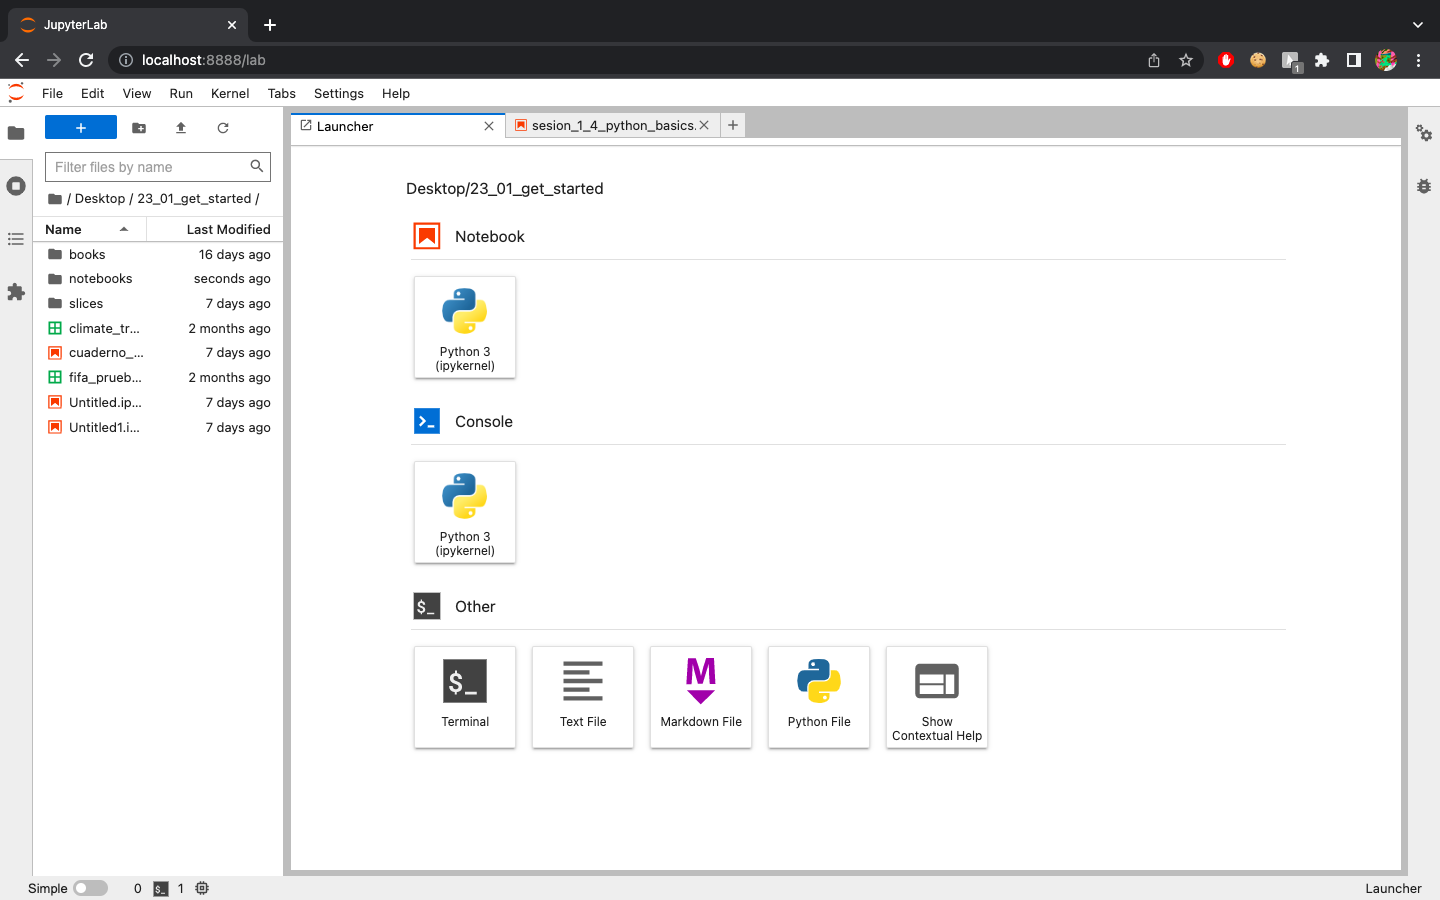
Once you have successfully installed JupyterLab on your computer, you just have to run the following statement to open up JupyterLab:
>>jupyter labThen you'll see the application opening in your preferred web browser on the following address: http://localhost:8888/lab
Anaconda is a package manager, an environment manager, and a Python distribution that contains a collection of many open-source packages. Anaconda is a great choice if you want to get started in data science. You no longer need to worry about how to install Python or JupyterLab, as they get installed automatically in modern Anaconda distributions.
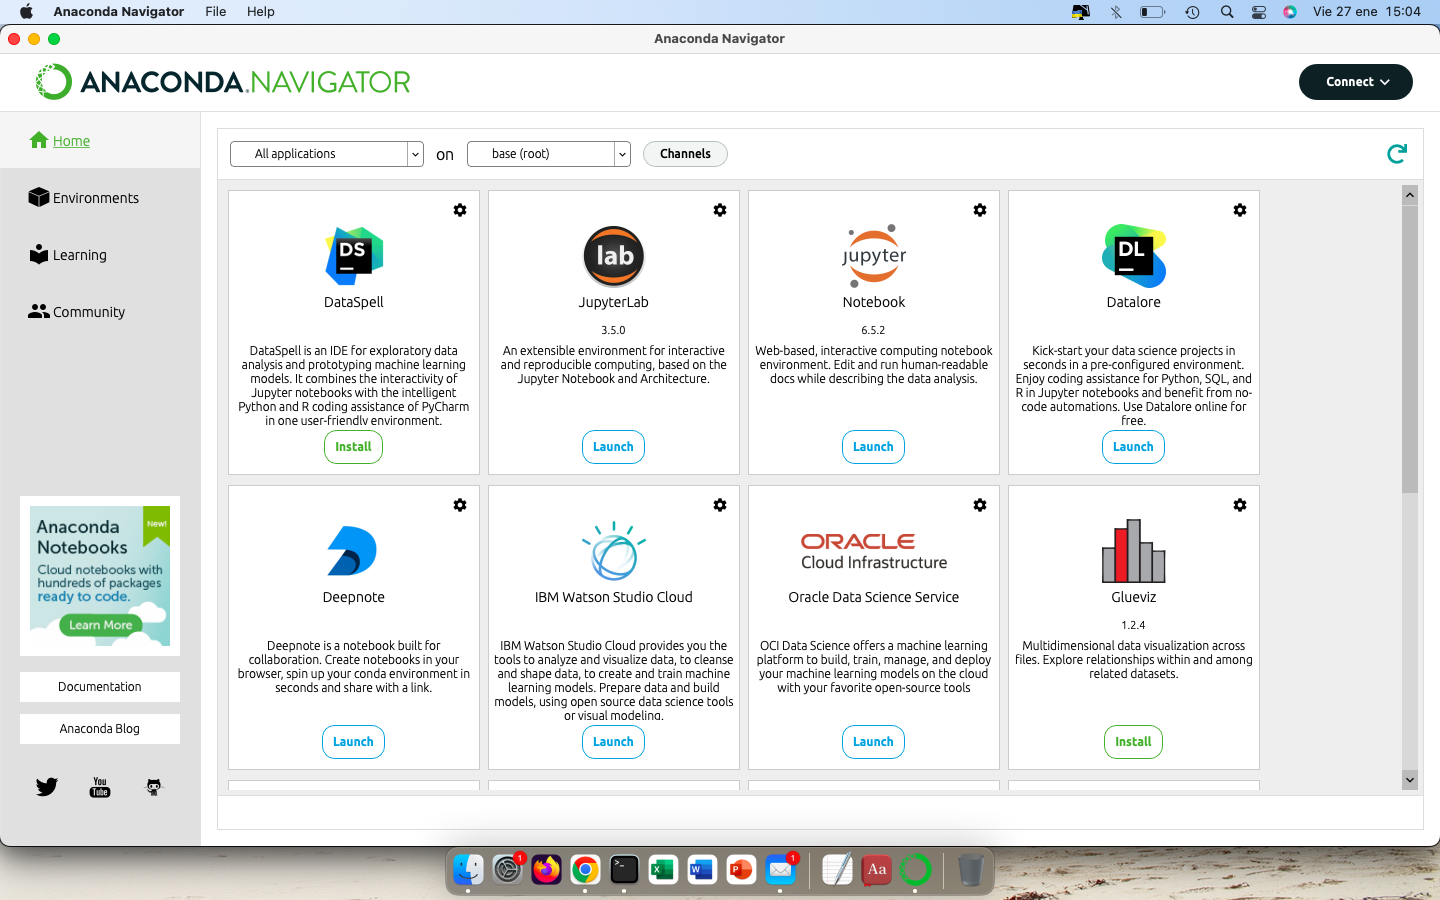
The easiest way to launch JupyterLab is through the Anaconda Navigator, an application that allows you to make use of Anaconda functionalities in a user-friendly and no-code way. As you can see in the picture below, both Jupyter Notebook and JupyterLab are already installed. You just have to click on the Launch button to open JupyterLab on your web browser.
However, in certain cases –for example, when you create a new conda environment–, you may need to install JupyterLab on that environment. To do so, the fastest way is by running the following on the conda command line (Anaconda Prompt on Windows and terminal on macOS and Linux):
>>conda install -c conda-forge jupyterlabDocker is an open platform to run software in containers. These containers are self-contained and isolated processes that allow you to separate your applications from your infrastructure so you can deliver software quickly.
If you have Docker installed, you can install and use JupyterLab by selecting one of the many Docker images supported by the Jupyter Docker Stacks. You can consider these images as pre-packaged bundles of software that can be automatically downloaded from Docker when you run them.
For example, if you want to install Doker’s image jupyter/datascience-notebook, which includes libraries for data analysis from Julia, Python, and R, you just have to run the following on the Docker command:
>>docker run -it -p 10000:8888 -e JUPYTER_ENABLE_LAB=yes jupyter/scipy-notebookFor more details and examples on how to use JupyterLab on Docker, check out the documentation. Also, for a detailed introduction to Docker, we highly recommend this DataCamp tutorial.
JupyterLab interface is a remastered version of the Jupyter Notebook interface, providing a new set of modular building blocks for interactive and efficient computing. JupyterLab integrates several coding tools into one single interface, thus offering a coding experience that resembles more to traditional IDEs.
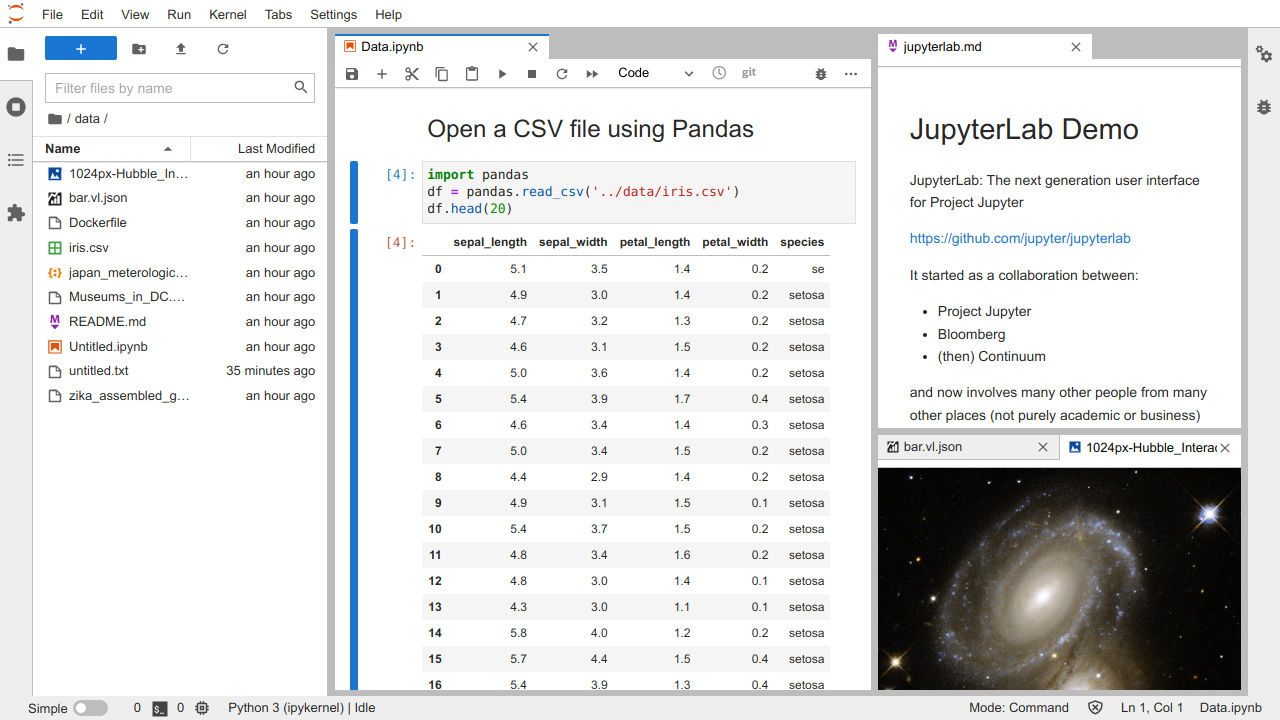
JupyterLab interface comprises the following main elements:
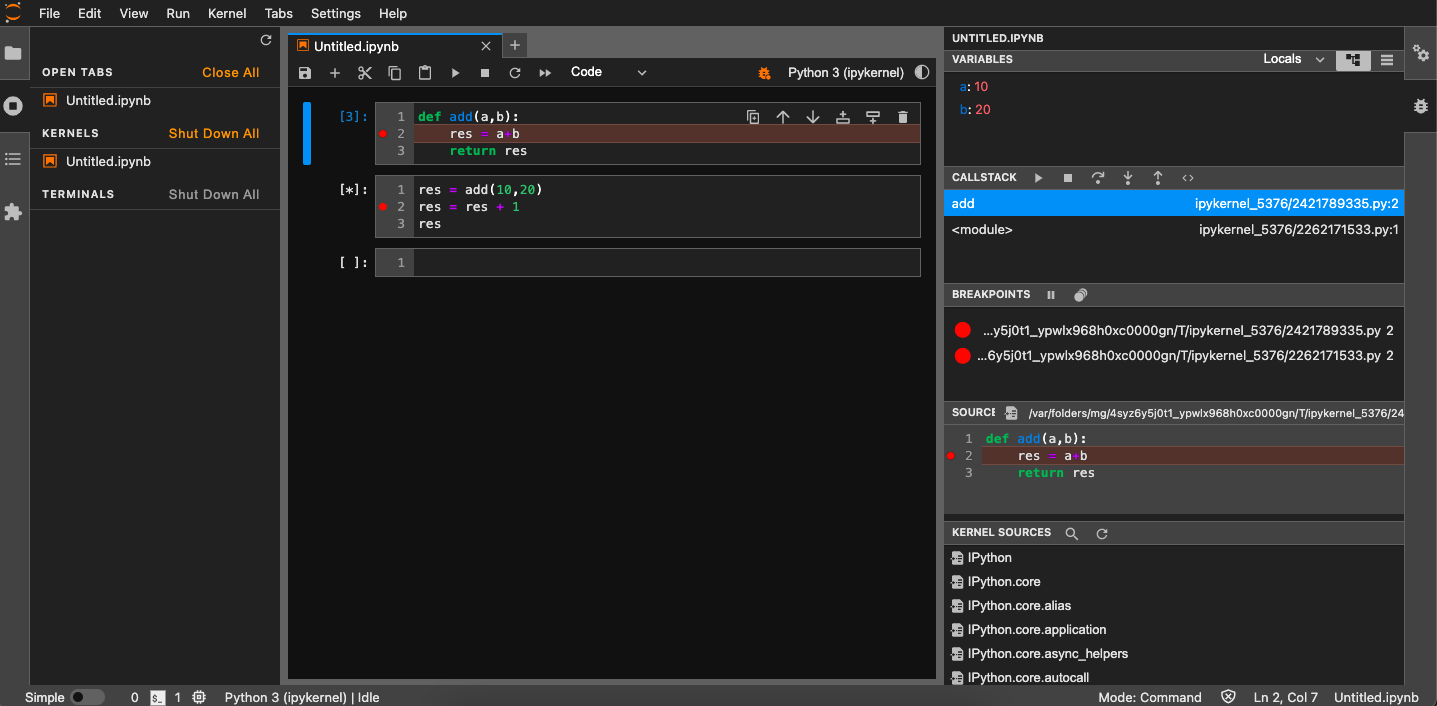
The goal behind debugging is to point out the causes of the bugs found in your program during the testing process, and thus adjust your code to output your accurate and desired result.
Data progressions, and more broadly, software developers, monitor the interactions between and changes in the program's variables in a debugging process. You can investigate the potential causes for the errors in your program by seeing how each different function, method, or even line of code alters the value and functionality of the variables.
Jupyter Notebook and the first versions of JupyterLab incorporated the %debug built-in magic command to conduct debugging tasks. However, the tool is quite rudimentary compared to debuggers in other IDEs.
Luckily, the latest versions of JupyerLab include a Debugger front-end by default, It includes the traditional debugging capabilities, including setting breakpoints, stepping into functions, and inspecting variables. You can activate it from the right sidebar, as shown in the image below:
JupyterLab is already a powerful and well-equipped tool, with new features that will make your coding experience more IDE-like. However, if you feel that some functionalities are missing or you want to enhance JupyterLab capabilities, you should check Jupyter Extensions.
Written in JavaScript, JUpyterLab extensions are pieces of software containing one or more plugins to add new capabilities to JupyterLab, such as new themes, file editor, and new command shortcuts.
There are two types of JupyterLab extensions:
If you use conda with conda-forge packages, you can get Node.js with:
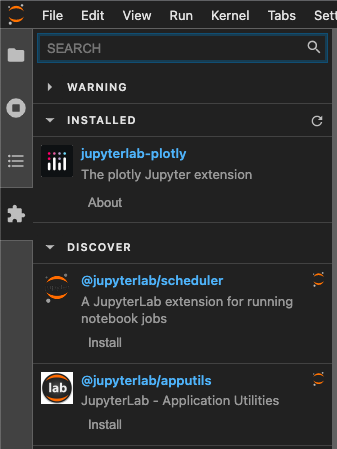
>>conda install -c conda-forge nodejsThere are several ways to manage JupyterLab extensions, but we highly recommend you use the built-in Extension Manager. Accessed through the puzzle icon on the life sidebar, the Extension manager allows you to install and disable extensions with no coding required.
For more information about JupyterLab extensions and how to manage them, check out JupyterLab documentation.
Below, you can find a table of differences between Jupyter Notebook and JupyterLab:
|
Jupyter Notebook |
JupyterLab |
|
|
Release date |
2014 |
2018 |
|
Open source? |
Yes |
Yes |
|
Tab system |
Single tab |
Multiple, modular tabs, everything in one view |
|
Debugging capabilities |
%debug magic command |
Debugger |
|
Data file viewer |
Data files view as text files |
Data can be viewed in table format |
|
Coding experience |
Feels like a standalone tool |
Feels like an IDE |
|
Themes by default |
White |
Light and Dark |
|
Advantages |
|
|
|
Disadvantages |
|
|
|
Future developments |
Remains as a legacy old version |
The future of the Project Jupyter |
If you’re looking for an online, cloud-based IDE that allows you to write code and analyze data collaboratively and share your data insights, DataLab is a great choice.
Built by DataCamp, DataLab is a cloud-based data analysis platform that is designed to help you get started quickly and easily. With DataLab, you can skip the time-consuming setup process and start working with data right away. There is no need to install anything, as everything is accessible through the browser.
When using DataLab, you’ll find built-in datasets that you can use instantly, as well as pre-built templates with pre-written code. DataLab is accessible to all skill levels, with low and no-code tools available to create stunning reports and visualizations.
It also supports Python and R, both with native SQL integrations and comes pre-configured and pre-installed with the world's most popular data science packages.
Run and edit the code from this tutorial online
Run codeRelated courses
Course
Course
Course
blog
Filip Schouwenaars
11 min
podcast
Tutorial
Olivia Smith
Tutorial
Adam Shafi
Tutorial
Bala Priya C
code-along
Filip Schouwenaars