track
Inginer AI asociat pentru oamenii de știință ai datelor
40 oră
GLM-5.2 is Z.ai’s latest flagship open model, built for long-horizon coding, reasoning, and agentic engineering tasks. It comes with a 1M-token context window, multiple thinking modes, tool-calling support, and improvements designed to help the model stay consistent across large codebases and multi-step tasks.
While the full model is massive, GGUF quantizations make it possible to run GLM-5.2 locally using llama.cpp on the right hardware.
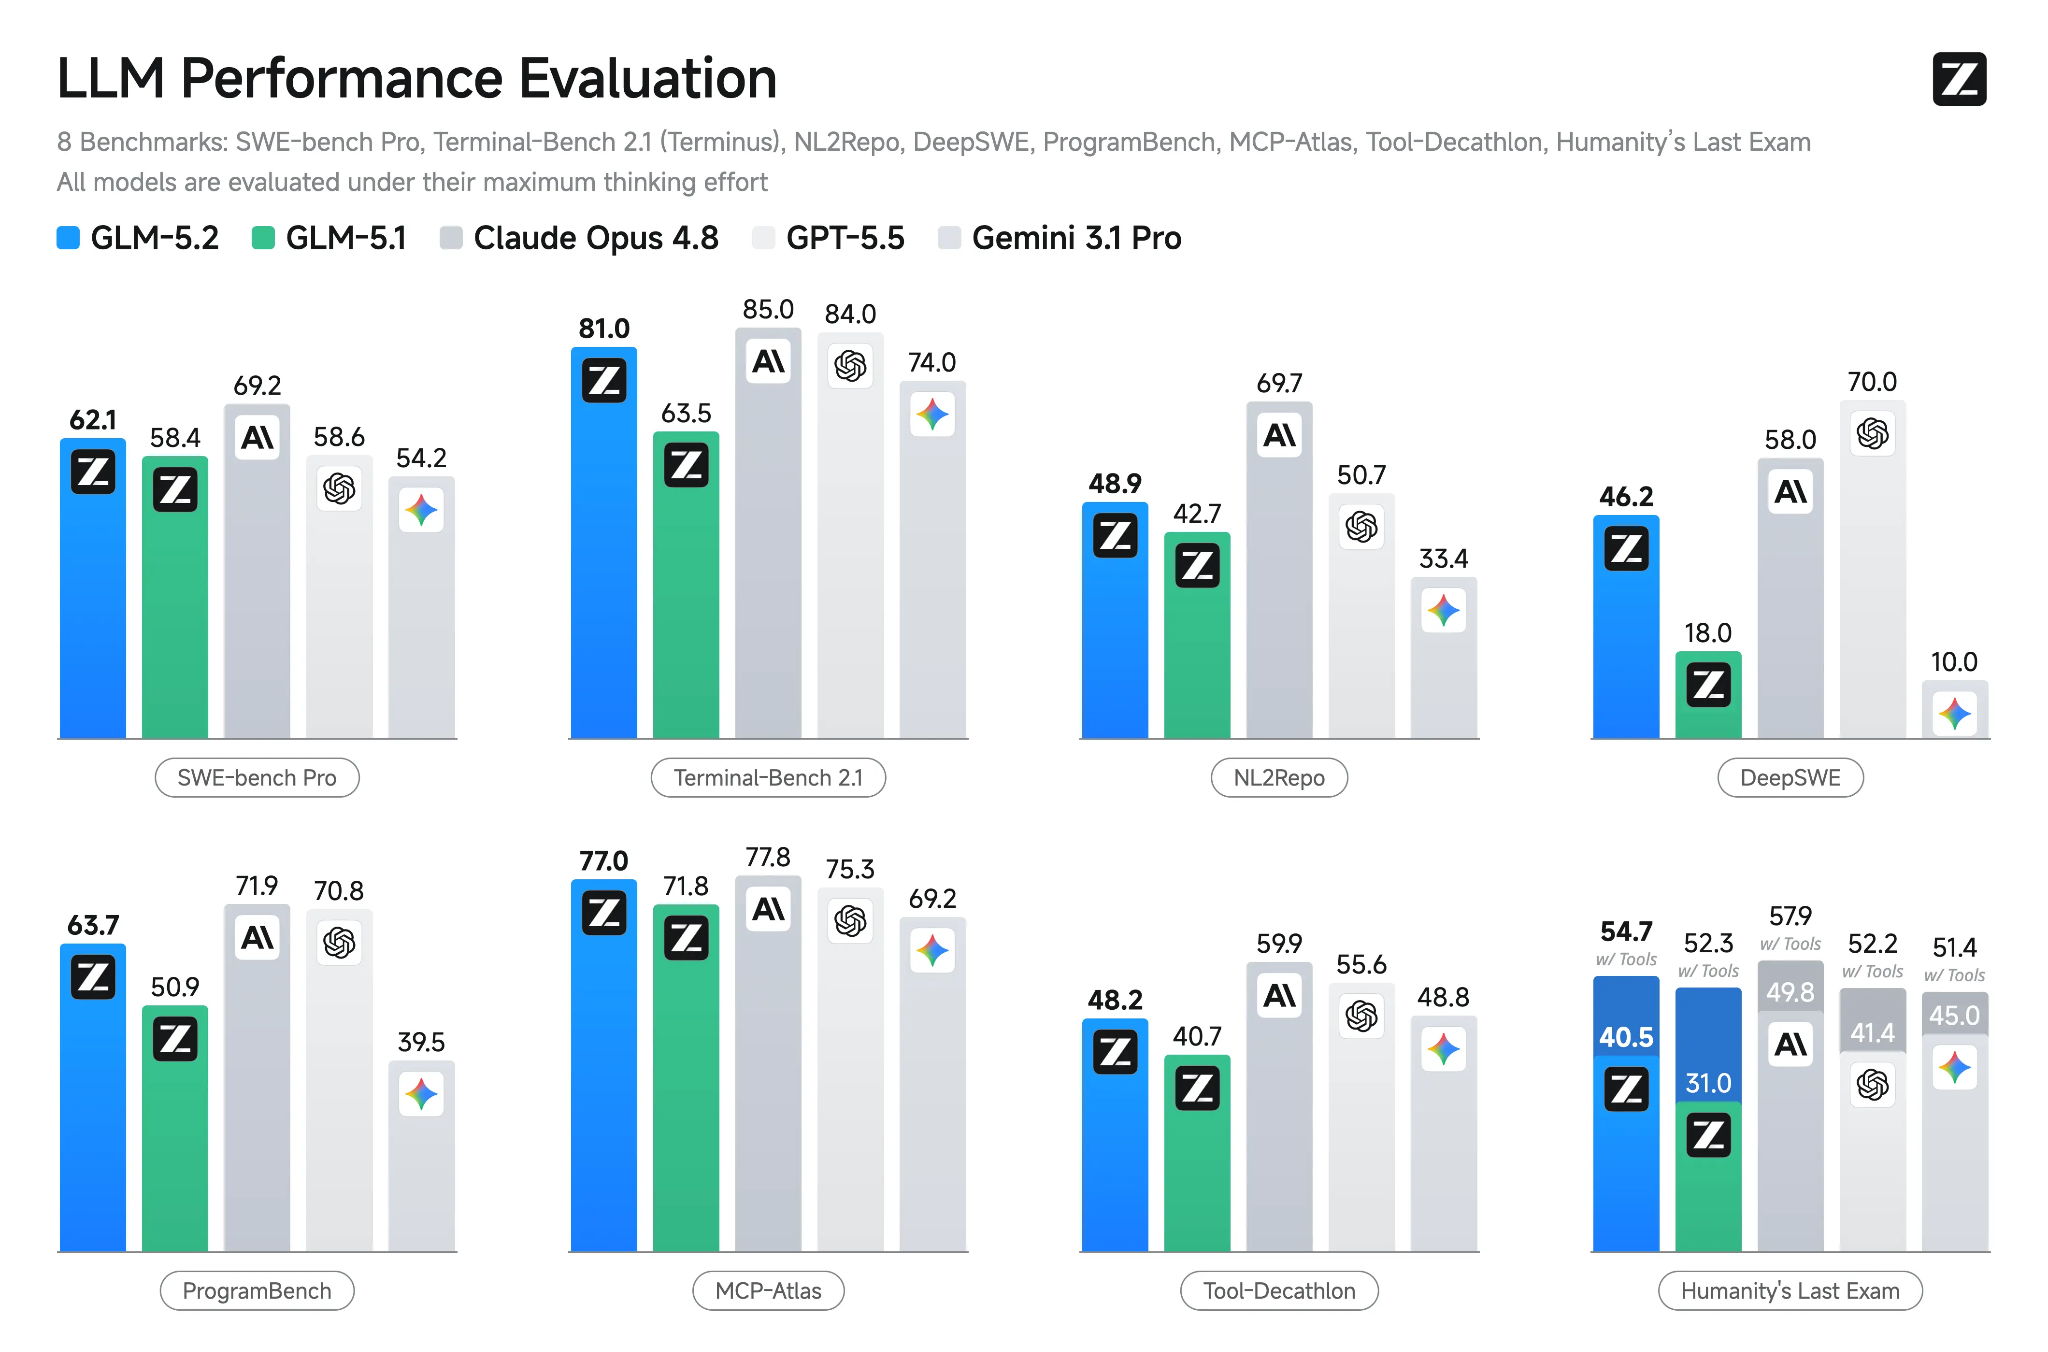
Source: GLM-5.2: Built for Long-Horizon Tasks
In this guide, I will show you how to install the prebuilt llama.cpp package and use it to serve GLM-5.2 on a RunPod GPU instance.
You will start the server with an API key, test its OpenAI-compatible endpoint with cURL, and use llama.cpp’s built-in Web UI in your browser.
Next, you will expose the server through RunPod’s proxy URL so it can be reached securely from your laptop or other applications.
Finally, you will connect that hosted GLM-5.2 server to OpenCode running locally beside your project, allowing OpenCode to read files, edit code, run tests, and use your local shell while GLM-5.2 handles the reasoning remotely.
Go to your RunPod dashboard and create a new Pod. Before launching it, make sure your account has at least $25 in credit, as GLM-5.2 requires a large multi-GPU setup.
Select a machine with 4× RTX PRO 6000 GPUs, which provides:
Before deploying, edit the Pod template. Increase the container disk space to at least 550 GB and add the following under Expose HTTP Ports:
8910This port will be used later for the llama.cpp server, Web UI, and OpenAI-compatible API.
For faster and more reliable model downloads, add your Hugging Face token as an environment variable in the template:
HF_TOKEN=your_hugging_face_token
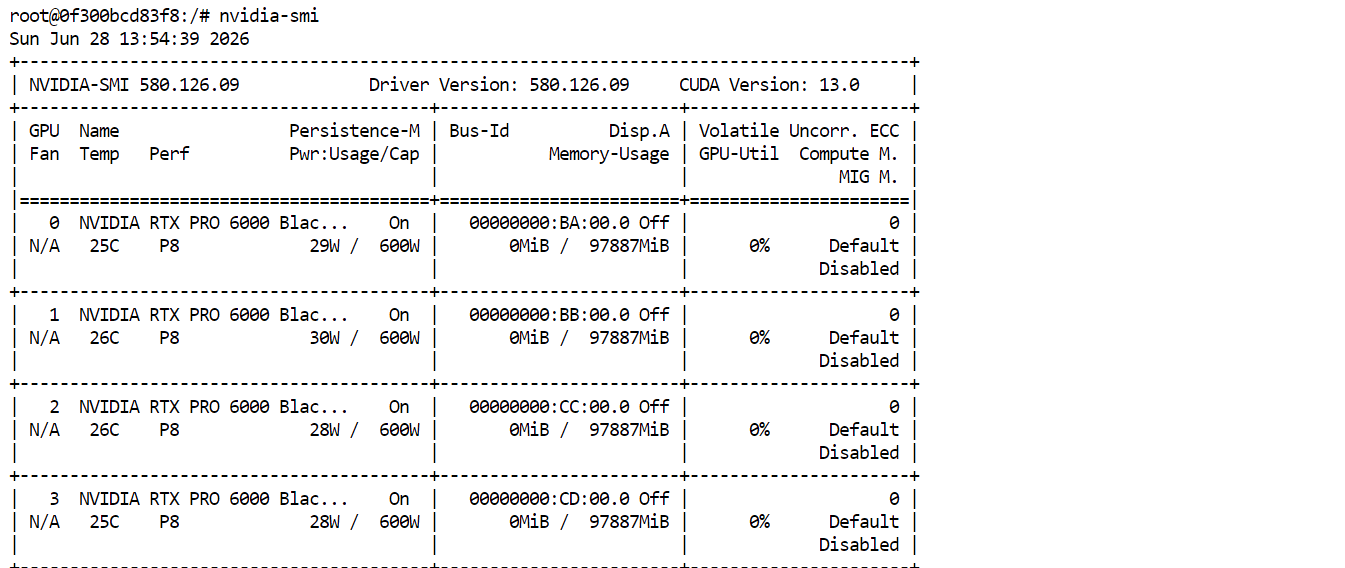
Once everything is configured, deploy the Pod. After it starts, click Connect and open JupyterLab. Launch a new terminal and run:
nvidia-smiYou should see all four RTX PRO 6000 GPUs listed and available. This confirms that the Pod is ready to download and run GLM-5.2.
Rather than compiling llama.cpp from source, install the latest prebuilt version using the official llama.app installer. Run the following command in your JupyterLab terminal:
curl -LsSf https://llama.app/install.sh | shNext, add the llama.cpp installation folder to your PATH so you can run the llama command from any terminal:
echo 'export PATH="$HOME/.local/bin:$PATH"' >> ~/.bashrcReload your Bash configuration to apply the change:
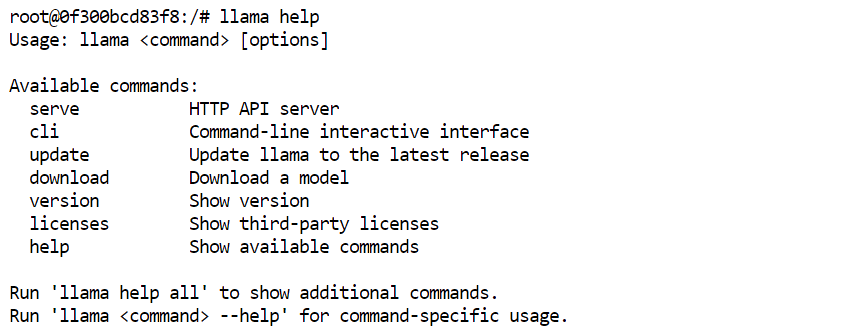
source ~/.bashrcFinally, confirm that llama.cpp was installed correctly:
llama helpYou should see the available llama.cpp commands.
Next, configure a persistent location for the model files.
RunPod’s /workspace directory remains available even when you pause the pod, so it is a better place to store the Hugging Face cache than the default location.
Run the following commands in the JupyterLab terminal:
export HF_HOME="/workspace/huggingface"
mkdir -p "$HF_HOME"
This ensures that downloaded model files are stored in /workspace/huggingface.
Now create an API key for your llama.cpp server. Use a long, random value and keep it private, as you will need the same key later when testing the API and connecting OpenCode:
export LLAMA_API_KEY="replace-this-with-a-long-random-secret"Finally, set a simple alias for the model:
export MODEL_ALIAS="glm-5.2-iq3s"OpenCode will use this exact model alias later, so keep it unchanged throughout the guide.
You are now ready to start the GLM-5.2 server. Run the following command in the same terminal:
CUDA_VISIBLE_DEVICES=0,1,2,3 llama serve \
  -hf unsloth/GLM-5.2-GGUF:UD-IQ3_S \
  --alias "$MODEL_ALIAS" \
  --host 0.0.0.0 \
  --port 8910 \
  --api-key "$LLAMA_API_KEY" \
  --n-gpu-layers 999 \
  --split-mode layer \
  --tensor-split 1,1,1,1 \
  --ctx-size 100000 \
  --parallel 1 \
  --flash-attn on \
  --jinja
The first time you run this command, llama.cpp will download the UD-IQ3_S GGUF quantization of GLM-5.2 from Hugging Face and store it in the cache directory you configured earlier.
The download may take some time because the model is very large.
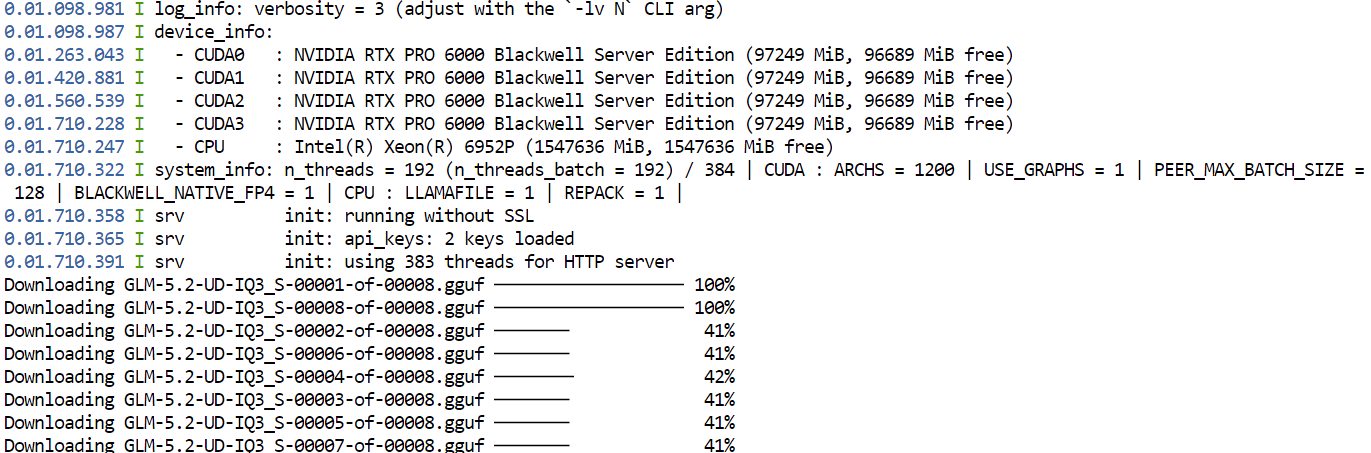
After the download finishes, llama.cpp will load the model across all four GPUs. The --split-mode layer and --tensor-split 1,1,1,1 settings divide the model evenly across the available GPUs, while Flash Attention helps improve performance.
Once the model has loaded successfully, the local server will be available at:
http://127.0.0.1:8910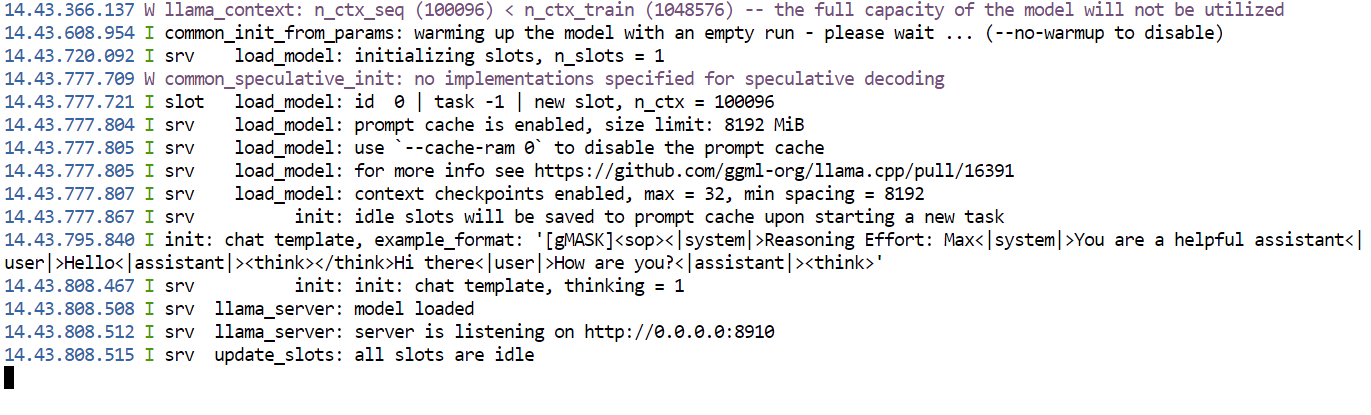
The server is protected by the API key you set earlier. Keep this terminal open while using the model, as closing it will stop the server.
Open your RunPod Pod and go to the Connect tab. Under the exposed HTTP ports, click the link associated with port 8910. This will open the llama.cpp Web UI in your browser.
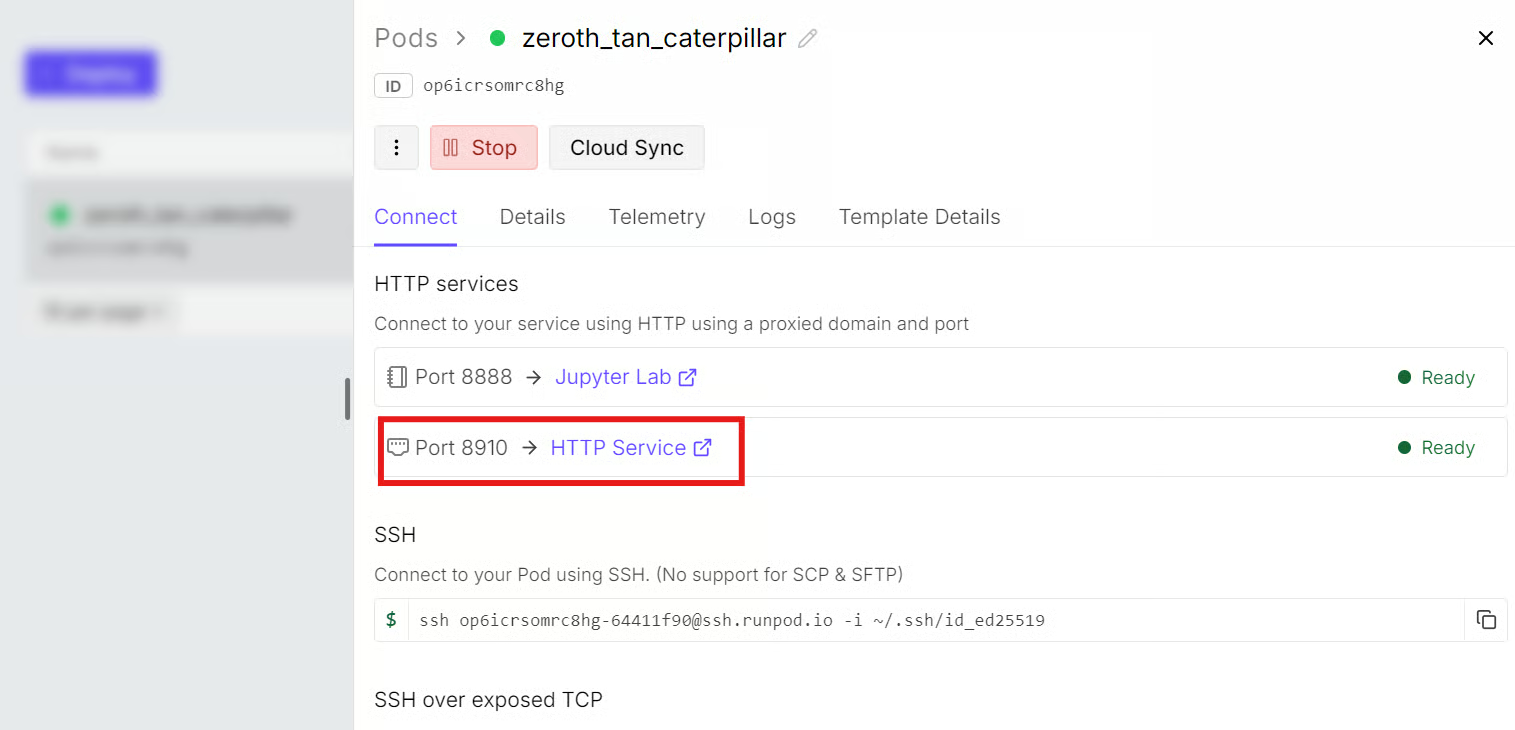
The URL will follow this format:
https://YOUR_POD_ID-8910.proxy.runpod.netReplace YOUR_POD_ID with your actual RunPod Pod ID if you need to enter the URL manually.
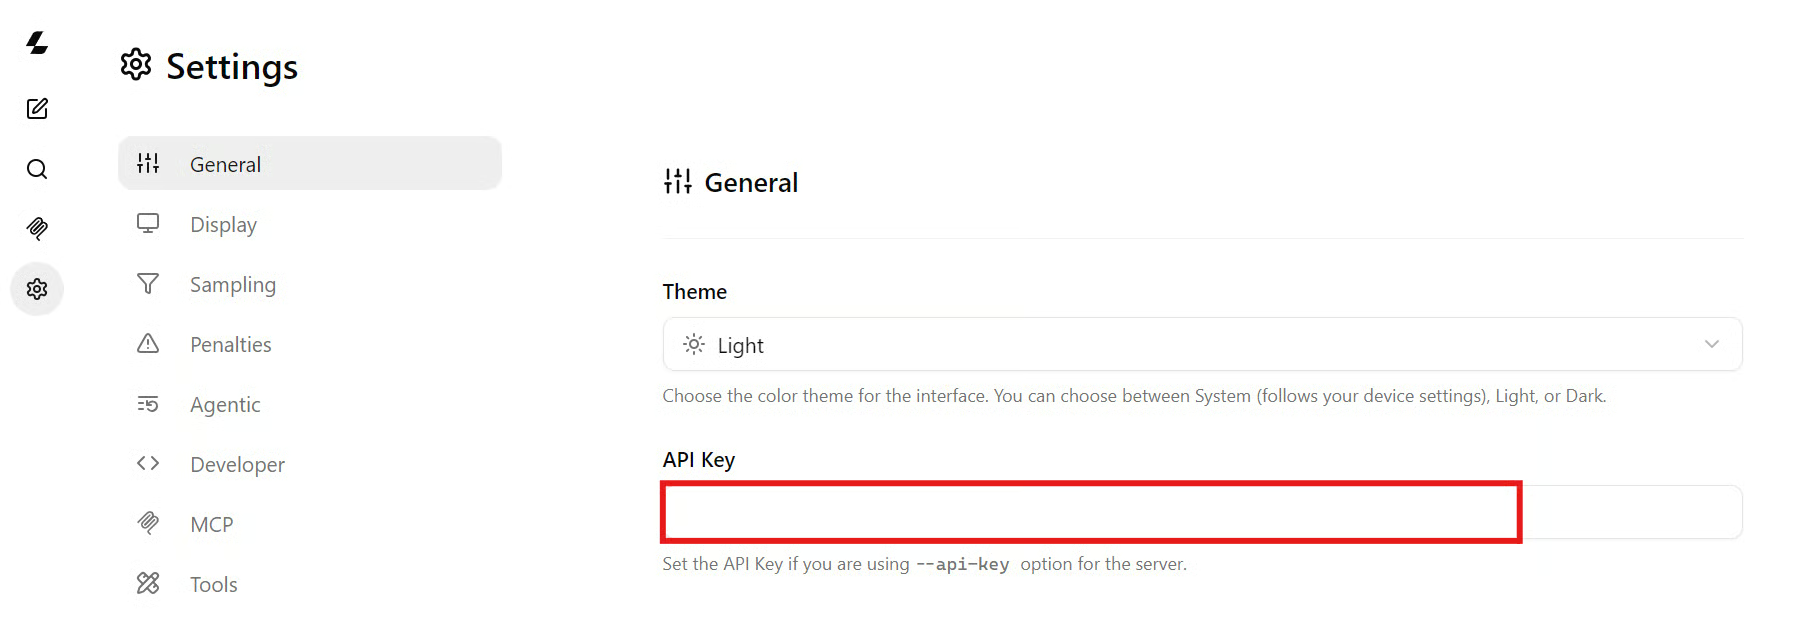
In the llama.cpp Web UI, open Settings and go to General. Paste the same API key that you used when starting the llama.cpp server.
This allows the Web UI to authenticate its requests and communicate with the protected server.
You can now test the model with a simple coding prompt:
Write a Python function that validates an email address without external packages.
Include three pytest tests.
In this setup, GLM-5.2 generated at around 41 tokens per second on average, which is a good speed for a model of this size.
The response quality was also strong, producing a structured implementation with clear validation rules and test cases.
Open a second terminal in JupyterLab. The first terminal must remain open because it is running the llama.cpp server.
In the new terminal, set the local API URL, reuse the same API key, and set the model alias:
export BASE_URL="http://127.0.0.1:8910/v1"
export LLAMA_API_KEY="replace-this-with-the-same-server-key"
export MODEL_ALIAS="glm-5.2-iq3s"
First, check that the server is running and that GLM-5.2 is available:
curl --fail-with-body -sS \
  "$BASE_URL/models" \
  -H "Authorization: Bearer $LLAMA_API_KEY"
You should see the model alias in the response:
glm-5.2-iq3sNext, send a test request to the OpenAI-compatible chat completions endpoint:
glm-5.2-iq3s

Next, send a test request to the OpenAI-compatible chat completions endpoint:
curl --fail-with-body -sS \
  --connect-timeout 15 \
  --max-time 600 \
  -X POST "$BASE_URL/chat/completions" \
  -H "Authorization: Bearer $LLAMA_API_KEY" \
  -H "Content-Type: application/json" \
  --data @- <<JSON
{
  "model": "$MODEL_ALIAS",
  "messages": [
    {
      "role": "system",
      "content": "You are a precise senior software engineer."
    },
    {
      "role": "user",
      "content": "Write a Python function that validates an email address without external packages. Include three pytest tests."
    }
  ],
  "temperature": 0.2,
  "max_tokens": 1500,
  "stream": false
}
JSON
The server will return a JSON response containing the model’s answer.
In this test, GLM-5.2 produced a structured Python implementation with validation logic and pytest test cases at an average generation speed of roughly 41 tokens per second.
This local URL only works inside the RunPod Pod. To call the same server from your laptop, OpenCode, or another external application, use the RunPod proxy URL instead:
export BASE_URL="https://YOUR_POD_ID-8910.proxy.runpod.net/v1"Replace YOUR_POD_ID with your actual RunPod Pod ID, and continue using the same API key in the Authorization header.
Install OpenCode on the computer where your code project is stored. Open a terminal and run:
curl -fsSL https://opencode.ai/install | bashNext, move into your project folder:
cd /path/to/your/projectExport the same API key that you used when starting the llama.cpp server on RunPod:
export LLAMA_API_KEY="replace-with-the-same-server-key"OpenCode runs locally alongside your project, while GLM-5.2 continues to run remotely on your RunPod Pod. This setup allows OpenCode to read your files, edit code, run tests, and use your local terminal, while GLM-5.2 handles the reasoning through the secured RunPod API.
Create a file named opencode.json in your project root and add the following configuration:
{
  "$schema": "https://opencode.ai/config.json",

  "enabled_providers": ["llama-runpod"],

  "provider": {
    "llama-runpod": {
      "npm": "@ai-sdk/openai-compatible",
      "name": "GLM-5.2 on RunPod",

      "options": {
        "baseURL": "https://YOUR_POD_ID-8910.proxy.runpod.net/v1",
        "apiKey": "{env:LLAMA_API_KEY}",
        "timeout": 600000,
        "chunkTimeout": 120000
      },

      "models": {
        "glm-5.2-iq3s": {
          "name": "GLM-5.2 UD-IQ3_S",
          "limit": {
            "context": 100000,
            "output": 32000
          }
        }
      }
    }
  },

  "model": "llama-runpod/glm-5.2-iq3s",
  "small_model": "llama-runpod/glm-5.2-iq3s"
}
Replace YOUR_POD_ID with your actual RunPod Pod ID. The URL must match the RunPod proxy URL you used to open the llama.cpp Web UI.
Once the opencode.json file is saved, open a terminal in the same project folder and start OpenCode:
opencodeThen run:
/modelsSelect:
GLM-5.2 UD-IQ3_S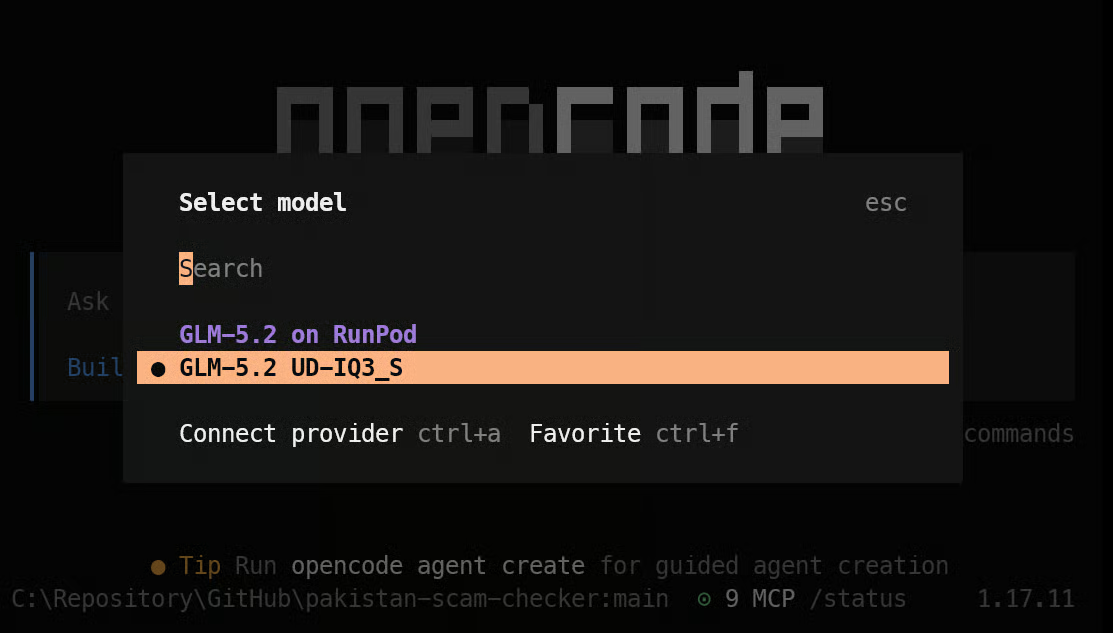
OpenCode is now connected to your GLM-5.2 server. It will use the remote model for reasoning while keeping project files, terminal commands, code edits, and test execution on your own laptop.
Start with a simple test to confirm that OpenCode can reach your GLM-5.2 server and return a response.
In OpenCode, type:
hey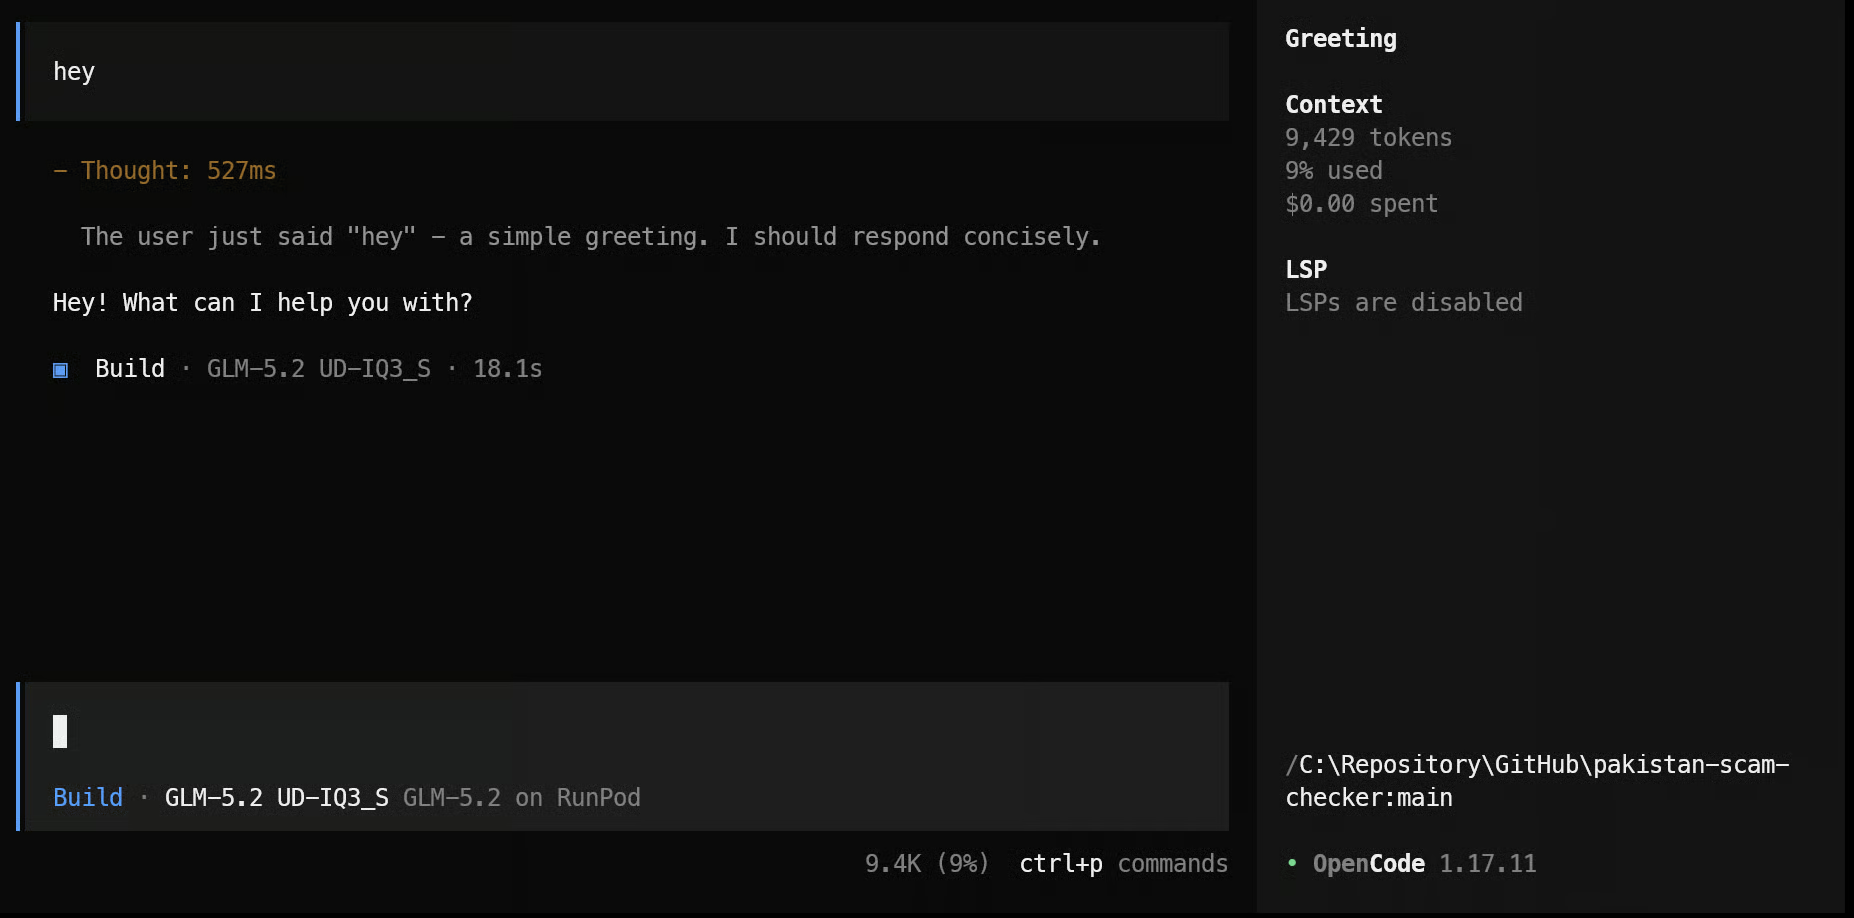
Next, ask OpenCode to inspect and explain your existing project:
Explain the project in 3-5 short bullet points, including its purpose, main technologies,
entry point, and how the main parts work together.
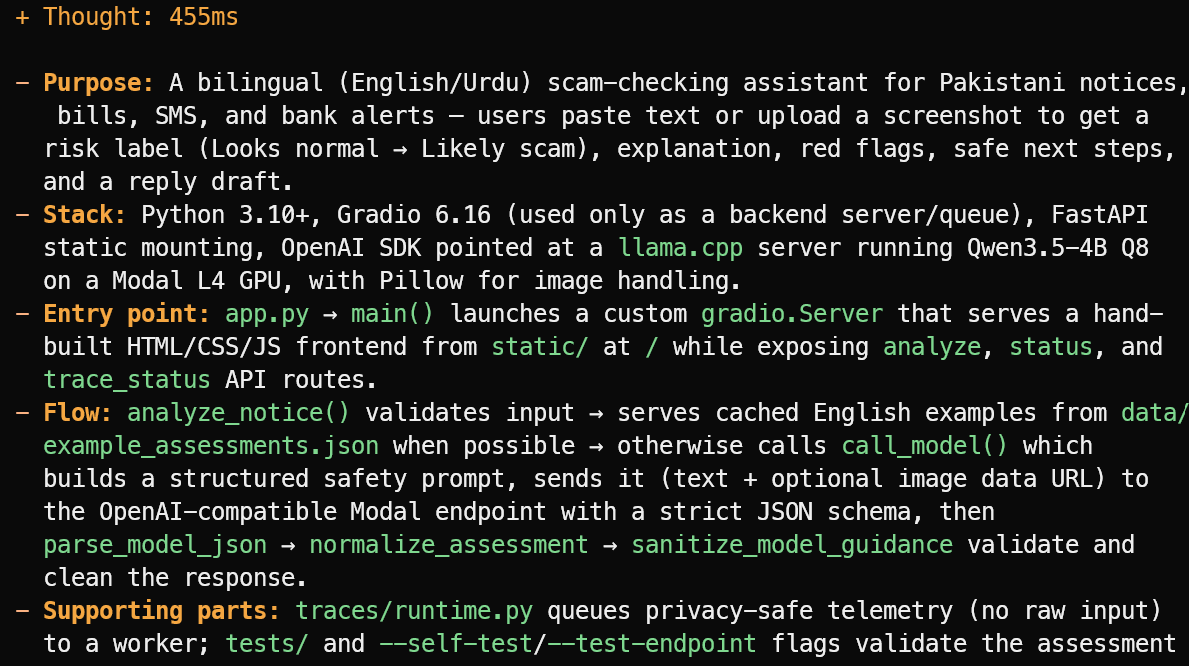
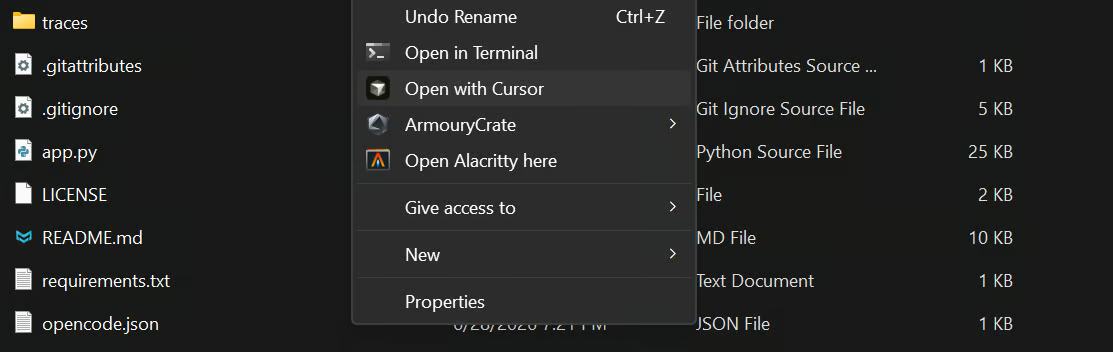
OpenCode reads the project files and gives a concise overview instead of guessing. In this example, it correctly identified that the project is a bilingual English/Urdu scam-checking assistant for Pakistani notices, bills, SMS messages, and bank alerts.
It also explained the main stack, the app.py entry point, the assessment flow, and the supporting test and telemetry files.
Prompt:
Suggest one useful new feature that fits the project's current scope.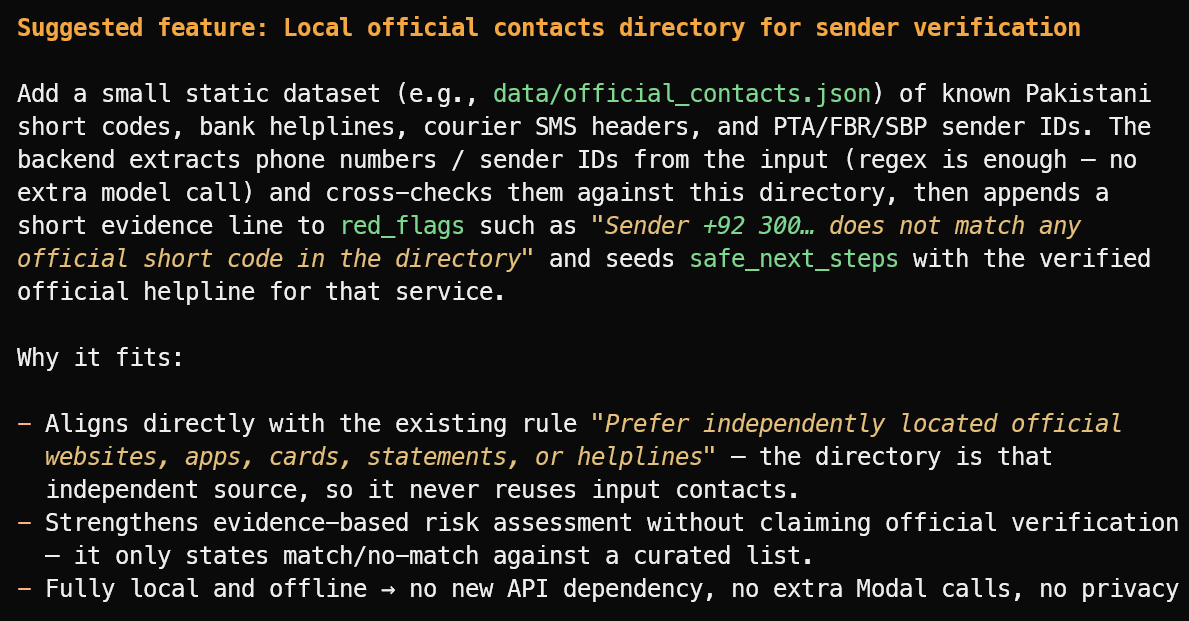
It suggested a useful feature: a local directory of verified official sender IDs, bank helplines, courier headers, and public short codes.
To test OpenCode on a larger task, create a new project folder on your laptop:
mkdir ml-app
cd ml-app
opencode
Then give OpenCode the following prompt:
Build and test a complete Python-based web UI for this machine learning application.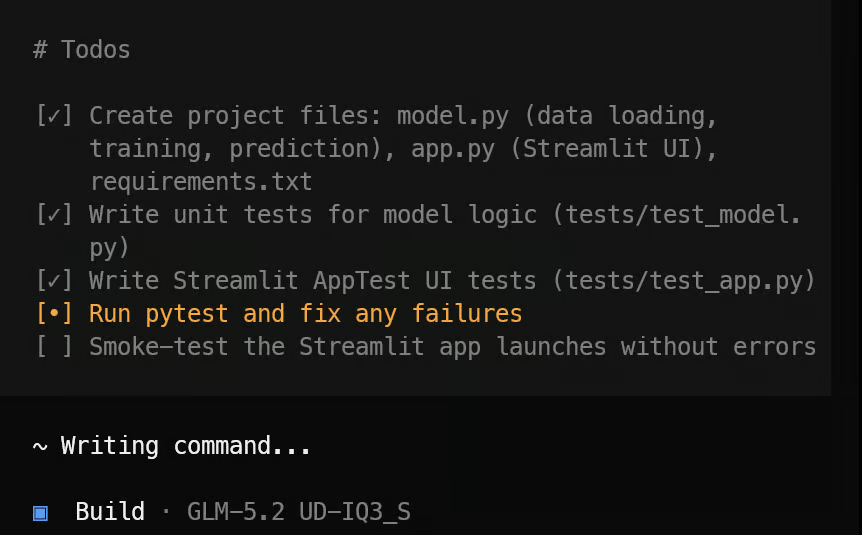
OpenCode first creates a task list and breaks the project into manageable steps.
It then creates the required application files, machine-learning logic, Streamlit interface, dependencies, and test suite.
Once the implementation is complete, it runs the tests, fixes any issues it finds, and provides a clear summary of the finished project along with the command needed to launch it.
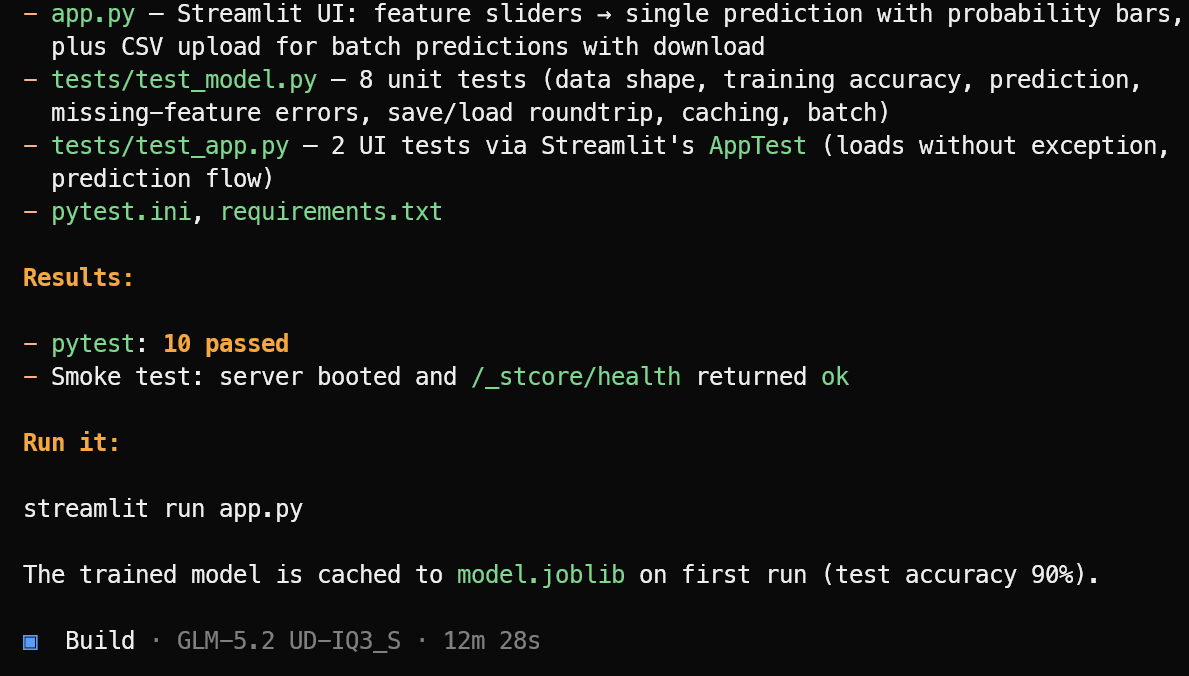
In this test, OpenCode completed 10 passing tests and verified that the Streamlit application launched successfully. Start the machine learning application with:
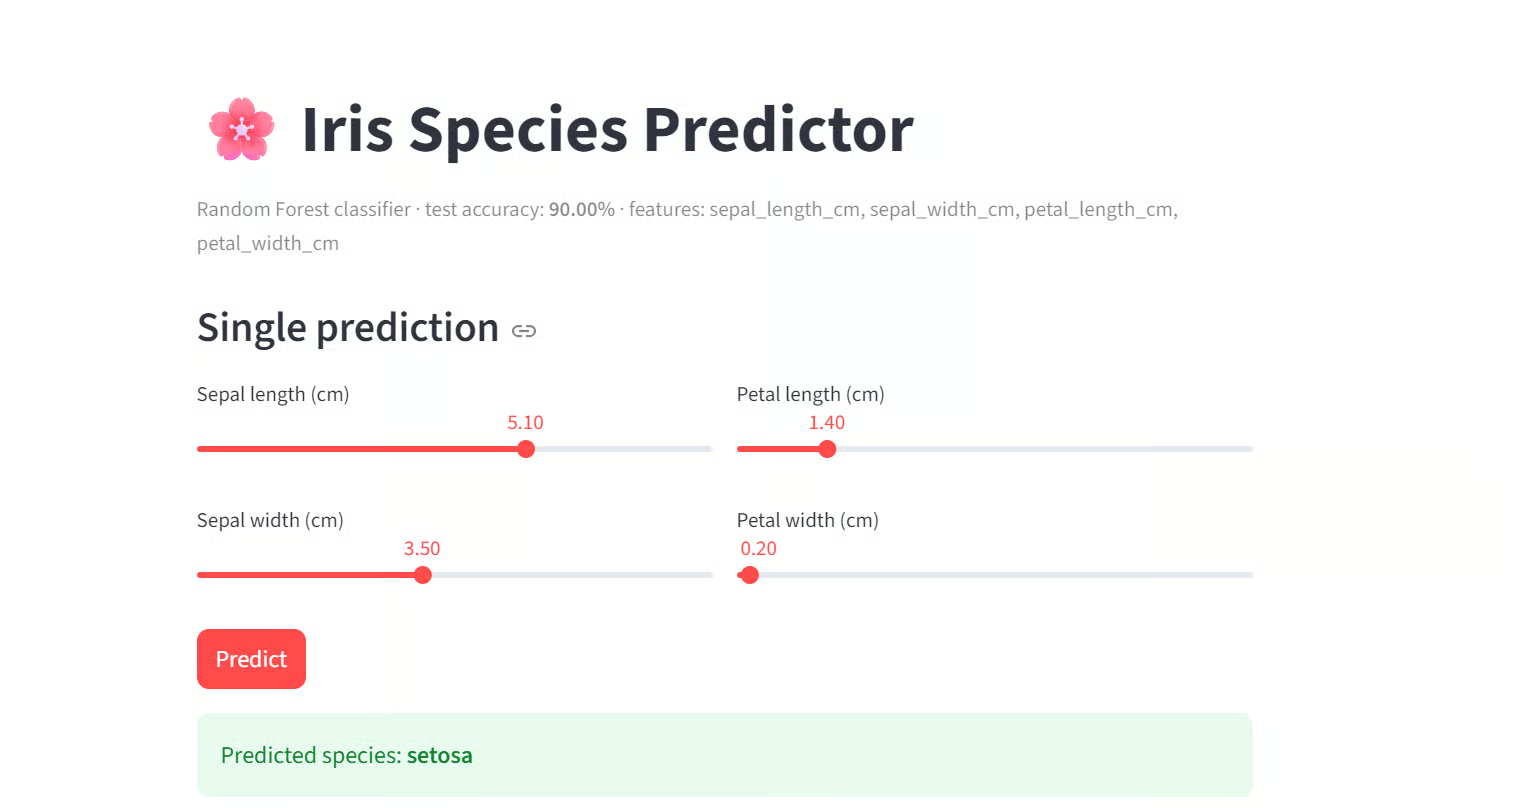
streamlit run app.pyThe resulting application looks clean and works as expected.
Even with the 3-bit quantized version of GLM-5.2, the reasoning quality was strong in these tests.
It understood the existing project, proposed a relevant feature, created a complete web application, used tools to inspect and modify files, and ran tests to verify its work.
This setup gives you something that standard API providers do not: your own privately hosted GLM-5.2 server.
Instead of sending every request to a shared model platform with fixed limits, model settings, and per-token pricing, you rent the GPU machine, deploy the model yourself, and control the complete serving stack.
You choose the model quantization, GPU configuration, context window, server settings, API key, and who can access the endpoint.
Your code, prompts, project context, and API responses remain within the infrastructure you control: your own laptop and your own RunPod deployment.
They are not sent to an additional hosted inference provider for processing. This is especially useful when you are working with private repositories, internal tools, sensitive code, or company data.
You also avoid the cost and effort of buying, running, and maintaining a high-end multi-GPU server yourself.
Instead, you can rent powerful GPUs only when you need them, serve GLM-5.2 with llama.cpp, secure the endpoint with your own API key, and connect from your laptop through OpenCode.
In this guide, you configured a multi-GPU RunPod machine, installed the prebuilt llama.cpp package, downloaded and served the GLM-5.2 GGUF model, and protected the server with an API key.
You then tested the model through both the llama.cpp Web UI and its OpenAI-compatible cURL API before exposing the secured RunPod URL for external access.
Finally, you connected that private model endpoint to OpenCode running on your laptop. This creates a practical hybrid workflow: GLM-5.2 runs on powerful rented GPUs, while OpenCode stays inside your local project and can inspect files, edit code, run tests, and use your shell.
You get the performance of a top-tier model, the flexibility of self-hosting, and far more control than you would have with a standard hosted API.
Top DataCamp Courses
track
course
course
tutorial
Abid Ali Awan
tutorial
Abid Ali Awan
tutorial
Abid Ali Awan
tutorial
Abid Ali Awan
tutorial
Abid Ali Awan
tutorial
Abid Ali Awan