Track
Alteryx Fundamentals
12 hr
Imagine a tool that allows you to access, clean, test, combine, analyze, and output data much easier than SQL, Microsoft Excel, or similar tools…
Now, stop imagining. Alteryx is that tool.
Namely, Alteryx is a powerful data analytics and ETL tool that enables teams to build data processes efficiently in a repeatable, less error-prone, and less risky way.
In this tutorial, we will look at what Alteryx is and then dive into a hands-on approach to how to use it.
Let’s start by properly defining what Alteryx is.
We’ve got a full guide covering what Alteryx is. However, in brief, Alteryx is a data analytics and visualization tool designed to simplify advanced analytics automation and make it accessible to all data professionals.
To be more specific, Alteryx is a tool that enables users to prepare, blend, and analyze data from various sources without extensive coding knowledge as a prerequisite. Leveraging the drag-and-drop interface, users can create complex workflows by integrating their data from various sources, cleaning and transforming it before performing advanced analytics and visualization.
The main benefit of adopting Alteryx to create your workflows is that it enables you to reduce manual effort by automating your data analytics processes. These workflows can be saved and reused at a later date, which makes it easier to replicate tasks such as data processing and analytics tasks. It also helps reduce the risk of human error in manual data manipulation.
We’ll be getting hands-on for the remainder of the tutorial; follow along to help make the lesson stick.
The installation process is extremely simple; follow these steps to install Alteryx onto your Desktop.
Navigate to the Alteryx website. Select “Products” from the menu, and navigate to “Alteryx Analytics Cloud Platform” under the “Platform Overview” section. Click on it to be taken to the next screen.
Select the “Start Free Trial” option. This will open up a page where you can opt to start a “Desktop Trial” or a “Cloud Trial.” For our tutorial, we will use the “Desktop Trial,” so select that option. Note the free trial is valid for 30 days.

The free trial page for the Alteryx Analytics Cloud Platform
Fill in the details about yourself on the next page, then select “Submit.” This will start the download.
Open the .exe to start the setup when the download is complete. There will be two options on the screen: select the typical download and click next. This will complete the setup and begin the installation. You’ll be prompted to accept a user license – read through before you do so – and choose where you want to save the program on your system. Pick what’s best for you.
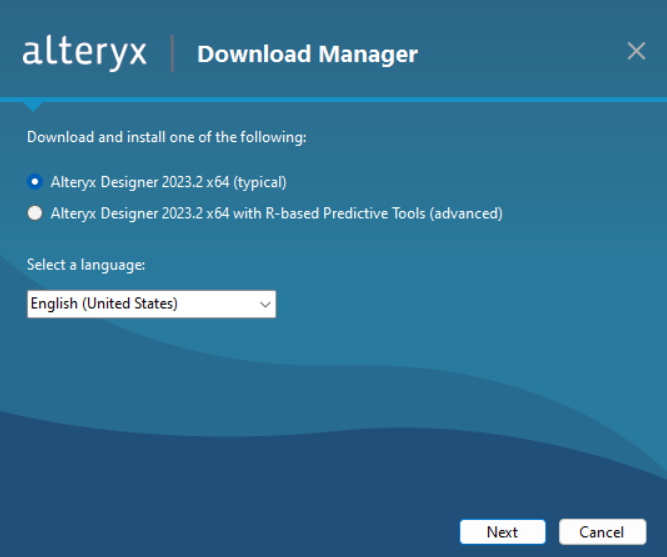
The setup page for Alteryx
Run Alteryx to open the platform. Upon opening, a prompt will come up to request your Alteryx Designer Activation. Select “Start Free Trial” and insert your email.
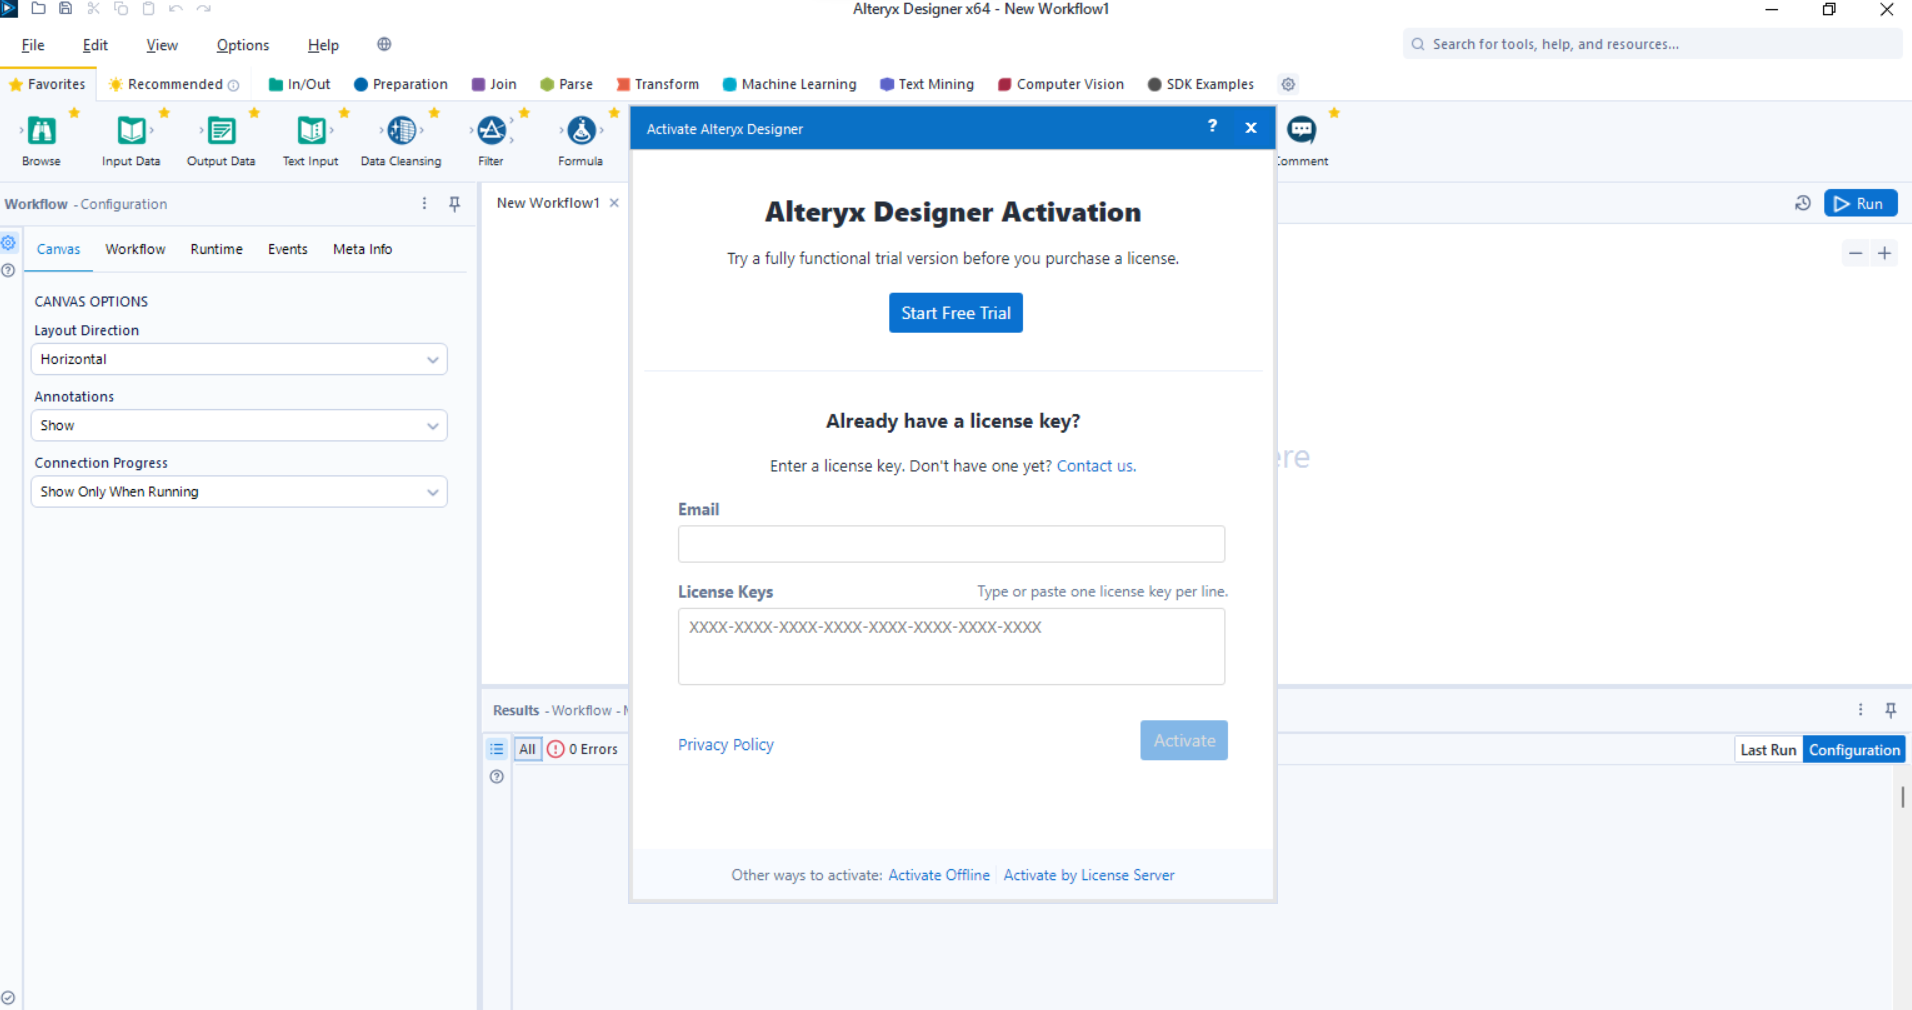
The AlteryX Designer platform and activation pop-up.
You’ll be asked for your details to get your trial activation code. Fill it out, then select “activate,” and voila!
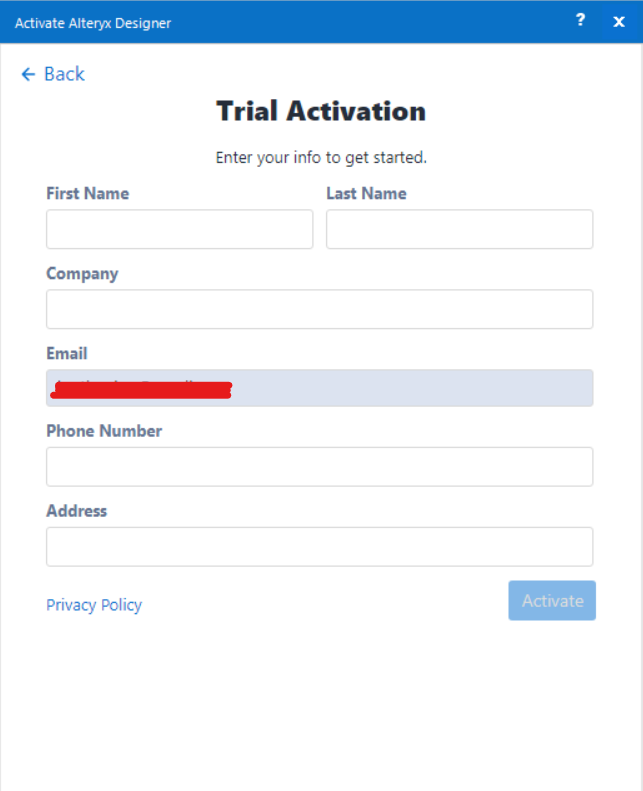
Trial activation form
You’re now ready to start solving.
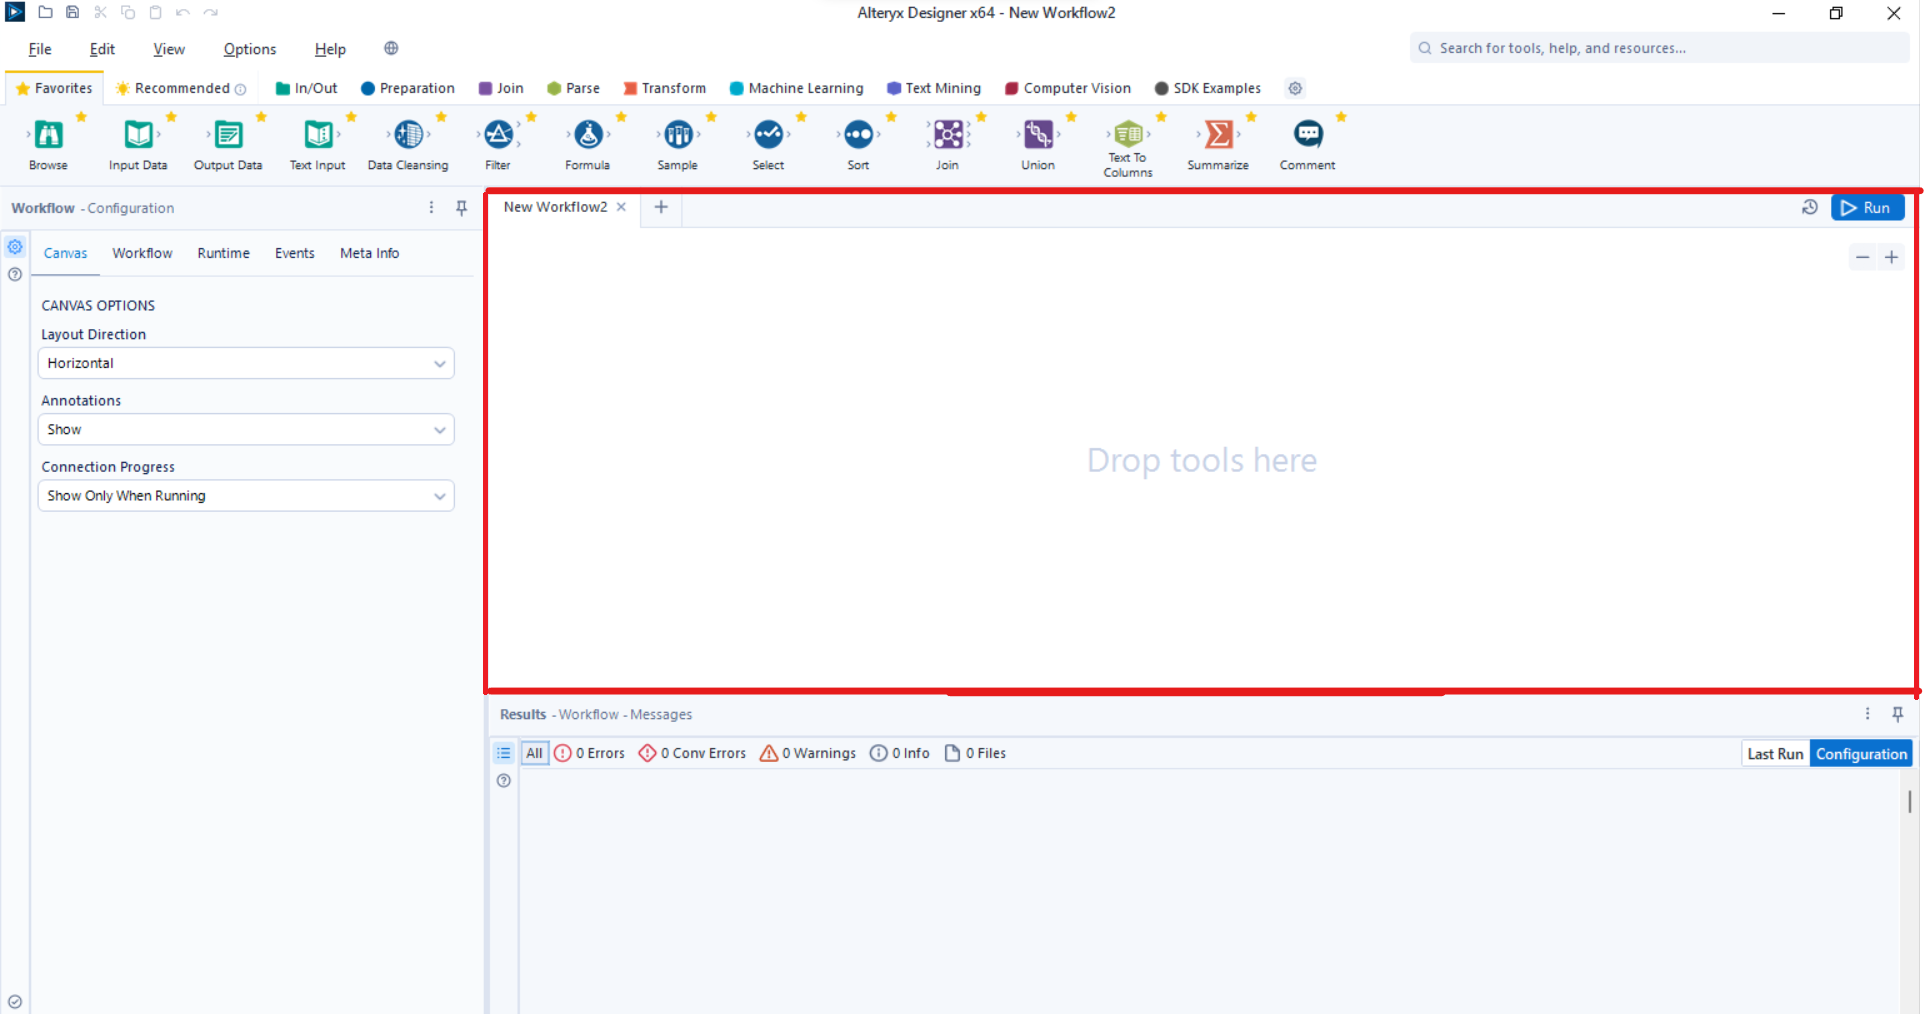
The Alteryx Workflow Canvas is marked in red
Workflows are built in the Workflow Canvas area. For clarity, a workflow defines a series of tools used to perform various functions to process data. Relative paths to various data sources can be saved within the workflow, thus enabling the workflow to be shared with other teammates via or by saving it in a shared drive.
Note: each workflow is saved as a YXMD file type.
When you open the Alteryx Designer interface, a Workflow will be initiated by default, but let's assume this doesn't happen for you. To build a new workflow, navigate to “File” at the top left-hand corner and select “New Workflow.” This will create a tab in the Workflow Canvas for your new workflow.
As stated above, a workflow is a series of connected tools performing different data-processing functions.
To begin building your workflow, drag the action you would like to perform from the palette and place it onto the canvas.
Selecting the Input Data tool
To connect a tool to your existing workflow, drag it from the palette onto the canvas and place it near the output anchor of another tool. It’s also possible to drag the output anchor from your existing tool to your recently added tool, so pick whichever feels most natural.
Connecting a tool; note this raises an error with the Input Data tool because no input data was defined.
Connections move in a downstream direction, which could either be from left to right or from top to bottom. It’s all based on the workflow layout you select in the Workflow Configuration window.
It’s possible for some tools to accept multiple inputs, and if a tool has a gray input anchor, it has an optional input. Lastly, all tools with an output anchor can be output to multiple streams.
Data preparation, or pre-processing as it’s sometimes called, is the act of manipulating raw data into a form that can be readily and accurately analyzed or used as input into a machine learning model.
People rarely celebrate this aspect of being a data professional. Still, it takes up a significant amount of time and is one of the key components of successful data analytics and machine learning.
Alteryx makes it extremely simple to perform data preparation. With a few clicks, you can acquire your data, clean it, perform joins, and implement transformations.
Let’s go through the process of each step.
Before we can start preparing our data, we must first acquire it — this can be from various sources such as a cloud data warehouse or data lake.
For our example, we will use one of the sample datasets on AlteryX. To do this, we must start by dragging the “Input data” tool from the palette. This will open a configuration bar on the left-hand side.
Select Set Up a Connection > Files > Alteryx Database (.yxdb) > TutorialData.yxdb
Acquiring data from the Alteryx database
Once the data has been pulled into Alteryx, analysts and data scientists would typically begin their examinations and data profiling to better understand the data at their disposal.
We can do this by dragging the “Browse” tool into the canvas, connecting it to the anchor of the input data, and then running the workflow.
Now, you can select various columns from the preview window to view the data quality in that column.
Browsing the input data
Notice that there is a value with trailing whitespace in our data's “Last” name column.
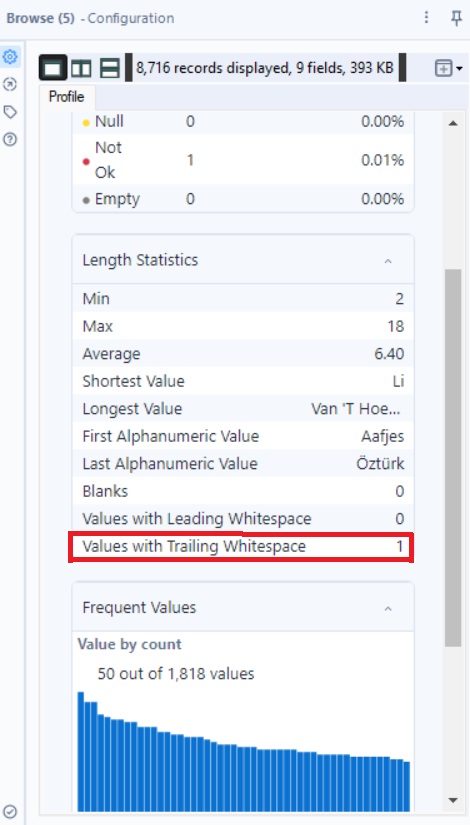
The length statistics of the “Last” column in our data.
We can handle this with some data cleansing.
Data cleansing is the act of cleaning poorly structured data to improve it’s quality. It involves procedures such as:
To perform data cleansing in Alteryx, drag the “Data Cleansing” tool from the palette and connect it to the output anchor of your input data.
In the configuration area, deselect all the other options apart from “Last” and “Leading and Trailing Whitespace” under the “Remove Unwanted Characters” heading.
Next, run the workflow to execute the command.
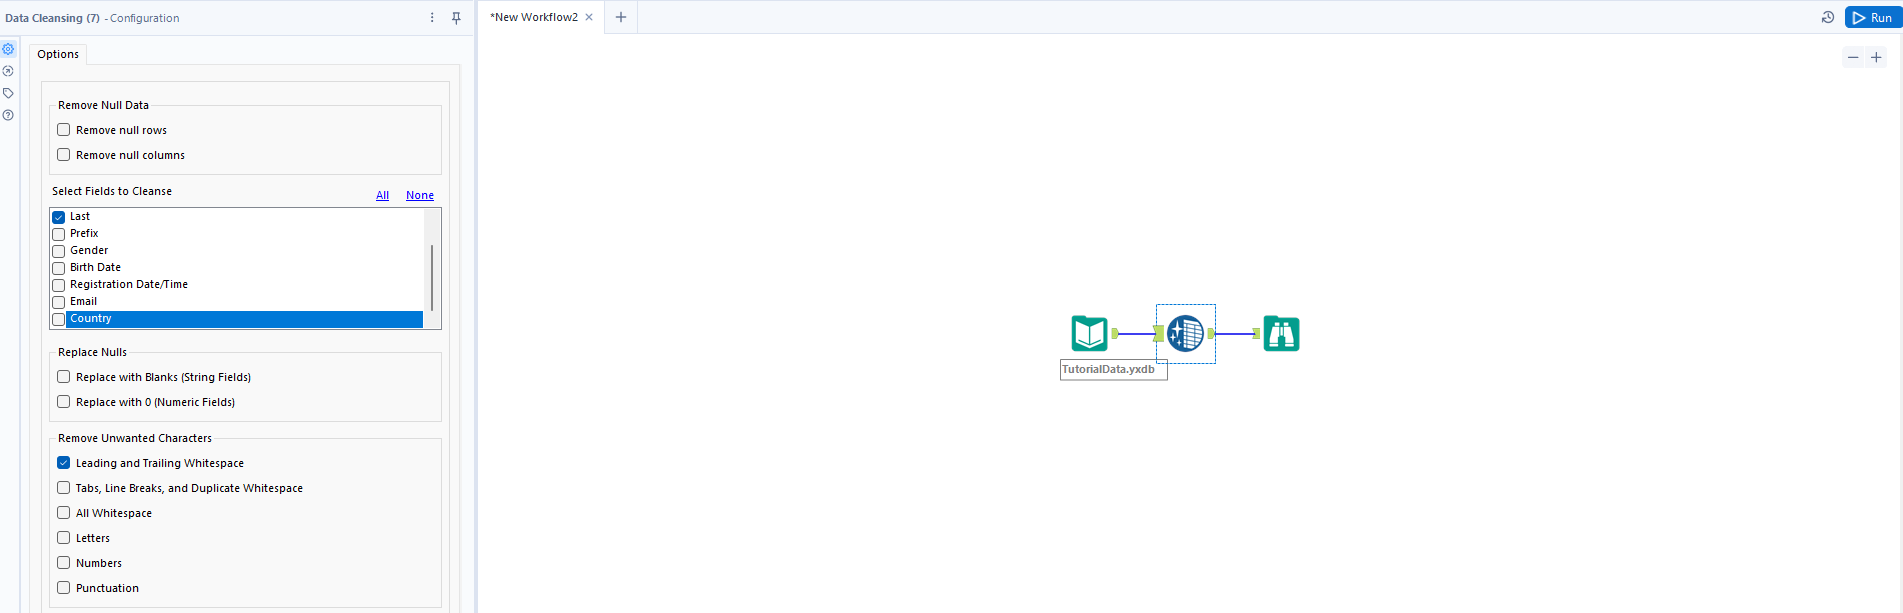
The configuration for the Data Cleansing tool
To check if the cleansing was performed correctly, click the “Browse” tool and select the “Last” column from the preview window.
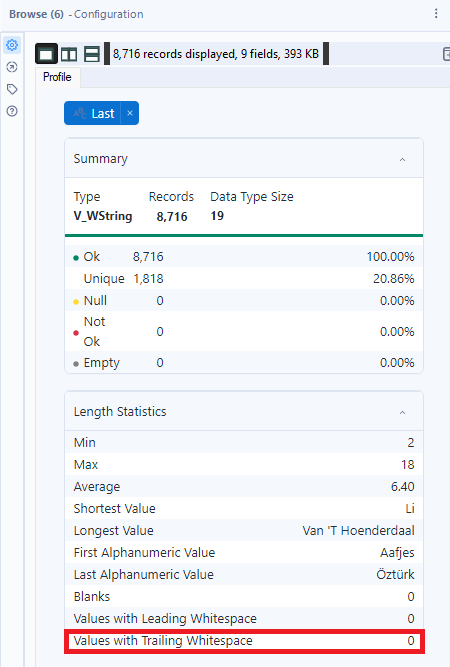
Checking values with trailing whitespace after execution
Notice the “Values with Trailing Whitespace” parameter says “0,” meaning the action was successful.
Data can come in various shapes, sizes, and structures. Sometimes, it may be ready to dive straight in with analysis, but that’s typically in data competitions. Data is messy in the real world, and it’s your responsibility, as a data professional, to format it so that it can be queried to derive meaningful insights.
The common data transformations are:
The transformation we’re going to do is convert the DOB of users to their real age. To do this in Alteryx, drag the “Formula” tool from the palette and connect it to the output anchor of the “Data Cleansing” tool.
In the configuration panel, you’ll be told to “select a column.” Select “Add a column” from this drop-down list and title it “Age.”
To calculate a person's age, we must subtract the current date from their Birth Date. To do this, enter “DateTimeDiff” where it says, “Enter Expression here.”
Replace “dt1” with “DateTimeToday()” and “dt2” with “[Birth Date].” The “u” in the expression stands for units; the units we’re working with in this instance is “Years,” so replace the “u” with that.
The last thing you must do is change the Data type to “Int16.”
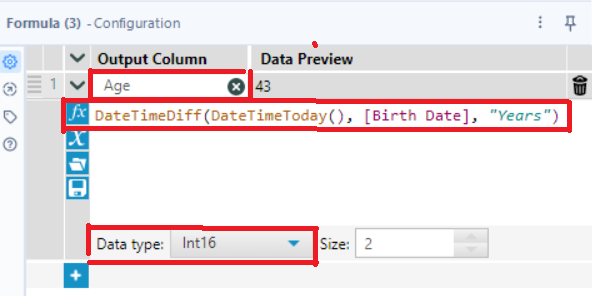
How your configuration box should look
Great! Now you know how to set up a basic workflow in Alteryx.
Workflow automation is the use of software to complete tasks without the need for human input. It’s a tool frequently used in business to speed up processes and reduce the need for manual work and repetitive tasks.
We can automate workflows in Alteryx with Batch Macros and Scheduling.
Batch processing refers to a method used by computers to periodically complete high-volume, repetitive data jobs – typically when compute resources are experiencing low demand. We can perform batch processing in Alteryx using Batch macro.
Namely, Batch macro is a tool that runs multiple times in a workflow and creates an output after each run. The macro runs once for each record (or a selected group of records) in the data, and the inputs can be configured to be used in each workflow execution or exclusively in specific runs.
Creating a Batch macro is simple. Navigate to the Workflow Configuration tab and select “Workflow” from the headings. Under the Workflow heading, you’ll see a “Type” sub-heading – change the selection to Macro, and select “Batch Macro” from the dropdown list.
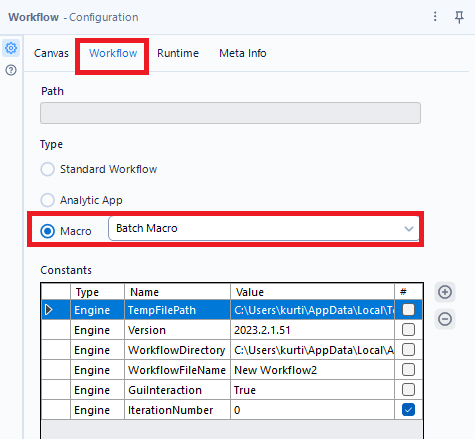
Setting up Batch macro
Once the workflow is saved as a Batch macro, each tool in the workflow will receive a lightning bolt anchor, and only interface tools can connect to them.
It’s also possible to schedule workflows, applications, or packages in Alteryx. Note scheduling is the act of assigning resources to perform tasks automatically at a designated frequency, date, and time.
Users can decide where they would like their scheduled workflows to run, but it’s usually based on their company's configuration. The two options are:
Scheduling a workflow in Alteryx is quite straightforward. Simply open the workflow you would like to schedule and select the “Add Workflow to Schedule” icon that is next to the “Run” icon at the top of the canvas.
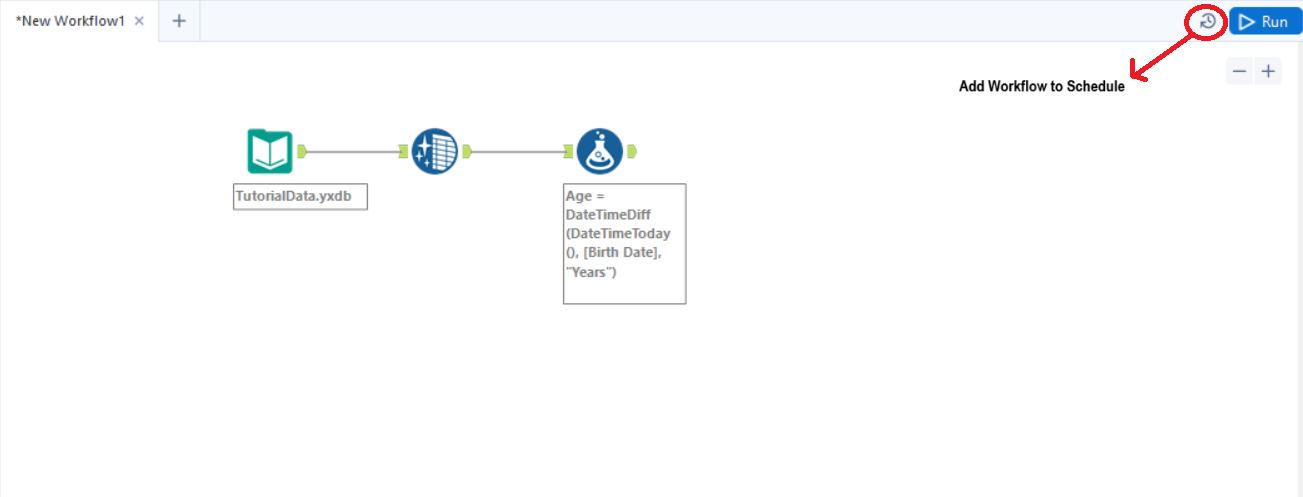
The “Add Workflow to Schedule” icon
You can also schedule a workflow by navigating to “Options” and selecting “Schedule Workflow.”
Like any tool, Alteryx has a set of best practices to ensure you produce the best outcomes. We will look at five, but you can check out the PDF containing 24 Best Practices shared in the Aletryx community if you want to know more.
The browse tool is extremely helpful during the development phase since it enables users to see/review the entire dataset from a connected tool. However, once you’ve completed your workflow, they are not useful for two reasons:
When you implement this best practice, you’ll have a good overview of your variables, and you will save time since you won’t be attempting to perform invalid transformations; for example, you will not attempt to perform a numeric operation on a string.
Be careful to document your workflows with descriptive titles. There are a number of reasons to do this; for example, it makes it much easier to hand over to a client or colleague and return to your previous work later.
If workflows are dependent, there is plenty of value in enumerating them. By using numbered titles, it will be much easier to decode the workflow dependency and obtain a clear understanding of what’s going on without needing to open each workflow.
Dealing with errors and warnings as soon as they occur is an Alteryx best practice. The reason it’s so important is that it allows you to catch errors in your logic early before they corrupt your workflow.
Note that Alteryx displays errors by adding an exclamation mark under the tool where the error occurred. However, conversion errors and warnings can be found by observing the tool reference, displayed in parentheses after the tool name in the results pane.
Limit the number of records you use when you are initially building out your workflow. This is important because it speeds up processing, thus saving you valuable time – especially when working with a large dataset.
To set a record limit, navigate to the Configuration window in the “Input Data” tool and specify a value.
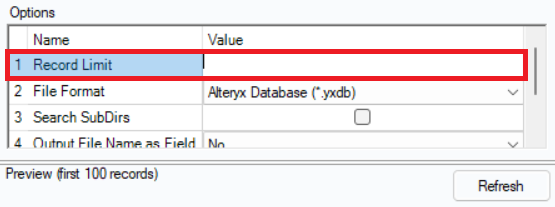
The place to specify a record limit in your Input Data tool
This will help you reach your objectives much faster.
Alteryx is a data analytics and visualization tool that was created to simplify advanced analytics automation and increase its accessibility to data professionals. Namely, users can leverage Alteryx to prepare, blend, and analyze data from various sources without coding knowledge. The main benefit of the tools is that users can easily reduce manual effort by automating their analytics processes by creating workflows.
In this hands-on tutorial, we covered:
Check out these resources to continue your learning:
Thanks for reading!
Start Your Data Journey Today!
Track
Course
Course
blog
Austin Chia
9 min
blog
Matt Crabtree
9 min
Tutorial
Zoumana Keita
Tutorial
Joleen Bothma
Tutorial
Eugenia Anello
code-along
Joshua Burkhow