Course
Understanding Artificial Intelligence
2 hr
401.5K
If you wish to start using the Stable diffusion model immediately, you can run it online using the following tools.
Stability AI, the creators of Stable Diffusion, have made it extremely simple for curious parties to test their text-to-image model with their online tool, DreamStudio.
DreamStudio grants users access to the latest version of Stable Diffusion models and allows them to generate an image in up to 15 seconds.
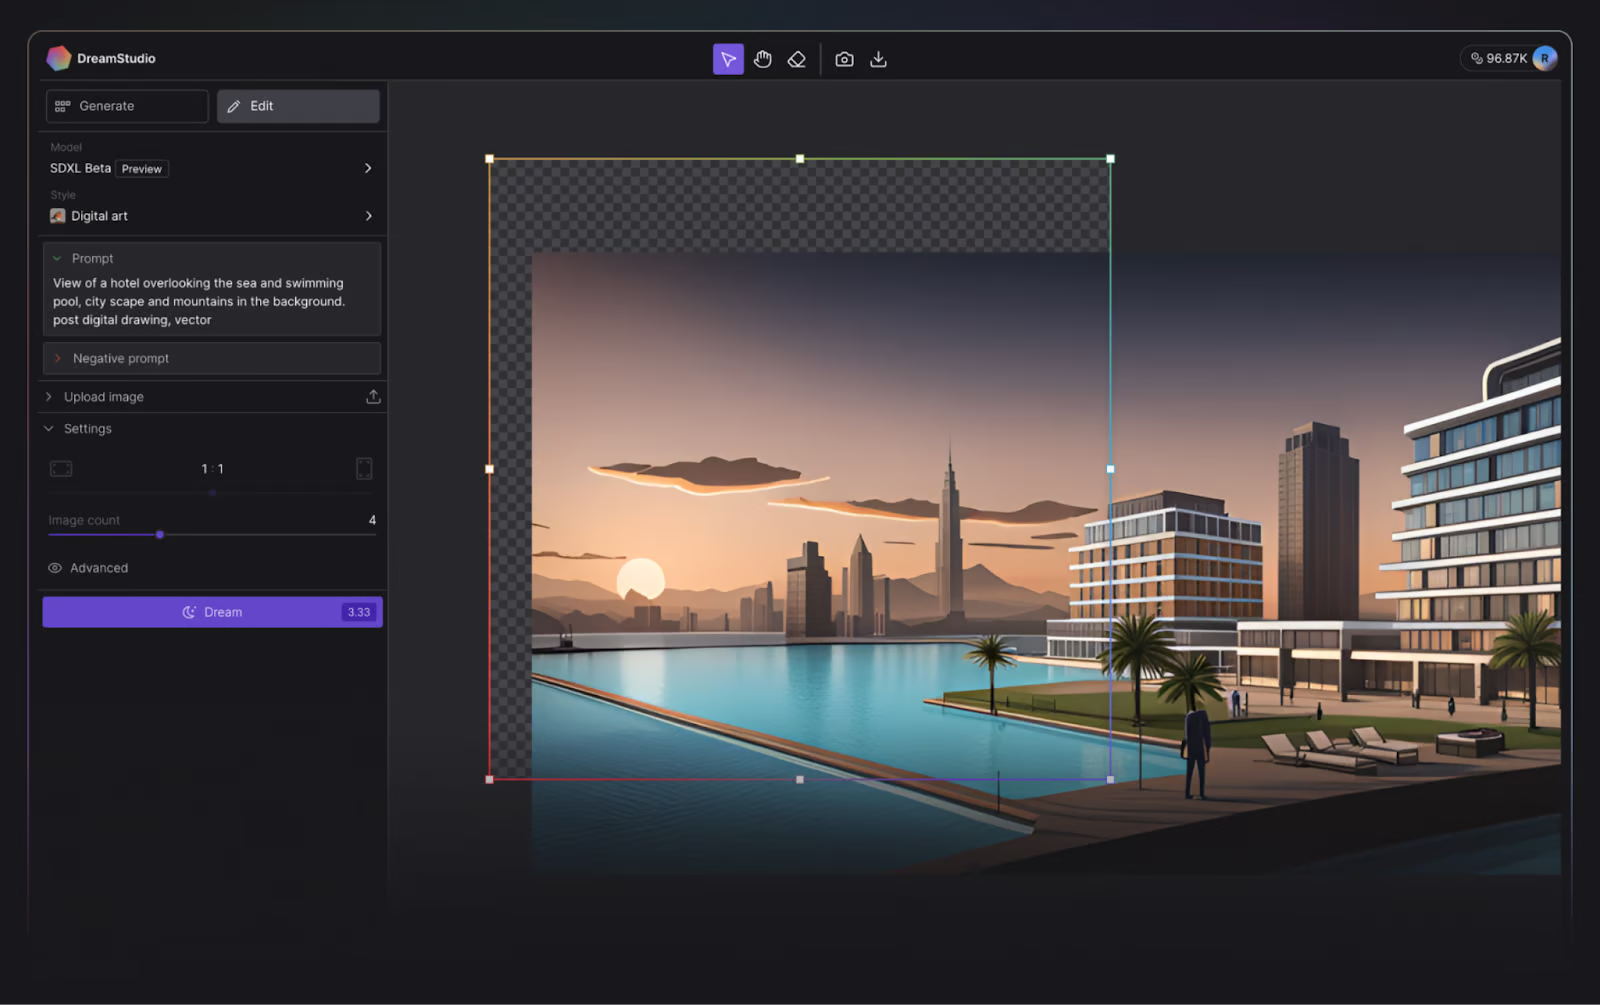
DreamStudio user interface. Image source: DreamStudio.
When writing this tutorial, new users receive 100 free credits to try out DreamStudio, which is enough for 500 images using the default settings! Additional credits can be purchased within the application at your convenience, costing only $10.00 per 1000 credits.
Hugging Face is an AI community and platform that promotes open-source contributions. Though it’s highly recognized for its transformer models, Hugging Face also provides access to the latest Stable diffusion model, and like a true lover of open-source, it’s free.
To run stable diffusion in Hugging Face, you can try one of the demos, such as the Stable Diffusion 2.1 demo.
The tradeoff with Hugging Face is that you can’t customize properties as you can in DreamStudio, and it takes noticeably longer to generate an image.
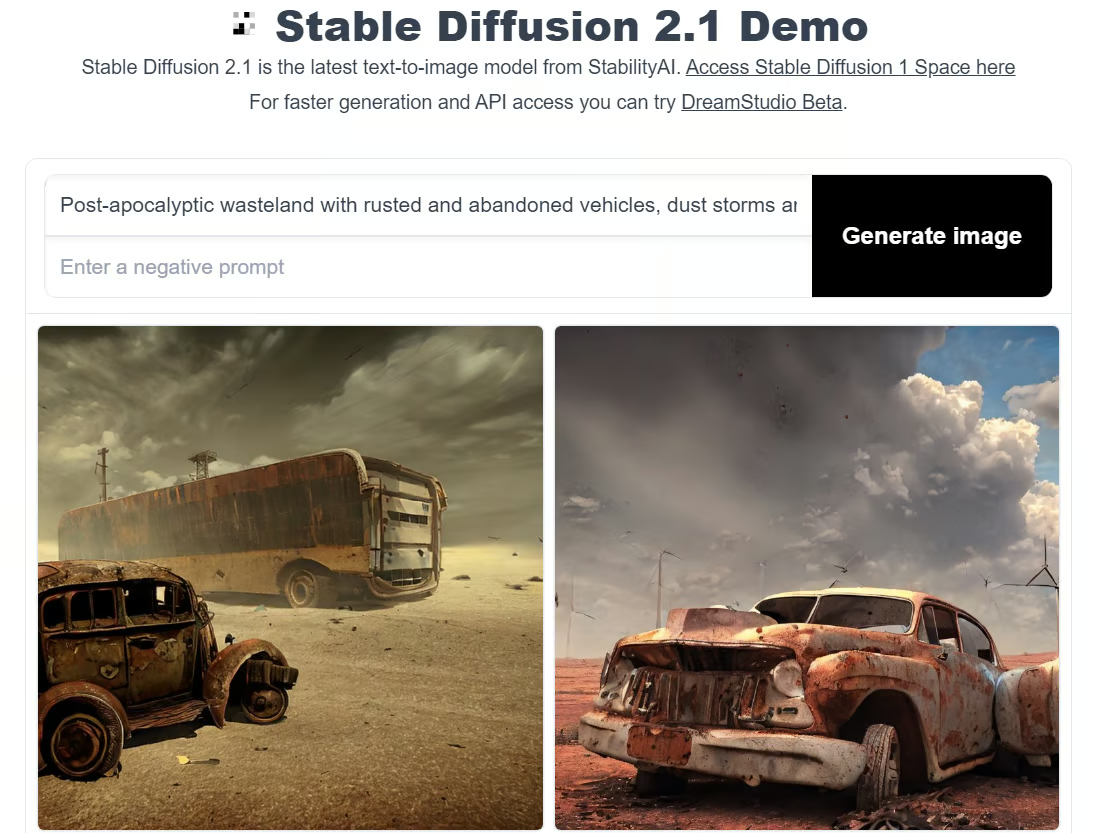
Stable Diffusion demo in Hugging Face. Image by author.
But what if you want to experiment with Stable Diffusion on your local computer? We’ve got you covered.
Running Stable Diffusion locally enables you to experiment with various text inputs to generate images that are more tailored to your requirements. You may also fine-tune the model on your data to improve the results, given the inputs you provide.
Disclaimer: You must have a GPU to run Stable Diffusion locally.
To run Stable Diffusion from your local computer, you will require Python 3.10.6. This can be installed from the official Python Website. If you get stuck, check out our How to Install Python tutorial.
Check the installation worked correctly by opening the command prompt, typing python, and executing the command. This should print the version of Python you’re using.
Disclaimer: The recommended version to run Stable Diffusion is Python 3.10.6. We recommend not to proceed without this version to avoid problems.
Next, you must install the code repository management system Git. The Git Install Tutorial can help, and our Introduction to Git course can deepen your knowledge of Git.
GitHub is a software development hosting service where developers host their code so they can track and collaborate with other developers on projects. If you haven’t got a Github account, now is also a good time to create one—check out Github and Git Tutorial for Beginners for assistance.
Hugging Face, on the other hand, is an AI community that advocates for open-source contributions. It is the hub for several AI models from various domains, including natural language processing, computer vision, and more. You’ll need an account to download the latest version of Stable Diffusion. We will get to this step later.
In this step, you will download the Stable Diffusion Web-UI to your local computer. While it's helpful to create a dedicated folder (e.g., stable-diffusion-demo-project) for this purpose, it's not mandatory.
1. Open Git Bash:
2. Navigate to your desired folder:
cd command to navigate to the folder where you want to clone the Stable Diffusion Web-UI. For example:cd path/to/your/folder3. Clone the repository:
git clone https://github.com/AUTOMATIC1111/stable-diffusion-webui.git
4. Verify the clone:
stable-diffusion-webui in your chosen directory.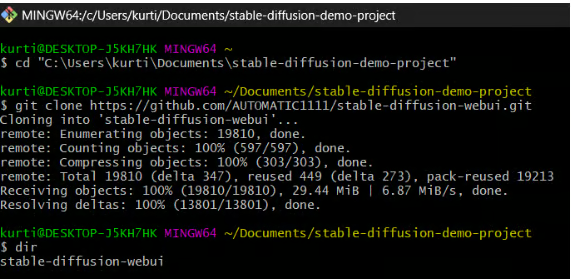
Note: You can find more specific instructions for your hardware and operating system in the Stable Diffusion web UI Github repository.
1. Log in to Hugging Face:
2. Download the Stable Diffusion model:
3. Locate the model folder:
stable-diffusion-webui\models\Stable-diffusion4. Move the downloaded model:
Stable-diffusion folder, you will see a text file named Put Stable Diffusion Checkpoints here.In this step, you will install the necessary tools to run Stable Diffusion.
1. Open the Command Prompt or Terminal.
2. Navigate to the Stable Diffusion web UI folder:
cd command to navigate to the stable-diffusion-webui folder you cloned earlier. For example:cd path/to/stable-diffusion-webui3. Run the setup script:
stable-diffusion-webui folder, run the following command:webui-user.batThis script will create a virtual environment and install all the required dependencies for running Stable Diffusion. The process may take about 10 minutes, so be patient.
Note: You can find more specific instructions for your hardware and operating system in the Stable Diffusion web UI Github repository.
After the dependencies have been installed, a URL will appear in your command prompt: http://127.0.0.1:7860.
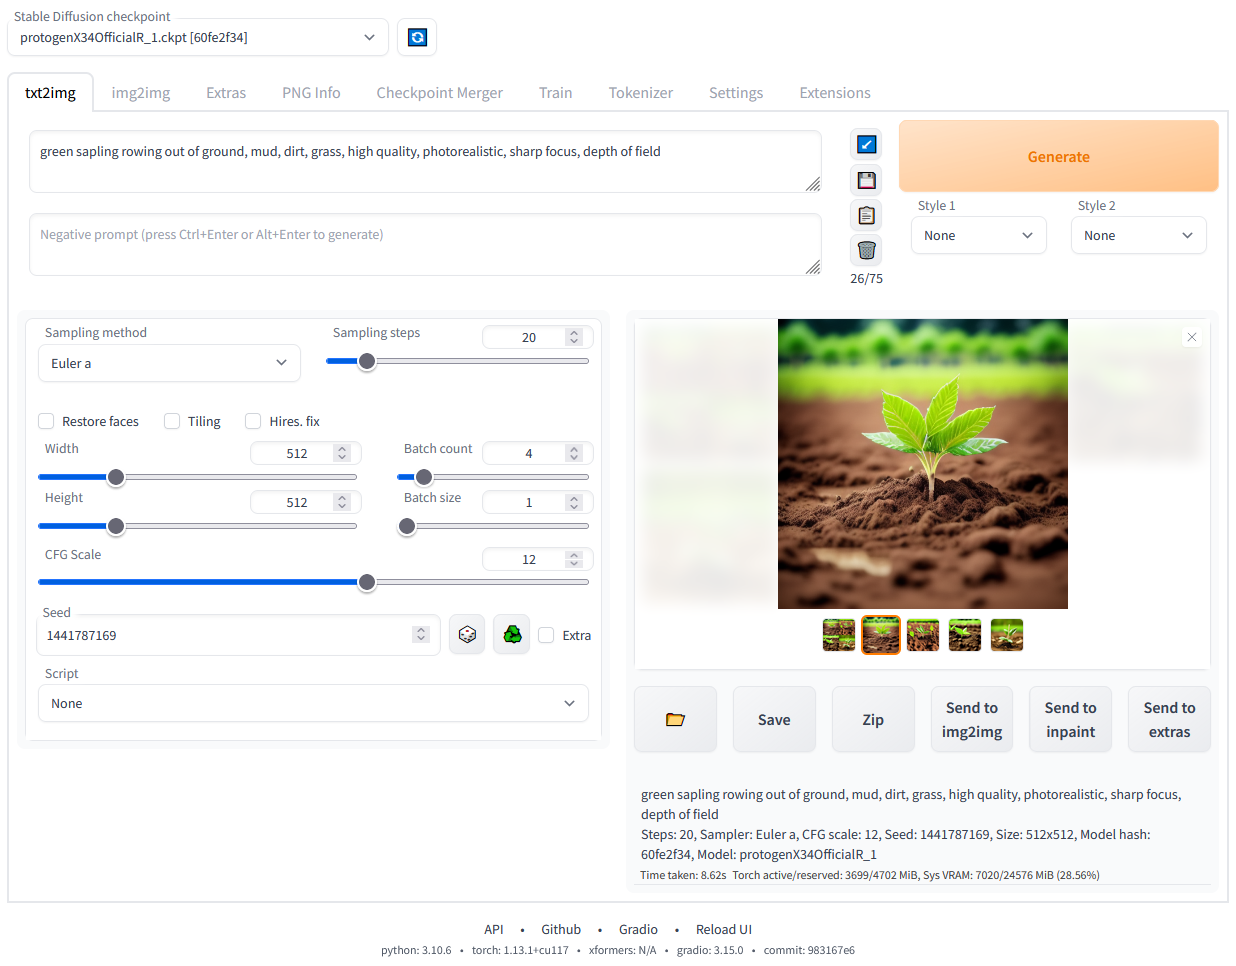
Stable Diffusion web UI running locally. Image by author.
Stable Diffusion represents a significant advancement in the field of generative AI. It offers the ability to generate high-quality, detailed images from textual descriptions. Whether you are looking to modify existing images, enhance low-resolution images, or create entirely new visuals, Stable Diffusion provides a powerful and versatile toolset.
With the recent updates and improvements in Stable Diffusion 3 and Medium, the model's capabilities have been further enhanced, making it a leader in the generative AI space.
Running Stable Diffusion locally or through various online platforms like DreamStudio and Hugging Face allows you to explore and leverage its full potential. Following the steps outlined in this guide, you can set up and start using Stable Diffusion to meet your creative and practical needs!
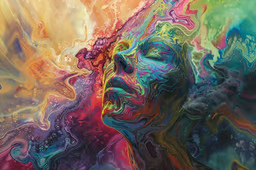
Generative AI is a groundbreaking mode of deep learning that creates high-quality text, images, and other content based on the data it was trained on. Tools like Stable Diffusion, ChatGPT, and DALL-E are excellent examples of how generative AI is transforming various industries by enabling new forms of creativity and innovation. As these technologies continue to evolve, they open up new possibilities for artists, developers, and researchers to push the boundaries of what is possible.
For those interested in diving deeper into the world of generative AI, here are some resources to explore:
Learn more about generative AI and deep learning with these courses!
Course
Course
Course
blog
Richie Cotton
Tutorial
Kurtis Pykes
Tutorial
Abid Ali Awan
Tutorial
Abid Ali Awan
code-along
Sayak Paul
code-along
Philip Bontrager