Track
Developing AI Applications
21 hr
To get started with Imagen 3 in Python, we need to perform a couple of essential steps. First, we'll create a Google Cloud project. Once our project is ready, we need to generate an API key. This key will allow our Python code to interact with the Imagen 3 service.
Creating a Google Cloud project is the first step for using Google's AI API. Let's walk through the process together:
Imagen-tutorial. The organization can be left blank.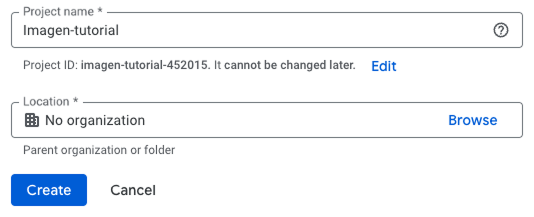
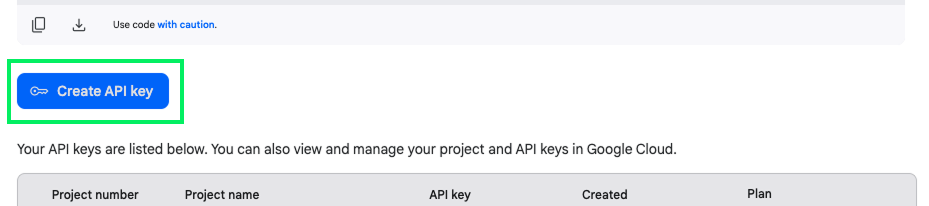
Now that the Google Cloud project is created, we can create an API key by navigating to the API key page in Google AI Studio.
To create the key, click the "Create API key" button:
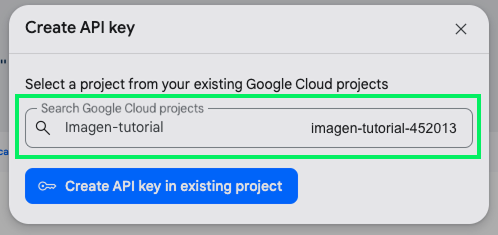
On the popup, type the name of the project we created above, select it, and click "Create API key in existing project":
Copy the key and create a file named .env located in the same folder where we’ll write the Python script. The content of the file .env should be:
GEMINI_API_KEY=<paste_your_key_here>If we tried using the API key now, we would get an error saying "Imagen API is only accessible to billed users at this time." This happens because the API isn't free, and we need to associate a billing account with the project before being able to use it.
At the time of writing, the price of generating an image with Imagen 3 is $0.03. Check their pricing page for more information.
To add a billing account, click the "Set up Billing" button next to the API key in Google AI Studio.

This will redirect us to the Google Cloud website, where we can either select an existing billing account by clicking "Link a billing account" or create a new one by clicking "Manage billing accounts."
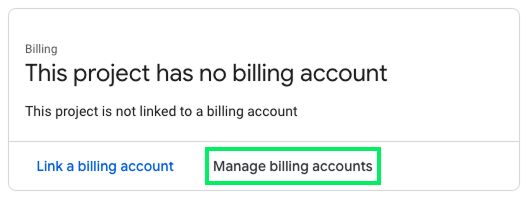
Let's assume we don't have one, so we create "Manage billing accounts." On the top left of the page, there's a "Create account" button. To create the account, we need to fill in our personal information and a credit card to process the payments.
In this tutorial, we use Anaconda, a popular platform that simplifies package management and project setup, making it easier to run Python scripts.
We can install Anaconda from their official website.
To set up the Anaconda environment, open a terminal and:
conda create -n imagen python=3.9. This command created an environment named imagen that uses version 3.9 of Python.conda activate imagen.pip install -q -U google-genai.pip install pillow.pip install python-dotenvWe can also install the packages directly without using Anaconda, but there’s a risk that some of the currently installed packages might conflict with some of the new packages or that our Python installation uses a different version of Python. Using Anaconda avoids these potential problems.
We're now ready to start using Imagen 3. Create a new Python script, for example, gen_image.py, in the same folder as the .env. file.
First, we import the necessary packages:
# Google generative AI:
from google import genai
from google.genai import types

# Packages to process the generated image:
from PIL import Image
from io import BytesIO

# Packages to load the .env file:
import os
from dotenv import load_dotenv
Next, we load the API key from the .env file:
load_dotenv()
api_key = os.getenv("GEMINI_API_KEY")
Then, we initialize the Google generative AI client. This is the object that allows us to communicate with the Google API:
client = genai.Client(api_key=api_key)To generate an image, we use the client.models.generate_images() function:
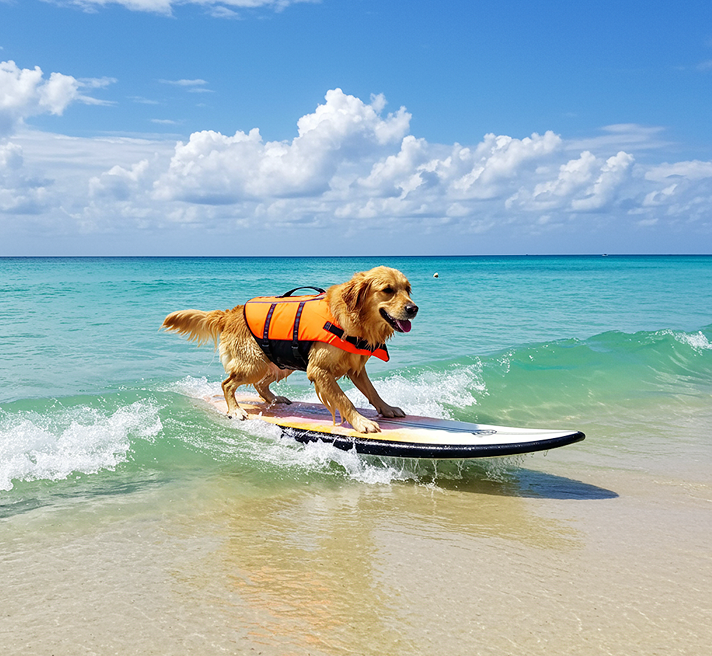
prompt="""
A dog surfing at the beach
"""
response = client.models.generate_images(
    model="imagen-3.0-generate-002",
    prompt=prompt,
    config=types.GenerateImagesConfig(
        number_of_images=1,
    )
)
Finally, we display the generated image using the Image object:
for generated_image in response.generated_images:
  image = Image.open(BytesIO(generated_image.image.image_bytes))
  image.show()
Here's the result:
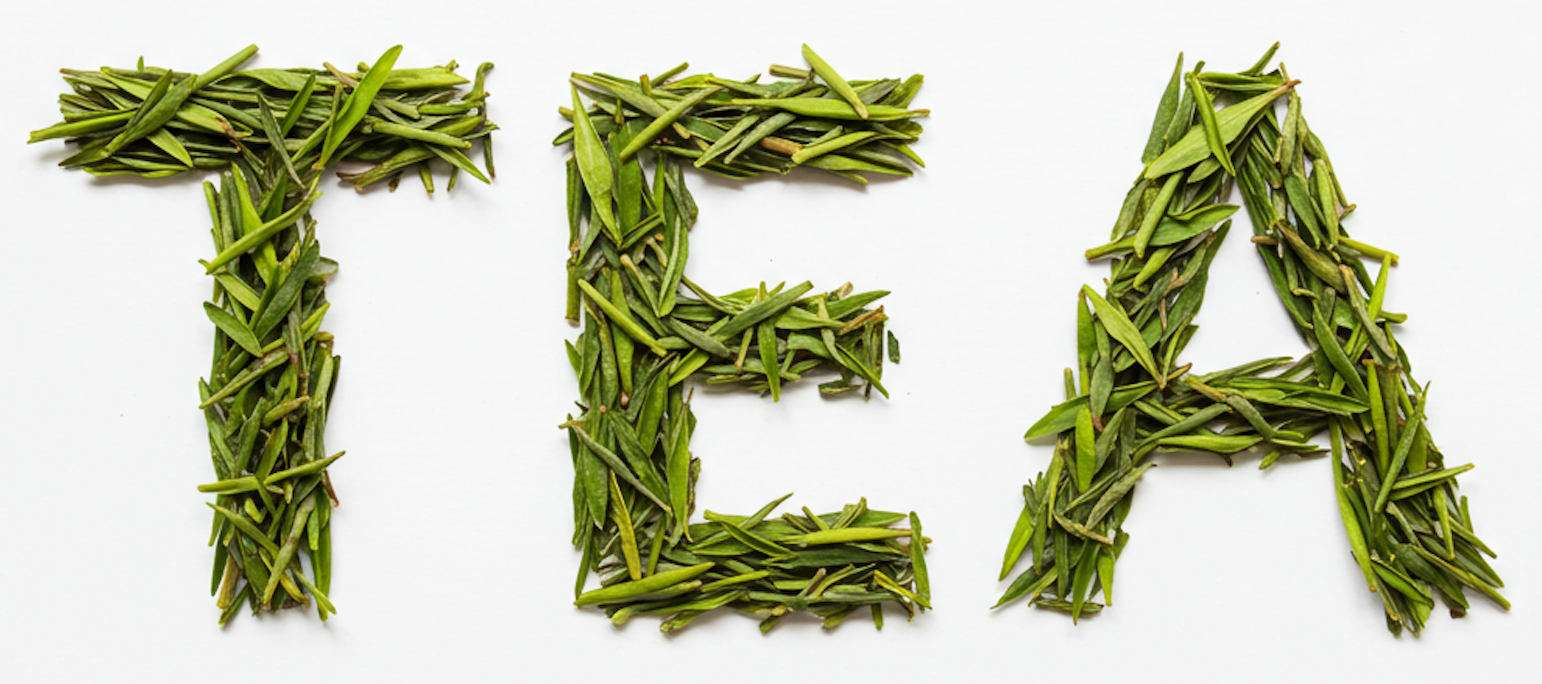
One of the interesting features of Imagen 3, when compared to other text-to-image model,s is the ability to generate text. Let’s try it out by having it generate the word “Tea” using fresh tea leaves:
prompt="""
Word "tea" made from fresh tea leaves, white background
"""
response = client.models.generate_images(
    model="imagen-3.0-generate-002",
    prompt=prompt,
)
Here’s the result:
The image generation options are provided using the types.GenerateImagesConfig options. In the above example, we only specified the number of images to generate:
config=types.GenerateImagesConfig(
    number_of_images=1,
)
In this section, we explore the other options the Imagen 3 API provides. Check the official documentation for more information.
We can use the number_of_images parameter to generate multiple images with a single prompt. By default, four images are generated.
Let's try generating two images for a comic book.
prompt="""
Single comic book panel of two people overlooking a destroyed city.
A speech bubble points from one of them and says: I guess this is the end.
"""
response = client.models.generate_images(
    model="imagen-3.0-generate-002",
    prompt=prompt,
    config=types.GenerateImagesConfig(
        number_of_images=2,
    )
)
Here's the result:

This is another example of generating text in images. Even though the image on the left has some extra unwanted text, because of the ability to generate several images we can increase our chances of getting the desired output. The image on the right almost completely complies with our prompt.
By default, the generated images are squares with a 1:1 aspect ratio. The model supports the following aspect ratios: 1:1, 3:4, 4:3, 9:16, and 16:9.
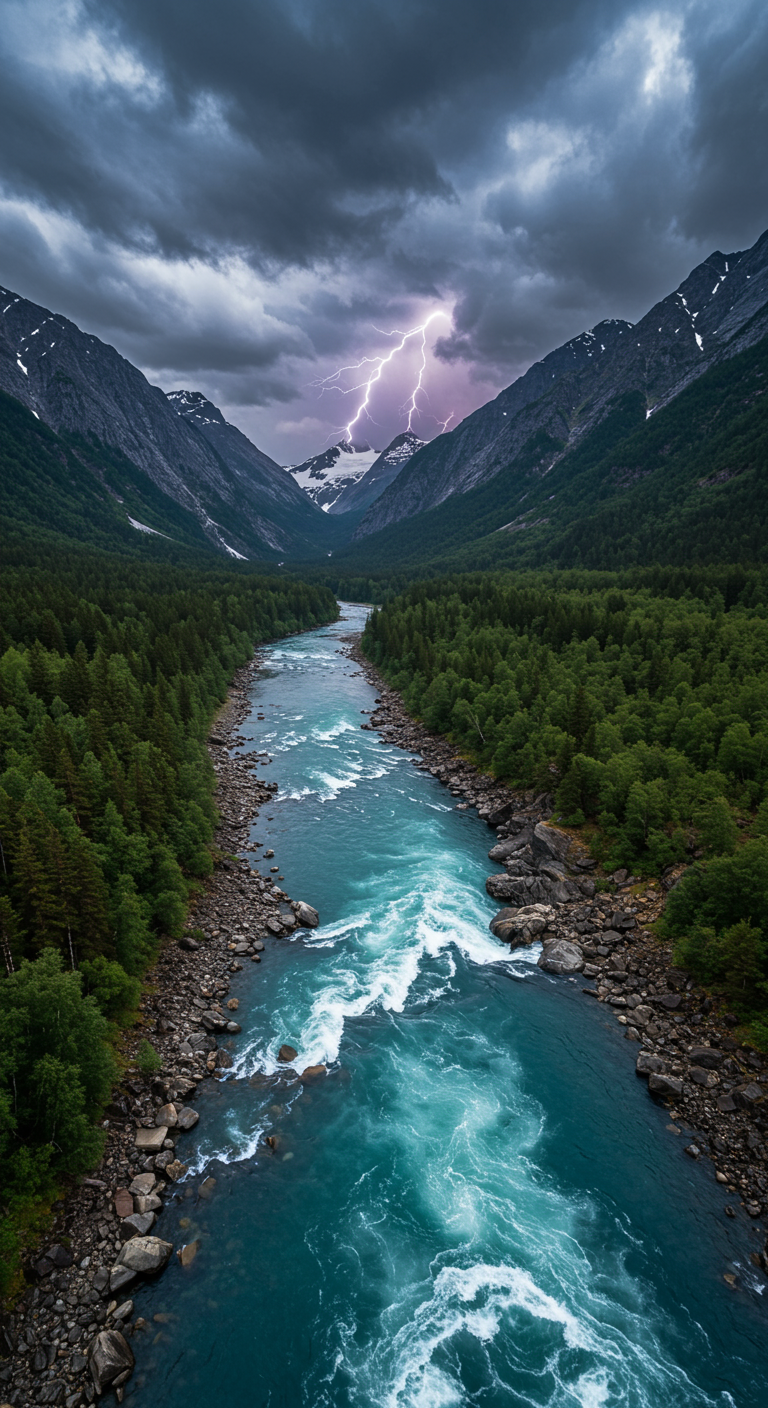
Let's generate a 9:16 image to use as a phone background:
prompt="""
A drone shot of a river flowing between mountains with a stormy sky.
"""
response = client.models.generate_images(
    model="imagen-3.0-generate-002",
    prompt=prompt,
    config=types.GenerateImagesConfig(
        aspect_ratio="9:16",
    )
)
Here's the result:
The documentation mentions that we can use the safety_filter_level to specify the image filtering level. Each generated image gets a probability score that measures the probability that the image is unsafe (for example, inappropriate content).
Setting the safety level filter is important because it helps ensure the generated content is appropriate and aligns with user preferences, thereby maintaining a safe and respectful environment for various applications.
The documentation says that it supports three levels:
BLOCK_LOW_AND_ABOVE: Block image even with a low probability score.BLOCK_MEDIUM_AND_ABOVE : Block only images with medium and high probability scores.BLOCK_ONLY_HIGH : Block only images with a high probability scoreHowever, after experimentation, the API now only supports the BLOCK_LOW_AND_ABOVE option. Providing anything else will result in an error.
We can control whether the model is allowed to generate people using the person_generation option. It provides two options:
DONT_ALLOW: Images with people in them will be blocked.ALLOW_ADULT: This will allow us to generate images with people (adults only) in them.The default option is to allow people. For example, if we set the option to not allow people and try to generate an image of someone cooking, we won't get any images.
prompt="""
A person cooking.
"""
response = client.models.generate_images(
    model="imagen-3.0-generate-002",
    prompt=prompt,
    config=types.GenerateImagesConfig(
        person_generation="DONT_ALLOW",
    )
)
print(response.generated_images)
Here’s the output:
NoneThe official documentation provides a comprehensive prompt guide for Imagen 3, so I won't repeat it here. Here are the key ideas on how to make a good prompt:
Imagen 3 also has the capability of editing images and performing image customization. Unfortunately, these features are still locked and only accessible to specific users.
For example, the customization feature allows us to customize a reference image from a prompt. In the example, a photo of a woman is given, and the prompt modifies that image to one of the same person holding oranges.
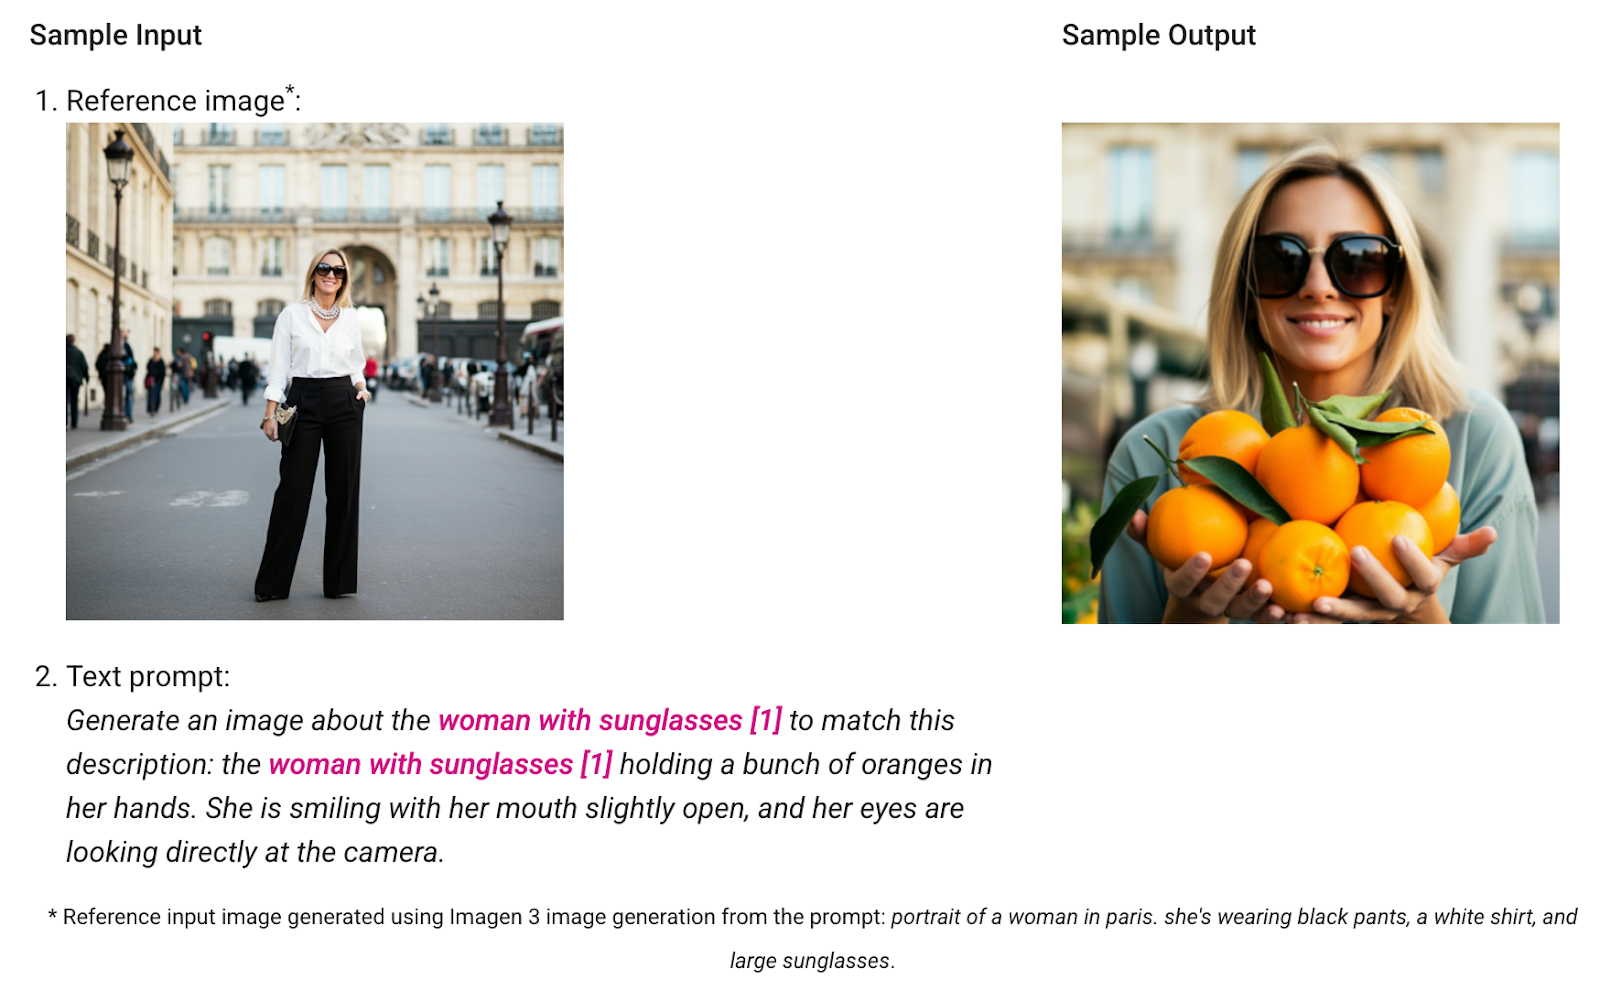
More information on these and the access request form can be found on their website.
In this tutorial, we learned how to use Imagen 3 to create images using Python and Google's Generative API. Overall, I’m pleased with the output I got while experimenting with the API. I feel the results are high quality and contain fewer AI artifacts, making it harder to distinguish them from real images.
The ability to work with text in images is useful for branding and marketing. Overall, I feel this model performs well. I just wish all of its features were open because I think that image editing is even more useful than image generation.
Learn AI with these courses!
Track
Course
Course
Tutorial
Abid Ali Awan
Tutorial
François Aubry
Tutorial
Natasha Al-Khatib
Tutorial
Abid Ali Awan
Tutorial
Bhavishya Pandit
Tutorial
Sayak Paul