Curso
Diseño de sistemas agénticos con LangChain
3 h
12.3K
Nanobot es un asistente personal de IA ligero, una alternativa a OpenClaw. Es un 98% más pequeño que OpenClaw y ofrece la misma funcionalidad básica de agente. Igual que OpenClaw, puede ejecutarse en tu equipo, conectarse a tus apps favoritas y, gracias a su pequeño tamaño, puedes inspeccionar el código con facilidad.
Nanobot conecta tus modelos favoritos, tanto cerrados como de código abierto, para ejecutar un agente local de programación. Cuando envías mensajes por Telegram, WhatsApp o el terminal, el agente responde ejecutando comandos en tu máquina, como leer logs, ejecutar scripts o buscar archivos.
En este tutorial, te muestro cómo configurar Nanobot desde cero y cómo montar un agente de IA con todas las funciones en pocos minutos. También cubriré algunos puntos delicados que debes tener en cuenta al usar esta tecnología.
Nanobot es una alternativa a OpenClaw que se ha hecho muy popular rápidamente, con más de 21.000 estrellas en GitHub en el momento de escribir esto. Al igual que OpenClaw, es compatible con plataformas de mensajería como Discord, Slack y Telegram.
Igual que el agente de OpenClaw, tu agente Nanobot también puede unirse a la fiesta en redes sociales en Moltbook, como mostramos en nuestro tutorial de primeros pasos con Moltbook.
Aunque es pequeño, Nanobot cubre tres aspectos fundamentales que necesitas en un agente potente:

Para seguir este tutorial, necesitas lo básico:
Vamos a crear un agente que viva en tu Telegram, pueda buscar en la web y recuerde tus intereses.
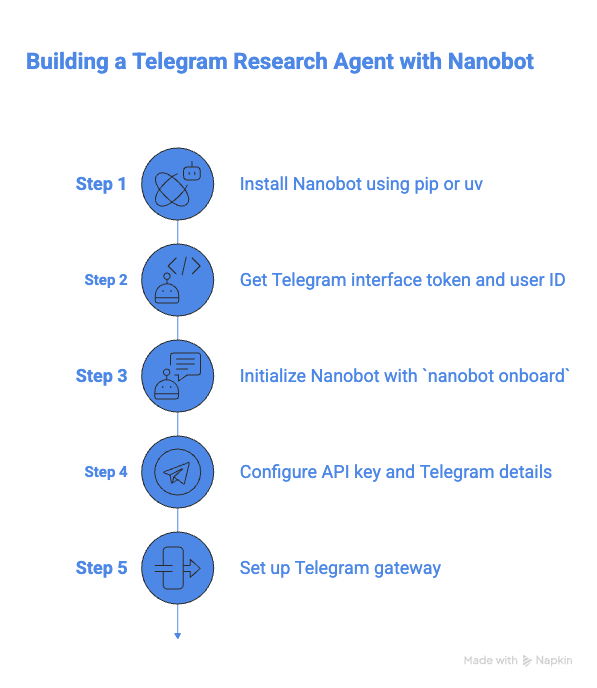
La forma más limpia de instalar herramientas de Python hoy en día es con pip o uv, que las aíslan del Python del sistema. Si no los tienes, el pip estándar también sirve.
Abre el terminal y ejecuta:
# run inside your env
pip install nanobot-ai
# OR if you prefer uv
uv tool install nanobot-ai
Una vez instalado, verás un mensaje como este:
Successfully installed nanobot-0.4.1Para configurar la interfaz:
/newbot y sigue las instrucciones Ejecuta nanobot onboard para inicializar tu bot. Deberías ver un mensaje similar a este:
✓ Created config at /Users/derrickmwiti/.nanobot/config.json
✓ Created workspace at /Users/derrickmwiti/.nanobot/workspace
  Created AGENTS.md
  Created SOUL.md
  Created USER.md
  Created memory/MEMORY.md
  Created memory/HISTORY.md
🐈 nanobot is ready!
Next steps:
  1. Add your API key to ~/.nanobot/config.json
     Get one at: https://openrouter.ai/keys
  2. Chat: nanobot agent -m "Hello!"
Want Telegram/WhatsApp? See: https://github.com/HKUDS/nanobot#-chat-appsEjecuta el siguiente comando y añade la clave de API del proveedor de modelo que quieras usar en la sección providers:
nano ~/.nanobot/config.jsonEdita el archivo para añadir la clave de API a tu proveedor elegido:
{
  "workspace": "./workspace",
  "providers": {
    // Option 1: OpenAI
    "openai": {
      "apiKey": "sk-YOUR-OPENAI-KEY-HERE",
      "model": "gpt-4o"
    },
    // Option 2: Anthropic (Claude)
    "anthropic": {
      "apiKey": "sk-ant-YOUR-CLAUDE-KEY-HERE",
      "model": "claude-3-5-sonnet-20240620"
    },
    // Option 3: Google Gemini
    "google": {
      "apiKey": "AIza-YOUR-GOOGLE-KEY-HERE",
      "model": "gemini-1.5-pro"
    },
    // Option 4: OpenRouter (Best for flexibility)
    "openrouter": {
      "apiKey": "sk-or-YOUR-OPENROUTER-KEY-HERE",
      "model": "nousresearch/hermes-3-llama-3.1-405b"
    },
    // Option 5: Local (Ollama or vLLM)
    "local": {
      "apiBase": "http://localhost:11434/v1",
      "apiKey": "ollama",
      "model": "llama3"
    }
  },
  "channels": {
    "telegram": {
      "enabled": true,
      "token": "YOUR_TELEGRAM_BOT_TOKEN",
      "allowFrom": ["YOUR_NUMERIC_USER_ID"]
    }
  }
}
Edita la sección de Telegram y añade el token y el ID de usuario que obtuviste antes. Esto es necesario para que solo tú puedas enviar instrucciones a tu agente.
"telegram": {
      "enabled": true,
      "token": "",
      "allowFrom": [""],
      "proxy": null
}
Modifica la sección agents para reflejar el proveedor elegido:
"agents": {
    "defaults": {
      "workspace": "~/.nanobot/workspace",
      "model": "openai/gpt-5",
      "maxTokens": 8192,
      "temperature": 0.7,
      "maxToolIterations": 20,
      "memoryWindow": 50
    }
  }
Prueba tu agente en el terminal:
nanobot agent -m "Hello"

🐈 nanobot
Hi there! How can I help you today? Para terminar la integración con Telegram, ejecuta este comando en el terminal:
nanobot gatewayAhora deberías ver que Telegram está habilitado, como puedes ver en mis mensajes a continuación:
🐈 Starting nanobot gateway on port 18790...
2026-02-13 09:59:35.405 | INFO | nanobot.channels.manager:_init_channels:46 - Telegram channel enabled
✓ Channels enabled: telegram
✓ Heartbeat: every 30m
2026-02-13 09:59:35.406 | INFO | nanobot.cron.service:start:154 - Cron service started with 0 jobs
2026-02-13 09:59:35.406 | INFO | nanobot.heartbeat.service:start:81 - Heartbeat started (every 1800s)
2026-02-13 09:59:35.406 | INFO | nanobot.agent.loop:run:116 - Agent loop started
2026-02-13 09:59:35.406 | INFO | nanobot.channels.manager:start_all:159 - Starting telegram channel...
2026-02-13 09:59:35.406 | INFO | nanobot.channels.manager:_dispatch_outbound:187 - Outbound dispatcher started
2026-02-13 09:59:35.411 | INFO | nanobot.channels.telegram:start:140 - Starting Telegram bot (polling mode)...
2026-02-13 09:59:39.245 | INFO | nanobot.channels.telegram:start:148 - Telegram bot @mwitibananabot connected
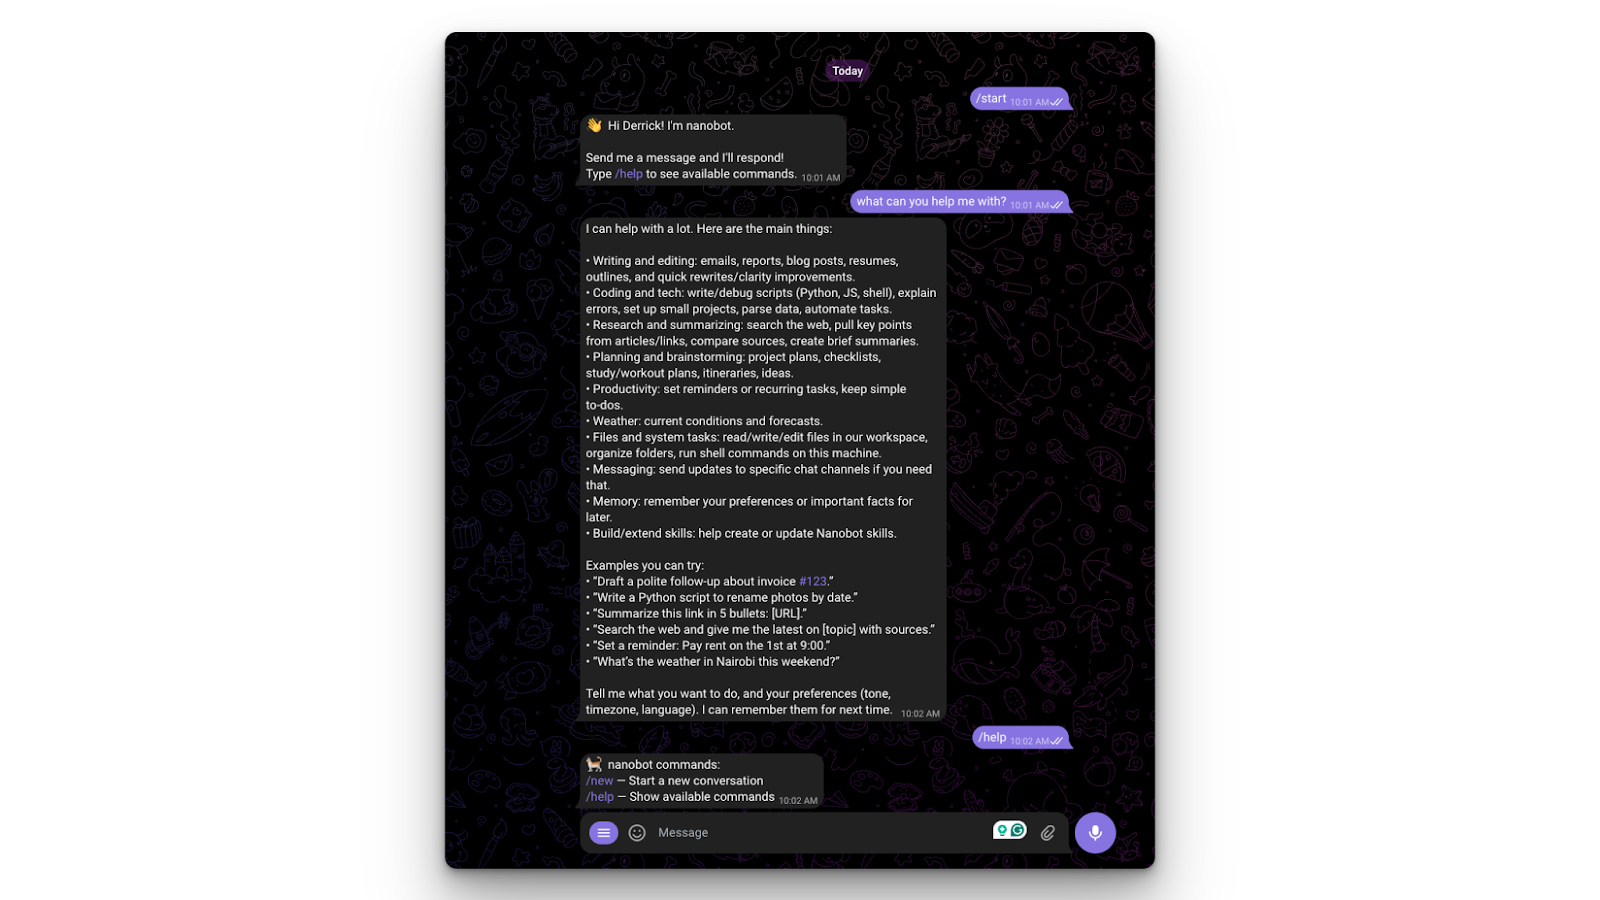
2026-02-13 09:59:39.417 | DEBUG | nanobot.channels.telegram:start:152 - Telegram bot commands registeredVe a Telegram y pruébalo:
Puedes aprender a usar Claude Code de Anthropic para mejorar flujos de trabajo de desarrollo de software con un ejemplo práctico usando la librería de Python de Supabase en nuestro tutorial de Claude Code.
Ahora que ya está configurado, es momento de hacerlo más funcional. La mayoría de modelos solo conocen información hasta la fecha de corte de sus datos de entrenamiento. Podemos hacerlo más útil conectándolo a internet.
Nanobot es compatible con el Model Context Protocol (MCP), lo que añade capacidades a tu agente, como búsqueda web o consultas a bases de datos. Vamos a añadir el Brave Search Server para que nuestro agente pueda acceder a internet:
"tools": {
    "web": {
      "search": {
        "apiKey": "",
        "maxResults": 5
      }
    },
    "exec": {
      "timeout": 60
    },
    "restrictToWorkspace": false
  }
Reinicia tu gateway.
Ahora en Telegram, haz una pregunta como “¿Cuál es el precio actual de la acción de Apple?”. En el terminal verás que realmente está buscando en la web:
2026-02-13 10:14:48.753 | INFO     | nanobot.agent.loop:_process_message:164 - Processing message from telegram:7045522516: What is the current price of the Apple Stock
2026-02-13 10:14:59.726 | INFO     | nanobot.agent.loop:_process_message:246 - Tool call: web_search({"query": "AAPL stock price Yahoo Finance", "count": 5})
2026-02-13 10:15:22.066 | INFO     | nanobot.agent.loop:_process_message:246 - Tool call: web_fetch({"url": "https://finance.yahoo.com/quote/AAPL/", "extractMode": "text", "maxChars": 20000})
2026-02-13 10:15:26.886 | INFO     | nanobot.agent.loop:_process_message:246 - Tool call: web_fetch({"url": "https://www.google.com/finance/quote/AAPL:NASDAQ", "extractMode": "text", "maxChars": 20000})
2026-02-13 10:15:51.361 | INFO     | nanobot.agent.loop:_process_message:246 - Tool call: web_fetch({"url": "https://query1.finance.yahoo.com/v7/finance/quote?symbols=AAPL", "extractMode": "text", "maxChars": 20000})
2026-02-13 10:15:52.018 | INFO     | nanobot.agent.loop:_process_message:246 - Tool call: web_fetch({"url": "https://query2.finance.yahoo.com/v10/finance/quoteSummary/AAPL?modules=price", "extractMode": "text", "maxChars": 20000})
2026-02-13 10:16:07.071 | INFO     | nanobot.agent.loop:_process_message:246 - Tool call: web_fetch({"url": "https://www.marketwatch.com/investing/stock/aapl", "extractMode": "text", "maxChars": 20000})
2026-02-13 10:16:07.406 | INFO     | nanobot.agent.loop:_process_message:246 - Tool call: web_fetch({"url": "https://finviz.com/quote.ashx?t=AAPL", "extractMode": "text", "maxChars": 20000})
2026-02-13 10:16:35.897 | INFO     | nanobot.agent.loop:_process_message:246 - Tool call: web_fetch({"url": "https://financialmodelingprep.com/api/v3/quote/AAPL?apikey=demo", "extractMode": "text", "maxChars": 20000})
2026-02-13 10:16:36.919 | INFO     | nanobot.agent.loop:_process_message:246 - Tool call: web_fetch({"url": "https://stooq.com/q/l/?s=aapl.us&i=5", "extractMode": "text", "maxChars": 20000})
2026-02-13 10:17:14.870 | INFO     | nanobot.agent.loop:_process_message:266 - Response to telegram:7045522516: Reflection:
- JS-heavy sites (Yahoo/Google) hid the live quote; Yahoo's JSON APIs blocked (401).
- Finviz returned a pr...
Como OpenClaw, una de las grandes bazas de Nanobot es la privacidad. Puedes usarlo sin enviar ningún dato a un proveedor en la nube. Como Nanobot admite vllm y endpoints compatibles con OpenAI, puedes apuntarlo a un motor de modelos local como Ollama.
ollamaEcha un vistazo a nuestro tutorial de OpenClaw con Ollama para aprender a crear un analista de datos de IA totalmente local con OpenClaw y Ollama que orquesta flujos de trabajo multietapa, analiza datasets y genera informes visuales sin enviar tus datos a la nube.
Incluso con una herramienta sencilla como Nanobot, pueden surgir problemas. Aquí tienes algunos de los más habituales y cómo resolverlos.
Si intentas ejecutar Nanobot en un servidor pero accedes a modelos locales, aparecerá un error de conexión rechazada. Esto se debe a que el servidor en línea no puede acceder a tu ordenador local.
Para evitarlo, asegúrate de que los modelos de código abierto también se ejecutan en el mismo servidor o utiliza algo como ngrok para hacer de puente entre ambos.
Los modelos locales suelen tener límites de memoria (ventanas de contexto) más pequeños. Incluso los modelos en la nube tienen una ventana de contexto limitada. Como Nanobot guarda su memoria en archivos simples, la mejor forma de "reiniciar" su cerebro es borrar manualmente los archivos de memoria dentro de tu carpeta ./workspace.
Alternativamente, cambia a un modelo con una ventana de contexto mayor, como gemini-1.5-pro o Claude Opus 4.6.
Nanobot demuestra que un software potente no tiene por qué ser grande. Ofrece las mismas funciones básicas que OpenClaw con un tamaño muchísimo menor. Sin embargo, mantiene los mismos riesgos en materia de seguridad, así que te recomiendo configurarlo en un entorno aislado para evitar problemas catastróficos, como que se borre todo el disco duro.
Para aprender más sobre cómo trabajar con herramientas de IA, te recomiendo consultar nuestra guía de las mejores herramientas de IA gratis. Para desarrollar habilidades más amplias de programación con IA, prueba nuestro curso AI-Assisted Coding for Developers y adquiere las competencias para que los asistentes de IA sean aliados más fiables en tu flujo de desarrollo.
También puedes descubrir cómo crear aplicaciones con IA usando LLMs, prompts, cadenas y agentes en LangChain en nuestro curso Developing LLM Applications with LangChain .
Top DataCamp Courses
Curso
Curso
Curso
Tutorial
Bex Tuychiev
Tutorial
Zoumana Keita
Tutorial
Arunn Thevapalan
Tutorial
Moez Ali
Tutorial
Abid Ali Awan
Tutorial