
Kurs
Agentische Systeme mit LangChain entwerfen
3 Std.
12.3K
Nanobot ist ein schlanker persönlicher KI-Assistent und eine Alternative zu OpenClaw. Er ist 98% kleiner als OpenClaw und liefert dennoch die gleiche Kernfunktionalität eines Agenten. Genau wie OpenClaw kann er lokal auf deinem Rechner laufen, sich mit deinen Lieblings-Apps verbinden und ist dank der geringen Größe leicht im Code zu prüfen.
Nanobot verbindet deine bevorzugten Closed- und Open-Source-Modelle, um einen lokalen Coding-Agenten auszuführen. Sobald du Nachrichten über Telegram, WhatsApp oder das Terminal sendest, reagiert der Agent, indem er Befehle auf deinem Rechner ausführt, zum Beispiel Logs liest, Skripte startet und Dateien durchsucht.
In diesem Tutorial zeige ich dir, wie du Nanobot von Grund auf einrichtest und in wenigen Minuten einen funktionsfähigen KI-Agenten baust. Außerdem gehe ich auf Stolperfallen ein, die du bei dieser Technik kennen solltest.
Nanobot ist eine OpenClaw-Alternative, die rasant an Popularität gewonnen hat und zum Zeitpunkt dieses Artikels über 21.000 GitHub-Sterne verzeichnet. Wie OpenClaw unterstützt es gängige Messaging-Plattformen wie Discord, Slack und Telegram.
Genau wie der OpenClaw-Agent kann auch dein Nanobot-Agent bei Moltbook in den Social-Media-Partychat einsteigen, wie wir in unserem Einstieg in Moltbook-Tutorial zeigen.
Trotz seiner Größe deckt Nanobot drei Kernanforderungen an einen leistungsfähigen Agenten ab:

Für dieses Tutorial brauchst du Folgendes:
Lass uns einen Agenten bauen, der in deinem Telegram lebt, das Web durchsuchen kann und sich deine Interessen merkt.
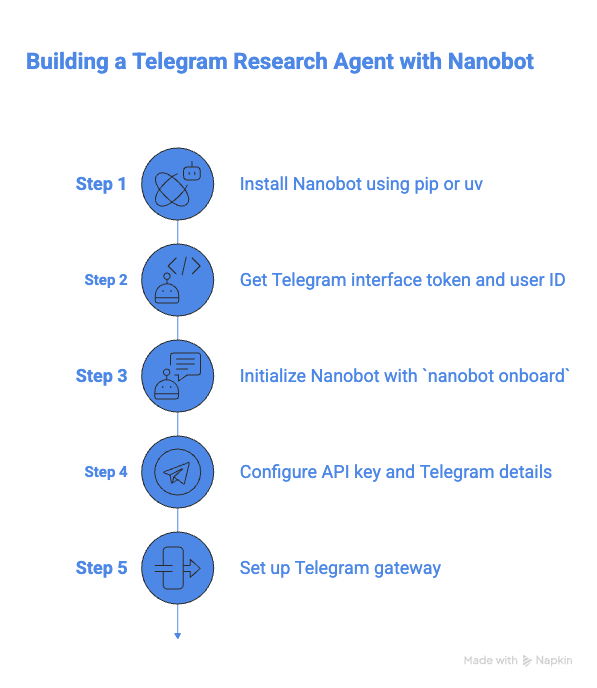
Am saubersten installierst du Python-Tools heute mit pip oder uv – so bleiben sie vom System-Python getrennt. Falls du beides nicht hast, funktioniert das klassische pip ebenfalls.
Öffne dein Terminal und führe aus:
# run inside your env
pip install nanobot-ai
# OR if you prefer uv
uv tool install nanobot-ai
Nach der Installation siehst du eine Meldung wie diese:
Successfully installed nanobot-0.4.1So richtest du die Oberfläche ein:
/newbot und folge den Anweisungen Führe nanobot onboard aus, um deinen Bot zu initialisieren. Du solltest eine ähnliche Meldung sehen:
✓ Created config at /Users/derrickmwiti/.nanobot/config.json
✓ Created workspace at /Users/derrickmwiti/.nanobot/workspace
  Created AGENTS.md
  Created SOUL.md
  Created USER.md
  Created memory/MEMORY.md
  Created memory/HISTORY.md
🐈 nanobot is ready!
Next steps:
  1. Add your API key to ~/.nanobot/config.json
     Get one at: https://openrouter.ai/keys
  2. Chat: nanobot agent -m "Hello!"
Want Telegram/WhatsApp? See: https://github.com/HKUDS/nanobot#-chat-appsFühre den folgenden Befehl aus und füge im Abschnitt providers den API-Schlüssel des gewünschten Modellanbieters hinzu:
nano ~/.nanobot/config.jsonBearbeite die Datei und ergänze beim gewählten Provider den API-Schlüssel:
{
  "workspace": "./workspace",
  "providers": {
    // Option 1: OpenAI
    "openai": {
      "apiKey": "sk-YOUR-OPENAI-KEY-HERE",
      "model": "gpt-4o"
    },
    // Option 2: Anthropic (Claude)
    "anthropic": {
      "apiKey": "sk-ant-YOUR-CLAUDE-KEY-HERE",
      "model": "claude-3-5-sonnet-20240620"
    },
    // Option 3: Google Gemini
    "google": {
      "apiKey": "AIza-YOUR-GOOGLE-KEY-HERE",
      "model": "gemini-1.5-pro"
    },
    // Option 4: OpenRouter (Best for flexibility)
    "openrouter": {
      "apiKey": "sk-or-YOUR-OPENROUTER-KEY-HERE",
      "model": "nousresearch/hermes-3-llama-3.1-405b"
    },
    // Option 5: Local (Ollama or vLLM)
    "local": {
      "apiBase": "http://localhost:11434/v1",
      "apiKey": "ollama",
      "model": "llama3"
    }
  },
  "channels": {
    "telegram": {
      "enabled": true,
      "token": "YOUR_TELEGRAM_BOT_TOKEN",
      "allowFrom": ["YOUR_NUMERIC_USER_ID"]
    }
  }
}
Bearbeite den Telegram-Abschnitt und trage den Token sowie die User-ID ein, die du zuvor erhalten hast. So stellst du sicher, dass nur du deinem Agenten Anweisungen senden kannst.
"telegram": {
      "enabled": true,
      "token": "",
      "allowFrom": [""],
      "proxy": null
}
Passe den agents-Abschnitt an deinen gewählten Provider an:
"agents": {
    "defaults": {
      "workspace": "~/.nanobot/workspace",
      "model": "openai/gpt-5",
      "maxTokens": 8192,
      "temperature": 0.7,
      "maxToolIterations": 20,
      "memoryWindow": 50
    }
  }
Teste deinen Agenten im Terminal:
nanobot agent -m "Hello"

🐈 nanobot
Hi there! How can I help you today? Um die Telegram-Integration abzuschließen, führe im Terminal folgenden Befehl aus:
nanobot gatewayJetzt sollte Telegram aktiviert sein – wie in meinen Meldungen unten zu sehen:
🐈 Starting nanobot gateway on port 18790...
2026-02-13 09:59:35.405 | INFO | nanobot.channels.manager:_init_channels:46 - Telegram channel enabled
✓ Channels enabled: telegram
✓ Heartbeat: every 30m
2026-02-13 09:59:35.406 | INFO | nanobot.cron.service:start:154 - Cron service started with 0 jobs
2026-02-13 09:59:35.406 | INFO | nanobot.heartbeat.service:start:81 - Heartbeat started (every 1800s)
2026-02-13 09:59:35.406 | INFO | nanobot.agent.loop:run:116 - Agent loop started
2026-02-13 09:59:35.406 | INFO | nanobot.channels.manager:start_all:159 - Starting telegram channel...
2026-02-13 09:59:35.406 | INFO | nanobot.channels.manager:_dispatch_outbound:187 - Outbound dispatcher started
2026-02-13 09:59:35.411 | INFO | nanobot.channels.telegram:start:140 - Starting Telegram bot (polling mode)...
2026-02-13 09:59:39.245 | INFO | nanobot.channels.telegram:start:148 - Telegram bot @mwitibananabot connected
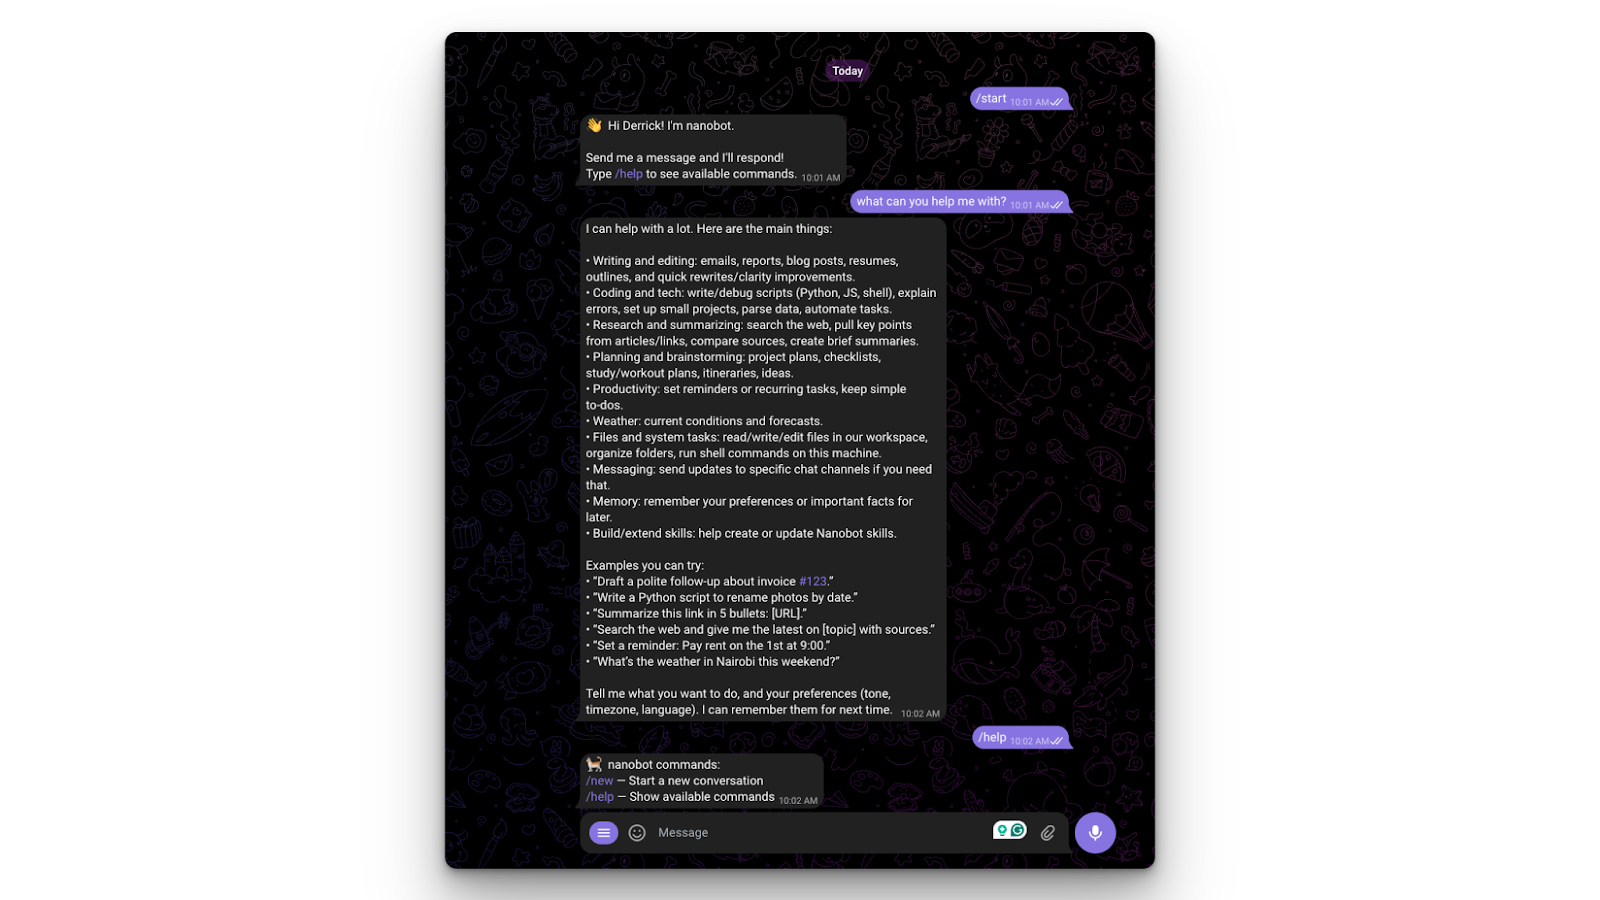
2026-02-13 09:59:39.417 | DEBUG | nanobot.channels.telegram:start:152 - Telegram bot commands registeredWechsle zu Telegram und teste es:
Wie du mit Anthropic's Claude Code Softwareentwicklungs-Workflows verbesserst – praxisnah mit der Supabase-Python-Bibliothek – erfährst du in unserem Claude Code Tutorial.
Jetzt, da die Einrichtung steht, machen wir deinen Agenten vielseitiger. Die meisten Modelle kennen nur Informationen bis zum Stichtag ihrer Trainingsdaten. Wir erhöhen die Nützlichkeit, indem wir ihn mit dem Internet verbinden.
Nanobot unterstützt das Model Context Protocol (MCP) und erweitert so die Fähigkeiten deines Agenten, etwa um Websuche oder Datenbankabfragen. Fügen wir den Brave Search Server hinzu, damit dein Agent aufs Internet zugreifen kann:
"tools": {
    "web": {
      "search": {
        "apiKey": "",
        "maxResults": 5
      }
    },
    "exec": {
      "timeout": 60
    },
    "restrictToWorkspace": false
  }
Starte dein Gateway neu.
Stelle nun in Telegram eine Frage wie „What is the current price of the Apple Stock?“. Im Terminal siehst du, dass es tatsächlich das Web durchsucht:
2026-02-13 10:14:48.753 | INFO     | nanobot.agent.loop:_process_message:164 - Processing message from telegram:7045522516: What is the current price of the Apple Stock
2026-02-13 10:14:59.726 | INFO     | nanobot.agent.loop:_process_message:246 - Tool call: web_search({"query": "AAPL stock price Yahoo Finance", "count": 5})
2026-02-13 10:15:22.066 | INFO     | nanobot.agent.loop:_process_message:246 - Tool call: web_fetch({"url": "https://finance.yahoo.com/quote/AAPL/", "extractMode": "text", "maxChars": 20000})
2026-02-13 10:15:26.886 | INFO     | nanobot.agent.loop:_process_message:246 - Tool call: web_fetch({"url": "https://www.google.com/finance/quote/AAPL:NASDAQ", "extractMode": "text", "maxChars": 20000})
2026-02-13 10:15:51.361 | INFO     | nanobot.agent.loop:_process_message:246 - Tool call: web_fetch({"url": "https://query1.finance.yahoo.com/v7/finance/quote?symbols=AAPL", "extractMode": "text", "maxChars": 20000})
2026-02-13 10:15:52.018 | INFO     | nanobot.agent.loop:_process_message:246 - Tool call: web_fetch({"url": "https://query2.finance.yahoo.com/v10/finance/quoteSummary/AAPL?modules=price", "extractMode": "text", "maxChars": 20000})
2026-02-13 10:16:07.071 | INFO     | nanobot.agent.loop:_process_message:246 - Tool call: web_fetch({"url": "https://www.marketwatch.com/investing/stock/aapl", "extractMode": "text", "maxChars": 20000})
2026-02-13 10:16:07.406 | INFO     | nanobot.agent.loop:_process_message:246 - Tool call: web_fetch({"url": "https://finviz.com/quote.ashx?t=AAPL", "extractMode": "text", "maxChars": 20000})
2026-02-13 10:16:35.897 | INFO     | nanobot.agent.loop:_process_message:246 - Tool call: web_fetch({"url": "https://financialmodelingprep.com/api/v3/quote/AAPL?apikey=demo", "extractMode": "text", "maxChars": 20000})
2026-02-13 10:16:36.919 | INFO     | nanobot.agent.loop:_process_message:246 - Tool call: web_fetch({"url": "https://stooq.com/q/l/?s=aapl.us&i=5", "extractMode": "text", "maxChars": 20000})
2026-02-13 10:17:14.870 | INFO     | nanobot.agent.loop:_process_message:266 - Response to telegram:7045522516: Reflection:
- JS-heavy sites (Yahoo/Google) hid the live quote; Yahoo's JSON APIs blocked (401).
- Finviz returned a pr...
Wie OpenClaw ist einer der größten Pluspunkte von Nanobot die Privatsphäre. Du kannst es nutzen, ohne Daten an einen Cloud-Anbieter zu senden. Da Nanobot vllm und OpenAI-kompatible Endpunkte unterstützt, kannst du es auf einen lokalen Model-Runner wie Ollama zeigen.
ollamaSieh dir unser Tutorial zu OpenClaw mit Ollama an, um zu lernen, wie du einen komplett lokalen KI-Datenanalysten mit OpenClaw und Ollama baust, der mehrstufige Workflows orchestriert, Datensätze analysiert und visuelle Reports erstellt – ohne deine Daten in die Cloud zu schicken.
Auch bei einem einfachen Tool wie Nanobot kann etwas schiefgehen. Hier sind typische Probleme – und wie du sie löst.
Wenn du Nanobot auf einem Server startest, aber lokale Modelle ansprechen willst, erhältst du einen Connection refused-Fehler. Ursache: Der Online-Server kann nicht auf deinen lokalen Rechner zugreifen.
Abhilfe: Stelle sicher, dass die Open-Source-Modelle ebenfalls auf demselben Server laufen – oder nutze z. B. ngrok, um die Verbindung zu überbrücken.
Lokale Modelle haben oft kleinere Speicherkapazitäten (Kontextfenster). Auch Cloud-Modelle sind begrenzt. Da Nanobot sein Gedächtnis als einfache Dateien speichert, „resettest" du sein Gehirn am besten, indem du die Speicherdateien im Ordner ./workspace manuell löschst.
Alternativ wechselst du zu einem Modell mit größerem Kontextfenster, etwa gemini-1.5-pro oder Claude Opus 4.6.
Nanobot zeigt: Leistungsstarke Software muss nicht groß sein. Es bietet die gleichen Kernfunktionen wie OpenClaw und ist dennoch drastisch kleiner. Sicherheitsseitig bestehen jedoch die gleichen Risiken. Richte Nanobot daher am besten in einer Sandbox ein, um katastrophale Folgen wie das Löschen deiner gesamten Festplatte zu verhindern.
Wenn du mehr über den Umgang mit KI-Tools lernen willst, empfehle ich dir unseren Guide zu den besten kostenlosen KI-Tools. Für umfassendere KI-Coding-Kompetenzen probiere unseren Kurs AI-Assisted Coding for Developers, um die Kompetenzen zu entwickeln, die KI-Assistenten zu verlässlichen Partnern in deinem Entwicklungs-Workflow machen.
Außerdem erfährst du in unserem Kurs Developing LLM Applications with LangChain, wie du KI-gestützte Anwendungen mit LLMs, Prompts, Chains und Agenten in LangChain baust.
Top-DataCamp-Kurse
Kurs
Kurs
Kurs
Blog
Tutorial
Kurtis Pykes
Tutorial
Matt Crabtree
Tutorial
DataCamp Team
Tutorial
Sejal Jaiswal
Tutorial
Derrick Mwiti