
course
Introduction to Claude Models
3 घंटा
10.7K
CLI flags set up how Claude Code runs, keyboard shortcuts handle real-time interruptions, and slash commands give you fine-grained control once you are inside a session.
All three layers exist because different needs arise at different moments in your workflow. You will not use all of them every session, but knowing they exist means you will reach for the right tool when you need it.
Slash commands are typed directly inside an active session. They start with / (e.g., /compact, /plan, or /clear) and execute immediately. They control what is happening right now, inside the conversation you are in.
CLI flags are set when you launch Claude Code from the terminal. Things like claude --model claude-opus-4-6 or claude --continue are CLI flags. They configure the session before it starts. You can read more about the full range of flags in our Claude Code CLI tutorial.
Keyboard shortcuts operate at the UI level. Esc interrupts a running response. Double-tapping Esc opens the rewind menu. Shift+Tab toggles between plan mode, accept edits, and auto mode. These should be muscle-memory shortcuts for things you do frequently.
This article focuses on slash commands, commands you use between prompts, with keyboard shortcuts noted where they overlap with a specific command.
The following table covers the 13 most important commands, all of which are covered in this guide.
|
Command |
Purpose |
|
|
Summarize older turns and free context window space with an optional set of instructions |
|
|
Hard reset, start a new conversation with an empty context |
|
|
Visualize current context window usage as a colored grid |
|
|
Enter read-only plan mode before making file changes |
|
|
Open an interactive viewer showing all changes from the session |
|
|
Set a high-level objective that Claude works toward across turns |
|
|
Ask a side question without adding it to the main conversation |
|
|
Continue a previous session by name or from a picker |
|
|
Fork the conversation to try an alternative approach (alias: /fork) |
|
|
Roll back to an earlier turn, either your code, conversation, or both |
|
|
Alias for /usage — shows token spend or quota usage |
|
|
Switch the active model mid-session |
|
|
Set reasoning depth from low to max |
Note that /cost is now an alias for /usage in the most recent versions of Claude Code, and /fork is an alias for /branch.
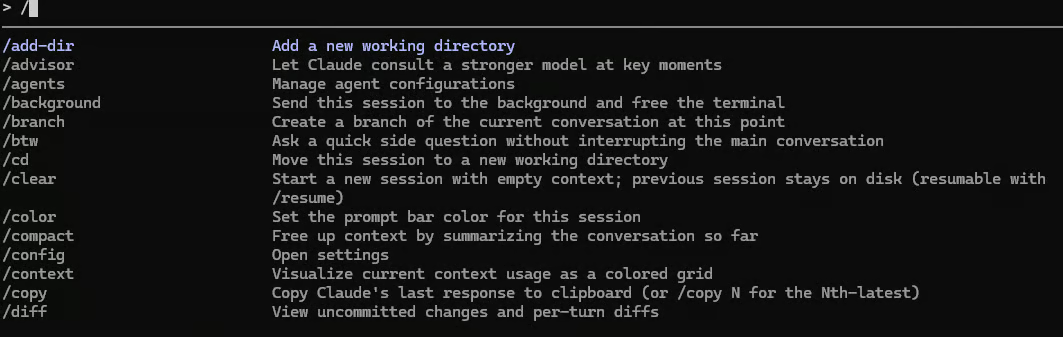
You can see all the options by typing / in your Claude session.
To manage the context window in Claude Code, a crucial skill for any power user, use the /compact, /clear, and /context commands.
The context window is the working memory of your session. It holds a lot of information:
As it fills up, Claude Code starts losing track of earlier parts of the session, like the file structure you described at the start, the constraints you laid out, and other key info. Quality degrades before you hit the limit, not just when you hit it.
The /compact command summarizes older turns in your conversation and replaces them with a compressed version, freeing up token budget while keeping Claude aware of what happened earlier in the session. It is best practice to run it early and be intentional about what you ask it to preserve.
The basic invocation is just /compact. But the more useful form is to tell it what to preserve: For instance, you can tell Claude /compact focus on the auth module, or /compact retain the error handling patterns we discussed.
When you pass instructions, the summary Claude generates will emphasize those topics over everything else. For data practitioners, that might look like /compact focus on the schema decisions and the pipeline DAG, so that the high-level architecture stays in focus even as the line-by-line debugging details get compressed away.
A useful rule from the community: compact before your context usage exceeds 80%. Waiting until it is full means the summary will be lower quality because Claude is already operating in a degraded state.
One important note: the contents of CLAUDE.md, loaded skills, and memory files are automatically preserved during compaction. You do not need to specifically ask for those to be retained.
The /clear command wipes the conversation history entirely and starts fresh. You should use /clear at task boundaries.
You can optionally pass a name to label the session before clearing: /clear payment-refactor. This labels the old session in the /resume picker so you can return to it later.
When you finish debugging a data loader and want to start working on a completely unrelated visualization module, carrying the old context forward is more of a hindrance than a help. A clean slate means Claude will not confuse references, will not carry over constraints that no longer apply, and will start with full attention on the new task.
Use /compact to continue the same work with less context bloat, and /clear to switch to different work entirely.
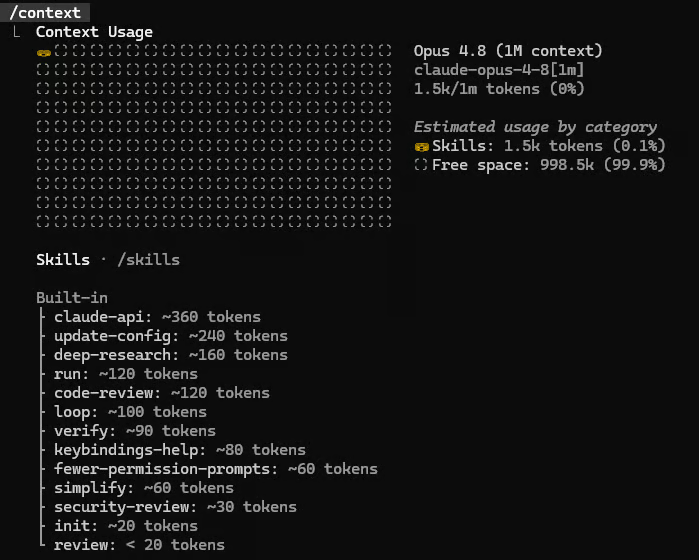
Before you decide whether to compact or clear, it helps to know where things actually stand. The /context command visualizes current context window usage as a colored grid and shows you exactly where the tokens are going.
You will see a breakdown by category:
The nice thing is that Claude will provide optimization suggestions if any item is consuming an unusual amount of space. Pass all to expand the full per-item breakdown: /context all
Get into the habit of running /context before starting any large task. If the window is already 60% full from earlier in the session, starting a major multi-file refactor without compacting or clearing first sets you up for frustration.
The fastest way to create a mess with AI vibe coding is to let it start editing files before it has a clear plan. To avoid ambiguous instructions from producing inconsistent changes, use /plan and diff.
Using /plan puts Claude into read-only mode, where it analyzes the codebase, proposes a plan of action, and waits for your approval before making any changes.
You can use it with a description to give it a head start: /plan refactor the feature engineering pipeline to support lazy evaluation. It will not write or delete anything until you give the go-ahead. Once you review and approve, Claude executes the full plan.
The keyboard shortcut for toggling plan mode is Shift+Tab, which is faster than typing the command if you are already mid-session and want to shift modes quickly.
Plan mode is most valuable in 3 situations:
This can be any sort of task, like migrating a feature store, refactoring ETL logic, or updating model training scripts that have accumulated years of one-off changes.
To go deeper, I recommend reading our full tutorial on this approach: Claude Code Plan Mode: Design Review-First Refactoring Loops.
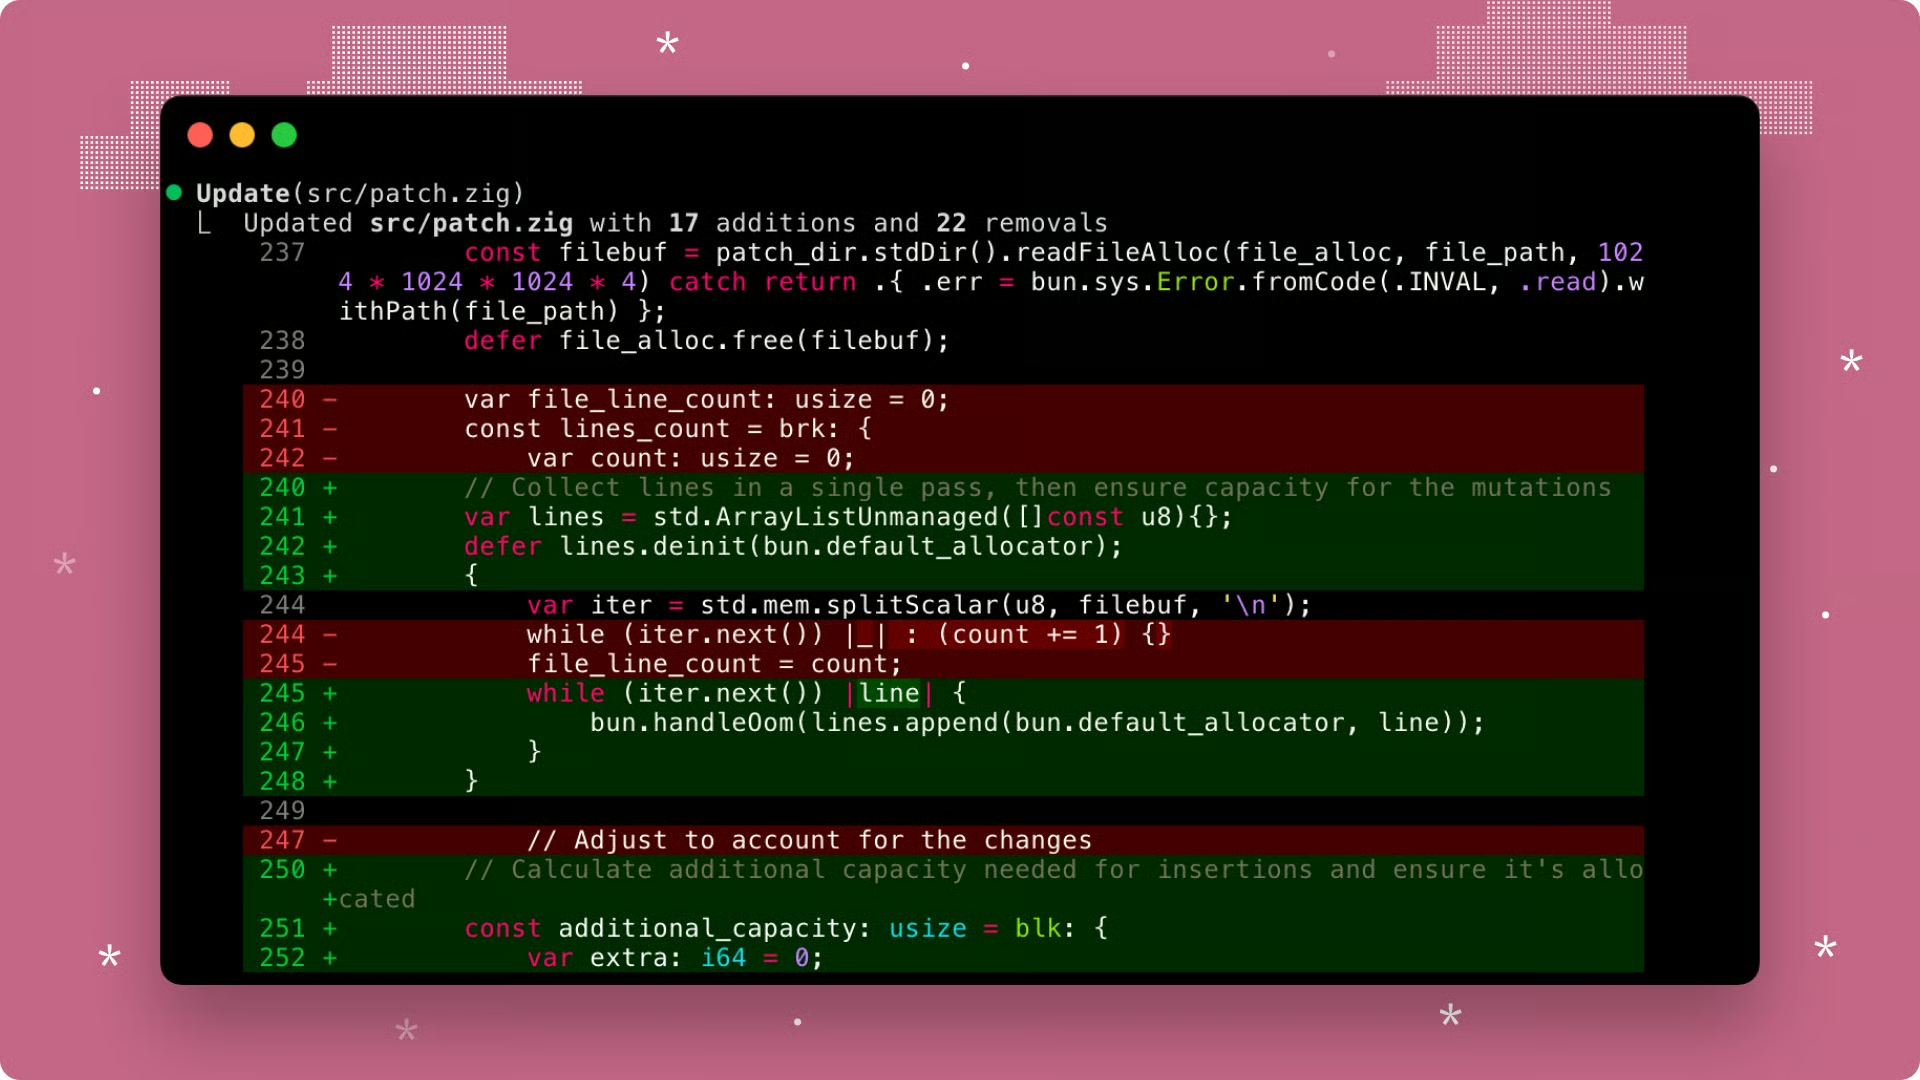
Using /diff opens an interactive diff viewer which shows all file changes from the current session.
It is useful to quickly review and confirm that nothing unexpected happened, such as unexpected file changes or unintended scope creep. Think of it as the final checkpoint between "Claude did some things" and "I am certain what went into this commit."
Inside the viewer, you navigate with the arrow keys. Left and right switch between the current cumulative git diff and per-turn diffs. Up and down browse files within the view. This lets you see what has happened throughout the session and in each turn.
To keep complex sessions from losing the thread and polluting the context with tangents, use /goal and /btw commands.
The Claude Code /goal command sets a high-level objective that persists across turns and keeps Claude working toward a defined outcome.
Once a goal is set, Claude keeps going automatically until the condition you described is met. This is particularly useful for long-running migrations, large test suite fixes, or any task that would otherwise require you to keep re-prompting Claude to continue.
You use it by using the command with the specific outcome you want. It is helpful to write clear, well-defined goals with specific end states, such as /goal All tests in the data pipeline are passing with no deprecation warnings.
A live progress overlay appears in the status line showing elapsed time, turn count, and token usage while a goal is active. When the goal is met, Claude stops and reports completion.
To remove a goal before it is reached: /goal clear.
For a similar but different approach, read our tutorial on Spec-Driven Development in Claude Code.
The /btw command lets you ask a side question that never becomes part of the main conversation thread.
Claude answers it in an overlay, and the main conversation continues from exactly where it was: /btw what was that config option for SQLAlchemy connection pooling called again?
I run into this a lot, Claude is churning away, and I have a question about the process. If I stop Claude from asking, I add noise, and Claude might have to start the task over. If I ignore the question, I lose it. The /btw command solves this cleanly.
Think of it as a sticky note you pass to yourself mid-task, the answer you need without the context or time cost of a detour.
Long projects do not fit in a single session. You need to pick up old work, experiment safely without destroying progress, and occasionally undo changes that went sideways. The /resume, /branch, and /rewind commands help us do all that.
Using /resume lets you continue a previous session. Run it without arguments, and you get a picker showing recent sessions sorted by date with a rough idea of what the last prompt was. Pass a session name or ID to jump straight there: /resume payment-refactor
You can also do this from the command line before starting a session. Using claude --continue (or claude -c) resumes the most recent session, and claude --resume <id> resumes by session ID. The CLI flags and the slash command accomplish the same thing; you would use the CLI before you start a session or the slash command if you’re in the middle of one.
Claude Code saves every session locally in ~/.claude/projects/ as a JSONL file, with each message, tool use, and result recorded. This is what makes resuming, rewinding, and branching possible.
The /branch command creates a copy of the current conversation at its current state, switches you into the new branch, and leaves the original exactly as it was. You can even name your branches: /branch try-polars-instead-of-pandas
This is the conversational equivalent of a git branch. Say you want to try a different approach without losing the one you have already built. Branch it, try the alternative, and if it does not work out, you can /resume back to the original. If it does work out, you have a clean branch that reflects the better path.
This approach is also very useful if your context window is filling up and you're confronted with two separate issues that both rely on the context you have gathered in the active chat.
/branch is also available as /fork, and in older community resources and tutorials, you will often see /fork used. The canonical name in the current official documentation is /branch, but both work.
Let’s say we go too far and realize some mistakes have been made… /rewind rolls back the session to an earlier turn like a convenient undo button.
The great part is that you get an interactive menu. Navigate with the arrow keys and select the turn you want to roll back to.
The key feature is choosing what to rewind:
The keyboard shortcut Esc Esc opens the same rewind menu without typing the command.
One important caveat: only file operations that Claude performed through its official tools are tracked and reversible. Changes you made manually in a separate editor during the session are not covered.
To control the cost-to-performance ratio in Claude Code, use the /cost, /model, and /effort commands.
If you are on an API plan, token spend is a real consideration. If you are on Pro or Max plans, staying within your usage quota matters. Either way, running the most powerful model at maximum reasoning depth on every task is wasteful.
/cost is an alias for /usage, and shows what you have spent thus far:
It could be good to check /cost at the start of a heavy session to establish a baseline, and again periodically during long runs to see how quickly you are burning through the budget.
If costs are climbing faster than expected, the next two commands are your levers.
Switching the active model with the /model command mid-session without losing any context can be powerful as your needs throughout a session change.
Running it without arguments opens an interactive picker that you navigate with the arrow keys. You can also pass the model name directly: /model claude-haiku-4-5.
A practical strategy:
The cost difference between Opus and Haiku is roughly 10 to 20 times at scale.
As of v2.1.153, the model you select with /model is saved as the default for new sessions. Press s in the interactive picker to apply the selection to the current session only without changing your default.
You can decide how much /effort your model uses and set the reasoning depth for the current model. Without arguments, you get an interactive slider, but you can always set it directly, like /effort low.
The available levels are the following:
low
medium
high
xhigh (April 2026)
max (May 2026)
ultracode (May 2026)
The max and ultracode effort levels are session-only and cannot be saved as defaults. Use /effort auto to reset to the current model default.
The ultracode level combines xhigh reasoning with automatic workflow orchestration for the most complex multi-step tasks. Be careful, as this can burn through a lot of tokens, as automatic workflow orchestration can spawn over 100 agents.
The practical rule:
Use low or medium for boilerplate, simple code generation, and straightforward refactors.
Reserve high or xhigh for complex debugging, architectural decisions, and multi-file analysis where getting it right the first time saves significant back-and-forth.
Use ultracode only for large refactors, codebase rewrites, or tasks with many moving components.
Effort directly affects both quality and token cost, so calibrating it to the task pays off.
The built-in commands cover the operational fundamentals. Custom slash commands in Claude Code are where the tool starts to feel like something you built for yourself.
The idea is simple: any prompt you find yourself typing repeatedly can be saved as a command file and invoked with a single /command-name call. Your team's standard code review checklist, your project's deployment verification steps, and your personal style of requesting test generation all become shareable.
One thing to flag up front: Anthropic has unified custom commands with skills. The .claude/commands/ format is now considered legacy. It still works, and the CLI will continue to support it, but the recommended format going forward is .claude/skills/<name>/SKILL.md.
Skills support the same /name invocation, can also be invoked autonomously by Claude when the description matches the task, and can bundle supporting files (scripts, templates, reference docs) alongside the prompt.
You can read more about skills in our tutorial on Claude Skills.
Custom commands are Markdown files stored in one of two locations:
Project-level: .claude/commands/ inside your project's root directory. These are scoped to that project, can be committed to version control, and are shared with anyone else working on the same repo.
Personal (global): ~/.claude/commands/ in your home directory. These are available across every project on your machine and are private to you.
The filename without the .md extension becomes the command name. A file at .claude/commands/fix-issue.md creates /fix-issue. A file at .claude/commands/frontend/component.md creates /component with a namespace label indicating it comes from the frontend subdirectory.
If you want to use the skills format instead, the equivalent paths are .claude/skills/<command-name>/SKILL.md for project-level and ~/.claude/skills/<command-name>/SKILL.md for personal. The frontmatter and prompt body described below work the same way.
The body of the Markdown file is the prompt template. When you invoke the command, Claude reads the file, processes any substitutions, and executes it as if you had typed that prompt yourself.
Here is a minimal example for a file at .claude/commands/summarize-pr.md:
Review the current git diff and write a concise pull request description.
Include: what changed, why it changed, and any important implementation notes.
Format as plain prose, not bullet points.
Run /summarize-pr, and Claude executes that prompt against the current session.
For more control over how a command behaves, add YAML frontmatter at the top of the file:
description: Generate a PR description from the current diff
allowed-tools: Bash(git diff *), Read
model: claude-sonnet-4-6
The frontmatter is important for different purposes:
The description shows up in the /help listing so you remember what the command does, and so Claude can automatically match it when you describe a use case without calling the command/skill outright.
As the name gives away, allowed-tools restricts which tools Claude can use when executing the command, which is good for limiting scope and context.
Finally, model pins the command to a specific model regardless of what is active in the session.
The $ARGUMENTS placeholder is where custom commands become very flexible. Whatever text you type after the command name gets substituted wherever $ARGUMENTS appears in the prompt.
Here is a complete example. Let’s create a command for fixing repo issues called .claude/commands/fix-issue.md:
---
description: Find and fix a GitHub issue by number
allowed-tools: Read, Edit, Bash(git diff *)
argument-hint: [issue-number]
---

Find and fix issue #$ARGUMENTS in this repository.

Steps:
1. Read the relevant source files to understand the current behavior
2. Identify the root cause
3. Implement the fix with minimal scope — do not change unrelated code
4. Verify the fix does not break anything obvious
5. Write a brief explanation of what changed and why
You invoke it as /fix-issue 847 and Claude receives the full prompt with $ARGUMENTS replaced by 847. You can also use positional arguments $0, $1, and so on for commands that take multiple distinct inputs.
Commands can inject live shell output using the ! prefix. This is useful for commands that should always operate on the current state:
allowed-tools: Read, Bash(git *)
description: Review staged changes before committing

Current staged diff:
!git diff --cached

Review these changes and suggest a clear, conventional commit message.
Flag any obvious bugs, missing tests, or incomplete logic before I commit.
When Claude loads this command, it runs git diff --cached first, captures the output, and injects it into the prompt. Claude sees the actual diff content, not a placeholder.
This combination of $ARGUMENTS, shell injection, and frontmatter makes Claude Code custom commands a good way to speed up your prompting.
For more patterns and real-world examples, DataCamp's tutorials on Claude Code Best Practices and Claude Code Hooks cover how these tools fit together in production workflows.
Slash commands are not advanced features reserved for power users. They are the basic operational layer of Claude Code, and learning them early will change how you approach AI-assisted development.
If you are new to all of this, start small. Pick up /compact, /plan, and /cost as small but powerful ways of optimizing your sessions. Once those feel natural, add /diff before commits and /goal for any task that runs more than a few turns. The rest will follow as the situations arise.
For more inspiration for custom command ideas, I recommend continuing with our Claude Code Terminal tutorial. If you want a structured foundation in how Claude models think and what they are built to do, our Introduction to Claude Models and Claude Code 101 courses are the right place to build it.
Learn Using Claude with DataCamp!
course
course
course
tutorial
Bex Tuychiev
tutorial
Vikash Singh
tutorial
Bex Tuychiev
tutorial
Aashi Dutt
tutorial
Bex Tuychiev
tutorial
Khalid Abdelaty