
Track
Microsoft Azure Fundamentals (AZ-900)
9 hr
You’ve just finished writing an excellent code or a data transformation script. You’re ready to deploy it, but then comes the chaos—manual testing, deployment errors, and team members working on outdated code versions. Sounds familiar? This is where Azure DevOps comes in.
Everything you need to develop your software product from start to finish is included in Azure DevOps.
This tutorial teaches you how to set up an Azure DevOps environment, use Azure Repos for version control, create and manage CI/CD pipelines, track and manage work items with Azure Boards, integrate Azure DevOps with other tools, monitoring and Reporting in Azure DevOps, and best practices for Azure DevOps.
Azure DevOps is a cloud-based suite of development tools offered by Microsoft that streamlines software development, collaboration, and deployment processes. It offers version control, continuous integration/continuous deployment (CI/CD), work tracking, and more.
Azure DevOps is scalable, integrates seamlessly with Azure and other cloud platforms, and fosters team collaboration. Whether you’re working on a small project or an extensive enterprise application, Azure DevOps has you covered.
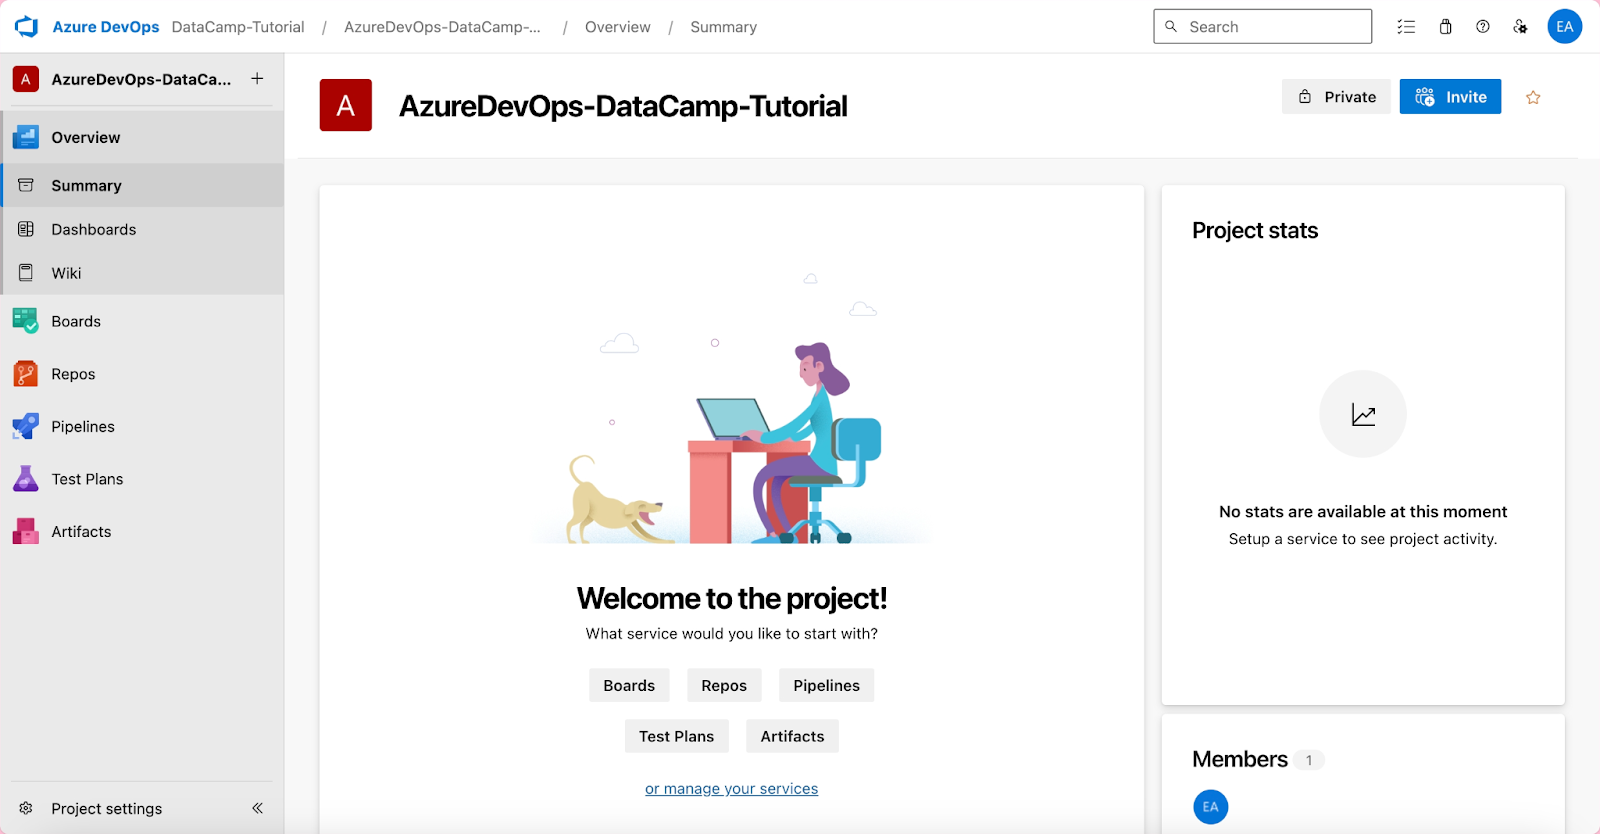
Azure DevOps interface: A project overview is provided in the console's main interface.
Azure DevOps comprises a suite of services designed to help teams plan, develop, test, and deliver software efficiently. It’s not just for developers—data practitioners can use it to manage code, automate workflows, and collaborate effectively. Azure DevOps lets you connect to and collaborate across its core services.
Core Services of Azure DevOps include:
|
Service |
Purpose |
|
Azure Boards |
Azure Boards facilitates agile project management, including sprints and backlog monitoring, and supports agile approaches by offering a configurable platform for managing work items and tracking tasks, problems, and user stories. |
|
Azure Repos |
Azure Repos offers version control tools (Git/TFVC) to manage code, track changes, and take snapshots for any project size, offering efficient version control. |
|
Azure Pipelines |
Azure Pipelines automates builds, testing, and deployments with CI/CD, supporting all major languages and project types for continuous integration, testing, and delivery. |
|
Azure Test Plans |
Azure Test Plans offers powerful tools for planned manual testing, user acceptance testing, exploratory testing, and stakeholder feedback, supporting test case management and execution. |
|
Azure Artifacts |
Azure Artifacts provides a more straightforward way to manage dependencies from a single feed. They function as repositories for storing, managing, and sharing packages within teams or publicly. |
Check out our Understanding Microsoft Azure interactive course if you’re just starting your Azure journey. You should also check out our Microsoft Azure Fundamentals track, which will help you prepare to become Azure-certified.
Now that we’ve learned a little about Azure DevOps let’s review its key features. Why should you use Azure DevOps? Here are some standout features:
In my experience, Azure DevOps is the go-to solution for companies and individuals wishing to implement the best DevOps practices. Why? It builds a culture of continuous growth and collaboration and provides tools.
Are you a DevOps beginner? Explore key concepts that drive modern software development and deployment in the DevOps Concepts course.
To access the Azure DevOps environment, you must first set up everything to foster team collaboration and end-to-end development process.
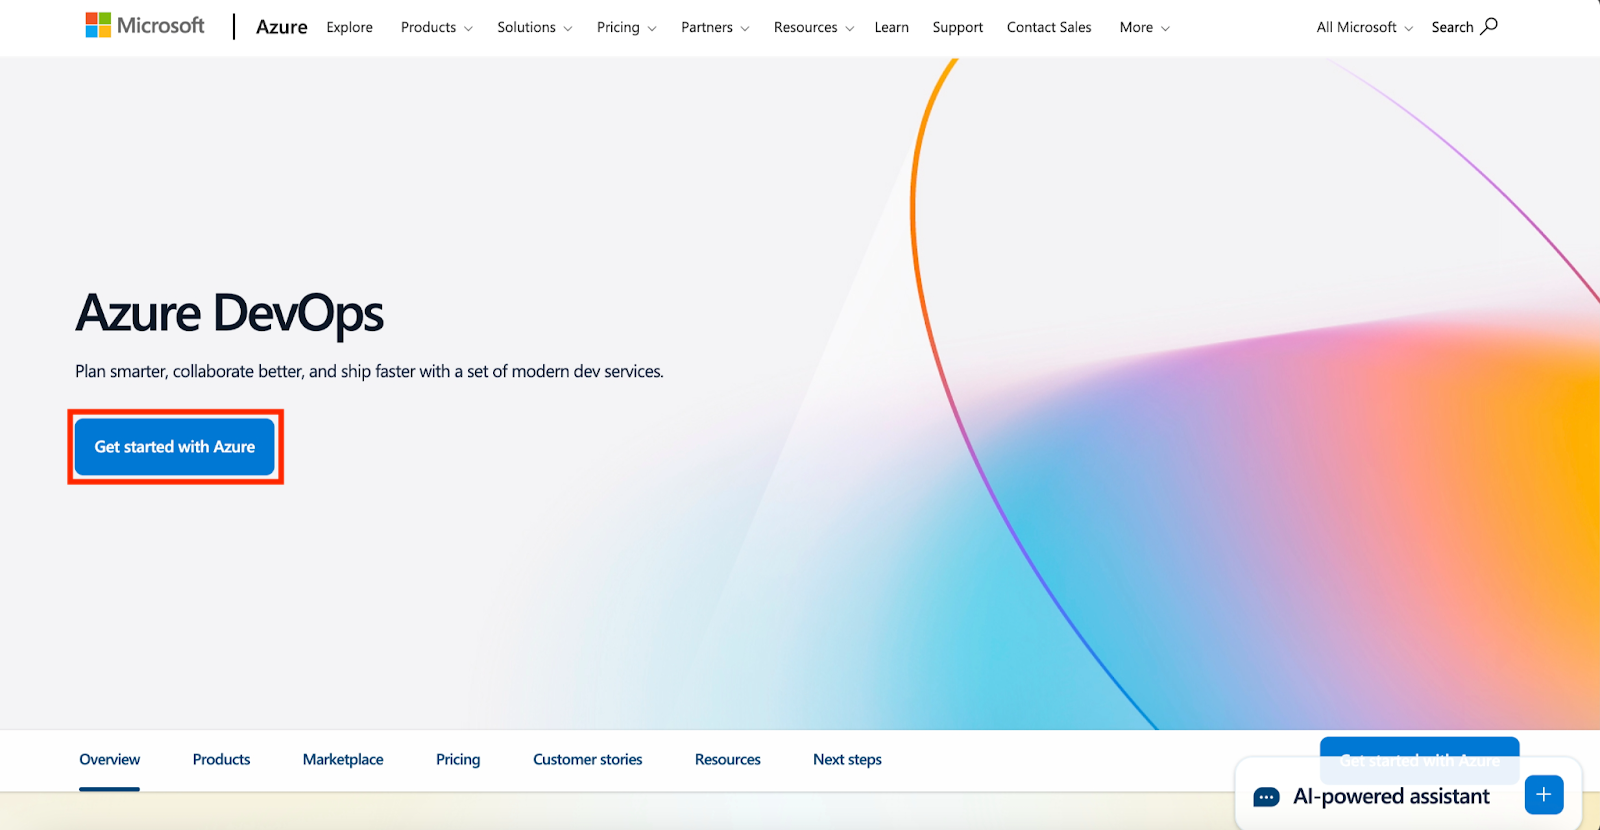
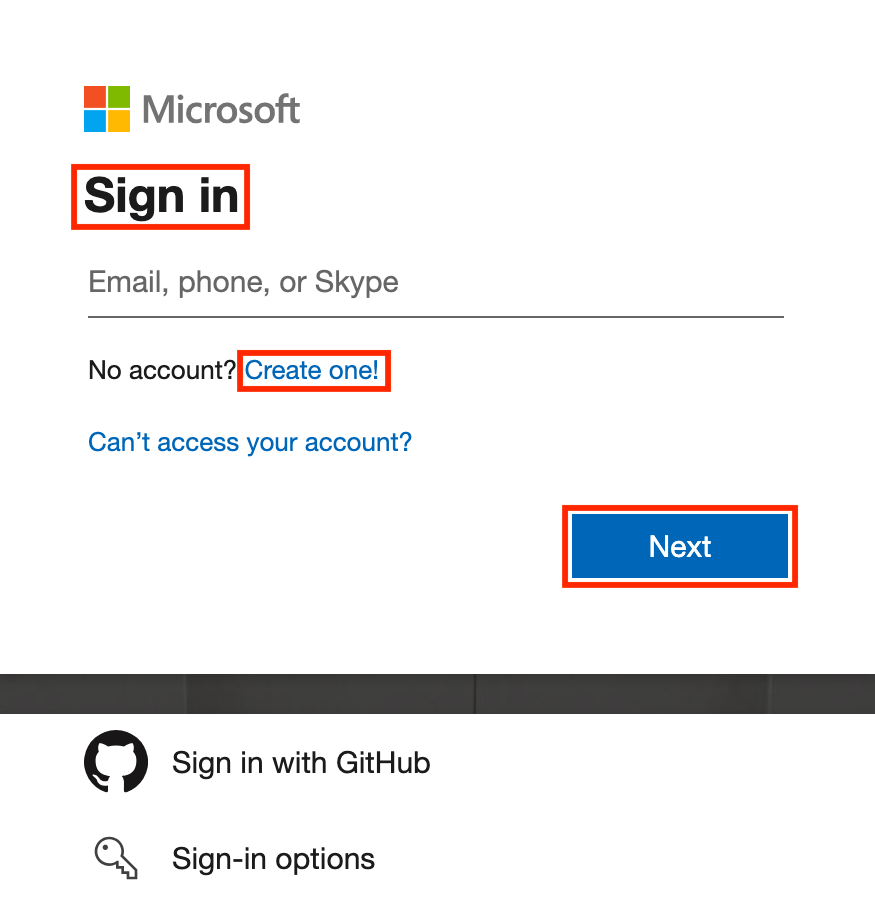
You'll need to create an account before using Azure DevOps. Here’s how you can get started:
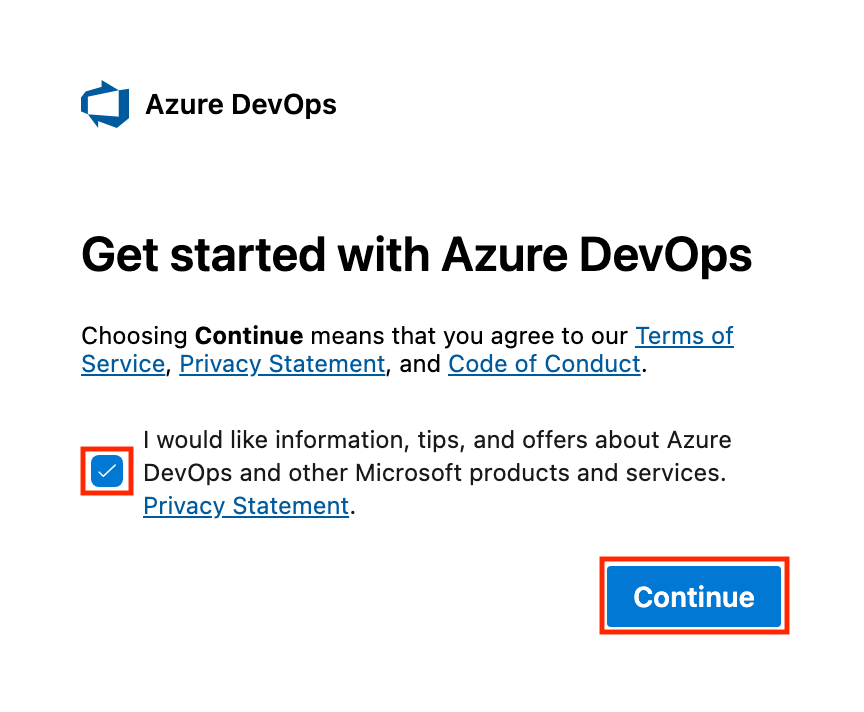
An organization in Azure DevOps is where all your projects and repositories live. This is also where you manage your teams, permissions, and billing.
https://dev.azure.com/yourorganization ).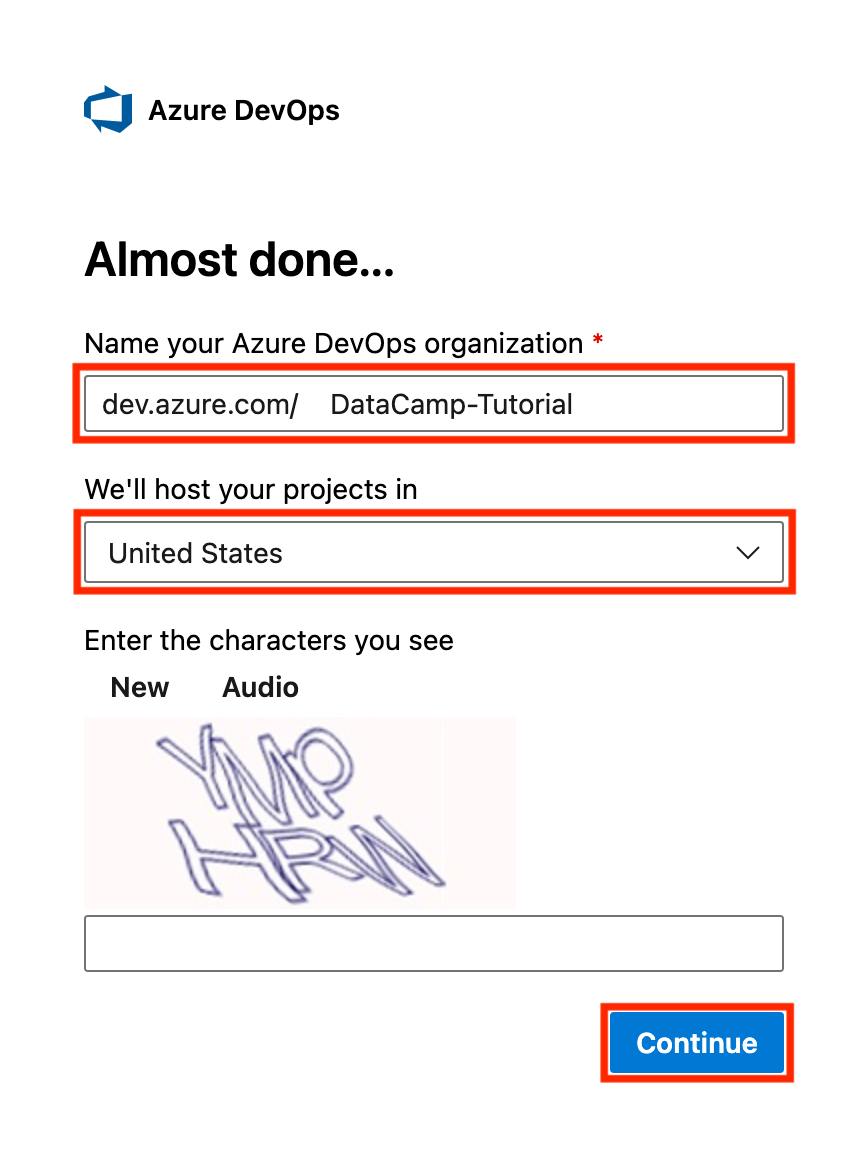
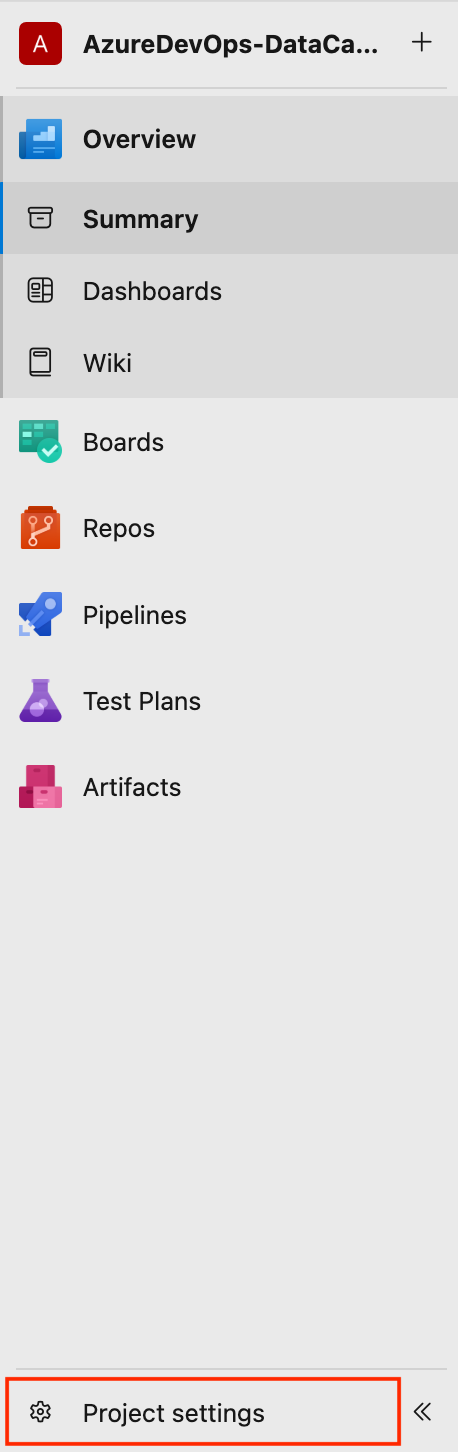
After creating your organization, you’ll be taken to the Azure DevOps portal. The main sections of the services are the Overview, Boards, Repos, Pipelines, Test Plans, and Artifacts.
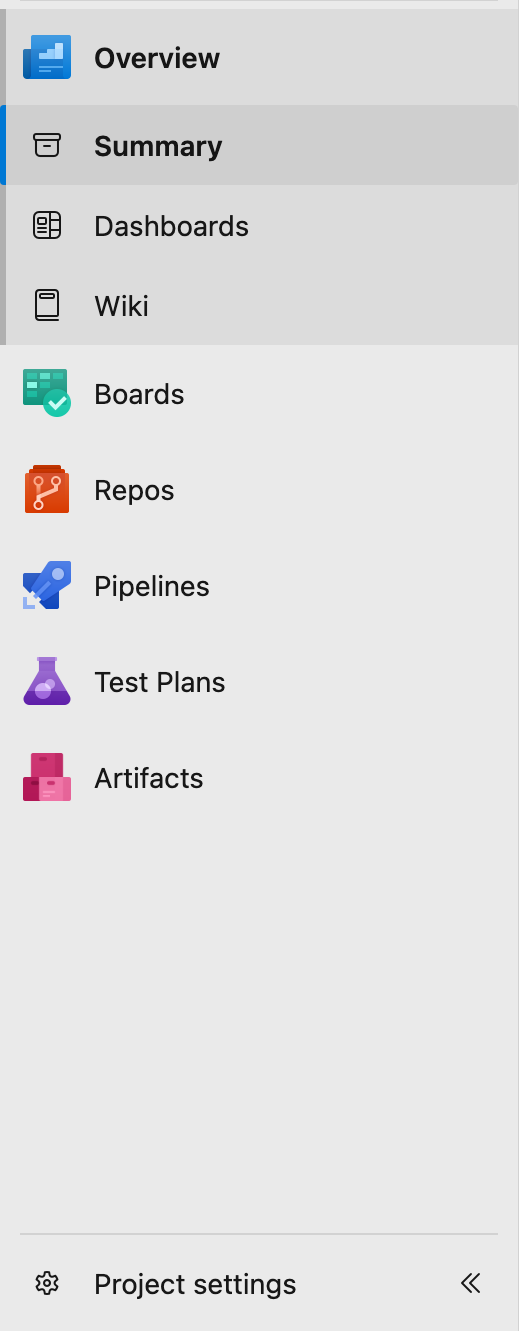
This user interface might feel overwhelming at first, but the core functions of Azure DevOps can be boiled down to version control, CI/CD, and project management.
Now that your account and organization are set up let’s create your first project for Azure DevOps.


In my experience, I will advise you to choose Git if you're just starting or don’t have a specific reason for choosing TFVC.
Ready to take control of your code? Learn Git and start managing your projects like a pro.
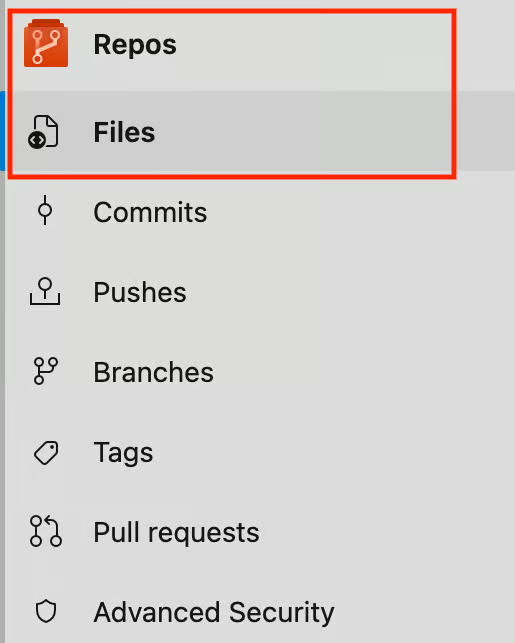
Now that you have your project all set, let’s look deep into it and explore some of its key features.
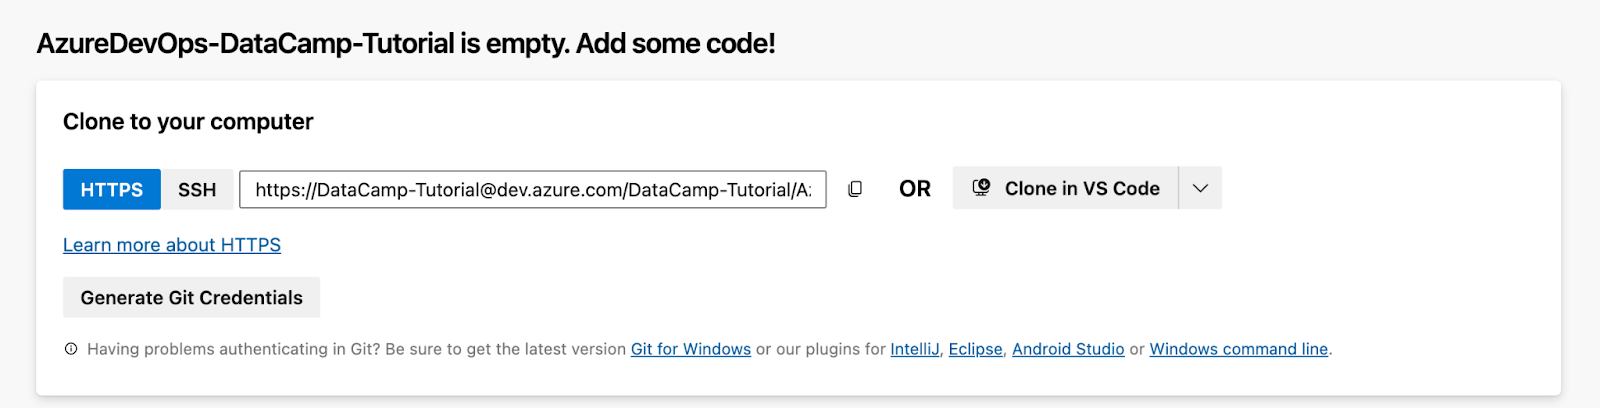
# This command clones the specified Git repository from Azure DevOps to your local machine.
git clone https://[email protected]/yourorganization/yourproject/_git/yourrepo
Let’s break the command above into chunks:
yourorganization with your organization’s name.yourproject with your project’s name.yourrepo with your repository’s name.Below is the URL in my Repos section:
git add .
git commit -m "my first commit"
git push origin main
Congratulations! You’ve just made your first commit in Azure Repos.
In software development, branching allows you to work on features or fixes separately from the main project. Merging is the process of bringing your changes from one branch into another.
git checkout -b feature-branchgit push origin feature-branchTo switch between branches, use the following command:
git checkout mainOr to switch to a different branch:
git checkout feature-branchOnce a feature is merged, you can delete the branch both locally and remotely:
git branch -d feature-branchgit push origin --delete feature-branch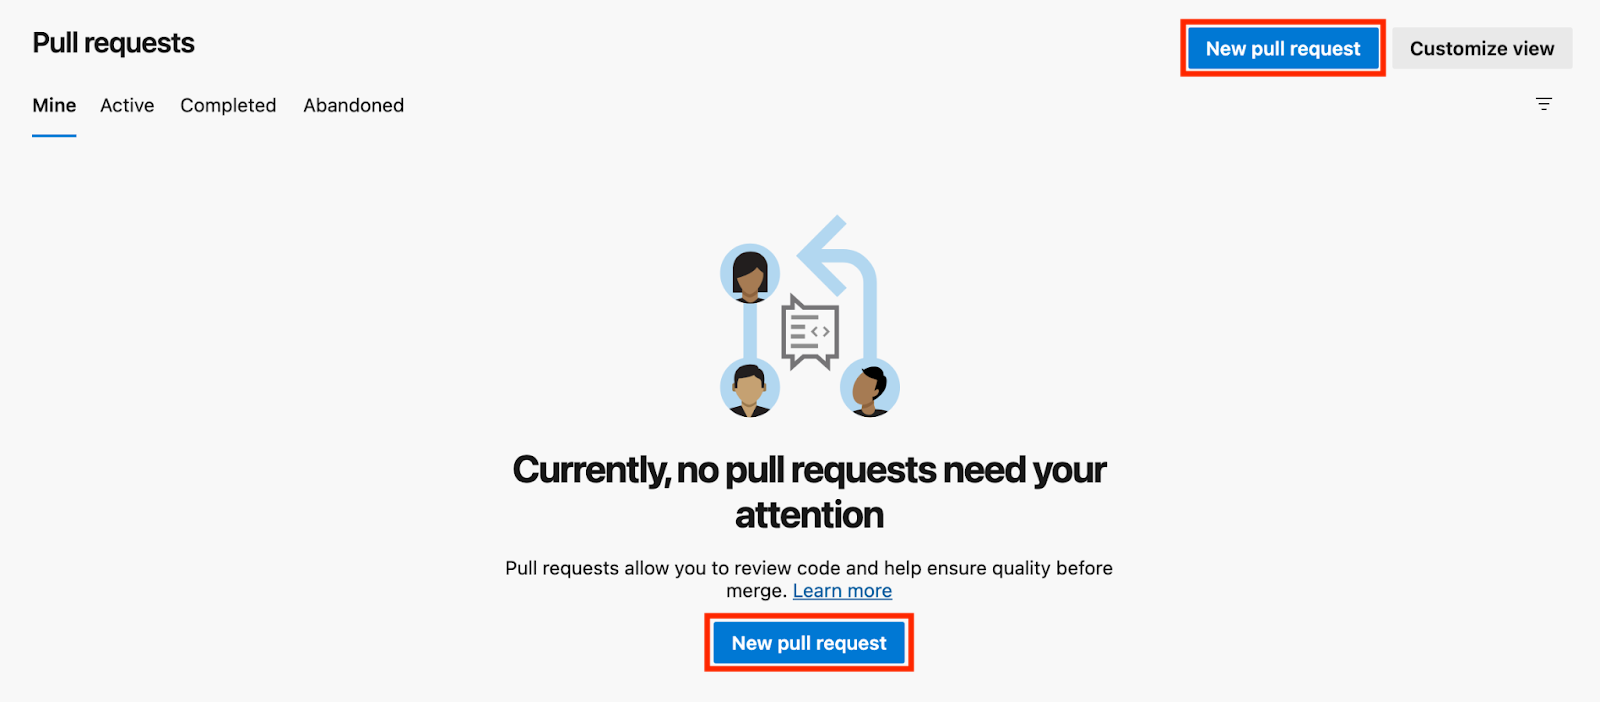
Pull requests are essential for code review and collaboration. They allow team members to review code before it’s merged into the main branch.
feature-branch) and the target branch (e.g., main).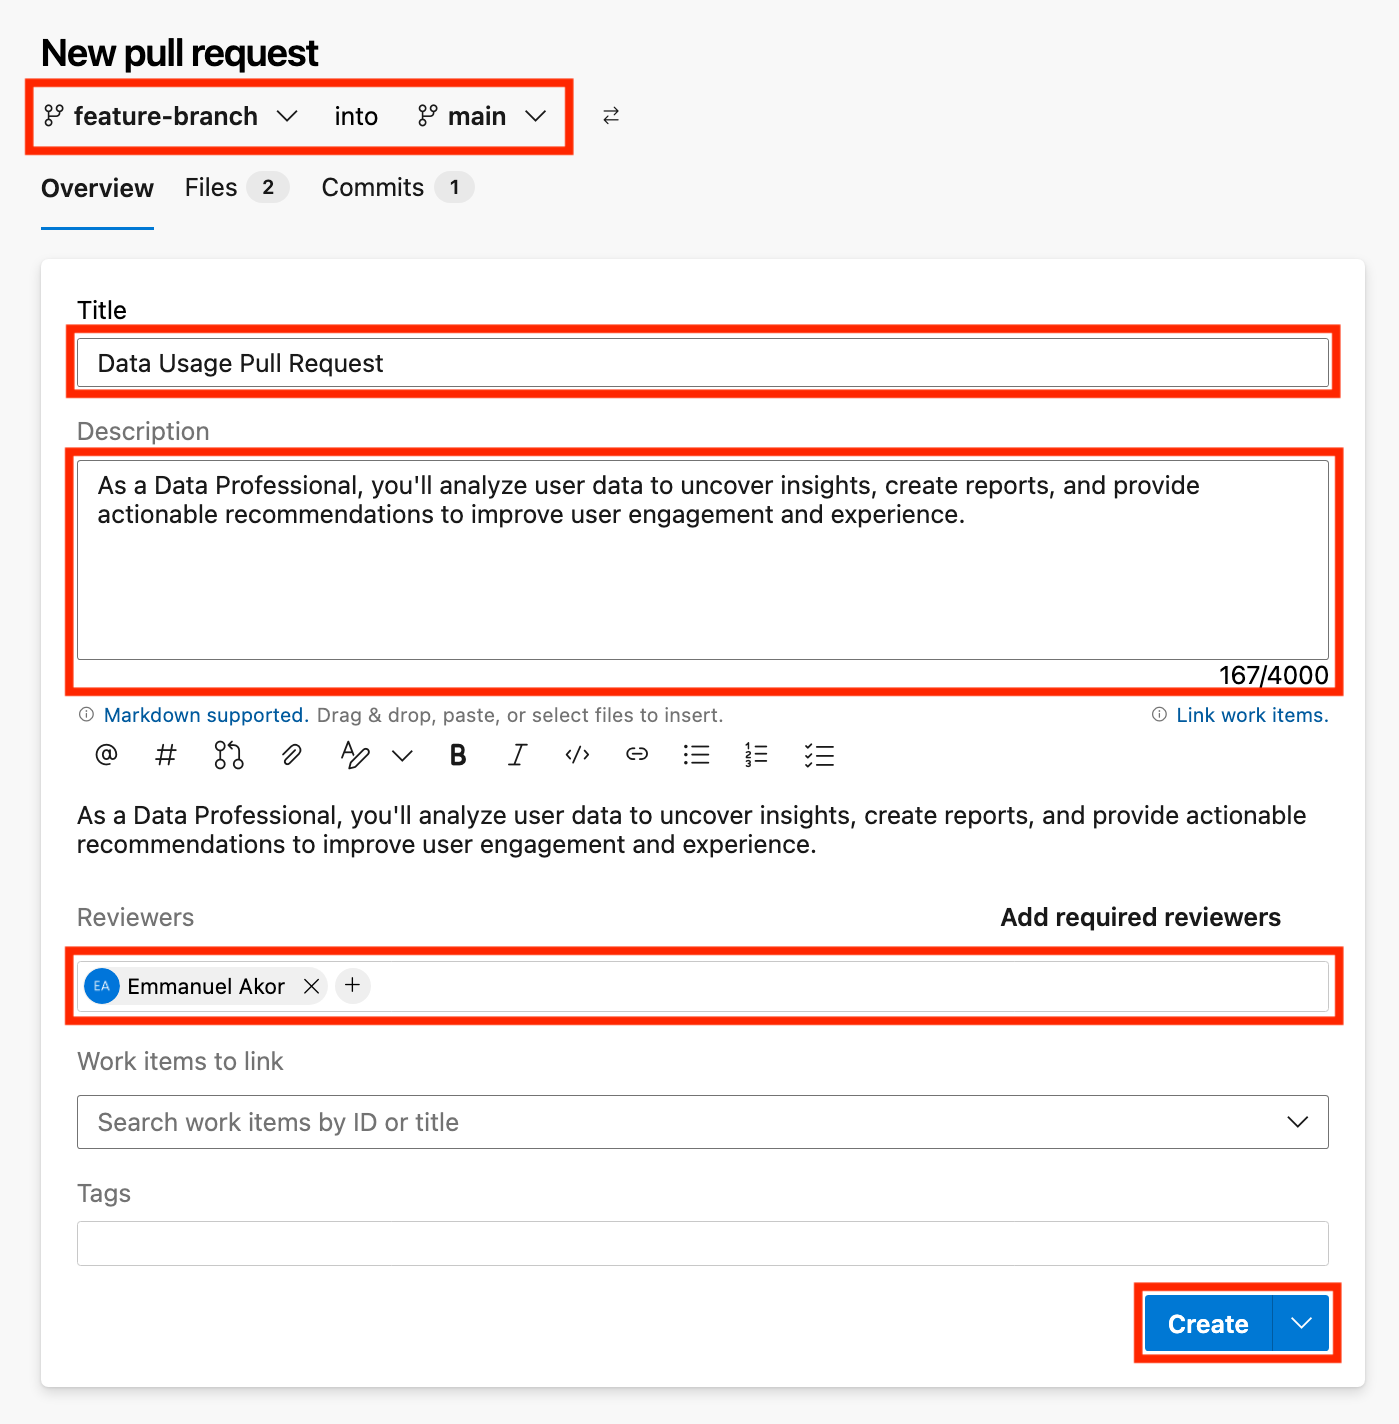
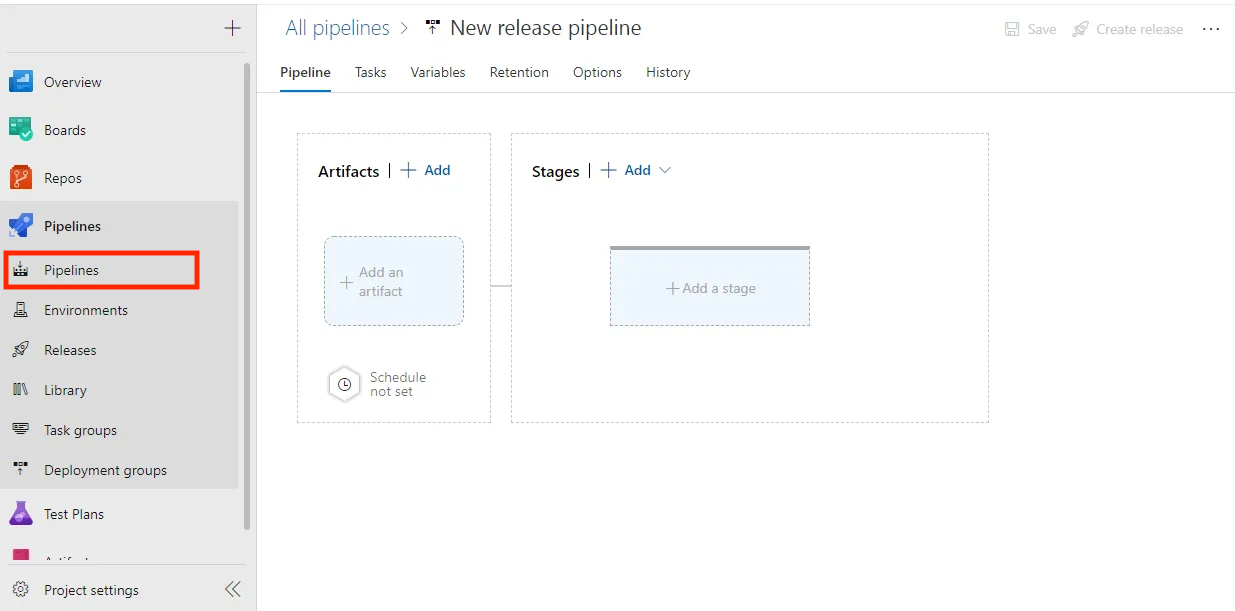
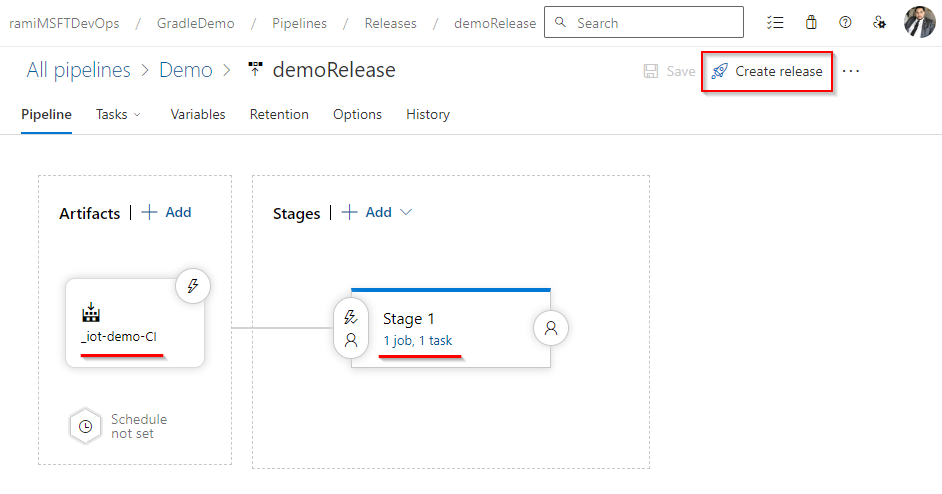
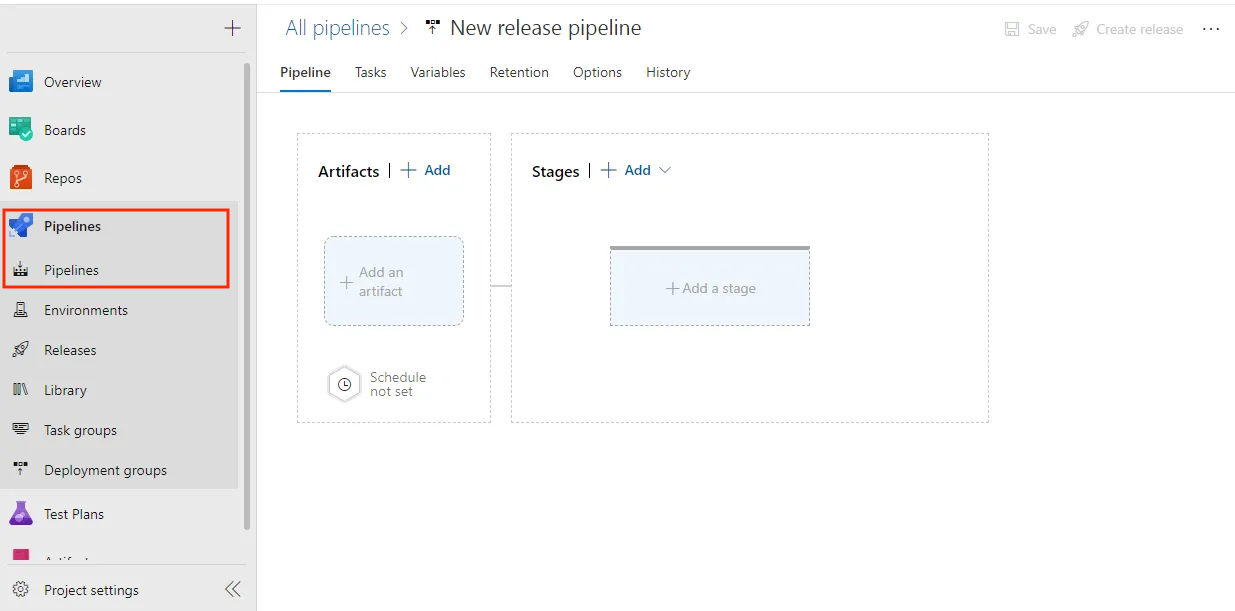
Azure DevOps also includes Pipelines to automate the build, test, and deployment process.
A pipeline in Azure DevOps is a collection of automated processes that help you:
These pipelines ensure your code is always ready for deployment and can be automatically tested.

Let’s take a basic Node.js application as an example. Our azure-pipelines.yml file below contains the YAML code that Azure DevOps automatically created.
# Node.js
# Build a general Node.js project with npm.
# Add steps that analyze code, save build artifacts, deploy, and more:
# https://docs.microsoft.com/azure/devops/pipelines/languages/javascript

trigger:
- main

pool:
  vmImage: ubuntu-latest

steps:
- task: NodeTool@0
  inputs:
    versionSpec: '20.x'
  displayName: 'Install Node.js'

- script: |
    npm install
    npm run build
displayName: 'npm install and build'Once your build pipeline is set up, you can run it manually by clicking Run Pipeline. The pipeline will go through different stages, such as “installing dependencies,” “running tests,” and “building.”
You can check the logs for each step to troubleshoot any failed builds. Azure DevOps provides detailed logs to help you determine what went wrong.


Azure DevOps can automatically deploy your application whenever a new build is triggered. You can set this up by adding triggers and defining tasks to deploy to platforms like Azure, AWS, etc.
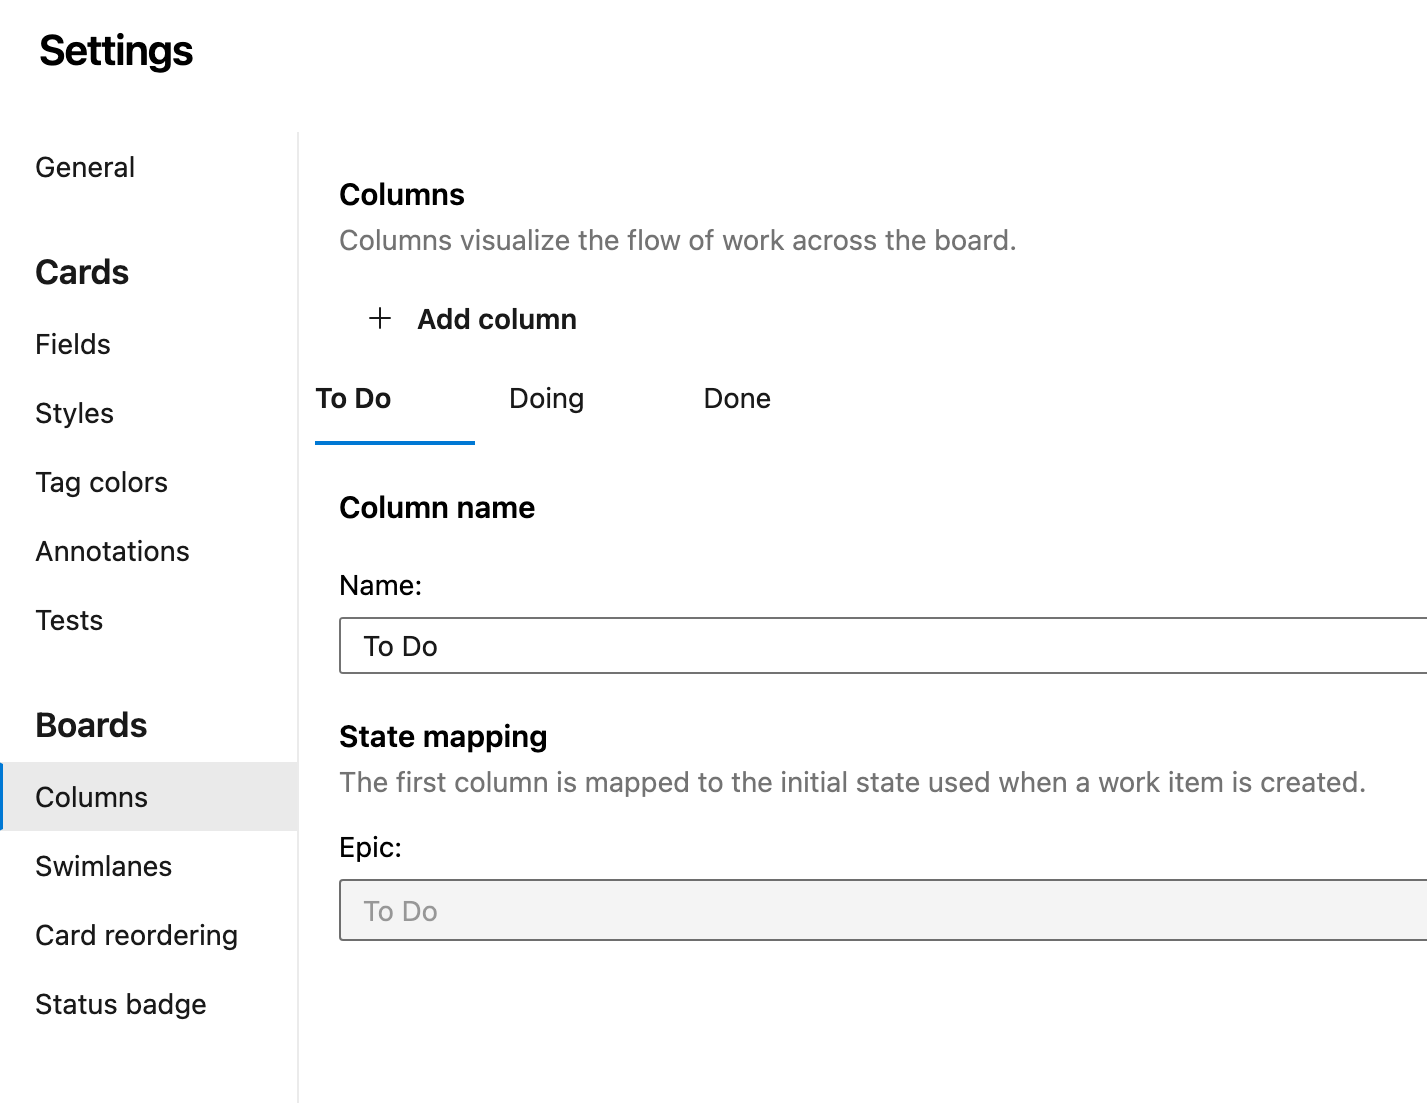
Azure Boards is the heart of project management in Azure DevOps. It helps teams plan, track, and discuss work across the software development lifecycle through features like Tasks, Bugs, User Stories, and Epics.
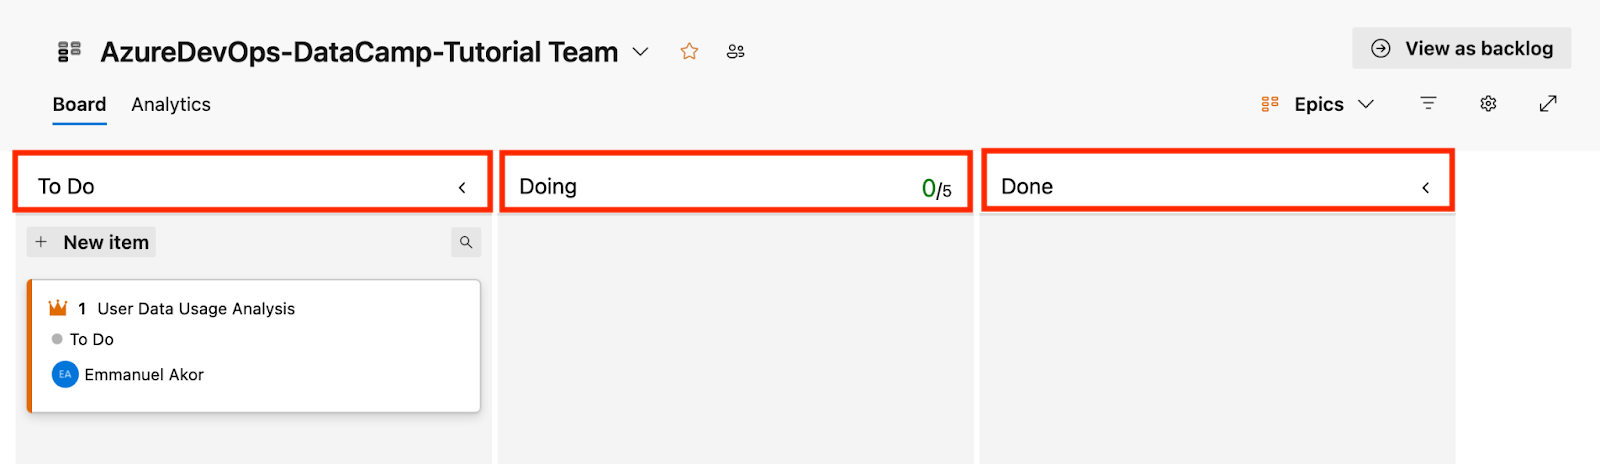
Whether following Scrum or Kanban, Azure Boards lets you visualize, prioritize, and manage your work efficiently.
Let’s break it down step by step.
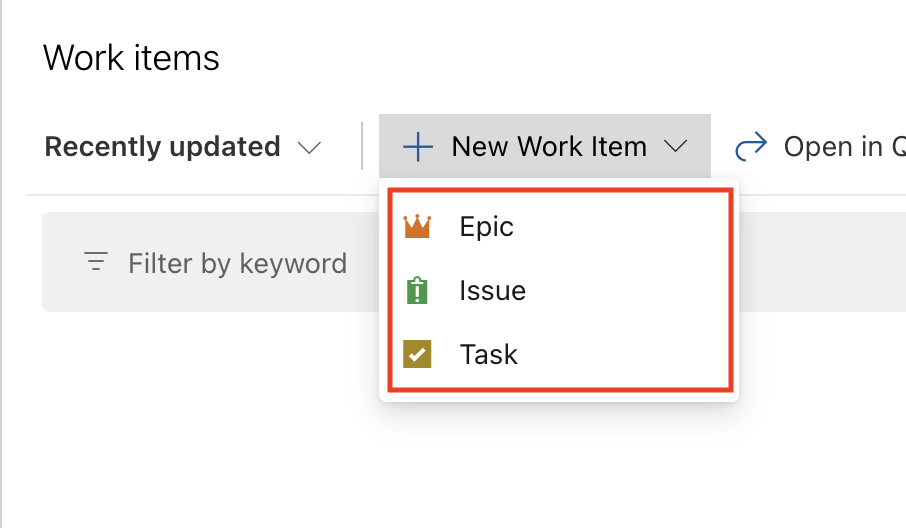
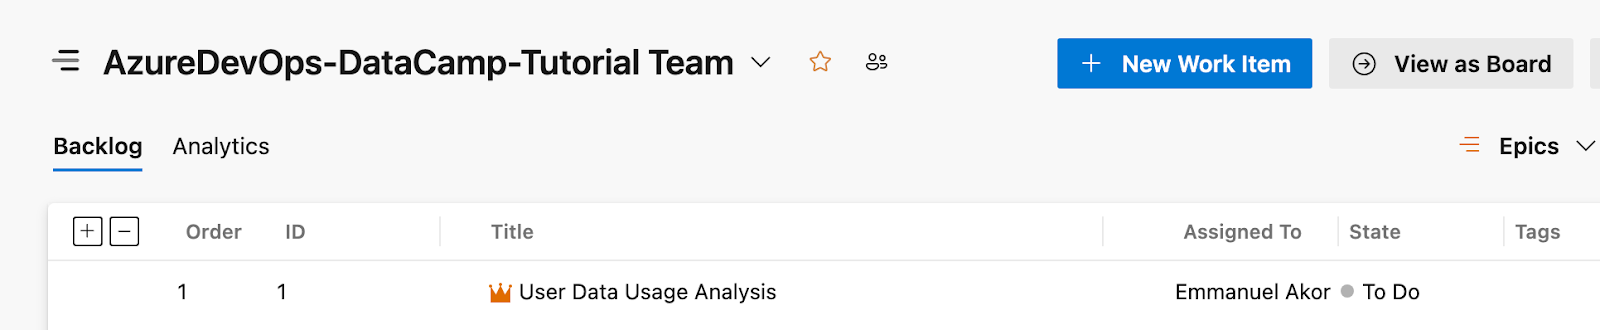
Azure Boards allows you to manage tasks, bugs, and features using work items.
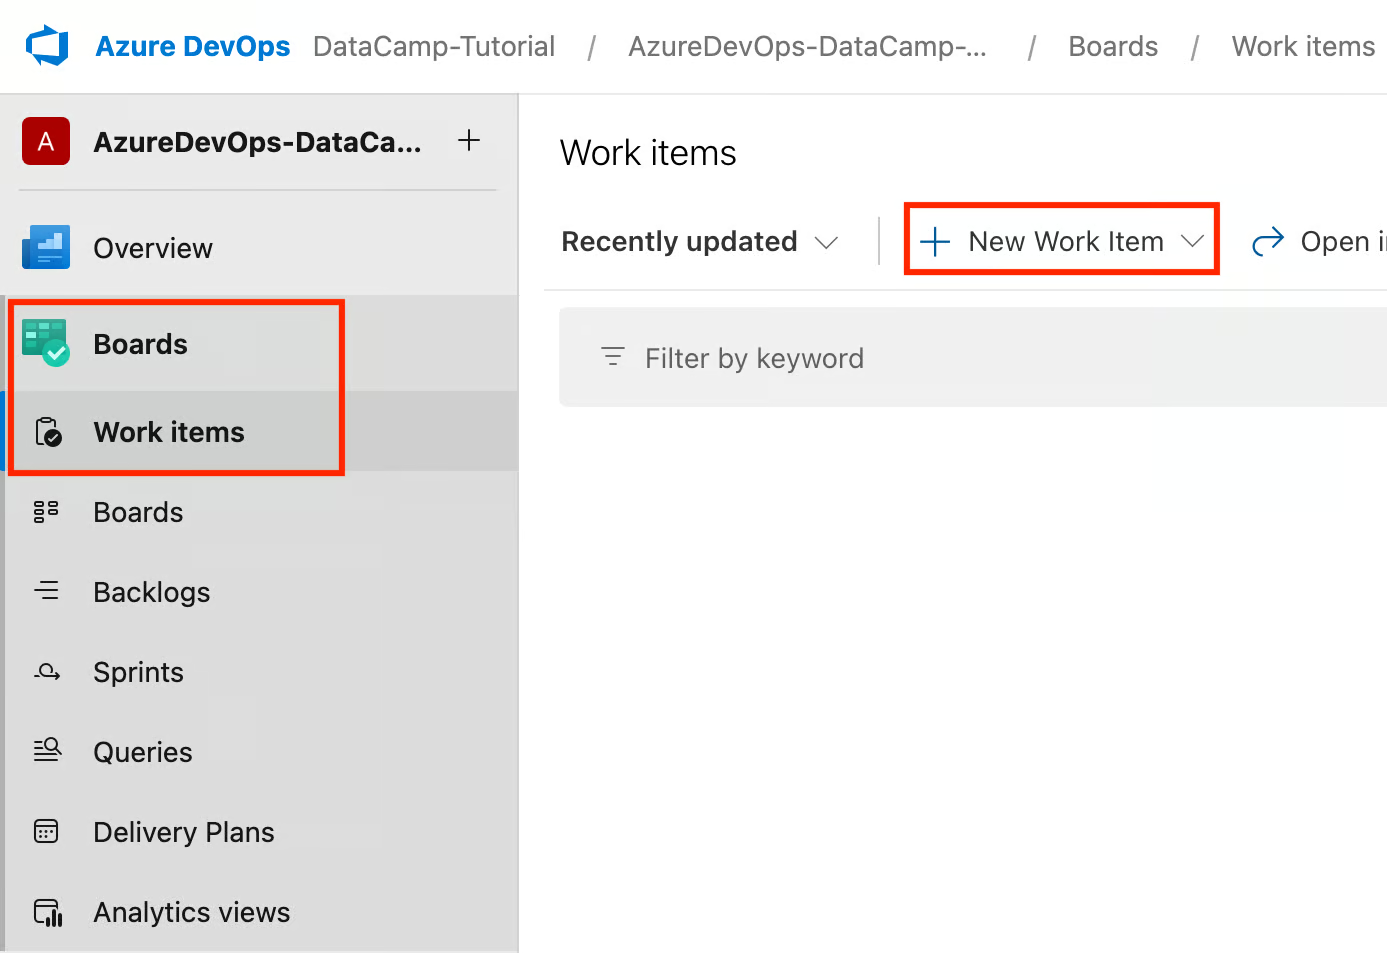
You can create:
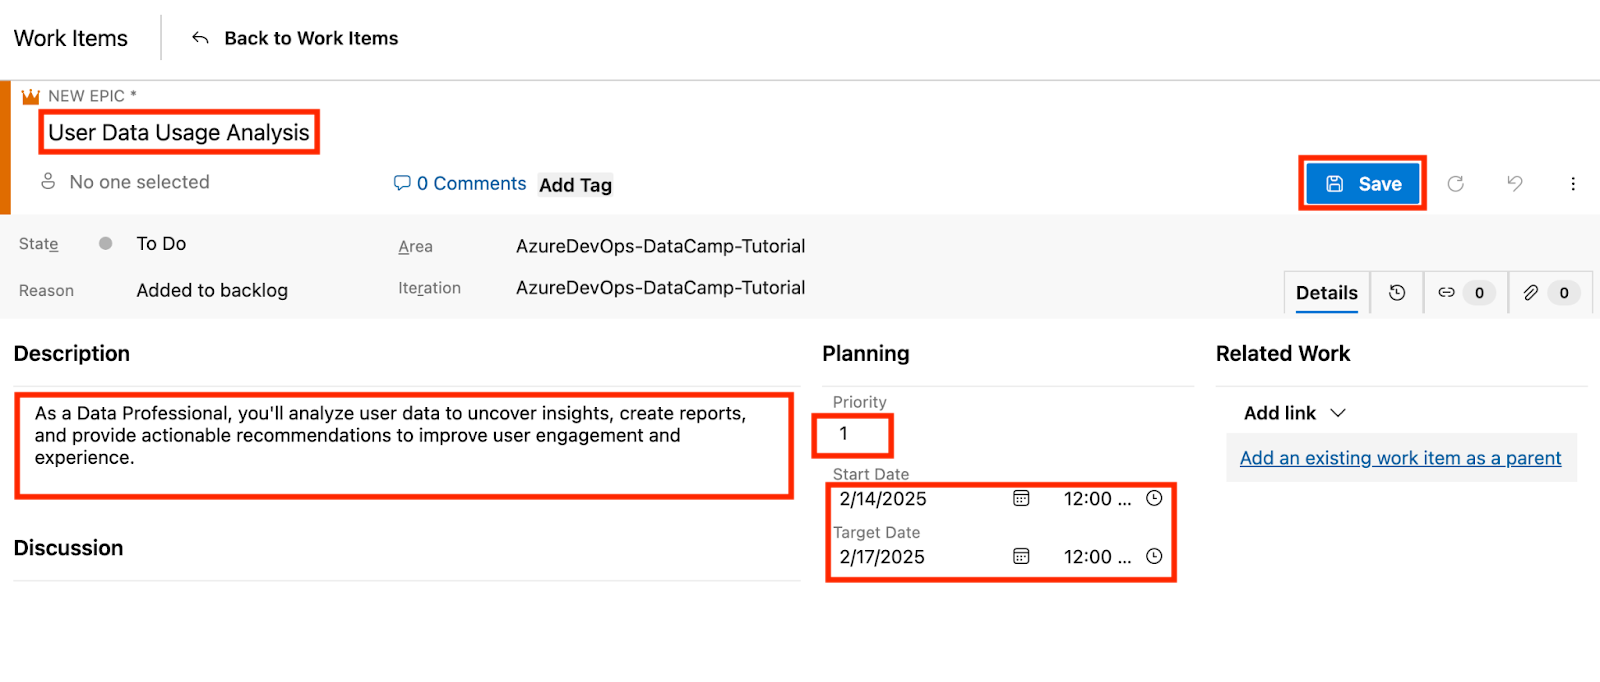
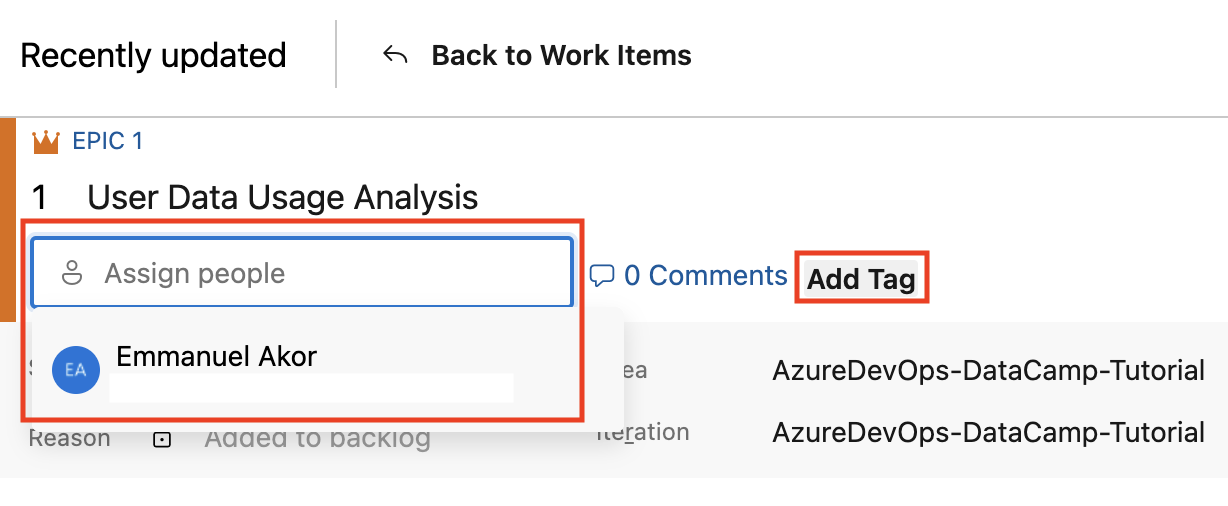
In my experience, teams remain accountable and focused when clear owners are assigned and reasonable deadlines are specified.
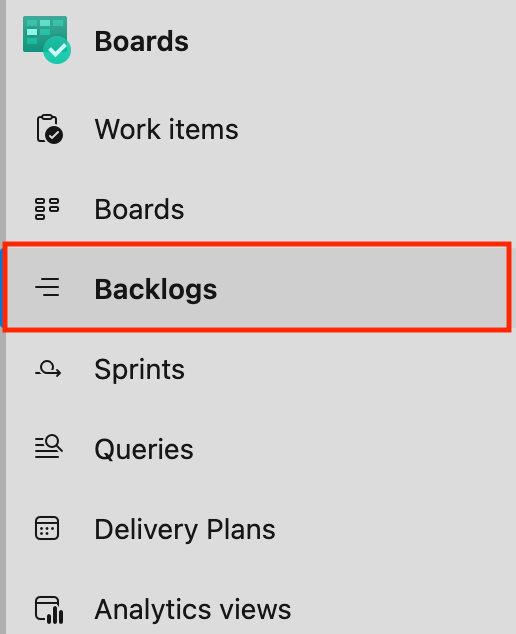
Agile sprints and backlogs are essential for iterative development. Here’s how to set them up:

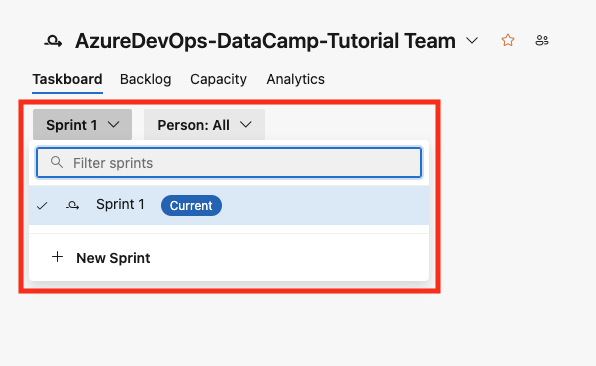

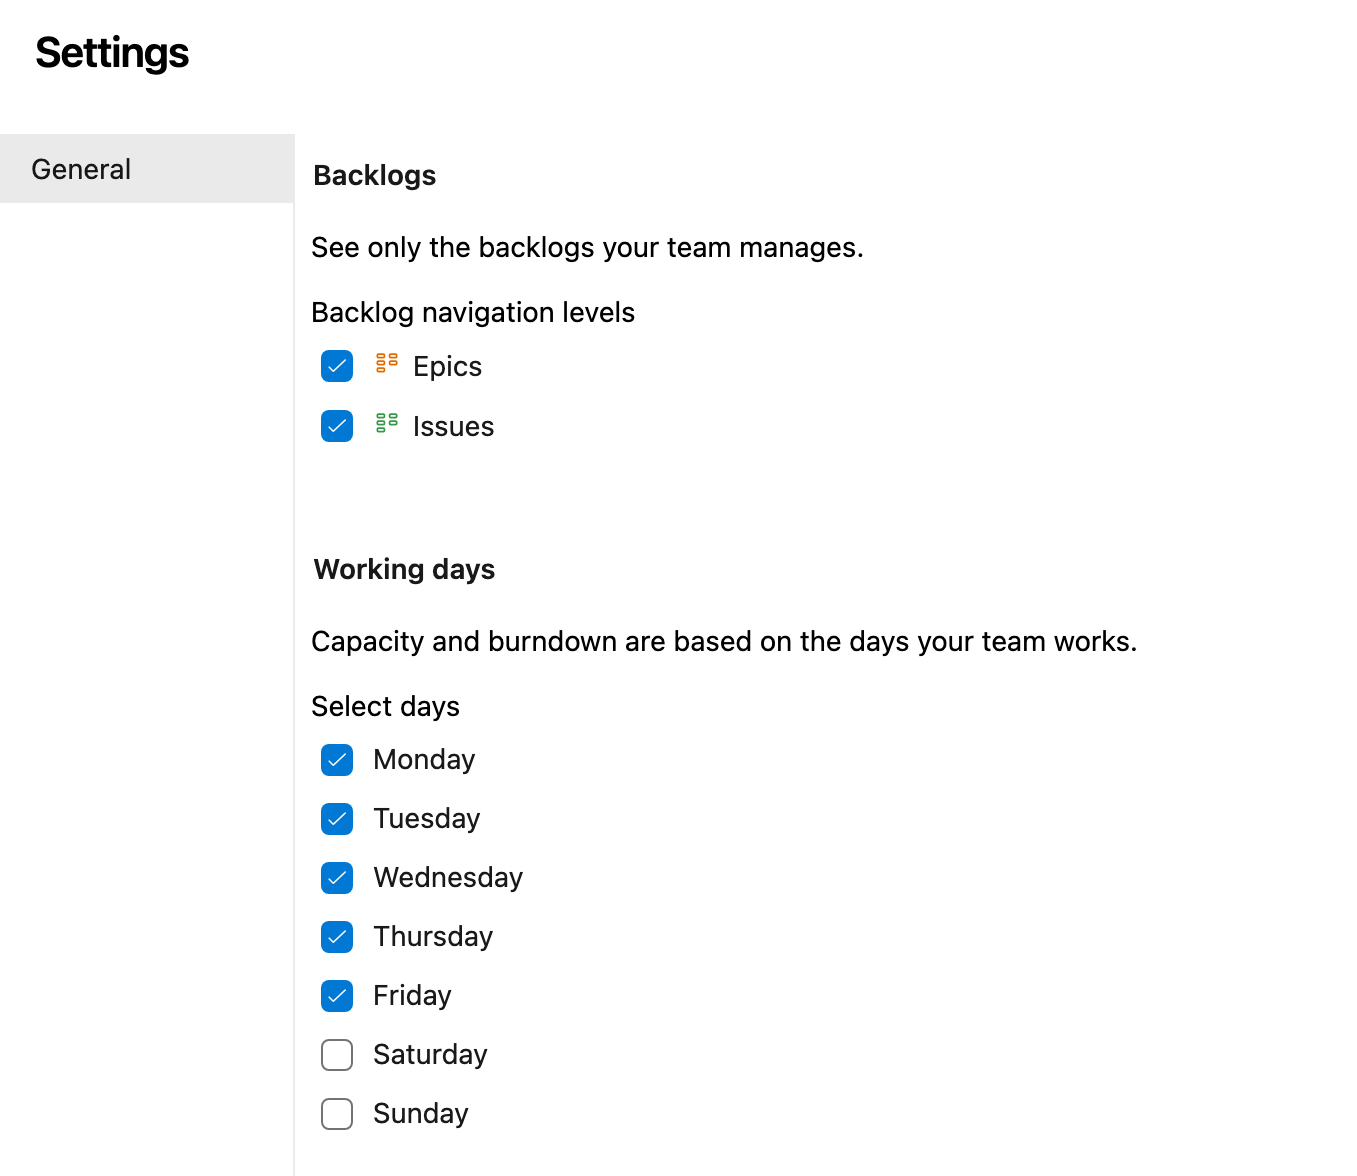
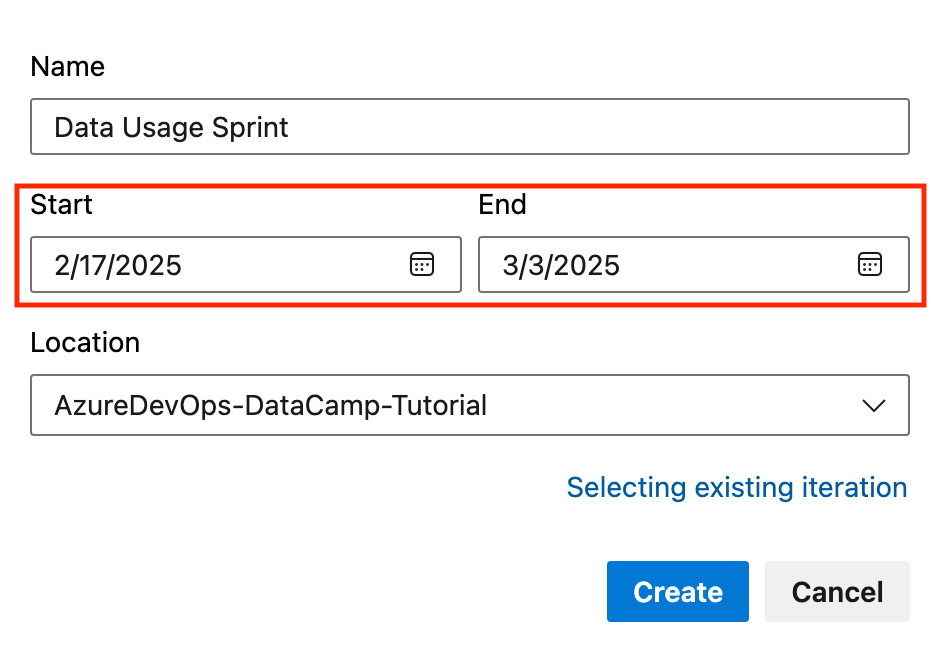
In my experience, following this gives your team less downtime and confusion if your backlog is well-organized and clear about what needs to be done next.
Linking work items to commits helps track the code changes to each task or bug. Here’s how:
#WorkItemID (e.g., #1). Click Commit. Azure DevOps automatically links the commit to the work item.
Fixed bug in login analytics #1).git commit -m "Fixed bug in login analytics #1"git push origin feature-branch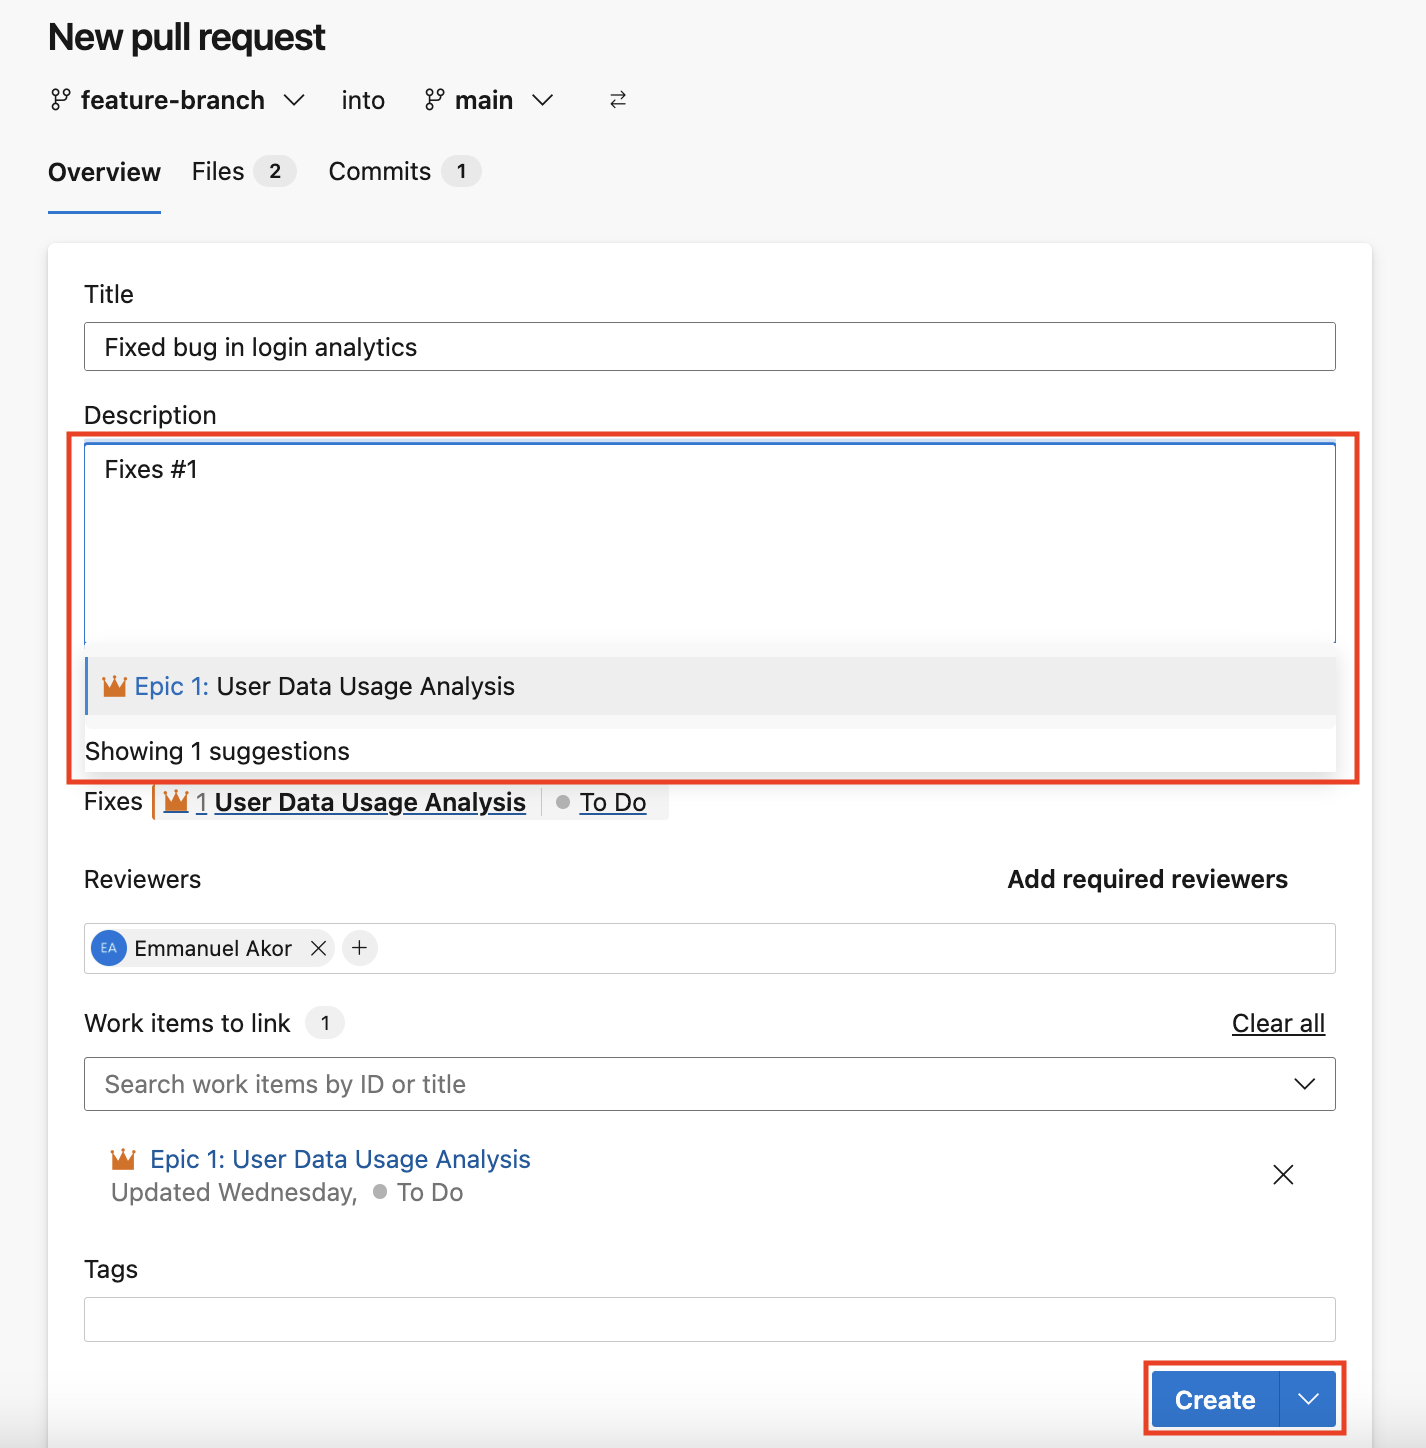
In my experience, this linkage provides full traceability, making it easy to see which code changes addressed specific tasks or bugs. Remember, you can see linked commits and PRs in the Development section of the work item.
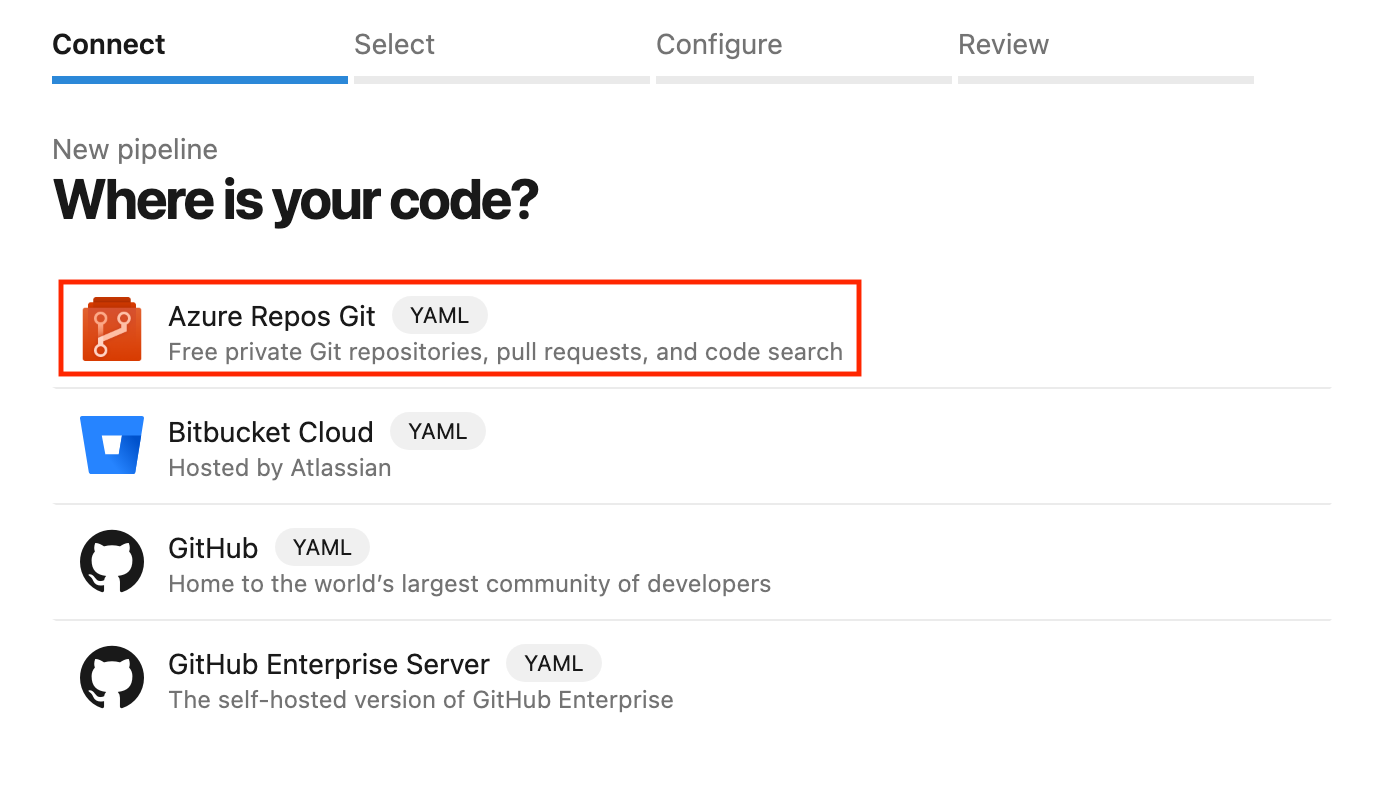
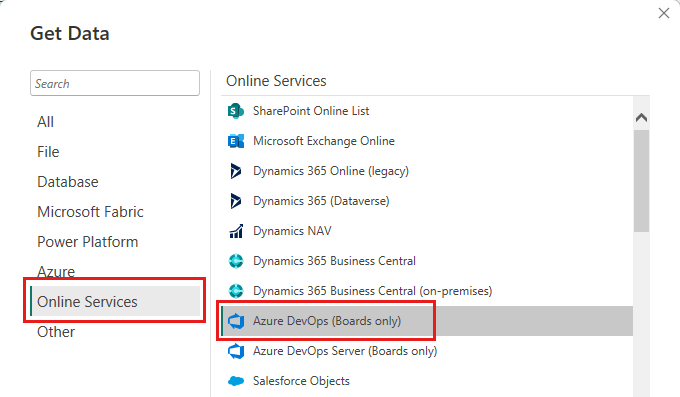
Azure DevOps shines when integrated with other tools like GitHub and cloud platforms. Let’s explore how to set this up.
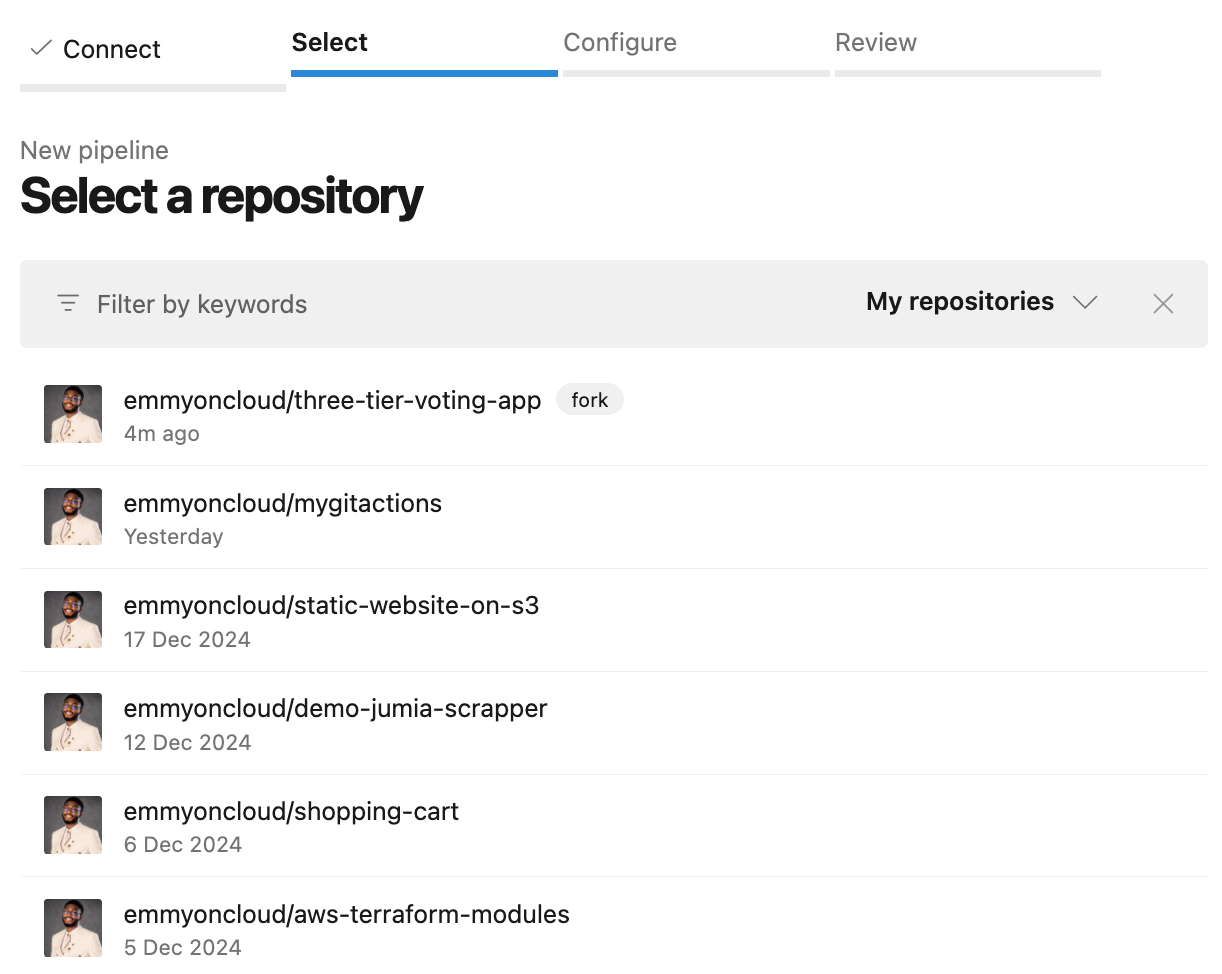
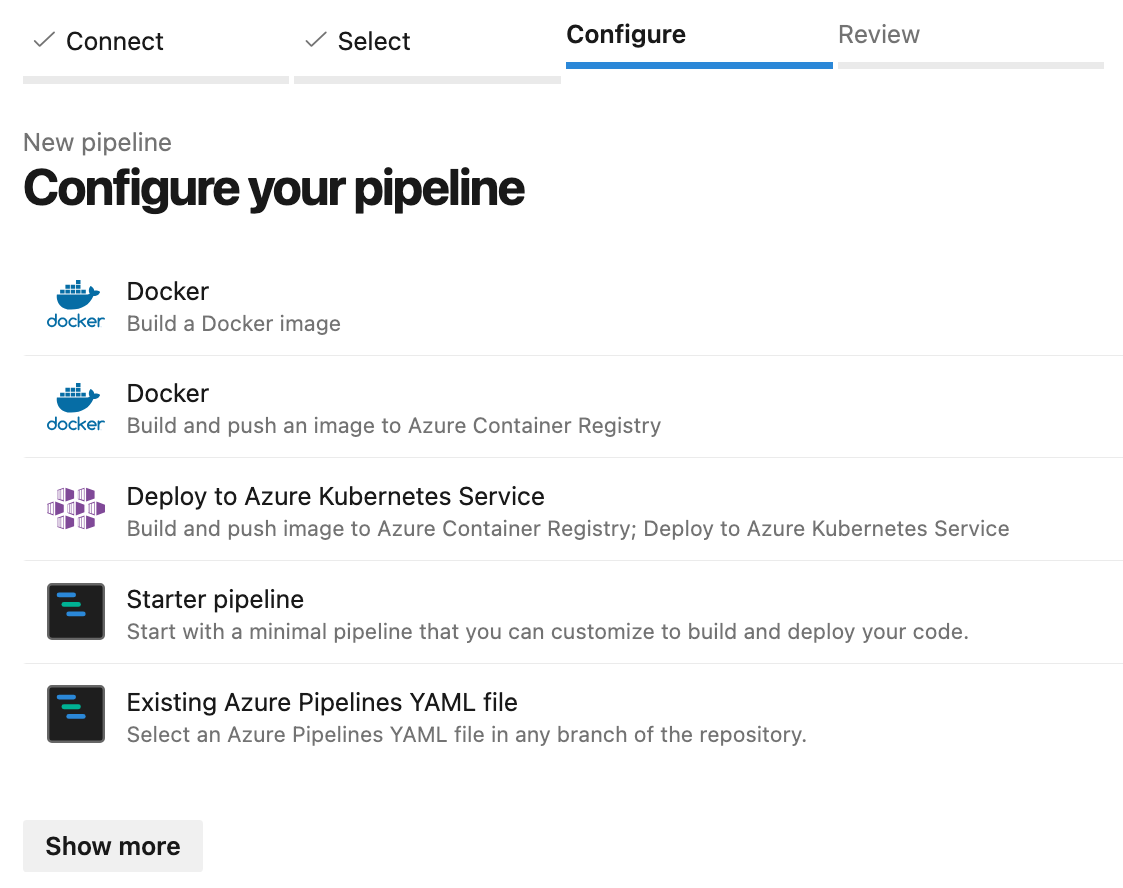
Connecting Azure DevOps to GitHub streamlines collaboration and CI/CD automation. Here’s how:

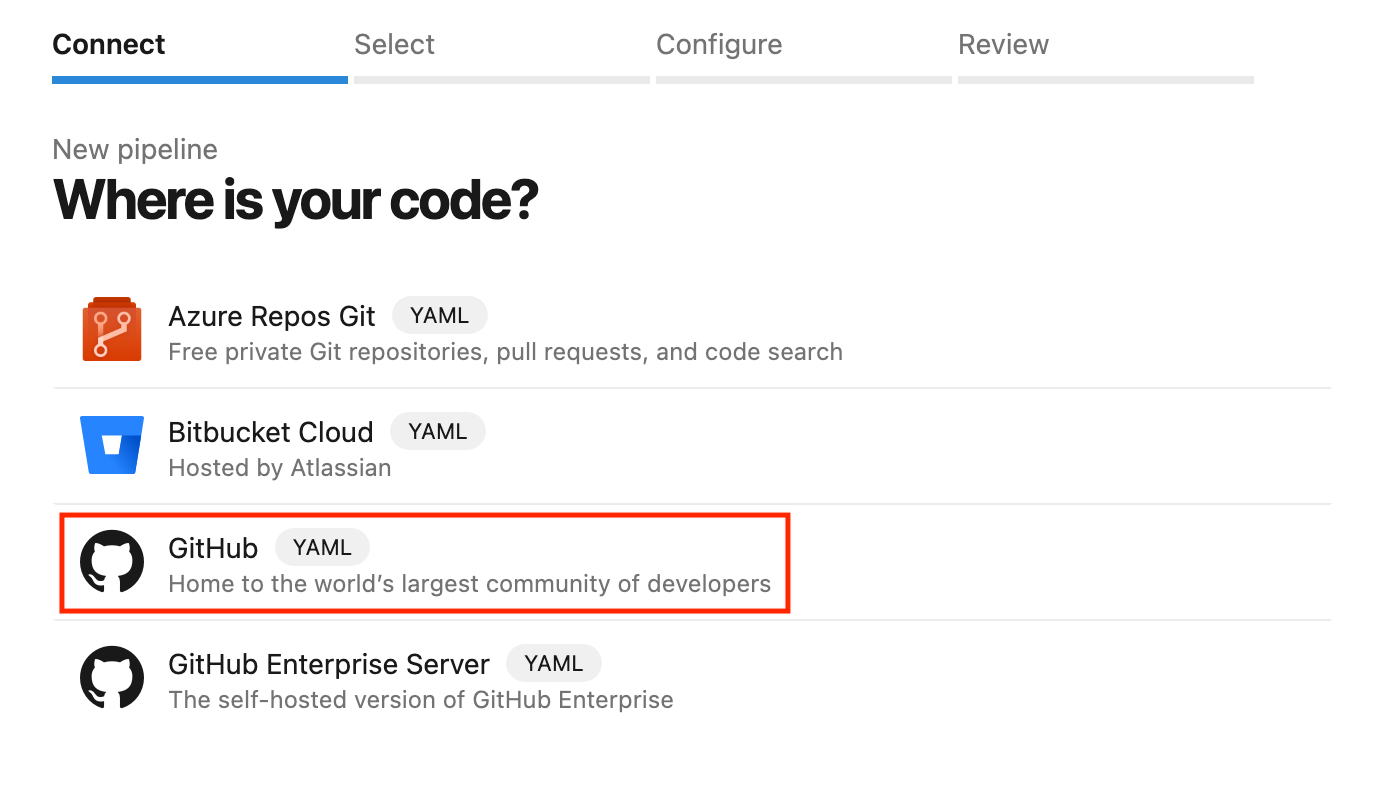
New to GitHub? Discover how to collaborate, track changes, and contribute to open-source projects with the GitHub concepts course.
# Set up the trigger for the pipeline
trigger:
  # Specify the branches to include
  branches:
    include:
      # Include the main branch
      - main

# Define the jobs for the pipeline
jobs:
  # Create a job named 'Build'
  - job: Build
    # List the steps for the 'Build' job
    steps:
      # Add a script step to print a message
      - script: echo "Building the project..."
In my experience, this integration automatically ensures seamless code updates and deployments, reducing manual effort.
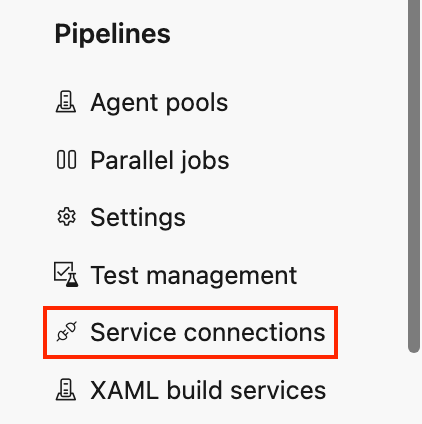
Azure DevOps integrates natively with Azure services like Azure Web Apps, Azure Kubernetes Services (AKS), and many more. Let’s learn how to connect our Azure DevOps to Azure Web Apps.

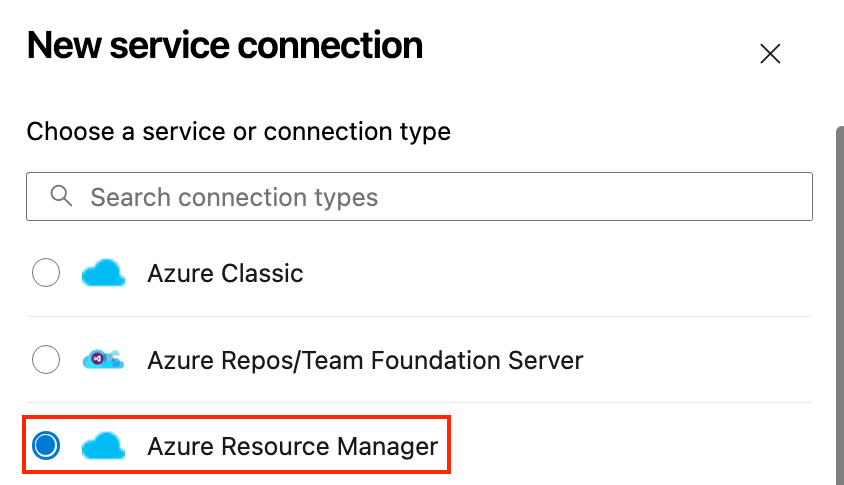
# Define the task for deploying to an Azure Web App
- task: AzureWebApp@1
  inputs:
    # Specify your Azure subscription service connection
    azureSubscription: 'Your-Service-Connection'
    # Specify the name of your web app
    appName: 'Your-Web-App'
Let’s break the command above into chunks:
Your-Service-Connection with the name of the service connection with access to your Azure subscription.Your-Web-App with the actual name of your web app in Azure.In my experience, this connection makes deployments easy, allowing you to focus mainly on building excellent software.
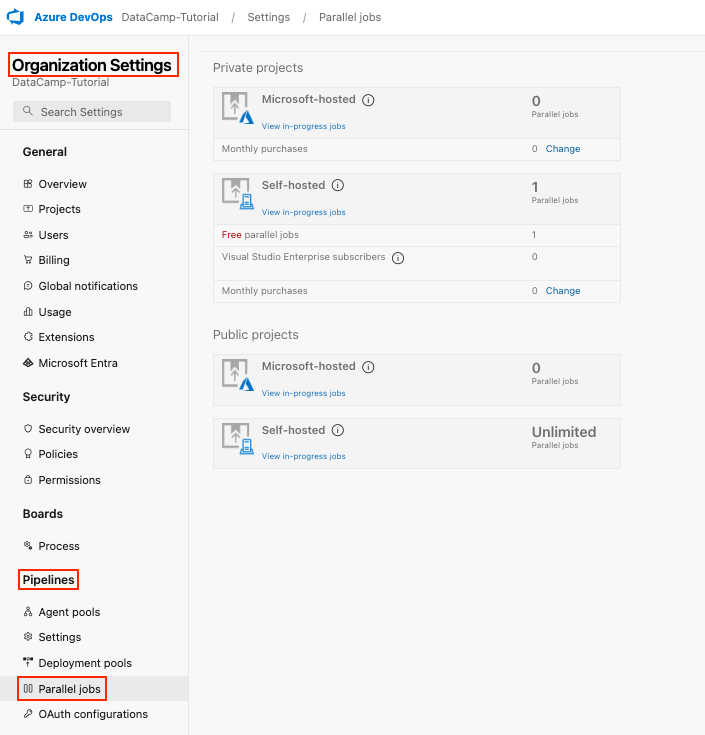
Monitoring and reporting are key processes for maintaining your project's health in Azure DevOps. Let’s explore how to carry this out effectively.
Pipeline metrics shed light on the performance of builds and deployments. This is how to get to them.
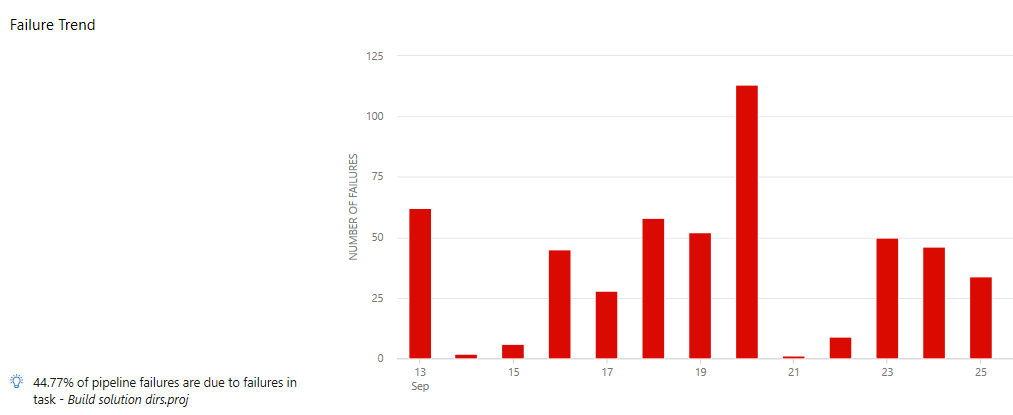
In my experience, caching dependencies, splitting jobs, and optimizing pipeline structure can significantly reduce build times and failure rates.
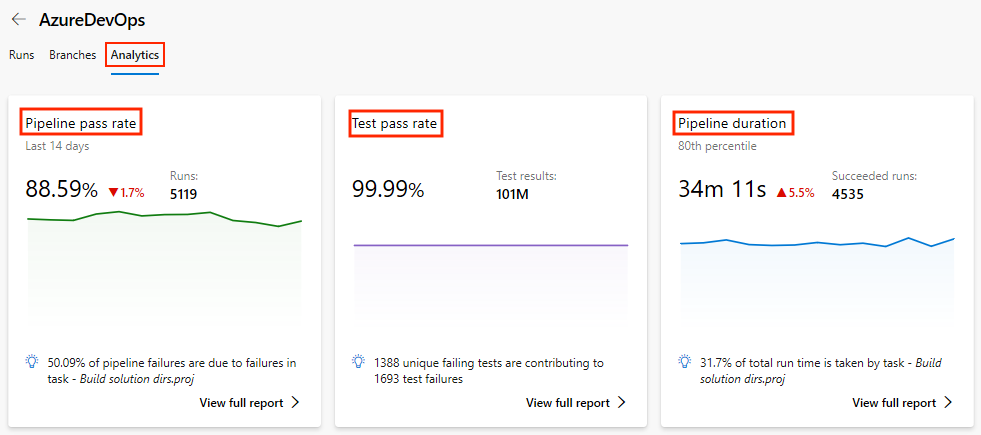
Azure DevOps offers robust reporting tools to track team productivity and project progress.
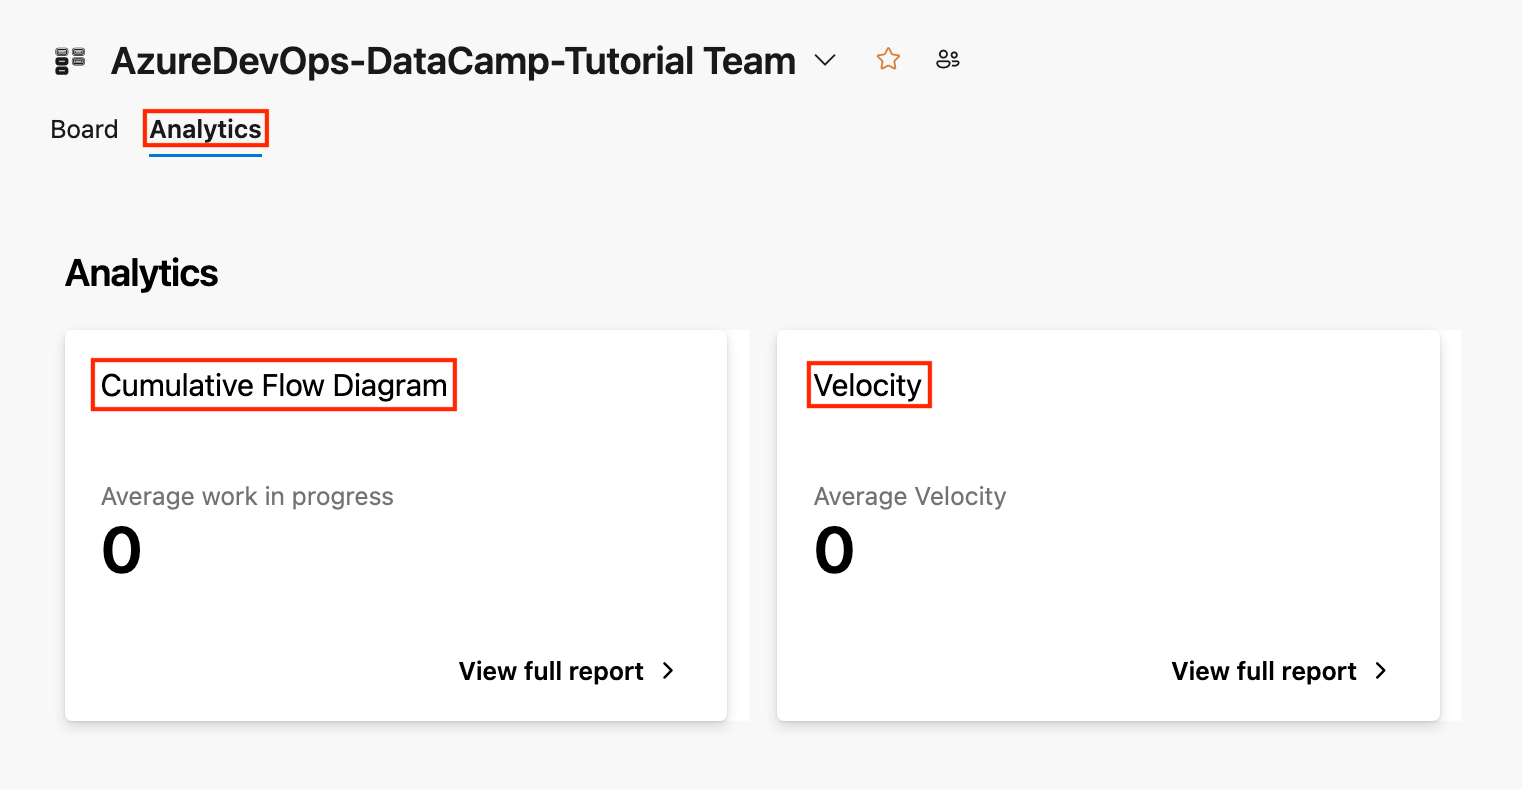

In my experience, you can make data-driven decisions with these analytics reports, which offer practical insights.
Now that we’ve learned about the core services of Azure DevOps and many more, let’s look at how to get the most out of Azure DevOps by following these best practices.
main branch stable and use feature branches for development.type(scope): description (e.g., feat(login): add user authentication).A clean and reusable codebase results from good version control practices.
Example cache task YAML:
# Define the cache task
- task: Cache@2
  inputs:
    # Set the cache key using npm, the OS, and package-lock.json
    key: 'npm | "$(Agent.OS)" | package-lock.json'
    # Specify the path to the node_modules directory
path: 'node_modules'Example jobs YAML:
jobs:
  # Define the first build job
  - job: BuildJob1
    displayName: 'Build Job 1'
    pool:
      vmImage: 'ubuntu-latest'
    steps:
      # Add a script step to print a message for Building Project A
      - script: echo "Building Project A"
        displayName: 'Build Project A'

  # Define the second build job
  - job: BuildJob2
    displayName: 'Build Job 2'
    pool:
      vmImage: 'ubuntu-latest'
    steps:
      # Add a script step to print a message for Building Project B
      - script: echo "Building Project B"
        displayName: 'Build Project B'

  # Define the test job
  - job: TestJob
    displayName: 'Run Tests'
    # Specify that this job depends on the completion of BuildJob1 and BuildJob2
    dependsOn:
      - BuildJob1
      - BuildJob2
    pool:
      vmImage: 'ubuntu-latest'
    steps:
      # Add a script step to print a message for Running Tests
      - script: echo "Running Tests"
displayName: 'Run Tests'Example template YAML:
# Define parameters for the pipeline
parameters:
  # Specify a parameter for the build configuration
  - name: buildConfiguration
    type: string
    default: 'Release'

# List the steps for the pipeline
steps:
  # Add a task to run the .NET Core CLI
  - task: DotNetCoreCLI@2
    inputs:
      # Set the command to 'build'
      command: 'build'
      # Pass the build configuration as an argument
      arguments: '--configuration $(buildConfiguration)'
I've found that pipeline optimization consistently results in time and resource savings.
# azure-pipelines.yml
trigger:
- main
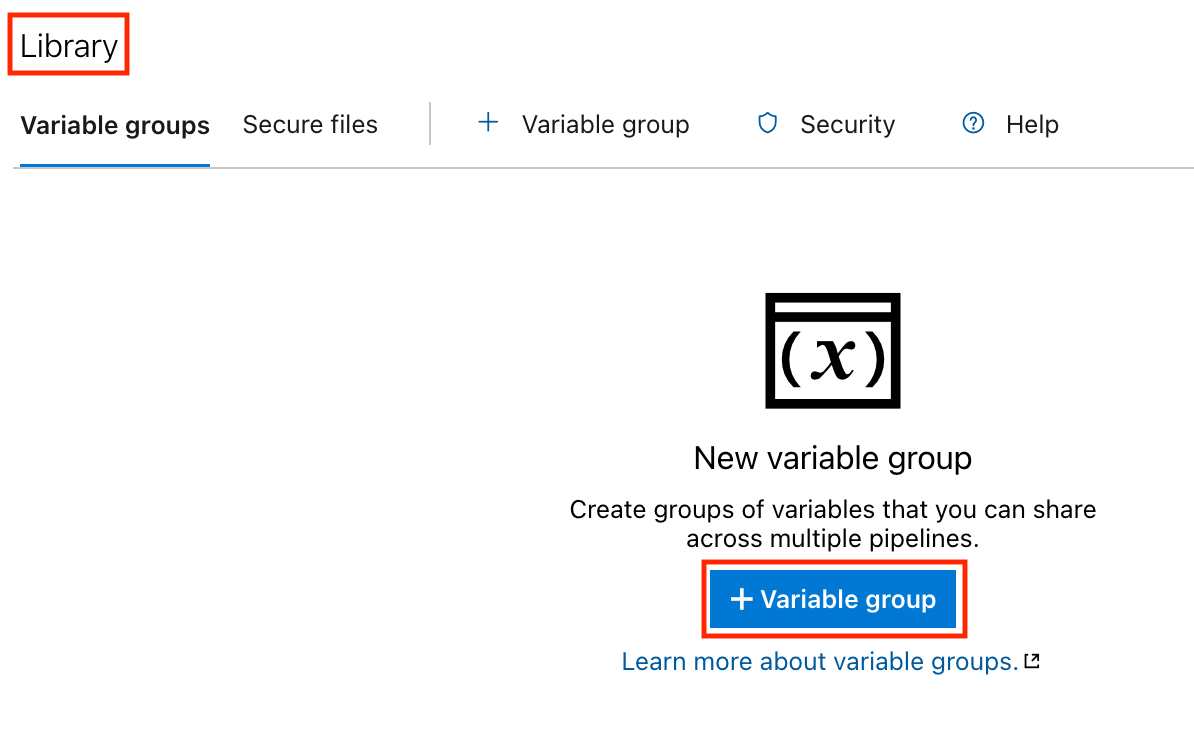
variables:
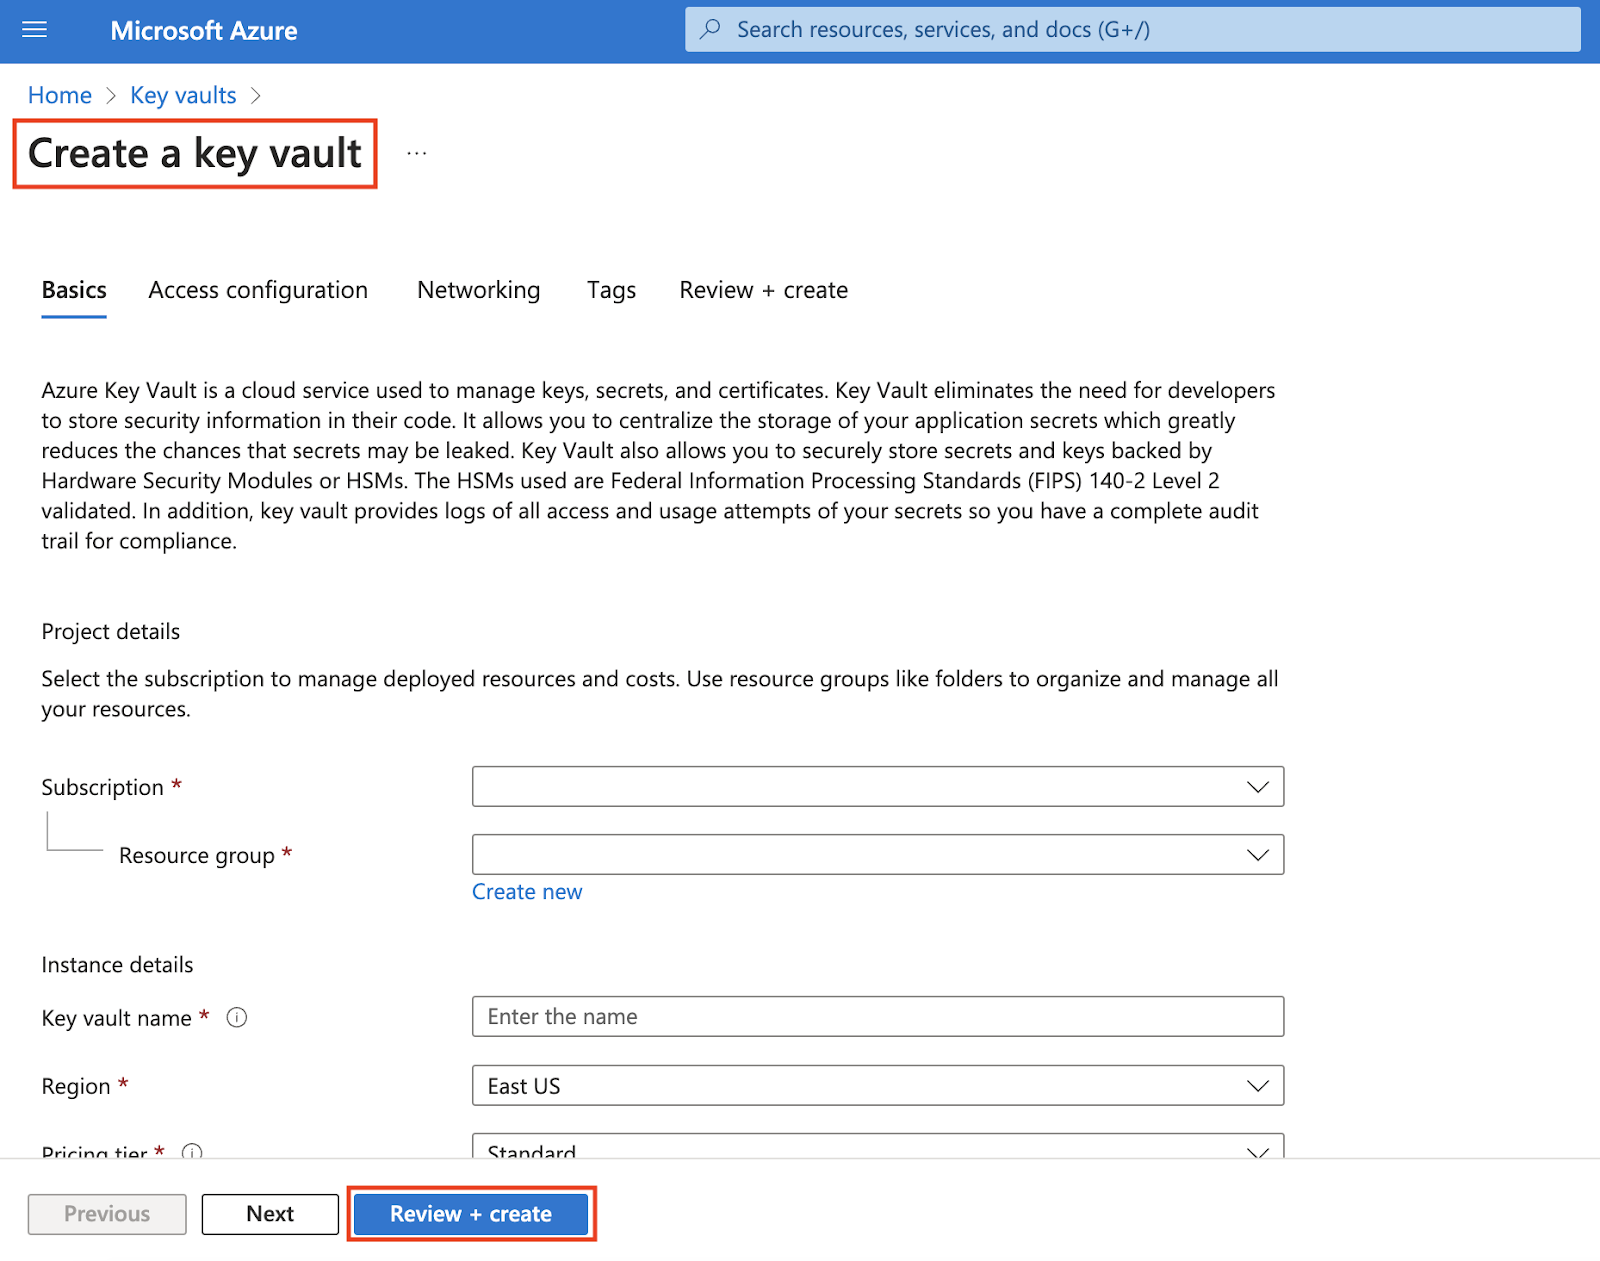
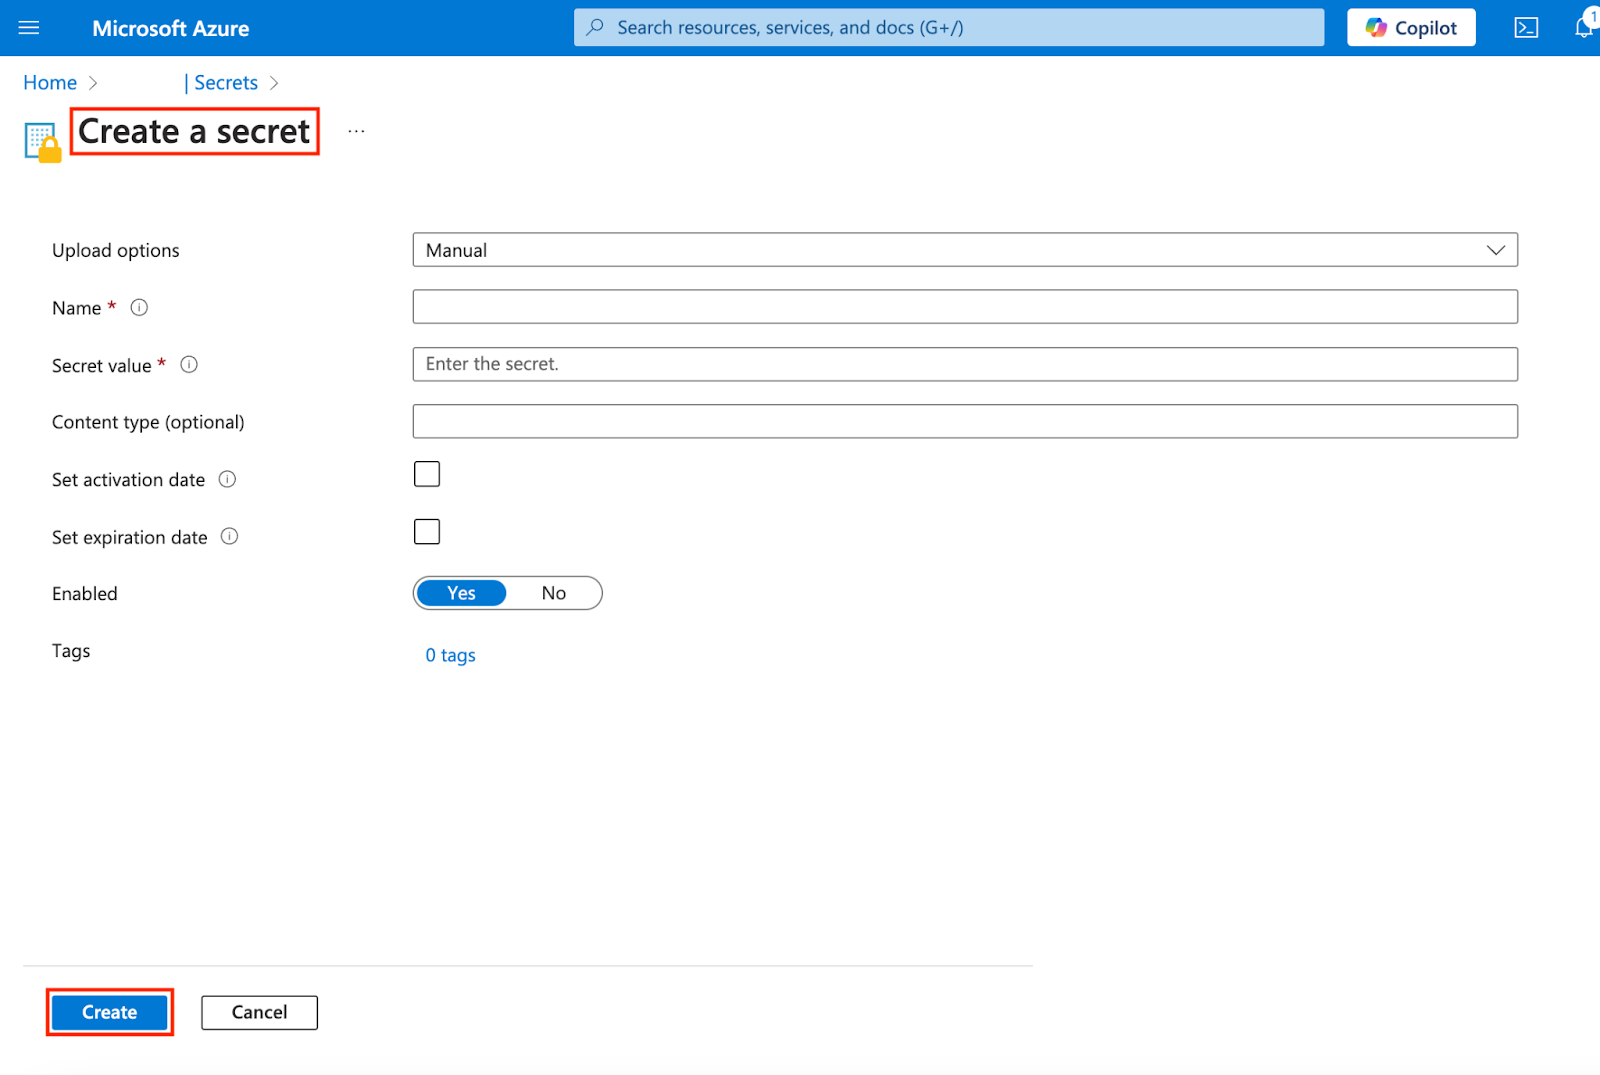
- group: my-variable-group # Reference the variable group that links to the Key Vault
jobs:
- job: BuildJob
pool:
vmImage: 'ubuntu-latest'
steps:
- script: echo "Using secret from Key Vault."
env:
MY_API_KEY: $(my-secret) # Reference the secret from the variable group
displayName: 'Print Secret'From the example above: The my-variable-group variable group is referenced, which contains secrets from the Key Vault. The script step echoes a message, using the variable group's secret $(my-secret) as an environment variable.
One essential practice in modern software development is Security. Security is non-negotiable and can’t be compromised because of the consequences at stake.
This tutorial taught us how to set up an Azure DevOps environment, use Azure Repos for version control, create and manage CI/CD pipelines, track and manage work items with Azure Boards, integrate Azure DevOps with other tools, best practices for Azure DevOps, and more.
Consistency is the secret to success. Review your processes frequently, get feedback, and make adjustments. Mastering these can unlock your full potential as a data professional in software development. Explore Azure DevOps, try out these tools, and see how much more productive your team is.
To dive deeper into Microsoft Azure, check out the following courses:
Learn more about Azure with these courses!
Track
Course
blog
Josep Ferrer
14 min
Tutorial
Emmanuel Akor
Tutorial
Kofi Glover
Tutorial
Karen Zhang
Tutorial
Patrick Brus
Tutorial
Moez Ali