Track
Microsoft Azure is a comprehensive cloud computing platform that offers a wide range of services for building, deploying, and managing applications and services through Microsoft-managed data centers. It provides solutions for computing, storage, networking, databases, analytics, and artificial intelligence, among others.
If you’re just starting out with your Azure journey, this guide will help you get setup with the platform and configured to your preferences. You should also check out our Azure Fundamentals track, which will help you prepare to become Azure certified.
Prerequisites
Before starting, ensure you have:
- An active Azure subscription.
- A basic understanding of Azure cloud and its services. Check out the Introduction to Azure course if you’re totally new.
Setting Up Your Azure Environment
Creating an Azure account
1. Visit the Azure portal
The first thing you’ll need to do is visit the Azure Portal.
2. Sign up
Since this is the first time accessing the portal, you will need to create an Azure account.
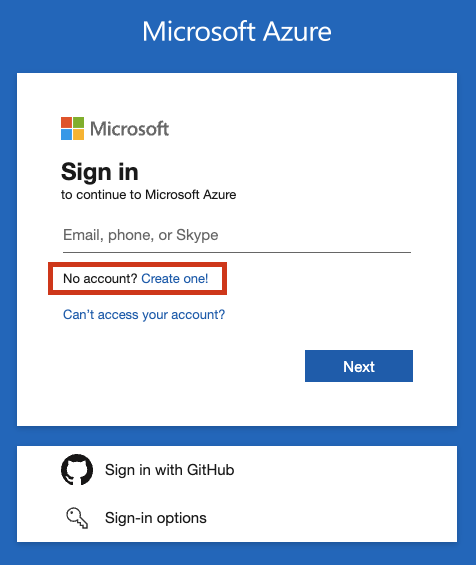
It’s worth noting that you can only create an Azure account using a Microsoft email address. If you don’t have a Microsoft email address, you will need to sign up for one.
If you do have a Microsoft address, fill in the details to continue the process. You might need to fill in some other details like your birthday and be asked to resolve various puzzles so that the system determines you are human.
Once the signup process is complete, you will be prompted with the Azure portal home screen.
3. Add a subscription
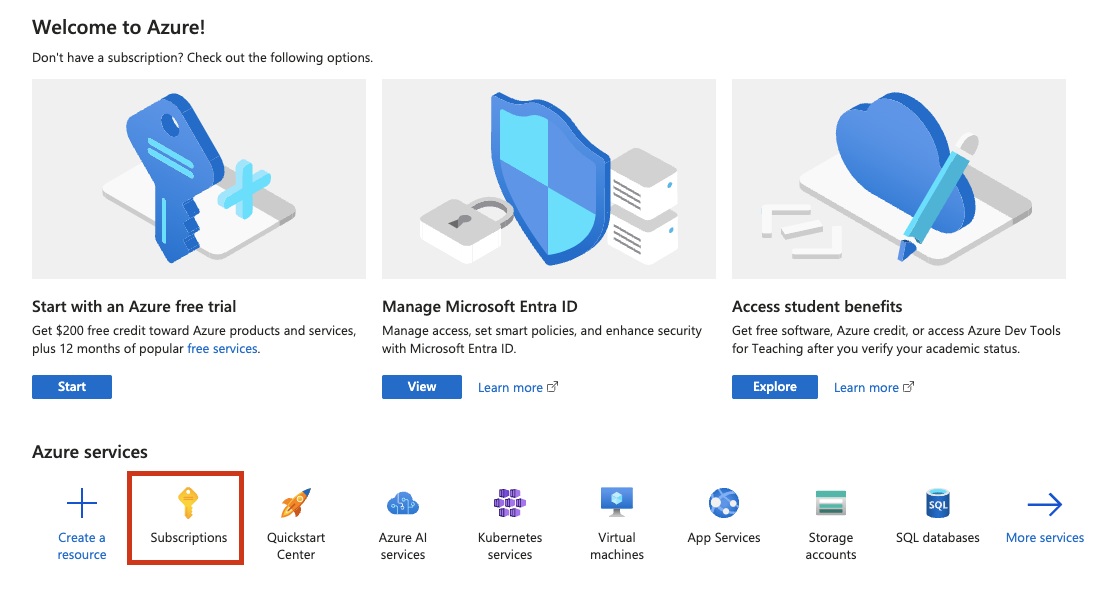
To start using the portal to create and interact with Azure services, you first need to set up an Azure subscription.
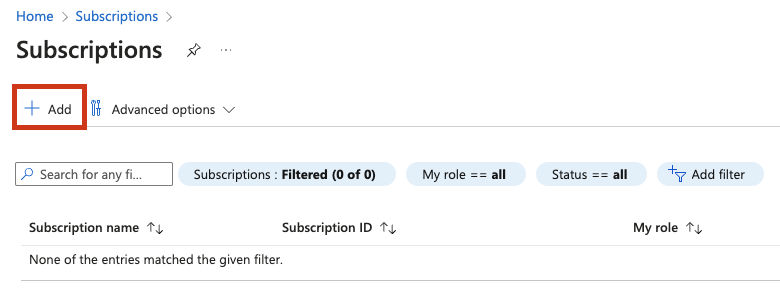
An Azure subscription holds the details of your Azure resources, including the associated cost. You can navigate to the Subscriptions page and click on the ‘Add’ button to add a new subscription.
You can select a free trial that will enable you to explore Azure services or you can choose Pay-As-You-Go (meaning you will pay for any services you use on a consumption basis).
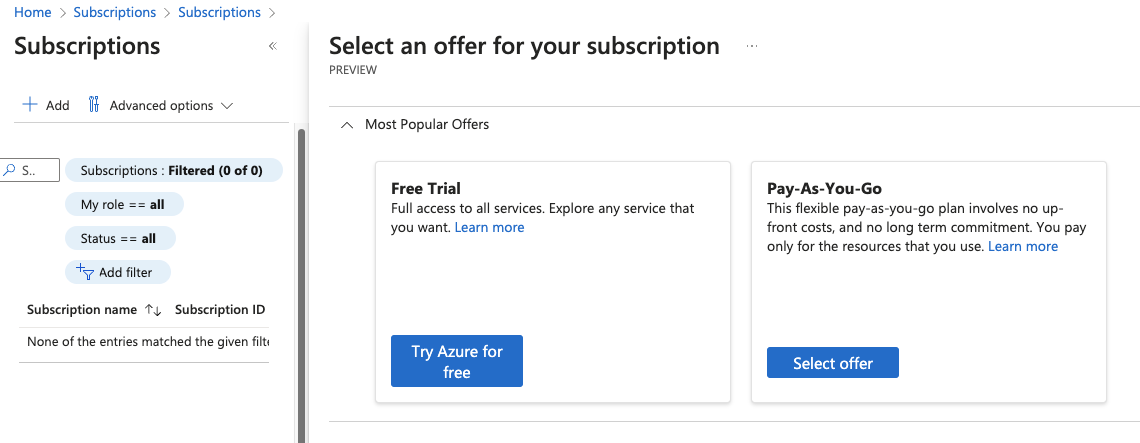
You will need to provide billing information. Once the process is complete, your new subscription will appear in the list. With a subscription, you can now create and use Azure resources and services.

Navigating The Azure Portal
Now that you’re all set up with your login and subscription, it’s time to start finding your way around the Azure portal
Azure portal key elements
1. Homepage
When you access the Azure portal for the first time or press the Home button, you will be taken to the Azure home page.
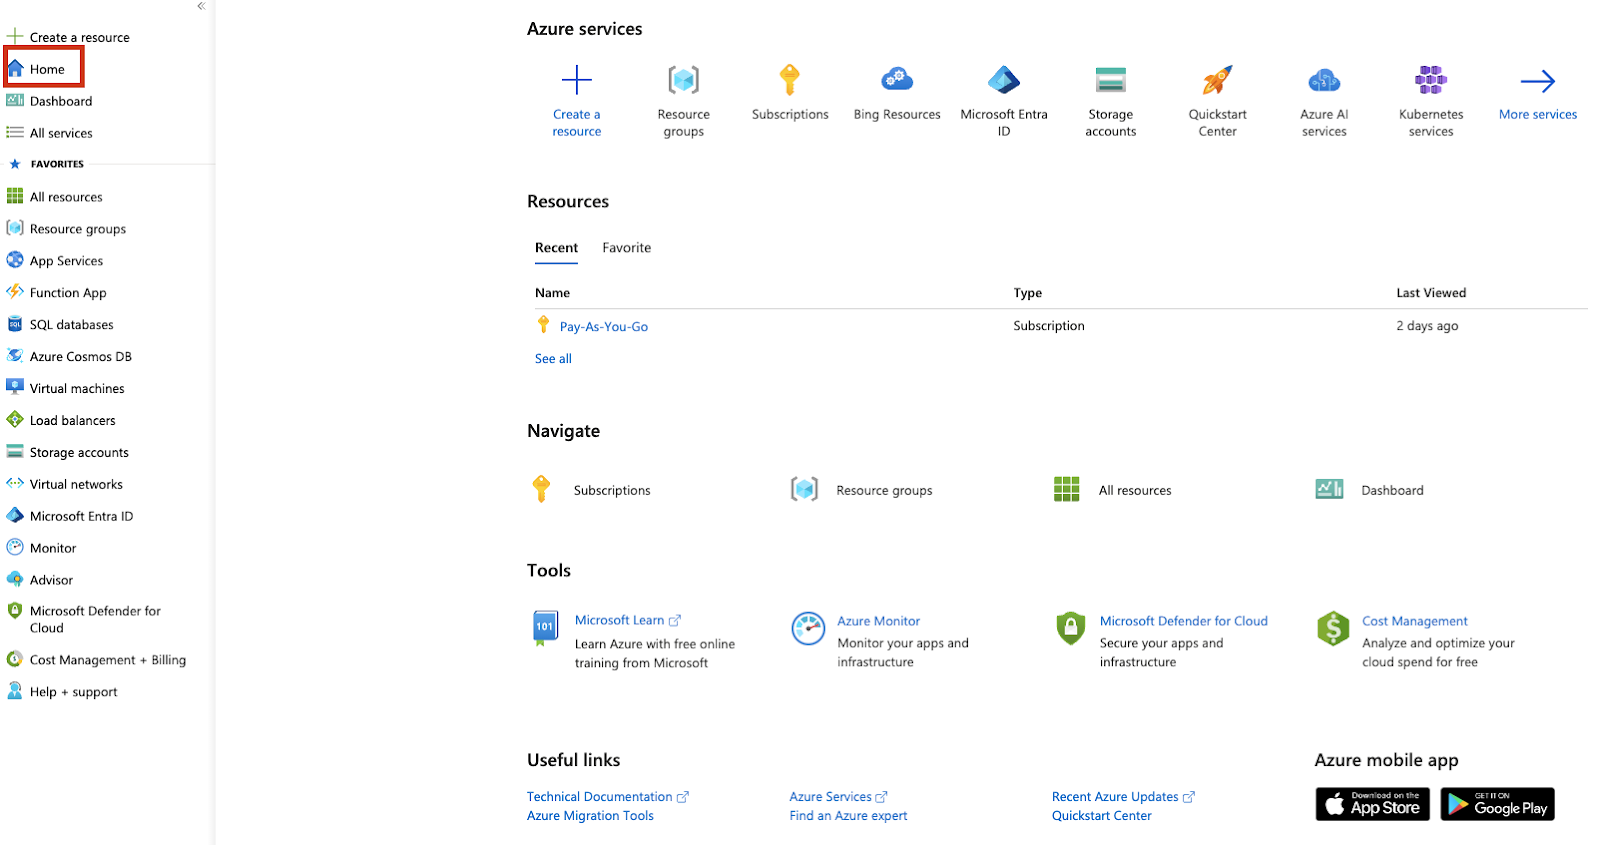
This page is an overview of the most important topics you can find in an Azure subscription. It includes links to core services, documentation, online courses, mobile apps, and other useful websites.
For more information on available Azure services and their use cases, check out our Azure Fundamentals track.
2. Azure portal header
The portal header is a key element of Azure's website and will always be present no matter the screen you find yourself in.
![]()
It includes a shortcut to the homepage in the form of Microsoft Azure text logo and a global search bar.
The global search bar can be used to look for existing resources or help you find a service you intend to start using.
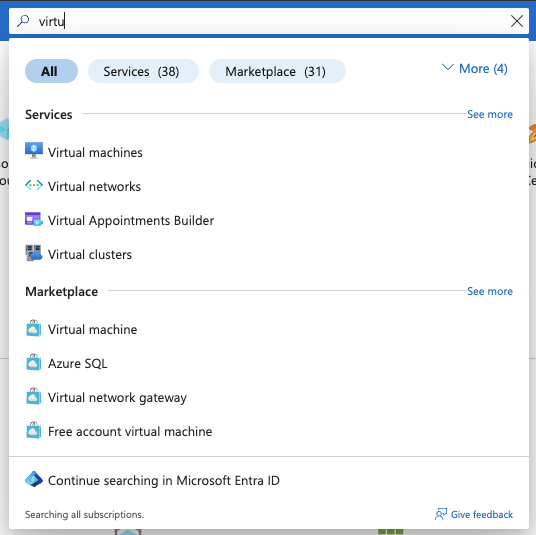
On the most right hand side you will find a couple of useful tools and a quick info about the account currently used and the current directory. This section is known as Global controls.

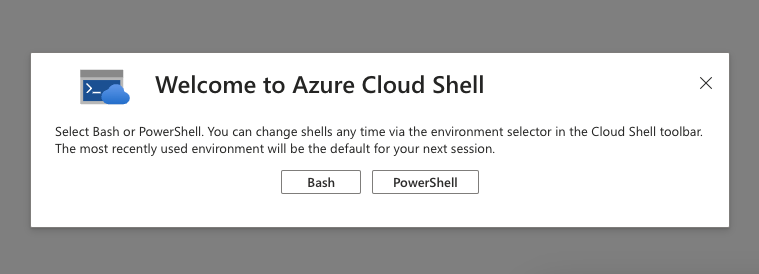
Available tools include Azure Cloud Shell, which is a command line tool that enables you to interact with Azure services programmatically.
![]()
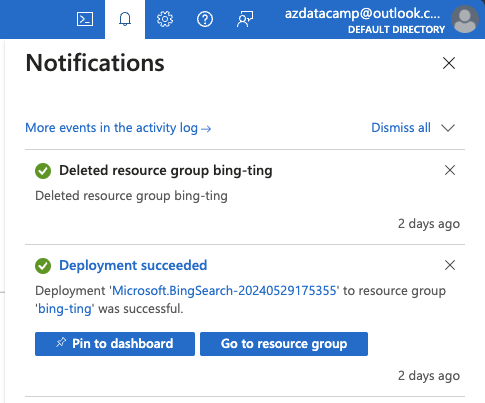
Another tool listed is the Notifications pane, which keeps a short history of your interaction with Azure resources in terms of creation, modification, or removal.
The next three icons represent the portal settings, Azure's support service (in case you need to contact Microsoft for Azure-related challenges), and the feedback form that allows you to rate your experience with the portal.
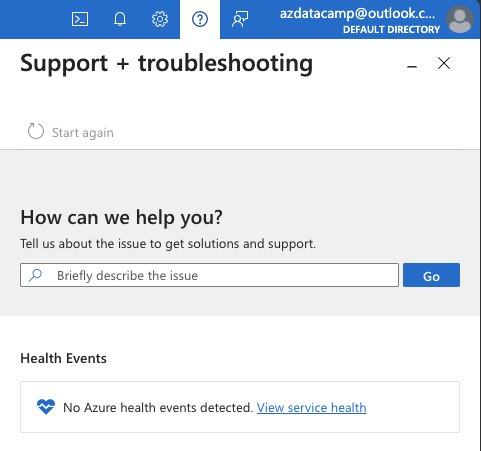
We will look at the Azure portal settings in more detail later on in the article.
3. The portal menu and favorites
The portal menu lets you access key functionalities and favorite resources.

Key functionalities include quick creation of resources, navigating to the home page, accessing Dashboard or browsing all available Azure services.
You can have it docked so it’s always present, or you can collapse it to leave more room on the page for other information.


4. The resource menu
Whenever you are working with Azure resources, you will notice a secondary menu.

This is called the resource menu, and it offers all the necessary means to get information and interact with the resource. It offers details about the resource, its configuration, its properties and integration, and access to various tools and analytics.
The options available depend on the resource type. In some documentation or materials, you might also find the term “blade”. It is a synonym of the various menu options in the resource menu. For example, the screenshot above shows the Overview blade output.
Dashboard
What is the Dashboard?
The dashboard is a type of widget centralized screen where you can select details about the resources in your subscription that matter most to your needs. Microsoft offers a default dashboard, but you can create and customize dashboards of your own.

You can also share your dashboards with other people in the organization, making them particularly useful for teams or groups that need the same type of access to important information.
Directory
What is an Azure directory?
An Azure directory refers to a Microsoft Entra ID entity. Microsoft Entra ID is a cloud-based identity and access management service that is used to allow, deny, and control access and permissions to all resources and services within Azure.
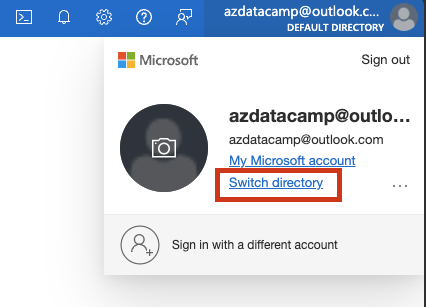
When you first sign up for Azure, a default directory will be created for you. If your user account has permissions in multiple Azure directories, you can switch between them by using the upper right side section in the portal.

Customizing Your Azure Portal Experience
Now that you’re familiar with Azure’s key features let’s look at how you can configure it to your preferences.
Azure portal settings
1. Reaching the settings page
One of the options available on the upper right side (in Global controls) is the Azure settings.

This will open up an Azure page where you can configure generic settings of the Azure portal appearance and behavior.
2. Configure Directories + subscriptions
We already had a glance of this first option. This is where you can see all available directories your account is part of.

Additionally, you can create filters and configure the starting directory, which will redirect you to different configuration pages.


3. Configure Advanced filters
Please note that this menu option will only be visible when you have permissions to multiple subscriptions. This menu can be useful if you want to view resources only from certain subscriptions, management groups, or from subscriptions in a certain state.
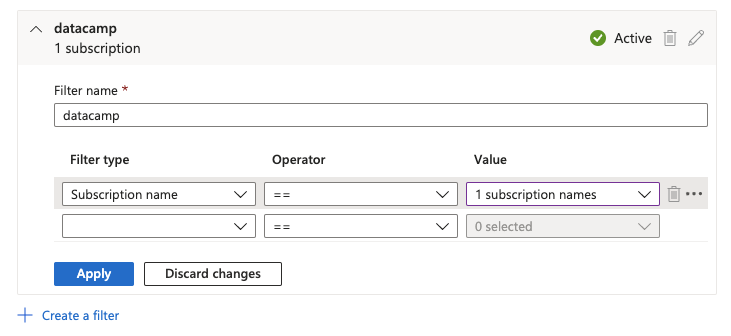
If there are subscriptions you rarely work with, you might choose to hide them from the list of resources to avoid confusion or mistakes.
4. Configure Appearance + startup views
Here, you can configure a variety of options about the portal’s behavior and appearance. You can choose if the portal menu should be docked or showing up only clicked (Flyout).

You can choose whether the resources menu is collapsed or expanded.
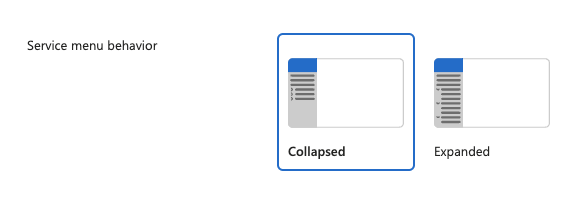
You can choose various themes for the portal colors.
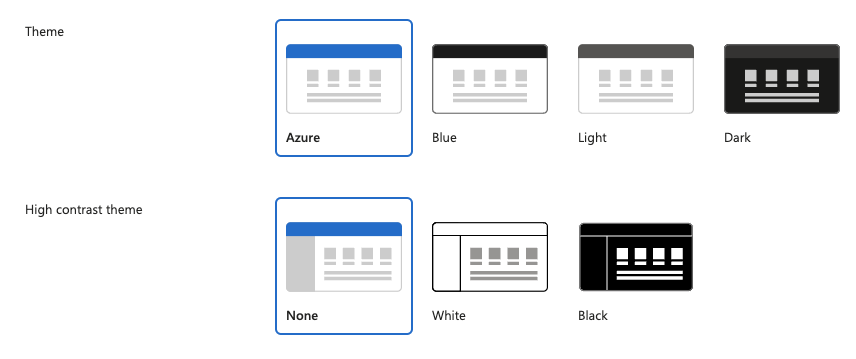
You can also choose what should be the default page when accessing Azure portal; it can be the home screen or a dashboard.

This is also the page where you can configure the starting directory: it can always be the same one you choose (a selected directory) or the last one visited. This menu option will be available only when you have access to multiple directories.

5. Configure language and region
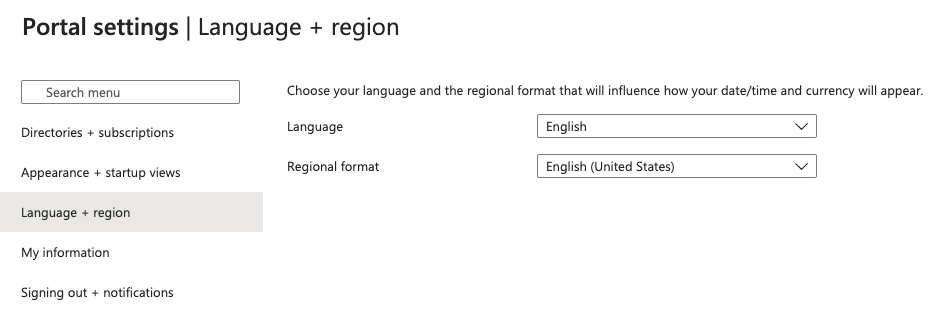
This section is straightforward enough, allowing you to select the language of Azure portal and the regional format for dates, numbers, etc. This is largely down to your preference and there are several options available.
6. Configure My information
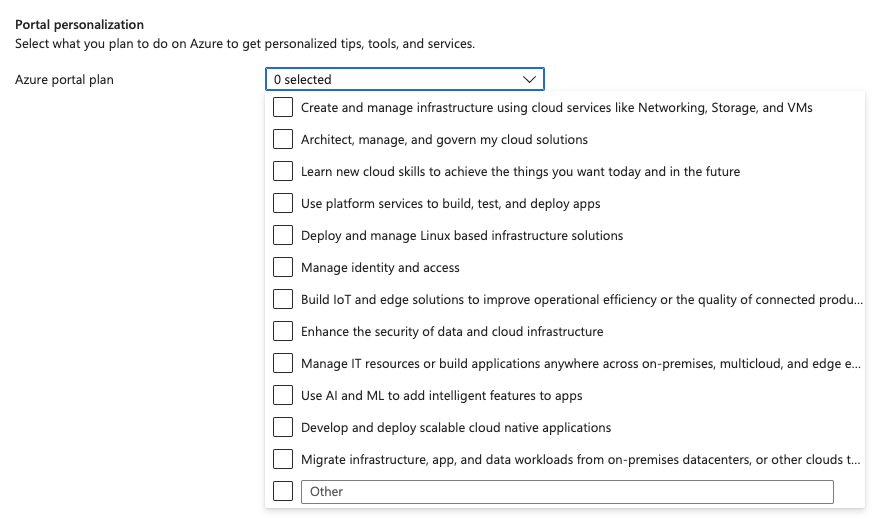
This is a section intended for communications and personalized tips. When there are outages or security issues in Azure, your email address will be used by Microsoft to reach out and inform you about affected services.

One handy feature here is the portal personalization, which can help you and your team be more productive. You can select what you plan to do with Azure, and it will generate tips, tools, and services to help you.
Configure Signing out and notifications
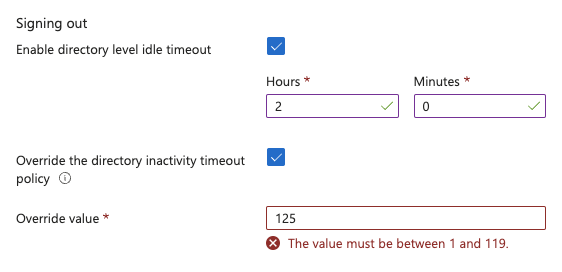
The last option in the Azure portal settings enables you to configure session timeouts for account inactivity.

It is always a good idea to enable session timeout to keep your account and resources secure. If you are a Global administrator in the Azure portal, you can also enable directory-level timeout that will apply to all users.
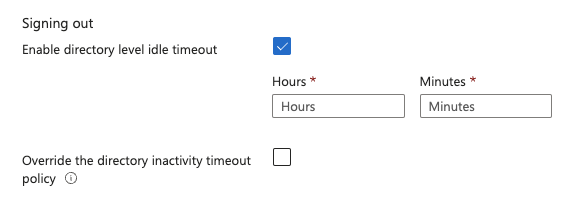
As you can see, individual users can still override the timeout policy, but there’s a catch there. They cannot set a more relaxed policy, only a more restrictive one.
The last setting here is about notifications that are visible in the portal. We’ve mentioned earlier that some information about resource interaction will be shown in the form of notifications.

The option to see these messages or not is configurable through this switch.

Additional Tips
By following the steps above, you should be able to navigate Azure with confidence. For some additional information, check out the tips below:
- Take advantage of Azure documentation: The Azure documentation is an excellent resource for learning more about specific services and best practices.
- Join Azure communities: Engaging with communities like Microsoft Q&A or Stack Overflow can provide additional support and insights.
- Regularly monitor billing: Keep an eye on your Azure spending by regularly checking the billing section to avoid unexpected charges.
Conclusion
This article aimed to provide a comprehensive guide to get you started with Azure cloud platform.
By following the steps outlined in this article, you should now be comfortable to start using Azure portal and personalize its settings.
This foundational knowledge will empower you to further explore and master Azure's vast capabilities.
If you would like to learn more data science skills, take DataCamp's introduction courses:

I'm a Cloud Architect and Automation Expert helping companies worldwide adopt Azure Cloud and DevOps technologies. My expertise includes cloud migrations, cloud services automation, CI/CD pipeline design, and custom monitoring solutions.