
Track
Snowflake Foundations
7 hr
Data pipelines are a central component of data engineering. They represent the series of steps that move raw data from source systems into a data warehouse, where it can be cleaned, transformed, and made ready for analysis. A well-designed pipeline ensures data flows efficiently, reliably, and securely from ingestion to insight.
Snowflake, a powerful cloud-based data platform, is especially well-suited for building scalable, flexible, and cost-efficient data pipelines. With built-in features for data loading, transformation, automation, and monitoring, Snowflake allows data teams to simplify complex workflows and focus on delivering value from data.
In this tutorial, we’ll walk through the process of building a data pipeline in Snowflake—from setting up your environment to automating data transformations using native tools like Streams and Tasks. Some of this will require knowledge of a cloud service’s integration process and event management systems. For these, I recommend the documentation of your particular cloud service.
If you’re just getting started with Snowflake, consider our Snowflake Foundations skill track to get hands-on and learn to query, model, and manage data.
Snowflake’s unique architecture is well-designed to support data pipelines. Snowflake separates compute and storage, which means you can scale each independently.
Data is stored centrally in the cloud storage layer, while computation happens in virtual warehouses, which can be started, stopped, and resized as needed.
This architecture allows multiple users and processes to access the same data without contention, making it ideal for pipeline workloads that involve ingestion, transformation, and analysis.
It also adds a layer of safety where data changes can happen without directly impacting a user’s ability to query that data.
For more information and to learn about the cloud layer not discussed here, I recommend this deep dive into Snowflake’s architecture.
Within each pipeline, we must consider the necessary steps. Typically, you will stage data before loading it into Snowflake. Snowflake itself handles data storage, including tables and their schema, while virtual warehouses provide the compute resources required to execute queries and other data operations.
Here are clear definitions of these essential components used in Snowflake data pipelines:
Let’s make sure you have a Snowflake environment ready to go. If you’re new to Snowflake, follow these steps to get started:
If you do not have a Snowflake account, there is a 30-day free trial which includes (at the time of writing) $400 in free usage. This should be enough for us to test a few sample pipelines!
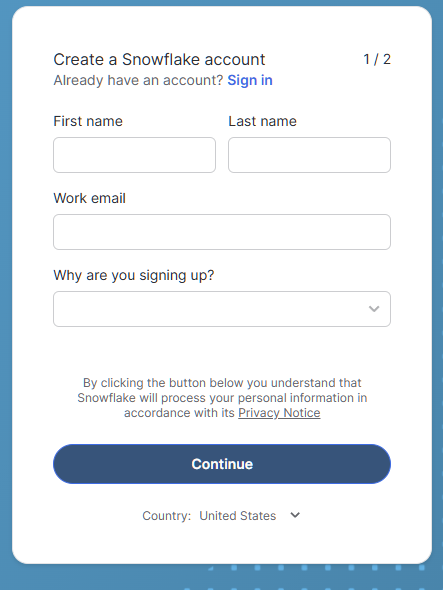
Sign-up form for Snowflake Trial
Once inside, you'll see:
If you want more advice on using Snowflake, follow this Snowflake Foundations course.
This step will cover the creation of a virtual warehouse, database, and schema. Run the following SQL in your worksheet to set up your environment:
-- set the user role appropriately
USE ROLE accountadmin;

-- Create a virtual warehouse
CREATE WAREHOUSE datacamp_pipeline_wh WITH WAREHOUSE_SIZE = 'XSMALL' AUTO_SUSPEND = 60;

-- Set our active working warehouse
USE WAREHOUSE datacamp_pipeline_wh;

-- create our Datacamp Sample Database
CREATE OR REPLACE DATABASE datacamp_sample_db;

-- create the Datacamp (Sample) Raw Schema
CREATE OR REPLACE SCHEMA datacamp_sample_db.raw_schema;As we discuss in our article about Data Ingestion in Snowflake, Snowflake supports both batch (bulk) and continuous loading. Bulk loading is designed to upload large chunks of data to your table at a time. This is generally done at scheduled intervals, or automated with Snowpipe’s event-based management.
Continuous (stream) loading can be accomplished using things like Snowpipe Streaming. To ingest data, we must create data integrations (stages) with our cloud provider and load the data using COPY INTO.
Data ingestion is the first step in any pipeline. In this step, we’ll cover the basics of creating a storage integration and creating a stage. To do so, we should imagine we have already connected your Snowflake to AWS with a Snowflake IAM user. If not, refer to the Snowflake AWS configuration guide in the documentation.
-- set Role Context
USE ROLE accountadmin;

-- set Warehouse Context
USE WAREHOUSE datacamp_pipeline_wh;

-- this creates the storage integration
-- The STORAGE_AWS_ROLE_ARN will come from the AWS configuration guide steps
-- We will allow access to all locations and block any with sensitive data
CREATE STORAGE INTEGRATION datacamp_aws
  TYPE = EXTERNAL_STAGE
  STORAGE_PROVIDER = 'S3'
  ENABLED = TRUE
  STORAGE_AWS_ROLE_ARN = '<iam_role>'
  STORAGE_ALLOWED_LOCATIONS = ('*')
  STORAGE_BLOCKED_LOCATIONS = ('s3://mybucket/private/path/’);

-- Create file format, this is referenced by your stage to easily determine presets for your files
CREATE FILE FORMAT my_csv_format
TYPE = 'CSV'
FIELD_OPTIONALLY_ENCLOSED_BY = '"';

USE SCHEMA datacamp_sample_db.raw_schema;

--This stage is what ultimately connects your AWS files to your database schema
CREATE STAGE datacamp_s3_stage
  STORAGE_INTEGRATION = datacamp_aws
  URL = 's3://bucket1/path1/'
  FILE_FORMAT = my_csv_format;
At the end, you should have successfully created your Snowflake integration with AWS and created the stage. If you want to review AWS basics, the following article is a great introduction to AWS.
The command COPY INTO is the common method for uploading data to Snowflake. We can either use a locally uploaded file in Snowflake, or use our cloud connections. In the following example, we will use our stage to copy a CSV file.
-- Load data using COPY INTO
-- The following will attempt to load all file in the bucket
-- To specify the particular files you can use the FILES or PATTERN settings
COPY INTO datacamp_sample_db.raw_schema.aws_first_upload
FROM @my_stage
FILE_FORMAT = (FORMAT_NAME = 'my_csv_format');Manually loading every time we get a new file is inefficient and time-consuming as velocity increases. Instead, we can use Snowpipe to load files from our stage. Then, we combine our AWS event notifications to our Snowflake IAM user to trigger the Snowpipe every time.
-- Let’ s first create our Snowpipe
CREATE PIPE my_pipe AS
COPY INTO datacamp_sample_db.raw_schema.aws_first_upload
FROM @datacamp_s3_stage
FILE_FORMAT = (FORMAT_NAME = 'my_csv_format');
Next, we can use something like Amazon SQS to send notifications to our IAM user whenever our target bucket receives a file.
Finally, we can monitor our Snowpipe using:
SELECT * FROM INFORMATION_SCHEMA.PIPE_USAGE_HISTORY;Now you don’t have to worry about uploading data every time a file arrives in your S3 bucket! These cloud notifications will trigger your Snowpipe to load data.
Snowflake’s Streams and Tasks are built-in tools for tracking and transforming changing data. Streams focus on tracking changes to tables where Tasks are utilized for automating the execution of SQL statements.
A Stream captures Change Data Capture (CDC) information—i.e., inserts, updates, and deletes—in a table since the last time it was queried. These are often in the form of Data Manipulation Language (DML) queries. This allows us to see the changes to a table between two different query times.
-- Create a stream on a table
CREATE OR REPLACE STREAM my_stream ON TABLE datacamp_sample_db.raw_schema.aws_first_upload;
You can then query the stream to get only the changes:
SELECT * FROM my_stream WHERE METADATA$ACTION = 'INSERT';Tasks allow you to automate SQL execution on a schedule or event trigger. Tasks can either call upon SQL, Javascript, Python, and so on, in order to automate procedures on our tables and pipelines.
-- Create a task to process changes and filter data
-- We want changes that occur in the US, for example
-- Schedule to run this task every 5 minutes from our stage
CREATE OR REPLACE TASK process_changes_task
  WAREHOUSE = datacamp_sample_db
SCHEDULE = '5 MINUTE'
AS
  INSERT INTO raw_schema.aws_processed_data
  SELECT * FROM my_stream WHERE location = ‘USA’;

-- This will allow us to test the task
EXECUTE TASK process_changes_task;This is the foundation for automated transformation pipelines. As you saw above, Tasks can use Streams to pull in new data to a different table. A general process may look like the following:
In this way, we have created parts of a data pipeline. By combining Streams and Tasks, we are able to perform transformations only on newly loaded data. With only Tasks, we would potentially have to process the entirety of our raw tables each time we wanted new data, this can be costly and inefficient use of compute power.
Let’s walk through a simple pipeline use case: ingesting order data, tracking changes, and transforming it for analytics. Since we covered how to execute each step independently, this section covers what the steps might look like together.
First, we have to connect our Snowflake ecosystem to our cloud storage. We used AWS as an example. In Snowflake, we used the CREATE STORAGE INTEGRATION and CREATE STAGE commands to build the connection between our AWS and our database.
-- set Role Context
USE ROLE accountadmin;

-- set Warehouse Context
USE WAREHOUSE datacamp_pipeline_wh;

-- this creates the storage integration
CREATE STORAGE INTEGRATION datacamp_aws
  TYPE = EXTERNAL_STAGE
  STORAGE_PROVIDER = 'S3'
  ENABLED = TRUE
  STORAGE_AWS_ROLE_ARN = '<iam_role>'
  STORAGE_ALLOWED_LOCATIONS = ('*')
  STORAGE_BLOCKED_LOCATIONS = ('s3://mybucket/private/path/’);

-- Create file format, this is referenced by your stage to easily determine presets for your files
CREATE FILE FORMAT my_csv_format
TYPE = 'CSV'
FIELD_OPTIONALLY_ENCLOSED_BY = '"';

USE SCHEMA datacamp_sample_db.raw_schema;

--This stage is what ultimately connects your AWS files to your database schema
CREATE STAGE datacamp_s3_stage
  STORAGE_INTEGRATION = datacamp_aws
  URL = 's3://bucket1/path1/'
FILE_FORMAT = my_csv_format;In this second step, we create a Snowpipe that will run the COPY INTO command into our raw data tables.
-- Let’ s first create our SnowpipeCREATE PIPE my_pipe AS

COPY INTO datacamp_sample_db.raw_schema.aws_first_upload

FROM @datacamp_s3_stage

FILE_FORMAT = (FORMAT_NAME = 'my_csv_format');We then use a stream on this raw data table in order to track changes.
-- Create a stream on a table
CREATE OR REPLACE STREAM my_stream ON TABLE datacamp_sample_db.raw_schema.aws_first_upload;Next, we create a Task that transforms and loads this newly loaded data to our processed version of the table. This will trigger on a schedule to check for new data. If there is no new data, the Task won’t run.
-- Create a task to process changes and filter data
-- We want changes that occur in the US, for example
-- Schedule to run this task every 5 minutes from our stage
CREATE OR REPLACE TASK process_changes_task
  WAREHOUSE = datacamp_sample_db
SCHEDULE = '5 MINUTE'
AS
  INSERT INTO raw_schema.aws_processed_data
  SELECT * FROM my_stream WHERE location = ‘USA’;

-- This will allow us to test the task
EXECUTE TASK process_changes_task;Finally, we want to make sure our pipelines are working as intended. Make sure to use the SHOW PIPES and SHOW TASKS commands to verify these are properly set up and running. Then use metadata tables from INFORMATION_SCHEMA to track data loading performance and errors.
As always, we want to ensure that we are operating with best practices in our development. Things to consider are optimizing for performance and cost, ensuring data quality and reliability, and implementing the appropriate levels of security and access.
Our goal should be to always operate our pipelines as efficiently as possible with as little cost. This way, we are minimizing our impact on servers and providing data in as timely a manner as possible. Here are some tips:
Data quality and reliability are critical for every data engineer to consider. You want to make sure the data being loaded is usable without errors. You also want to make sure your data pipeline won’t inadvertently cause data to drop when there are issues. Here are some tips for data quality management:
NULL data where we cannot have any or pre-dedupe in the event of overlapping data pulls.Finally, it is important to ensure proper access and security to your data. Some tables can hold sensitive information or should not be altered except by a select group. Follow this advice to properly manage your security and access in Snowflake:
Building data pipelines in Snowflake is a streamlined and scalable process that is perfect for beginners stepping into the data engineering world. With its intuitive architecture, robust ingestion options, and built-in automation tools like Streams and Tasks, Snowflake empowers data teams to move quickly from raw data to actionable insights.
By following this guide, you now have the foundational knowledge to set up your own Snowflake pipeline—handling ingestion, transformation, and orchestration, all within a single platform. For more information on Snowflake, check out the following guides:
Top DataCamp Courses
Track
Course
Course
blog
Bex Tuychiev
14 min
Tutorial
Bex Tuychiev
Tutorial
Tim Lu
Tutorial
Amberle McKee
Tutorial
Moez Ali
Tutorial
Bex Tuychiev