
Course
Data Analysis in Excel
3 hr
140.7K
The CONCAT() function in Excel lets you join text, numbers, or cell contents into a single cell, helping you tidy up data and reduce manual entry. As you will see, it’s much appreciated when you are putting together names, addresses, or custom labels of some kind.
Let's walk through the function’s essentials, see it in action, and explore how it compares to related Excel tools. Hint: It’s a replacement of the more out of date CONCATENATE() function, but it also is being overshadowed by an even more flexible function called TEXTJOIN(), which I also have an article on.
It's helpful to first clarify exactly what CONCAT() does and when you’d want to use it.
CONCAT(), as you might already know, stands for “concatenate,” which is a long way of saying linking together, like in a chain. In Excel, this means combining the contents of two or more cells (also, values) into one. For instance, you might have first and last names in separate columns, but you want both in a single column for a mailing list.
As I mentioned in the intro, it’s a modern replacement for the older CONCATENATE() function. CONCAT() is better than CONCATENATE() because it’s shorter to type, for one, and also (and more importantly) for two, it offers more flexibility and allows you to merge ranges as well as individual cells.
=CONCAT(text1, [text2], ...)Each argument is a cell reference, range, or text value you want to combine. text1 is required, while text2 and any additional items are optional, which is why it’s referenced using brackets.
Now that we've established what CONCAT() does, let's see how it handles real, common scenarios.
Suppose you maintain a contact list with first names in column A and last names in column B. This has to be the most common use case. To merge these into a single cell (with a space in between), you’d use:
=CONCAT(A2, " ", B2)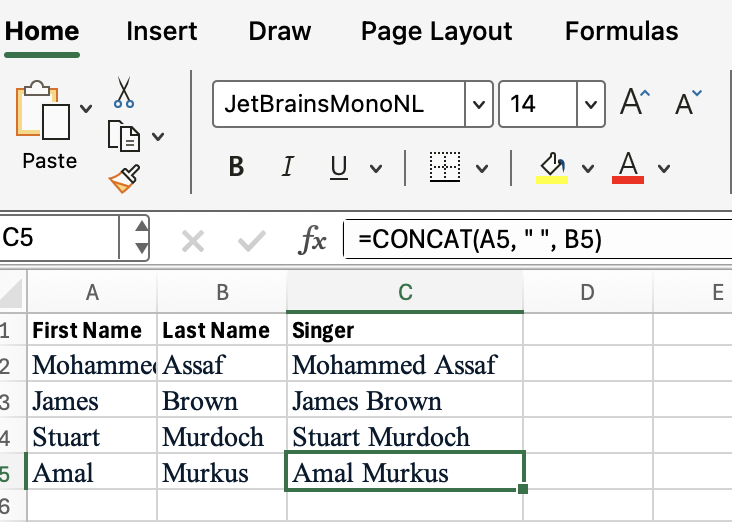
This formula joins the content of cell A2, a space character, and the content of B2. Extend this formula down the column to assemble a full list. You could separate with a comma instead like this: =CONCAT(A2, ",", B2)
Every location does addresses differently but almost always they span several columns, like house number, street, city. With CONCAT(), you can combine these for mailing labels, or just for more tidy recordkeeping.
=CONCAT(A2, " ", B2, ", ", C2)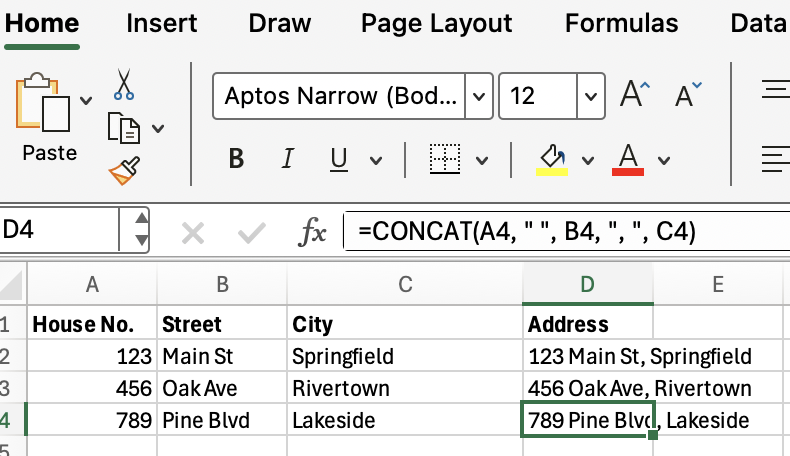
One benefit of CONCAT() over the older CONCATENATE() is the ability to join entire ranges. This one I want to show because it illustrates a power of CONCAT() over CONCATENATE(). For example, to combine the values in cells A2 through E2, use this:
=CONCAT(A2:E2)
Excel will merge the contents in order, with no separators by default. In this case, it does look a little weird because these different items are running together. So I’m showing a strength of CONCAT() over CONCATENATE() (the latter doesn't work at all here) and also its weakness compared to TEXTJOIN(), which can add easily add spaces - more on that last one in a bit.
Now, it’s important to address some quirks and limitations of CONCAT(). I want to help you to avoid common frustrations and make better decisions about when to use the function.
First, CONCAT() does not add separators (like spaces or commas) automatically between items or cell values. If your data comes from multiple columns and you want readable results, you need to insert your own separators as in the examples I showed.
Second, CONCAT() ignores empty cells without warning. If you try to merge a range where some cells are blank, the result may look odd, by which I mean the words or values may run together.
Also, CONCAT() does not support delimiters across ranges. What I mean by this is that, for instance, if you try to merge A2:E2 and want to insert commas between each value, CONCAT() alone won’t handle this. This is like the example output in that last fruit example, where apple, banana, and others all ran together.
Last but not least, CONCAT() only produces text results, even if you include numbers. If you need a numeric output, this isn’t the function to use.
Several times, I’ve mentioned other Excel functions like TEXTJOIN() and CONCATENATE(). Let me clarify their roles.
TEXTJOIN() offers a solution when you want to merge values and insert a delimiter (like a comma or space) automatically between items, and this works even when combining ranges. The syntax looks like this:
For example, to join all values in A2:E2, separated by commas and skipping blanks, you can use this:
=TEXTJOIN(", ", TRUE, A2:E2)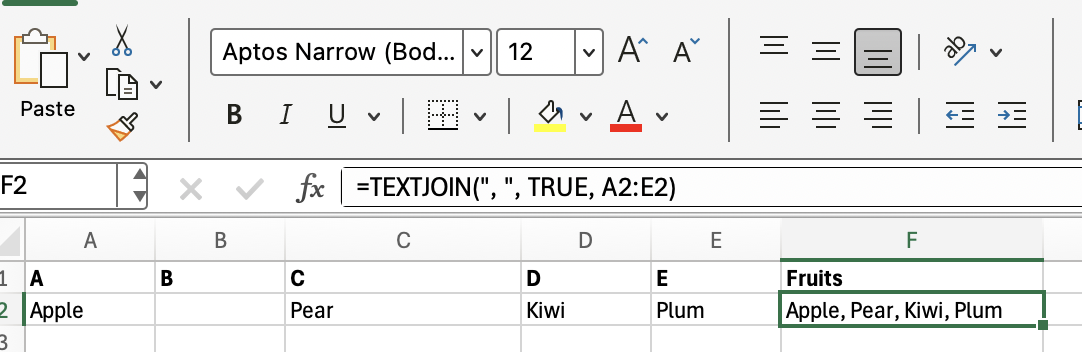
As you can see, TEXTJOIN() is a nice approach for lists, addresses, or any situation where consistent separators are needed, and the range of data is too long to practically use CONCAT(). TEXTJOIN() even nicely handles the blank cell I left in the example.
You can see how unwieldy CONCAT() might get for this kind of situation:
=CONCAT(A1, ", ", B1, ", ", C1, ", ", D1, ", ", E1)CONCATENATE() was Excel’s original function for joining text. Its main drawback is that it doesn’t accept ranges. Each cell or value must be listed individually.
In other words, this works:
=CONCAT(A1:E1)But this returns an error:
=CONCATENATE(A1:E1) # this doesn’t workYou’re better off with CONCAT() or TEXTJOIN() in any modern workflow. In summary:
Use CONCAT() for straightforward merging of cells or ranges when you don’t need a custom separator.
Use TEXTJOIN() for merging with automatic and customizable delimiters.
Avoid CONCATENATE() in new files; it’s included only for compatibility.
Now that you understand when to use CONCAT(), let’s address a few practical tips to help you use the function efficiently in your daily work.
You can combine cell references with fixed text or symbols. For example, to add "ID-" before an employee number in A2:
=CONCAT("ID-", A2)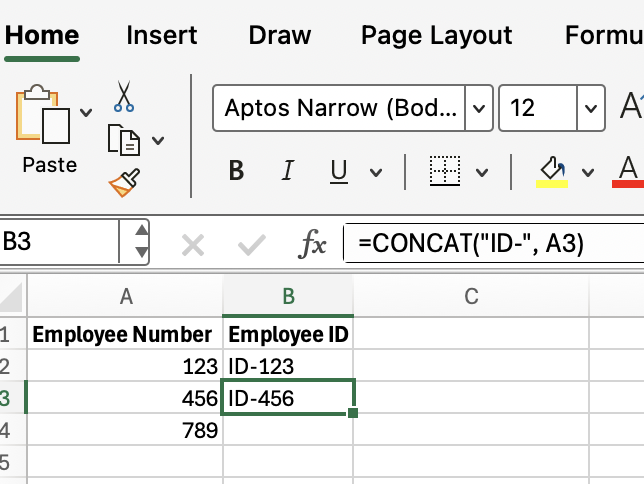
This technique helps standardize formats or labels within your sheet.
CONCAT() treats numbers and dates as text. If you want to control formatting, use the TEXT() function inside your formula. For instance, to merge a name and a formatted date:
=CONCAT(A2, " hired on ", TEXT(B2, "mmmm d, yyyy"))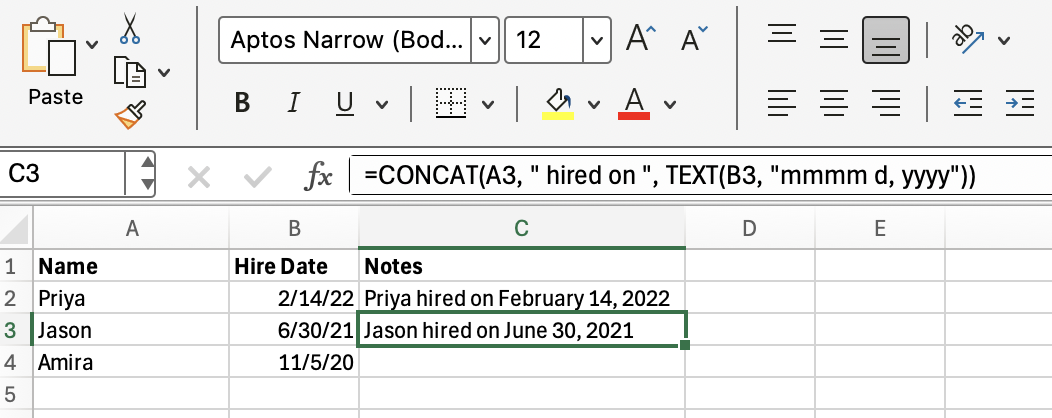
This ensures the output matches your desired style, whether you’re preparing a report or a mail merge.
As we've explored, the CONCAT() function offers a simple way to merge text, numbers, and ranges in Excel, making it a time-saver for anyone managing lists, reports, or routine data cleanup, which is going to be part of any data specialist or data analyst or data scientist job description.
I mentioned other functions in the course of this article. To stay current, explore our Advanced Excel Functions course and learn about lots of interesting Excel things, like Excel’s dynamic array capabilities and methods for automation.
Learn Excel with DataCamp
Course
Course
Course
Tutorial
Laiba Siddiqui
Tutorial
Laiba Siddiqui
Tutorial
Abid Ali Awan
Tutorial
Allan Ouko
Tutorial
Laiba Siddiqui
Tutorial
Laiba Siddiqui