Course
Developing LLM Applications with LangChain
3 hr
46.2K
The Model Context Protocol (MCP) is an open standard for connecting AI models to external tools, APIs, and data sources. It provides a standardized way for large language models (LLMs) to interact with external systems.
As the world moves toward agentic workflows, where AI systems act as autonomous agents, learning MCP has become increasingly important. The Gradio ecosystem offers the simplest and most efficient way to build MCP servers, enabling developers to create powerful AI tools with minimal effort.
In this tutorial, we will:
If you’re keen to get hands-on with Designing Agentic Systems with LangChain, I recommend checking out our course.
The latest version of Gradio (5.32.0) now natively supports the MCP, making it incredibly easy to build and run MCP servers. All you need to do is enable MCP support either via a simple code argument or an environment variable.
Gradio MCP servers use the Server-Sent Events (SSE) protocol, which provides real-time, one-way communication from the server to the client—perfect for streaming responses from LLMs.
1. Install the latest version of Gradio with MCP support.
pip install -U "gradio[mcp]"2. Build a Gradio app that takes a city name as input and returns weather data (mock data in this case). This is a great starting point, especially if you are already familiar with the Gradio framework.
import gradio as gr
def check_weather(city):
"""
Simple weather checker function (mock data for demonstration).
Args:
city (str): The city name to check weather for
Returns:
str: Weather information for the city
"""
# Mock weather data for demonstration
weather_data = {
"london": "Cloudy, 15°C",
"paris": "Sunny, 22°C",
"tokyo": "Rainy, 18°C",
"new york": "Partly cloudy, 20°C",
"sydney": "Sunny, 25°C",
}
city_lower = city.lower().strip()
if city_lower in weather_data:
return f"Weather in {city.title()}: {weather_data[city_lower]}"
else:
return f"Weather data not available for {city}. Try: London, Paris, Tokyo, New York, or Sydney"
demo = gr.Interface(
fn=check_weather,
inputs=[gr.Textbox("London", label="Enter city name")],
outputs=[gr.Textbox(label="Weather Info")],
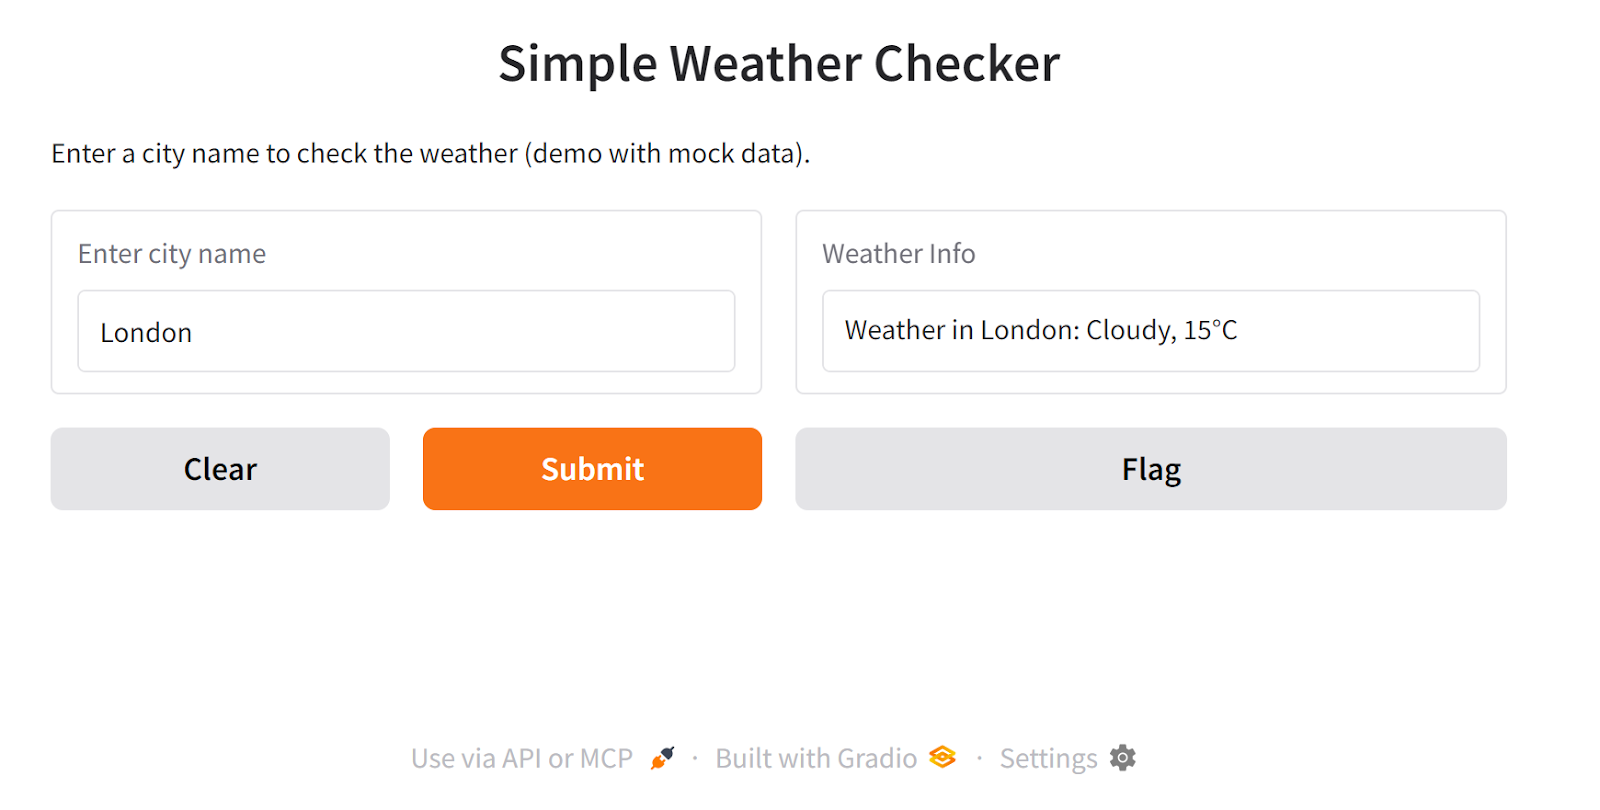
title="Simple Weather Checker",
description="Enter a city name to check the weather (demo with mock data).",
)
if __name__ == "__main__":
demo.launch(mcp_server=True)3. There are two ways to enable MCP support in Gradio:
mcp_server Argument: demo.launch(mcp_server=True)export GRADIO_MCP_SERVER=True4. Save the Python file test.py and run it.
$ python test.py
* Running on local URL:  http://127.0.0.1:7860
* To create a public link, set `share=True` in `launch()`.

🔨 MCP server (using SSE) running at: http://127.0.0.1:7860/gradio_api/mcp/sse
You will see two URLs in the terminal output:
5. Open the app URL (http://127.0.0.1:7860) in your browser. Enter a city name (e.g., Tokyo) and check the weather.
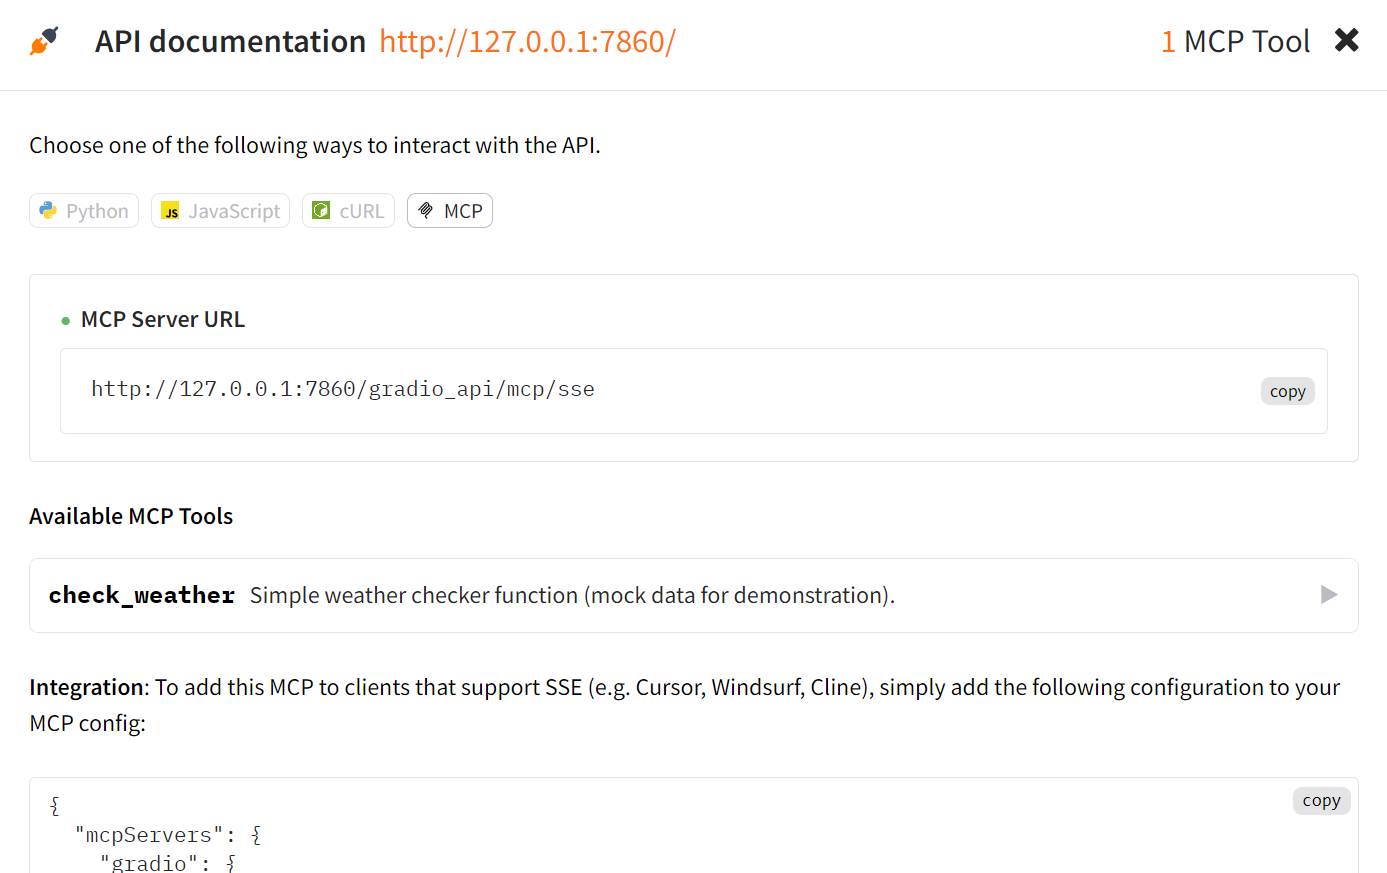
6. At the bottom of the app, click the "Use via API or MCP" button. This will display additional information about your app's API and MCP server.
7. To test the MCP server with Cursor AI, open Cursor Settings, navigate to the “MCP” tab, and click the “+ Add new global MCP server” button.

8. Add the following JSON configuration to the MCP settings file:
{
  "mcpServers": {
    "gradio": {
      "url": "http://127.0.0.1:7860/gradio_api/mcp/sse"
    }
  }
}
9. Save the file. You will now see an active MCP server named gradio with the tool check_weather.

To test this MCP server, we will create a new chat in agent mode of the Cursor using (CTRL +T) and ask about the weather in Tokyo. Cursor will ask for permission to run the MCP tool. Approve it.
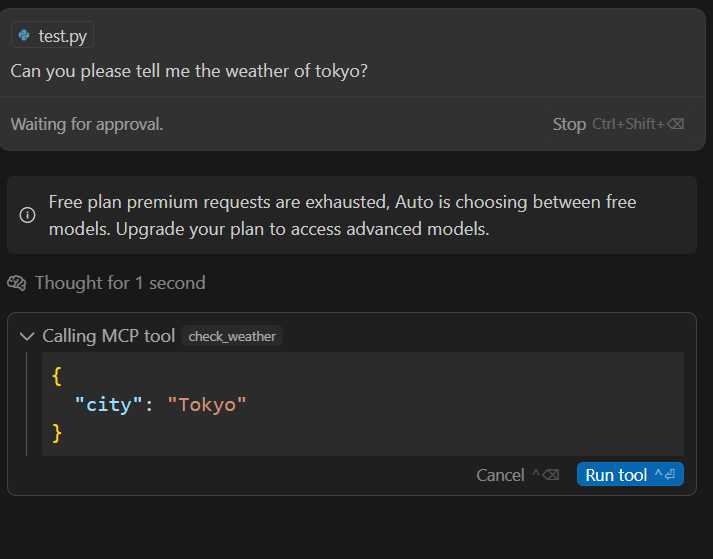
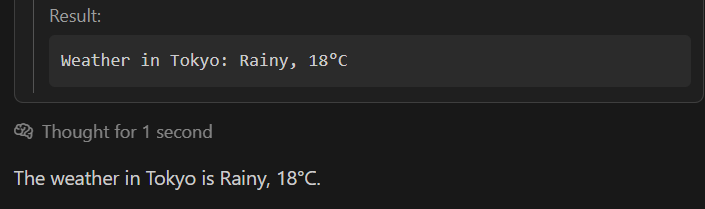
As a result, the MCP server will fetch the weather data and return the result:
Let’s create something practical and production-ready. In this project, we will build a multi-tool MCP server using Gradio.
The server will include two tools:
This server will help users plan their travels by providing both weather updates and relevant news.
We will set up the MCP server, test it locally, deploy it on Hugging Face Spaces, and test the deployed server using Cursor AI and Claude Desktop.
We need to create the new spaces by going to https://huggingface.co/new-space, adding the app's name, providing a short description, and selecting Gradio as the template.
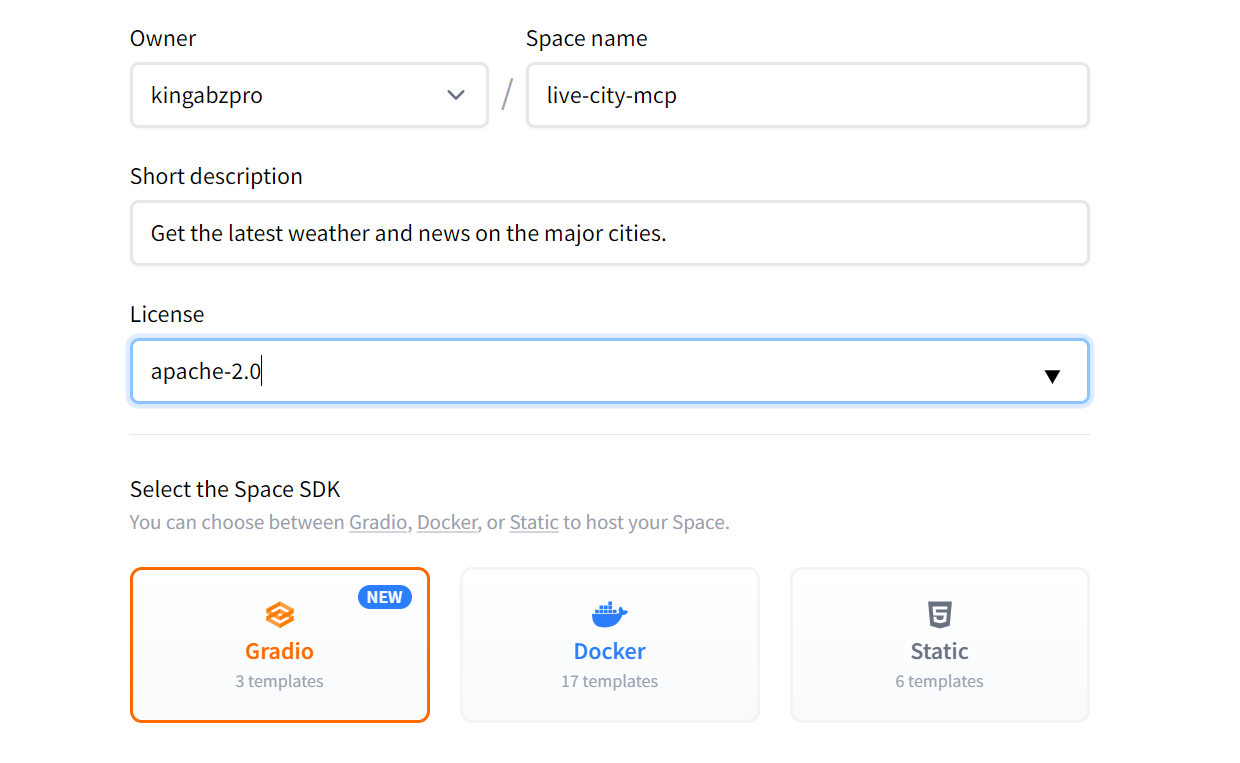
Source: new-space
Once created, you will be redirected to your new Space. Follow the instructions provided to set it up.
Clone the repository to your local project directory
git clone https://huggingface.co/spaces/kingabzpro/live-city-mcpFor this project, we will use the Tavily API for web search capabilities, please create an account on Tavily AI and generate an API key.
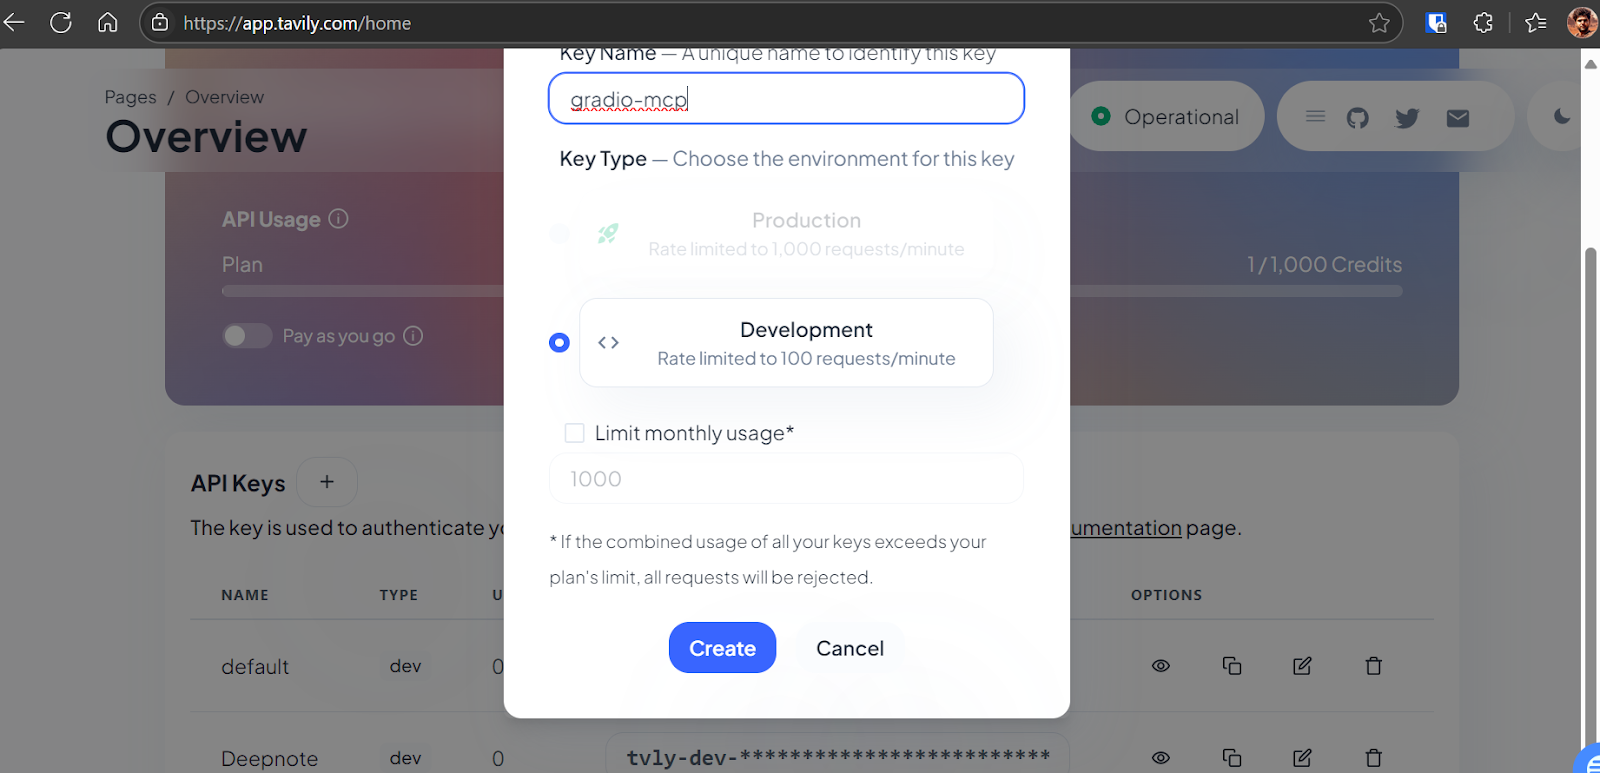
Source: Tavily AI
Then, save the API key as an environment variable on your local system
TAVILY_API_KEY="API-KEY"After that, install the Tavily Python SDK
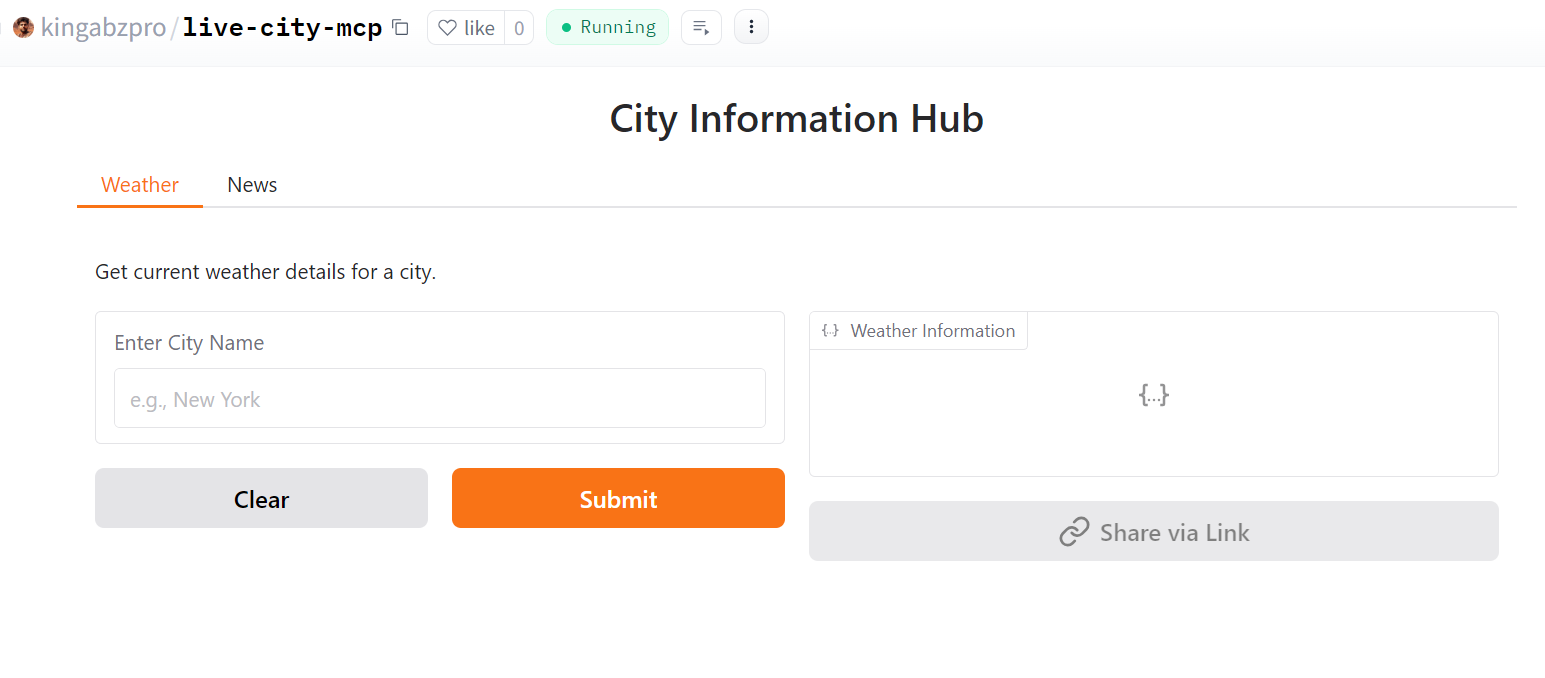
pip install tavily-pythonThis MCP server has two tools, both of which use the Tavily API to access the latest information from the web. The first tool takes a city name and generates a detailed weather report, while the second tool takes the city name and lists the headlines for the top five news stories in the area. We created a graphical interface for each tool and then combined them using a Tabbed Interface.
app.py:
import gradio as gr
from tavily import TavilyClient


def get_city_weather_info(city_name):
    """
    Search for current weather information about a city using Tavily search API

    Args:
        city_name (str): Name of the city
        api_key (str): Your Tavily API key

    Returns:
        dict: Search results containing weather information
    """
    # Initialize Tavily client
    client = TavilyClient()

    # Search for current weather information
    search_query = f"current weather in {city_name} temperature humidity conditions"

    try:
        # Perform the search
        response = client.search(
            query=search_query, search_depth="basic", max_results=5
        )

        # Extract relevant information from search results
        weather_info = {"city": city_name, "search_query": search_query, "results": []}

        # Process each search result
        for result in response.get("results", []):
            weather_info["results"].append(
                {
                    "title": result.get("title", ""),
                    "content": result.get("content", ""),
                    "url": result.get("url", ""),
                }
            )

        # Add the answer if available
        if "answer" in response:
            weather_info["summary"] = response["answer"]

        return weather_info

    except Exception as e:
        return {
            "city": city_name,
            "error": f"Failed to fetch weather information: {str(e)}",
        }


def get_city_news(city_name):
    """
    Fetches the top 5 news articles for a given city using the Tavily API.

    Args:
        city_name (str): Name of the city

    Returns:
        dict: News results containing the top 5 articles or an error message
    """
    # Initialize Tavily client
    client = TavilyClient()

    # Search query for news about the city
    search_query = f"Top 5 latest news articles about {city_name}, including major events, politics, economy, and local updates."

    try:
        # Perform the search
        response = client.search(
            query=search_query,
            search_depth="advanced",
            max_results=5,
        )

        # Extract relevant information from search results
        news_info = {"city": city_name, "search_query": search_query, "articles": []}

        # Process each search result
        for result in response.get("results", []):
            news_info["articles"].append(
                {
                    "title": result.get("title", ""),
                    "content": result.get("content", ""),
                    "url": result.get("url", ""),
                }
            )

        # Add the answer if available
        if "answer" in response:
            news_info["summary"] = response["answer"]

        return news_info

    except Exception as e:
        return {"city": city_name, "error": f"Failed to fetch news: {str(e)}"}


# Create Gradio interfaces
weather_demo = gr.Interface(
    fn=get_city_weather_info,
    inputs=gr.Textbox(label="Enter City Name", placeholder="e.g., New York"),
    outputs=gr.JSON(label="Weather Information"),
    description="Get current weather details for a city.",
)

news_demo = gr.Interface(
    fn=get_city_news,
    inputs=gr.Textbox(label="Enter City Name", placeholder="e.g., London"),
    outputs=gr.JSON(label="News Articles"),
    description="Get the latest news articles for a city.",
)

# Create tabbed interface
demo = gr.TabbedInterface(
    [weather_demo, news_demo], ["Weather", "News"], title="City Information Hub"
)

if __name__ == "__main__":
    # Launch without MCP server to avoid initialization issues
demo.launch(share=False, mcp_server=True, debug=True)Before deploying the MCP server, it is essential to test it locally. Start the server, by running the following command in the terminal:
python app.pyOutput:
* Running on local URL:  http://127.0.0.1:7860
* To create a public link, set `share=True` in `launch()`.

🔨 MCP server (using SSE) running at: http://127.0.0.1:7860/gradio_api/mcp/sse
Open your browser and navigate to http://127.0.0.1:7860 and enter a city name in the input box. The server will return detailed weather information in JSON format.
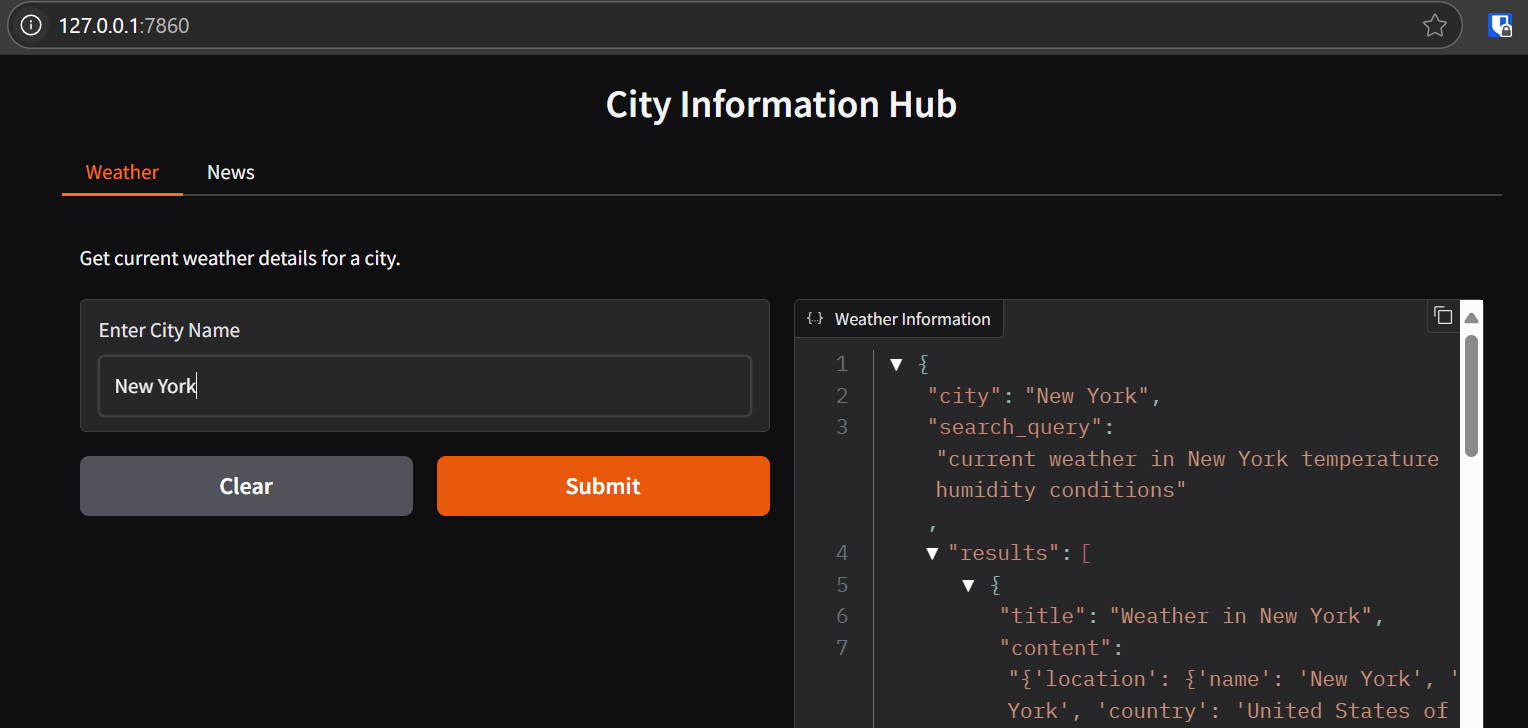
The application should work without issues, providing accurate weather and news data for the entered city.
To deploy the server, follow these steps:
1. Create the requirements.txt file and add the add the following dependency:
tavily-python==0.7.32. We will commit the changes and then push them to the Hugging Face Space.
git add .
live-city-mcp  git commit -m "weather and news MCP"
git push
Once pushed, the Hugging Face Space will start building.
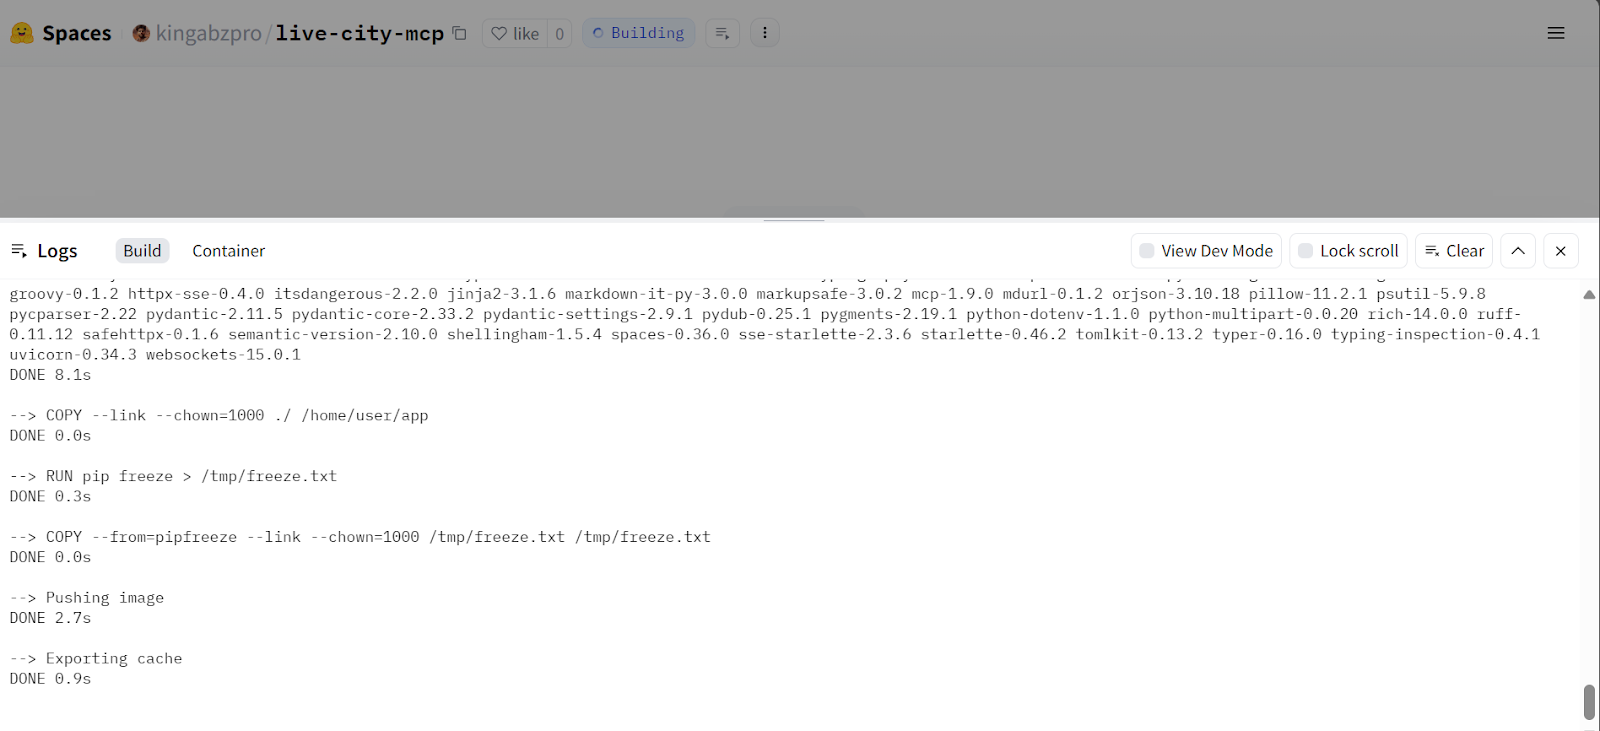
Source: Live City Mcp
After about a minute, the MCP server will be live and accessible at Live City Mcp.
Source: Live City Mcp
3. Before using it as an MCP server, we need to set the environment variable with the Tavily access token. To do this, go to the Spaces settings, scroll down, and click on the "New Secret" button. Then, add the API key and the Tavily API name.
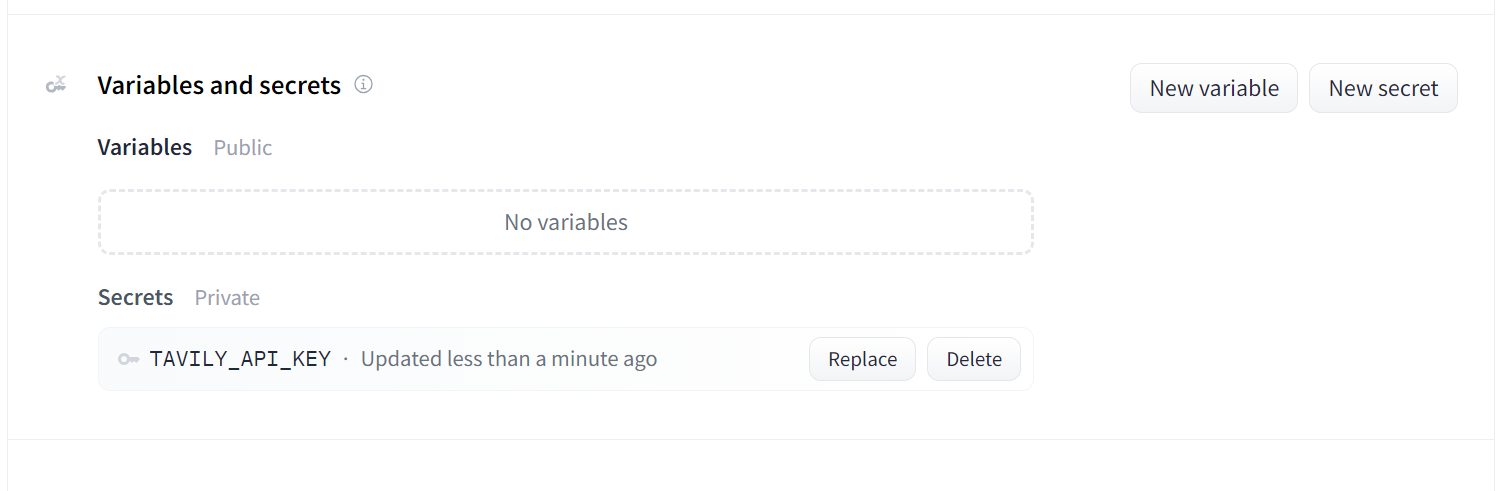
Source: live-city-mcp/settings
Our MCP is deployed and functioning properly. Now, we will set up the MCP client. First, we will configure Cursor AI. Navigate to the Cursor Settings, click on the MCP tab, and then click the button labeled "+Add new global MCP server." Enter the following code:
{
"mcpServers": {
"weather-news": {
"url": "https://kingabzpro-live-city-mcp.hf.space/gradio_api/mcp/sse"
}
}
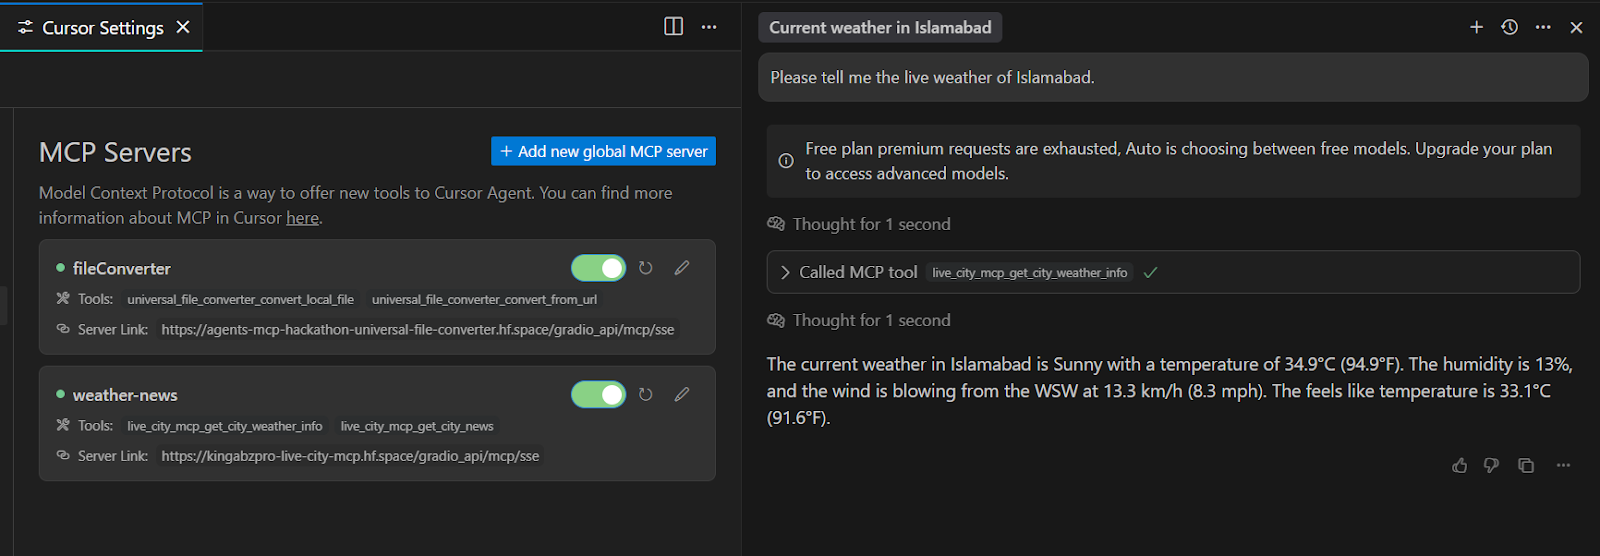
}You will see that the weather-news MCP is running fine with two tools. Let's ask a question about the weather in Islamabad.
As we can see, it has responded quickly and accurately.
We can verify its correctness by searching online and checking the weather on AccuWeather.
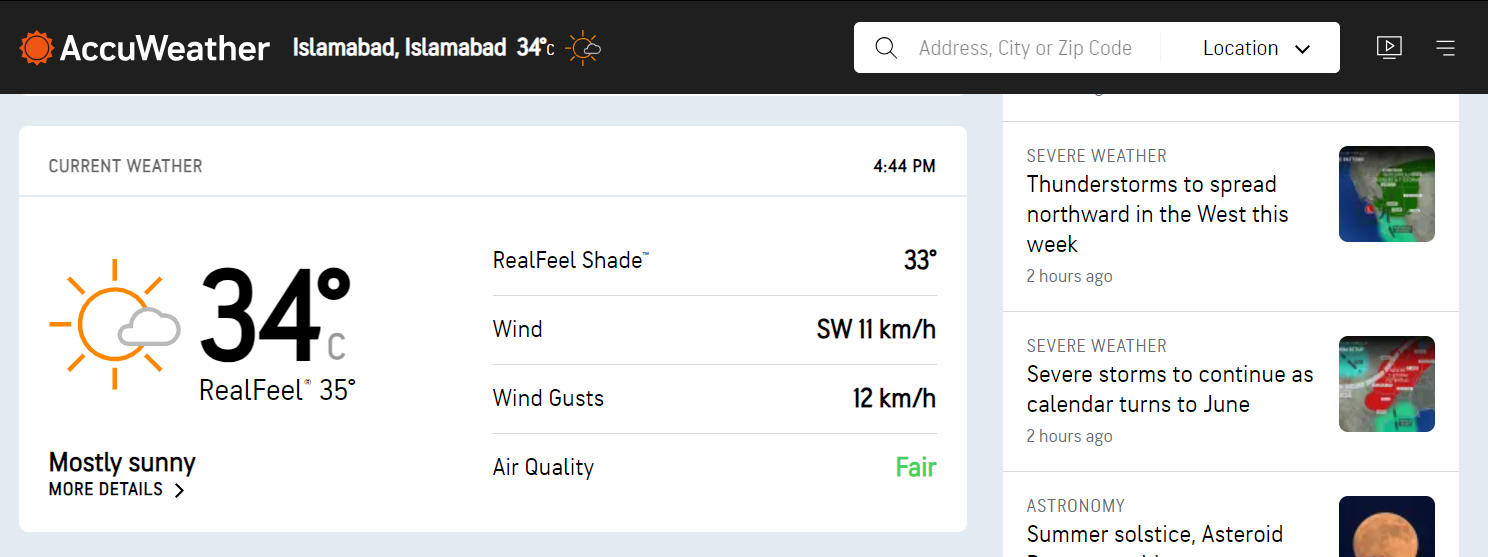
Source: AccuWeather
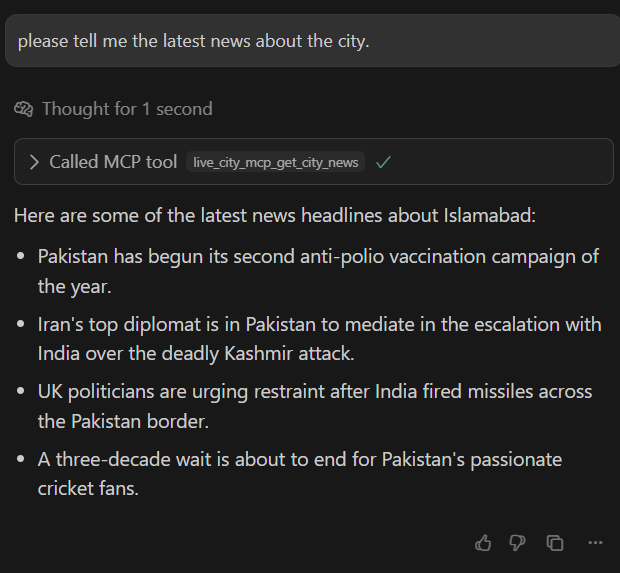
Next, let’s test the second tool by asking about the news around Islamabad.
As a result, we received a list of four news headlines about Pakistan. If the Tavily API cannot find anything related to the latest Islamabad news, it will switch to the country-level news instead.
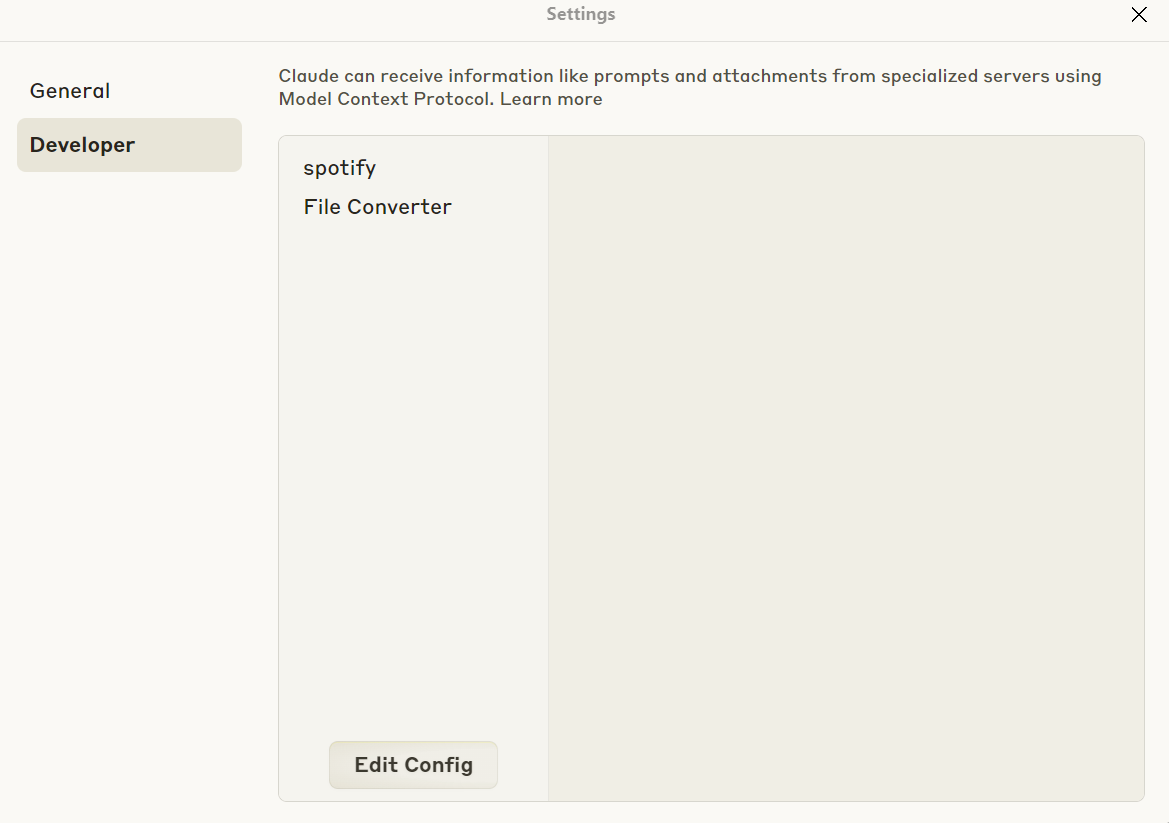
Let’s set up Claude Desktop by going to the settings, clicking on the “Developer” option, and clicking on the “Edit Config” button. This will take you to the folder where you need to edit the claude_desktop_config.json file.
The Claude Desktop does not currently support SSE-based MCP Servers. In such cases, you can use a tool called mcp-remote.
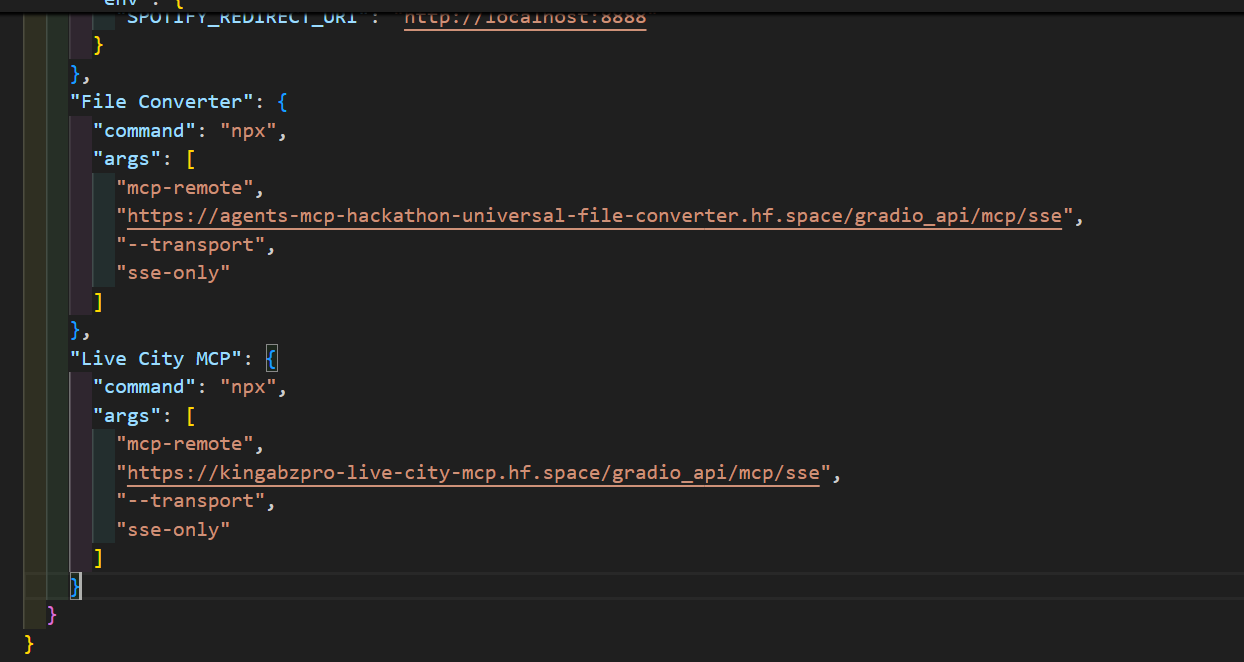
To run mcp-remote, you must first install Node.js by visiting the Download Node.js® page. Then, add the following code to your claude_desktop_config.json file:
 "Live City MCP": {
      "command": "npx",
      "args": [
        "mcp-remote",
        "https://kingabzpro-live-city-mcp.hf.space/gradio_api/mcp/sse",
        "--transport",
        "sse-only"
      ]
    }
Here is the example of adding the MCP server configuration.
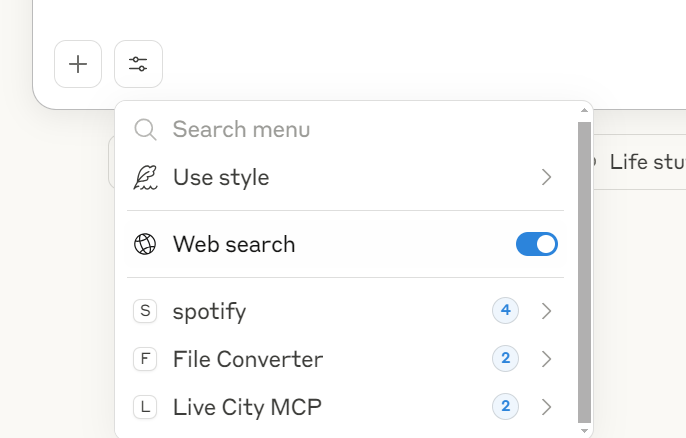
Once you have completed this, please exit the Claude Desktop application and relaunch it. You will then see access to the new MCP server called “Live City MCP,” which comes with two available tools.
I am traveling to Ireland soon, so I asked about the weather in Dublin and received really good results.

The best way to access the MCP server is through Claude Desktop. It is interactive and provides extra capabilities for tools use and displaying the information in a clear manner.
If you are already familiar with creating Gradio applications for machine learning projects, converting your existing app into an MCP server has never been easier. With just a single argument (mcp_server=True), your Gradio app can also function as an MCP server, enabling seamless integration with tools like Cursor AI and Claude Desktop. This opens up exciting possibilities for connecting your AI applications to external systems and workflows.
In this fun tutorial, we explored the basics of Gradio MCP, learned how to build and test an MCP server, and worked on a practical project using the Tavily API to fetch live weather data and city news. By the end, we deployed the project on Hugging Face Spaces and tested it with popular MCP-compatible clients.
If you’re eager to learn more about agentic AI and other concepts we’ve covered in this tutorial, I recommend the resources below:
Top DataCamp Courses
Course
Course
Course
Tutorial
Aashi Dutt
Tutorial
Aryan Irani
Tutorial
Aashi Dutt
Tutorial
Abid Ali Awan
Tutorial
Bex Tuychiev
Tutorial
Bex Tuychiev