Track
Developing AI Applications
21 hr
n8n has emerged as a popular and powerful framework in agentic AI. It allows us to build automated workflows without the need for complex coding.
In this article, I will explain step by step how to make the most of this robust platform to automate two distinct processes:
We keep our readers updated on the latest in AI by sending out The Median, our free Friday newsletter that breaks down the week’s key stories. Subscribe and stay sharp in just a few minutes a week:
n8n is an open-source automation tool that helps us connect various apps and services to create workflows, much like a digital assembly line. It allows users to visually design these workflows with nodes, each representing a different step in the process.
With n8n, we can automate tasks, manage data flow, and even integrate APIs, all without needing extensive programming skills. Here's an example of an automation we'll build in this tutorial:
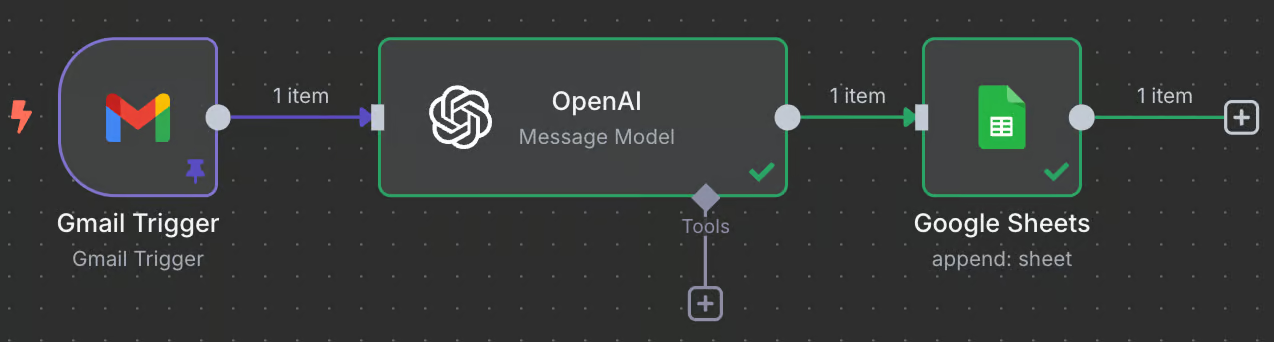
Without going into details, here’s a description of what this automation does:
We have two options to use n8n:
Both options let you follow this tutorial at no cost. We’ll run it locally, but if you prefer to use the web interface, the steps are the same.
Note: n8n 2.0 shipped in late 2025 and introduced a Draft/Publish workflow system, autosave (January 2026), an updated focus panel for editing nodes without losing canvas context, and Task Runners that isolate workflow execution for better security.
The workflows below run on 2.x — if you're on 1.x, consider upgrading before following along.
n8n’s official repository explains how to set up n8n locally. The simplest way is to:
Download and install Node.js from the official website.
Open a terminal and run the command npx n8n.
That's it! After running the command, you should see this in the terminal:
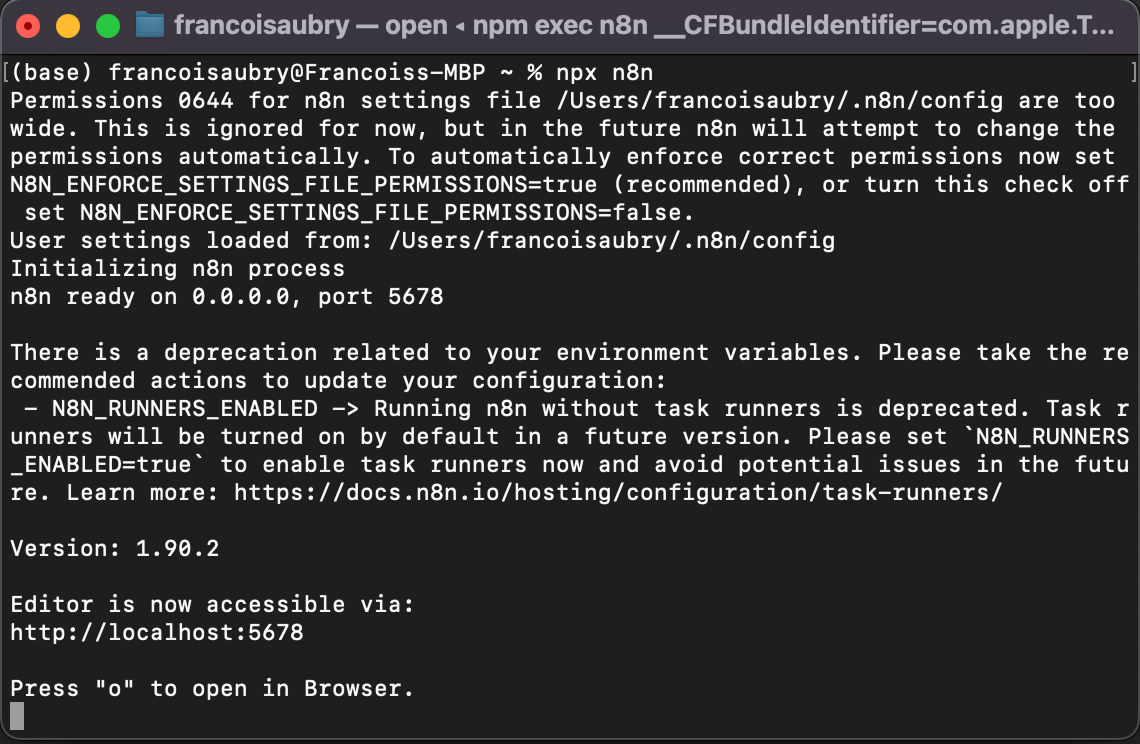
To open the interface, either press "o" on the keyboard or open the localhost URL shown in the terminal—in my case, http://localhost:5678.
Before we build our first automation, it's good to understand how n8n works. An n8n workflow consists of a sequence of nodes. It starts with a trigger node that specifies a condition for the workflow to be executed.
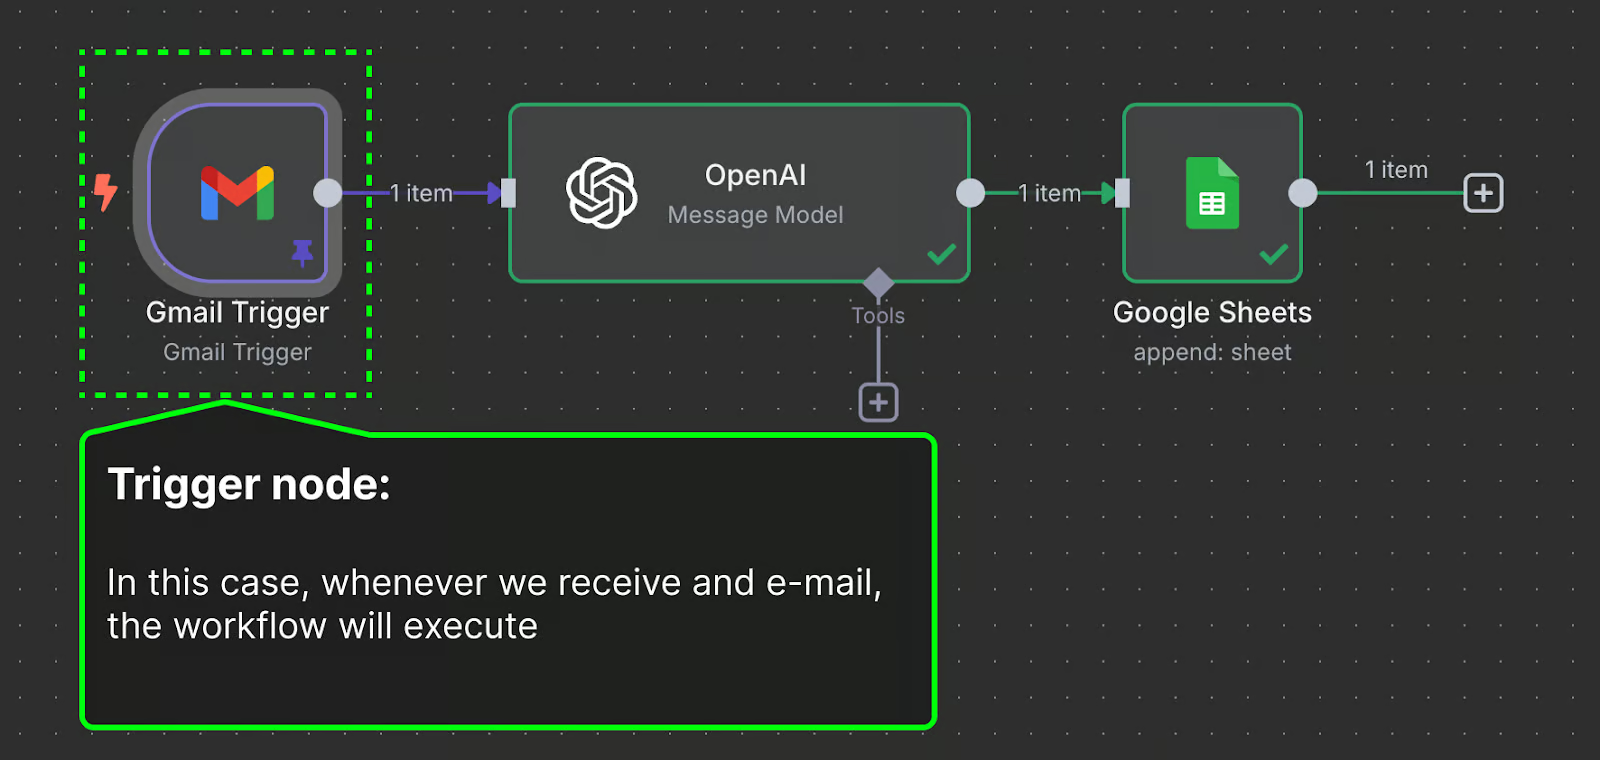
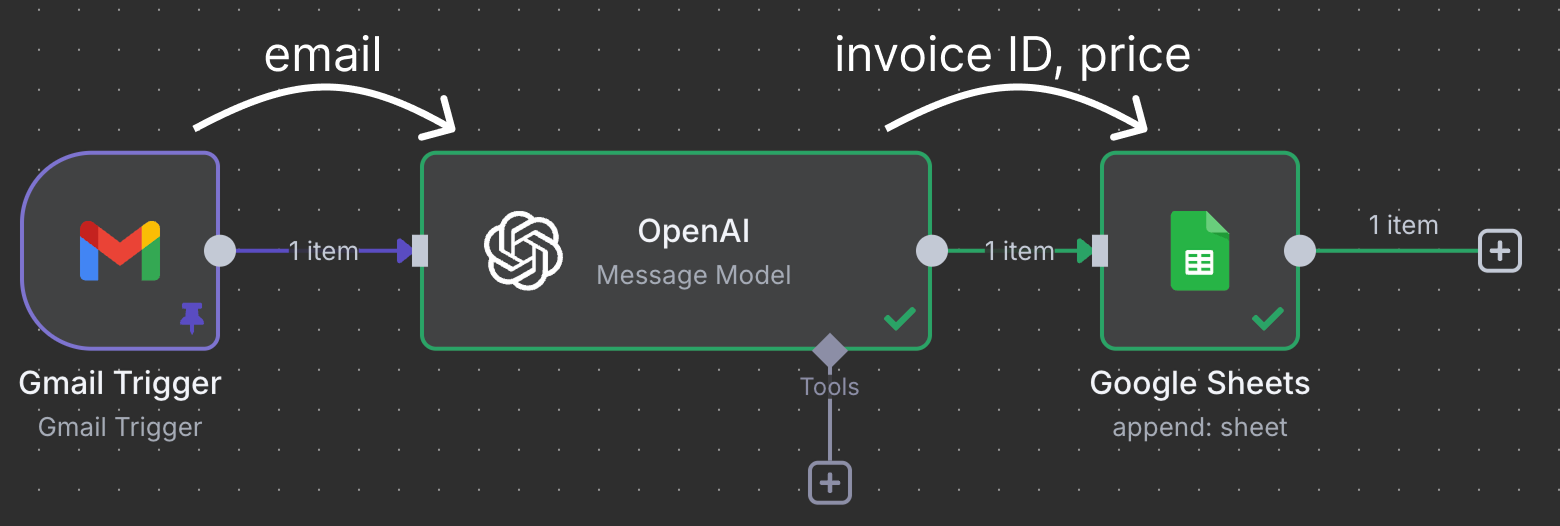
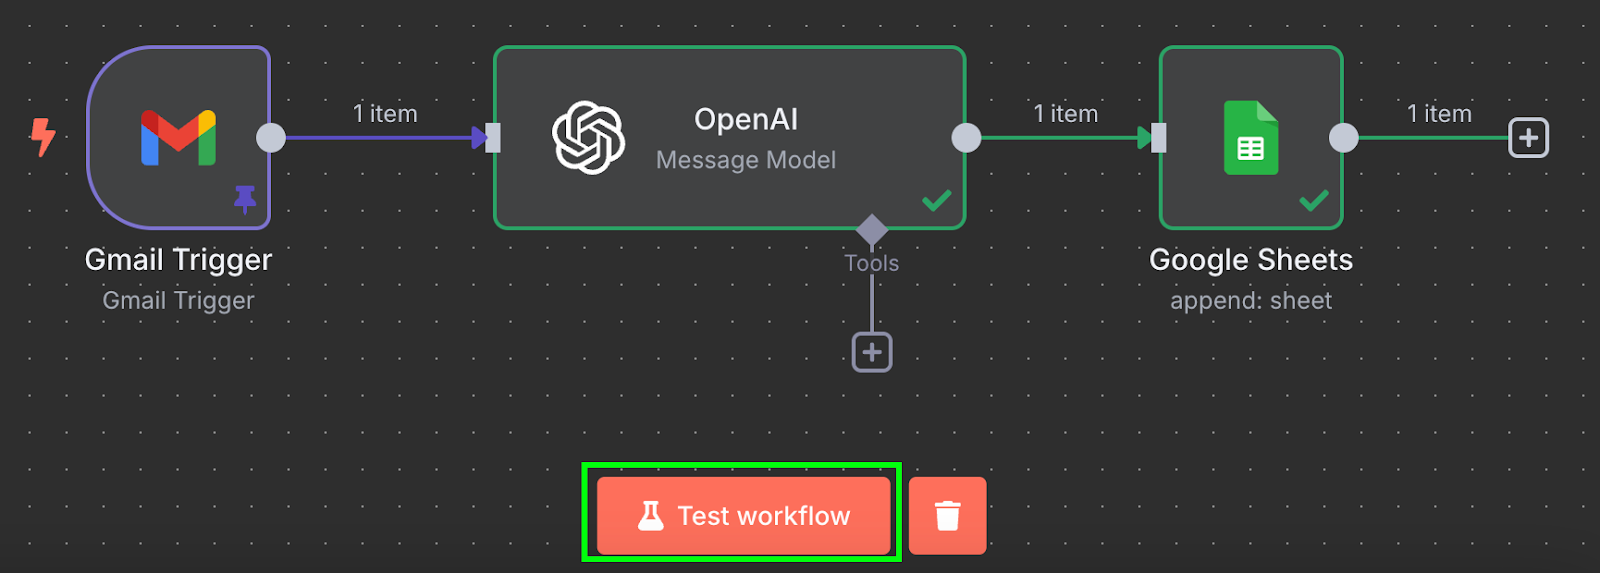
Nodes connect to move and process data. In this example, the Gmail trigger node connects to an OpenAI node. This means that the email is given to ChatGPT for processing. Finally, the output of ChatGPT is sent to a Google Sheet node, which connects to a Google Sheet in our Google Drive and writes a new line into a spreadsheet.
This particular workflow uses ChatGPT to identify invoices that need to be paid and assigns a line in the sheet with the invoice ID and the price.
n8n workflows can be much more complex. n8n supports over 400 official integrations (core nodes), plus 600+ community-built nodes and custom connections via the HTTP Request node — so we can't cover all of them in a tutorial.
Instead, I'll focus on giving you a general idea of how it works and the necessary background to explore it on your own. If there's a tool you use regularly, chances are that either n8n supports it or you can manually integrate it.
In this section, we learn how to build the workflow above.
This is a real use case that I use to manage my rental invoices. I have a house with a few rooms that I rent. The bills are split equally between all tenants. Each time I receive an invoice, I need to add the total to a spreadsheet that is shared with my tenants.
I have a specific email address to which invoices related to house bills are forwarded. This way, I know all emails in that mailbox correspond to an invoice. I send the content of the email to ChatGPT to identify the invoice ID and the total amount to be paid. Then this information is added to a new row in the shared spreadsheet.
To start a new workflow, we need to click the "Add first step..." button.

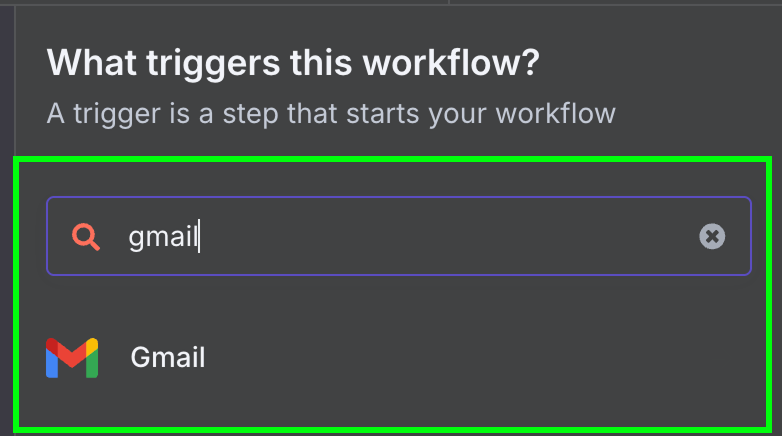
Because it's the first node, it must be a trigger, so we're presented with a panel to select a trigger node. A trigger node defines the conditions for the workflow to execute.
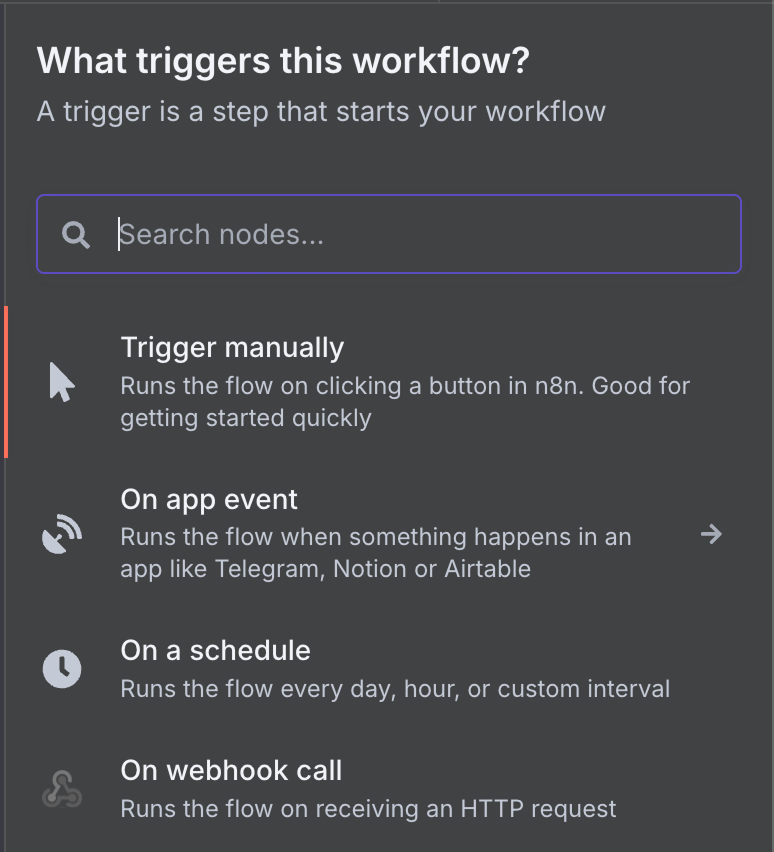
There's a wide range of possible trigger nodes. Let's select a Gmail trigger node by typing "gmail" in the search box and clicking the Gmail node.
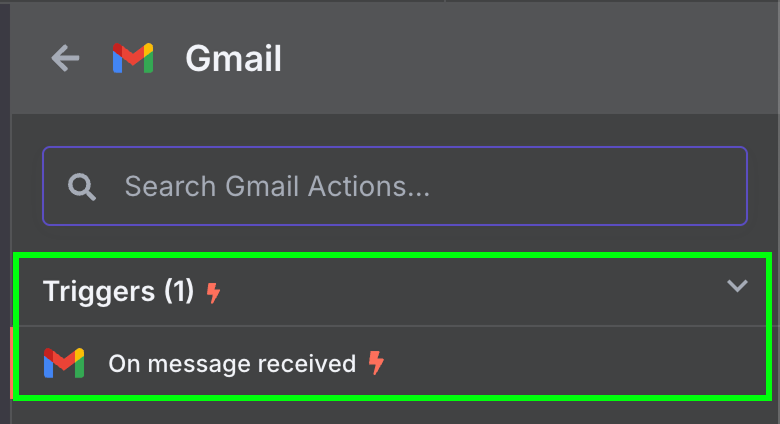
Then, we choose the only available trigger for Gmail: "On message received".
This will open the node configuration panel, where we need to configure our Gmail credentials to allow the n8n workflow to access our Gmail account. To do so, click "New credential". This will open the following window:
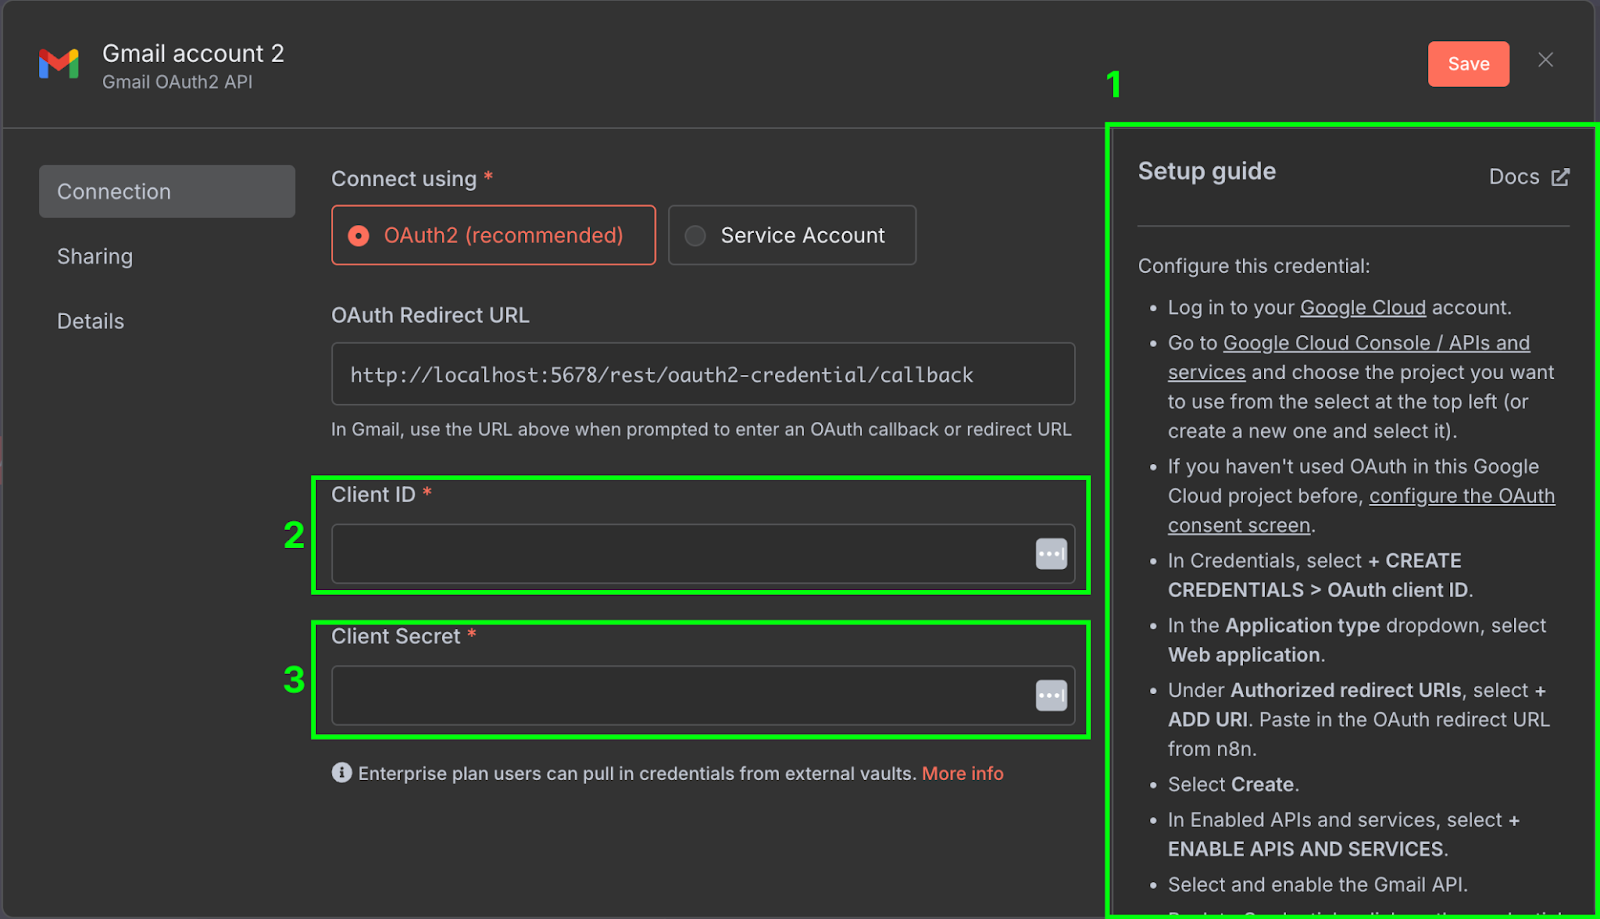
On the right-hand side (1), there's a setup guide explaining the steps required to configure the credentials on Google Cloud. The guides provided by n8n are quite comprehensive, so we won't repeat the steps here. Make sure to also enable the Gmail API in the Google Cloud Console.
Once it's configured, we need to copy the client ID (2) and client secret (3) from Google Cloud into the credential configuration of n8n.
To make sure everything is correctly configured, we can test the node by clicking "Fetch Test Event."
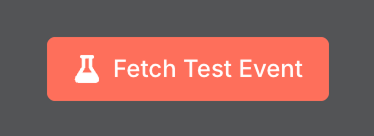
After the test, we should see the latest email we've received in our inbox in the output section. The content of the email is the snippet field.
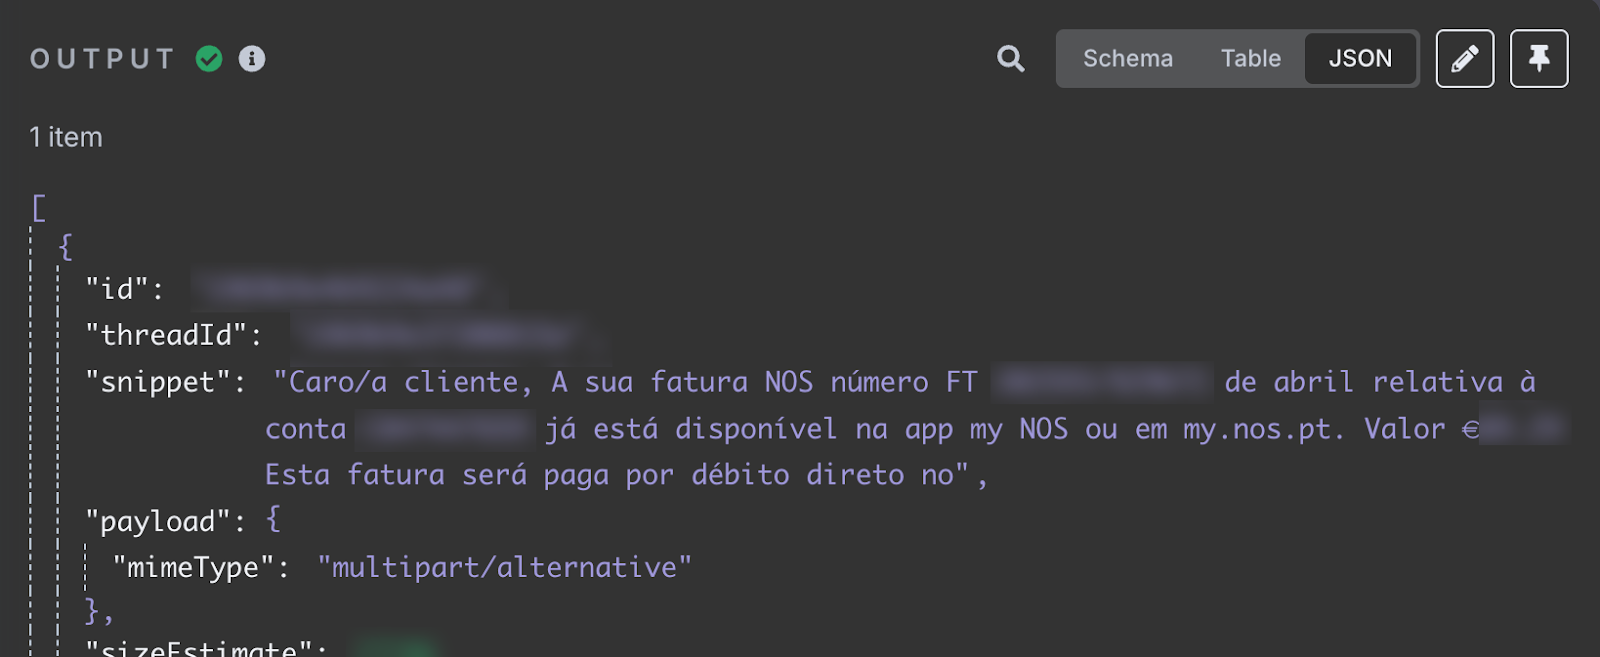
The snippet field stores the email content. It says that my April internet invoice is available. It provides the invoice ID and total amount to be paid. This is the information we want to add to the spreadsheet.
For testing purposes, I recommend pinning the output by clicking the pin button in the top right corner:
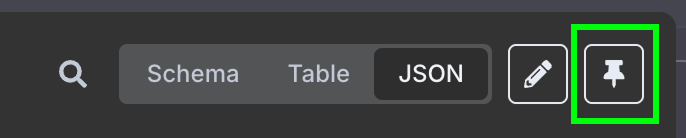
This will lock the result to the trigger, meaning that whenever we run this workflow, this same output is used, making it easier to test the workflow because the results won't be affected by any new emails we may receive. We will unpin it once the workflow is properly set up.
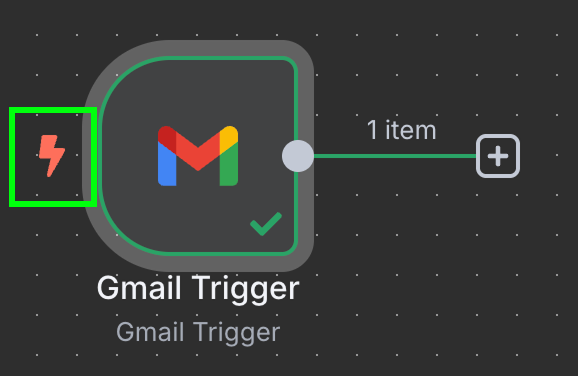
At this stage, our workflow should have a single trigger node (we can see it's a trigger node because of the small lightning bolt marker on the left).
Note that, since you likely won't have an email invoice in your mailbox, later on, ChatGPT will likely give you an answer that doesn't make sense. If you want to test this exact workflow, you can send yourself a test e-mail with the following content (or something similar):
Dear customer,

Your internet invoice number FT 2025**/****** for April is now available in the attachment.

Amount

€**.**
This invoice must be paid by 19/05/2025.
After you send this, you must unpin the result, re-run the Gmail node, and pin the new result.
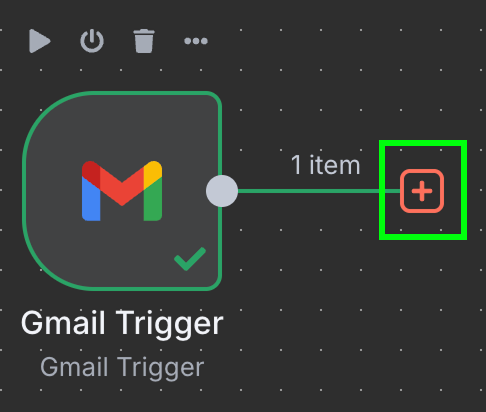
The next step is to configure the OpenAI node. Start by clicking the "+" button on the right of the Gmail trigger node:
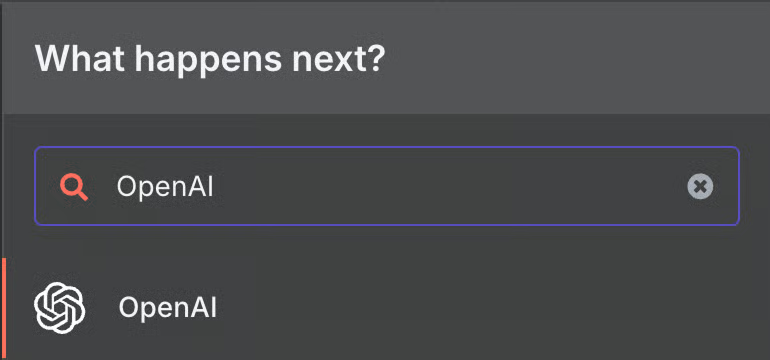
Type "OpenAI" and select the corresponding option from the list.
Then, under "Text Actions", select the "Message a model" node. This node is used to message an LLM.

As before, we need to create a credential to access OpenAI. Note that once a credential is created, it can be reused in any workflow. We don't need to set it each time.
For the OpenAI credential, all we need is an API key. If you don't have one, you can create one here. If you have trouble doing this, n8n also provides a guide for this.
In terms of configuration, we need to select the AI model we want to use and the message we send to the model.
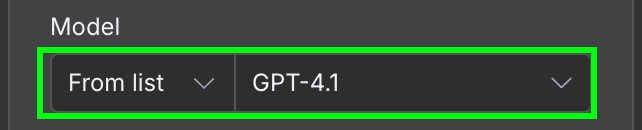
For the model, we'll use GPT-4.1. OpenAI has since released the GPT-5 family (5.4, 5.4-mini, 5.5) and retired 4.1 from ChatGPT, but it's still available via the API and is plenty for simple extraction like this.
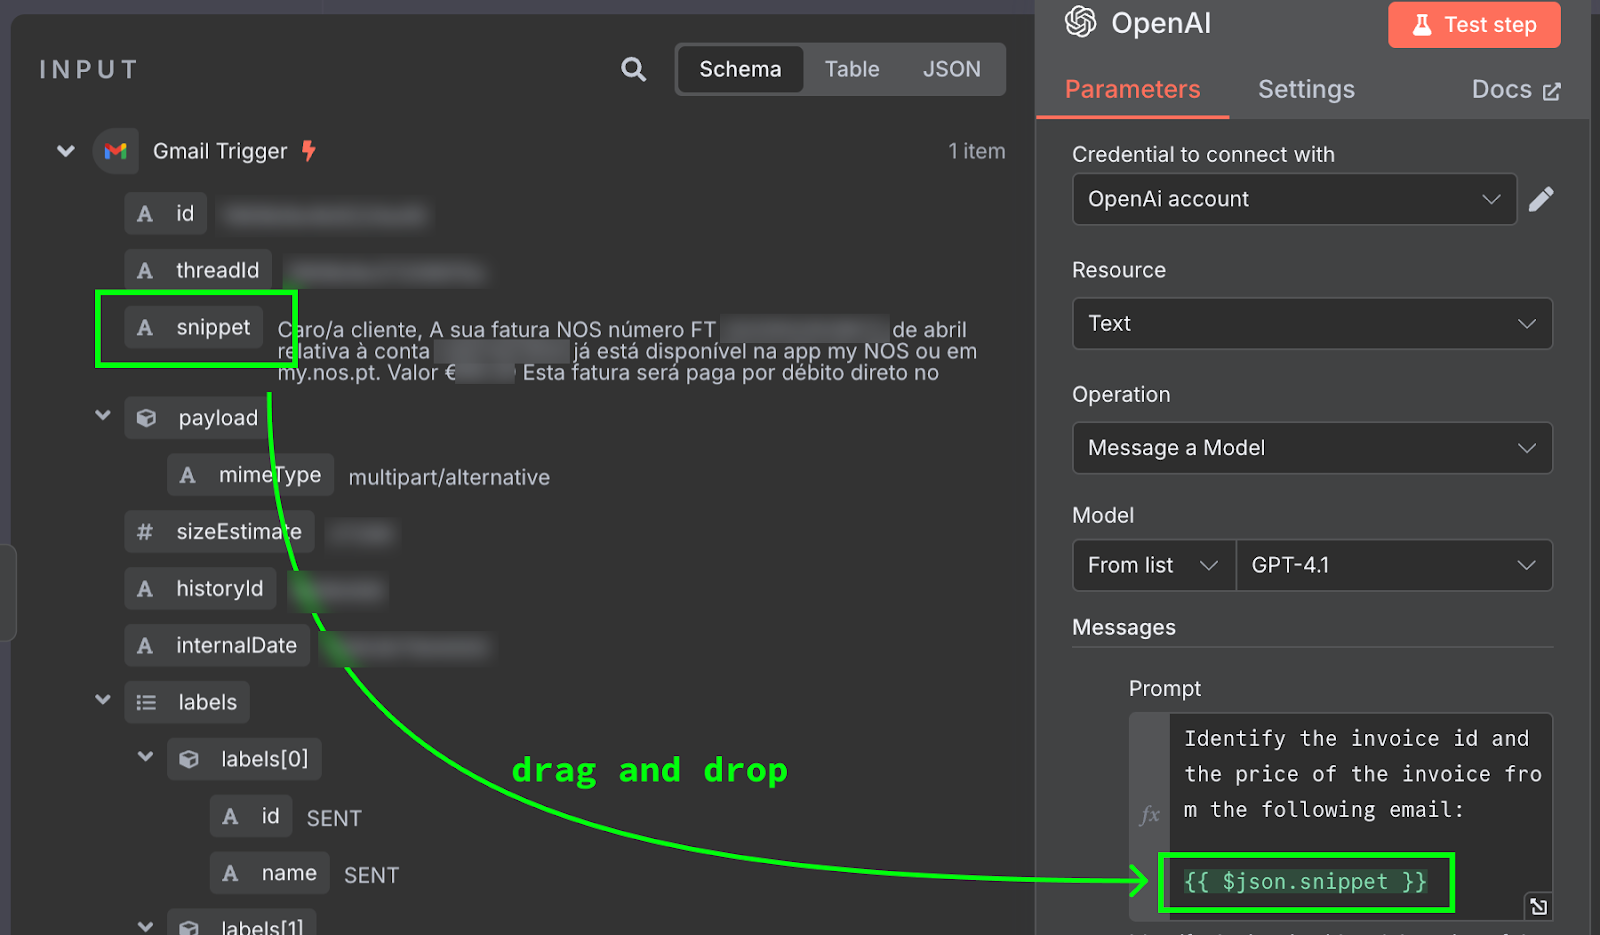
In the message field, we need to provide the prompt. For this example, we give the model the content of the email and ask it to identify the invoice ID and the total amount to pay. Here's the prompt I used:
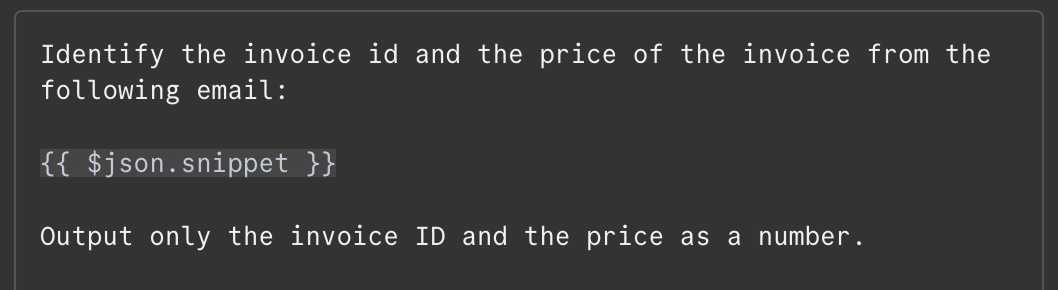
The content of the email is provided as {{ $json.snippet }}. In n8n, the prompt can contain variables that are populated from the output of previous nodes, the email in our case. The list of available fields can be seen on the left. We can type the field manually or drag and drop it into the prompt.
To test this, we click the "Test Step" button at the top of the configuration panel. The result is displayed on the right:
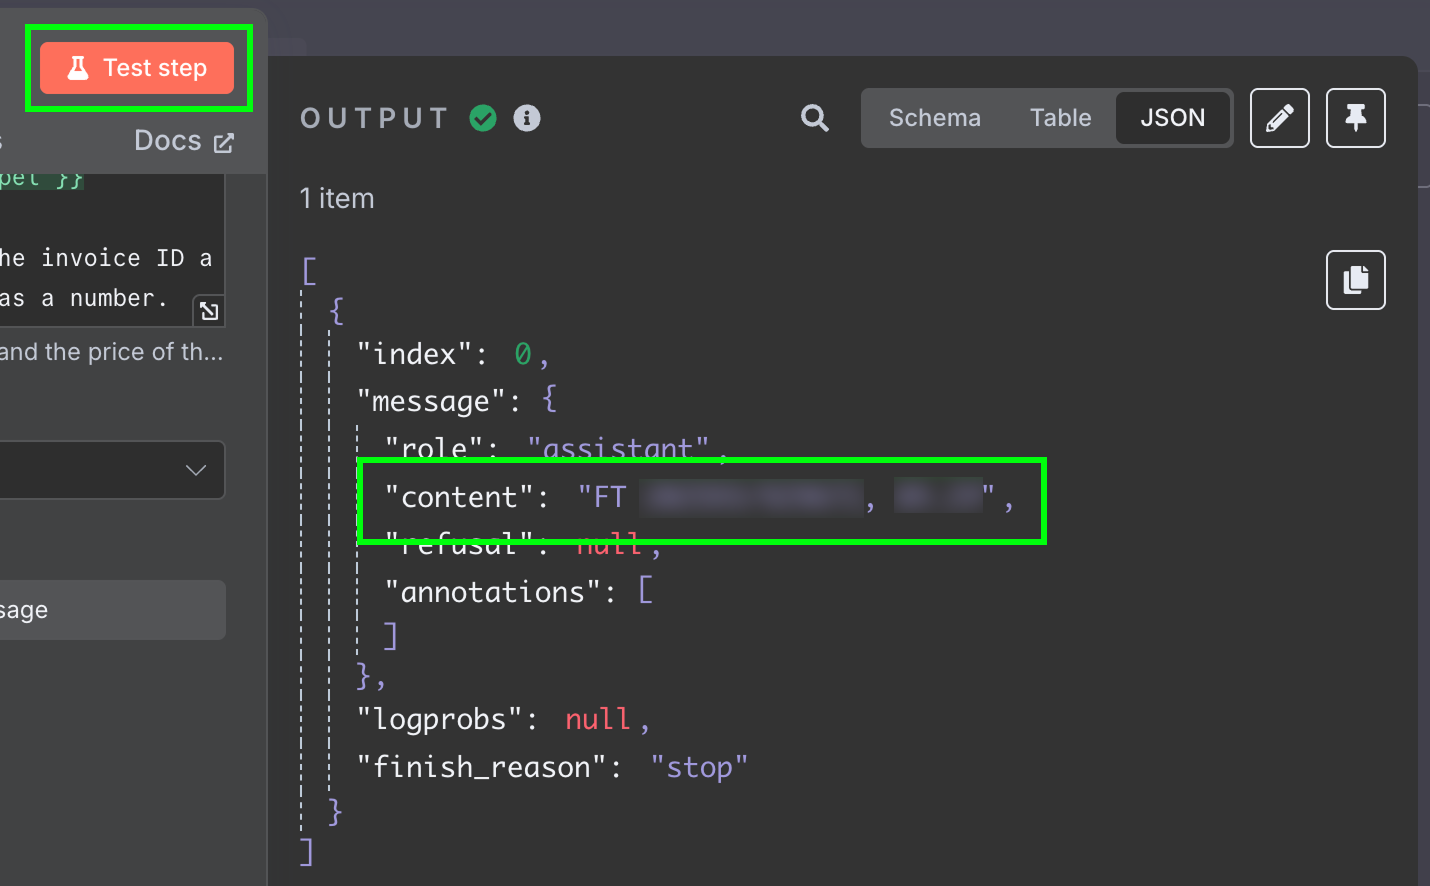
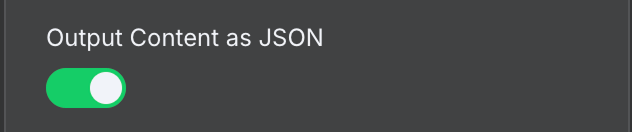
The result is a string with the answer from the model. We would like to have the two fields separately, so we don't have to further process the message. We can achieve this by changing the output of the LLM to JSON:
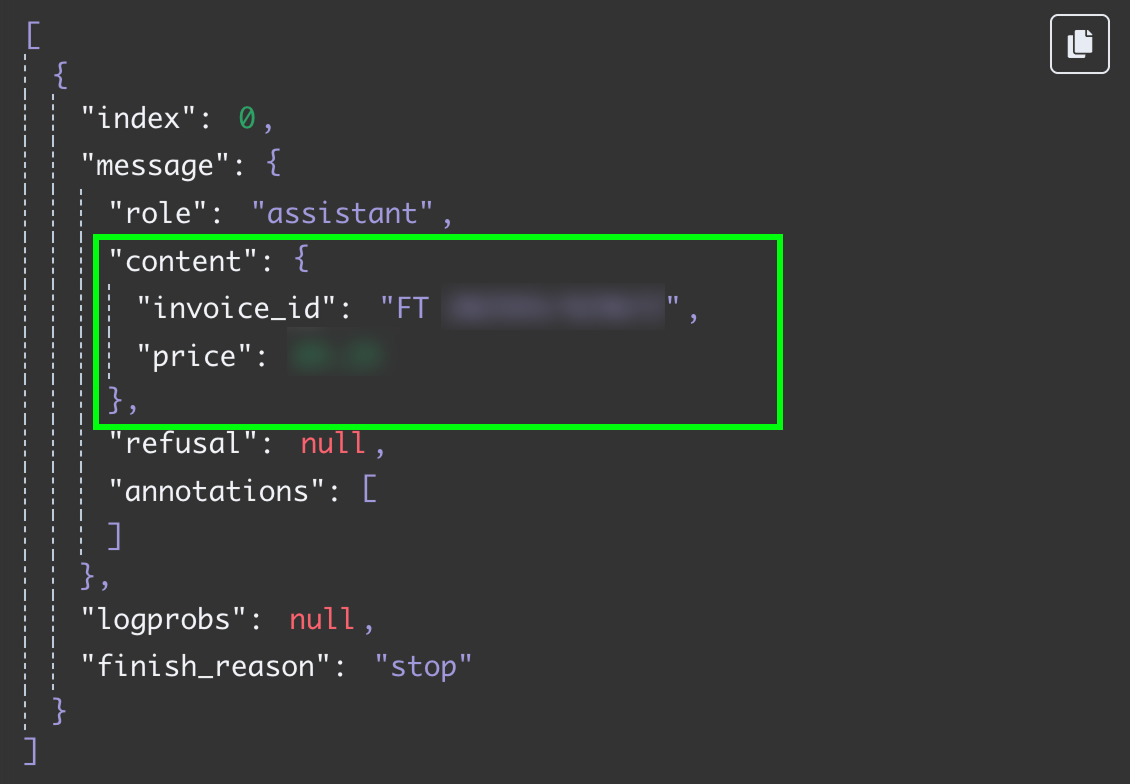
Testing this step again, we get the two fields as JSON data:
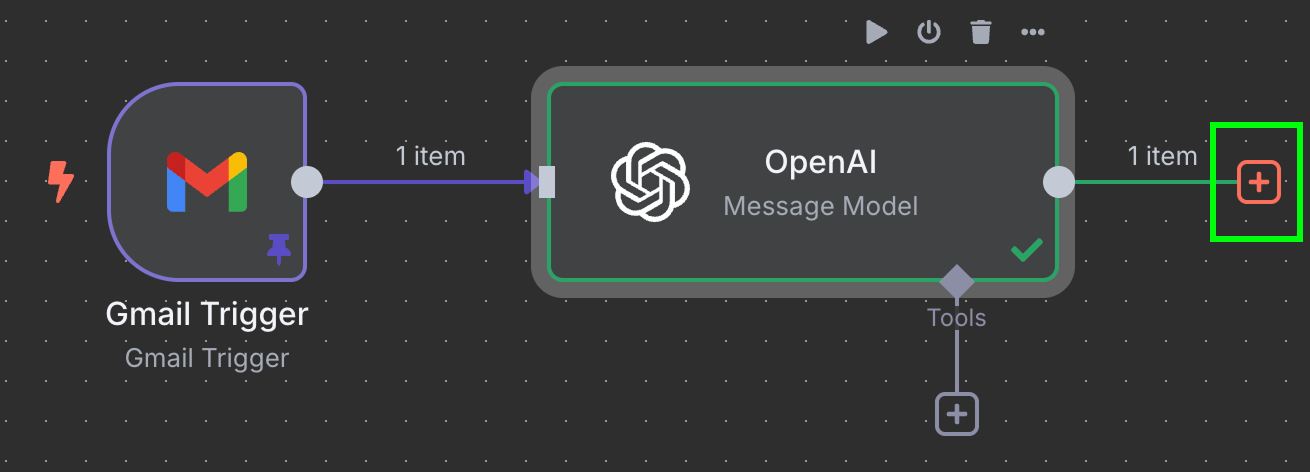
The final step in this workflow is to send the invoice ID and price to a new row in a Google Sheet. At this stage, we need to connect the output of the OpenAI node to Google Sheets. We do this as before by clicking the "+" button to the left of the node:
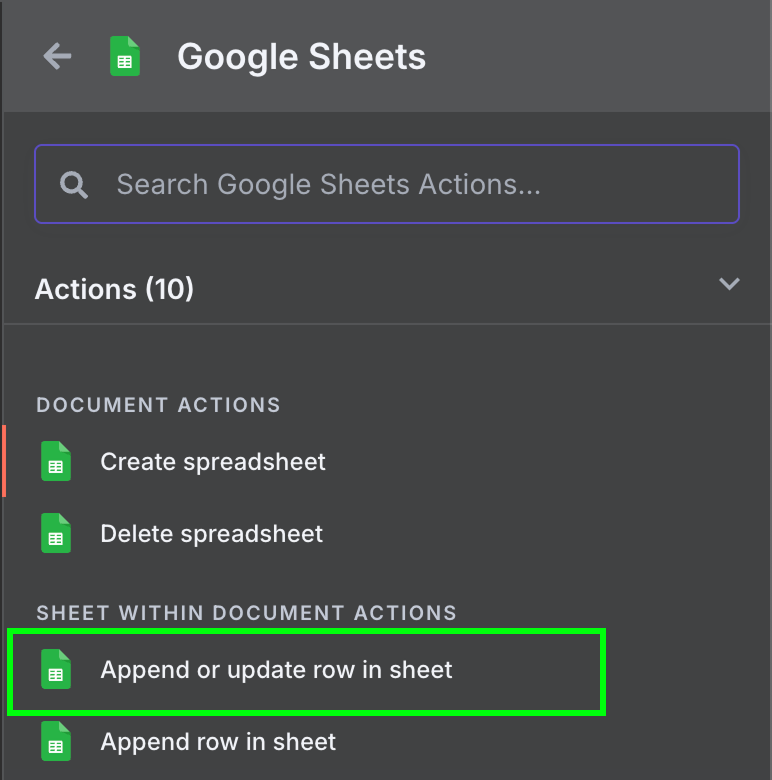
Here we want to type Google Sheets and select the "Append row in sheet" node:
We can use the same credentials we used for Gmail access. But we need to enable the following API's in the Google Cloud Console:
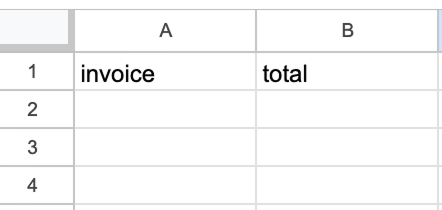
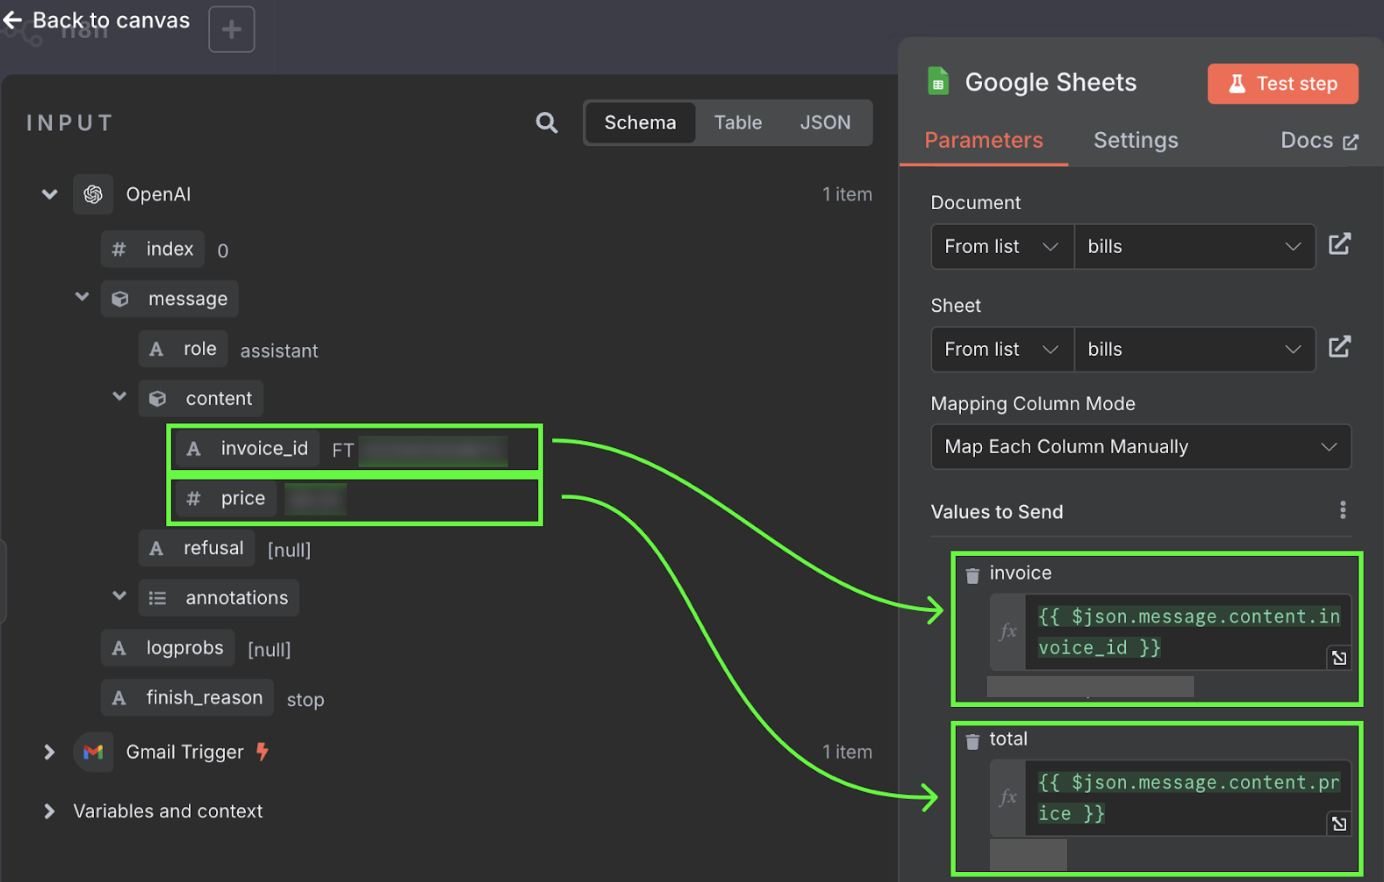
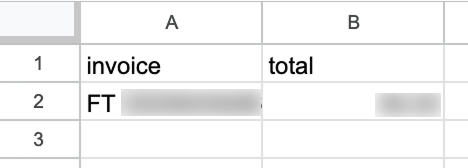
To configure the Google Sheets node, we need to select the sheet and select the values to populate the fields. The sheet should be created manually with two columns, one to hold the invoice ID and another for the invoice total.
Those values are taken from the output of the OpenAI node. We can drag and drop them into the columns.
That's it! We have a workflow that will automatically process our invoices into a Google Sheet. We can test it by clicking the "Test workflow" at the bottom:
After running it, if we go to our Google Sheet, we'll see a new row with the data:
By default, a workflow will run every minute. Depending on the workflow, we should configure an appropriate frequency for it to run. In this specific example, once a minute is far too frequent. Once a day is a more appropriate frequency.
We can configure that by double-clicking on the trigger node and setting a different value in the "Poll Times" field:

In this section, we build a more complex RAG agent workflow. RAG stands for retrieval-augmented generation, a technique that combines retrieving relevant information from a database or document and then using a language model to generate responses based on the retrieved information.
This is very useful when we have a specific knowledge base, such as a long text document, and want to build an AI agent that is able to answer questions about it.
I like to play board games, but my friends and I often argue about the rules and then spend time searching for the correct rules instead of playing, which can be frustrating. Building a RAG agent based on the rules of the game is a good solution to fix this problem because the next time we have a question, we can simply ask the agent.
To build this agent, we'll do two workflows:
Pinecone is a type of database that manages data in the form of vectors. A vector database like Pinecone is great for our RAG agent because it helps the agent quickly look up and understand relevant information, making it more efficient at providing accurate answers.
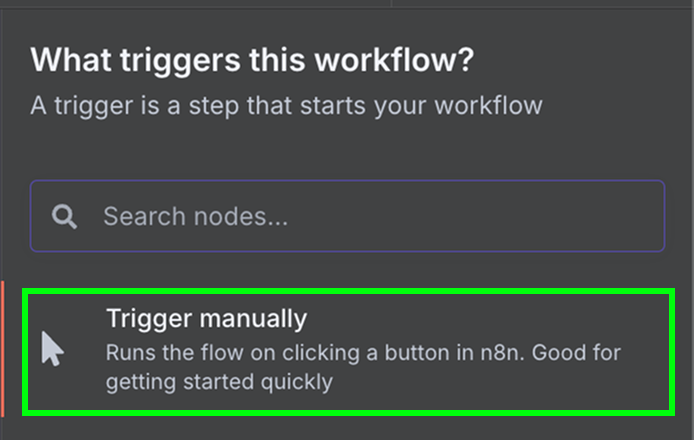
Since we only need to run this workflow once, we can use a manual trigger node. This is a trigger node used to manually run a workflow.
Connect the manual trigger node to a “Google Drive” node to download the data from Google Drive.
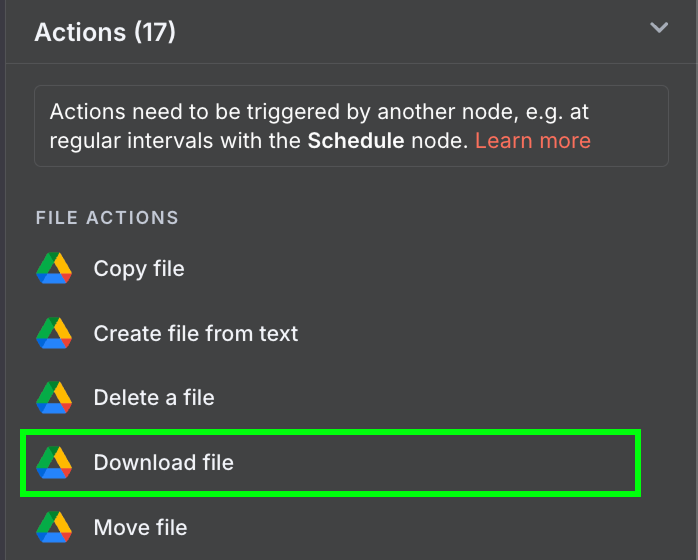
Use the following configuration:
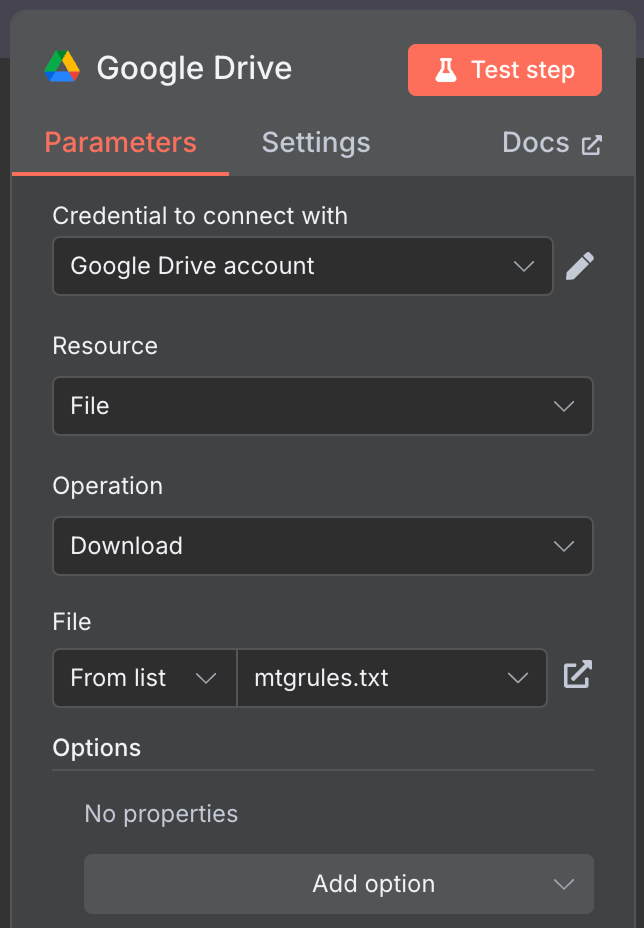
I used the publicly available mtgrules.txt file with the rules of the trading card game Magic: The Gathering. You can use any file you'd like to ask questions about; the workflow is the same.
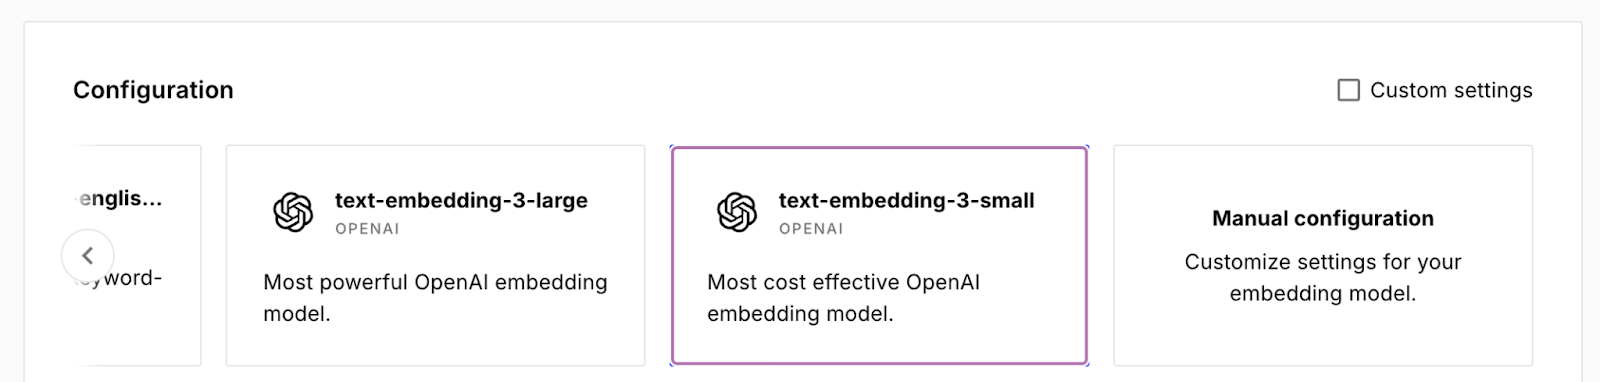
To configure Pinecone, log into Pinecone, copy the API key, and create an index by clicking the "Create index" button. I called my index rules and selected the text-embedding-3-small model.
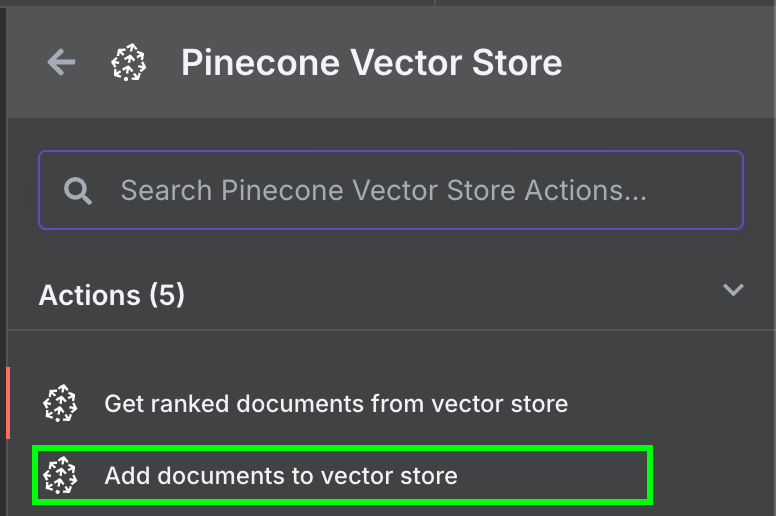
Back to n8n, connect the output of the Google Drive node to a Pinecone Vector Store node for the action "Add documents to vector store":
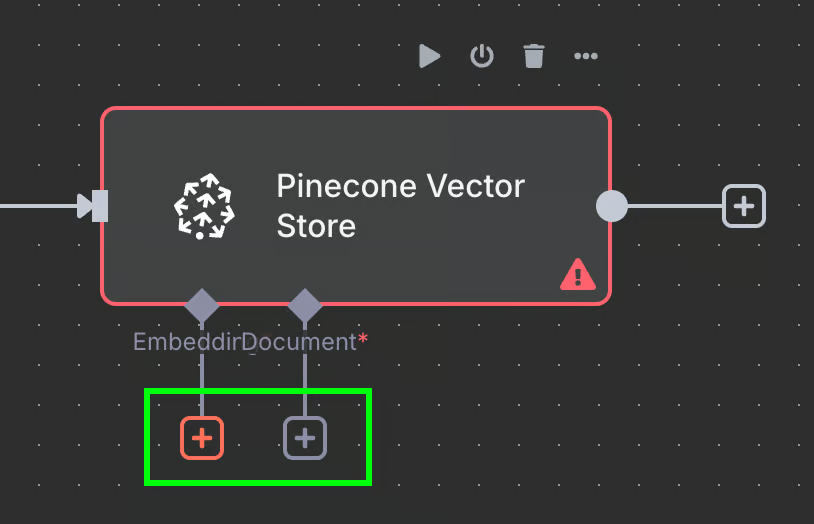
To configure the node, we need to create a credential by pasting the API key and selecting the Pinecone Index we just created. Below the Pinecone Vector Store node, we see two things we need to configure: an embedding model and a data loader.
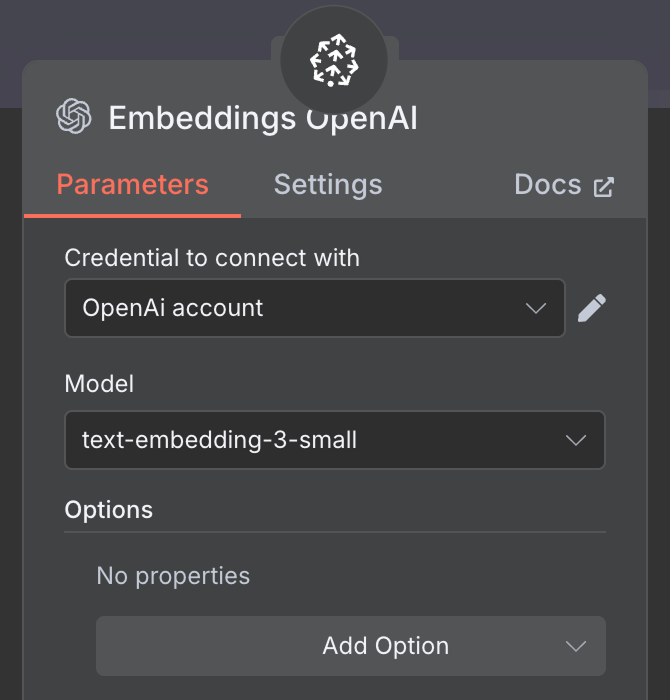
For the embedding, create an OpenAI Embedding node with the model text-embedding-3-small:
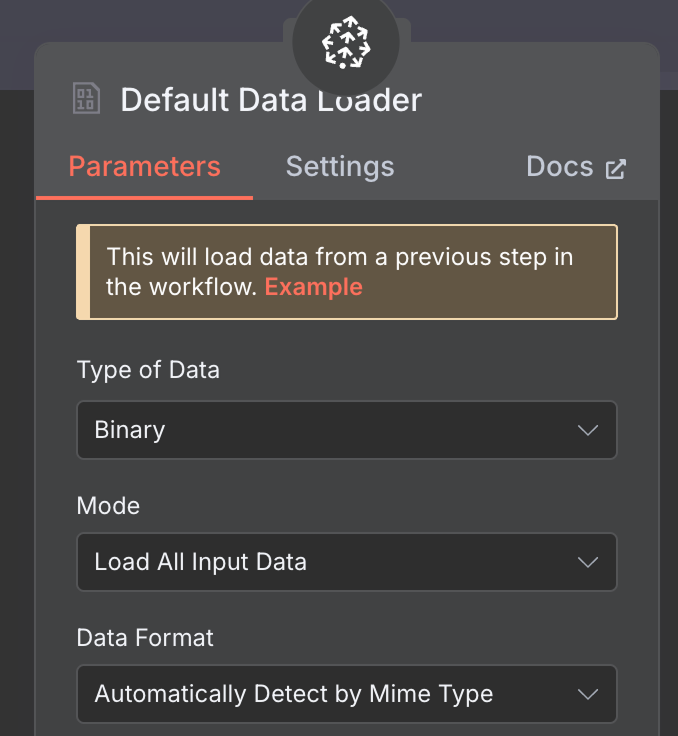
For the data loader, we create a Default Data Loader node with a binary data type:
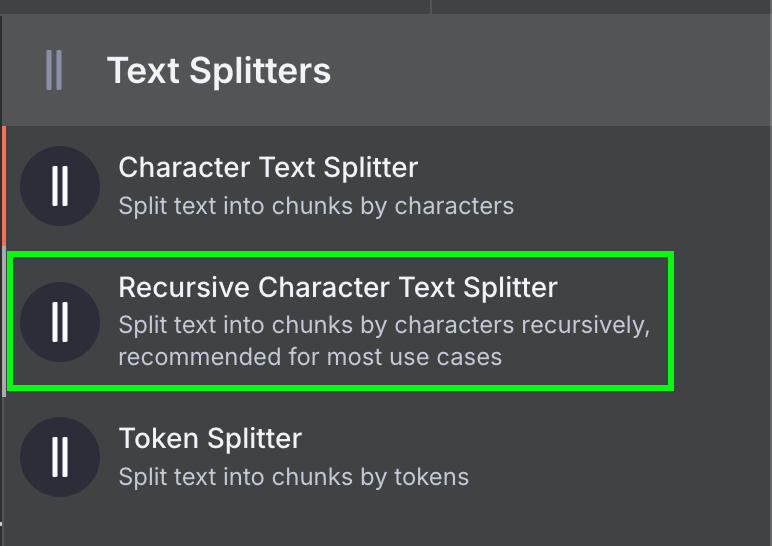
Finally, the data loader requires a Text Splitter node, which specifies how the data from the file should be split when creating the vector store. We use the Recursive Character Text Splitter node, which is the recommended node for most applications.
We configure it to use a chunk size of 1,000 and a chunk overlap of 200:
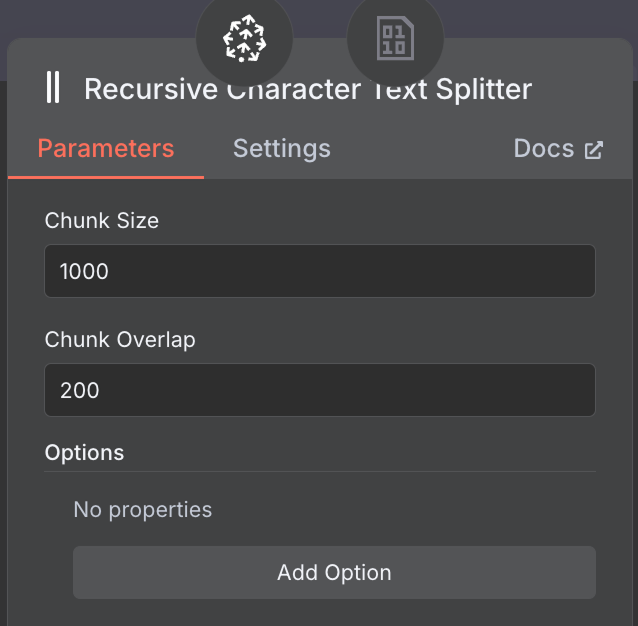
When choosing the chunk size and chunk overlap, consider using a larger chunk size for lengthy documents to capture adequate content and a smaller overlap to maintain context between segments without redundancy.
This is what the final workflow looks like:
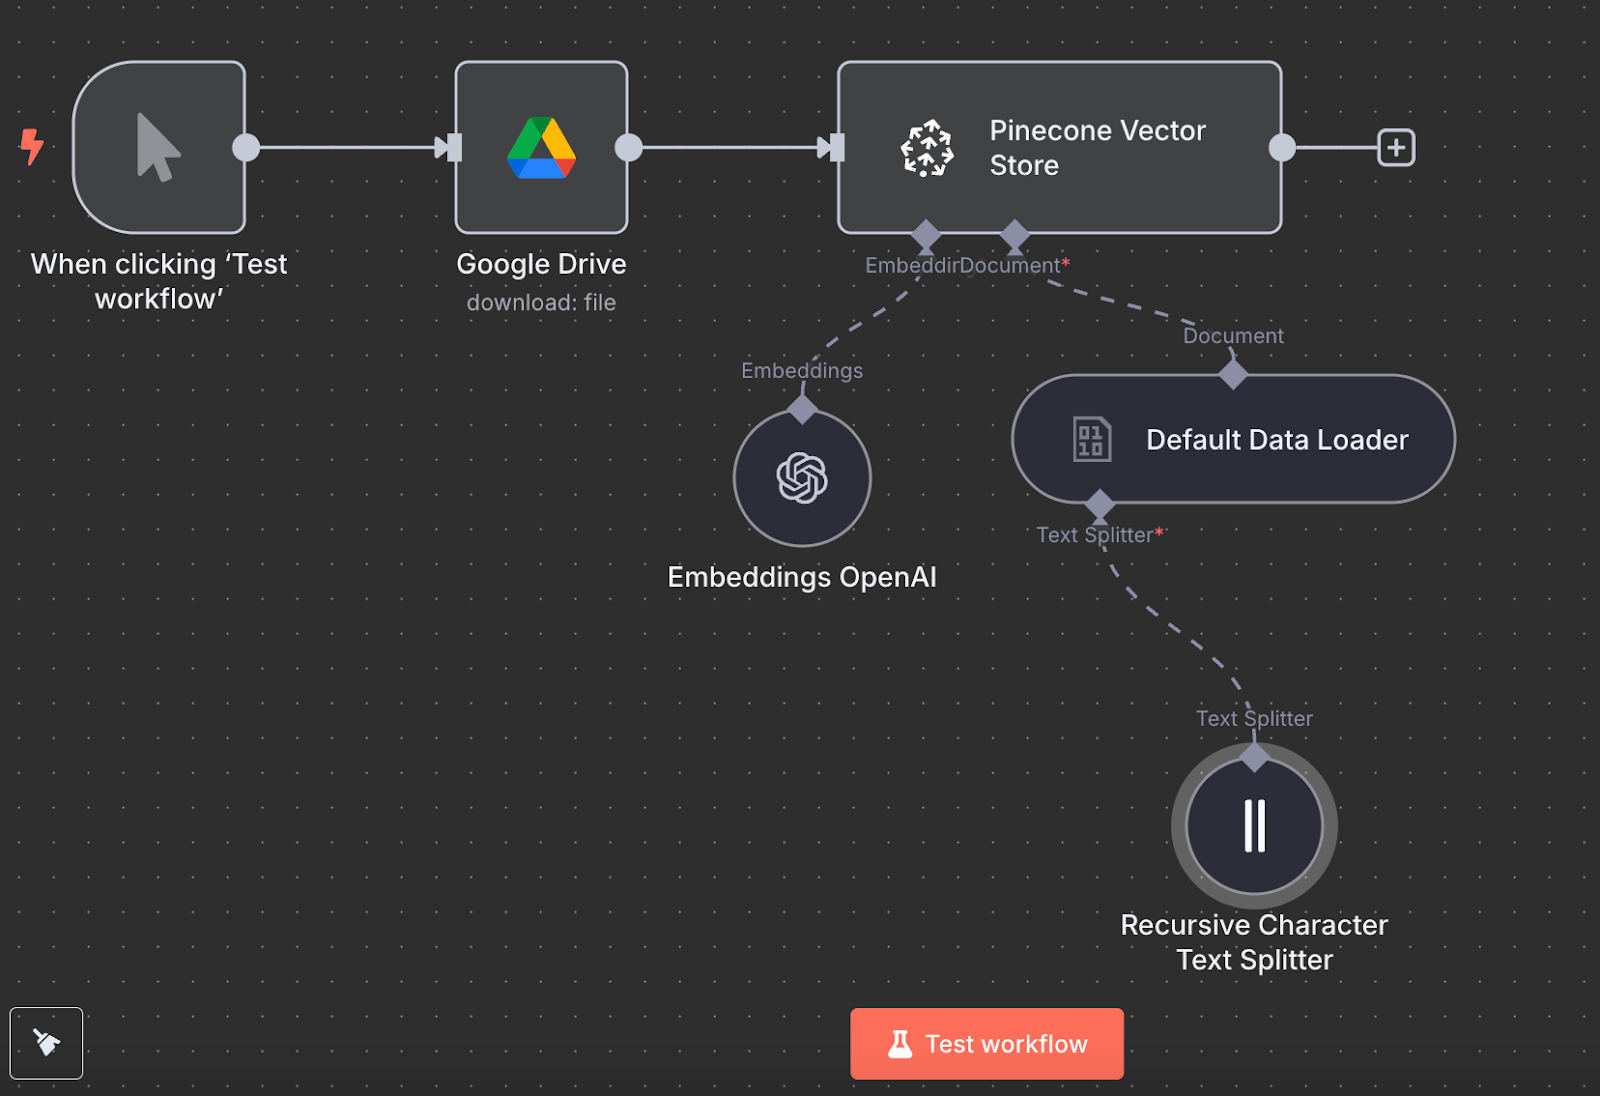
We can run it by clicking “Test workflow”, and once it's done, we can verify in Pinecone that the data was loaded.
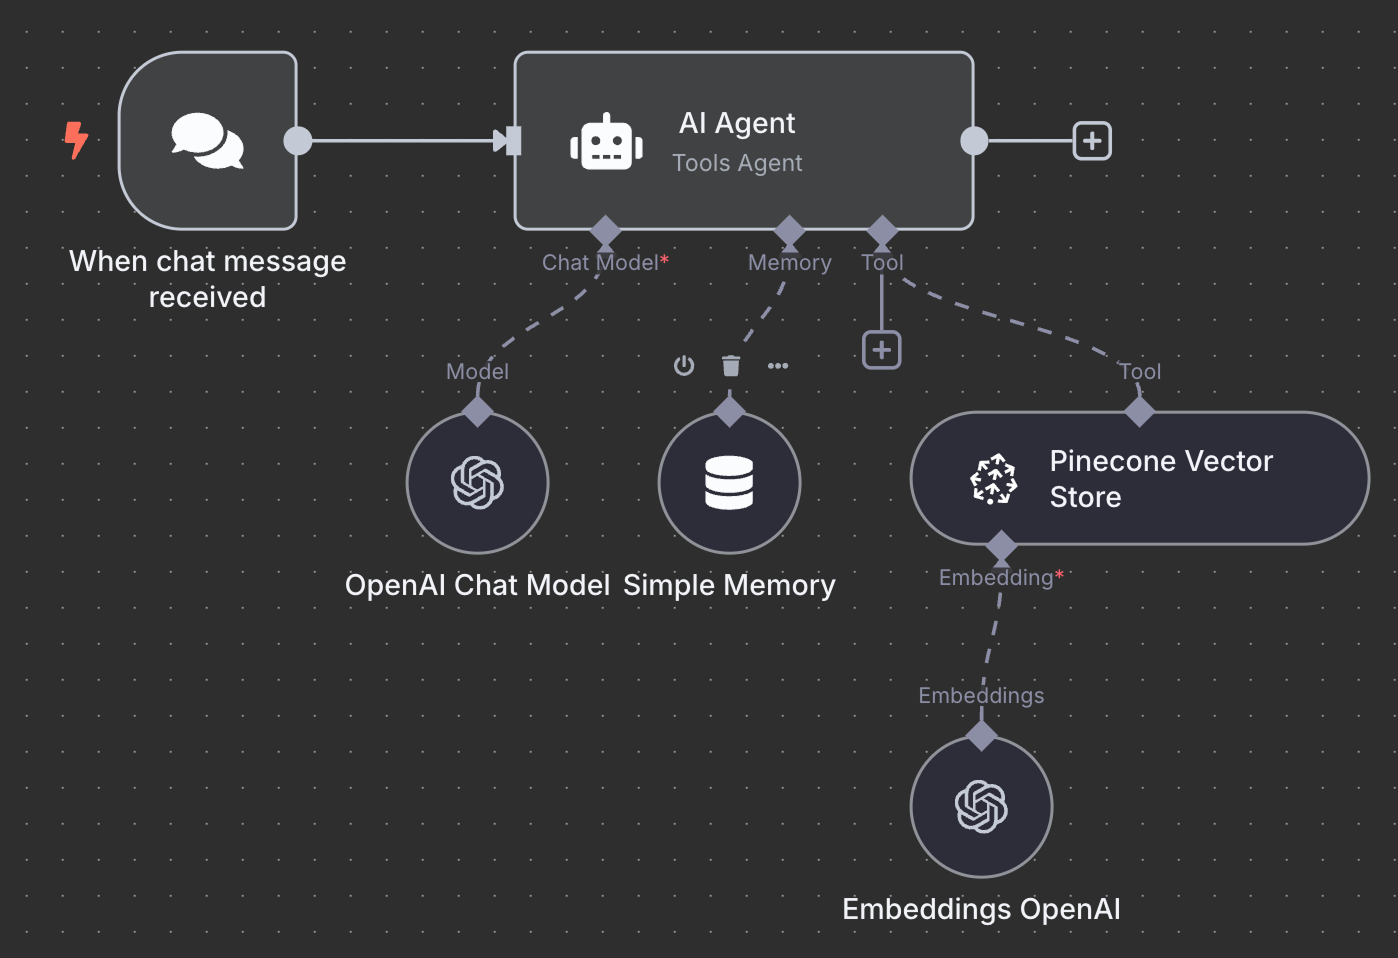
Here's the final schema for the RAG agent:
As an exercise, I encourage you to try to understand it and maybe even recreate it yourself locally before reading further.
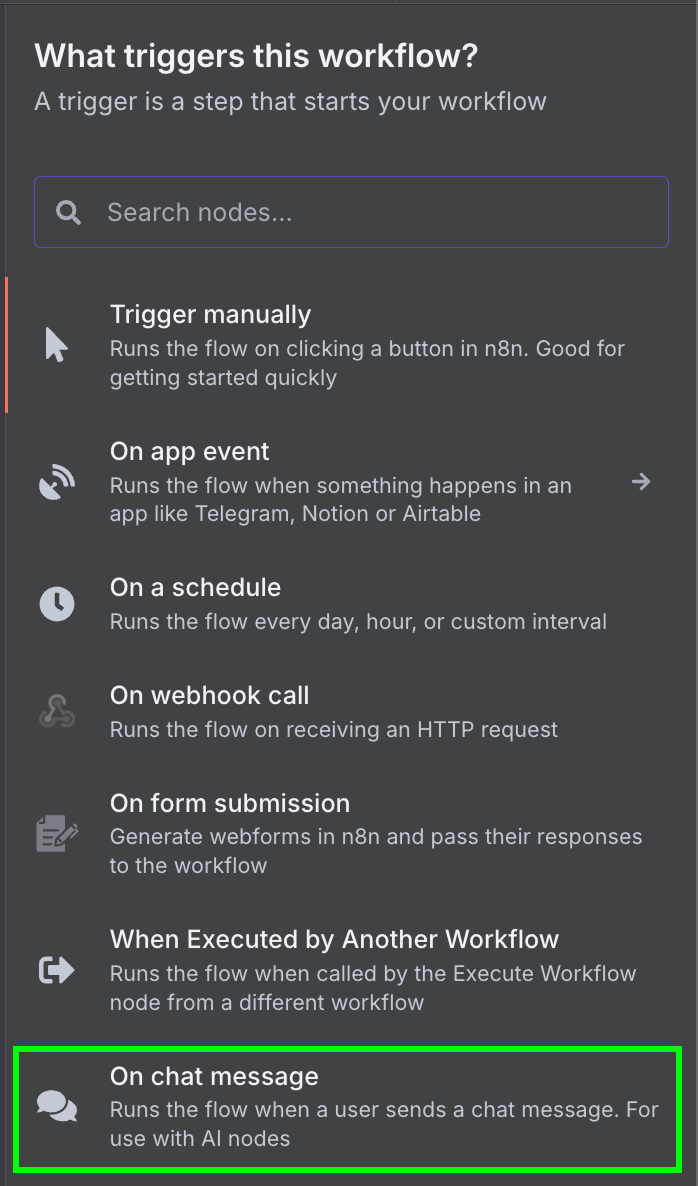
We start with an "On chat message" trigger node. This is used to create a chat workflow.
Next, we connect the chat trigger to an "AI Agent" node with the default options.
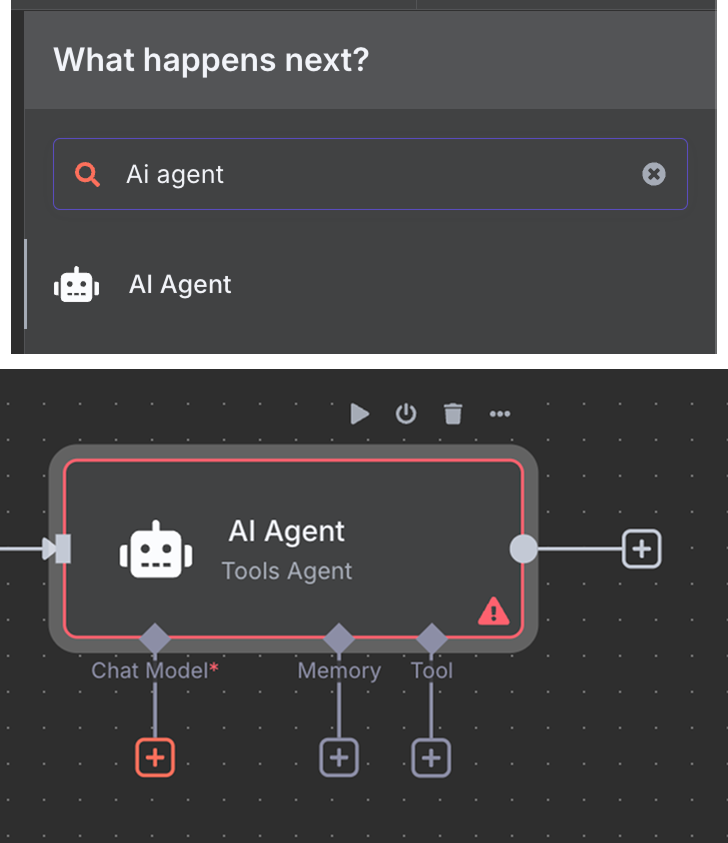
Below the AI Agent, we see that we can configure three things:
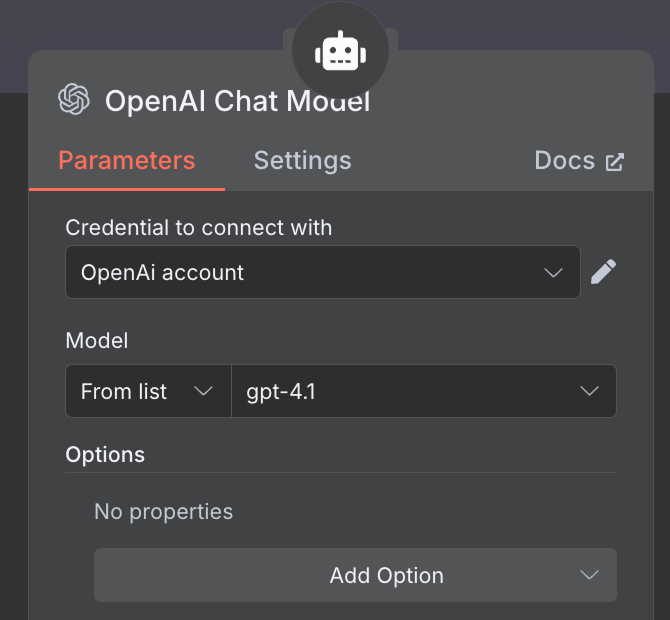
For the AI model, we select an "OpenAI Chat Model" node and use GPT-4.1, like we did before. The GPT-5 family is OpenAI's current model family, but 4.1 has a 1M-token context window and suits RAG well.
For the memory, we use a "Simple Memory" node with a context window of length 5. This means that the agent will remember and consider the five previous interactions when answering.
Finally, in the tool, we add a "Pinecone Vector Store" node with the following configuration:
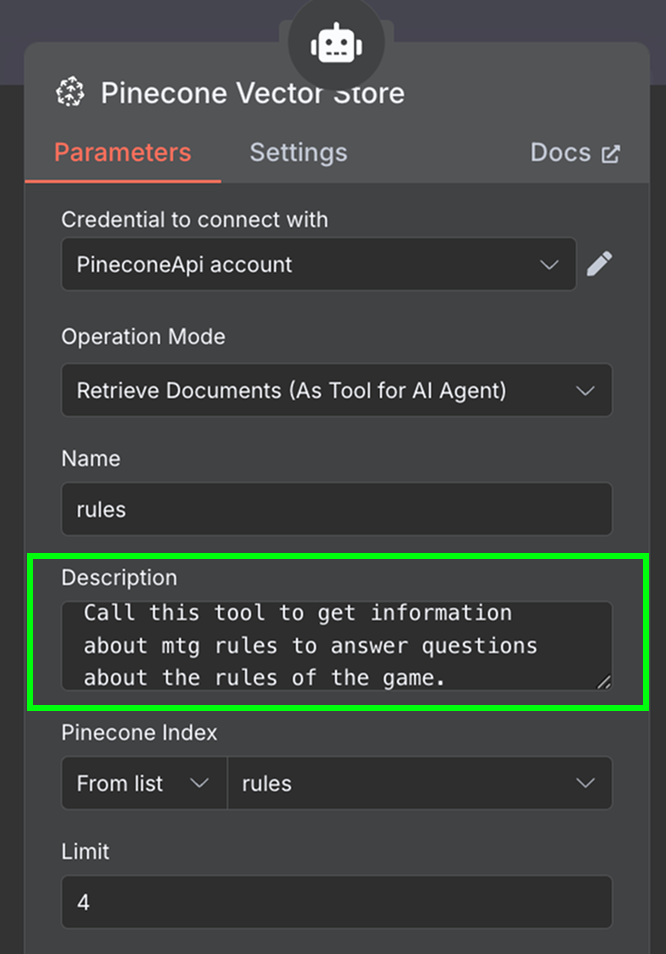
In the description field, it is important to specify when the tools should be used. This is what the agent will use to determine whether it should call the tool.
The last thing we need is to configure the embedding used by the vector store. As before, we use an OpenAI Embedding node with the model text-embedding-3-small:

The workflow is complete, and we can chat with the agent. Here's an example:
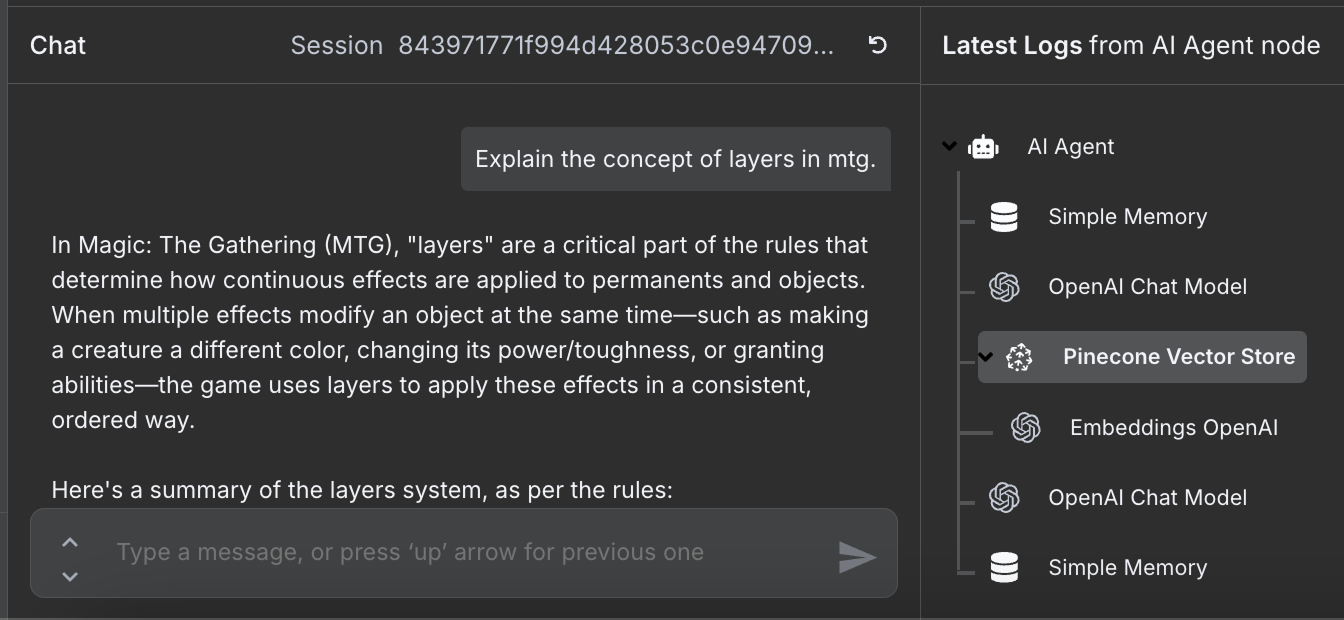
We can see on the right the steps that the agent took to answer our question. In particular, it accessed the Pinecone database to fetch the relevant rules information.
n8n offers a useful feature that can significantly speed up our workflow creation process: the n8n template library.
This library is a collection of pre-built workflows, crafted by the community and n8n experts. Whether we're trying to automate simple tasks or more complex processes, chances are that someone has already built a workflow suited for our needs.
Importing a workflow into our n8n setup means we don't always have to start from scratch. Instead, we can take advantage of the creative solutions other users have developed. Once we've imported a workflow, all we need to do is configure it with our credentials and tweak it to fit our exact requirements.
For any task we wish to automate, from email processing to social media management, it’s highly likely that there's a template available in the library.
n8n offers a vast ecosystem of integrations, allowing us to connect over a thousand services and tools to create AI agents. We've only scratched the surface of what n8n can do in this tutorial. By exploring how to use n8n for building AI agents to automate everyday tasks, we've just begun to tap into its potential.
Learn AI with these courses!
Track
Course
Course
Tutorial
François Aubry
Tutorial
Aashi Dutt
Tutorial
Bhavishya Pandit
Tutorial
Austin Chia
code-along
Frank Nillard
code-along
Frank Nillard